Intuitive DAVINCI XP User manual

intuitive.com
Intuitive Surgical, Sàrl
Chemin des Mûriers 1
1170 Aubonne, Switzerland
Intuitive Surgical, Inc.
1266 Kifer Road
Sunnyvale, CA 94086 USA
intuitive.com
Instruments and Accessories
User Manual
PN 553415-03 REV. A 2019.11

da Vinci SP Instruments and Accessories
ii
DRAFT/PRE-RELEASE/CONFIDENTIAL
12/5/19
Copyright
© 2019 Intuitive Surgical, Inc. All rights reserved.
Trademarks
Intuitive, Intuitive Surgical, da Vinci, da Vinci SP, EndoWrist SP, EnergyShield, EntryGuide, are
trademarks or registered trademarks of Intuitive Surgical, Inc. Product names are trademarks
or registered trademarks of their respective holders.
Rx only

da Vinci SP Instruments and Accessories
Contents iii
DRAFT/PRE-RELEASE/CONFIDENTIAL
12/5/19
Contents
1 General Information . . . . . . . . . . . . . . . . . . . . . . . . . . . . . . . . . .1
1.1 How to Use this Manual . . . . . . . . . . . . . . . . . . . . . . . . . . . . . . . . . . . . . . .1
Non-Sterile . . . . . . . . . . . . . . . . . . . . . . . . . . . . . . . . . . . . . . . . . . . . . . . . . . . . . . . . . 2
Knowing What Applies: Organization of this Manual . . . . . . . . . . . . . . . . . 2
1.2 Contact Information . . . . . . . . . . . . . . . . . . . . . . . . . . . . . . . . . . . . . . . . . .3
1.3 Limitation on Use: Limited License . . . . . . . . . . . . . . . . . . . . . . . . . . . . .3
1.4 Indications for Use/Intended Use . . . . . . . . . . . . . . . . . . . . . . . . . . . . . .3
1.5 General Warnings and Cautions. . . . . . . . . . . . . . . . . . . . . . . . . . . . . . . .4
1.6 General Instructions . . . . . . . . . . . . . . . . . . . . . . . . . . . . . . . . . . . . . . . . . .4
Proper Care and Handling. . . . . . . . . . . . . . . . . . . . . . . . . . . . . . . . . . . . . . . . . . . 4
Storage Between Uses . . . . . . . . . . . . . . . . . . . . . . . . . . . . . . . . . . . . . . . . . . . . . . 4
Disposal . . . . . . . . . . . . . . . . . . . . . . . . . . . . . . . . . . . . . . . . . . . . . . . . . . . . . . . . . . . .5
2 EndoWrist SP Camera . . . . . . . . . . . . . . . . . . . . . . . . . . . . . . . . .6
2.1 Introduction. . . . . . . . . . . . . . . . . . . . . . . . . . . . . . . . . . . . . . . . . . . . . . . . . .6
Intended Use . . . . . . . . . . . . . . . . . . . . . . . . . . . . . . . . . . . . . . . . . . . . . . . . . . . . . . . 6
General Warnings and Cautions . . . . . . . . . . . . . . . . . . . . . . . . . . . . . . . . . . . . . 6
Device Description. . . . . . . . . . . . . . . . . . . . . . . . . . . . . . . . . . . . . . . . . . . . . . . . . . 7
2.2 Preoperative Preparation . . . . . . . . . . . . . . . . . . . . . . . . . . . . . . . . . . . . .8
Inspection Before Use. . . . . . . . . . . . . . . . . . . . . . . . . . . . . . . . . . . . . . . . . . . . . . . 8
da Vinci SP Camera Sheath Overview . . . . . . . . . . . . . . . . . . . . . . . . . . . . . . . . 8
Camera Sheath Installation. . . . . . . . . . . . . . . . . . . . . . . . . . . . . . . . . . . . . . . . . . 9
2.3 Intraoperative Use . . . . . . . . . . . . . . . . . . . . . . . . . . . . . . . . . . . . . . . . . . 11
2.4 Postoperative Instructions . . . . . . . . . . . . . . . . . . . . . . . . . . . . . . . . . . 11
Camera Sheath Removal . . . . . . . . . . . . . . . . . . . . . . . . . . . . . . . . . . . . . . . . . . .11
Disposal . . . . . . . . . . . . . . . . . . . . . . . . . . . . . . . . . . . . . . . . . . . . . . . . . . . . . . . . . . .12
3 EndoWrist SP Instruments. . . . . . . . . . . . . . . . . . . . . . . . . . . .13
3.1 Introduction. . . . . . . . . . . . . . . . . . . . . . . . . . . . . . . . . . . . . . . . . . . . . . . . 13
Intended Use . . . . . . . . . . . . . . . . . . . . . . . . . . . . . . . . . . . . . . . . . . . . . . . . . . . . . .13
General Warnings and Cautions . . . . . . . . . . . . . . . . . . . . . . . . . . . . . . . . . . . .13
Device Description. . . . . . . . . . . . . . . . . . . . . . . . . . . . . . . . . . . . . . . . . . . . . . . . .14
Device Overview. . . . . . . . . . . . . . . . . . . . . . . . . . . . . . . . . . . . . . . . . . . . . . . . . . .15
3.2 Preoperative Preparation . . . . . . . . . . . . . . . . . . . . . . . . . . . . . . . . . . . 16
Inspection Before Use. . . . . . . . . . . . . . . . . . . . . . . . . . . . . . . . . . . . . . . . . . . . . .16
da Vinci SP Instrument Sheath Overview. . . . . . . . . . . . . . . . . . . . . . . . . . . .17
Instrument Sheath Installation . . . . . . . . . . . . . . . . . . . . . . . . . . . . . . . . . . . . .17

Contents
da Vinci SP Instruments and Accessories
iv
DRAFT/PRE-RELEASE/CONFIDENTIAL
12/5/19
3.3 Intraoperative Use . . . . . . . . . . . . . . . . . . . . . . . . . . . . . . . . . . . . . . . . . . 20
3.4 Postoperative Instructions . . . . . . . . . . . . . . . . . . . . . . . . . . . . . . . . . . 20
Instrument Sheath Removal. . . . . . . . . . . . . . . . . . . . . . . . . . . . . . . . . . . . . . . .20
Disposal . . . . . . . . . . . . . . . . . . . . . . . . . . . . . . . . . . . . . . . . . . . . . . . . . . . . . . . . . . .21
4 Medium-Large Clip Applier. . . . . . . . . . . . . . . . . . . . . . . . . . .22
4.1 Introduction. . . . . . . . . . . . . . . . . . . . . . . . . . . . . . . . . . . . . . . . . . . . . . . . 22
Compatibility Information. . . . . . . . . . . . . . . . . . . . . . . . . . . . . . . . . . . . . . . . . .22
Hem-o-lok Ligating Clips . . . . . . . . . . . . . . . . . . . . . . . . . . . . . . . . . . . . . . . . . . .22
4.2 Preoperative Preparation . . . . . . . . . . . . . . . . . . . . . . . . . . . . . . . . . . . 23
4.3 Intraoperative Use . . . . . . . . . . . . . . . . . . . . . . . . . . . . . . . . . . . . . . . . . . 24
4.4 Postoperative Instructions . . . . . . . . . . . . . . . . . . . . . . . . . . . . . . . . . . 24
5 Monopolar Curved Scissors . . . . . . . . . . . . . . . . . . . . . . . . . .25
5.1 Introduction. . . . . . . . . . . . . . . . . . . . . . . . . . . . . . . . . . . . . . . . . . . . . . . . 25
General Warnings and Cautions . . . . . . . . . . . . . . . . . . . . . . . . . . . . . . . . . . . .25
5.2 Preoperative Preparation . . . . . . . . . . . . . . . . . . . . . . . . . . . . . . . . . . . 26
MCS Tip Overview . . . . . . . . . . . . . . . . . . . . . . . . . . . . . . . . . . . . . . . . . . . . . . . . .26
Install the MCS Tip . . . . . . . . . . . . . . . . . . . . . . . . . . . . . . . . . . . . . . . . . . . . . . . . .26
5.3 Intraoperative Use . . . . . . . . . . . . . . . . . . . . . . . . . . . . . . . . . . . . . . . . . . 29
MCS Tip Troubleshooting. . . . . . . . . . . . . . . . . . . . . . . . . . . . . . . . . . . . . . . . . . .29
5.4 Postoperative Instructions . . . . . . . . . . . . . . . . . . . . . . . . . . . . . . . . . . 29
Remove the MCS Tip . . . . . . . . . . . . . . . . . . . . . . . . . . . . . . . . . . . . . . . . . . . . . . .29
Disposal . . . . . . . . . . . . . . . . . . . . . . . . . . . . . . . . . . . . . . . . . . . . . . . . . . . . . . . . . . .30
6 Monopolar Cautery Instrument. . . . . . . . . . . . . . . . . . . . . . .31
6.1 Introduction. . . . . . . . . . . . . . . . . . . . . . . . . . . . . . . . . . . . . . . . . . . . . . . . 31
General Warnings and Cautions . . . . . . . . . . . . . . . . . . . . . . . . . . . . . . . . . . . .31
6.2 Preoperative Preparation . . . . . . . . . . . . . . . . . . . . . . . . . . . . . . . . . . . 32
Monopolar Cautery Tip Overview. . . . . . . . . . . . . . . . . . . . . . . . . . . . . . . . . . .32
Install the Monopolar Cautery Tip . . . . . . . . . . . . . . . . . . . . . . . . . . . . . . . . . .32
6.3 Intraoperative Use . . . . . . . . . . . . . . . . . . . . . . . . . . . . . . . . . . . . . . . . . . 34
6.4 Postoperative Instructions . . . . . . . . . . . . . . . . . . . . . . . . . . . . . . . . . . 34
Remove the Monopolar Cautery Tip . . . . . . . . . . . . . . . . . . . . . . . . . . . . . . . .34
Disposal . . . . . . . . . . . . . . . . . . . . . . . . . . . . . . . . . . . . . . . . . . . . . . . . . . . . . . . . . . .35
7 Bipolar Instruments . . . . . . . . . . . . . . . . . . . . . . . . . . . . . . . . .36
7.1 Introduction. . . . . . . . . . . . . . . . . . . . . . . . . . . . . . . . . . . . . . . . . . . . . . . . 36
Compatibility Information. . . . . . . . . . . . . . . . . . . . . . . . . . . . . . . . . . . . . . . . . .36

da Vinci SP Instruments and Accessories
v
DRAFT/PRE-RELEASE/CONFIDENTIAL
12/5/19
8 Using the Electrosurgical Unit (ESU) with Monopolar and
Bipolar Instruments . . . . . . . . . . . . . . . . . . . . . . . . . . . . . . . . .37
8.1 Introduction. . . . . . . . . . . . . . . . . . . . . . . . . . . . . . . . . . . . . . . . . . . . . . . . 37
General Warnings and Cautions . . . . . . . . . . . . . . . . . . . . . . . . . . . . . . . . . . . .37
8.2 Integrated ERBE VIO dV 2.0 . . . . . . . . . . . . . . . . . . . . . . . . . . . . . . . . . . 39
VIO dV Overview. . . . . . . . . . . . . . . . . . . . . . . . . . . . . . . . . . . . . . . . . . . . . . . . . . .40
Selecting VIO dV Settings . . . . . . . . . . . . . . . . . . . . . . . . . . . . . . . . . . . . . . . . . .42
Bipolar and Monopolar Instrument Activation . . . . . . . . . . . . . . . . . . . . . .43
Control Assignment Indicators . . . . . . . . . . . . . . . . . . . . . . . . . . . . . . . . . . . . .45
ERBE VIO dV 2.0 Fault Conditions . . . . . . . . . . . . . . . . . . . . . . . . . . . . . . . . . . .47
8.3 Monopolar Instruments and EnergyShield Monitor Use . . . . . . . 47
General Warnings and Cautions-Monopolar Instruments . . . . . . . . . . . .47
EnergyShield Monopolar Cautery Cord . . . . . . . . . . . . . . . . . . . . . . . . . . . . .49
EnergyShield Monitor Overview . . . . . . . . . . . . . . . . . . . . . . . . . . . . . . . . . . . .50
Connecting the Monopolar Instruments, EnergyShield Monitor
and VIO dV . . . . . . . . . . . . . . . . . . . . . . . . . . . . . . . . . . . . . . . . . . . . . . . . . . . . . . . .50
EnergyShield Monitor Faults and Failure . . . . . . . . . . . . . . . . . . . . . . . . . . . .54
Intraoperative Use . . . . . . . . . . . . . . . . . . . . . . . . . . . . . . . . . . . . . . . . . . . . . . . . .56
Intraoperative Cleaning . . . . . . . . . . . . . . . . . . . . . . . . . . . . . . . . . . . . . . . . . . . .57
8.4 Bipolar Cautery . . . . . . . . . . . . . . . . . . . . . . . . . . . . . . . . . . . . . . . . . . . . . 57
Bipolar Cautery Cord . . . . . . . . . . . . . . . . . . . . . . . . . . . . . . . . . . . . . . . . . . . . . . .57
Connecting Bipolar Instruments to the VIO dV . . . . . . . . . . . . . . . . . . . . . .59
Intraoperative Use . . . . . . . . . . . . . . . . . . . . . . . . . . . . . . . . . . . . . . . . . . . . . . . . .59
Intraoperative Cleaning . . . . . . . . . . . . . . . . . . . . . . . . . . . . . . . . . . . . . . . . . . . .60
8.5 Troubleshooting . . . . . . . . . . . . . . . . . . . . . . . . . . . . . . . . . . . . . . . . . . . . 60
Monopolar and Bipolar Instrument Energy Delivery . . . . . . . . . . . . . . . . .60
Patient Neutral Pad Positioning. . . . . . . . . . . . . . . . . . . . . . . . . . . . . . . . . . . . .62
9daVinci SP Port Accessories . . . . . . . . . . . . . . . . . . . . . . . .63
9.1 Introduction. . . . . . . . . . . . . . . . . . . . . . . . . . . . . . . . . . . . . . . . . . . . . . . . 63
Intended Use . . . . . . . . . . . . . . . . . . . . . . . . . . . . . . . . . . . . . . . . . . . . . . . . . . . . . .63
9.2 Device Description . . . . . . . . . . . . . . . . . . . . . . . . . . . . . . . . . . . . . . . . . . 63
Compatibility Information. . . . . . . . . . . . . . . . . . . . . . . . . . . . . . . . . . . . . . . . . .63
Device Overview. . . . . . . . . . . . . . . . . . . . . . . . . . . . . . . . . . . . . . . . . . . . . . . . . . .64
9.3 Preoperative Preparation . . . . . . . . . . . . . . . . . . . . . . . . . . . . . . . . . . . 65
Inspection Before Use. . . . . . . . . . . . . . . . . . . . . . . . . . . . . . . . . . . . . . . . . . . . . .65
9.4 Using the Port Accessories. . . . . . . . . . . . . . . . . . . . . . . . . . . . . . . . . . . 67
Disposal . . . . . . . . . . . . . . . . . . . . . . . . . . . . . . . . . . . . . . . . . . . . . . . . . . . . . . . . . . .69

da Vinci SP Instruments and Accessories
vi
DRAFT/PRE-RELEASE/CONFIDENTIAL
12/5/19
A Appendix A: Reprocessing Preparation in the Operating
Room. . . . . . . . . . . . . . . . . . . . . . . . . . . . . . . . . . . . . . . . . . . . . . .70
Prime and Soak . . . . . . . . . . . . . . . . . . . . . . . . . . . . . . . . . . . . . . . . . . . . . . . . . . . .70
Transport to Sterile SPD or CSSD. . . . . . . . . . . . . . . . . . . . . . . . . . . . . . . . . . . .70
B Appendix B: Symbols Defined . . . . . . . . . . . . . . . . . . . . . . . .71
C Appendix C: Natural Rubber Latex . . . . . . . . . . . . . . . . . . . .74
D Appendix D: Intended Use Statements . . . . . . . . . . . . . . . .75
E Appendix E: Sterilization Methods . . . . . . . . . . . . . . . . . . . .77

da Vinci SP Instruments and Accessories
General Information 1
DRAFT/PRE-RELEASE/CONFIDENTIAL
12/5/19
1General Information
1.1 How to Use this Manual
This User Manual provides instructions for use and limitations on use for instruments and
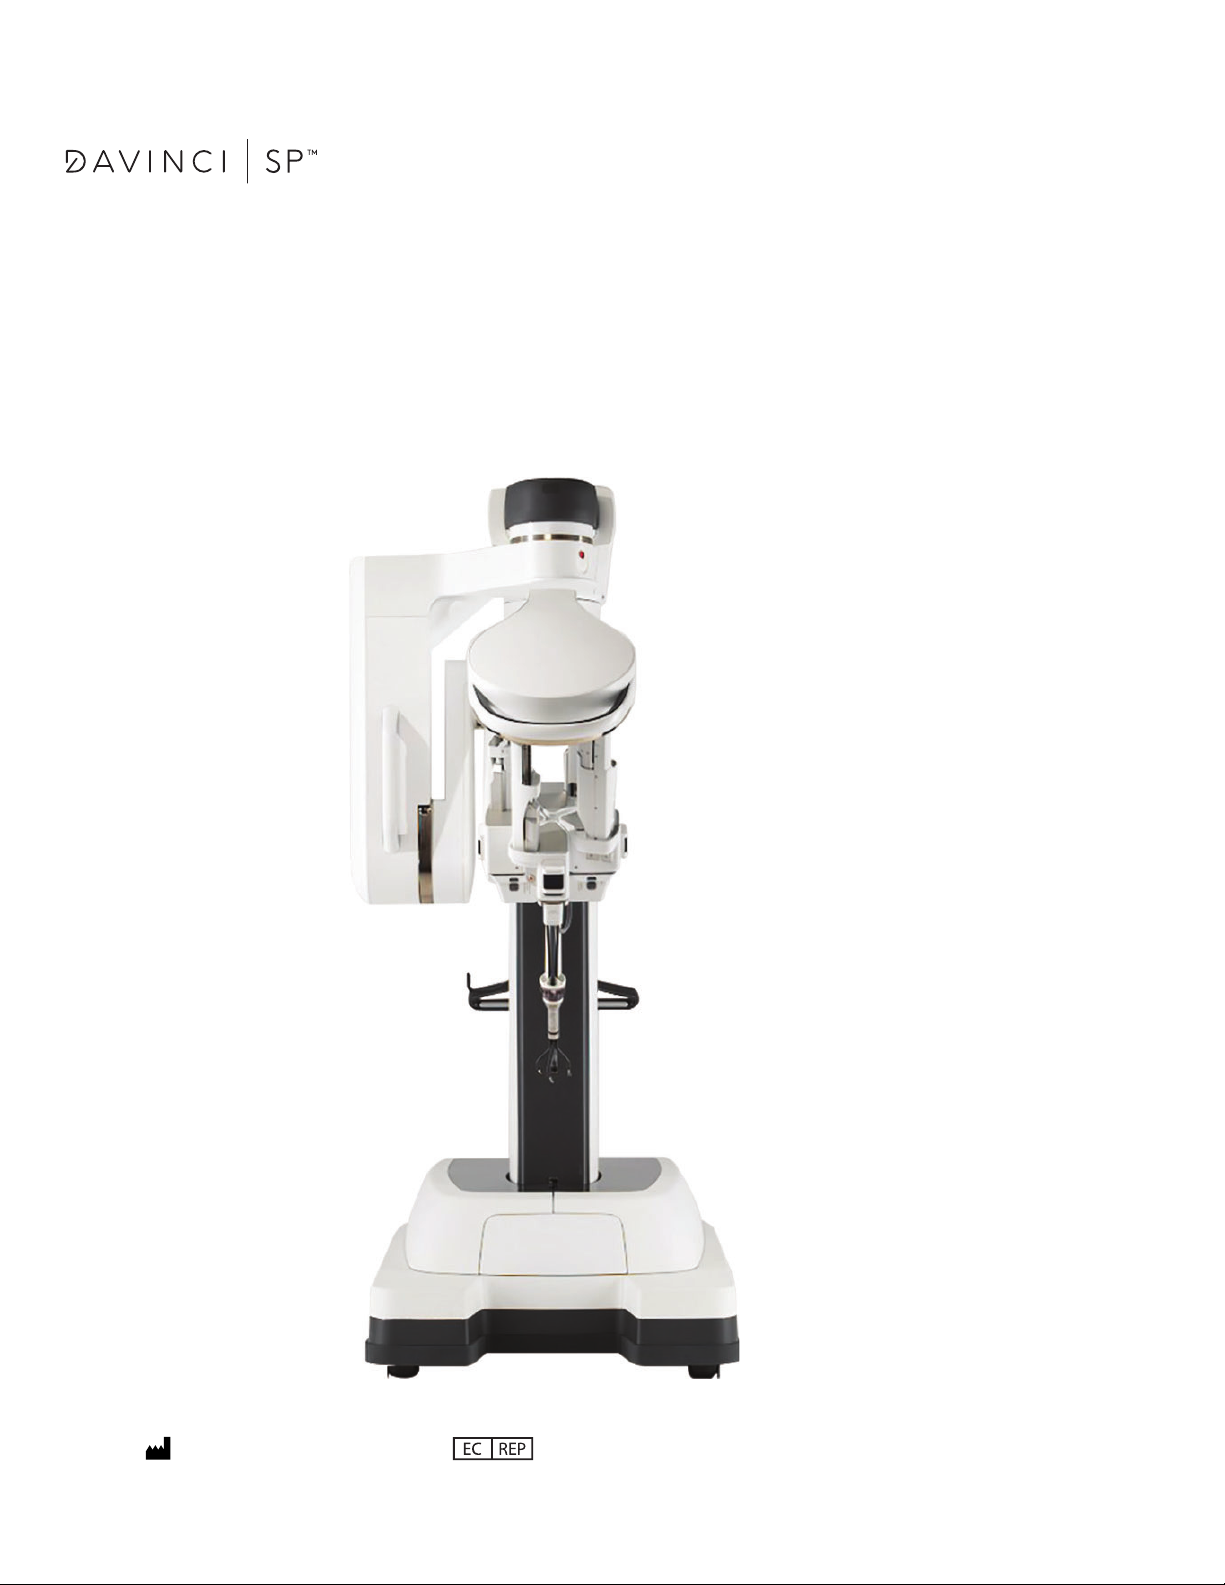
accessories used with the da Vinci SP® Surgical System model SP1098 (referred to in this
manual as da Vinci SP System). It is not a reference for surgical techniques. This User Manual is
to be used in conjunction with the da Vinci SP System User Manual, da Vinci SP Reprocessing
Instructions for Accessories, da Vinci SP Reprocessing Instructions for Instruments, da Vinci SP
Reprocessing Instructions for Camera, and da Vinci SP Reprocessing Instructions Appendices.
These documents provide general information that applies broadly to use of the da Vinci SP
System, instruments and accessories. Additional information related to the use of the
da Vinci SP System, instruments and accessories is available as follows:
•Addenda: Information related to new features, corrections, optional accessories, training
information, updated references, or new part numbers may be provided as addenda to
the da Vinci SP User Manuals.
•Supplements: Supplements to the da Vinci SP User Manuals provide additional
information specific to the types of surgical procedures that are cleared for a particular
market. For information on specific types of surgical procedures, refer to the appropriate
supplement that is available for your market.
Prior to use of this User Manual, ensure access to the latest revision of all applicable addenda
and supplements.
WARNING: Be sure to read and understand all information, particularly caution and
warning information, found in the applicable user manuals before using these
products. Failure to properly follow all instructions, including instructions supplied
with accessory devices such as generators and the applicable user manuals for the
da Vinci SP System may lead to injury and result in improper functioning of the
device.
Table 1-1 Note, Caution, and Warning
Symbol Meaning
Note: Highlights important information.
Caution: Alerts the reader about a potentially hazardous situation
which, if not avoided, may result in minor or moderate injury to the
user or patient or damage to the equipment or other property. It
may also be used to alert against unsafe practices. This includes the
special care necessary for the safe and effective use of the device
and the care necessary to avoid damage to a device that may occur
as a result of use or misuse.
Warning: Alerts the reader about a situation which, if not avoided,
could result in death or serious injury.

General Information
da Vinci SP Instruments and Accessories
2
DRAFT/PRE-RELEASE/CONFIDENTIAL
12/5/19
Note: Read Knowing What Applies: Organization of this Manual (page 2) to understand
what portions of this manual apply to any specific instrument or accessory. If
information specific to an instrument or accessory is not included in this manual,
Intuitive Surgical supplies it with that instrument or accessory.
Non-Sterile
Note: Intuitive Surgical devices ship non-sterile unless otherwise indicated in the
device’s labeling. Clean and sterilize reusable devices before each use, unless a
particular device is not used within the sterile field.
Note: Use standard sterile technique for proper handling and cleaning of
components that enter the sterile field.
Knowing What Applies: Organization of this Manual
•Chapter 1 General Information (the chapter you are reading now) applies to all
da Vinci SP instruments and accessories supplied by Intuitive Surgical. Includes general
precautions.
•Chapter 2 EndoWrist SP Camera provides general information for the EndoWrist SP®
Camera, and da Vinci SP® Camera Sheath installation and removal instructions.
•Chapter 3 EndoWrist SP Instruments provides general information that applies to all
EndoWrist SP® instruments including Instrument Sheath installation and removal
instructions.
•Chapter 4 Medium-Large Clip Applier provides specific instrument information and
instructions for use.
•Chapter 5 Monopolar Curved Scissors provides specific instrument information including
tip accessory installation and removal instructions.
•Chapter 6 Monopolar Cautery Instrument provides specific instrument information
including tip accessory installation and removal instructions.
•Chapter 7 Bipolar Instruments provides general instrument information.
•Chapter 8 Using the Electrosurgical Unit (ESU) with Monopolar and Bipolar Instruments
provides general information on the ERBE VIO® dV 2.0, EnergyShield® Monitor, use of the
monopolar and bipolar instruments, energy activation settings and troubleshooting.
•Chapter 9 da Vinci SP Port Accessories provides general information for the port
accessories and instructions for use.
•Appendix A: Reprocessing Preparation in the Operating Room provides information on
reprocessing preparation in the operating room.
•Appendix B: Symbols Defined provides information about symbols that may appear on
packaging and labels for instruments and accessories.
•Appendix C: Natural Rubber Latex provides information about products referenced in the
manual that are not made with natural rubber latex.
•Appendix D: Intended Use Statements provides information about the specific intended
use of individual da Vinci SP instruments and accessories.

da Vinci SP Instruments and Accessories
General Information 3
DRAFT/PRE-RELEASE/CONFIDENTIAL
12/5/19
•Appendix E: Sterilization Methods provides information about sterilization methods used
for single-use Intuitive Surgical products referenced in this manual.
1.2 Contact Information
For Customer Service and Reporting of Complaints or Adverse Events
Use the following information for customer service, including ordering, reporting complaints
or adverse events, and general information regarding Intuitive Surgical or our products and
services.
If the system requires maintenance or service, call our Customer Service line. In the U.S., call
1.800.876.1310, where phones are staffed 24 hours a day, seven days a week. In Europe, call
+41.21.821.2020.
If you have questions regarding the use, cleaning, sterilizing or storing of Intuitive Surgical
devices used with the da Vinci SP System, contact Intuitive Surgical Customer Service at the
phone number above.
1.3 Limitation on Use: Limited License
Intuitive Surgical da Vinci SP instruments and accessories are provided pursuant to a limited
license to use only with the Intuitive Surgical da Vinci SP System (Endoscopic Instrument
Control System, Model SP1098). Upon expiration of the instrument's or accessory's
programmed maximum number of uses, this limited license expires. Any repair,
refurbishment, reconditioning, or servicing of Intuitive Surgical instruments and accessories is
strictly prohibited and results in expiration of limited license.
1.4 Indications for Use/Intended Use
For information on specific indications for use and intended use of the da Vinci SP Surgical
System, refer to the appropriate da Vinci SP supplement. For information on specific intended
uses of each instrument and accessory, see Appendix D: Intended Use Statements in this
manual.
In the U.S.
Intuitive Surgical, Inc.
1266 Kifer Road
Sunnyvale, CA 94086 USA
Toll free: 1.800.876.1310
Direct: 408.523.2100
Fax: 408.523.2377
In Europe
Intuitive Surgical, Sàrl
Chemin des Mûriers 1
1170 Aubonne, Switzerland
Toll free: +800.0821.2020
Direct: +41.21.821.2020
Fax: +41.21.821.2021

General Information
da Vinci SP Instruments and Accessories
4
DRAFT/PRE-RELEASE/CONFIDENTIAL
12/5/19
1.5 General Warnings and Cautions
WARNING: When instruments (camera and surgical) are not in use, they need to be
placed in a clean, dry, highly visible area not in contact with the patient. Inadvertent
contact with the patient may result in burns.
WARNING: Do not use instruments, cameras, or accessories that have been
reprocessed with single-use accessories installed. Inadequate sterilization may
occur when these single-use accessories, such as the MCS Tip, monopolar cautery
tip, sheath, SP Cannula Seal, or EntryGuide™ (also known as Entry Guide), are
installed during reprocessing.
CAUTION: Use only the instruments and accessories approved by Intuitive Surgical.
System compatibility with non-approved instrumentation cannot be guaranteed.
CAUTION: EndoWrist SP instruments and accessories should be handled and
operated by trained personnel.
Cautions for Single-Use Items
CAUTION: DO NOT RE-STERILIZE. DO NOT RE-USE.
Reprocessing and/or reuse of products intended for single use only may result in
degraded instrument performance or loss of functionality, and in exposure to viral,
bacterial, fungal, or prionic pathogens.
CAUTION: Do not use if package is damaged.
CAUTION: A breach in the sterile packaging of the device indicates possible
contamination. Do not use the device if the packaging is not intact.
1.6 General Instructions
Proper Care and Handling
Proper care and handling is essential for satisfactory performance of surgical instruments and
accessories. Use care when handling devices during setup and operation. Examine the
instrument or accessory, including all of its components, thoroughly before and after each
use. If any abnormality is found (such as dents), do not use the instrument or accessory. Use
the device for its intended purpose only.
Do not expose instruments to X-rays, radioactive rays or strong electromagnetic waves.
Otherwise, the instrument may be damaged, making it unrecognizable to the system.
Storage Between Uses
After removing products from their packaging, store Intuitive Surgical instruments,
accessories or components in a clean, dry, dark place. Care must be taken to protect the
instrument tips from damage.

da Vinci SP Instruments and Accessories
General Information 5
DRAFT/PRE-RELEASE/CONFIDENTIAL
12/5/19
Disposal
When disposing of Intuitive Surgical instruments, accessories, or any of their components,
follow all applicable national and local laws and guidelines. Do not dispose of cameras.
_______________________________End of section_______________________________

EndoWrist SP Camera
da Vinci SP Instruments and Accessories
6
DRAFT/PRE-RELEASE/CONFIDENTIAL
12/5/19
2EndoWrist SP Camera
2.1 Introduction
This chapter contains general information for the EndoWrist SP® Camera (also referred to as
endoscope) and da Vinci SP® Camera Sheath. For further information on the camera, refer to
the da Vinci SP System User Manual.
Intended Use
For intended use of the camera and associated accessories, see Appendix D: Intended Use
Statements.
General Warnings and Cautions
WARNING: Do not use instruments, cameras, or accessories that have been
reprocessed with single-use accessories installed. Inadequate sterilization may
occur when these single-use accessories, such as the MCS Tip, monopolar cautery
tip, sheath, SP Cannula Seal, or EntryGuide™ (also known as Entry Guide), are
installed during reprocessing.
WARNING: The EndoWrist SP camera and instruments must be used with the
appropriate SP Cannula, SP Cannula Seal, and Entry Guide. Refer to Chapter 9
da Vinci SP Port Accessories for details.
CAUTION: All EndoWrist SP surgical instruments and the camera must be covered
with sheaths designed specifically for use with the da Vinci SP System before
surgical use.
CAUTION: Always have a backup camera and instruments available to complete the
surgical procedure in case of failure.
CAUTION: Handle the camera carefully. The camera is delicate and can be broken if
dropped or struck. Adhere to the sterilization, inspection, and connection
requirements.
CAUTION: Handle the camera cable carefully. If bent sharply or kinked, it can
damage the internal fibers. Damage to the camera cable can occur through
repetitive actions during use in surgical or cleaning procedures. Such damage can
substantially reduce the amount of light transmitted through the cable.

da Vinci SP Instruments and Accessories
EndoWrist SP Camera 7
DRAFT/PRE-RELEASE/CONFIDENTIAL
12/5/19
Device Description
The camera is an articulated instrument that includes a small stereo three-dimensional (3D)
camera with a 73-degree field-of-view (FOV) located at the distal end of the shaft. The camera
acquires 3D video from the surgical site in high definition (HD). The HD video is processed by
the system electronics in the Vision Cart and displayed on the Surgeon Console 3D viewer and
Vision Cart touchscreen.
The surgeon controls the camera with a single hand control (master). The camera does not
feature shaft roll, but the elbow and wrist joints enable the surgeon to move the camera tip (at
the distal end) to choose a vantage point to visualize the surgical scene.
The camera consists of the tip, wrist, forearm, elbow, shaft, housing, release buttons, cable,
and connector (Figure 2.1).
Figure 2.1 Camera
Wrist
Elbow
Forearm
Tip
Cable
Connector
Close-up of camera distal end
Housing
Release Buttons (one on either side) Shaft Tip

EndoWrist SP Camera
da Vinci SP Instruments and Accessories
8
DRAFT/PRE-RELEASE/CONFIDENTIAL
12/5/19
2.2 Preoperative Preparation
Inspection Before Use
WARNING: Do not use cameras with any defects or signs of damage, including
damage to the glass surface at the cable connector end, glass surface at the distal
tip, or cables. Serious injury or surgical complications may occur to the patient.
WARNING: Do not use a camera that has been reprocessed with a sheath installed.
Inadequate sterilization may occur when single-use accessories are installed during
reprocessing.
Note: By design, the camera shaft has a slight bend near the housing. This is not a
defect. (See Figure 2.1.)
Before each use, the camera should be inspected for any physical damage or irregularities.
• Prior to each procedure, thoroughly inspect the camera for mechanical or optical defects.
• Visually inspect the exterior of the device for cleanliness, paying special attention to the
tip. There should be no visual contamination of the device (for example, adherent soil). If
the device has any residual contamination, do not use it.
• Thoroughly inspect the camera for mechanical or optical defects. Remove the camera
from the sterilization tray.
• Inspect the glass surfaces at the distal tip and at the cable connector end. These areas
should be clean and free of any deposits, residues or haze to ensure a bright and clear
image.
• Inspect camera surfaces carefully for any irregularities or damage: sharp edges, cracks,
dents, corrosion or mechanical defects.
• Inspect the camera cable for any cuts, damage or defects.
da Vinci SP Camera Sheath Overview
The da Vinci SP® Camera Sheath (PN 430020) is specifically designed to cover the camera and
must be installed on the camera prior to surgical use. The Camera Sheath is supplied sterile
and is for single use only; do not reuse the Camera Sheath. Always install the Camera Sheath
(Figure 2.2) in the sterile field.
Figure 2.2 Camera Sheath
Connector
Black band

da Vinci SP Instruments and Accessories
EndoWrist SP Camera 9
DRAFT/PRE-RELEASE/CONFIDENTIAL
12/5/19
Camera Sheath Installation
WARNING: Inspect the Camera Sheath for damage throughout use. Examples of
damage include tears or cuts in the sheath material. If damage is observed, remove
and replace the Camera Sheath to prevent thermal hazards or other risks.
CAUTION: All EndoWrist SP surgical instruments and the camera must be covered
with sheaths designed specifically for use with the da Vinci SP System before
surgical use.
CAUTION: After the sheath is installed on a camera or instrument, do not reuse the
sheath on another camera or instrument.
CAUTION: Use caution when installing and removing the sheaths to avoid camera
shaft, elbow, or wrist damage. Use gloves with sufficient grip to aid with installation
and removal of the sheath.
Note: Use care when placing the sheath onto the camera to prevent damage to the
glass surface at the distal tip or camera distal joints.
1. Remove the Camera Sheath (Figure 2.2) from the sterile packaging using sterile
technique.
2. Straighten the distal end of the camera shaft (Figure 2.3 A). Slide the connector end of the
sheath onto the shaft and slide the sheath down the shaft (Figure 2.3 B).
Figure 2.3 Straighten the distal end of the camera (A) and slide the sheath onto the shaft (B)
AB

EndoWrist SP Camera
da Vinci SP Instruments and Accessories
10
DRAFT/PRE-RELEASE/CONFIDENTIAL
12/5/19
3. Press down the connector on the sheath until it is over the flanges on the base of the
camera shaft, and there is a tactile and audible click (Figure 2.4).
Figure 2.4 Connector over the flanges on the base of instrument shaft
4. With one hand, wrap your fingers around the joints to stabilize the camera tip and hold
your thumb over the black band on the distal end of the sheath (as shown in Figure 2.5).
Slide the black band down until your thumb contacts the camera lens and the band is
past the distal ridge.
Figure 2.5 Hold thumb over black band and push black band down onto distal tip
5. Confirm that the sheath is correctly installed by ensuring that the black band of the
sheath rests between the two ridges (as shown in Figure 2.6 and Figure 2.7 C). If the
sheath is incorrectly installed, adjust the position of the black band or remove and
reinstall the sheath.
Figure 2.6 Ridges on the camera tip
Connector
over flanges
Flange
(one on each side)
Black band
on sheath
Ridge
Ridge

da Vinci SP Instruments and Accessories
EndoWrist SP Camera 11
DRAFT/PRE-RELEASE/CONFIDENTIAL
12/5/19
Figure 2.7 Examples of incorrect installation (A and B) and correct installation (C)
2.3 Intraoperative Use
For information on intraoperative use (installation, insertion, and removal of the camera), refer
to the da Vinci SP System User Manual.
2.4 Postoperative Instructions
Camera Sheath Removal
CAUTION: Use caution when installing and removing the sheaths to avoid camera
shaft, elbow, or wrist damage. Use gloves with sufficient grip to aid with installation
and removal of the sheath.
Remove the sheath from the camera immediately after each procedure.
1. Press the clips on both sides of the sheath connector and pull up to disengage from the
flanges at the base of the shaft (Figure 2.8).
Figure 2.8 Press the clips on the connector
ABC
Clips on
connector
AB

EndoWrist SP Camera
da Vinci SP Instruments and Accessories
12
DRAFT/PRE-RELEASE/CONFIDENTIAL
12/5/19
2. With your thumb and index finger, pinch the black band on the sheath and gently twist
and push to remove it from the camera tip (Figure 2.9). When the sheath is completely
loosened, hold the sheath from the black band and pull it off of the shaft. If needed,
sterile gauze or less slippery gloves may be used to more firmly grasp the sheath while
twisting.
Figure 2.9 Pinch the black band, then twist and push
Disposal
When disposing of Intuitive Surgical instruments, accessories, or any of their components,
follow all applicable national and local laws and guidelines.
Do not dispose of cameras. Contact Intuitive Surgical Customer Service to exchange expired
cameras.
Note: For more information on reprocessing the camera, refer to the da Vinci SP
Reprocessing Instructions.
_________________________________End of section______________________________

da Vinci SP Instruments and Accessories
EndoWrist SP Instruments 13
DRAFT/PRE-RELEASE/CONFIDENTIAL
12/5/19
3EndoWrist SP Instruments
3.1 Introduction
This chapter contains general instructions for use specific to the EndoWrist SP® instruments
(also referred to as instruments). The following sections provide general information such as
part numbers and device names, intraoperative information, and troubleshooting. Specific
information on individual types of instruments can be found in each specific instrument
chapter.
Intended Use
For intended use of the instruments and associated accessories, see Appendix D: Intended Use
Statements.
CAUTION: Endoscopic instruments are designed and manufactured for a specific
surgical function. Use of an instrument for a task other than that for which it is
intended may result in a damaged or broken instrument.
General Warnings and Cautions
WARNING: Do not use instruments, cameras, or accessories that have been
reprocessed with single-use accessories installed. Inadequate sterilization may
occur when these single-use accessories, such as the MCS Tip, monopolar cautery
tip, sheath, SP Cannula Seal, or EntryGuide™ (also known as Entry Guide), are
installed during reprocessing.
WARNING: Unless it is stated, do not use EndoWrist SP instruments on cartilage,
bone or hard objects. Doing so may damage the instrument and make it impossible
to remove it from the SP Cannula.
WARNING: Do not grasp tissue with instruments not intended to grasp tissue, as
tissue injury may result. For example, do not grasp tissue with clip appliers, which
are made to hold and apply plastic ligation clips, or needle drivers, which are made
to hold metallic needles.
WARNING: The EndoWrist SP camera and instruments must be used with the
appropriate SP Cannula, SP Cannula Seal, and Entry Guide. Refer to Chapter 9
da Vinci SP Port Accessories for details.
CAUTION: Handle instruments with care. Avoid mechanical shock or stress that can
cause damage to the instruments.
CAUTION: Prior to using compatible third party devices with the da Vinci SP System,
read all associated instructions for use.
CAUTION: Always have a backup camera and instruments available to complete the
surgical procedure in case of instrument failure.

EndoWrist SP Instruments
da Vinci SP Instruments and Accessories
14
DRAFT/PRE-RELEASE/CONFIDENTIAL
12/5/19
CAUTION: Clean and sterilize the instruments immediately after each use. Do not
allow debris to dry on or inside the instrument intraoperatively before instrument
processing. In order to keep the instrument from drying when soiled, keep the
instrument in water or an enzymatic bath between the surgical procedure and
instrument processing. The instrument may also be flushed through the main flush
port with sterile water during use to minimize buildup of internal deposits of
biological material.
Warning for Grasping Instruments
The following warning applies to all grasping EndoWrist SP instruments, such as the Needle
Driver, Fenestrated Bipolar Forceps, Maryland Bipolar Forceps, Medium-Large Clip Applier,
Round Tooth Retractor and Cadiere Forceps.
WARNING: In case of system failure while the instrument is grasping tissue, the grips
can be manually opened by first pressing the instrument disengage button on the
instrument drive and then turning the Grip Release Dial on the instrument housing
to release the grips from tissue.
For troubleshooting information, see the da Vinci SP System User Manual.
Device Description
Note: Instruments and accessories contain metal components. Ensure that patients
do not have metal allergies.
Note: Use only EndoWrist SP instruments. Other Intuitive Surgical instruments are
not compatible with the da Vinci SP system.
EndoWrist SP instruments are multiple-use endoscopic instruments to be used only in
conjunction with the da Vinci SP System. Table 3-1 and Table 3-2 list the EndoWrist SP
instruments and accessories.
Table 3-1 EndoWrist SP Instruments
Description/Name Part Number (PN)
Monopolar Instruments
6 mm Monopolar Curved Scissors (MCS) 430004
6 mm Monopolar Cautery Instrument 430007
Bipolar Instruments
6 mm Maryland Bipolar Forceps 430010
6 mm Fenestrated Bipolar Forceps 430011
Needle Drivers
6 mm Needle Driver 430006
Clip Appliers
6 mm Medium-Large Clip Applier 430005
Grasping Instruments
6 mm Round Tooth Retractor 430002
6 mm Cadiere Forceps 430009
Table of contents
Popular Medical Equipment manuals by other brands

Sakura
Sakura Tissue-Tek Film 4740 operating manual

Apex Digital
Apex Digital MD300M user manual

Trulife
Trulife Solas SLS490 Installation and user guide

Medic Therapeutics
Medic Therapeutics D20 user manual

Agilent Technologies
Agilent Technologies M4735A user guide

Flaem
Flaem Universal Plus Instructions for use manual