iPazzPort The Pearl SY-20-19VC User manual

Model:SY-20-19VC
Pearl
R
Entertainment System
Questions or Problems?
Don’t return it, Email us at
Techsupport@unisen-usa.com

System Requirements
Contents
.............................................. 1
Package Contents ................................................ 1
IMPORTANT OPERATING NOTE ............................ 1
iPazzPort Pearl Entertainment System Introduction ...... 2
What Can I do with my iPazzPort Pearl? ..................... 2
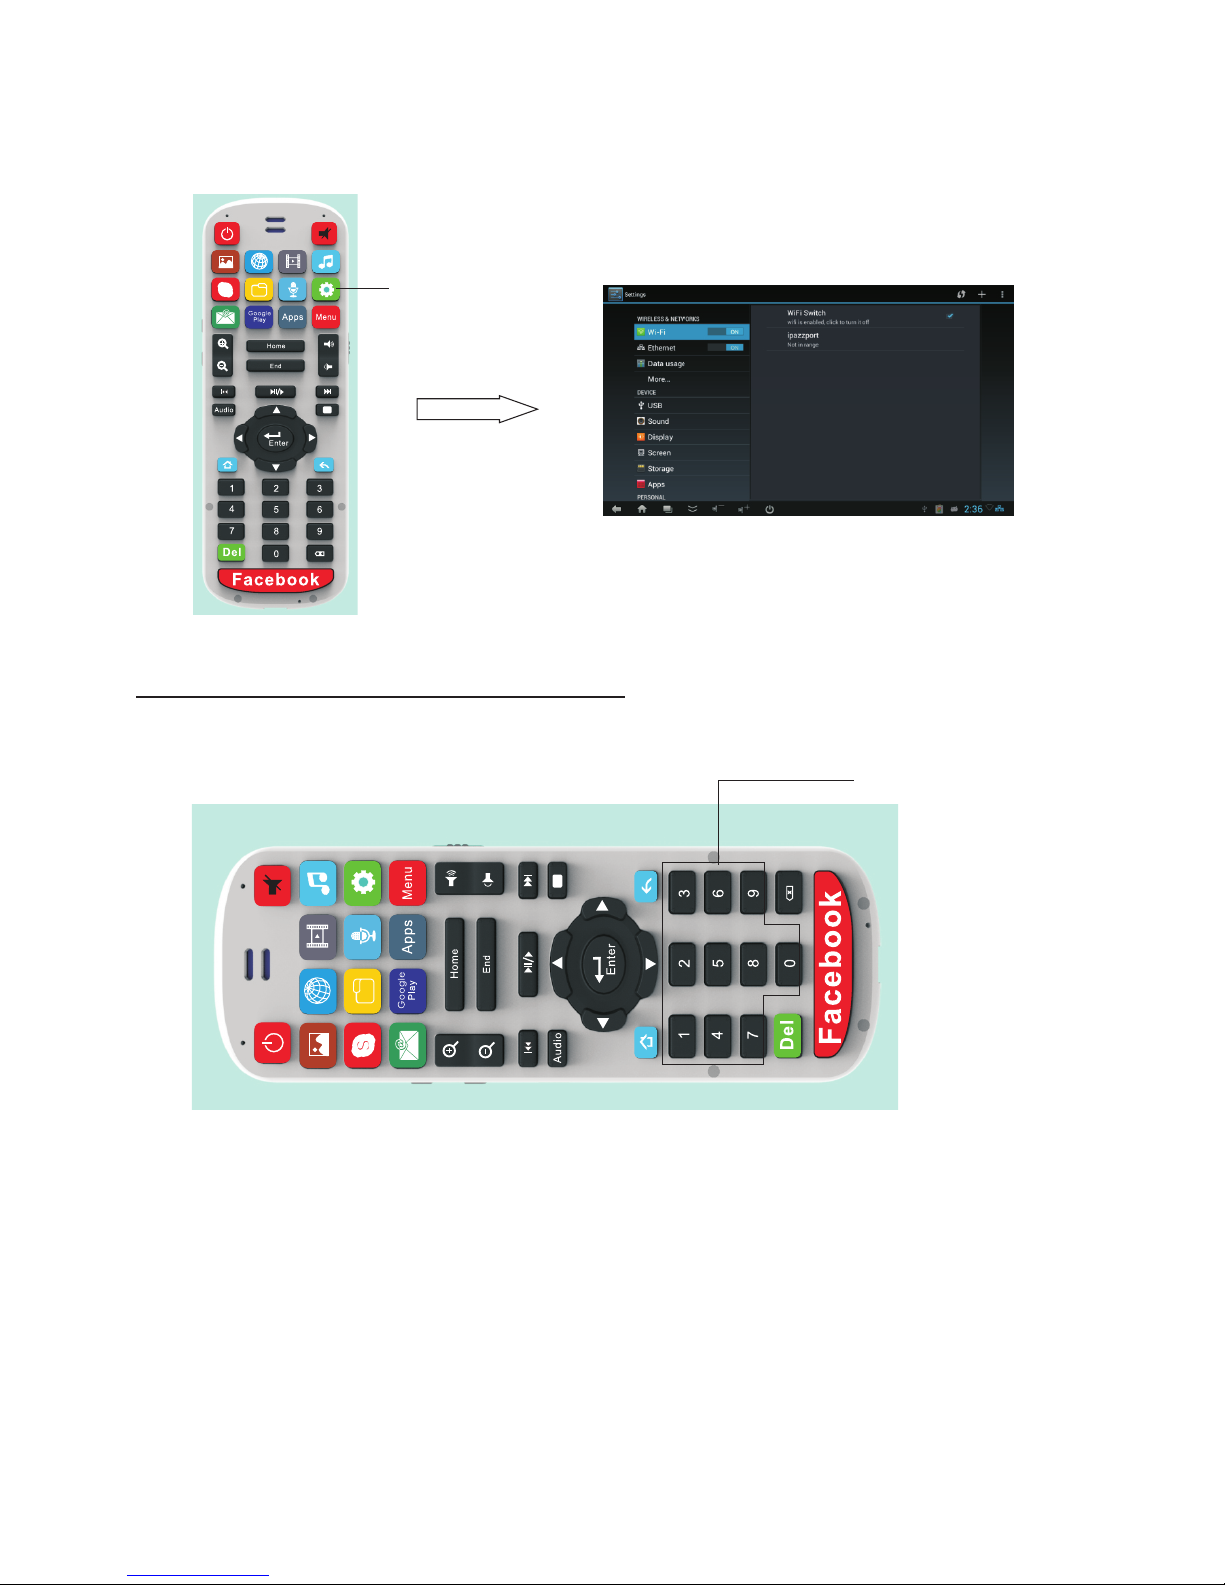
Pearl Command Center Overview ............................. 2
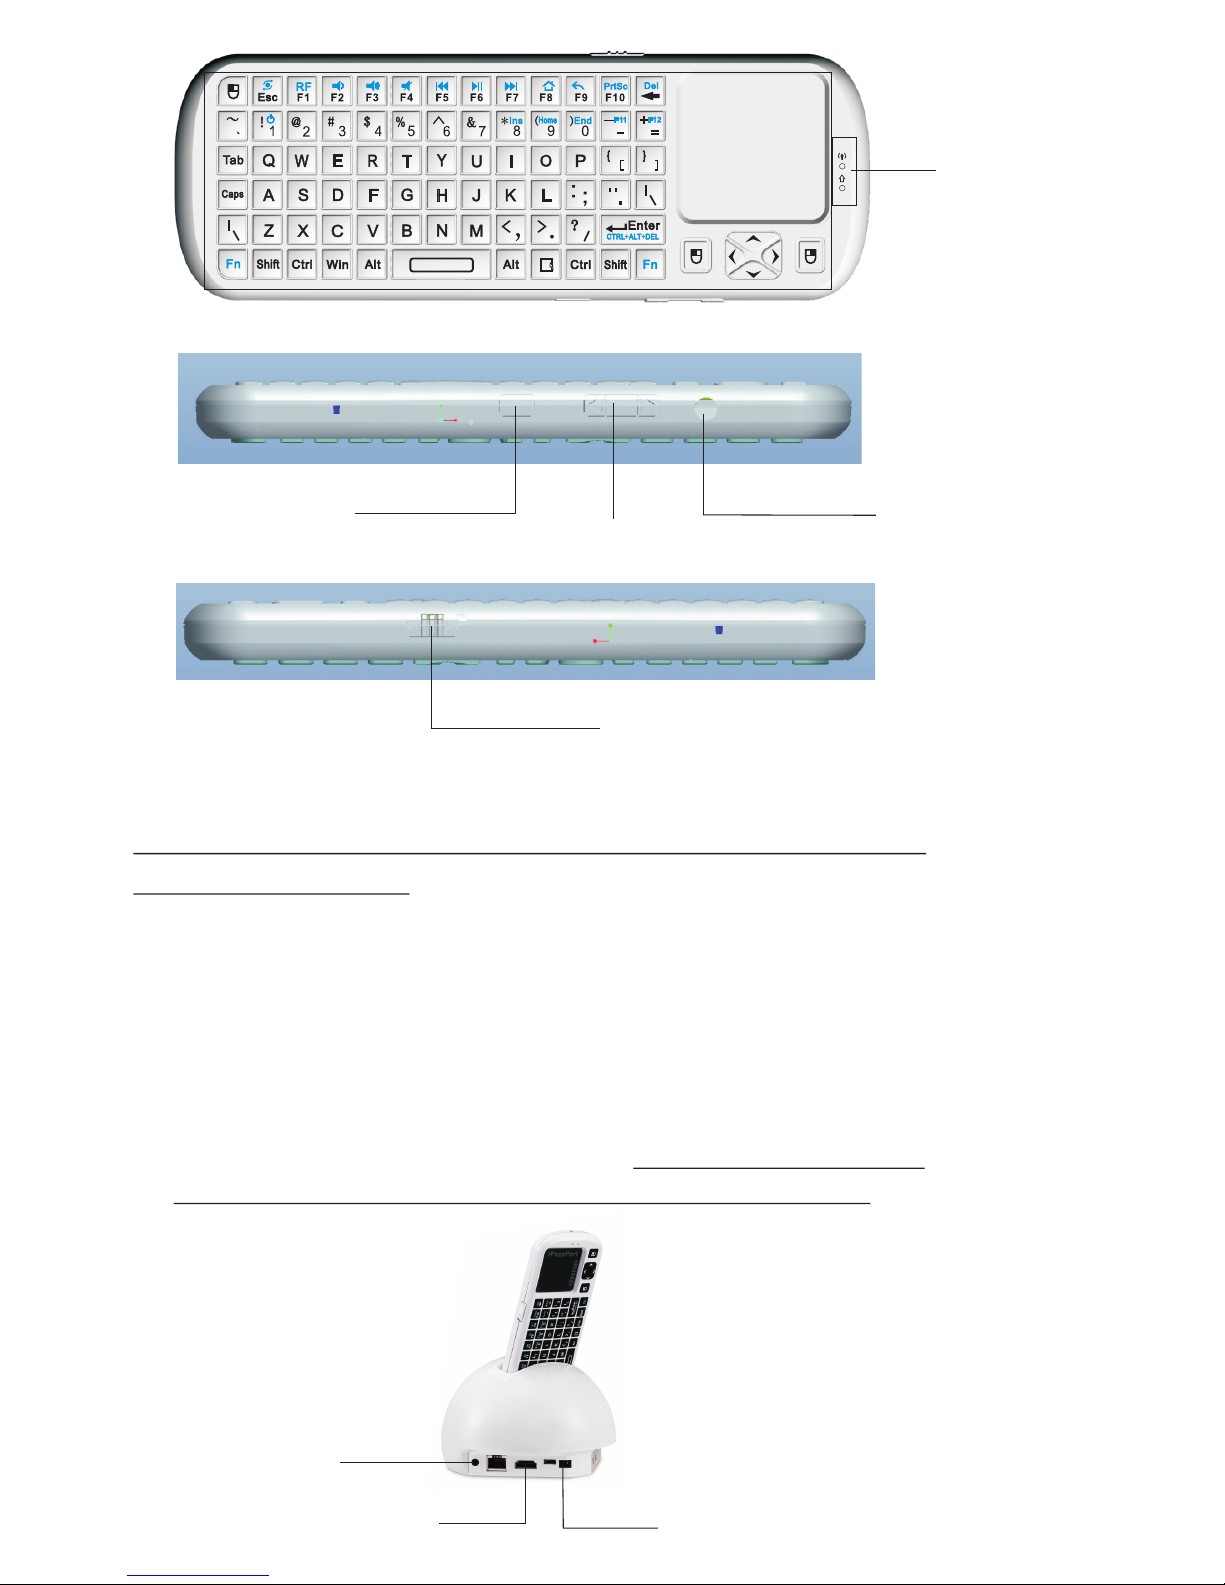
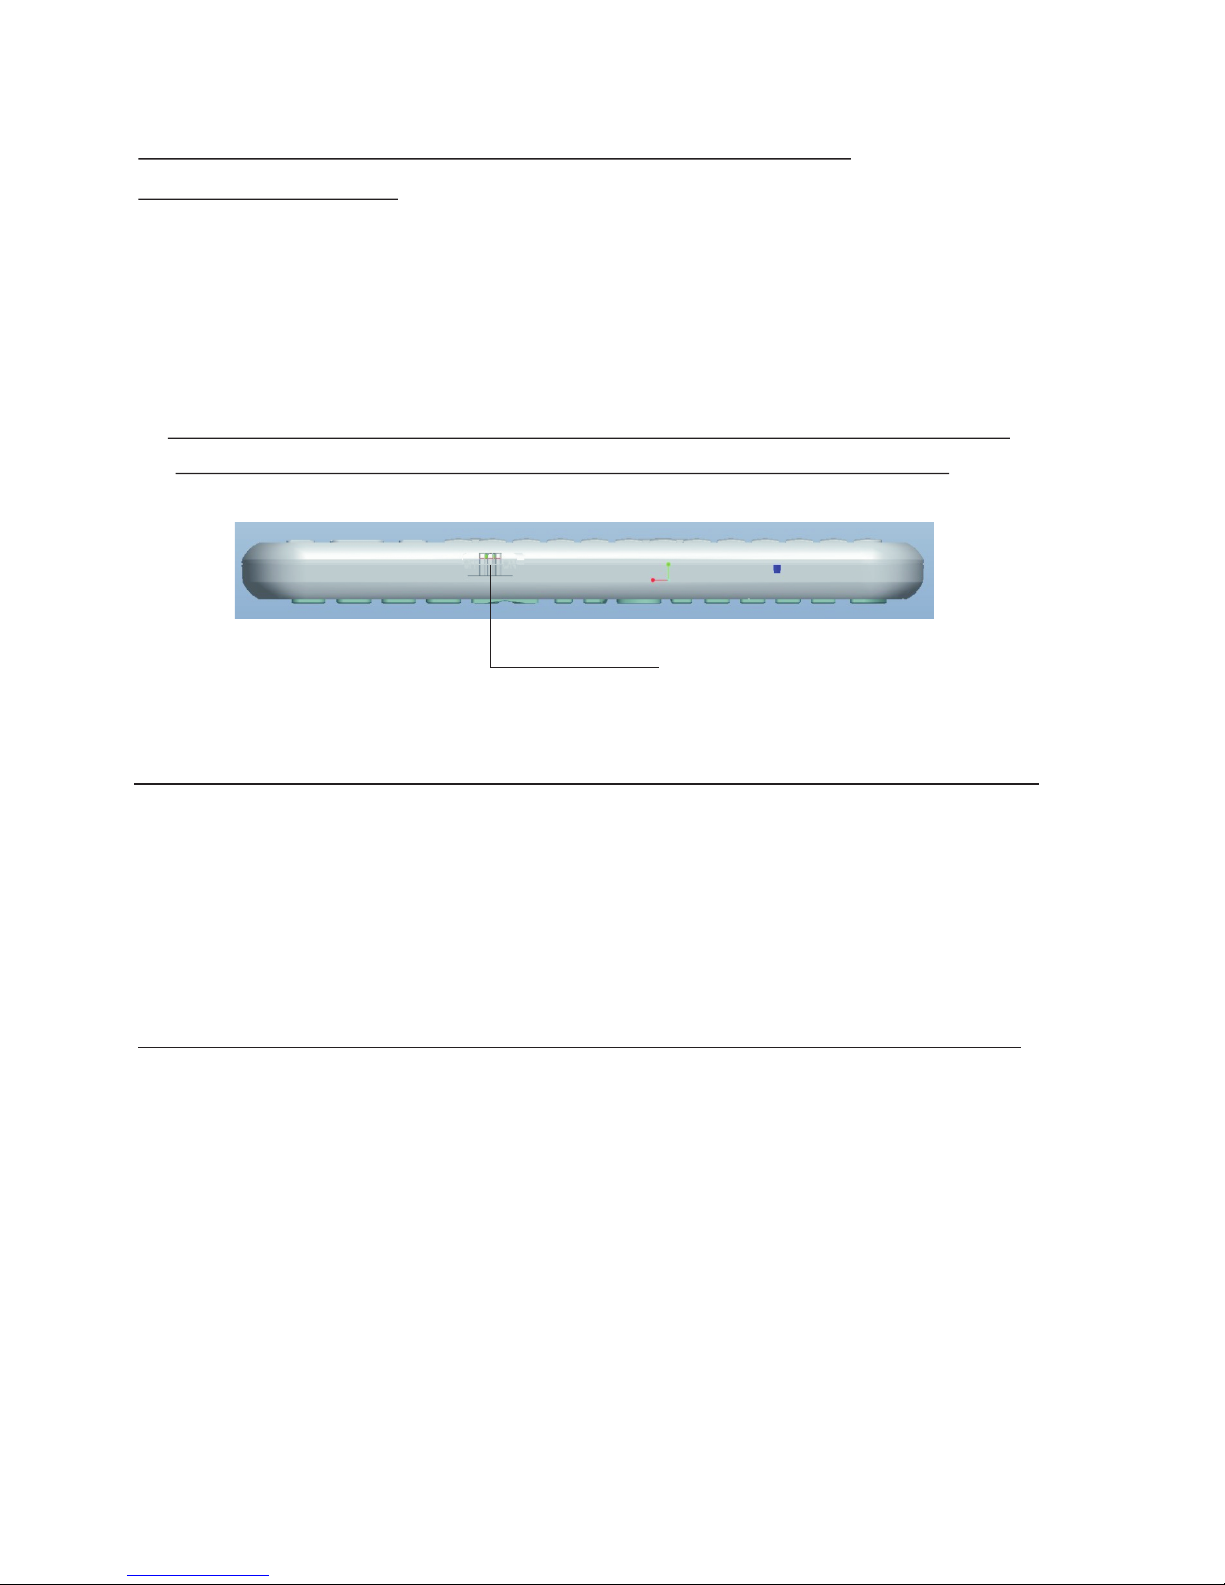
Pearl Keyboard Overview .......................................... 4
Connecting the Pearl Entertainment System to a TV
and Power On ..................................................... 5
Connecting and Powering on the Pearl
Double Sided Keyboard ........................................ 6
Connecting the Pearl to the Internet via
Wired Connection .................................................... 6
Connecting the Pearl to the Internet via
WiFi Connection ...................................................... 7
Operation of the “Remote Side” ................................ 7
Operating the Touch Pad .......................................... 9
Operation of the “Keyboard Side”...................................10
Using the Function “Fn”Ky For Additional Features ....... 11
Installing and Setting Up Voice Search ..................... 12
Using Voice Search .................................................... 13
Using Voice Out ............................................... 15
Enabling Voice Out ............................................. 15
Disabling Voice Out ................................................. 16
Audio and Video Playback ........................................ 16
Audio/Video Controls .............................................. 17
Adjust Screen Resolution ................................... 17
Main Menu Toolbar Icons (at bottom of all screens) ....... 17
Features of the iPazzPort Pearl ............................... 2
Document Management 18
.........................................
System Restore 19
...................................................
Interface Functions 19
................................................
Technical Specs 21
......................................................

System Requirements:
Monitor, Television or Projector with HDMI or RCA connectors
A/C Power
High Speed Internet Connection
Package Contents:
iPazzPort Command Center
iPazzPort Keyboard/Remote
A/C Power Adaptor
4' HDMI Cable
USB to Micro USB Cable
3.5 mm A/V to RCA Cable
User Manual
iPazzPortWorldTV.com Trial Membership
As detailed in the “Connecting and Powering On” Section,
THE KEYBOARD MUST BE CHARGED FOR 4-6 HOURS PRIOR TO
FIRST USE.
IMPORTANT OPERATING NOTE
The iPazzPort Pearl is a “plug and play” Entertainment System
built on the latest Android Operating System. The unique design
of the Pearl provides an easy to use Internet Experience complete
with Integrated Voice Technology, pre-programmed Hot Keys for
less typing and more surfing, 1080P HD Video, and the ability to do
more with a keyboard and TV than you ever thought possible!
iPazzPort Pearl Entertainment System Introduction

What Can I do with my iPazzPort Pearl?
Watch Videos, TV & Movies
Listen to Music
Make Skype Calls with Video
Facebook and Twitter
Surf the Web
Download Google Play Apps
Play Games
Use Office Applications
Access Dropbox
Use as an Alarm Clock
View, edit and send Pictures
Video Conferencing
Take Pictures with Built-in 2 Mega Pixel Camera
Create affordable Home Surveillance (with add'l app)
Connect to Home Ent. System for enhanced Hifi enjoyment
Everything you can do on your tablet or smartphone and more!
Features of the iPazzPort Pearl
Built in Microphone and Speaker with Interactive Voice
Technology for Audio Playback, Skype Calls, and use with
Voice Supported Applications
Full Qwerty “Keyboard Side” with 10 Dedicated Function Keys
and a Multi-touch, notebook quality touchpad with scrolling,
pinch, zoom and page flip.
Feature Rich “Remote Side” with Dedicated Hot Buttons for
Popular Apps and Features, Volume +/-, Zoom, Number Pad
and Multimedia Controls (Play, Pause, Skip, FF, Rew)
Hot Buttons link to your favorite Internet locations like Facebook,
Sky.FM, Skype and the Chrome browser; as well as shortcuts to
frequently visited locations like Google Play, all Apps, E-mail,
Settings and Directories.
iPazzPort World TV is an interactive Internet content viewing
experience that gives you access to thousands of channels
from around the globe.

5
679
8
4
10 11
Pearl Command Center Overview:
1
3
2

Micro SD Slot
Two (2) USB Ports
A/C Power Supply
9
10
11
Camera
Voice Keyboard Charging Portal
Voice Keyboard Front
Voice Keyboard Back
3.5mm AV Port
RJ 45 Ethernet Port
Micro USB Port
HDMI Port
1
2
3
4
5
6
7
8
charge lamp
Voice prompt indicator
Power
LED
Pearl Keyboard Overview

Connecting the Pearl Entertainment System to a TV
and Powering On:
1. Connect HDMI (or RCA cable) to your TV (or Monitor or Projector).
2. Using your TV's “Input” or “source” button, select the input location being
used (HDMI, Video 1, Auxiliary etc.)
3. Next, plug the HDMI cable into the back of the Pearl in Port #7
(also shown below). If using the RCA adapter, insert the cable
into Port #5.
4. Insert the Power Supply into Port #9 AND THEN PLUG THE
POWER SUPPLY INTO YOUR ELECTRICAL OUTLET.
Indicator
Headset jack
Page up/down
LED button
Power swith
Power
HDMI
Port 5

Connecting and Powering on the Pearl Double
Sided Keyboard:
1. Holding the keyboard in your hand with the Keyboard/Touchpad
side up, slide the power switch down on the left hand side down
to “ON”.
2. Flip the keyboard over so that the Remote Side is facing up and
slide it into the opening on the top of the Pearl Command Center.
3.ONCE IN THE CHARGING TERMINAL, ALLOW THE KEYBOARD
TO CHARGE FOR 4-6 HOURS BEFORE CONTINUING USE.
Power swith
Connecting the Pearl to the Internet via Wired Connection:
If you are using a wired connection, simply plug one end of
an RJ 45 cable (NOT supplied) into your router or modem
and the other end into Port # 6
Connecting the Pearl to the Internet via WiFi Connection:
1. On the Remote side of the Pearl keyboard, press the “Settings”
button, which is the green button shown below.
2. Once in the “Settings” page, ensure that “Wi-Fi” is turned to “on”.
Available networks should populate on the right side of the screen.
If they do not, simply press the “refresh” button on the top right of
the screen.
3. Next, select the name of the network you would like to connect to.
Click once on the name and enter a password if necessary.
4. In the lower left hand corner, a “Wi-Fi” icon will appear and
your clock will automatically be adjusted to the current time.

Operation of the “Remote Side”
Nunber key
Settings

Function Operation
Enter standby or
Start from standby Press this button
Mute
Open the “Picture” App
Open the “Video” App
Open the “Music” App
Open the “Skype” App
Open the “File Directory”
Open the voice search
Open the settings
Open the “Email”App
Open the Google Play Store
Open the All Apps Menu
Open the menu of Current Page
Zoom in
Zoom out
Page Home
Press this button
Press this button
Press this button
Press this button
Press this button
Press this button
Press this button
Press this button
Press this button
Press this button
Press this button
Press this button
Press this button
Press this button
Press this button
Press this button
Google play
Apps
Menu
Home
Open the “Browser” App
Button

Audio
Press Corresponding
button
Volume up
Volume down
Previous/Rewind
Stop/play
Next/Fast Forward
Return to Home page
Back to previous page
Delete
Backspace
Opens Facebook
Function Operation
ON/OFF voice
Repeat
Cursor up,down,left, right
Enter
End
Del
Facebook
Press this button
Press this button
Press this button
Press this button
Press this button
Press this button
Press this button
Press this button
Press this button
Press this button
Press this button
Press this button
Press this button
Press this button
Page End
Button

Operating the Touch Pad:
The Touchpad is multi-directional and can easily be switched
from a horizontal to vertical orientation depending on your needs.
To switch direction, press and hold the “Fn” and “ESC” keys together.
The Touchpad is Multi-touch and recognizes finger gesture
combinations to perform various actions.
Hold and Drag
Double Click
Scroll Up/Down
Right Click
Scroll Left/Right
The Bottom edge of the touchpad will also scroll left to right with
one finger operation.
Operation of the “Keyboard Side”
Back Space Touch PAD
Indicator
Mouse left Navigator Mouse right
Page up/down
LED Light
Pair R.F with Fn

Item Function Operation
Using the Function “Fn” Key For Additional Features:
Fn Key
Fn Key
Touchpad
Indicator
R.F
Mouse left
Mouse right
Press to operate like left mouse key
Press to operate like right mouse key
Key R.F Press to pair keyboard and USB receiver
Cursor move cursor up, down, left,and right
Page up
Page down
Press to scroll page up
Press to scroll page down
Mouse move finger on touch pad to operate cursor
Recharge indicator, off when fully charger
Light up when fully recharged
Flash when signal transited
Light up when switch to Caps lock input
Light Operates the LED Light

PrtSc
Works with the secondary
function of other keys
Press Fn and any key with
blue secondary function
Change operation directions Press “Esc” and “Fn” together
Press “F2” and “Fn” together
Press “F3” and “Fn” together
Press “F4” and “Fn” together
Press “F5” and “Fn” together
Press “F6” and “Fn” together
Press “F7” and “Fn” together
Press “F8” and “Fn” together
Press “F9” and “Fn” together
Press “F10” and “Fn” together
Press “ ” and “Fn” together
Press “9” and “Fn” together
Press “=” and “Fn” together
Press “-” and “Fn” together
Press “0” and “Fn” together
Press “8” and “Fn” together
Volume down
Volume up
Mute
Previous
Stop
Next
Return to main page
Back to previous page
Print screen
Delete
Home
Home
F11 F11
End End
Ins
Del
Fn
Insert
F12 F12
Ctrl+Alt+Del Ctrl+Alt+Del Press Fn+Enter together
RF Press “F1” and “Fn” together
Key RF
Enter standby or
Start from standby Press “1” and “Fn” together
Installing and Setting Up Voice Search
Voice Search is a free from Google App that lets you speak your search
queries instead of typing them. Follow these instructions to easily
install Voice Search:
Make sure your Pearl is connected to a TV and powered on as
detailed previously.
Open a browser and go to:
Once there, search for “Voice Search”
Click the link for the Android 'Voice Search” App and follow
the installation instructions.
http://www.google.com
(either end
of bottom row)

Once Voice Search is installed, you may need to adjust your settings
for your native language.
Click the Green Hot Key for “Settings”, then select “Language & Input”
and select your language from the first drop down window.
Next, scroll down to Keyboard & Input Method and select
“Google Voice Typing”
Using Voice Search
To activate Voice Search on your Keyboard, simply press the
Voice/Audio button as shown below. This will now allow the Pearl
to be used for speech to text, listening to music, and other
voice and audio services.
ON/OFF voice
Settings

With Voice Search, a microphone icon will appear next to
search fields or anywhere else you would normally type a
command or query. Just click the icon and a pop-up window
will appear prompting you to speak.
Speak your search query, and the device will perform
a search as if it were typed.
Note: Voice Search is new technology and is rapidly improving.
Please be patient when using Voice Search and speak clearly
and distinctly for the most accurate results. Don't forget to
check http://www.google.com often for features updates.
Using Voice Out
The Voice Out feature allows you to enjoy watching movies and
listening to music with your iPazzPort Pearl without disturbing
those around you. Follow the instructions below to use the Voice
Out feature your device.
Note: For this feature to work, you must have an iPazzport
voice keyboard and a pair of earphones.

Enabling Voice Out
1. Select Settings from the Home screen.
2. Go to Sound > Sound Devices Manager
3. Under Sound Output Decive Menu Select Wireless Audio
HID Device. Your device is now configured to transmit audio
through your iPazzPort voice keyboard. (Don’t change the
selection under sound devices menu.)
Disabling Voice Out
1. From the Home screnn, select Sound > Sound Devices Manager.

2. Under Sound Output Decive Menu Select RK29-RK1000.
Your device is now configured to transmit audio. Through the
computer or TV it is connected to. (Don’t change the selection
under sound devices menu.)
Audio and Video Playback
1.Your Pearl is able to play audio through either the keyboard or the
command center. Audio converters are also available to direct audio
through hi-fi stereo systems and stand alone speakers.
2.Internet Radio, demo video and other media content may be
pre-installed on your Pearl. If not, or for additional content, a simple
search in the “Google Play Store” will lead you to numerous
entertainment options.To open or listen to installed audio or
video content:
Open the “Music” or “Video Player” App
Select the file of your choice and click once to open it and begin
playing.

Audio/Video Controls
When playing Video, you can use the play, pause, next and volume
up/down keys of the keyboard to control the action.
When the Keyboard is in your hand, the sound will play through
the Keyboard.
When the Keyboard is inserted in the charging Port, the sound will
play through the Pearl Command Center base.
The volume can be adjusted from the Keyboard whether it is in
the base or in your hand.
Adjust Screen Resolution
If your TV screen is not full mapped when device is powered on,
please do the following:
Settings Screen HDMI Mode Auto detecting.
Main Menu Toolbar Icons (at bottom of all screens)
Back to previous page or menu
Return to Home Page
Show and Hide all Open Apps
Hides Toolbar. To restore, move mouse to very bottom
of screen, hold, then flick up on touchpad and release
at the same time.
Volume Up and Down
Power Off

Document Management
Connected to the computer
Keyboard click the "Settings" button to enter the "the setting
interface" - "USB" -"Connect to PC" and "Developer Option"
USB debugging must be checked on
With the included Micro USB cord connecting the #8 port to a PC,
you can copy documents and files between your Pearl and your PC.
Other manuals for The Pearl SY-20-19VC
1
Table of contents