iPdomo Thermostat Installation Guide
www.ipdomo.co.uk | Copyright 2015 Audon Electronics Ltd
iPdomo Thermostat Installation Guide
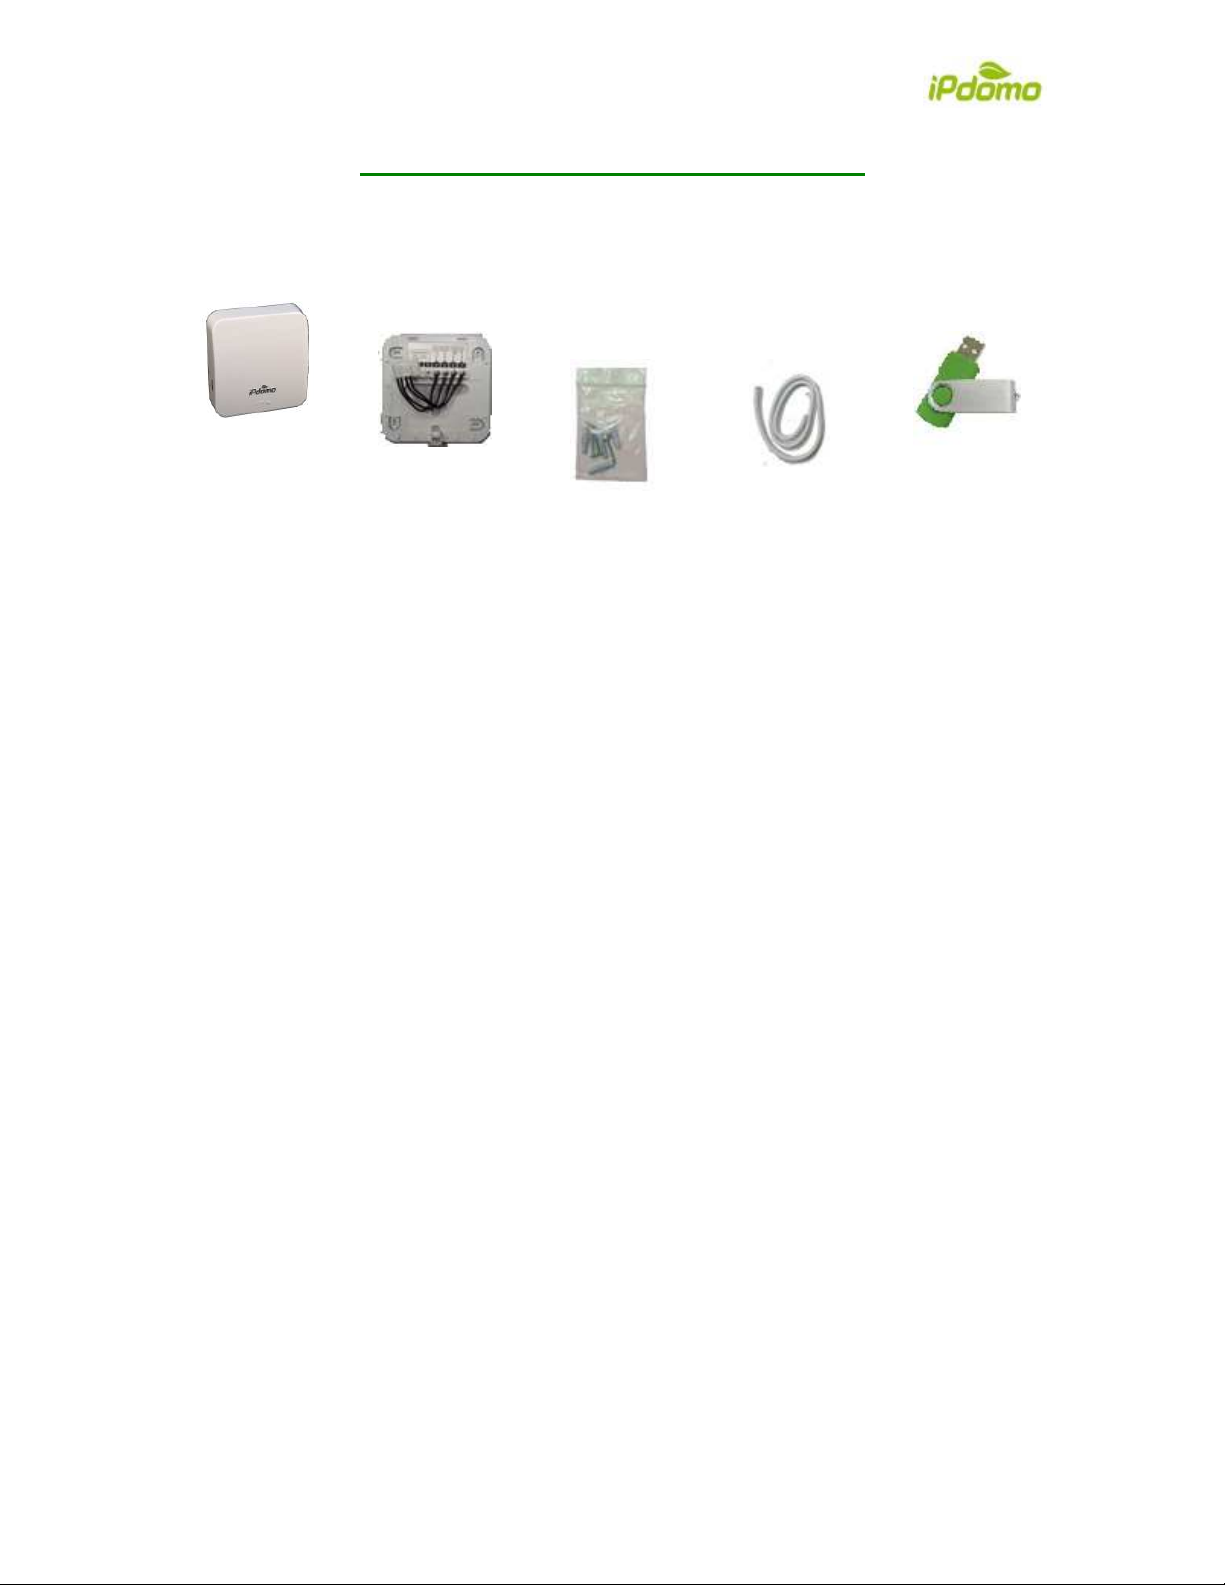
1Package Contents
Thermostat Wall Mounting
Plate Wall Fixing
Screws and
Batteries
Length of
2-core mains
cable
USB Flash
Drive
2Installation Considerations
The iPdomo Thermostat can be used in conjunction with your existing
thermostat/programmer it can replace it altogether or it can be connected to most new
heating system installations.
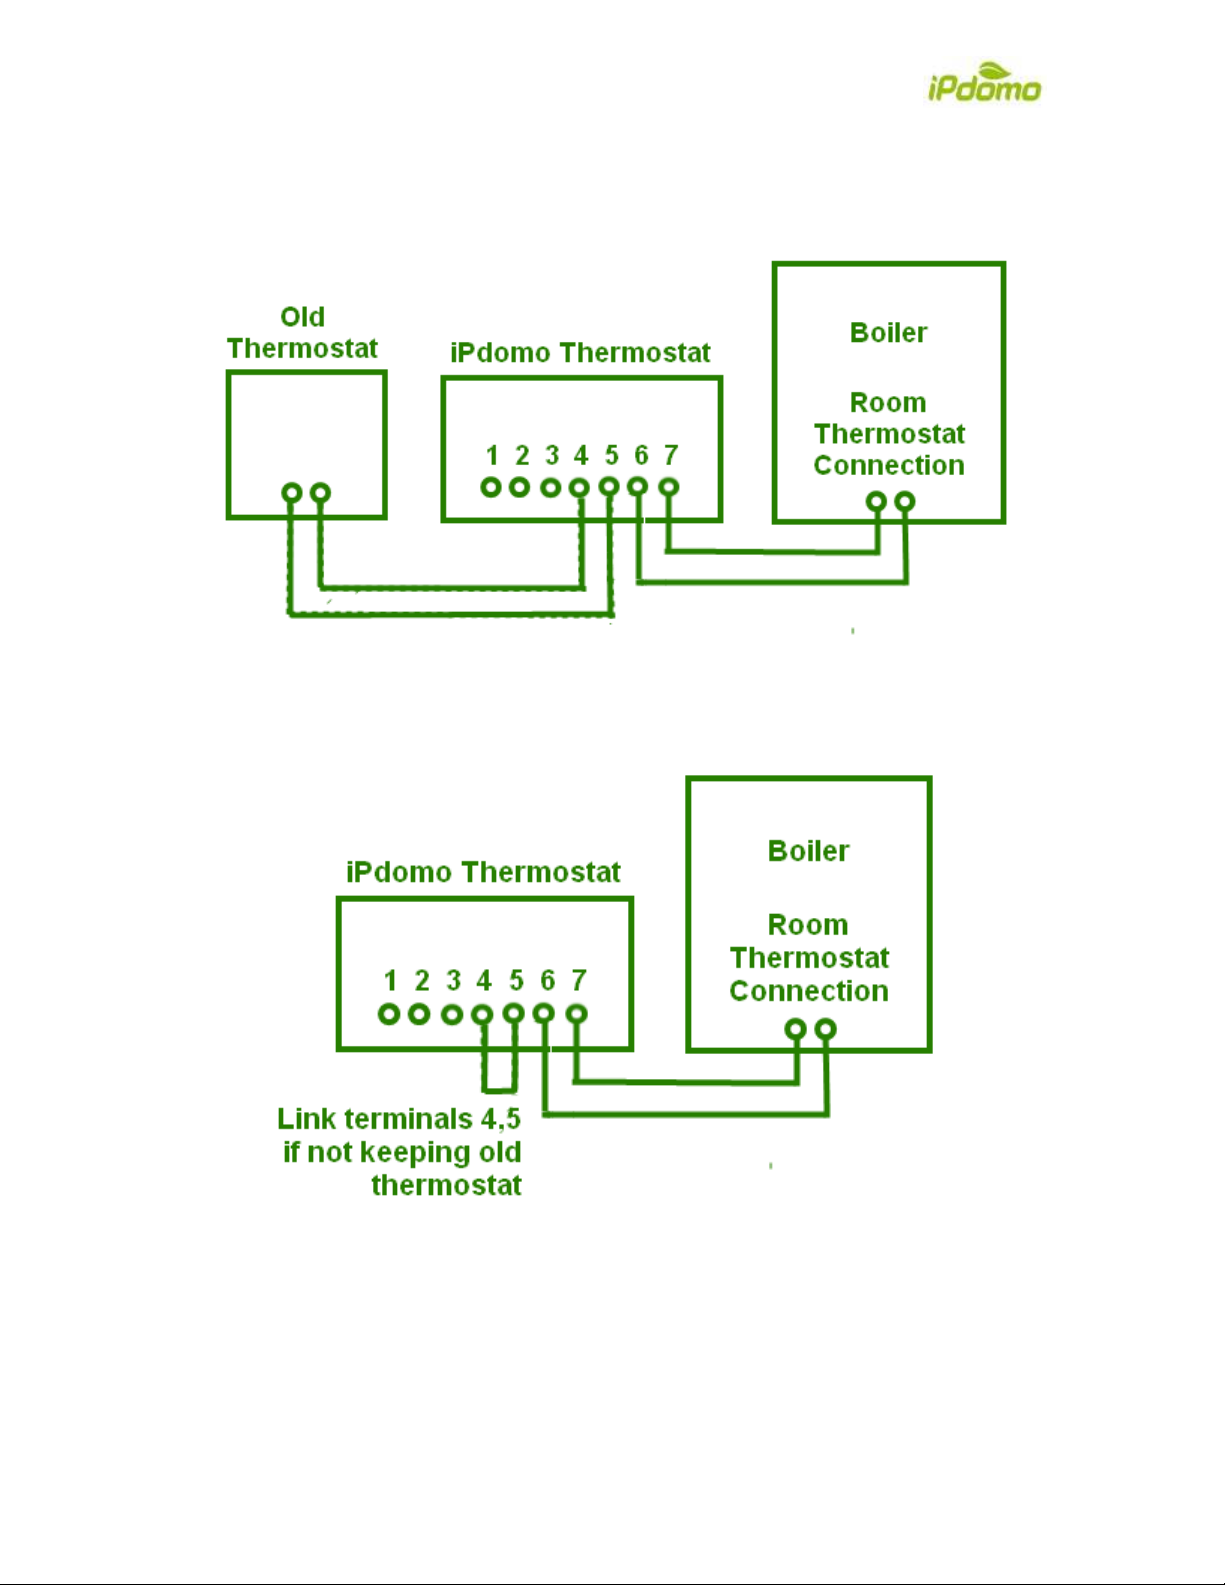
2.1 Keeping your existing Programmer/Thermostat
If you chose to retain your existing thermostat, you can operate your heating system as
normal, only reverting to Internet control when you want. If there is a problem with your
WiFi router or internet connection, control is automatically transferred to your existing
thermostat by the iPdomo thermostat. You can switch control between existing
thermostat and iPdomo thermostat by using the Mode button on the web interface (see
6.2.1)
2.2 Replacing your existing Programmer/Thermostat
If you choose to completely replace your existing thermostat, and there is a problem with
your Wifi router or internet connection, control will revert to your boiler controls.
2.3 New Installation
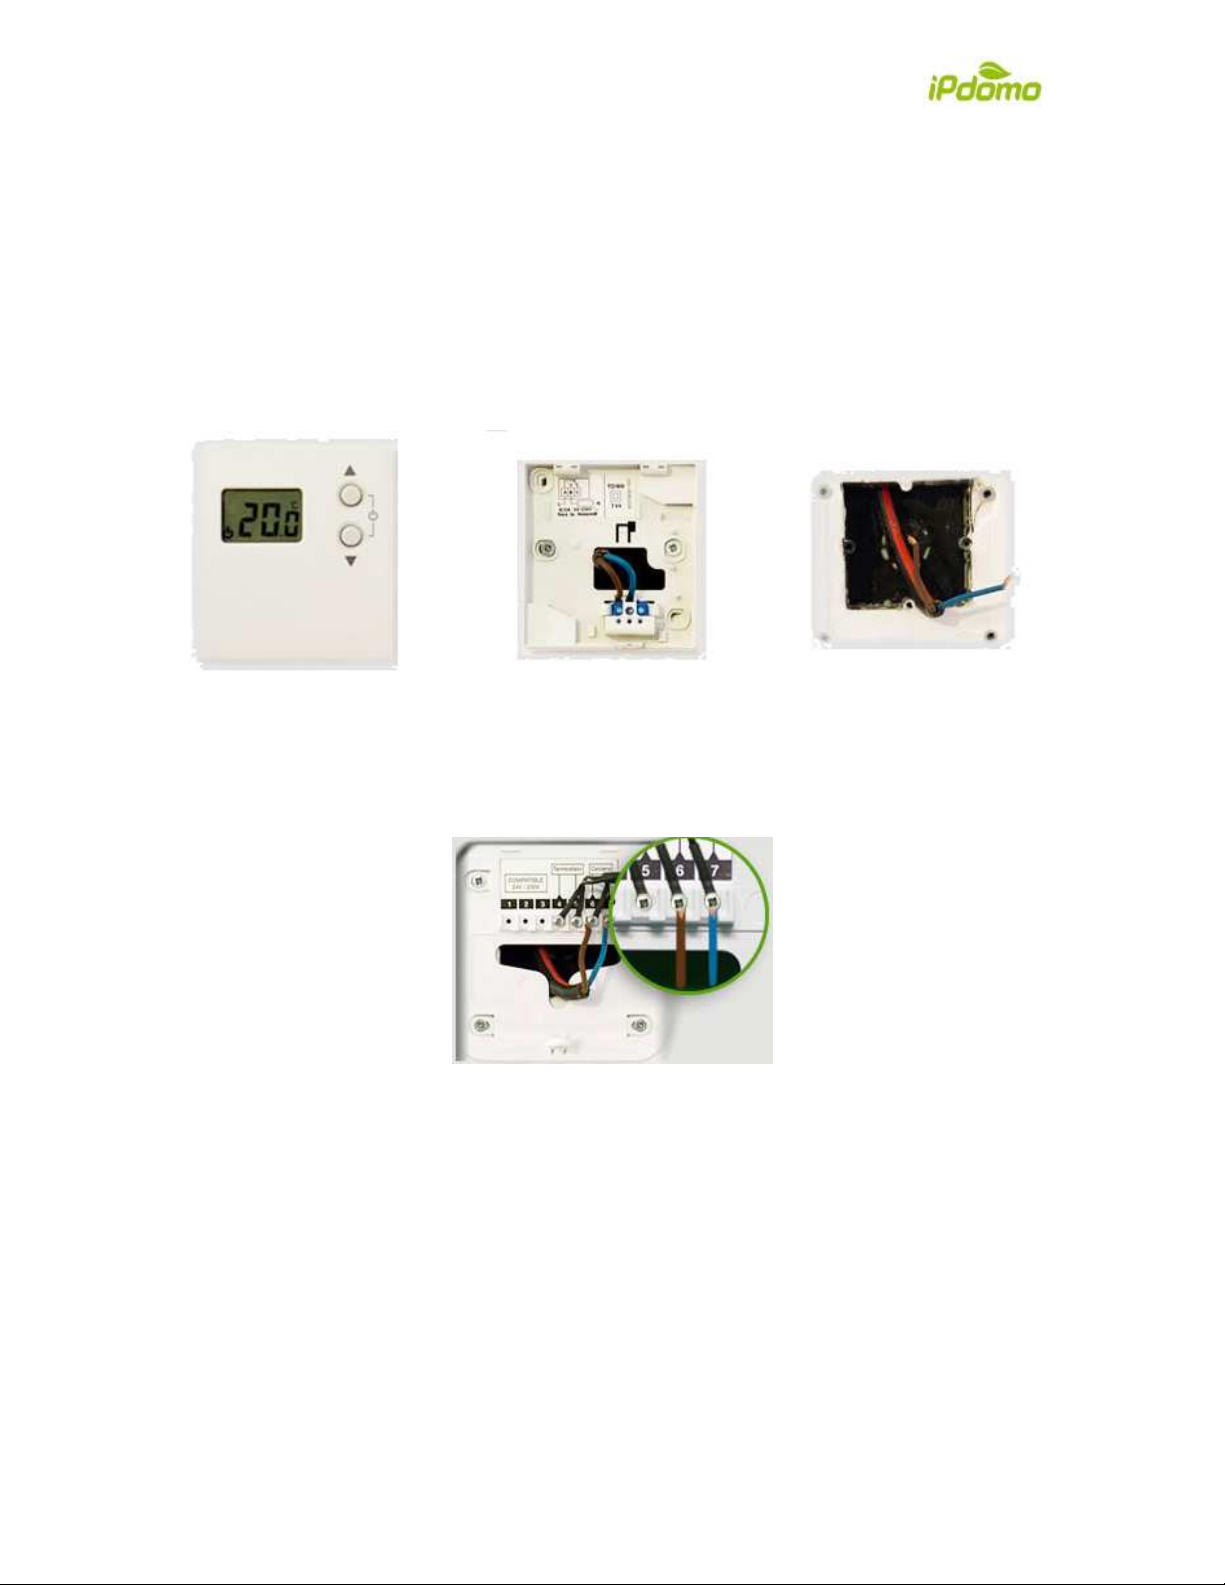
Look at your boiler user manual for details of the external room thermostat connection.
2.4 Siting your iPdomo Thermostat
Wherever you decide to locate your iPdomo thermostat it will need to obtain a good WiFi
signal from your router. This is determined by your router performance, construction of
your home and the distance from your router. Typically, you can expect to achieve a
10-15m range. Test your preferred location with a smartphone, tablet or laptop. Hold it
next to the place you want to fit the iPdomo Thermostat and see what sort of WiFi signal
can be obtained. If the signal is poor, or there is no signal at all, you may need to relocate
your router to achieve a better signal. Alternatively, you can obtain WiFi expanders to
extend your WiFi routers’ range.