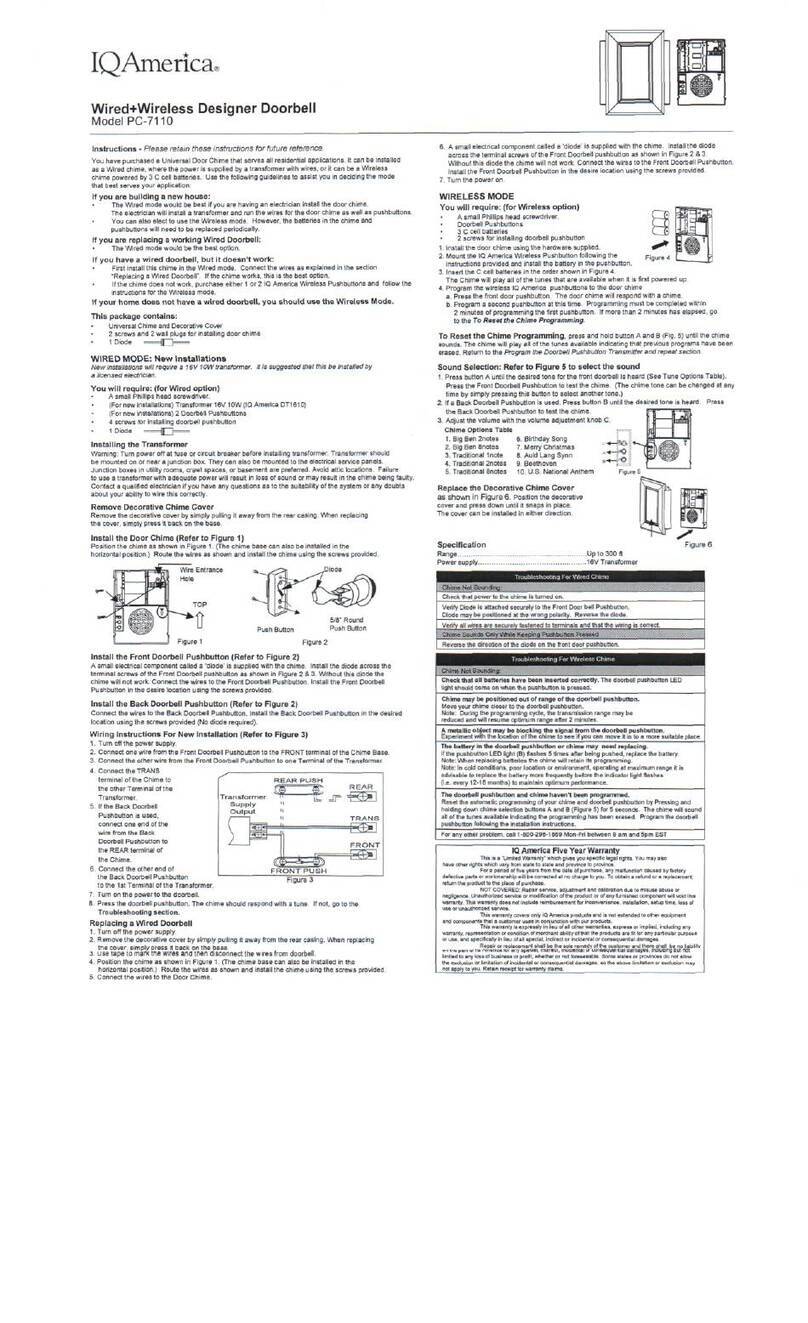
IQAmerica PC-7210 User manual

IQAmerica.
Wired+Wireless
Designer
Doorbell
Model
PC-7210
Instructions
-
Please
retain
these
instructions
for
future
reference.
You
havepurchased
a
UniversalDoorChimethatserves
all
residentialapplications.
Itcanbe
installed
as
a
Wired
chime,
where
the
power
is
supplied
bya
transformerwithwires,
oritcanbea
Wireless
chimepowered
by3 C
cellbatteries.
Usethe
followingguidelines
to
assist
youin
deciding
the
mode
that
bestservesyourapplication:
Ifyouare
building
a new
house:
The
Wired
modewould
be
best
ifyouare
having
an
electricianinstall
the
doorchime.
The
electrician
willinstall
a
transformer
andrunthe
wires
forthe
doorchime
as
well
as
pushbuttons.
You
can
alsoelect
tousethe
Wirelessmode.However,
the
batteries
inthe
chime
and
pushbuttons
willneed
tobe
replacedperiodically.
If
youare
replacing
a
working
Wired
Doorbell:
The
Wiredmodewould
bethe
best
option.
If
you
have
a
wired
doorbell,
butit
doesn't
work:
First
install
thischime
inthe
Wired
mode.Connect
the
wires
as
explained
inthe
section
"Replacing
a
Wired
Doorbell".
Ifthe
chime
worKs,
this
isthe
bestoption.
Ifthe
chime
does
network,
purchaseeither
1 or2
IQ
AmericaWirelessPushbuttons
and
follow
the
instructions
forthe
Wirelessmode.
If
your
home
does
not
have
a
wired
doorbell,
you
should
usethe
Wireless
Mode.
This
package
contains:
UniversalChime
and
DecorativeCover
2
screws
and2
wallplugs
for
installingdoor
chime
.1
Diode
=^=-
WIRED
MODE:
New
Installations
New
installations
will
require
a 16V
10W
transformer.
It is
suggested that this
be
installed
by
a
licensed
electrician.
You
will
require:
(for
Wired
option)
A
smallPhillipsheadscrewdriver.
A
smallPhillipsheadscrewdriver.
(For
new
installations}
Transformer
16V
10W
(IQ
America
DT1610)
(For
new
installations)
2
Doorbell
Pushbuttons
4
screws
for
installing
doorbell
pushbutto
1
Diode
Remove
Decorative
Chime
Cover
Remove
the
decorativecover
by
simplypulling
it
awayfrom
the
rear
casing.
Whenreplacing
the
cover,simplypress
it
back
onthe
base.
Install
the
Door
Chime
(Refer
to
Figure
1)
Position
the
chime
as
shown
in
Figure
1.
(Thechimebase
can
also
be
installed
inthe
horizontalposition.)Route
the
wires
as
shown
and
install
the
chimeusing
the
screwsprovided,
Figure
1
Figure
2
REAR
PUSH
REAR
Transforms
Supply
Output
Install
the
Front
Doorbell
Pushbutton
(Refer
to
Figure
2}
A
smallelectricalcomponentcalled
a
'diode'
is
suppliedwith
the
chime.Install
the
diodeacross
the
terminalscrews
ofthe
Front
Doorbell
pushbutton
as
shown
in
Figure
2 & 3.
Withoutthisdiode
the
chimewill
not
work.Connect
the
wires
tothe
FrontDoorbellPushbutton.Install
the
FrontDoorbell
Pushbutton
inthe
desirelocationusing
the
screws provided.
Install
the
Back
Doorbell
Pushbutton
(Refer
to
Figure
2)
Connect
the
wires
tothe
BackDoorbellPushbutton.Install
the
BackDoorbellPushbutton
inthe
desired
locationusing
the
screwsprovided
(No
diode
required).
Wiring
Instructions
ForNew
Installation
(Refer
to
Figure
3)
1.
Turn
offthe
powersupply,
2.
Connect
one
wirefrom
the
Front
Doorbell
Pushbutton
tothe
FRONTterminal
ofthe
ChimeBase.
3.
Connect
the
otherwirefrom
the
FrontDoorbellPushbutton
toone
Terminal
of
the
Transformer.
4.
Connect
the
TRANS
terminal
ofthe
Chime
to
the
otherTerminal
ofthe
Transformer.
5.
Ifthe
BackDoorbell
Pushbutton
is
used,
connect
oneendofthe
wirefrom
the
Back
Doorbell
Pushbutton
to
the
REARterminal
of
the
Chime.
6.
Connect
the
other
endof
the
BackDoorbellPushbutton
to the 1 st
Terminal
of the
Transforr
7.
Turn
onthe
power
tothe
doorbell,
8.
Press
the
doorbellpushbutton.
The
chimeshouldrespondwith
a
tune.
If
not,
gotothe
Troubleshooting
section.
Replacing
a
Wired
Doorbell
1.
Turn
offthe
powersupply.
2.
Remove
the
decorative
cover
by
simplypulling
it
awayfrom
the
rear
casing.When
replacing
the
cover,
simplv
cross
it
back
on
the
base
3.
Use
tape
to
mark
the
wires
and
then
disconnect
the
wiresfromdoorbell.
4.
Position
the
chime
as
shown
in
Figure
1.
(The
chimebase
can
also
be
installed
inthe
horizontalposition.)Route
the
wires
as
shown
and
install
the
chimeusing
the
screws
provided.
5.
Connect
the
wires
tothe
Door
Chime.
FRONTPUSH
Figure
3
Figure
4
6.
A
smallelectricalcomponentcalled
a
'diode'
is
suppliedwith
the
chime.
Install
the
diode
across
the
terminal
screws
ofthe
FrontDoorbell
pushbutton
as
shown
in
Figure
2 & 3.
Withoutthisdiode
the
chimewill
not
work.Connect
the
wires
tothe
FrontDoorbellPushbutton.
Install
the
FrontDoorbell
Pushbutton
inthe
desirelocationusing
the
screwsprovided.
7.
Turn
the
power
on.
WIRELESS
MODE
You
will
require:
(for
Wireless
option)
A
small
Phillips
headscrewdriver.
DoorbellPushbuttons
3C
cellbatteries
2
screws
for
installingdoorbellpushbutton
1.
Install
the
doorchimeusing
the
hardware
supplied.
2.
Mount
the IQ
America
Wireless
Pushbuttonfollowing
the
instructions
provided
and
install
the
battery
inthe
pushbutton.
3.
Insert
theC
cellbatteries
inthe
ordershown
in
Figure
4.
The
Chimewillplay
allofthe
tunes
that
are
availablewhen
itis
firstpowered
up.
4.
Program
the
wireless
IQ
Americapushbuttons
tothe
doorchime
a.
Press
the
frontdoorpushbutton.
The
doorchimewillrespondwith
a
chime.
b.
Program
a
second
pushbutton
at
thistime.Programmingmust
be
completedwithin
2
minutes
of
programming
the
firstpushbutton.
If
morethan
2
minutes
has
elapsed,
go
to
theTo
Reset
the
Chime
Programming.
To
Reset
the
Chime
Programming,
press
and
holdbutton
A andB
(Fig.
5)
until
the
chime
sounds.
The
chimewillplay
allofthe
tunesavailableindicatingthatpreviousprogramshavebeen
erased.Return
tothe
Program
trie
Doorbell Pushbutton Transmitter
and
repeat section.
Sound
Selection:
Refer
to
Figure
5 to
select
the
sound
1.
Pressbutton
A
until
the
desiredtone
forthe
front
doorbell
is
heard(SeeTuneOptionsTable).
Press
the
FrontDoorbellPushbutton
to
test
the
chime,(Thechimetone
canbe
changed
atany
time
by
simplypressingthisbutton
to
select
another
tone,)
2.
Ifa
BackDoorbellPushbutton
is
used.
Press
button
B
until
the
desiredtone
is
heard.Press
the
BackDoorbellPushbutton
to
test
the
chime.
3.
Adjust
the
volume
with
the
volume
adjustment
knob
C.
Chime
Options
Table
6.
BirthdaySong
L^ii
1.
BigBen
2notes
2.
BigBen
Snotes
3.
Traditional
1note
4.
Traditional2notes
5.
Traditional
Snotes
7.
MerryChristmas
8.
Auld
LangSynn
9.
Beethoven
10.
U.S.NationalAnthem
Replace
the
Decorative
Chime
Cover
as
shown
in
Figure
6.
Position
the
decorative
cover
and
pressdown
until
it
snaps
in
place.
The
cover
canbe
installed
in
eitherdirection.
Figure
E
Check
that
all
batteries
light
should
come
on
whe
ave
been
inserted
c<
the
pushbutton
is
prt
rectly.
The
doorbell
pushbutton
LED
;ed.
Chime
maybe
positioned
outof
range
ofthe
doorbell
pushbutton.
Move
your
chime
closer
tothe
doorbell
pushbutton.
Note:
During
the
programming
cycle,
the
transmission
range
maybe
reduced
and
will
resume
optimum
range
after
2
minutes.
A
metallic
object
maybe
blocking
the
signalfrom
the
doorbell
pushbutton,
Experiment
with
the
location
ofthe
chime
toseeifyoucan
move
itintoa
more
si
suitable
place.
The
doorbell
pushbutton
and
chime
haven't
been
prograi
Reset
the
automatic
programming
of
your
chime
and
doorbell
Cammed.
holding
down
chime
selection
buttons
A andB
(Figure
5)for 5
seconds.
The
chime
will
sounc
all
ofthe
tunes
available
indicating
the
programming
has
been
erased.
Program
the
doorbell
pushbutton
following
the
installation
instructions.
For
any
other
problem,
call
1-800-296-1869
Mon-Fri
between
9 amand5pmEST
IQ
America
Five
Year
Warranty
This
isa
'Limited
Warranty"
which
gives
you
specific
legal
rights
Fof
a
period
of
five
years
from
the
date
of
purchase,
any
malfunction
caused
by
factory
return
the
product
tothe
place
of
purchase.
NOT
COVERED:
Repair
service,
adjustment
and
calibration
dueto
misuse
abuse
or
negligence
Unauthorized
service
or
modification
of
the
product
orofany
furnished
component
will
void
this
warranty.
This
warranty
does
not
include
reimbursement
for
inconvenience,
installation,
setup
time,
loss
of
useor
unauthorized
service.
This
warranty
is
expressly
in
lieu
ofall
other
warranties,
express
or
implied,
including
any
warranty,
representation
or
condition
of
merchant
ability
of
that
the
products
arefitforany
particular
purpose
Repair
er
roela&smonl
oholl
be
Ihc
aolc
rcmcGi
ff
the
ouMuiner
and
Ihere
shall
Dm
nn
nanimi
on
tne
part
ot
IU
America
torany
special,
indirect,
incidental
or
consequential
damages,
including
butnot
limited
toanytossof
business
or
profit,
whether
ornot
foreseeable.
Some
states
or
provinces
donot
allow
the
exclusion
or
limitation
of
incidental
or
consequential
damages,
sothe
above
limitation
or
exclusion
may
not
apply
to
you.
Retain
receipt
for
warranty
claims.
__^
umaya

IQAmerica,
Timbre
de
Diseno
Inalambrico
y Con
Cable
Modelo
PC-7210
Instrucciones
-
Guardarestas
instructions
para
futuras
referencias.
Ha
comprado
un
Timbrepara
Puertas
Universal
que
le
sirve
paratodas
las
aplicaciones
ensu
residencia.
Se
puede
instalar
comotimbre
con
Cable,
cuando
un
transformador
con
cablesuministra
la
corriente
o
puedeusarsecomotimbreInalambricousando
3
pilas
C.Veael
siguientemanualpara
ayudarte
a
decidir
la
modalidad
que
mejorle
vaya:
Si
estaconstruyendo
una
casanueva:
La
modalidad
con
Cable
seta
la
mejor
siun
etectricista
le
instala
el
timbre.
El
electricista
lo
instalara
a un
transformador
y
pondra
los
cables
del
timbre
y los
pulsadores.
Tambienpuedeelegir
usar
la
modalidadinalambrica.
Sin
embargo,tendra
que
cambiar
periodicamente
las
pilas
del
timbre
y
pulsadores.
Si
quiere
cambiar
un
Timbre
con
Cables
que
funciona:
La
modalidad
con
Cable
seria
la
mejoropcion.
Si
tiene
un
timbre
con
cable
pero
no
funciona:
Primeroinstaieestetimbre
enla
modalidad
con
Cable.Conecte
los
cablescomo
se
explica
en
la
section
"Cambio
de
Timbre
con
Cable".
Siel
timbrefunciona,esta
esla
mejoropcion.
Siel
timbre
no
funciona.compre
1 o 2
Pulsadores
Inalambricos
IQ
America
y
siga
las
instrucciones
para
la
modalidadInalambrica.
Sisu
casa
no
tiene
un
timbre
con
cable,deberiausar
la
Modalidad
Inalambrica.
Este
paquetecontiene:
Base
y
Tapa
de
Timbre
con
Cablespara
Puerta
2
tornillos
y 2
tacosparainstalar
el
timbrepara
puerta
1
DlOdO
rr-r*fjxsss==
MODALIDAD
CON
CABLE:NuevaInstalacion
Para
instalacitin
nueva
se
necesita
un
transformador
16V
10W.
Se
recomienda
que un
electricista
profesional
lo
instaie.
Sera
necesario:(para
la
opcion
con
Cable)
Un
destorniliador
pequefto
de
cabeza
Phillips.
(Para
instalaciones
nuevas)Transformador
16V
10W
{Para
instalacionesnuevas)
2
Pulsadores
de
Timbre
4
tornillosparamontar
el
pulsador
de
timbre
1
Diodo
Instalacion
del
Transformador
Advertencia:
Antes
de
instalar
el
transformadordesconecte
dela
corriente
los
fusibles
o el
cortacircuitos.
Se
deberiamontar
el
transformador
enuna
caja
de
empalmes
o
cerca
de
esta.
Tambien
se
puedenmontar
en
paneles
de
servicios
electricos.
Se
prefiere
cajas
de
empalmes
en
trasteros,
lugares
bajos
o
sotano.
Evite
aticos.
Fallo
enelusodel
transformador
con
corrienteadecuada
resultara
en
perdida
de
sonido
o
podria
serqueel
timbre
falle.
Pongase
en
contacto
conun
electricistacualificado
si
tiene
algunapreguntasobre
la
idoneidad
del
sistema
o
cualquierduda
sobre
su
capacidad
para
conectarlo
correctamente.
Quite
la
Cubierta
Decorativa
del
Timbre
Quite
la
cubierta
decorativa
extrayendola
dela
parte
de
atras.
Cuando
la
vuelva
a
poner,
simplemente
haga
presion
conla
base
Instaie
el
TimbreparaPuerta(Veallustracion
1)
Posicione
el
timbrecomo
se
muestra
enla
ilustracion
1.
(La
base
de!
timbretambien
se
puedeinstalar
en
posicion
horizontal).
Fije
los
cablescomo
se
muestra
&
instaie
el
timbreusando
los
tornillos
quese
proporcionan.
'»'•"><"'«
*!••
-*
—
Diodo
llustracion
1
Pulsador
Montado
5/8"Pulsador
en
Superficie
Redondo
llustracibn
2
Instaie
el
Pulsador
dela
Puerta
Principal
(Veallustracion
2)
Se
proporciona
conel
timbre
un
pequefio
componente
electrico
llamado
'diodo'.
Instaie
el
diodo
a
traves
dela
terminal
delos
tornillos
del
pulsador
del
TimbreDelanterocomo
se
muestra
en
llustracion
2 & 3.
Sin
estediodo
el
timbre
no
funcionara.Conecte
los
cables
al
Pulsador
del
TimbreDelantero.Instaie
el
Pulsador
de
TimbreDelantero
enel
lugar
deseadousando
los
tornillos
quese
proporcionan.
Instaie
el
Pulsador
dela
Puerta
Trasera
(Vea
llustracion
2}
Conecte
fas
cables
al
Pulsador
dela
PuertaTrasera.Instaie
el
Pulsador
dela
PuertaTrasera
enel
lugar
deseado
conlos
tornillos
quese
proporcionan
(Nose
necesitadiodo).
Instrucciones
de
Cableado
Para
Nueva
Instalacidn
(Vea
llustracion
3)
1.
Desconecte
la
corriente.
2.
Conecte
un
cable
del
Pulsador
del
Timbre
de
la
Puerta
Principal
al
TerminalPRINCIPAL
dela
Base
del
Timbre.
3.
Conecte
el
otrocable
del
Pulsador
del
Timbre
dela
PuertaPrincipal
a un
Terminal
del
Transformador.
4.
Conecte
el
terminalTRANS
del
Timbre
al
otroterminal
del
Transformador,
PULSADOR
TRASERO
TRASERO
PULSADOR
PRINCIPAL
5.
Siseusael
Pulsador
dela
PuertaTrasera,conecte
un
extreme
del
cable
del
llustracion
3
Pulsador
de
la
PuertaTrasera
al
terminal
TRASERO
del
Timbre,
6.
Conecte
el
otro
extreme
del
Pulsador
dela
PuertaTrasera
al
1er
Terminal
del
Transformador.
7.
Conecte
la
corriente
al
timbre.
8.
Presione
el
pulsador
del
timbre.
El
timbredeber
ia
responder
conuna
melodia.
Si
noes
ssi
vaya
a En
caso
de
problemas.
Cambio
de
Timbre
con
Cable
1.
Desconecte
la
corriente
e!6ctnca.
2.
Quite
la
cubierta
decorativatirando
dela
carcasatrasera.Cuandovuelva
a
poner
la
cubierta,presionela
a
la
base.
3.
Use
cintaadhesivaparamarcar
los
cables
y
luegodesconecte
los
cables
del
timbre.
4.
Ponga
el
timbrecomomuestra
la
llustracion
1.
(La
base
del
timbretambien
se
puedeinstalar
en
posicion
horizontal.)
Redireccione
los
cablescomo
se
muestra
e
instaie
el
timbre
usando
los
tornillos
quese
proporcionan.
5.
Conecte
los
cables
al
Timbre.
MODALIDAD
INALAMBRICA
Sera
necesario:(para
la
opcionInalambrica)
Un
destorniliador
pequeno
de
cabeza
Phillips.
Pulsadores
de
Timbre
3
Pilas
C
2
tornillosparamontar
el
pulsador
de
timbre
1.
Instaie
el
timbreusando
el
hardware
quese
proporciona.
2.
Monte
el
PulsadorInalambrico
IQ
Americasiguiendo
las
Hus
instrucciones
quese
proporcionan
e
instaie
la
pila
enel
pulsador.
3.
inserte
las
pilas
C enel
orden
quese
muestra
enla
llustracion
4.
Sonarantodas
las
melodiasdisponibles
del
timbre
cuando
se
conecte
por
pnmera
vez.
4.
Programe
los
pulsadores
inatembricos
IQ
America
al
timbre
a.
Presione
el
pulsador
dela
puertadelantera.
El
timbre
respondera
conuna
melodia.
b.
Programe
un
segundo
pulsador
al
mismo
tiempo.
La
programacion
se
completara
en
2
minutos
de
haberprogramado
el
primerpulsador.
Sihan
pasado
masde
2
minutos,vaya
a
Reiniciarla
Programacidn
del
Timbre.
Reiniciar
la
Programacion
del
Timbre,
presione
y
mantenga
presionados
el
boton
A
y B
(llustracion
5)
hasta
queel
timbre
suene.Sonarantodas
las
melodiasdisponibtes
del
timbre
indicando
quesehan
borra
doslos
programasprevios.Vuelva
a
Programe
el
Transmisordel
Pulsador
de
Timbre
y
repita
la
seccion.
Seleccidn
de
Sonido:
Vea
llustracion
5
para
seleccionarel
sonido
1.
Presione
el
boton
A
hasta
quese
oiga
la
melodiadeseadapara
el
Timbre
dela
PuertaPrincipal
(Vea
la
Tabia
de
Opciones
de
Melodias).Presione
el
pulsador
dela
PuertaPrincipal
para
probar
el
timbre,
{La
melodia
del
timbre
se
puedecambiar
en
cualquier
momenta
presionandoeste
boton
paraseleccionarotra).
2.Siseusaun
Pulsador
dela
PuertaTrasera.Presione
el
boton
B
hasta
quese
oiga
la
melodia
deseada.
Presione
el
Pulsador
deia
PuertaTraseraparaprobar
el
timbre.
3.
Ajusle
el
volumen
en
el
boton
C.
Tabla
de
Melodias
1.
BigBen
2notas
2.BigBen
Snotas
3.
Tradicional
tnota
4.
Tradicional2notas
5.
Tradicional
Snotas
6.
Cancion
de
Cumpleanos
7.
Feliz
Navidad
8.
Auld
Lang
Synn
9.
Beethoven
10.
Himno
NacionaiU.S.A
Cambie
la
CubiertaDecorativa
del
Timbre
Como
se
muestra
enla
llustracion
6,
ponga
la
cubiertadecorativa
y
presionelahasta
quese
meta
ensu
lugar.
Se
puedeponer
la
cubierta
en
ambas
direcciones.
Especificacion
Alcance
Suministro
de
energia...hasta
300
pies
..16VA
Transformador
En
caso
de
problomas
para
Timbre
con
Cable
El
Timbre
No
S=jena
Compruebe
queel
timbreestaenchufado
a
Asegurese
queel
Diodoesta
puesto
de
fora
Puerta
Principal.
El
Diodopuedeestarpuesto
enla
polandad
Asegurese
que
todos
los
cables
estan
bien
forma
corrects.
a
electricidad.
aseguraen
el
Pulsador
dela
equivocada.
Cambielo.
justados
a las
terminales
y de
£3
Timbre
Sofa
Qusna
cuarrdo
se
Mannen«
Presionadc
el
S0t6rt
Caribie
lad
reccicn
del
diodo
enel
pu-sador
dela
puerta
deianlera
de
la
terminal
delos
tornillos
del
pulsador
del
TimbreDelanterocomo
se
muestra
en
llustracion
2 a 3.Sin
este
dioda
et
timbre
no
funcionara.Conecte
las
cables
al
Pulsador
del
TimbreDelantero.Instaie
el
Pulsador
de
TimbreDelantero
enel
lugardeseadousando
los
tornillos
quese
proporcionan.
7.
Conecte
la
corriente
electrica.
Compruebe
que
todas
las
pilasestan
puestas
correctamente
. La
luz
LEDdel
pulsador
deberia
encenderse
cuando
se
presiona
el
pulsador.
El
Timbre
puede
estarpuestofuera
del
alcance
pulsador
del
timbre.
Cambie
el
timbre
a un
sitjo
mas
cercano
del
pulsador.
Nota:Durante
el
ciclo
de
programacion,
el
alcance
de
transmisidn
podria
reducirse
pero
despues
de2
minutos tendra
un
alcance
bpti
Un
objetometalicopodriaestarbloqueando
la
serialdesde
el
pulsador.
Expenmente
conla
posicion
del
timbre
para
versilo
puedeponer
en
otrolugar
I*"4".
apropiado.
La
bateria
del
pulsador
o
timbre
se
tiene
que
cambiar.
SilaluzLED(B)del
pulsadorparpadea
5
veces
despues
de
presionario,
cambie
la
pila.
Nota
Cuando
se
cambian
las
piias
el
timbre
mantiene
la
programacion.
Nota
Se
recomiendacambiar
la
bateria
conmas
frecuencia(cada
12-18
meses)
para
tener
un
bptimo
funcionamiento
en
condiciones
de
trio,
ambiente
pobre
y
funcionando
a
maximo
alcance.
El
pulsador
y
el
timbre
Vuelv;
tl
pulsador
y el
timbre
nosenan
programado.
Vuelva
a
poner
la
programacifln
automatica
desu
timbre
y
pulsadorpresionando
los
botones
Ay B
(Ilustraci6n
6)
durante
5
segundos.
El
timbre
emitira
todas
las
melodias
disponibles
indicando
quela
programacion
seha
borrado.Programe
el
pulsador
del
timbre
siguiendo
las
_i_nstrucaone5
de
instalacibn.
a
cualquier
otro
problema
Name
al
1-800-296-1869
de
lunes
n
hasta
las
5pm.
Garantia
de
Cinco
Arios
IQ
America
Esta
esuna
'Garantia
LJmitada
tener
otros
derechos
que
varian
de
ui
Durante
onco
anos
desde
la
fe
defectuosas
de
fabncaaon
se
corregii
1
queleda
derechoslegales
concretes.
Podria
tamb-
estado
a
otro
y deuna
provincia
a
otra.
;ha
de
compra,cualquier
falio
causado
por
plezas
3
sm
coste
para
ustedParaobtener
una
devolucion
reemptazo,
devuelva
el
producto
al
lugar
di
NO
CUBRE:Servicios
de
reparacibn,
ajustes
y
calibrado
por
rnal
uso.abuso
o
neglige
Reparaciones
no
autorizadas,
modificacion
del
producto
o de
cualquier
pieza
anulara
esta
garantia.
Estagarantia
no
incluye
reembolso
por
mconvementes.
instalacibn,
tiempo
de
Esta
garantiacubresolo
los
productos
deIQ
America
y no
cubreotrosequipos
o
componentes
queun
cliente
use
junto
a
nuestros
productos.
No
existen
olras
garantias,
ni
explicitas
ni
tmpliotas,
mcluyendo.
pero
no
limitadas
a,
garantias
impliotas
de
comeraalizacion
o
aptitud
para
un
propbsito
particular.
La
obiigacibn
deIQ
America
de
reparar
o
reemplazar,
siguiendo
su
criterio,
debera
se
Cinico
y
exclusive
recurso
legal
del
comprador
bap
estagarantia,
IQ
America
no
sera
responsable
por
danosincidentales,consiguientes,
o por
danos
especiales
resultantes
antes
menaonada
podrh
I.
Guards
lafactui
o
13
nmiiacion
o
exclusion
Table of contents
Languages:
Other IQAmerica Intercom System manuals
Popular Intercom System manuals by other brands

Code Blue
Code Blue LS1000 Installation, Configuration, Operation, & Troubleshooting

Chamberlain
Chamberlain ELITE EL2000LG Programming manual

KOCOM
KOCOM KIP-120 User's manual for operation and installation

Aiphone
Aiphone Jb-Da installation manual

Fermax
Fermax DUOX plus 970050b Installer manual

Studio Technologies
Studio Technologies 348 user guide