manuals.online logo
Brands
  1. Home
  2. •
  3. Brands
  4. •
  5. SSS Siedle
  6. •
  7. Intercom System
  8. •
  9. SSS Siedle BVI 750-0 Assembly instructions

SSS Siedle BVI 750-0 Assembly instructions

Other manuals for BVI 750-0

1

Other SSS Siedle Intercom System manuals

SSS Siedle MOCT 711-01 User manual

SSS Siedle

SSS Siedle MOCT 711-01 User manual

SSS Siedle A 150-10 User manual

SSS Siedle

SSS Siedle A 150-10 User manual

SSS Siedle ZERT 811-0 User manual

SSS Siedle

SSS Siedle ZERT 811-0 User manual

SSS Siedle Vario SET VVP 850-1-01 User manual

SSS Siedle

SSS Siedle Vario SET VVP 850-1-01 User manual

SSS Siedle CA 812-1 User manual

SSS Siedle

SSS Siedle CA 812-1 User manual

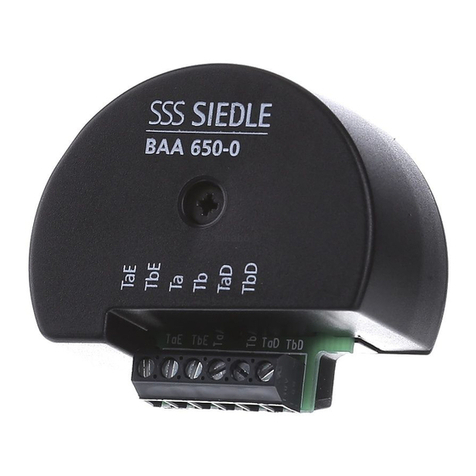
SSS Siedle BAA 650-0 User manual

SSS Siedle

SSS Siedle BAA 650-0 User manual

SSS Siedle SBV 850-0 User manual

SSS Siedle

SSS Siedle SBV 850-0 User manual

SSS Siedle SET CV 850-01 User manual

SSS Siedle

SSS Siedle SET CV 850-01 User manual

SSS Siedle Siedle BTS 850-0 User manual

SSS Siedle

SSS Siedle Siedle BTS 850-0 User manual

SSS Siedle Basic CVB 850-1 User manual

SSS Siedle

SSS Siedle Basic CVB 850-1 User manual

SSS Siedle Compact CV 850-1 User manual

SSS Siedle

SSS Siedle Compact CV 850-1 User manual

SSS Siedle HTC 811-0 User manual

SSS Siedle

SSS Siedle HTC 811-0 User manual

SSS Siedle BTCV 850-02 User manual

SSS Siedle

SSS Siedle BTCV 850-02 User manual

SSS Siedle BTSV 850 Series User guide

SSS Siedle

SSS Siedle BTSV 850 Series User guide

SSS Siedle Siedle-Classic CL 111 Series User manual

SSS Siedle

SSS Siedle Siedle-Classic CL 111 Series User manual

SSS Siedle Basic CVB 850-2 User manual

SSS Siedle

SSS Siedle Basic CVB 850-2 User manual

SSS Siedle SET CAB 850-1 User manual

SSS Siedle

SSS Siedle SET CAB 850-1 User manual

SSS Siedle DCA 650-02 Installation manual

SSS Siedle

SSS Siedle DCA 650-02 Installation manual

SSS Siedle STLM/LL 611-01 User manual

SSS Siedle

SSS Siedle STLM/LL 611-01 User manual

SSS Siedle Siedle Scope S 850-0 User manual

SSS Siedle

SSS Siedle Siedle Scope S 850-0 User manual

SSS Siedle BVI 750-2 Assembly instructions

SSS Siedle

SSS Siedle BVI 750-2 Assembly instructions

SSS Siedle HTSV 811-0 User manual

SSS Siedle

SSS Siedle HTSV 811-0 User manual

SSS Siedle IQ HTA User manual

SSS Siedle

SSS Siedle IQ HTA User manual

SSS Siedle BCVU 850-1-0 E User manual

SSS Siedle

SSS Siedle BCVU 850-1-0 E User manual

Popular Intercom System manuals by other brands

Videx VRDK1 (25H) Technical manual

Videx

Videx VRDK1 (25H) Technical manual

Auta COMPACT VISUALTECH manual

Auta

Auta COMPACT VISUALTECH manual

Aiphone LC-10S instructions

Aiphone

Aiphone LC-10S instructions

Aiphone PD-1 instructions

Aiphone

Aiphone PD-1 instructions

Aiphone JF-DVF-HID-I instructions

Aiphone

Aiphone JF-DVF-HID-I instructions

Comelit 4893M Technical manual

Comelit

Comelit 4893M Technical manual

MGL Avionics V16 manual

MGL Avionics

MGL Avionics V16 manual

urmet domus AIKO 1716/1 quick start guide

urmet domus

urmet domus AIKO 1716/1 quick start guide

urmet domus IPerVoice 1039 Installation

urmet domus

urmet domus IPerVoice 1039 Installation

Alpha Communications STR QwikBus TT33-2 Installation, programming, and  user's manual

Alpha Communications

Alpha Communications STR QwikBus TT33-2 Installation, programming, and user's manual

Monacor ICM-20H instruction manual

Monacor

Monacor ICM-20H instruction manual

Logenex A202CR Installation & programming

Logenex

Logenex A202CR Installation & programming

Quantum QR5 Installation and programming manual

Quantum

Quantum QR5 Installation and programming manual

EVGA XR1 quick guide

EVGA

EVGA XR1 quick guide

CyberData 011211 series Installation quick reference

CyberData

CyberData 011211 series Installation quick reference

Vidos duo M1021 user manual

Vidos

Vidos duo M1021 user manual

Savant DOR-SMS-00 Deployment guide

Savant

Savant DOR-SMS-00 Deployment guide

Dahua VTO Series quick start guide

Dahua

Dahua VTO Series quick start guide

manuals.online logo
manuals.online logoBrands
  • About & Mission
  • Contact us
  • Privacy Policy
  • Terms and Conditions

Copyright 2025 Manuals.Online. All Rights Reserved.

Produkt-
information
Bus-Video-Innenstation
BVI 750-0
Installation
Programmierung
Internal bus video station
BVI 750-0
Installation
Programming
Poste intérieur bus vidéo
BVI 750-0
Installation
Programmation
Posto interno video bus
BVI 750-0
Montaggio
Programmazione
Bus-Video-Binnenstation
BVI 750-0
Installation
Programmierung
Bus-Video-Innenstation
BVI 750-0
Installatie
Programmering
Buss-video-
inomhusstation
BVI 750-0
Installation
Programmering
Sběrnicová vnitřní video
stanice
BVI 750-0
Instalace
Programování
4
English
Installation
Application
The internal bus video station
BVI 750-0 is a combination of In-
Home bus audio and monochrome
video unit including bus video
receiver as a surface wall-mounted
device with a 4” diagonal screen.
Classical installation can be
performed using a side circuit, or by
looping.
Important notes:
!
•Electrical appliances may only be
mounted and installed by suitably
qualified electricians.
•The device may only be opened
when disconnected from the power
supply.
•In order to prevent injury, the
device must be fastened reliably in
accordance with the installation
instructions either on the floor or on
the wall.
•The BVI 750-... cannot be used in
conjunction with Multi, 1+n or 6+n
technology-based systems.
•The forward and return feed
cables must be separately routed.
• If an electrically adjustable camera
is used, the BVI 750 and BTS/BTC
750 with MOM/MOC 711 should
not be mixed in one and the same
system.
•The camera cannot be controlled
from the BVI 750-... .
• It is not possible to retrofit a video
memory module.
•A maximum of 8 BVI 750-... units
can be connected in parallel.
•Where units are connected in
parallel, the first BVI 750-... receives
its power supply from the bus. For
all other units, a separate
VNG 602-... must be used for each
group of 3 BVI units.
1 Device description
aDoor release button, ON time fixed
at 3 secs.
bLight button
cCall silencing button with LED
• Lights for a silenced call and
flashes to signal an incoming call
dImage activation button, ON time
fixed at appr. 45 secs.
• With receiver lifted, a speech
connection to the relevant door
remains for a maximum of 10 mins.
eCall volume potentiometer
f Brightness / contrast controller
gScreen
hTelephone receiver
Mounting
2Open the housing by exerting a
light pressure on the concealed
spring tabs with a size “1”
screwdriver through the release
holes on the right-hand side.
3Hinge open the cover panel to the
left, detach the ribbon cable with
the non-reversible plug “S1” from
the main circuit board and remove
the cover panel.
4 Feed the connecting cables into
the base of the housing and fasten
the base using 4 screws.
5Connect to BVI 750-... in
accordance with the circuit diagram
Circuit diagram note:
!
1) For details of the internal wiring
of the door loudspeaker, refer to
product information BVSM 650-...!
2) With the TR 602-... pay attention
to the total simultaneously
admissible load.
7) An additional VNG 602-... is only
required if devices are switched in
parallel. One VNG 602-... is required
for each started group of 3
BVI 750 -... units.
8) If the installation is looped
through from BVI to BVI, at the last
BVI 750-... the combination of
resistor and capacitor must not be
removed at terminals TaM, TbM.
9) The power supply to a BVI 750-...
is provided by the VNG 602-... from
the In-Home bus.
6(not illustrated)
Close the internal station.
Plug the ribbon cable of the housing
cover into the main circuit board
(S1), attach the cover on the left
hand side, hinge down on the right
and clip into place.
7(not illustrated)
Call volume regulation
Using a size “1” screwdriver, it is
possible to set the required call
volume at the potentiometer on the
underneath of the housing.
8 (not illustrated)
Brightness/contrast controllers
These are located on the underneath
of the device at the left.
Terminal assignment
TaM, TbM = User bus cores (core
pair 1)
TaM, TbM = User bus cores (core
pair 2)
+M = Supply to the video unit
-M = Supply to the video unit
ERT 1 = Storey call button
ERT 2 = Storey call button
Performance features‚
•Call, speech, door release between
the door and internal station
•Light button
•2 freely programmable buttons
•Call automatically actuates image
•Image connection possible at the
BVI
•LED for status display of call
silencing, incoming call and call tone
definition
•Volume controller accessible from
outside
•Brightness and contrast control
accessible at any time
•10 different call signals freely
selectable
Specifications
•Power supply as standard from the
in-home bus
•4” screen diagonal
•Ambient temperature 5 - 40 °C
•Protection system IP 20
•Dimensions 216 x 255 x 60 mm
When switched in parallel,
external supply required‚
•20-30 V DC, max. 350 mA
2
1
34