Contents
Safety Guidlines
Important safety instructions
Safety compliance 2
Warnings 2
iRV technologies 3
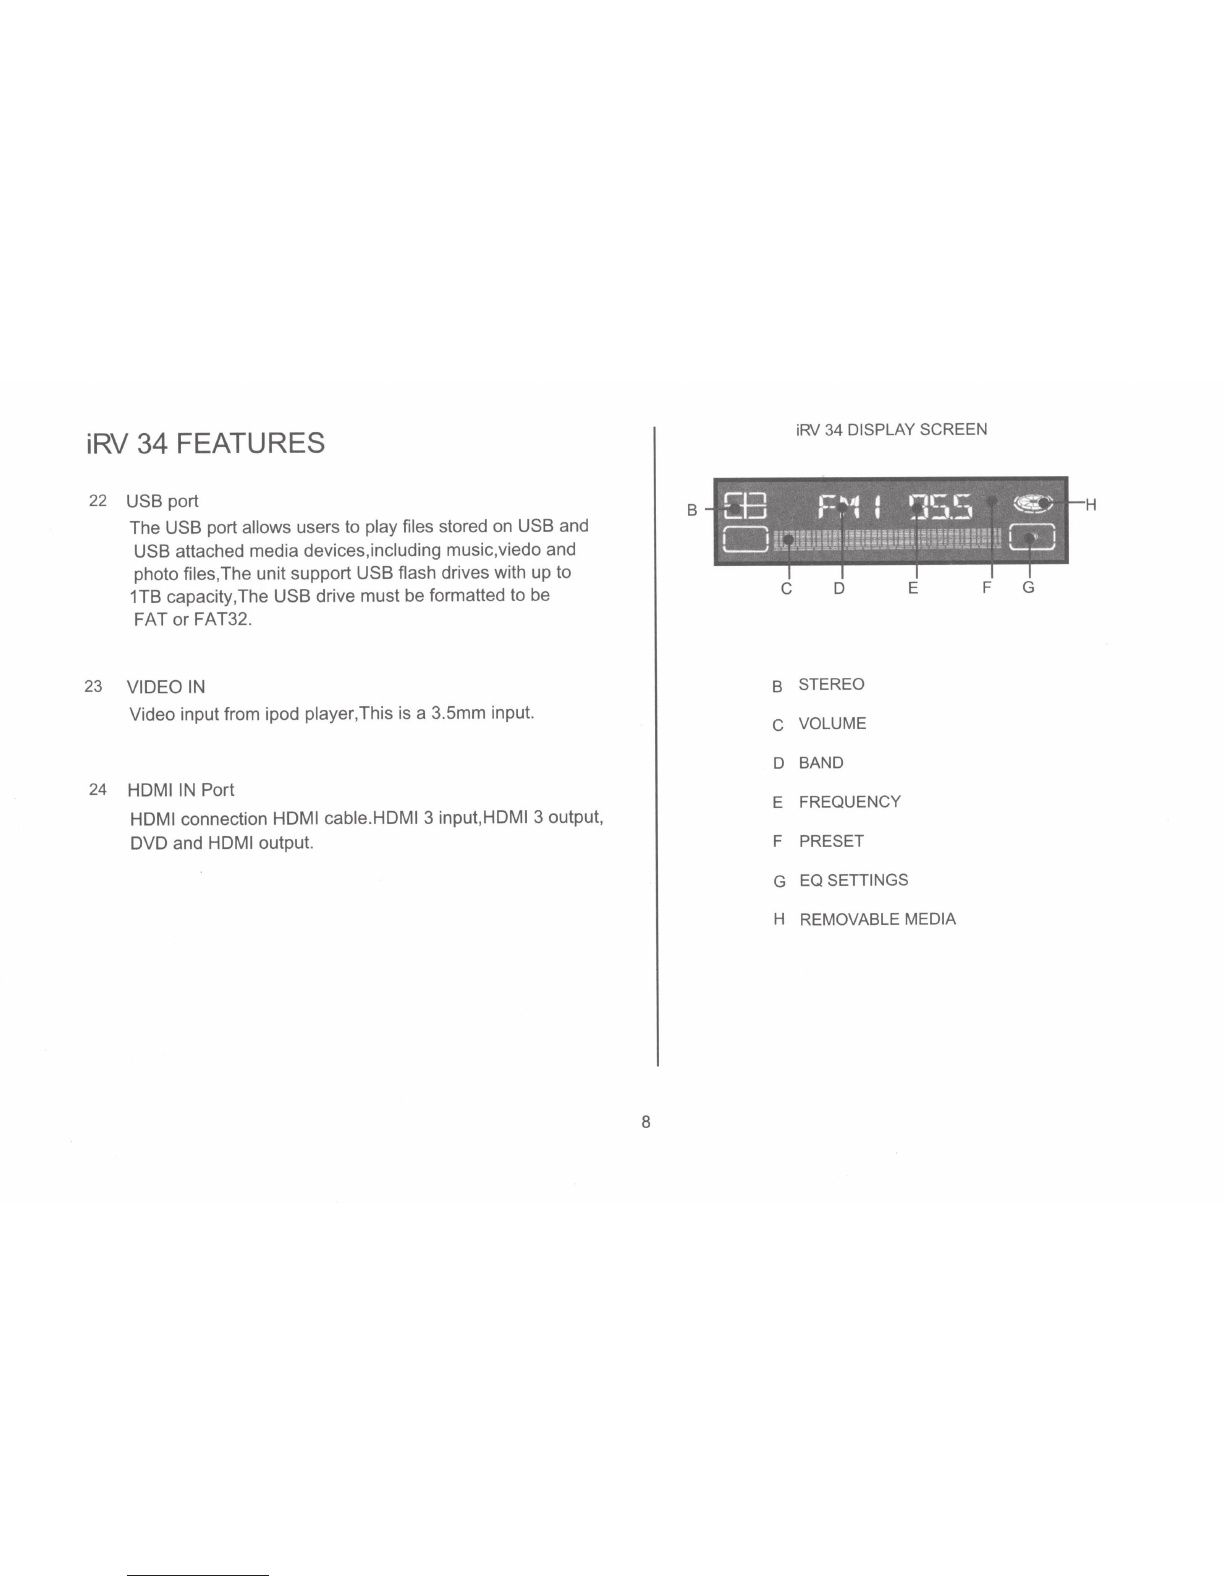
iRV 34 Features 5
Radio Operation 9
DVD/CD/MP3/MP4 Operation
12
App Operation 13
Bluetooth Syncing 14
Remote Control Guide 15
System Setup
18
Lanugage 19
Audio 20
Speaker setup 20
Wiring Diagram
21
Troubleshooting
22
iRV
34
Specifications 23
CAUTION:
To
reduce the risk
of
electric shock. do not
remove cover (or back). No User-serviceable parts
inside.
Rete<
servicing to quaHfied service personne
l.
WARNING-
To reduce the risk of electrical shock, do not
remove cover (or open unit).
NO
USER SERVICEABLE parts are
inside. Refer servicing to QUALIFIED SERVICE PERSONNEL.
The design and manufacture ofthis player takes personal safety
into consideration. However, any improper operation may result
in
electric shock, fire, or other hazard.
DO
NOT open the cabinet by yourself to prevent electric shock.
Please contact a professional technician to preform any service
needed. Please use only components recommended by factory
when replacement
is
necessary.
Please turn unit offwhen not
in
use. Use a dry, soft cloth to clean
face with the system turned off.
PRECAUTION -Moisture may cause the lens
on
loader
in
this
unit to malfunction. To remedy the problem, turn unit on, eject
disc and
run
1-2 hours to vaporize moisture inside the unit.
Do
not repeatedly turn unit off and on. After turning unit offwait 10
seconds before turning
on
again. Do not use broken, scratched,
or twisted discs
in
player. This could result
in
damage to the unit.
Use only
5",
12cm discs
in
this unit.
2