General
• Read the operating instructions and keep
them in a safe place!
• Electrical installation, if required, should
be carried out by a qualified electrician.
• The machine should only be used for
tumble-drying as described in these instruc-
tions.
•Repairs and maintenance relating to safety
or performance must be carried out by a
qualified professional.
• Damaged mains cables must only be re-
placed by a qualified electrician.
• Sufficient ventilation is required to prevent
smoke from open fires or fumes from
equipment burning other fuels being
sucked into the room.
• Do not try dirty laundry in the tumble dryer.
• Items that are stained with e.g. cooking oil,
acetone, alcohol, petrol, kerosene, stain
remover, turpentine, wax and wax remover
should be washed in hot water with extra
detergent before they go in the tumbler
dryer.
• Items such as foam rubber (latex foam),
shower caps, waterproof textiles, rubber-
coated items and clothes or latex foam-
filled cushions may not be dried in the
tumbler dryer.
• Fabric softener or similar products should
be used as per the recommendations of
the detergent manufacturer.
•The last phase of the drying cycle is carried
out without any heat (cool down cycle) in
order to ensure that items are not ruined
by excess heat after the programme is fin-
ished.
Caution!
Never stop a tumble dryer before the pro-
gramme is completed unless you immediately
remove all the laundry and spread it out so
that the heat can disappear.
Installation
See the “Installation” chapter.
Safety
• The machine must not be used for drying
items that have been dry-cleaned at home
or fabrics that may contain residues of
flammable liquids.
• The tumble dryer is protected by an over-
heating cut-out. This shuts off the machine
if the temperature gets too high.
• A float shuts off the machine in the event
of a blockage in the condensed water hose
or if there is a risk of the condensed water
container overflowing.
Caution!
When the tumble dryer is operating, the back
of the tumble dryer will get very hot. Leave
the machine to cool completely before
touching the back.
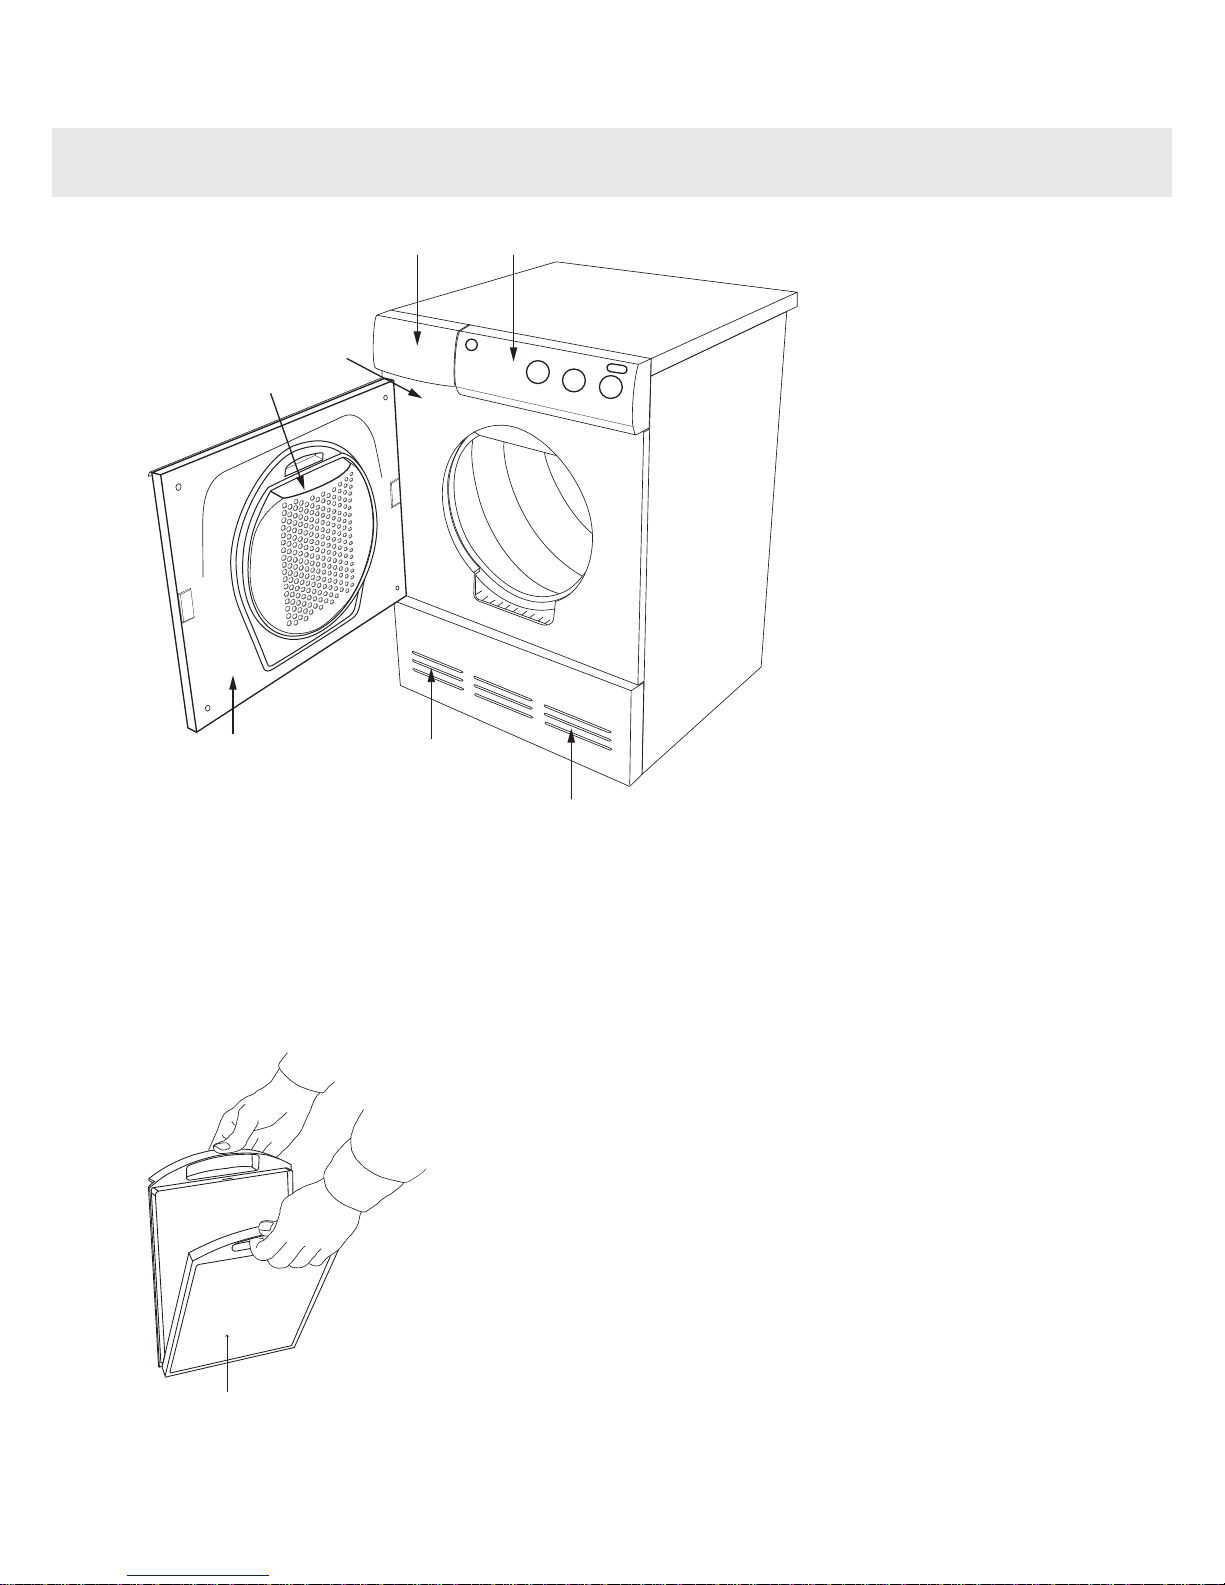
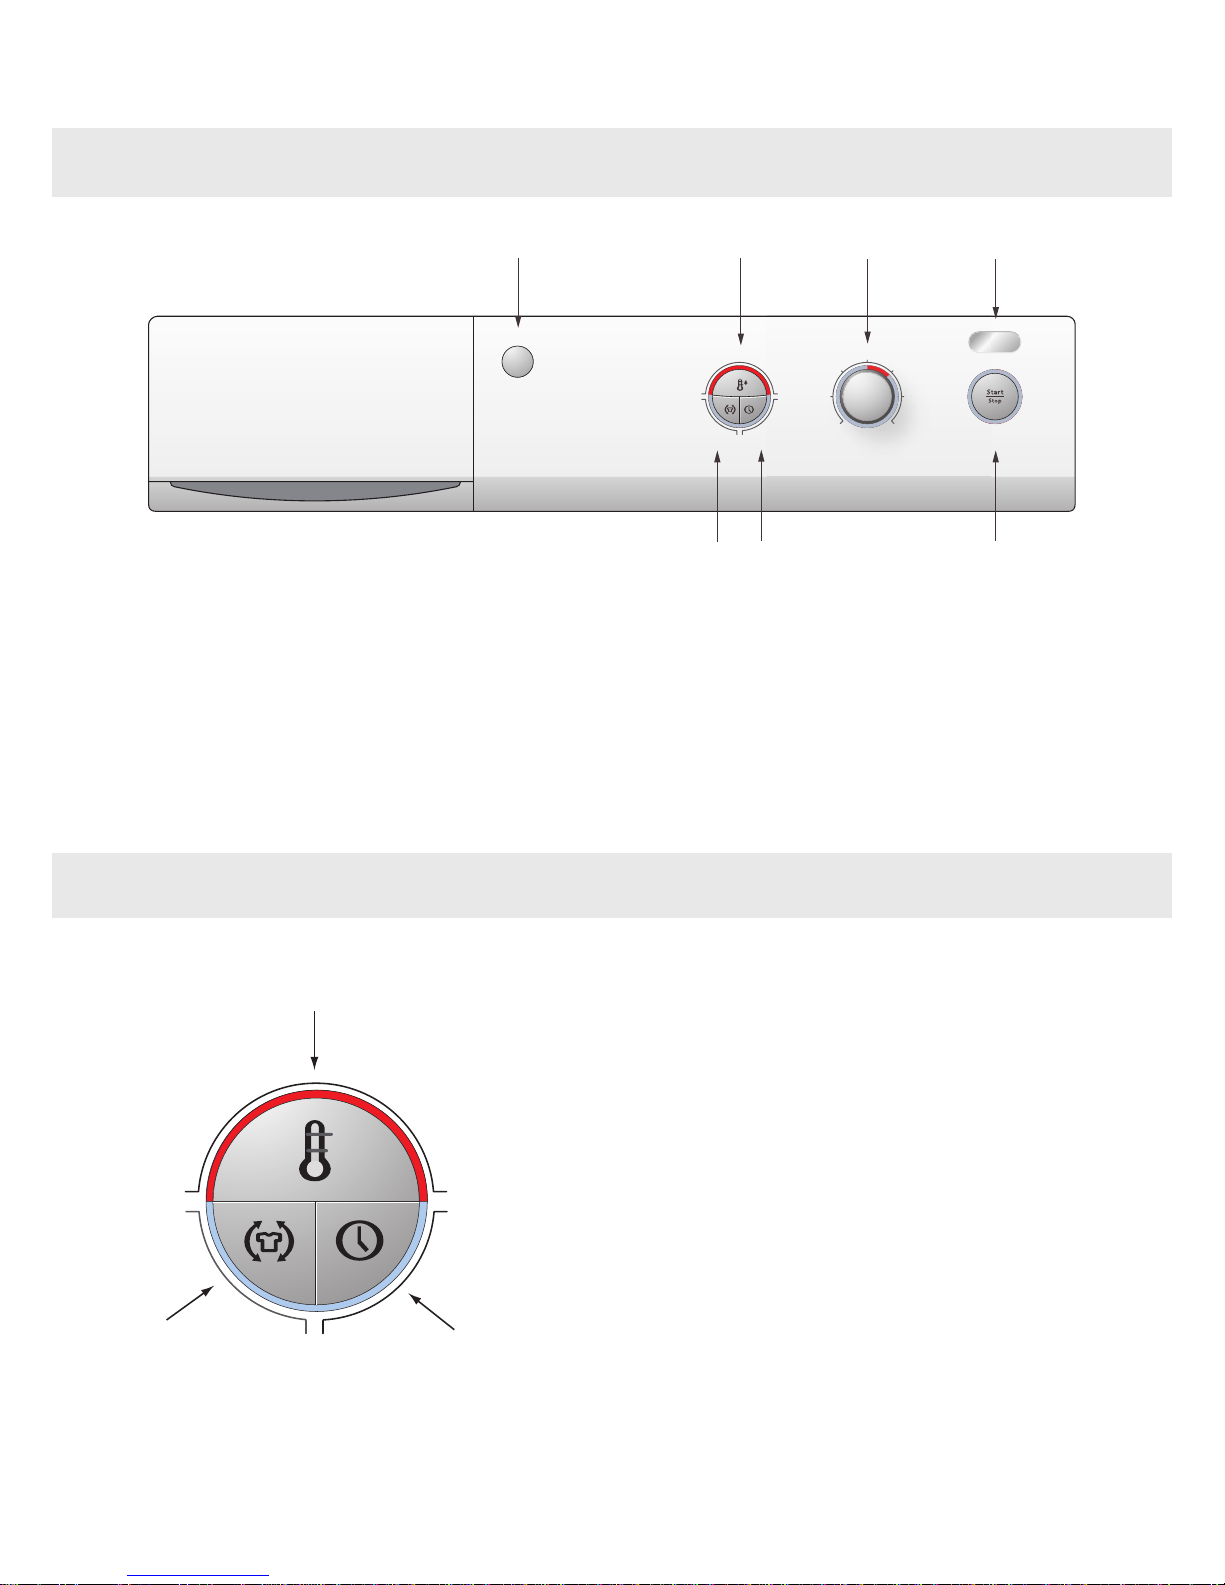
Interrupting a programme
You can stop a drying programme by:
• Open the door. The drum will then then
stop automatically.
• Press the main power switch.
• Press the Stopp button for three seconds.
When you want to resume tumble-drying,
simply close the door and press the Start
button.
Transport/Winter storage
If you need to move your machine or store it
over the winter in unheated premises, make
sure that you drain the condensed water
container beforehand.
Packing material
Please sort waste materials in accordance
with local guidelines.
4
Safety instructions