5. OMSI 2-ADDON IRISBUS FAMILY LOW
ENTRY BUSES
In the past, IVECO, the world‘s largest bus manufacturer, had various brands in
the bus sector. Until 2013, this included the Irisbus brand under which IVECO
marketed its buses. In 2006, IRISBUS launched its brand new Low Entry coach
series. It is based on the CROSSWAY chassis and has a low floor between the
doors and a high floor at the rear.
Intended for mixed and versatile use, these new coaches will now find many
opportunities for suburban and intercity operations in OMSI, the Omnibus-
Simulator.
Discover the low-floor buses from Irisbus now!
The OMSI2 add-on Irisbus Family Low Entry Buses introduces you to this
product line in its entirety, including 20 models, with countless customisation
options to get as close to reality as possible.
These coaches are offered in two versions, developed according to the missions
to be carried out:
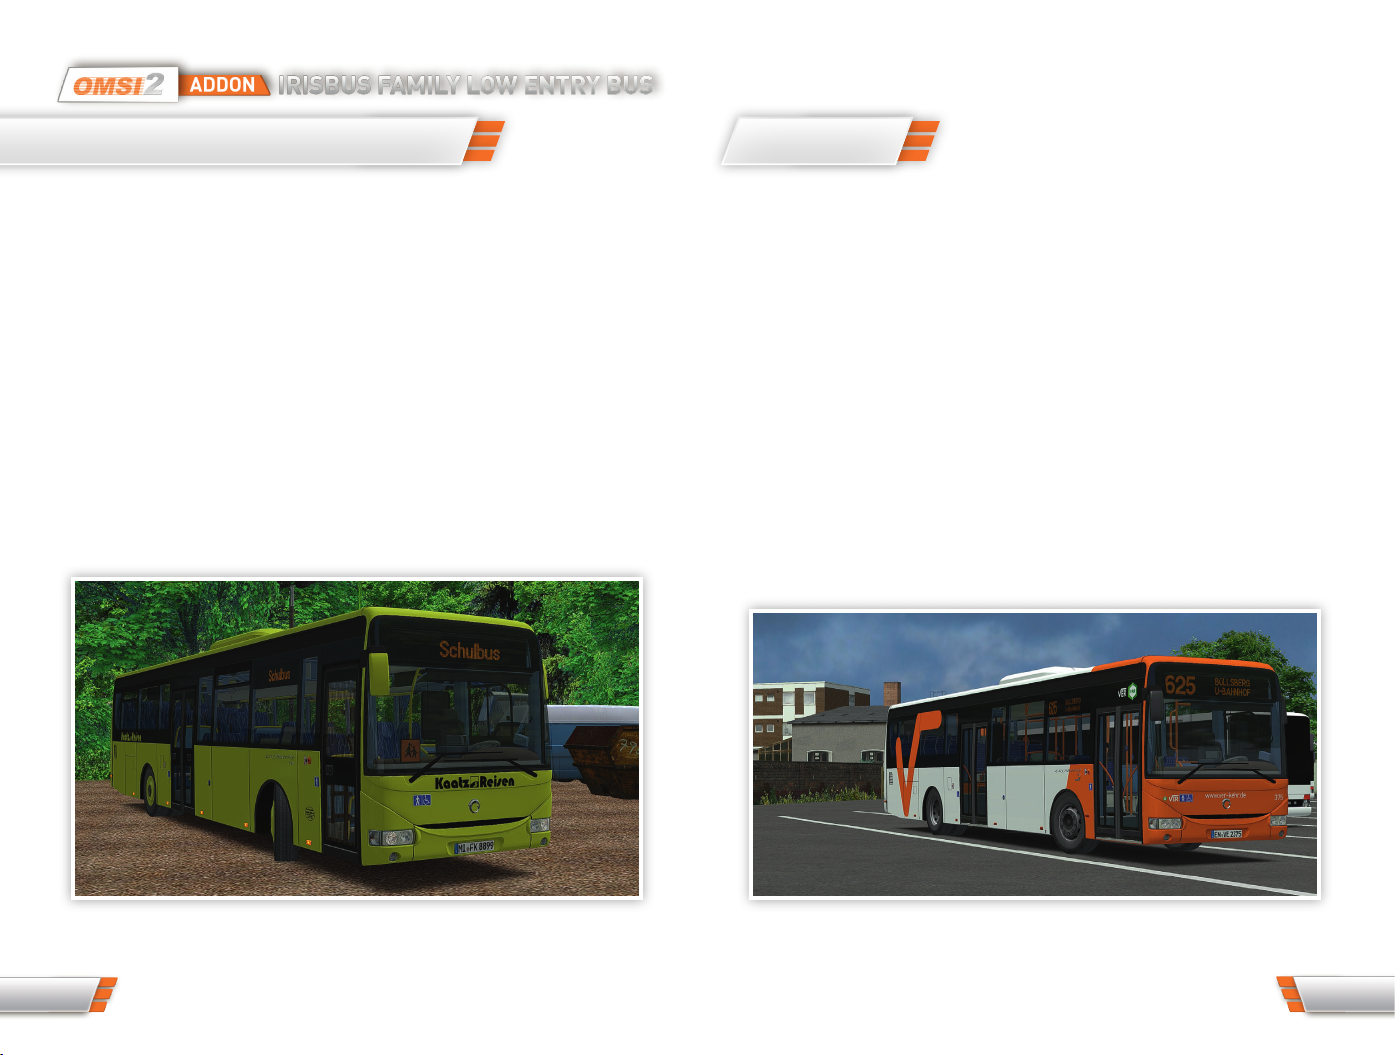
CROSSWAY LE Urban
Available in three lengths: 10.6 m, 12 m and 12.8 m.
Equipped with special bus seats, these versions offer maximum freedom of
movement to ensure accessibility for all.
As these buses are available with different floors, number of seats and door
types, they can adapt to any urban or suburban use. The 3-door version will
optimise passenger flow on busy routes.
CROSSWAY LE SubUrban
Available in three lengths: 10.6 m, 12 m and 12.8 m.
Equipped with a floor that maximises seating capacity with Lineo seats and seat
belts, as well as luggage racks, they carry your passengers comfortably, safely
and easily.
We wish you a lot of fun with the Irisbus Family Pack - Low Entry
Information about OMSI add-ons in general
The range of OMSI2 extensions is constantly changing. Numerous updates and
bonus downloads are also published. If you would like to stay up to date here,
we recommend that you register with us for one or more news channels. This is
free of charge and can be cancelled at any time.
So you are always up to date on the status of our products.
Facebook www.facebook.com/halyconmedia
Twitter www.twitter.com/HalyconMedia
Newsletter www.halycon.de/newsletter.html
Telegram – Push service https://t.me/halyconmedia
You can also find us on YouTube. There, numerous videos of our products are
presented:
YouTube www.youtube.com/user/YTHalycon
We wish you a lot of fun with MyHalycon
Using the 4GB-Patch for OMSI 2
If white areas appear in the OMSI 2 simulator on the buses, AI vehicles and
other 3D objects, the computer‘s memory is heavily used. OMSI 2 is a 32bit
application and accesses by default a maximum of 2 GB of the working memory,
regardless of how much working memory the computer actually contains. To
provide OMSI with more working memory (RAM), the so-called 4GB patch can be
used. You can obtain this patch, for example,
at www.ntcore.com/4gb_patch.php
Please note that this patch must be reloaded when updating OMSI 2.
IMPORTANT: Please note that after each update or data check it may be
necessary to reactivate the 4GB patch.
8 9