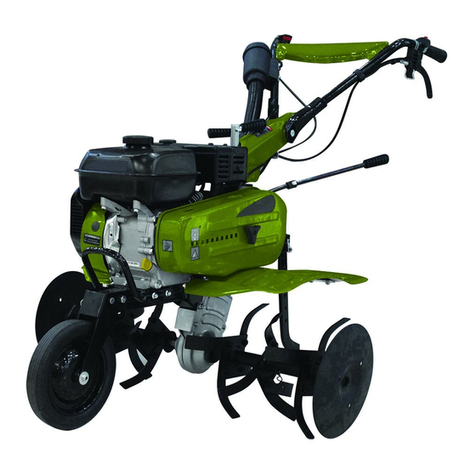
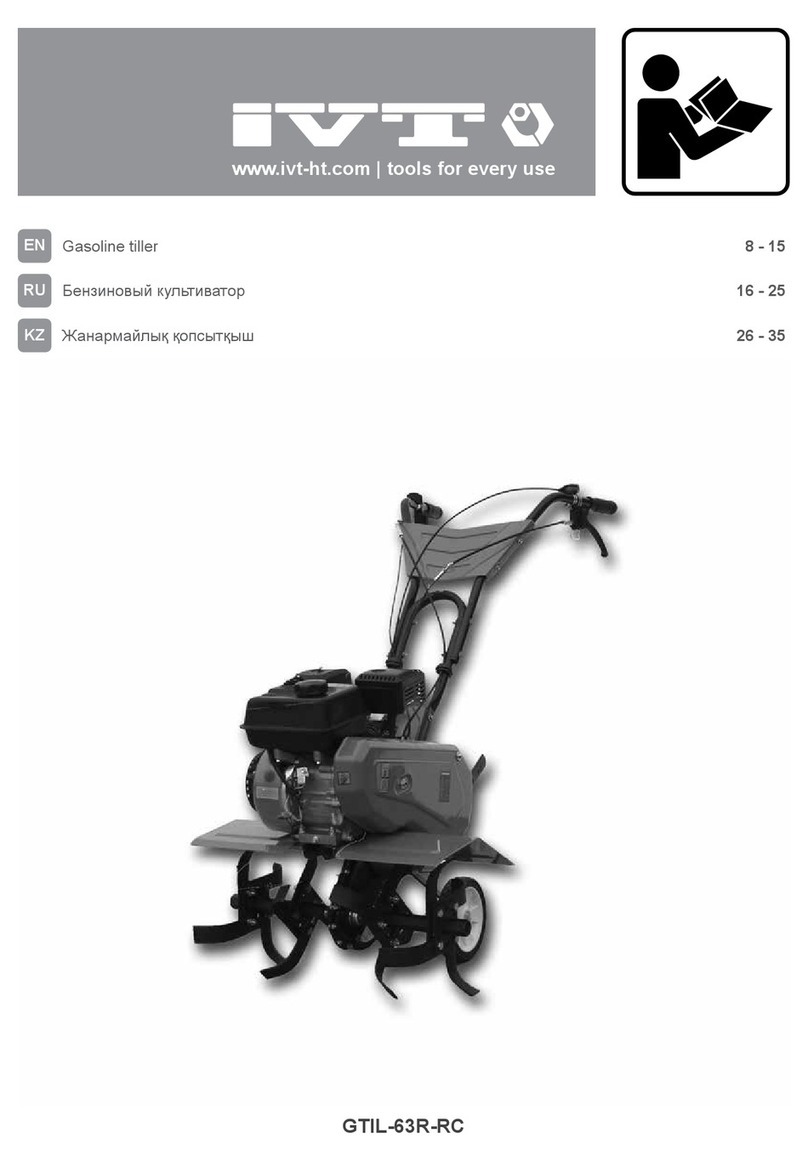
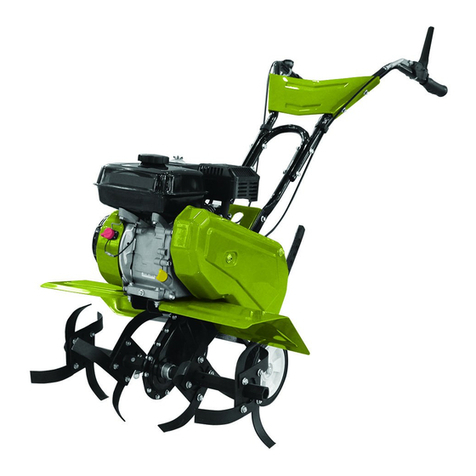
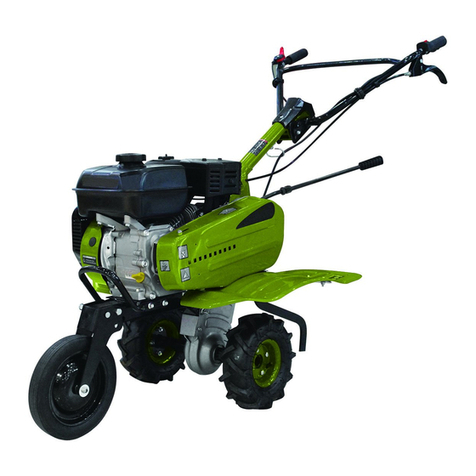
IVT GTIL-70105-RC User manual

www.ivt-ht.com | tools for every use
GTIL-70105-RC
EN Gasoline tiller 8 - 15
RU Бензиновый культиватор 16 - 25
KZ Жанармайлық қопсытқыш 26 - 35

2
EN CONGRATULATION!
Dear customer,
IVT team would like to thank you for your choice and for
the condence you put in our product.
Our aim is always to offer an innovative, high-class-strong
and prize-adequate product to the customer.
We wish you’ll get much satisfaction from all your do-it-
yourself activities, by using this tool.
Your IVT Swiss SA Team
NOTE: Illustrations, gures, photos and contents might
vary slightly due to our program of continuous product
improvements.
RU ПОЗДРАВЛЯЕМ!
Уважаемый Покупатель,
Коллектив компании IVT благодарит вас за оказанное
доверие и выбор в пользу нашей продукции.
Мы стремимся к тому, чтобы у наших покупателей была
возможность пользоваться только современными,
прочными и высококачественными продуктами.
Надеемся, что с нашими инструментами вы получите
истинное удовольствие от работы.
С уважением, коллектив IVT Swiss SA
ПРИМЕЧАНИЕ: Рисунки, количественные данные,
фотографии и содержание инструкции могут
изменяться в силу постоянного усовершенствования
нашей продукции.
KZ ҚҰТТЫҚТАЙМЫЗ!
Құрметті сатып алушы,
IVT компаниясының ұжымы Сізге бізге сенім
артқаныңыз үшін және біздің өнімімізді таңдағаныңыз
үшін алғыс білдіреді.
Біз Сіздерге инновациялық, жоғарғы классты және
жоғары сапалы өнімді тиімді бағамен ұсынуға үнемі
ұмтылып келеміз.
Біздің құралдарыңызбен сіз өз жұмысыңыздан
рахаттанасыз деп үміттенеміз.
Ізгі ниетпен, IVT Swiss SA ұжымы
ЕСКЕРТУ: Суреттер, сандық мәліметтер және
нұсқаудың мазмұны біздің өнімнің үздіксіз жетілуіне
байланысты өзгеруі мүмкін.

3

4
11
4
3
7
10
1
25
26
19
2
9
18
8
17
16
6
GTIL-70105-RC

5
MIN
MAX
123
6
5
4
7 7 7
777
17
2
2
16
2
[F1]
[F2]
[F4] [F5]
[F3]

6
1
3
4
2
HOT / SOAPY
WATER
19 19
16
21
60-65 mm
ENGAGED
DISENGAGED
3
5
1
8
[F9]
[F7]
[F10]
[F8]
[F6]
[F11]

7
0.7-0.8mm
2324
22
[F12] [F13]

8
EN
Instruction manual
PART LIST
1. Clutch lever
2. Depth regulator
3. Recoil starter
4. Engine
5. Belt
6. Gear box
7. Blades
8. Height adjuster
9. Shift lever
10. Handlebar
11. Throttle lever
12. On/Off switch
13. Wheel
14. Bumper
15. Choke lever
16. Oil ller cap
17. Fuel tank
18. Fuel tank cap
19. Air lter
20. Fuel valve
21. Oil drain plug
22. Fuel sediment cup
23. Spark plug
24. Spark plug cap
25. Fender
26. Shield cover
CONTENT OF THE BOX
Instruction manual (1 pc), blades assembly (1 set),
wheel (1 set), tool kit (1 set), oil lling funnel (1 pc),
connecting rod (1 pc).
INTENDED USE
This tool is intended for tilling the supercial layer of the
soil. It’s particularly used for tilling small plots of land
and for horticultural gardening. They replace the work
traditionally done manually with spade and hoe.
TOOL SPECIFICATIONS
Model GTIL-70105-RC
Rated power [W] 3650
No-load speed [RPM] 3600
Displacement [cc] 196
Engine power [HP] 6.5
Nr. strokes of the engine 4
Type of engine cooling air cooling
Starting system recoil starter
Driving mode belt
Numbers of gears -1 / 0 / 2 / 1
Employed fuel unleaded gasoline 90#
Employed oil SAE10W-30
Fuel tank capacity [L] 3.6
Oil tank capacity [L] 0.6
Transmission oil capacity [L] 1.5
Fuel consumption [g/kWh] 395
Tilling depth [mm] 150 - 300
Tilling width [mm] 700 - 1050
Number of rotary blades 24
Wheel type 4.0 - 8
Vibration level (at grip) [m/s2]12 (K=1.5)
Sound pressure level [dB(A)] 99 (K=3)
Sound power level [dB(A)] 48.2 (K=3)
Weight [Kg] 70

9
EN
Instruction manual
SAFETY REGULATION FOR THE USE
General safety rules
The following listed safety instructions should serve you
for the right use of the tool and for the protection of your
own safety, therefore, please read this very carefully.
When passing this tool to a third person, these
instructions must be handed too.
Retain this user’s manual and all other literature supplied
with your tool for any future reference.
Comply with all the safety information and the warnings
on the tool.
Be familiar with the controls and the proper use of the
tool before attempting to use it and above all, make sure
you know how to stop to use it in case of emergency.
Following these simple instructions will also maintain
your tool in good working order.
∙The tool must be assembled correctly before use.
∙Only use the tool for its designed purposes.
∙On the tool, there may be also decals and further
indications about the safety equipment to use that
must be considered. The prevention of accidents is
dependent upon the awareness, common sense and
proper training of everyone involved in the operation,
transport, maintenance and storage of the tool.
∙Never leave the tool unattended.
∙Never allow children to use the tool. Children
should be supervised to ensure that they do not play
with the tool.
∙Keep children and pets away. All onlookers should
be kept at a safe distance away from the tool when it
is in use.
∙The user is responsible for third parties while
working with the tool.
∙People who aren’t acquainted with the operating
instructions, children, juveniles who have not yet
reached the minimum age for using this tool and people
under the inuence of alcohol, drugs or medication
are not allowed to use the tool. Local regulations may
restrict the age of the operator.
WARNING! The consumption of
alcohol, medication and drugs, plus
states of illness, fever and fatigue will
affect your ability to react. Do not use
this tool in any of these situations.
∙Make sure that all the protective devices (if present)
are tted and are in good condition.
∙Never operate the tool with defective safety devices
or guards (if present), or without safety devices in place.
∙Inspect the entire tool to look for loose parts (e.g.
nuts, bolts, screws, etc.) and for any damage. Check
at frequent intervals if screws and bolts (if present)
are properly tight to be sure the equipment is in safe
working condition. Repair or replace them, if necessary,
before using the tool. Serious injury to the operator and
to the bystanders could result if there’s any damage to
the tool.
∙While using the tool, dress properly. Do not
wear loose clothing or jewelery that could become
caught by the tool. Wear suitable working clothes.
It is recommended that legs and feet are covered, to
protect them from eventual ying debris. Do not work
barefoot or wearing open sandals. Long air should be
tided back.
∙Keep handles and grips dry, clean and free from
oil and grease.
∙Use proper protective equipment. Use safety
glasses and safety gloves. Also use a dust mask during
pulverulent operations or if exhaust gases are present.
When necessary, use also non-slipping boots or shoes,
hardhat and earplugs. If the noise level exceeds 85
dB(A), ear protection is obligatory.
WARNING! Use personal protective
equipment! Safety devices and
personal protective equipment protect
your own health and the health of
others and ensure a trouble-free
operation of the tool.
∙Do not start to use the tool if it is in an inverted
position or it is not in the right working order.
∙Ensure that you have a good stand, while you
operate with the tool. Keep proper footing and balance
at all times.
∙Keep work area clean. Cluttered areas invite
injuries. Before use, all foreign bodies must be removed
from the working area, also pay attention to foreign
objects during operation.
∙Do not force the tool.
∙Only work in daylight or sufciently good articial
light. Never operate the tool without good visibility.
∙Be careful not to drop the tool or hit it against
obstacles.
ATTENTION! Stay alert. Watch what you are doing.
Distraction can cause you to lose control. Use
common sense.
Gasoline engine safety rules
WARNING! Petrol is highly ammable.
Handle fuel with care.

10
EN
Instruction manual
∙Store fuel in containers specically designed for
this purpose.
∙Refuel outdoors only and do not smoke while doing
this operation.
∙Add fuel before starting the engine.
∙Always allow mufer to cool before lling fuel tank.
∙Never remove the cap of the fuel tank or add fuel
while the engine is running or when the engine is still
hot.
∙If petrol is spilled, do not attempt to start the engine,
but move the machine away from the area of spillage
and avoid creating any source of ignition until petrol
fumes have dissipated.
∙Clean up spilled fuel before restarting.
∙Replace all fuel tanks and container caps securely.
∙Do not run the engine indoor or in a conned space:
dangerous carbon monoxide fumes can collect. Exhaust
fumes are dangerous.
WARNING! Exhaust contains
poisonous carbon monoxide, a
colourless and odourless gas.
Breathing exhaust can cause loss of
consciousness and may lead to death.
Provide an adequate ventilation to
keep exhaust gas level as low as
possible.
∙Never store the equipment with fuel in the tank
inside a building where fumes can reach an open ame
or spark.
∙To reduce re hazard, keep the engine, silencer,
battery compartment and petrol storage area free of
vegetative material and excessive grease.
∙The exhaust system gets hot enough to ignite
some materials. Keep ammable materials away from
the device.
∙The mufer becomes very hot during operation and
remains hot for a while after stopping the engine. Be
careful not to touch the mufer while it is hot. Let the
engine cool before storing the machine indoors.
∙Remove adjusting keys or wrenches before starting
the machine.
WARNING! During the use of certain
gasoline tools, some dust containing
chemicals known to cause cancer,
may occur.
Some of these chemicals are: lead from lead based
paints, crystalline silica from bricks and cement and
other masonry products, arsenic and chromium from
chemically treated lumber and other dangerous
products. If dust is present, your risk from these
exposures varies, depending on how often you do this
type of work.
To reduce your exposure to these chemicals, any
time you do pulverulent operations, work in a well
ventilated area and work with approved safety
equipment, such as dust masks that are specially
designed to lter out microscopic particles.
∙If the machine strikes a foreign body, examine the
device for signs of damage and carry out any necessary
repairs before restarting and continuing to work.
∙If the machine starts to vibrate abnormally, switch
off the motor and check for the cause immediately.
Vibration is generally a warning of trouble.
∙Always turn off the machine and wait until the
machine completely stops whenever you leave
the machine, before carrying out maintenance,
before changing accessories, checking, cleaning,
troubleshooting or working on the machine.
∙It is forbidden to move or modify any of the internal
parts of the machine.
Specic safety rules
∙Thoroughly inspect the area where the equipment is
to be used and remove all objects which can be thrown
up by the machine. Do not till above underground water
lines, gas lines, electric cables, or pipes. Do not operate
the tiller in soil with large rocks and foreign objects
which can damage the equipment.
∙Never attempt to make any adjustments while the
engine is running.
∙Keep hands, feet, and clothing away from rotating
parts.
∙Be extremely cautious when operating in reverse
and when pulling the machine towards you. Take extra
care to avoid slipping or falling and to keep feet clear
of tines.
∙Always be sure of your foot on slopes.
∙For wheeled rotary machines, work across the
slopes, never up and down.
∙Exercise extreme caution when changing direction
on slopes.
∙Do not work on excessively steep slopes.
∙Walk, never run with the machine.
∙Start the engine carefully according to manufacture
instructions and with feet well away from the tool.
∙Do not change the engine governor setting or
overspeed the engine.
∙Never pick up or carry a machine while the engine
is running
∙Never operate the tiller without good visibility or
light.
∙Be careful when tilling in hard ground. The tines
may catch in the ground and propel the tiller forward. If
this occurs, let go off the handlebars and do not attempt
to hold back the machine.

11
EN
Instruction manual
∙Stop the engine whenever you leave the machine
and before refueling.
∙Reduce the throttle setting during engine shut down
and, if the engine is provided with a shut-off valve, turn
the fuel off at the conclusion of working;
∙Take all possible precautions when leaving the
machine unattended. Disengage all control levers, stop
the engine, wait for all moving parts to stop, and make
certain guards and shields are in place.
∙Always allow mufer to cool before lling fuel tank.
∙The engine shall be stopped when carrying out
maintenance and cleaning operations, when changing
tools and when being transported by means other than
its own power.
UNPACKING
When unpacking, check to make sure that all
components are included. Refer to the drawings on this
manual. If any parts are missing or broken, please call
an IVT assistance center.
ASSEMBLY INSTRUCTIONS
Assembling the blades (7) or the wheels (13) [F1]
∙Place and align the blades (7) or the wheels (13)
to the shaft.
∙Line up the hole on the shaft and the hole in the
blades (7) or in the wheels (13).
∙Fix the blades (7) with locking pins, bolts and nuts.
Assembling the handlebar (10)
∙Assemble the handlebar (10) to the handlebar arm
and x it with bolt and locked turning grip.
Assembling the depth regulator (2) [F2]
∙Fix the depth regulator (2) on the base with the
locking pin.
∙Insert the retaining pin on the locking pin to prevent
it from moving out.
PRE-OPERATION CHECK
Fuel recommendation [F3]
1. Check the fuel level gauge.
2. Rell the tank if the fuel level is low. Do not ll
above the shoulder of the fuel strainer.
∙We recommend unleaded gasoline because it
produces fewer deposits and extends exhaust system
life. Never use stale or contaminated gasoline or oil/
gasoline mixture.
∙ Avoid putting dirt or water in the fuel tank (17).
NOTICE: running the engine (4) with persistent
spark knock or pinging can cause engine damage.
If “spark knock” or “pinging” persists, go to an
authorized IVT dealer.
Engine oil [F4]
WARNING! Engine (4) is shipped from
factory without oil. Add engine oil
before starting the engine (4).
NOTICE: engine oil is a major factor affecting
engine performance and service life. Non-detergent
and 2-stroke engine oils will damage the engine (4)
and are not recommended.
1. Check the oil level before each use with the tiller on
a level surface with the engine (4) stopped.
2. Remove the oil ller cap (16) and wipe the dipstick
clean.
3. Check the oil level by inserting the dipstick into the
ller neck without screwing it in.
4. If the level is low, ll to the top of the oil ller neck
with the recommended oil.
Air lter (19)
Check air lter box forr dirt or obstructions of elements.
ADJUSTING INSTRUCTIONS
Adjusting the tilling depth [F5]
∙Draws out the retaining pin and the locking pin.
∙Adjust the depth regulator (2) to the appropriate
position.
∙Replace the locking pin and xed with the retaining
pin.
Adjusting the tiller height [F6]
∙To adjust the tiller height, loosen the height adjuster
(8), select the needed height and tighten the height
adjuster (8).
Clutch lever (1) operation [F7]
∙The clutch lever (1) engages and disengages the
power from the engine (4) to the transmission.
∙When the clutch lever (1) is squeezed, the clutch is
engaged and power is transmitted. Squeeze the clutch
lever (1), the shaft will be rotated.
∙When the clutch lever (1) is released, the clutch is
disengaged and power is not transmitted. Release the
clutch lever (1), the shaft will be stopped.
Gear shifting
∙Return the throttle lever (11) to the extreme right.
∙Release the clutch lever (1) to disengage the clutch.
∙Move the shift lever (9) to the needed gear position.

12
EN
Instruction manual
NOTE: if the shift lever (9) will not engage the needed
gear, squeeze the clutch lever (1) and move the tiller
slightly to reset the gears.
Belt (5) tensity [F8]
Squeezed the clutch lever (1) and the tension pulley
move upward, then the belt (5) tightening. If the belt (5)
tensity is not in the right range, it needs adjusted.
∙Screw off xed nuts.
∙If the belt (5) tensity is too loose, move it forward.
∙If the belt (5) tensity is too tight, move it backward.
∙Fix the xed nuts and the connection plate nuts
when the tensity is in the right range.
Clutch and throttle cables adjustment
∙Measure the free play at the lever tips (clutch cable:
3 - 8 mm; throttle cable: 5 - 10 mm).
∙If the free play is incorrect, loosen the lock nuts and
turn the adjusting bolts near or far as you need.
∙After adjustment, tighten the lock nuts securely.
Then start the engine (4) and check for proper levers
operation.
Normal operating angle
∙Lower the handle slightly so the front of the machine
is raised about 6-8°.
To get the maximum advantage from the tiller, try to hold
the machine at the angle shown while you are tilling the
ground.
STARTING / STOPPING THE ENGINE (4)
[F9]
Before starting the tiller:
WARNING! The machine may be
supplied with the spark plug cap
unassembled. Before starting,
connect it.
∙Check all bolts and screws for tightness and make
sure they are securely tightened.
∙Clean the machine and check the condition of its
parts. Make sure the connections are tight and no fuel is
leaking after each use.
Starting the engine (4)
CAUTION! Be sure that the clutch
is disengaged to prevent sudden
uncontrolled movement when the
engine (4) starts.
1. Put throttle lever (11) to the ( ) position.
2. Turn the On/Off switch (12) to the “ON” position (ON).
3. Grasp the recoil starter (3) and slowly pull it out,
until it pulls slightly harder.
4. Pull recoil starter (3) with a rapid full arm stroke until
engine (4) runs.
5. After engine (4) starts running, move throttle lever
(11) to the appropriate position.
: minimum motor revolutions.
: maximum motor revolutions.
ATTENTION! Do not pull the starter rope all the way
to the end.
ATTENTION! DO NOT release the starter rope after
pulling. Allow it to rewind as soon as possible.
Stopping the engine (4)
ATTENTION! Never stop the engine (4) suddenly
when working at high speed.
If in an emergent situation:
1. Turn the On/Off switch (12) to the “OFF” position
(OFF).
In normal situations:
1. Release the clutch lever (1) to disengaged position
and let shift lever (9) in neutral position.
2. Move the throttle lever (11) to the STOP position.
3. Turn the On/Off switch (12) to the “OFF” position
(OFF).
4. Move the fuel valve (20) to the left (CLOSE).
MAINTENANCE AND STORAGE
CAUTION! Before carrying out any
maintenance operation, turn off
the engine and wait until it stops
completely.
∙Always keep the tool and the ventilation slots (if
present) cleaned. Regular cleaning and maintenance of
the appliance will ensure efciency and prolong the life
of your tool.
∙If the tool should fail despite the rigorous
manufacturing and testing procedures, the repair should
be carried out by an authorized IVT customer service.
∙Keep all nuts, bolts, and screws tight, to be sure the
tool is in safe working condition.
∙Replace worn or damaged parts for safety.
∙Use only original spare parts. Parts not produced
by manufacturer may cause poor t and possible injury.

13
EN
Instruction manual
∙Store the tool in a dry room out of reach of kids and
away from any ammable material.
∙Store all fuel tanks securely. Never store the
equipment with fuel in the tank inside a building, where
fumes can reach an open ame or sparks.
Engine oil change [F10]
Drain the oil while the engine (4) is warm to assure rapid
and complete draining.
1. Remove the oil drain plug (21) and sealing washer,
oil ller cap (16) and drain the oil.
2. Reinstall the oil drain plug (21) and sealing washer.
Tightern the plug securely.
3. Rell with the recommended oil and check the level.
CAUTION! Used motor oil may cause
skin cancer if repeatedly left in contact
with the skin for prolonged periods.
Although this is unlikely unless you
handle used oil on a daily basis, it is
still advisable to thoroughly wash your
hands with soap and water as soon as
possible after handing used oil.
Please dispose of used motor oil in a manner that is
compatible with the environment. We suggest you take
it in a sealed container to your local service station or
recycling center for reclamation. Do not throw it in the
trash or pour it on the ground.
Air lter (19) service [F11]
A dirty air lter (19) will restrict air ow to the carburetor.
To prevent carburetor malfunction, service the air lter
(19) regularly. Service more frequently when operating
the tiller in extremely dusty areas.
WARNING! Using gasoline or ammable
solvent to clean the lter element can
cause a re or explosion. Use only
soapy water or nonammable solvent.
NOTICE: never run the tiller without the air lter
(19). Rapid engine (4) wear will result.
1. Release the air lter cover clips / screws, remove
the air lter cover and remove the element.
2. Wash the element in a solution of household
detergent and warm water, then rinse thoroughly, or
wash in nonammable or high ash point solvent. Allow
the element to dry thoroughly.
3. Soak the element in clean engine oil and squeeze
out the excess oil. The engine (4) will smoke during
initial start up if too much oil is left in the element.
4. Reinstall the air lter element and the cover.
Fuel sediment cup (22) cleaning [F12]
The fuel sediment cup (22) prevents dirt or water which
may be in the fuel tank (17) from entering the carburetor.
If the machine has not been run for a long time, the fuel
sediment cup (22) should be cleaned.
ITEM
REGULAR SERVICE PERIOD
daily rst month
or 20 Hrs.
every 3
months
or 50 Hrs
every 6
months
or 100 Hrs
every year
or 300 Hrs
Drive belt
tension Adjust x x
Engine oil Check level x
Change x x
Air lter element Check x
Clean x (1*)
Transmission
gear oil Check level x
Tappet clearance Clean - Adjust x
Spark plug Clean - Adjust x
Fuel tank Clean x
Clutch cable Adjust x x
Throttle cable Adjust x
Fuel line
Check
(replace if neces-
sary)
Every 2 years
(1*) Service more frequently when used in dusty areas.

14
EN
Instruction manual
1. Turn the fuel valve (20) to the OFF position.
2. Press the button and turn the drain lever to open
the fuel sediment cup (22).
3. Drain the fuel.
4. Re-turn the drain lever in the initial position and turn
the fuel valve (20) to the ON position.
5. Check for leaks.
Spark plug (23) service [F13]
To ensure proper engine (4) operation, the spark plug
(23) must be properly gapped and free of deposits.
If the engine (4) has been running, the mufer will be
very hot. Be careful not to touch the mufer.
1. Remove the spark plug cap (24).
2. Clean any dirt from around the spark plug (23)
base.
3. Use the spanner supplied in the tool kit to remove
the spark plug (23).
4. Visually inspect the spark plug (23). Discard it if the
insulator is cracked or chipped. Clean the spark plug
(23) with a wire brush if it is to be reused.
5. Measure the plug gap with a feeler gauge. Correct
as necessary by carefully bending the side electrode.
The gap should be: 0.70-0.80 mm (0.028-0.031 inch).
6. Check that the spark plug washer is in good
condition, and thread the spark plug (23) in by hand to
prevent cross-threading.
7. After the spark plug (23) is seated, tighten with a
spark plug spanner to compress the washer. If installing
a new spark plug (23), tighten 1/2 turn after the spark
plug seats to compress the washer. If reinstalling a used
spark plug (23), tighten 1/8-1/4 turn after the spark plug
seats to compress the washer.
NOTICE: the spark plug (23) must be securely
tightened. An improperly tightened spark plug
(23) can become very hot and could damage the
engine (4). Never use spark plugs (23) which have
an improper heat range. Use only the recommended
spark plugs (23) or equivalent.
Transportation
Always turn off the engine before transportation.
Keep the tiller level balanced to prevent fuel
spillage. Fuel vapor or spilled fuel may ignite.
WARNING! Contact with a hot engine
(4) or exhaust system can cause
serious burns or res. Let the engine
(4) cool before transporting or storing
the tiller.
Take care not to drop or strike the tiller when transporting.
Do not place heavy objects on the tiller.
Long-term storage
Before storage the unit for an extended period:
∙Be sure the storage area is free of excessive
humidity and dust.
∙Service according to the table.
1. Drain the carburetor by loosening the drain screw.
Drain the fuel into a suitable container.
WARNING! Fuel is extremely
ammable and is explosive under
certain conditions. Perform this task
in a well ventilated area with the
engine (4) stopped. Do not smoke
or allow ames or sparks in the area
during this procedure.
2. Change the engine oil.
3. Remove the spark plug (23), and pour about a
tablespoon of clean engine (4) oil into the cylinder.
4. Crank the engine (4) several revolutions to
distribute the oil, then reinstall the spark plug (23).
5. Slowly pull the recoil starter (3) until resistance is
felt.
6. The piston is coming up on its compression stroke
and both the intake and exhaust valves are closed.
Storing the engine (4) in this position will help to protect
it from internal corrosion.
ENVIRONMENTAL PROTECTION
Recycle raw materials instead of
disposing as waste.
Tool, accessories and packaging should be sorted for
environment-friendly recycling.
The plastic components are labeled for categorized
recycling. These instructions are printed on recycled
paper manufactured without chlorine.

15
EN
Instruction manual
TROUBLESHOOTING
CAUTION! Turn off the engine and wait until the machine stops completely before
investigating fault.
Conventional trouble Trouble reason Remedy
The engine (4) does not start ∙The machine ran out of fuel.
∙There is dirt or water in the
carburetor tray.
∙The spark plug (23) is wet,
faulty, fouled or improperly
positioned.
∙The fuel tank (17) is clogged.
∙The carburetor isn’t reached by
the fuel.
∙Add fuel.
∙Empty the tray removing the
nut.
∙Remove and inspect the spark
plug (23); dry and clean any dirt
away from around the spark plug
(23); reinstall the spark plug (23) or
replace if necessary.
∙Clean it.
∙Clean the fuel sediment cup
(22).
The engine (4) starts, then stops ∙The fuel cap bleed valve is
blocked.
∙The air lter (19) is dirty.
∙The machine ran out of fuel.
∙The spark plug (23) is wet,
faulty, fouled or improperly
positioned.
∙Clean it.
∙Clean it.
∙Add fuel.
∙Remove and inspect the spark
plug (23); dry and clean any dirt
away from around the spark plug
(23); reinstall the spark plug (23) or
replace if necessary.
If the engine (4) stops ∙Engine (4) is overloaded.
∙The air lter (19) is dirty.
∙The machine ran out of oil.
∙The spark plug (23) is wet,
faulty, fouled or improperly
positioned.
∙The fuel tank (17) is clogged.
∙The mufer is clogged.
∙Limit the work depth using the
handlebar (10).
∙Clean it.
∙Add oil.
∙Remove and inspect the spark
plug (23); dry and clean any dirt
away from around the spark plug
(23); reinstall the spark plug (23) or
replace if necessary.
∙Clean it.
∙Clean or replace it.
The shaft does not turn or has no
torque
∙Throttle lever (11) is not
properly adjusted.
∙Tilling is too deep.
∙Shear pin(s) is broken.
∙Check throttle lever (11)
control setting.
∙Limit the work depth using the
handlebar (10).
∙Replace shear pin(s).
If the problem cannot be remedied on the basis of the information above, please take the device to an authorized
IVT Service Center.
ATTENTION! DO NOT ATTEMPT TO REPAIR THE PRODUCT BY YOURSELF AND DO NOT
TAMPER WITH IT! Any operation of repairing or extraordinary maintenance must be carried
out only by a qualied and authorized IVT Service Center. Do not try to modify any internal
part of the product! THIS WILL COMPLETELY VOID THE WARRANTY AND IT COULD CAUSE
SERIOUS INJURY AND DAMAGE.

16
RU
Инструкция по эксплуатации
КОМПЛЕКТУЮЩИЕ ДЕТАЛИ
1. Рычаг сцепления
2. Регулятор глубины
3. Ручка стартера
4. Двигатель
5. Ремень
6. Коробка передач
7. Ножи
8. Регулятор положения по высоте
9. Рычаг переключения передач
10. Рукоятка управления
11. Рычаг дроссельной заслонки
12. Переключатель «вкл. / выкл.»
13. Колесо
14. Упор
15. Рычаг дросселирования
16. Крышка пополнителя масла
17. Бак топливный
18. Крышка топливного бака
19. Фильтр воздуха
20. Топливный клапан
21. Пробка для слива масла
22. Отстойник топливный
23. Свеча
24. Крышка свечи
25. Ограждение
26. Кожух защитный
СОДЕРЖИМОЕ КОРОБКИ
Руководство по эксплуатации (1 шт.), ножи в сборе (1
к.), колесо (1 к.), набор инструментов (1 к.), воронка для
заправки масла (1 шт.), cоединительная тяга (1 шт.).
ПРЕДПОЛАГАЕМОЕ ИСПОЛЬЗОВАНИЕ
Данный культиватор предназначен для обработки
поверхностного слоя почвы. А именно для
небольших участков земли и садовых участков.
Культиватор упростит работу, обычно выполняемую
вручную лопатой и мотыгой.
ТЕХНИЧЕСКИЕ ХАРАКТЕРИСТИКИ ИНСТРУМЕНТА
Модель GTIL-70105-RC
Мощность номинальная [Вт] 3650
Частота вращения на холостом ходу [мин-1]3600
Объем двигателя [куб. см] 196
Мощность двигателя [л.с.] 6.5
Число тактов двигателя 4
Тип охлаждения двигателя воздушное хлаждение
Система запуска тросик
Режим привода ремень
Передача -1 / 0 / 2 / 1
Топливо бензин неэтилиров. 90#
Используемое масло SAE10W-30
Емкость топливного бака [л] 3.6
Емкость масляного бака [л] 0.6
Объемная вместимость трансмиссионного
масла [л] 1.5
Расход топлива [г/кВт-ч] 395
Глубина вспашки [мм] 150 - 300
Ширина вспашки [мм] 700 - 1050
Количество вращающихся ножей 24
Тип колеса 4.0 - 8
Величина вибрации (на рукояти) [м/с2]12 (K=1.5)
Уровень звукового давления [дБ(A)] 99 (K=3)
Cила звука [дБ(A)] 48.2 (K=3)
Вес [кг] 70

17
RU
Инструкция по эксплуатации
ТЕХНИКА БЕЗОПАСНОСТИ ПРИ
ИСПОЛЬЗОВАНИИ
Общие правила техники безопасности
Следующие инструкции по технике безопасности
помогут вам правильно пользоваться инструментом
и обеспечить собственную безопасность. Поэтому
прочитайте их вдумчиво и внимательно.
В случае передачи инструмента для использования
третьему лицу передайте и настоящие инструкции
по технике безопасности.
Сохраните данную инструкцию и прочую литературу,
входящую в комплект поставки. Обращайтесь к ней
в случае возникновения вопросов.
Строго следуйте правилам техники безопасности и
предостережениям, указанным на инструменте.
Перед началом работы ознакомьтесь с органами
управления инструмента, но, прежде всего, изучите
способы его экстренной остановки.
Следуя этим простым инструкциям, и вы будете
содержать ваш инструмент в исправном состоянии.
∙Перед использованием инструмент необходимо
правильно собрать.
∙Используйте инструмент строго по назначению.
∙Отнеситесь внимательно к предупредительным
надписям и указаниям на инструменте и
внимательно изучите их. Внимательность, разумный
подход к работе и соответствующая подготовка лиц,
задействованных в эксплуатации, транспортировке,
обслуживании и хранении инструмента, помогут
предотвратить несчастные случаи.
∙Не оставляйте инструмент без присмотра.
∙Не допускайте использования инструмента
детьми. Не позволяйте детям играть с
инструментом.
∙Не допускайте нахождения вблизи инструмента
детей и животных. Те, кто желает понаблюдать
за работой инструмента, должны находиться на
безопасном расстоянии от него.
∙При работе с инструментом пользователь несет
ответственность безопасность третьих лиц.
∙Лица, не ознакомленные с инструкциями по
эксплуатации, дети, несовершеннолетние, не
достигшие возраста, позволяющего использовать
инструмент, а также лица, находящиеся в состоянии
алкогольного или наркотического опьянения,
либо под воздействием медицинских препаратов,
не допускаются к работе с инструментом.
Возраст оператора устанавливается местными
нормативными актами.
ОСТОРОЖНО! Алкоголь, некоторые
лекарственные препараты и
наркотические вещества, а также
состояние нездоровья, жар и
утомление снижают скорость реакции.
Не используйте данный инструмент в
вышеперечисленных случаях.
∙Убедитесь, что все защитные приспособления
(если таковые имеются) установлены и пригодны к
эксплуатации.
∙Не используйте инструмент без защитных
приспособлений (если таковые имеются), либо если
они повреждены.
∙Осмотрите инструмент на наличие
незакрепленных деталей (гаек, болтов, винтов и т.д.)
или повреждений. Чтобы обеспечить безопасную
работу инструмента, периодически проверяйте,
хорошо ли затянуты болты и винты (если таковые
имеются). При необходимости перед использованием
инструмента произведите их ремонт или замену. В
случае использования поврежденного инструмента
оператору или посторонним лицам могут быть
нанесены серьезные травмы.
∙Используйте для работы соответствующую
спецодежду. Просторная одежда, украшения могут
быть затянуты движущимися частями. Работайте
только в подходящей спецодежде. Защитите ноги
и ступни от разлетающегося мусора. Не работайте
босиком или в открытых сандалиях. Соберите
длинные волосы сзади.
∙Содержите ручки и рукоятки в чистоте и
сухости.
∙Используйте соответствующие СИЗ.
Используйте защитные очки и перчатки. При работе
с порошками или при выбросах выхлопных газов
используйте противопылевой респиратор. При
необходимости наденьте нескользкую обувь, каску
и защитите органы слуха берушами. Если уровень
шума превышает 85 дБ(A), обязательно используйте
защитные наушники.
ОСТОРОЖНО! Пользуйтесь
средствами индивидуальной
защиты! Защитные приспособления
и СИЗ обеспечивают сохранность
вашего здоровья и здоровья
окружающих, а также гарантируют
бесперебойную работу
инструмента.
∙Не запускайте инструмент, если он перевернут
или находится в нерабочем положении.

18
RU
Инструкция по эксплуатации
∙Во время работы примите устойчивое
положение. Постоянно сохраняйте равновесие.
∙Соблюдайте чистоту на рабочем участке. На
загроможденных участках наблюдается высокий
уровень травматизма. Перед использованием
инструмента уберите с рабочей площадки все
посторонние предметы, а также избегайте попадания
под инструмент посторонних предметов во время
работы.
∙Не давите на инструмент с силой во время
работы.
∙Используйте инструмент только при хорошем
дневном или искусственном освещении. Не
используйте инструмент в условиях плохой видимости.
∙Не роняйте инструмент, не допускайте
столкновения инструмента с какими-либо
препятствиями.
ОСТОРОЖНО! Будьте внимательны. Не отводите
взгляд от обрабатываемого инструментом
предмета. Отвлекшись, можно потерять
управление. Подходите к работе разумно.
Правила техники безопасности при работе с
бензиновым двигателем
ВНИМАНИЕ! Бензин является
легковоспламеняющимся веществом.
Будьте осторожны с топливом.
∙Храните топливо только в специальных
канистрах.
∙Заправляйте бак только на открытом воздухе,
не курите во время заправки.
∙Сначала заправьте бак, а затем запускайте
двигатель.
∙Перед тем, как заправлять бак, дайте глушителю
остыть.
∙Не снимайте крышку топливного бака и не
заливайте топливо при работающем или неостывшем
двигателе.
∙В случае проливания бензина не запускайте
двигатель, отодвиньте инструмент в сторону от
пролитого бензина и не допускайте возникновения
источника возгорания до тех пор, пока пары бензина
не рассеются.
∙Протрите пролитое топливо перед тем, как
запускать двигатель.
∙Плотно закройте топливный бак или канистру.
∙Не запускайте инструмент в помещении или
в замкнутом пространстве, чтобы предотвратить
накапливание опасного угарного газа. Выхлопные
газы опасны для здоровья.
ВНИМАНИЕ! В выхлопных газах
содержится ядовитый угарный
газ, который не имеет ни цвета,
ни запаха. Вдыхание выхлопных
газов может привести к потере
сознания и летальному исходу.
Для предотвращения скапливания
выхлопных газов обеспечьте
соответствующую вентиляцию.
∙Не храните инструменты с топливом в баке в
помещении, где пары могут воспламениться.
∙Чтобы сократить риск возникновения пожара,
содержите в чистоте место хранения двигателя,
глушителя, батарейного отсека и бензохранилище.
∙Выхлопная система нагревается достаточно для
того, чтобы воспламенить некоторые материалы.
Храните инструмент на безопасном расстоянии от
легковоспламеняющихся материалов.
∙Во время работы глушитель сильно нагревается
и остается горячим некоторое время после
выключения. Не прикасайтесь к глушителю, чтобы
избежать ожога. Перед тем, как заносить инструмент
в закрытое помещение, дайте двигателю остыть.
∙Перед запуском инструмента извлеките
установочные клинья и ключи.
ВНИМАНИЕ! Иногда во время
работы инструментов с бензиновым
двигателем образуется пыль,
содержащая вызывающие рак
вещества.
К таким химическим веществам относятся: свинец в
составе свинцовых белил, кварц, входящий в состав
кирпича и цемента, мышьяк и хром, содержащиеся в
пиломатериале, обработанном химическими
реагентами, и прочие вредные вещества. Риск
воздействия данных химических веществ зависит от
частоты проведения связанных с ними работ.
Чтобы сократить их вредное воздействие,
работайте в хорошо проветриваемом
помещении и используйте соответствующие
исправные СИЗ, например, противопылевые
респираторы, специально разработанные для
отфильтровывания микроскопических частиц.
∙При попадании под инструмент постороннего
предмета осмотрите его на наличие повреждений и
произведите необходимый ремонт.
∙При возникновении чрезмерной вибрации
отключите инструмент и немедленно выясните
причину. Вибрация обычно является признаком
повреждения.

19
RU
Инструкция по эксплуатации
∙Перед тем, как покинуть рабочее место,
произвести ремонт, осмотр или очистку инструмента,
отключите его и дождитесь полной остановки
движущихся деталей.
∙Запрещается снимать или изменять внутренние
детали инструмента.
Особые правила по технике безопасности
∙Тщательно осмотрите участок, который
требуется обработать, уберите посторонние
предметы. Не обрабатывайте участок, если
под землей проложены водо- или газопровод,
электрокабели или трубы. Не используйте
культиватор для обработки почвы, содержащей
крупные камни и посторонние предметы, которые
могут повредить прибор.
∙Не производите настроек при работающем
двигателе.
∙Остерегайтесь движущихся частей.
Остерегайтесь борон.
∙Будьте особо осторожны при движении
культиватора задним ходом или по направлению к
вам. Сохраняйте устойчивое положение, держите
ноги на безопасном расстоянии от борон.
∙Сохраняйте устойчивое положение на склонах.
∙При работе с колесными роторными машинами
продвигайтесь поперек склона, не перемещайте
машину вверх и вниз.
∙Будьте особо внимательны при изменении
направления движения на склонах.
∙Не используйте прибор для обработки почвы на
слишком крутых склонах.
∙Продвигайтесь медленно.
∙Запускайте двигатель согласно инструкциям
производителя.
∙Не изменяйте настройку регулятора хода
двигателя и не превышайте скорость двигателя.
∙Не переносите прибор с включенным
двигателем.
∙Не используйте машину в условиях плохой
видимости или при недостаточном освещении.
∙Будьте осторожны при обработке твердой
почвы. Борона может застрять в земле, протолкнув
культиватор вперед. В таком случае отпустите рычаг
управления и не пытайтесь удержать культиватор.
∙Заглушите двигатель перед тем, как заправлять
бак или оставить прибор без присмотра.
∙При отключении двигателя опустите дроссельную
заслонку и, при наличии запорного клапана,
перекройте подачу топлива по окончании работы.
∙Примите все возможные меры предосторожности,
оставляя прибор без присмотра. Освободите все
рычаги управления, заглушите двигатель, подождите
до полной остановки всех движущихся частей и
убедитесь, что все щитки и ограждения на месте.
∙Остудите глушитель перед тем, как заправлять
бак.
∙Заглушите двигатель перед тем, как производить
ремонт, очистку, замену деталей и транспортировку.
ВСКРЫТИЕ УПАКОВКИ
При вскрытии упаковки проверьте наличие всех
комплектующих деталей. См. чертежи к данному
руководству. При отсутствии или неисправности
каких-либо деталей обратитесь в центр
обслуживания IVT.
УКАЗАНИЯ ПО СБОРКЕ
Сборка ножей (7) или колес (13) [F1]
∙Установить и выровнять ножи (7) или колеса
(13) на валу.
∙Совместить отверстие вала с отверстиями
ножей (7) или колес (13).
∙Закрепить ножи (7) с помощью стопорных
пальцев, болтов и гаек.
Сборка рукоятки управления (10)
∙Установите рукоятку управления (10) на ручку
управления и зафиксируйте ее с помощью болтов.
Сборка регулятора глубины (2) [F2]
∙Закрепить регулятор глубины (2) на раме
штифтом.
∙Во избежание выпадения крепежного штифта,
зафиксировать последний удерживающим штифтом.
ПРОВЕРКА ПЕРЕД ЭКСПЛУАТАЦИЕЙ
Рекомендации по заправке [F3]
1. Проверьте указатель уровня топлива.
2. Если уровень топлива низкий, заполните бак. Не
заливайте топливо выше топливного фильтра.
∙Рекомендуется использовать неэтилированный
бензин, поскольку он образует меньше отложений,
а также продляет срок службы выхлопной системы.
Не используйте несвежий или загрязненный бензин
или смесь масла/бензина.
∙Избегайте попадания в топливный бак (17) грязи
или воды.
ВНИМАНИЕ: эксплуатация двигателя (4) с
постоянным постукиванием или дребезжанием
может привести к поломке. Эксплуатировать
двигатель с постоянным постукиванием или
дребезжанием запрещено. Если дребезжание
не прекращается, обратитесь к официальному
дилеру IVT.

20
RU
Инструкция по эксплуатации
Моторное масло [F4]
ВНИМАНИЕ! Двигатель (4)
поставляется без заправки масла.
Перед запуском двигателя (4) заливка
моторного масла обязательна.
ВНИМАНИЕ: моторное масло является
важнейшим фактором, влияющим на работу
и срок службы двигателя. Не рекомендуется
использовать немоющие масла, а также масла
для двухтактных двигателей (4), поскольку они
повреждают двигатель.
1. Перед каждым использованием машины
проверяйте уровень масла на ровной поверхности с
выключенным двигателем (4).
2. Снимите крышку маслозаправочного отверстия
(16) и протрите масляный щуп.
3. Проверьте уровень масла, вставив щуп в
заливную горловину не закручивая.
4. Если уровень масла низкий, заполните бак до
горловины.
Воздушный фильтр (19)
Осмотреть коробку воздушного фильтра на предмет
наличия грязи и посторонних предметов.
РУКОВОДСТВО ПО РЕГУЛИРОВКЕ
Регулировка глубины вспашки [F5]
∙Вытянуть удерживающий и крепежный штифты.
∙ Установить регулятор глубины (2) в
требующееся положение.
∙Заменить крепежный штифт, зафиксировать
удерживающим штифтом.
Регулировка высоты культиватора [F6]
∙Для регулировки высоты культиватора ослабьте
регулятор положения по высоте (8), выберите нужную
высоту и затяните регулятор положения по высоте (8).
Управление рычагом сцепления (1) [F7]
∙Рычаг сцепления (1) управляет передачей
энергии от двигателя (4) на трансмиссию.
∙При нажатии на рычаг (1) муфта входит в
зацепление и происходит передача движения,
начнется вращение вала.
∙При отпускании рычага (1) муфта выходит из
зацепления, передача прекращается, вращение
вала прекратится.
Переключение передач
∙Переведите рычаг дроссельной заслонки (11) в
крайнее правое положение.
∙Отпустите рычаг сцепления (1), чтобы выжать
сцепление.
∙Переведите рычаг переключения передач (9) в
положение нужной передачи.
ПРИМЕЧАНИЕ: если рычаг переключения передач
(9) не встанет в положение нужной передачи,
сожмите рычаг сцепления (1) и немного передвиньте
культиватор, чтобы отключить передачи.
Натяжение ремня (5) [F8]
Удерживая зажатым рычаг сцепления (1),
передвиньте вверх натяжной шкив, выполнив
тем самым натяжение ремня (5). Если натяжение
ремня (5) выполнено неправильно, его необходимо
отрегулировать.
∙Открутите фиксирующие гайки.
∙Если натяжение ремня (5) слишком слабое,
передвиньте его вперед.
∙Если натяжение ремня (5) слишком сильное,
передвиньте его назад.
∙После выполнения соответствующего
натяжения затяните фиксирующие гайки и гайки
соединительной планки.
Регулировка тросиков сцепления и дроссельной
заслонкиt
∙Измерьте свободный ход на кончиках рычага
(тросик сцепления: 3 - 8 мм; тросик дросселя: 5 - 10
мм).
∙Если свободный ход неправильный, ослабьте
стопорные гайки и, по необходимости, закрутите или
открутите регулировочные болты.
∙После регулировки до конца затяните стопорные
гайки. Затем запустите двигатель (4) и проверьте
правильность работы рычагов.
Нормальный рабочий угол
∙Слегка опустите рукоятку так, чтобы передняя
часть машины опустилась примерно на 6-8°.
Для получения максимального эффекта от работы
культиватора, старайтесь удерживать машину в
пределах этого угла во время вспашки земли.
ЗАПУСК / ОСТАНОВ ДВИГАТЕЛЯ (4)
[F9]
Перед запуском мотокультиватора:
ВНИМАНИЕ! Возможна поставка
машины с отсоединенным
колпачком свечи зажигания. Перед
запуском ее следует присоединить.
Table of contents
Languages:
Other IVT Tiller manuals
Popular Tiller manuals by other brands

Craftsman
Craftsman INCREDI.PULL 316.299371 Operator's manual

Troy-Bilt
Troy-Bilt 12001 Owner's/operator's manual

Lawn Solutions
Lawn Solutions TA3016KAF1 Operator's manual

Husqvarna
Husqvarna 540000073 / TA36 Operations & parts manual

Perla Barb
Perla Barb PBJJ operating instructions

Troy-Bilt
Troy-Bilt PONY Operator's manual