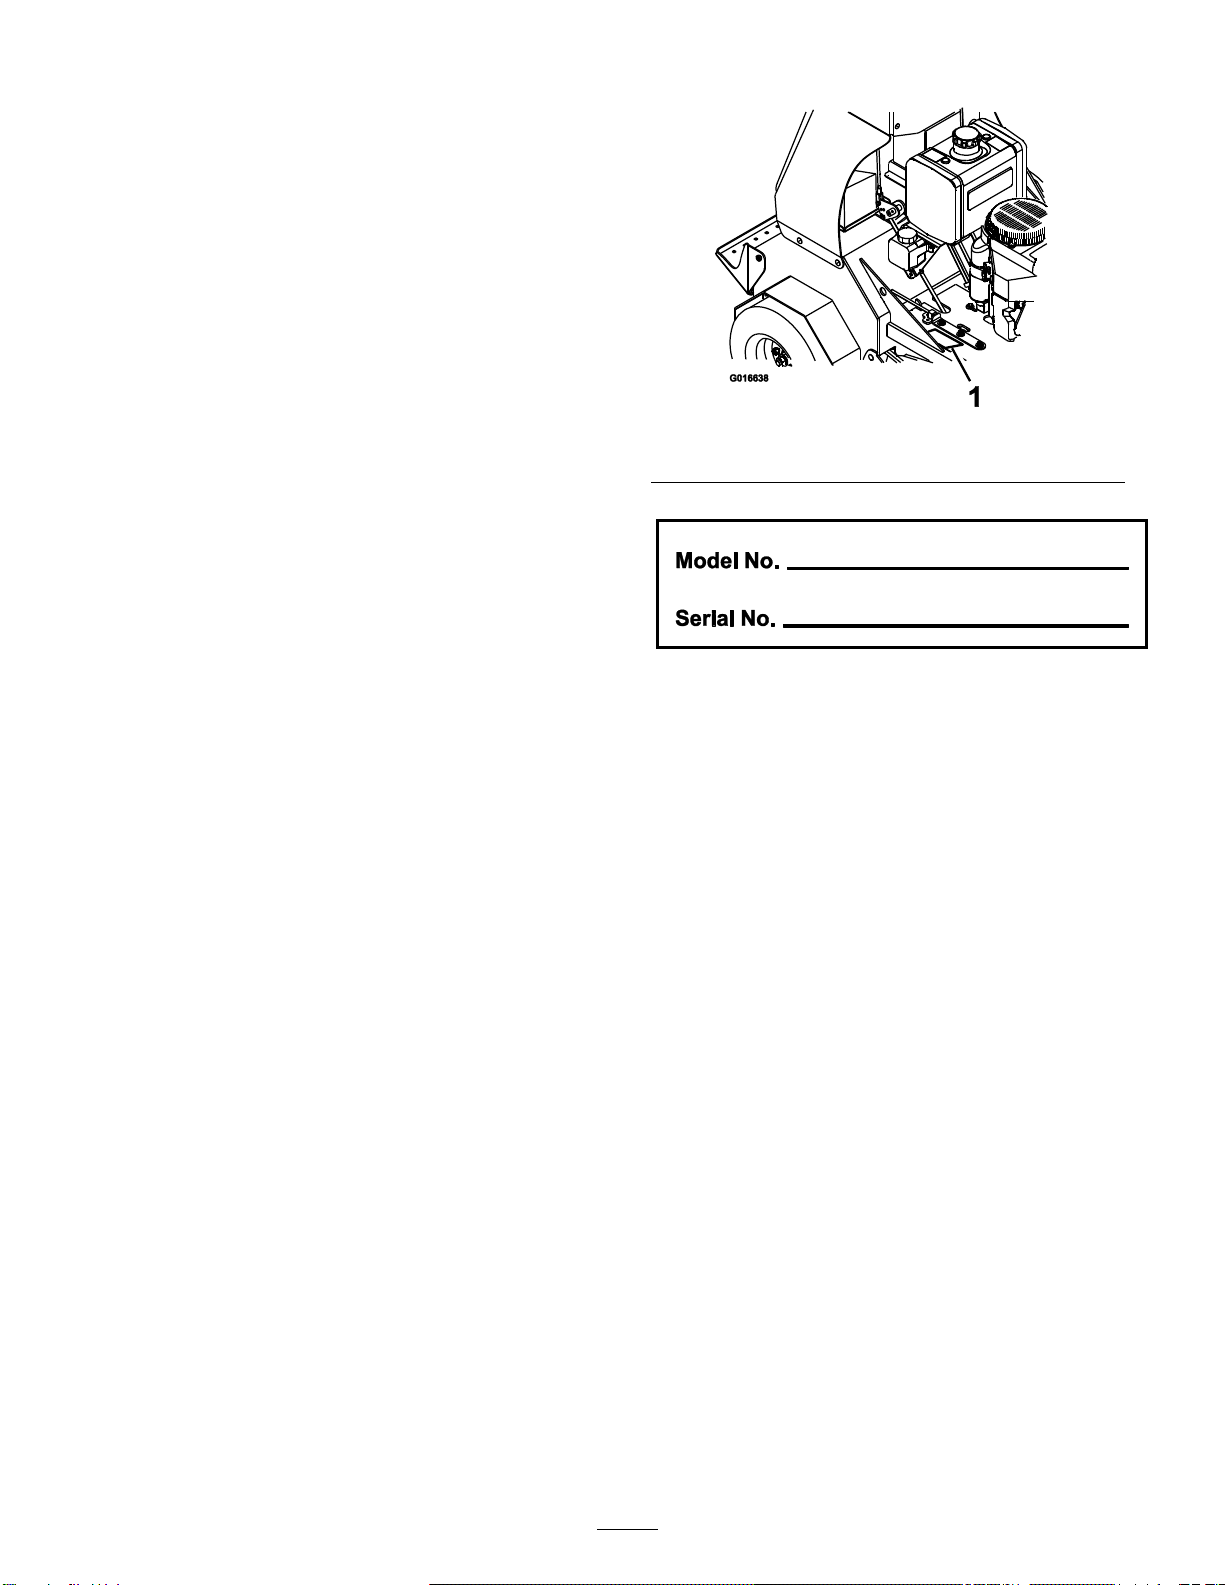
Lawn Solutions TA3016KAF1 User manual

Form No. 3373-757

2
WARNING
CALIFORNIA
Proposition 65 Warning
The engine exhaust from this product
contains chemicals know to the State of
California to cause cancer, birth defects, or
other reproductive harm.
Important: The engine in this product is
not equipped with a spark arrester muffler. It
is a violation of California Public Resource
Code (CPRC) Section 4442 to use or operate
this engine on any forest-covered, brush-
covered, or grass-covered land as defined in
CPRC 4126. Other states or federal areas may
have similar laws.
To acquire a spark arrester for your unit, see your
Engine Service Dealer.
This spark ignition system complies with the
Canadian standard ICES-002. Ce système
d’allumage par ètincelle de vèhicule est conforme
à la norme NMB-002 du Canada.
The enclosed Engine Owner’s Manual is
supplied for information regarding The U.S.
Environmental Protection Agency (EPA) and
the California Emission Control Regulation
of emission systems, maintenance and
warranty.
Keep this engine Owner’s Manual with your
unit. Should this engine Owner’s Manual
become damaged or illegible, replace
immediately. Replacements may be ordered
through the engine manufacturer.
Lawn Solutions reserves the right to make
changes or add improvements to its products
at any time without incurring any obligation
to make such changes to products
manufactured previously. Lawn Solutions, or
its distributors and dealers, accept no
responsibility for variations which may be
evident in the actual specifications of its
products and the statements and descriptions
contained in this publication.
© 2011 Lawn Solutions Commercial Products, Inc.
5406 Shepherdsville Road
Louisville, KY 40228
Contact us at www.lawnsolutionscp.com
Printed in the USA
All Rights Reserved

3
Introduction
CONGRATULATIONS on the purchase of
your Lawn Solutions aerator. This product has
been carefully designed and manufactured to give
you a maximum amount of dependability and
years of trouble-free operation.
This manual contains operating, maintenance,
adjustment, and safety instructions for your Lawn
Solutions aerator.
BEFORE OPERATING YOUR AERATOR,
CAREFULLY READ THIS MANUAL IN
ITS ENTIRETY.
By following the operating, maintenance, and
safety instructions, you will prolong the life of
your aerator, maintain its maximum efficiency,
and promote safe operation.
If additional information is needed, or should
you require trained mechanic service, contact
your authorized Lawn Solutions equipment
dealer.
All Lawn Solutions equipment dealers are kept
informed of the latest methods of servicing and
are equipped to provide prompt and efficient
service in the field or at their service stations.
They carry ample stock of service parts or can
secure them promptly for you from the factory.
All Lawn Solutions parts are thoroughly tested
and inspected before leaving the factory;
however, attention is required on your part if you
are to obtain the fullest measure of satisfaction
and performance.
Whenever you need service, genuine Lawn
Solutions parts, or additional information,
contact an Authorized Service Dealer or Lawn
Solutions Customer Service and have the model
and serial numbers of your product ready.
Figure 1 identifies the location of the model and
serial numbers on the product. Write the
numbers in the space provided.
Figure 1
1. Model and serial number location

4
Contents
Introduction ....................................................... 3
Safety ................................................................... 5
Safety Alert Symbol...................................... 5
Safe Operating Practices ............................. 5
Safety and Instructional Decals................. 10
Specifications .................................................... 14
Model Numbers........................................... 14
Systems.......................................................... 14
Dimensions .................................................. 15
Product Overview ............................................ 15
Operation........................................................... 16
Controls ........................................................ 16
Pre-Start ........................................................ 17
Operating Instructions ............................... 17
Transporting................................................. 19
Maintenance ...................................................... 21
Recommended Maintenance Schedule .... 21
Periodic Maintenance ................................. 22
Check Engine Oil Level ........................ 22
Check Tines ............................................ 24
Check Safety Interlock System............. 24
Check for Loose Hardware .................. 25
Service Air Cleaner................................. 25
Change Engine Oil................................. 25
Check Auxiliary Hydraulic Oil Level .. 25
Check Hydraulic Transmission
Oil Level............................................... 25
Check Tire Pressures ............................. 25
Check Condition of Belts...................... 25
Check Condition of Chains .................. 26
Check Condition of Sprockets ............. 26
Lubricate Chains..................................... 26
Lubricate Grease Fittings...................... 26
Check Spark Plugs.................................. 26
Check Fuel Filter.................................... 26
Change Auxiliary Hydraulic Reservoir
Fluid...................................................... 27
Change Hydraulic Transmission
Filter and Fluid.................................... 27
Check Spark Arrester (if equipped) ..... 28
Thread Locking Adhesives ................... 28
Adjustments................................................ 28
Auxiliary Pump Drive Belt
Adjustment........................................... 28
Drive Belt Tension Adjustment ........... 28
Jackshaft Drive Chain Tension
Adjustment........................................... 28
Drive Wheel Chain Tension
Adjustment........................................... 29
Tine Drive Chain Adjustment .............. 29
Adjusting the Park Brake ...................... 29
Motion Control Linkage Adjustment.. 29
Cleaning.........................................................
Clean Engine and Exhaust System
Area ..................................................... 30
Clean Debris From Machine ................ 30
Waste Disposal ....................................... 30
Troubleshooting.............................................. 31

5
CAUTION
Safety
Safety Alert Symbol
This Safety Alert Symbol is used in this manual
and on the machine to identify important safety
messages which must be followed to avoid
accidents.
This symbol means: ATTENTION!
BECOME ALERT! YOUR SAFETY IS
INVOLVED!
Figure 2
Safety Alert Symbol
The safety alert symbol appears above
information which alerts you to unsafe actions or
situations and will be followed by the word
DANGER, WARNING, or CAUTION.
DANGER: White lettering / Red background.
Indicates an imminently hazardous situation
which, if not avoided, Will result in death or
serious injury.
WARNING: Black lettering / Orange
background. Indicates a potentially hazardous
situation which, if not avoided, Could result in
death or serious injury.
CAUTION: Black lettering / Yellow
background. Indicates a potentially hazardous
situation which, if not avoided, May result in
minor or moderate injury.
This manual uses two other words to highlight
information. Important calls attention to special
mechanical information and Note emphasizes
general information worthy of special attention.
Safe Operating Practices
Training
Read the Operator’s Manual and other
training material. If the operator(s) or
mechanic(s) can not read English it is the
owner’s responsibility to explain this material
to them.
Become familiar with the safe operation of the
equipment, operator controls, and safety signs.
All operators and mechanics should be trained.
The owner is responsible for training the users.
Never let children or untrained people operate
or service the equipment. Local regulations
may restrict the age of the operator.
Only adults and mature teenagers should
operate an aerator, and even mature teenagers
should have adult supervision. Be sure a
teenager:
1. has read and understands the Operator's
Manual and recognizes the risks involved;
2. is sufficiently mature to use caution; and
3. is of sufficient size and weight to operate
the controls comfortably and to manage
the aerator without taking risks.
The owner/user can prevent and is responsible
for accidents or injuries occurring to himself or
herself, other people or property.
Preparation
Evaluate the terrain to determine what
accessories and attachments are needed to
properly and safely perform the job. Only use
accessories and attachments approved by Lawn
Solutions.
Wear appropriate clothing including safety
glasses, substantial footwear, long trousers, and
hearing protection. Do Not operate when
barefoot or when wearing open sandals. Long
hair, loose clothing or jewelry may get tangled
in moving parts.
This machine produces sound levels in excess
of 85 dBA at the operator’s ear and can cause
hearing loss through extended periods of
exposure.
Wear hearing protection when operating this
machine.
Inspect the area where the equipment is to be
used and remove all rocks, toys, sticks, wires,
bones, and other foreign objects which can be
contacted by the machine and may cause
personal injury to the operator or bystanders.

6
In certain conditions gasoline is extremely
flammable and vapors are explosive.
A fire or explosion from gasoline can burn
you, others, and cause property damage.
Fill the fuel tank outdoors on level
ground, in an open area, when the
engine is cold. Wipe up any gasoline
that spills.
Never refill the fuel tank or drain the
machine indoors or inside an enclosed
trailer.
Do Not fill the fuel tank completely
full. Fill the fuel tank to the bottom of
the filler neck. The empty space in the
tank allows gasoline to expand.
Overfilling may result in fuel leakage
or damage to the engine or emission
system.
Never smoke when handling gasoline,
and stay away from an open flame or
where gasoline fumes may be ignited
by spark.
Store gasoline in an approved
container and keep it out of the reach
of children.
Add fuel before starting the engine.
Never remove the cap of the fuel tank
or add fuel when engine is running or
when the engine is hot.
If fuel is spilled, Do Not attempt to
start the engine. Move away from the
area of the spill and avoid creating any
source of ignition until fuel vapors
have dissipated.
Do Not operate without entire exhaust
system in place and in proper working
condition.
In certain conditions during fueling, static
electricity can be released causing a spark
which can ignite gasoline vapors. A fire or
explosion from gasoline can burn you and
others and cause property damage.
Always place gasoline containers on the
ground away from your vehicle before
filling.
Do Not fill gasoline containers inside a
vehicle or on a truck or trailer bed
because interior carpets or plastic truck
bed liners may insulate the container
and slow the loss of any static charge.
When practical, remove gas-powered
equipment from the truck or trailer and
refuel the equipment with its wheels on
the ground.
If this is not possible, then refuel such
equipment on a truck or trailer from a
portable container, rather than from a
gasoline dispenser nozzle.
If a gasoline dispenser nozzle must be
used, keep the nozzle in contact with
the rim of the fuel tank or container
opening at all times until fueling is
complete.
Gasoline is harmful or fatal if swallowed.
Long-term exposure to vapors has caused
cancer in laboratory animals. Failure to
use caution may cause serious injury or
illness.
Avoid prolonged breathing of vapors.
Keep face away from nozzle and gas
tank/container opening.
Keep away from eyes and skin.
Never siphon by mouth.
Check that the operator's presence controls,
safety switches, and shields are attached and
functioning properly. Do Not operate unless
they are functioning properly.
DANGER
DANGER
WARNING

7
Operation
Operating engine parts, especially the muffler,
become extremely hot. Severe burns can occur
on contact and debris, such as leaves, grass,
brush, etc. can catch fire.
Allow engine parts, especially the muffler,
to cool before touching.
Remove accumulated debris from muffler
and engine area.
Install and maintain in working order a
spark arrester before using equipment on
forest-covered, grass-covered, or brush-
covered unimproved land.
Engine exhaust contains carbon monoxide,
which is an odorless deadly poison that can
kill you.
Do Not run engine indoors or in a small
confined area where dangerous carbon
monoxide fumes can collect.
Operate only in daylight or good artificial
light, keeping away from holes and hidden
hazards.
Be sure all drives are in neutral and parking
brake is engage before starting engine.
Never operate the machine with damaged
guards, shields, or covers. Always have safety
shields, guards, switches and other devices in
place and in proper working condition.
Do Not change the engine governor setting or
overspeed the engine.
Park machine on level ground. Stop engine,
wait for all moving parts to stop, remove key
and engage parking brake:
-Before checking, cleaning or working on
the machine.
-After striking a foreign object or abnormal
vibration occurs (inspect the machine for
damage and make repairs before restarting
and operating the machine).
-Before clearing blockages.
-Whenever you leave the machine.
Stop engine, wait for all moving parts to stop,
and engage parking brake:
-Before refueling.
Hands, feet, hair, clothing, or accessories
can become entangled in rotating parts.
Contact with the rotating parts can cause
traumatic amputation or severe lacerations.
Do Not operate the machine without
guards, shields, and safety devices in
place and working properly.
Keep hands, feet, hair, jewelry, or
clothing away from rotating parts.
NEVER carry passengers. DO NOT operate
the machine when people, especially children,
or pets are in the area.
Be alert, slow down and use caution when
making turns. Look behind and to the side
before changing directions.
Raise the tines, slow down, and use caution
when crossing surfaces other than grass and
when transporting the machine to and from the
work area.
Do Not operate the machine under the
influence of alcohol or drugs.
Use extreme care when loading or unloading
the machine into a trailer or truck.
Use care when approaching blind corners,
shrubs, trees, or other objects that may obscure
vision.
Slope Operation
Use Extreme caution when aerating and/or
turning on slopes as loss of traction and/or tip-
over could occur. The operator is responsible for
safe operation on slopes.
WARNING
WARNING
WARNING

8
Operating on wet grass or steep slopes can
cause sliding and loss of control. Wheels
dropping over edges, ditches, steep banks, or
water can cause rollovers, which may result in
serious injury, death or drowning.
Do Not operate on slopes when grass is
wet.
Do Not operate near drop-offs or near
water.
Do Not operate on slopes greater than 15
degrees.
Reduce speed and use extreme caution on
slopes.
Avoid sudden turns or rapid speed
changes.
Reduce tine down pressure to prevent the
drive tires from raising off the ground and to
prevent the front tires from raising off of the
ground while aerating uphill.
See inside the back cover to determine the
approximate slope angle of the area to be
aerated.
Remove or mark obstacles such as rocks, tree
limbs, etc. from the working area. Tall grass
can hide obstacles.
Watch for ditches, holes, rocks, dips and rises
that change the operating angle, as rough
terrain could overturn the machine.
Avoid sudden starts when aerating uphill
because the machine may tip backwards. The
machine is more stable going uphill with the
tines disengaged.
Be aware that operating on wet grass, across
steep slopes or downhill may cause the
machine to lose traction. Loss of traction to
the drive wheels may result in sliding and a
loss of braking and steering.
Always avoid sudden starting or stopping on a
slope.
Follow the manufacturer’s recommendations
for wheel weights or counter weights to
improve stability.
Use extreme care with attachments. These can
change the stability of the machine and cause
loss of control.
Maintenance and Storage
Raise the tines, set the parking brake, stop
engine and remove key or disconnect spark
plug wire. Wait for all movement to stop
before adjusting, cleaning or repairing.
Keep engine and engine area free from
excessive grease or oil and other debris which
can accumulate in these areas. These materials
can become combustible and may result in a
fire.
Let engine cool before storing and do not store
near flame or any enclosed area where open
pilot lights or heat appliances are present.
Shut off fuel while storing or transporting. Do
Not store fuel near flames or drain indoors.
Park machine on level, hard ground. Never
allow untrained personnel to service machine.
Use jack stands to support components when
required.
Carefully release pressure from components
with stored energy.
Disconnect battery or remove spark plug wire
before making any repairs. Disconnect the
negative terminal first and the positive last.
Reconnect positive first and negative last.
Use care when checking and servicing tines.
Wrap the tine(s) or wear gloves, and use
caution when servicing them. Only replace
damaged tines. Never straighten or weld them.
Keep hands and feet away from moving parts.
If possible, do not make adjustments with the
engine running.
Charge batteries in an open well ventilated area,
away from spark and flames. Unplug charger
before connecting or disconnecting from
battery. Wear protective clothing and use
insulated tools.
DANGER

9
Charging or jump starting the battery may
produce explosive gases. Battery gases can
explode causing serious injury.
Keep sparks, flames, or cigarettes away
from battery.
Ventilate when charging or using
battery in an enclosed space.
Make sure venting path of battery is
always open once battery is filled with
acid.
Always shield eyes and face from
battery.
Battery electrolyte contains sulfuric acid,
which is poisonous and can cause severe
burns. Swallowing electrolyte can be fatal
or if it touches skin can cause severe
burns.
Wear safety glasses to shield eyes, and
rubber gloves to protect skin and
clothing when handling electrolyte.
Do Not swallow electrolyte.
In the event of an accident, flush with
water and call a doctor immediately.
If the ignition is in the “ON”position
there is potential for sparks and
engagement of components. Sparks could
cause an explosion or moving parts could
accidentally engage causing personal
injury.
Be sure ignition switch is in the “OFF”
position before charging the battery.
Keep all guards, shields and all safety devices
in place and in safe working condition.
Check all bolts frequently to maintain proper
tightness.
Frequently check for worn or deteriorating
components that could create a hazard.
Removing standard original equipment parts
and accessories may alter the warranty,
traction, and safety of the machine. Failure to
use original Lawn Solutions parts could cause
serious injury or death. Making unauthorized
changes to the engine, fuel or venting system,
may violate EPA and CARB regulations.
Replace all parts including, but not limited to,
tires, belts, chains, tines, and fuel system
components with original Lawn Solution parts.
Hydraulic fluid escaping under pressure can
penetrate skin and cause injury. Fluid
accidentally injected into the skin must be
surgically removed within a few hours by a
doctor familiar with this form of injury or
gangrene may result.
If equipped, make sure all hydraulic fluid
hoses and lines are in good condition and
all hydraulic connections and fittings are
tight before applying pressure to hydraulic
system.
Keep body and hands away from pinhole
leaks or nozzles that eject high pressure
hydraulic fluid.
Use cardboard or paper, not your hands, to
find hydraulic leaks.
Safely relieve all pressure in the hydraulic
system by placing the motion control levers
in neutral, shutting off the engine, and
lowering tines to the ground before
performing any work on the hydraulic
system.
DANGER
DANGER
CAUTION
WARNING
WARNING

10
Safety and Instructional Decals
Keep all safety signs legible. Remove all grease,
dirt and debris from safety signs and
instructional labels.
Replace all worn, damaged, or missing safety
signs.
When replacement components are installed,
be sure that current safety signs are affixed to
the replaced components.
If an attachment or accessory has been
installed, make sure current safety signs are
visible.
New safety signs may be obtained from your
authorized Lawn Solutions equipment dealer
or distributor or from Lawn Solutions
Products, Inc.
Safety signs may be affixed by peeling off the
backing to expose the adhesive surface. Apply
only to a clean, dry surface. Smooth to remove
any air bubbles.
Familiarize yourself with the following safety
signs and instruction labels. They are critical to
the safe operation of your Lawn Solutions
commercial aerator.
98-5954
103-2076
116-6454

11
116-6455
116-6456
116-6457
116-6459
116-6460
116-6461
116-6462

12
116-6362
1. Fast
2. Slow
3. Neutral
4. Reverse
5. Wheels and tines rotate when moving forward
6. Wheels and tines rotate when moving rearward
7. Rotate counterclockwise to decrease pressure
8. Rotate clockwise to increase pressure

13
116-6452
1. Fast
2. Slow
3. Wheels and tines rotate when moving forward
4. Wheels and tines rotate when moving rearward
5. Neutral
6. Reverse
7. Engine –stop
8. Engine –run
9. Engine –start
10. Park brake –release
11. Park brake –engage
116-6506

14
Specifications
Model Number
Systems
Engine
Engine Specifications: See your Engine
Owner’s Manual
RPM: Full Speed: 3600 ±100 RPM (No Load)
Fuel System
Capacity: 4.4 gal. (20.0 L)
Type of Fuel: Regular unleaded gasoline, 87
octane or higher; containing no more than
10% methanol or ethanol.
Fuel Filter: Kawasaki P/N 49065-7007
Fuel Shut-Off Valve: 1/4 turn increments
Electrical System (Electric Start)
Charging System: Flywheel Alternator
Charging Capacity: Kawasaki: 15 amps
Battery Type: BCI Group U1
Battery Voltage: 12 Volt
Polarity: Negative Ground
Fuses: 30 amp main fuse
Safety Interlock System
Engine will not start unless both motion control
levers are in the neutral position.
Operator Controls
Steering and Motion Control:
-Separate levers, on each side of the
console, control speed and direction
of travel of the respective drive
wheels.
-Steering is controlled by varying the
position of the levers relative to each
other.
Tine Ground Engagement: Engages the
tines with the ground.
Parking Brake Lever: Engages the parking
brake.
Tine Down Pressure Control: Adjusts tine
down pressure.
Transmission
Two unitized hydrostatic transmissions:
Hydro Gear ZT3400
Hydraulic Oil Capacity: 78 oz. (2.3 L)
Hydraulic Filter is replaceable cartridge type
Speeds:
-0-7.0 mph (11.3 km/hr) forward.
-0-2.0 mph (3.2 km/hr) reverse.
Wheel and Tine Drive System
Drive wheels and the outside aeration tines are
driven through roller chains by the two hydrostatic
transmissions.
Tires & Wheels
Drive
Front Caster
Pneumatic
(Air-Filled)
Pneumatic
(Air-Filled)
Quantity
2
2
Tread
Super Turf
Ribbed
Size
16 x 6.50-8
13 x 5.00-6
Ply Rating
4
2
Pressure
13 psi (90 kPa)
13 psi (90 kPa)
Serial Nos: LS02001 and Higher
TA3016KAF1

15
Aeration
Aeration Width: 30 inches (76.2 cm)
Tines: Qty: 48
Tine Down Pressure: 0-1200 lbs
Core Depth: 2-5 inches (5.1-12.7 cm)
Holes per square foot: 4.6
Dimensions
Overall Width:
47.75 inches (121.3 cm)
Overall Length:
64 inches (162.6 cm)
Overall Height:
52 inches (132.1 cm)
Tread Width (Outside to Outside of
Tires, Widthwise):
47.75 inches (121.3 cm)
Curb Weight:
1015 lb (460 kg)
Product Overview
Figure 3
1. Motion control levers
3. Fuel cap
2. Controls

16
Operation
Note: Determine the left and right sides of the
machine from the normal operating position.
Controls
Motion Control Levers
The motion control levers, located on each side of
the top console, control the forward and reverse
motion of the machine (see Figure 4).
Important: The tines are rotating when the
motion control levers are moved out of the
neutral position.
Figure 4
1. Tine down
pressure gauge
6. RH motion control
2. Tine down
pressure control
7. Hour meter/ tachometer
3. Choke
8. Park brake
4. LH motion control
9. Ignition switch
5. Throttle
10. Tine ground
engagement foot switch
Throttle Control
Located on the control console (see Figure 4).
The throttle is used to control engine speed.
Moving the throttle lever forward will increase
engine speed and moving the throttle lever to the
rear will decrease engine speed. Moving the
throttle forward into the detent is full throttle.
Choke Control
Located on the control console (see Figure 4).
Choke is used to aid in starting a cold engine. The
choke control is pulled out to be in the “ON”
position and pushed in to be in the “OFF”
position. Do Not run a warm engine with choke in
the “ON”position.
Park Brake Lever
Located on right side of the control console (see
Figure 4).
The brake lever engages a parking brake in the
transmissions.
To engage the brake, pull knob out and slide
rearward.
To release, push the knob forward into the detent.
When parking on a steep slope, the wheels must be
chocked or blocked in addition to the brake being
engaged. The unit must be tied down and brake
engaged when transporting.
Ignition Switch
Located on the right side of the control console
(see Figure 4).
The ignition switch is used to start and stop the
engine. The switch has three positions “OFF”,
“ON” and “START”. Insert key into switch and
rotate clockwise to the “ON” position. Rotate
clockwise to the next position to engage the starter
(key must be held against spring pressure in this
position). Allow the key to return to the “ON”
position immediately after the engine starts.
Note: To start the engine, place the LH and RH
motion control levers in neutral. (It is not necessary
for the operator to be on the platform.)
Hour Meter/Tachometer Display
Located above the ignition switch (see Figure 4).
When the engine is off, the hour meter/tachometer
displays the number of hours of operation that
have been logged on the machine. When the
engine is running, it displays the speed of the
engine in revolutions per minute (RPM).
The hour meter is recording when the tachometer
displays RPM.

17
Fuel Shut-Off Valve
Located under the fuel tank.
The fuel shut-off valve is used to shut off the fuel
when the machine will not be used for a few days,
during transport to and from the jobsite, and
when parked inside a building
Rotate the valve handle downward to open.
Rotate 90°to close.
Tines Ground Engagement Foot
Switch
Keep hands and feet away from the tines.
Make sure the tines area is clear of any
obstructions before lowering it.
Located on the operator platform (see Figure 4).
To lower the tines into the ground, stand on the
foot switch. To raise the tines, remove your foot
from the switch.
Tine Down Pressure Control
Located on the control console (see Figure 4).
Rotate the control counterclockwise to decrease
the pressure and the length of the plug; rotate
clockwise to increase pressure and increase the
length of the plug.
Tine Down Pressure Gauge
Located on the control console (see Figure 4).
The gauge displays the tine down pressure when
aerating.
Pre-Start
Fill fuel tank on level ground. For best results use
only clean, fresh regular grade unleaded gasoline
with an octane rating of 87 or higher.
Important: Never use methanol, gasoline
containing methanol, gasohol containing
more than 10% ethanol, premium gasoline, or
white gas because the fuel system could be
damaged.
Do Not add oil to gasoline.
Do Not overfill fuel tank. Fill the fuel tank to the
bottom of the filler neck. The empty space in the
tank allows gasoline to expand. Overfilling may
result in fuel leakage or damage to the engine or
emission system.
Make sure you understand the controls, their
locations, their functions, and their safety
requirements.
Refer to the Maintenance section and perform all
the necessary inspection and maintenance steps.
Operating Instructions
Open the Fuel Shut-Off Valve
Rotate the valve and align with the fuel line to
open.
Starting the Engine
1. Place the motion control levers in neutral and
engage the parking brake.
2. Place the throttle midway between the
“SLOW” and “FAST” positions.
3. On a cold engine, pull the choke control out.
On a warm engine, leave the choke pushed in
to the “OFF” position.
4. Turn ignition switch to the “START”position.
Release the switch as soon as the engine starts.
Important: Do Not crank the engine
continuously for more than ten seconds at a
time. If the engine does not start, allow a 60
second cool-down period between starting
attempts. Failure to follow these guidelines
can burn out the starter motor.
5. If the choke is in the “ON”position, gradually
return choke to the “OFF”position as the
engine warms up.
Lowering the Tines
The rotating tines under the engine deck are
dangerous. Tine contact can cause serious
injury or kill you.
Do Not put hands or feet under the engine
deck when the tines are engaged.
1. Set the throttle to “MIDWAY” position.
2. Step on the tine ground engagement foot
switch to lower the tines. Stand on the switch
and move the motion control levers forward to
aerate.
3. Adjust the throttle for the working conditions.
DANGER
CAUTION

18
Adjusting the Tine Down Pressure
Adjust the plug depth by rotating the tine down
pressure control. Rotate the control
counterclockwise to decrease the hydraulic down
pressure to remove a shorter plug. Rotate
clockwise to increase pressure and pull a longer
plug.
First time use: set the pressure to 350 psi (24 bar).
Ideal plug depth is 3-4 inches (7.6–10 cm). Rotate
the plug depth control to adapt to the soil
conditions.
Keep the drive tires on the ground at all times.
Raising the Tines
To raise the tines, remove your foot from the
tines ground engagement foot switch.
Important: The tines are rotating when the
motion control lever is moved out of the
neutral position.
Stopping the Engine
1. Move the motion control levers back to the
neutral position and bring the unit to a full
stop.
2. Lift your foot off of the tine ground
engagement foot switch control to raise the
tines.
3. Place the throttle in the midway between the
“SLOW” and “FAST” positions.
4. Allow the engine to run for a minimum of 15
seconds, then turn the ignition switch to the
“OFF” position to stop the engine.
5. Remove the key to prevent children or other
unauthorized persons from starting the
engine.
6. Close the fuel shut-off valve when the
machine will not be in use for a few days,
when transporting, or when the unit is parked
inside a building.
Driving the Machine
Machine can spin very rapidly by positioning
one lever too much ahead of the other.
Operator may lose control of the machine,
which may cause damage to the machine or
injury.
Use caution when making turns.
Slow the machine down before making
sharp turns.
Important: To begin movement (forward or
backward), the brake lever must be disengaged
(pushed forward) before the motion control levers
can be moved or the engine will stop.
Figure 5
1. LH Motion control lever
5. Forward
2. RH Motion control lever
6. Neutral
3. Front reference bar
7. Reverse
4. Front of unit
Driving Forward
1. Make sure the motion control levers are in the
neutral position.
2. Release the parking brake.
3. To move forward in a straight line, move both
levers forward with equal pressure.
To turn left or right, pull the motion control
lever back toward neutral in the desired turn
direction. The tines can be in the down
position when making gradual turns.
To make zero turns, lift your foot off of the
tine engagement foot switch control to raise
the tines. The head will raise in one second.
Important: Do Not make a zero turn when
the tines are down as turf tearing will result.
CAUTION

19
The machine will move faster the farther the
motion control levers are moved from the
neutral position.
4. To stop, position both motion control levers
in the neutral position.
Figure 6
Driving in Reverse
1. Move the motion control levers to the neutral
operate position.
2. To move rearward in a straight line, slowly
move both levers rearward with equal
pressure.
Figure 7
To turn left or right, release pressure on the
motion control lever toward the desired turn
direction.
To make zero turns, lift your foot off of the
tines ground engagement foot switch to raise
the tines. The head will raise in half second.
Important: Do Not make a zero turn when
the tines are in the down position.
3. To stop, position both motion control levers in
the neutral operate position.
Transporting
Transporting a Unit
Use a heavy-duty trailer or truck to transport the
machine. Lock brake and block wheels. Securely
fasten the machine to the trailer or truck with
straps, chains, cable, or ropes. Be sure that the
trailer or truck has all necessary lighting and
marking as required by law. Secure a trailer with a
safety chain.
This unit does not have proper turn signals,
lights, reflective markings, or a slow moving
vehicle emblem. Driving on a street or roadway
without such equipment is dangerous and can
lead to accidents causing personal injury.
Driving on a street or roadway without such
equipment may also be a violation of State laws
and the operator may be subject to traffic
tickets and/or fines.
Do Not drive unit on a public street or
roadway.
CAUTION

20
Loading a unit on a trailer or truck increases
the possibility of backward tip-over. Backward
tip-over could cause serious injury or death.
Use extreme caution when operating a
unit on a ramp.
Use only a single, full width ramp; Do Not
use individual ramps for each side of the
unit.
If individual ramps must be used, use
enough ramps to create an unbroken ramp
surface wider than the unit.
Do Not exceed a 15 degree angle between
ramp and ground or between ramp and
trailer or truck.
Avoid sudden acceleration while driving
unit up a ramp to avoid tipping backward.
Avoid sudden deceleration while backing
unit down a ramp to avoid tipping
backward.
Loading a Unit
Use extreme caution when loading units on
trailers or trucks. One full width ramp that is wide
enough to extend beyond the rear tires is
recommended instead of individual ramps for
each side of the unit. If it is not possible to use
one full width ramp, use enough individual ramps
to simulate a full width continuous ramp.
Ramp should be long enough so that the angles
between the ramp and the ground and the ramp
and the trailer or truck do not exceed 15 degrees.
A steeper angle may cause aerator components to
get caught as the unit moves from ramp to trailer
or truck. Steeper angles may also cause the unit to
tip backward. If loading on or near a slope,
position the trailer or truck so it is on the down
side of the slope and the ramp extends up the
slope. This will minimize the ramp angle. The
trailer or truck should be as level as possible.
Important: Do Not attempt to turn the unit
while on the ramp, you may lose control and
drive off the side.
Avoid sudden acceleration when driving up a
ramp and sudden deceleration when backing
down a ramp. Both maneuvers can cause the unit
to tip backward.
WARNING
Table of contents
Other Lawn Solutions Tiller manuals