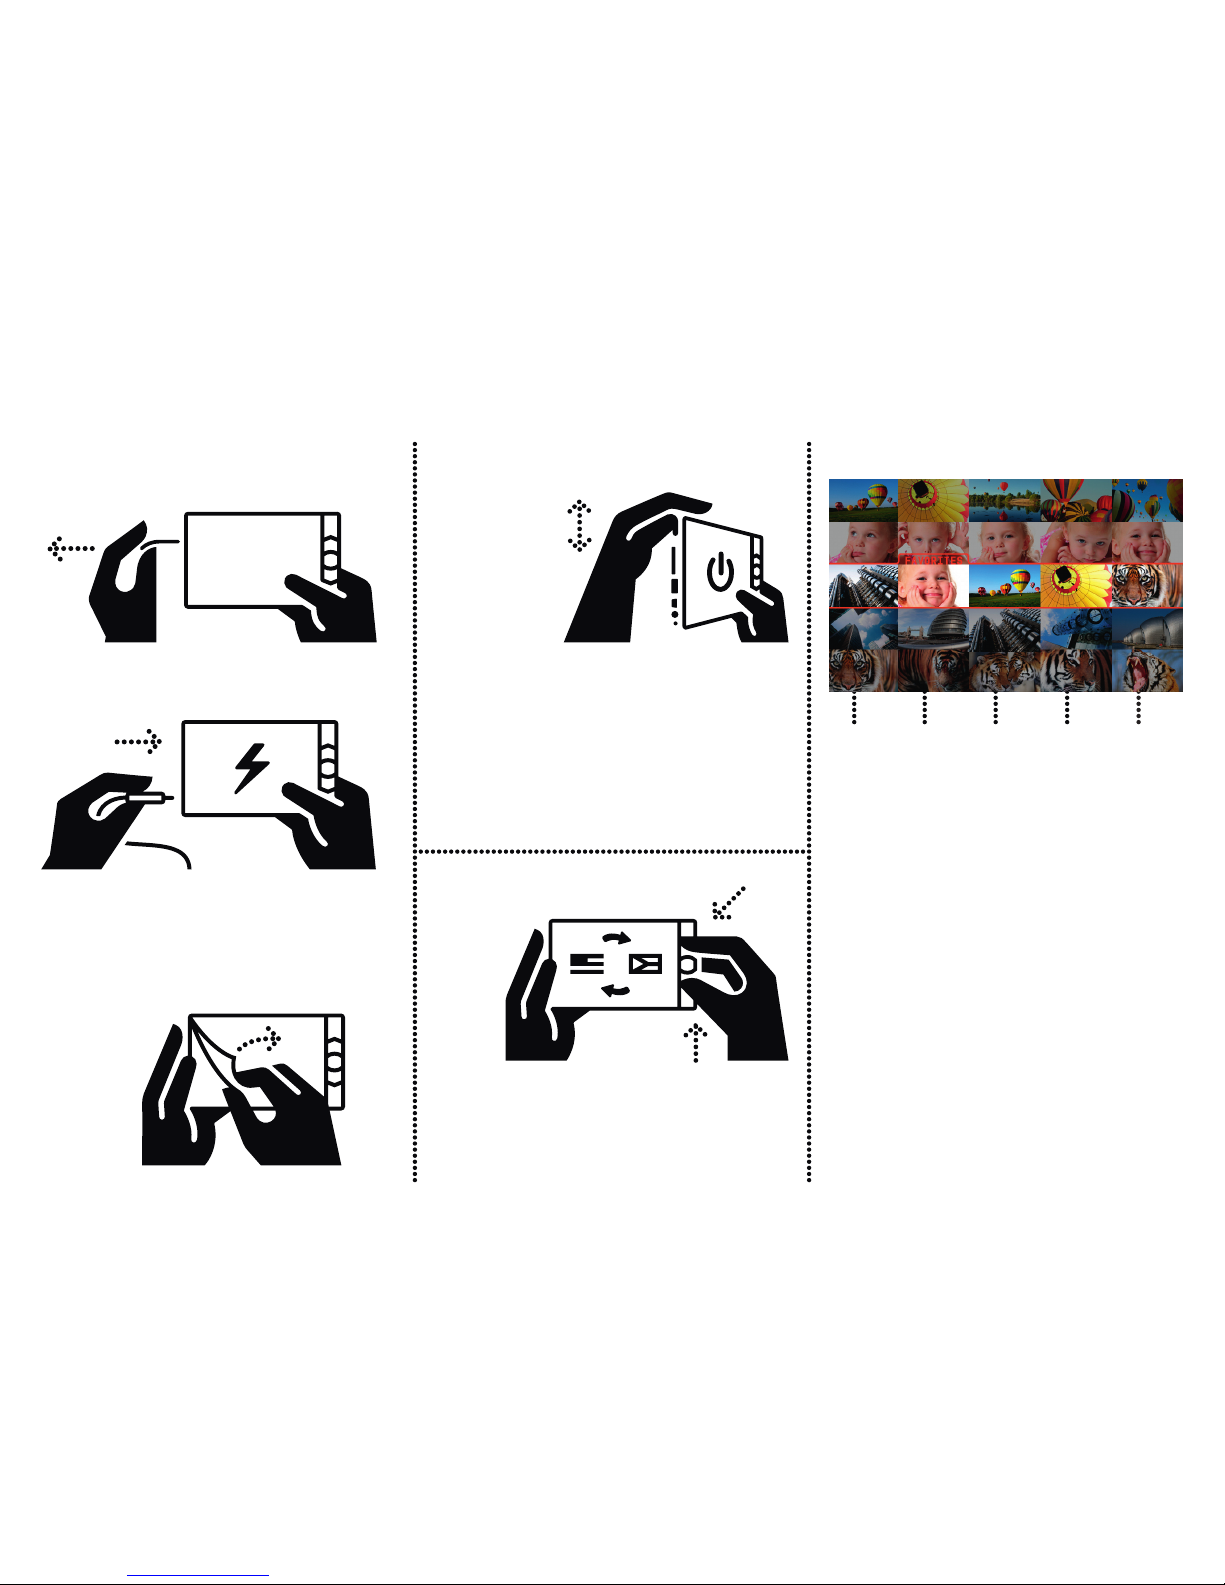
DOWNLOAD ALL from CONNECTED
VIEW PHOTOS from CONNECTED
BACK
I WANT to
LANGUAGE
FULL SCREEN
AUTO SLIDESHOW
POWER SAVING
BACK
BRIGHTNESS
LOCK
RESIZE PHOTOS while DOWNLOADING
DELETE PHOTOS while DOWNLOADING
CLEAN-UP
RESET
12567 PHOTOS in Album (43%) | FW 1.23
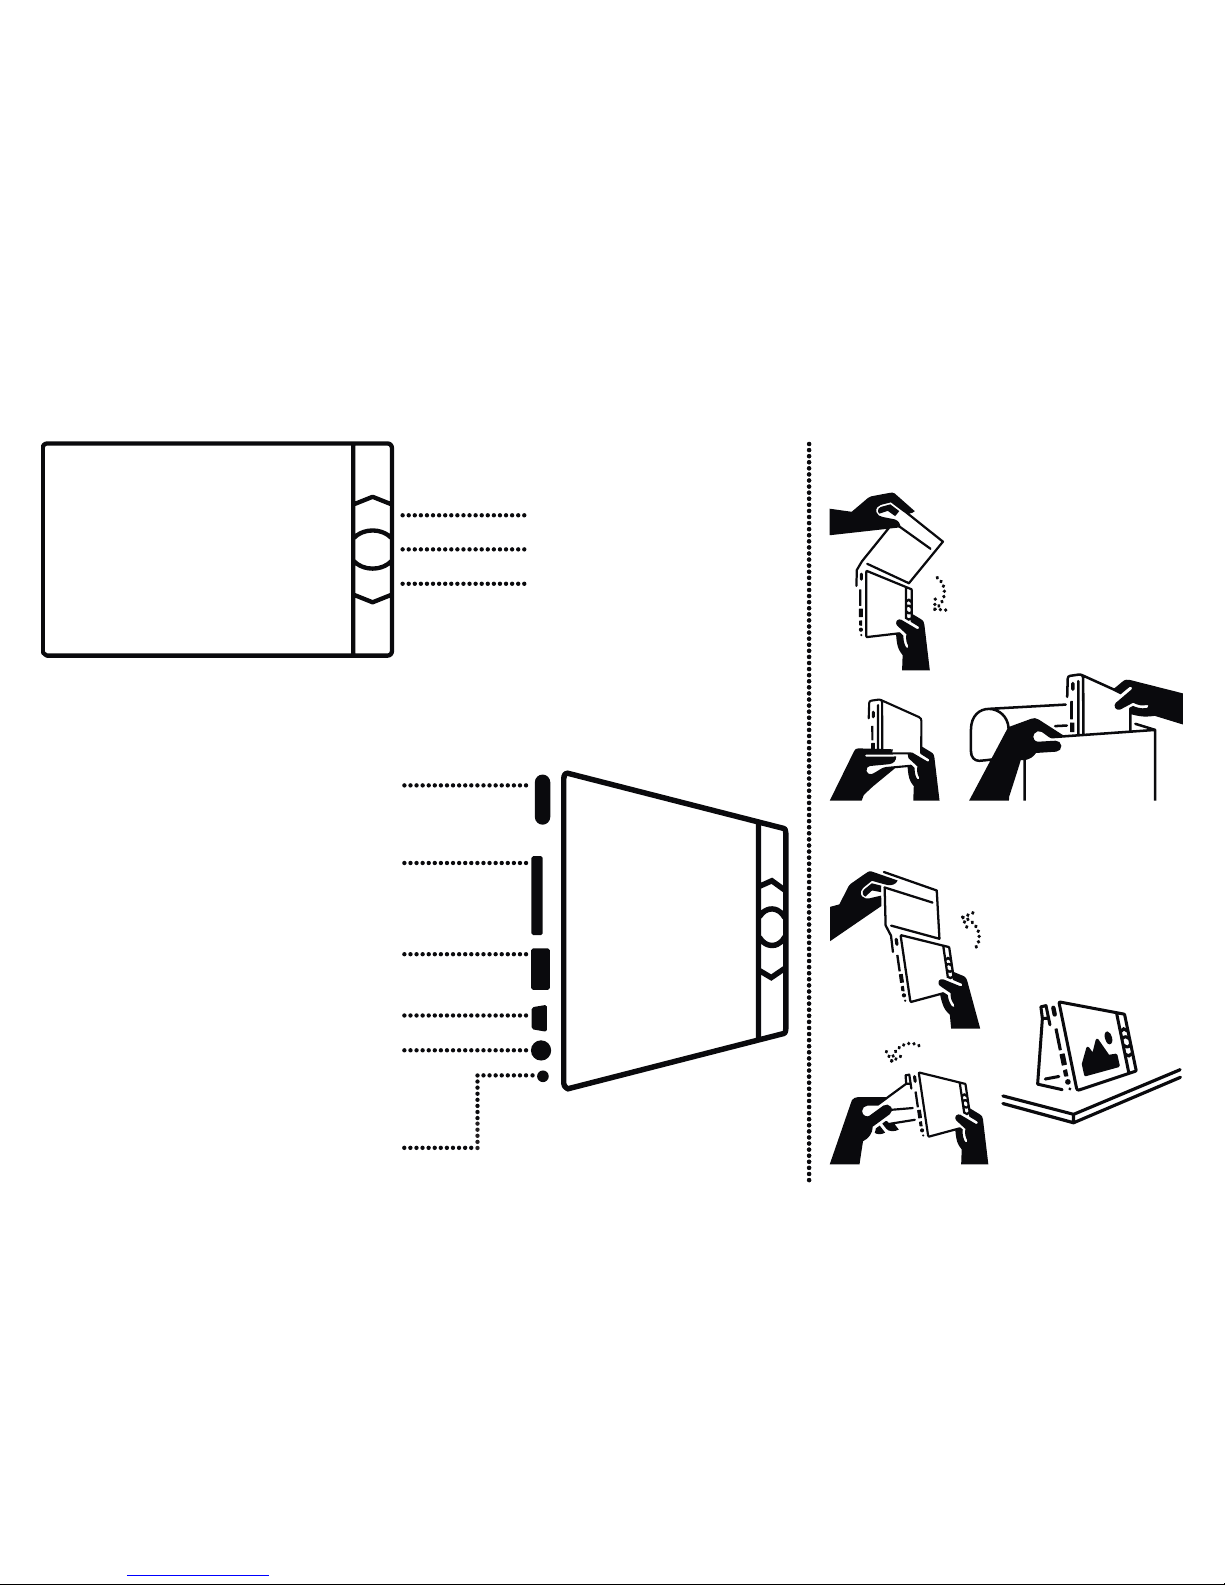
CONNECTING USB MEMORY
DEVICE, DIGITAL CAMERA,
OR SD CARD
When an external device is connected, the “I WANT to” menu
appears:
ADVANCED SETTINGS
From the control menu, it is possible to enter the ADVANCED
SETTINGS menu: DOWNLOAD ALL from CONNECTED
Creates a new directory (GALLERY) in ALBUM and stores
all photographs found in an external device to it. Copied
photographs and the download process status indicator are
shown on the screen during the download. If the “RESIZE
PHOTOS while DOWNLOADING” command is ON – see
ADVANCED SETTINGS – while the photographs are copied
to ALBUM, they are resized to optimize the viewing quality of
the ALBUM screen (factory setting is ON). The photographs
downloaded to ALBUM can also be automatically deleted
from a connected device using the “DELETE PHOTOS while
DOWNLOADING” command - see ADVANCED SETTINGS.
This command prevents copying of the same photographs
during subsequent downloads from the external device (factory
setting is OFF).
VIEW PHOTOS from CONNECTED
Displays photographs thumbnails found in a connected
device. If there are more directories containing photographs
in a connected device, ALBUM displayed them as a separate
“GALLERIES”. If the connected device contains other data
LANGUAGE
Selects the language of the ALBUM. The language is selected using
the arrow buttons and the selection is confirmed by pressing the
middle button. The language selection menu is also made available
by holding both arrow buttons down at the same time (in case
you select a language you do not understand by mistake).
FULL SCREEN
Fills the entire screen with the currently displayed photograph;
it also rotates the photographs from portrait orientation to view
in landscape orientation; factory setting is ON.
AUTO SLIDESHOW
Automatically starts a slideshow when a directory is selected;
factory setting is OFF.
POWER SAVING
When working of the battery power supply, after about 2
minutes of inactivity, the command switches ALBUM to an
energy saving mode. The screen turns off and a red “ALBUM”
logotype blinks on the screen). Press any button to resume
regular operation; factory setting is ON.
BACK
Returns ALBUM to viewing photographs.
BRIGHTNESS
Sets the brightness of ALBUM screen. Be careful – high
brightness decreases the battery-powered operation time.
If the battery is running low, the brightness is reduced
automatically.
LOCK
if lock is ON, it is not possible to delete or copy the photographs
to and from ALBUM. The lock is disabled from the ADVANCED
SETTINGS menu only; factory setting is OFF.
RESIZE PHOTOS while DOWNLOADING
If the command is ON, the photographs, while downloading
to ALBUM, are resized to optimize the viewing quality
of the ALBUM screen; factory setting is ON. Be careful,
the compression is irreversible; factory setting is ON.
DELETE PHOTOS while DOWNLOADING
If the command is ON, the photographs, when copied to
ALBUM, are automatically deleted from a connected device.
This command prevents downloading of the same photographs
during subsequent downloads from the external device.
This function is possible only while downloading, not while
copying photographs or directories; factory setting is OFF.
than photographs (.jpg), ALBUM ignores them. A red symbol
of a digital camera is displayed while viewing the photographs
from a connected device.
BACK
Returns ALBUM to viewing photographs stored in ALBUM.
Caution: If only the “DOWNLOAD ALL from CONNECTED”
option is available when a digital camera is connected, this
particular digital camera uses the USB transfer so-called PTP
protocol. We recommend you to check whether the USB
interface of such camera offers the option to choose a “MASS
STORAGE DEVICE” mode. In this mode, ALBUM offers all the
above-mentioned commands.