JADEMAR LIGHTING JSLCT-SOL Series User manual

• Sculpture/Memorial
• Billboard/sign
• Pathway
• Sign boards
• Wall washer
• Garden feature
• Commercial product
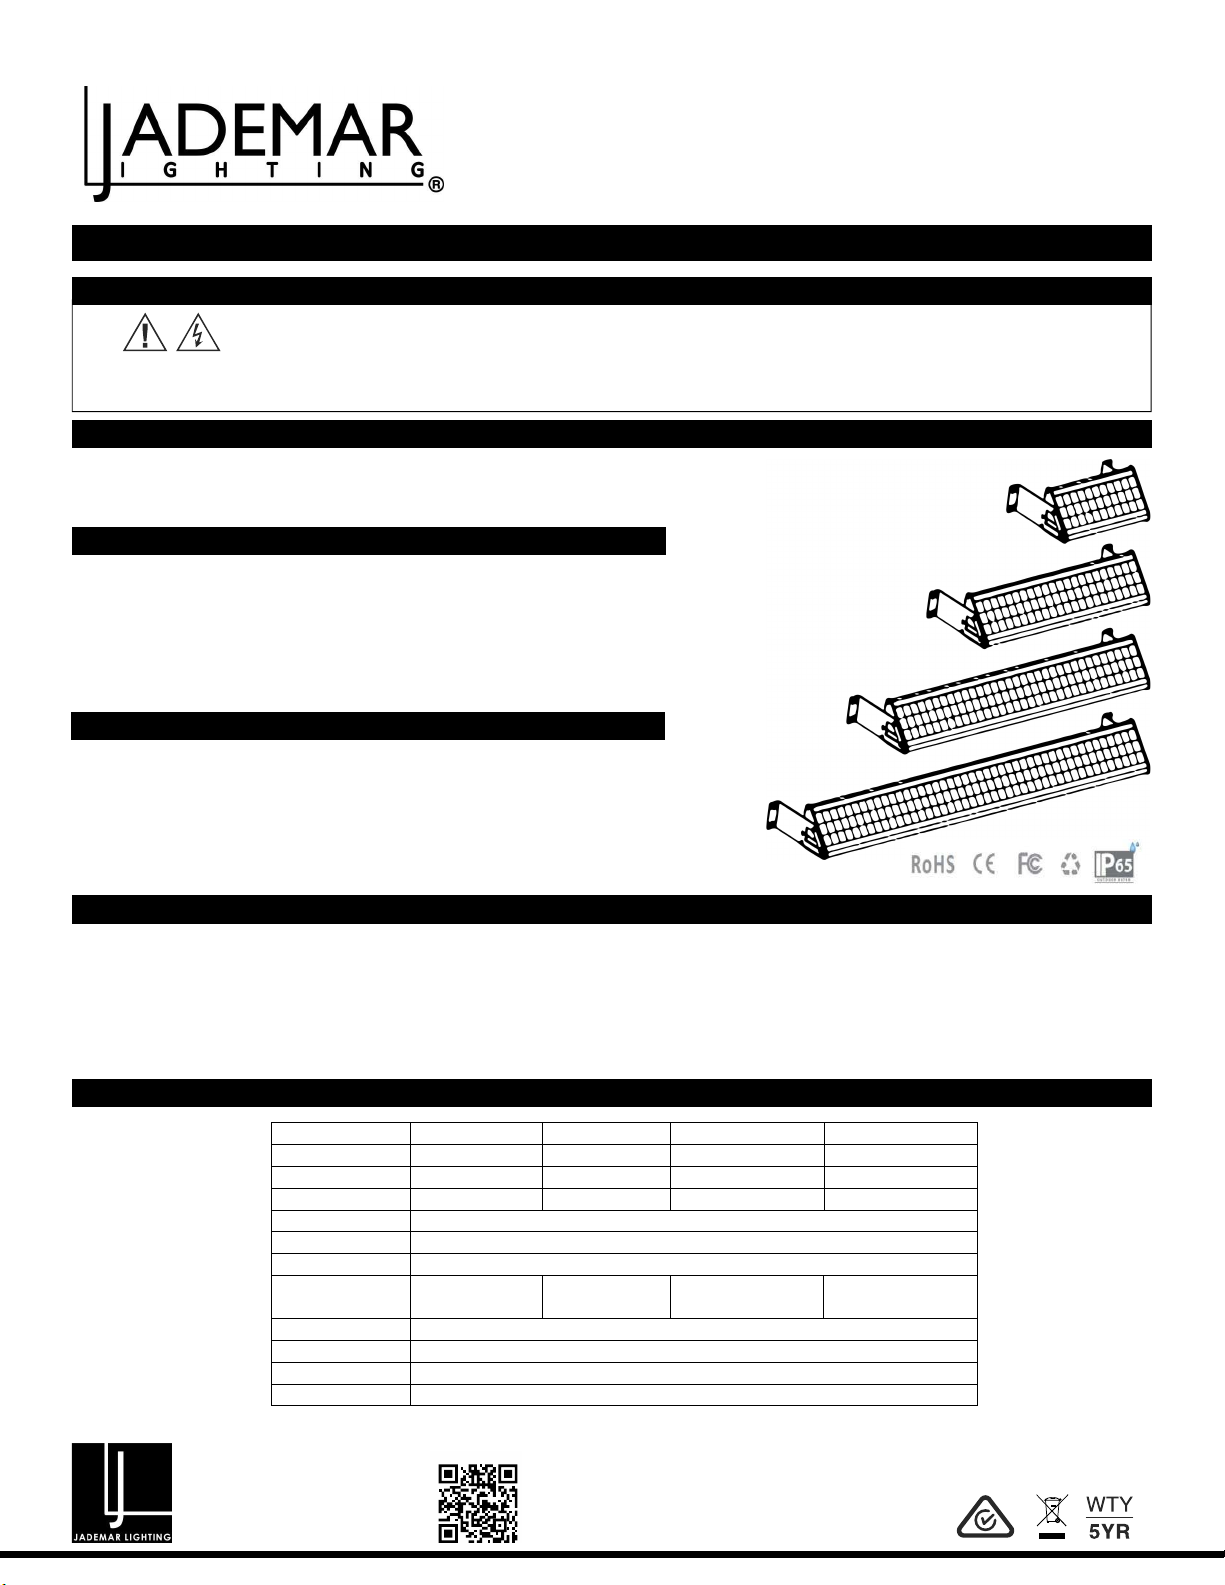
Model-31
Model-60
Model-90
Model-120
Model-3 Model-61 0 Model-90 Model-120
Solar Panel Po r we 5.5V 4.5W 5.5V 9W 5.5V 13W 5.5V 17W
Bat eryt 3.7V 8800mAh 3.7V 17600mAh 3.7V 26400mAh 3.7V 35200mAh
LED Po r we 5W 10W 15W 20W
Chargin Time g 8-9 Hou s(10r 00W/㎡)
LED Color Warm white/Natural white/Cool white
LED Life Time >50000 Hours
Product Size 300*95*95mm 600*95*95mm 900*95*95mm 1200*95*95mm
Beam Angle 120 Degree
Material Aluminum Alloy+PC
Con roller t Sunshine Control Automatic
Work Mode 4 hrs full bright + 25% brightness dim till dawn
INSTALLATION REQUIREMENTS
WARNING: Risk of electric shock and serious injury. SHUT OFF BREAKER AT PANEL BEFORE INSTALLING.
J T-SOL SERIES SLC OFF-GRID SOLAR SIGN LIGHT
WWW.JADEMAR.COM
Miami, FL USA - info@jademar.com
T: 305.640.0465 - F: 305.640.0468 Revised /2001 22
Page of 1 3
INSTALLATION INSTRUCTIONS
Please read these instrucons before installaon to ensure opmum results and longevity of your lights. The solar panel should be charged in full sunlight for 6 to 8
hours before first use to obtain opmum results.
1.0 PACKAGE CONTENTS
1. Solar Panel and Baery box with LED array (1 pcs)
2. Wall brackets (2 pcs)
3. Instrucon sheet (1 pcs)
2.0 APPLICATIONS
3.0 FEATURES
• Easy installaon- no electrical wiring required with integrated design.
• Turns on automacally at night and off during the day.
• The lights include an On/Off switch and built in baery.
• Baery can support 2-3 nights with cloudy days.
• When the baery is full charged in sunlight, the lights will operate up to 3 nights.
• Intelligent power saving mode increases lighng x 1.5 mes.
• IP65 water and dust resistance.
4.0 HOW THE SOLAR PANEL WORKS
During the day, the solar panel converts sunlight into electricity to charge the baery. At night, the lights turn ON automacally using the electricity stored in the
baery. The performance of the solar lights is dependent on the locaon of the solar panel and/ or weather condions. Install the solar panel in a sunny posion
ensuring it receives 6-8 hours sunlight each day. Reduced sunlight will reduce connuous working hours at night.
Please note: during connuous wet & overcast days, lighng me may be reduced as the baery will not be fully charged. The lights may stop working during
longer rainy periods of more than 5 days & will return to normal funcon when the sun returns. Aer an extended period of poor weather restore the baery
power by turning the unit off and, fully charge the baery for 8 hours in full sunlight.
5.0 PRODUCT PARAMETERS

JSLCT-SOL SERIES OFF-GRID SOLAR SIGN LIGHT
WWW.JADEMAR.COM
Miami, FL USA - info@jademar.com
T: 305.640.0465 - F: 305.640.0468
6.0 INSTALLATION STEPS - INSTALLATION WITH BRACKETS
Revised 01/2022
Page of 2 3
1. Using the brackets as a template, mark out and drill the mounng holes for the bracket. Insert the wall anchors provided.
2. Fix the two brackets onto the sides of the light. Use the exisng screws in the bracket fixing locaon by removing the screws and reinstang them with the
brackets in place.
3. Install the brackets into the pre-drilled wall holes making sure to use the washers. Tighten the screws and check the unit is square and straight.
4. Turn on the main power buon to acvate the LED display under the solar panel.
(Model-3 0 only) 1 and Model-6
7.0 INSTALLATION STEPS - DIRECT FIXED TO THE WALL
1. Mark out and drill the mounng holes to correspond with the mounng locaons on the light. Insert the wall anchors provided.
2. Insert the screws into the wall anchors and ghten.
3. Directly hang the unit onto the screws, ensuring the unit is square and straight.
4. Turn on the main power buon to acvate the LED display under the solar panel.
Notes:
1. All screws and bolts must be ghtened firmly.
2. Only press the main power buon once. The light will operate automacally at night.
3. Please charge the product for 6-8h before use.
8.0 NOTES
1. The solar light will automacally turn off when it detects low voltage from the baery. This may happen aer 3-4 cloudy days. For best charging performance,
please place light in direct sunlight.
2. To test the light during daylight hours, fully cover the solar panel and press the main power buon.
Note: This product uses a series of 3.7V, 2200mAh rechargeable lithium baery
BATTERY WARNINGS – Do not dispose of baeries in regular household waste. Do not get the baeries wet, hot or in contact with flames.
Dispose of baeries at your local baery recycle center. Do not expose to flames or other corrosive material. Follow aviaon safety
guidelines were applicable.
INSTALLATION INSTRUCTIONS

WWW.JADEMAR.COM
Miami, FL USA - info@jademar.com
T: 305.640.0465 - F: 305.640.0468 Revised /2001 22
Page of 3 3
JSLCT-SOL SERIES OFF-GRID SOLAR SIGN LIGHT
9.0 BATTERY REPLACEMENT
Step 2: This step is very important,
be sure to disassemble (unscrew)
the mounng
bracket
and
end
cap
on the button side of the light
fing.
Step 3: After open the end cap at the
buon
side,
removing
the
quick
connecon cable clamps smoothly to
avoid damaging the wire.Disconnect the
wires marked
(S h/LED/display)olar/switc
and gently
slide
out
the
baery
pack.
Step4:
a.Ensure replacement
baery
compartment
is
inserted
in
the correct direcon:
1. Cables
marked
(display/LED)
insert
towards
LED
display
2.Cables mark de with (solar/switch) extend towards
ON/OFF buon
side.
b.R coe nnect
the cables marke ar/Switc )d(display/LED/Sol h
respecvely, then slide over connector isolaon covers
(clear silicon cove sr ). Slide the baery back into the SSL
fixture.
Step 5: a.Replace buon end capto light fing then ghten
screws firmly. Note: Do not over ghten as aluminum threads will
strip.
b.
To
reset
and
test
push
in
the
ON/OFFbuon
and
ensure all the
solar panel is covered to prevent UV light reaching the surface.
The
light
will
turn
ON
automacally.
Note:
Leaving
the
ON/OFF
buon engaged and covering the solar
panel will cause the SSL fixture to turn ON automacally. When
the solar panel is unco erv ed and expose it to light the
LED’s will
immediately
turn
OFF
and
baery
will
begin
to charge.
Performing
this
test
will
det rminee
if
the
baery
replacement
was
succe fss ul.
If
the
above
does
not
occur
then
installaon steps
must
be
repeated,
double
checking
connectors
are
in correct
order.
Step6:
Line
up
all
sc wre s
on
the
back
of
the
light
fing,
then ghten.
This is best done before re-fing the end cap, as
the baery
compartment can be maneuvered to help line up back screws.
Step
7:
Check
all
seals
and
fing
are
in
place,
then
re-install buon
end
cap
and
mo ngun
brackets, ghten screws firmly. (do not
cross thread screws. All screws should be done up by fingers
before using a screwdriver to finish.
Step1: Loosen rear facing sc wre s
on main frame, ensure the baery
box is loose (free) to move.
Switch
Display Solar
Led
INSTALLATION INSTRUCTIONS
This manual suits for next models
4
Other JADEMAR LIGHTING Outdoor Light manuals