JBL ON TIME MICRO User manual

English............................... 2
Français.......................... 15
Deutsch........................... 28
Italiano............................ 41
Español ........................... 54
Nederlands..................... 67
한 글............................... 80
Dansk .............................. 93
Japanese...................... 106
中文............................... 119
Русский
......................... 132
Svenska ........................ 146
Suomi ............................ 159
Norsk............................. 172
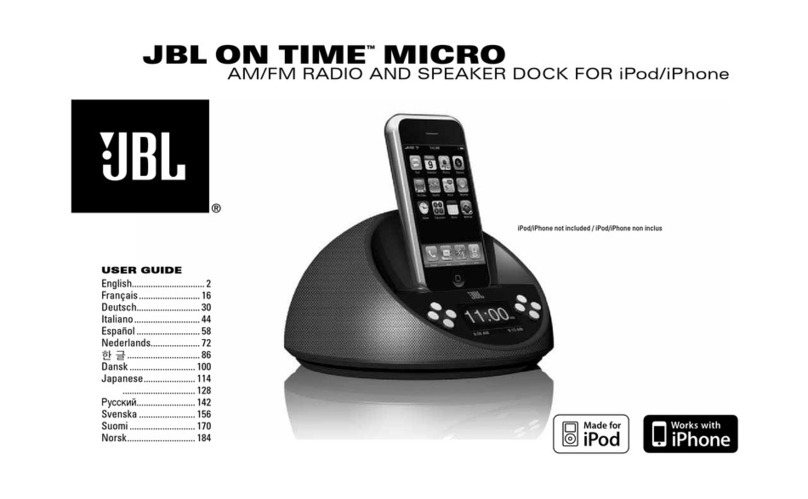
JBL ON TIME™MICRO
AM/FM RADIO AND SPEAKER DOCK FOR iPod/iPhone
USER GUIDE
iPod/iPhone not included / iPod/iPhone non inclus

2JBL ON TIME MICRO USER GUIDE
Read these instructions, heed all warnings and keep for future reference.
•
Do not use this apparatus near water.
•
Clean only with a dry cloth.
•
Do not block any ventilation openings; a minimum distance of 10mm around the entire apparatus is required for sufficient ventilation.
•
No naked flame sources, such as lighted candles, should be placed on or near the apparatus.
•
Attention should be drawn to the environmental aspects of battery disposal.
•
The apparatus is to be used in moderate climates only.
•
Do not install near any heat sources such as radiators, heat registers, stoves or other apparatuses (including amplifiers) that produce heat.
•
Protect the power cord from being walked on or pinched, particularly at the plugs and convenience receptacles, and at the point where they exit from the
•apparatus.
Only use attachments/accessories specified by the manufacturer.
•
Unplug this apparatus during lightning storms or when unused for long periods of time.
•
Refer all servicing to qualified service personnel. Servicing is required when the apparatus has been damaged in any way, such as the power supply
•cord or plug is
damaged, liquid has been spilled or objects have fallen into the apparatus, or the apparatus has been exposed to rain or moisture, does not operate normally, or has
been dropped.
To be completely disconnected from the power input, the main plug of the AC/DC adapter shall be disconnected from the main.
•
The main plug of the AC/DC adapter should not be obstructed OR should be easily accessed during intended use.
•
The marking information is located at the bottom of the apparatus.
•
The battery shall not be exposed to excessive heat such as sunshine, fire or the like.
•
The apparatus and AC/DC adapter shall not be exposed to dripping or splashing, and no objects filled with liquids, such as vases, shall be placed on the apparatus
•and AC/DC adapter.
TO PREVENT THE RISK OF ELECTRIC SHOCK, DO NOT REMOVE THE COVER (OR BACK). THERE ARE NO USER-SERVICEABLE PARTS INSIDE THIS UNIT. PLEASE
•REFER SERVICING TO QUALIFIED HARMAN CONSUMER GROUP, INC., SERVICE PERSONNEL.
Never remove grille covers in order to service the speaker system. The speaker system does not contain any user-serviceable parts.
•
IMPORTANT NOTE FOR ALL ELECTRONIC PRODUCTS:
Before inserting or unplugging audio cables from the source device’s headphones or line-level output jacks, it is good practice to turn off the device
first. This will prolong the life of your unit, help protect your device from static electricity and prevent potential damage.
IMPORTANT SAFETY INSTRUCTIONS
PLEASE READ THE FOLLOWING PRECAUTIONS BEFORE USE:

3
FCC STATEMENT AND WARNING
This device complies with Part 15 of the FCC Rules. Operation is subject to the following two conditions: 1) this device may not cause harmful interference, and
2) this device must accept any interference received, including interference that may cause undesired operation.
This equipment has been tested and found to comply with the limits for a Class B digital device, pursuant to Part 15 of the FCC Rules. These limits are
designed to provide reasonable protection against harmful interference in a residential installation. This equipment generates, uses and can radiate radio
frequency energy and, if not installed and used in accordance with the instructions, may cause harmful interference to radio communications. However,
there is no
guarantee that interference will not occur in a particular installation. If this equipment does cause harmful interference to radio or television reception,
which can be determined by turning the equipment off and on, the user is encouraged to try to correct the interference by one or more of the following
measures:
Reorient the receiving antenna.• Increase the separation between the equipment and receiver.• Connect the equipment into an outlet on a circuit different from that to which the receiver is connected.• Consult the dealer or an experienced radio/TV technician for help.•
Any special accessories needed for compliance must be specified in the instruction manual.
MODIFICATIONSNOTEXPRESSLYAPPROVEDBYTHEMANUFACTURERCOULDVOIDTHEUSER’SAUTHORITYTOOPERATETHEEQUIPMENTUNDERFCCRULES.
The normal function of the product may be disturbed by strong electromagnetic interference. If so, simply reset the product to resume normal operation by
following the instruction manual. In case the function could not resume, please use the product in another location.
WARNING: TO PREVENT FIRE OR
ELECTRICAL SHOCK HAZARD, DO NOT EXPOSE
THIS PRODUCT TO RAIN OR MOISTURE.
WARNING: THE APPARATUS SHOULD
NOT BE EXPOSED TO DRIPPING OR SPLASHING
AND NO OBJECTS FILLED WITH LIQUID, SUCH AS
VASES, SHOULD BE PLACED ON THE APPARATUS.
THE EXCLAMATION
POINT WITHIN
THE TRIANGLE IS
A WARNING SIGN
ALERTING YOU
TO IMPORTANT
INSTRUCTIONS
ACCOMPANYING
THE PRODUCT.
CAUTION: TO REDUCE
THE RISK OF SHOCK, DO
NOT REMOVE COVER. NO
USER-SERVICEABLE PARTS
INSIDE. REFER SERVICING
TO QUALIFIED SERVICE
PERSONNEL.
THE LIGHTNING
FLASH AND
ARROWHEAD
WITHIN THE
TRIANGLE IS A
WARNING SIGN
ALERTING YOU
TO DANGEROUS
VOLTAGE INSIDE
THE PRODUCT.
RISK OF ELECTRIC
SHOCK — DO NOT OPEN
IMPORTANT:
THE APPROPRIATE ADAPTER MUST BE INSTALLED BEFORE
INSERTING YOUR iPod/iPhone INTO THE JBL®PRODUCT.
MAKE SURE THAT THE CONNECTOR FOR THE iPod/iPhone IS
PROPERLY ALIGNED WITH THE JBL PRODUCT’S CONNECTOR
WHEN INSTALLING YOUR iPod/iPhone. FAILURE TO DO SO
MAY CAUSE PERMANENT DAMAGE TO THE CONNECTOR FOR
THE iPod/iPhone, RENDERING THE iPod/iPhone INOPERABLE.
WWW.JBL.COM
CAUTION
English
Declaration of Conformity
We, Harman Consumer, Consumer Division
8500 Balboa Blvd.
Northridge, CA 91329
USA
As the manufacturer and through our representative within the EU
Harman Consumer, Consumer Division
2, route de Tours
72500 Chateau du Loir
France
Do declare under our sole responsibility that the product listed
below conforms to the requirements of the Directive(s) and
Standards listed here in.
Type of Equipment: iPod docking clock radio
Model(s): OT Micro
Directives to which Conformity is declared:
2004/108/EC – EMC Directive, as amended.
2006/95/EC – Low Voltage Directive, as amended
2004/32/EC – Energy Using Products Directive, as amended
Harmonized Standards Applied to show Conformity:
EN 55013:2001+A1:2003+A2:2006
EN 55020:2007
EN 61000-3-2:2006
EN 61000-3-3:1995+A1:2001+A2:2005
EN 60065:2002+A11:2008
EN 60825-1:2007
Richard Metcalfe
Product Manager
Château du Loir, France 08/09

4
JBL ON TIME™MICRO
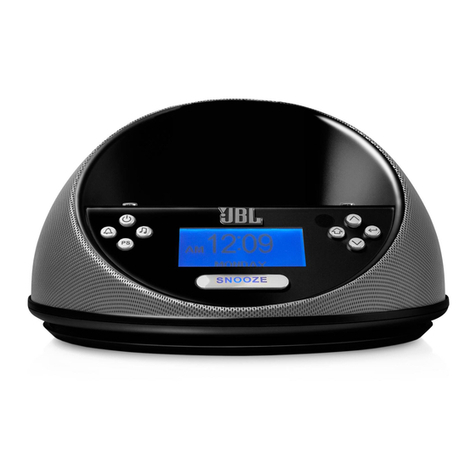
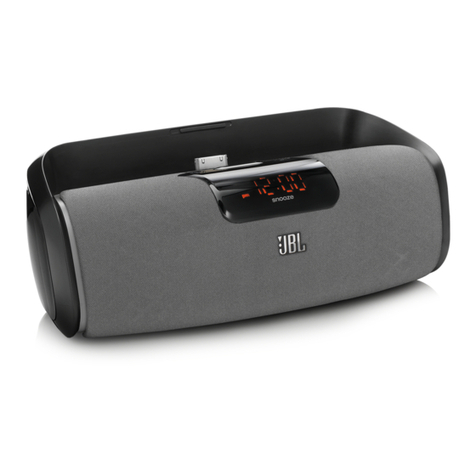
The JBL On Time™Micro high-performance loudspeaker dock and clock radio for iPod/iPhone will revolutionize the way you listen to your
radio, use your iPod/iPhone, and wake from a good night’s sleep.
The JBL On Time Micro system is a revolution in time travel. Imagine waking up to music on your favorite station or your iPod/iPhone,
with no more buzzer or bad radio reception. The compact time machine and sound center, when connected to your iPod/iPhone, MP3
player or other music source, produces clean, powerful sound while providing time-keeping, alarm and radio features.
The JBL On Time Micro loudspeaker dock has full ability to navigate your iPod via IR remote. Also, not only can you wake up to your
favorite radio station or song on your iPod/iPhone, but with the multiple alarm setting option, you can set up to seven different alarms for
“His” and “Hers,” at whatever day or frequency needed.
EVERCHARGE TOPOLOGY
The JBL On Time Micro speaker dock charges your iPod/iPhone, even when the system is off. The system’s memory is maintained by a
backup battery. Even with the power out, it will provide the alarm function.
COE (COMPUTER-OPTIMIZED EQUALIZATION)
The JBL On Time Micro system equalization is computer-optimized to provide a rich, complete soundstage.
OCT (OPTIMIZED COMPRESSION TOPOLOGY)
The JBL On Time Micro radio and loudspeaker dock utilizes a proprietary compression technology to ensure clean, accurate sound at
high output levels.
DISPLAY
The large, backlit LCD enables easy viewing and menu navigation. Automatic dimming sets the correct brightness level in any
room environment.
JBL ON TIME MICRO USER GUIDE

5
2
UNPACKING YOUR JBL ON TIME™MICRO
Carefully unpack your speaker system and identify all its components:
Apple Adapter
IR remote
QUICK SETUP INSTRUCTIONS
•Place Apple adapter into the docking unit, if necessary. Then place your iPod/iPhone into the adapter.
•For backup memory, install three AAA batteries in the battery compartment underneath the unit.
•Connect the external AM antenna for better reception.
•Unwind the FM antenna and straighten the wire for the best reception.
•Plug the power adapter into the “DC In” jack and then plug the adapter into a wall outlet.
•If an additional audio source is used, connect the source to the “Aux In” jack (cable sold separately).
JBL On Time™Micro Power supply AM antennaFM antenna
WWW.JBL.COM
English
Aux In DC In

6
Note: During clock-setting, if there is no user input for 2 seconds, display will return to the Now Playing screen. Press any one of the Enter, Up/Down arrows, or
Menu/Up Level to return to setting selection.
CONTROLS
Setting the Clock
Press Menu/Up Level at any screen to display Top Menu (may require repeated presses, depending on which menu state the unit1. was previously in).
Use Up/Down arrows to highlight Clock. Press Enter to confirm.2.
Use Up/Down arrows to highlight 12-hour or 24-hour format. Press Enter to confirm.3.
Use Up/Down arrows to set Hour. Press Enter to confirm. Minute field becomes highlighted.4.
Use Up/Down arrows to set Minutes. Press Enter to confirm. AM/PM field becomes highlighted.5.
Use Up/Down arrows to set Day of Week. Press Enter to confirm. The clock is set!6.
Base Unit Control
Power Select Up
Preset Select Down
Alarm Menu/Up LevelSource Enter
Navigation
JBL ON TIME MICRO USER GUIDE

7
Playing Music
Press Source button to select the source (iPod/iPhone, AM, FM, Aux).1.
Press “+” button to increase volume.2.
Press “–” button to decrease volume.3.
Radio Tuning
If AM or FM radio is already selected and playing, use Up/Down arrows to1.
tune frequency; hold either button and release to scan for the next station.
Otherwise, press Source until FM or AM is selected.2.
Tune to the desired frequency using Up/Down arrows; hold either button and3.
release to scan for the next station.
Setting Presets
While listening to AM/FM radio, press and hold Preset for 2 seconds.1.
The Radio Preset screen will be displayed.
Use Up/Down arrows to select slot to store preset. Press Enter to confirm.2.
Preset is stored!
To Select a Preset for Listening
Press Preset once at any screen to display the Preset list.1.
Use Up/Down arrows to highlight Preset. Press Enter to confirm. Preset station will begin playing!2.
Power
Select Up
Preset
Select Down
Alarm
Menu/Up Level
Source
Enter
WWW.JBL.COM
English
Languages/Region
Press the Menu/Up Level button until you reach the Top Menu screen.1.
Use Up/Down arrows to select Region and press Enter.2.
Use Up/Down arrows to select language. Press Enter.3.
Use Up/Down arrows to select radio band region type. Press Enter.4.

8
Power
Select Up
Preset
Select Down
Alarm
Menu/Up Level
Source
Enter
CONTROLS (CONT.)
Alarm Setting†
Press Menu/Up Level at any screen to display Top Menu (may require repeated presses,1. depending on which menu state the unit was previously in).
Use Up/Down arrows to highlight Alarm. Press Enter to confirm; or press Alarm to go directly to the Alarm menu.2.
Use Up/Down arrows to select an Alarm slot to edit. Press Enter to confirm. Hour field becomes highlighted.3.
Use Up/Down arrows to set Hour. Press Enter to confirm. Minute field becomes highlighted.4.
Use Up/Down arrows to set Minutes. Press Enter to confirm. AM/PM field becomes highlighted.5.
Use Up/Down arrows to set AM/PM. Press Enter to confirm.6.
Use Up/Down arrows to set Day of Week, Weekdays, Weekends, Everyday or One-Time. Press Enter to confirm.7.
Use Up/Down arrows to set Alarm source. Press Enter to confirm. Alarm is set!8.
Note: During alarm-setting, if there is no user input for 2 seconds, display will return to the Now Playing screen. Press any one of the
Enter, Up/Down arrows, or Menu/Up Level to return to setting selection.
† Use this same procedure to modify a previously set Alarm.
To Enable/Disable a Set Alarm
Press Menu/Up Level at any screen to display the Top Menu (may require repeated presses,1. depending on which menu state the unit was previously in).
Use Up/Down arrows to highlight Alarm. Press Enter to confirm;2. or press Alarm to go directly to the Alarm menu.
Use Up/Down arrows to highlight Alarm. Press Alarm to enable/disable the alarm.3. An icon will be displayed on the left when the alarm is enabled, and the alarm will sound at the set time.
Waking to the iPod/iPhone
Use the steps under Alarm Setting and choose “iPod” as the source.1.
On your iPod/iPhone, choose the song you would like to awaken to and press Play.2.
Put your iPod/iPhone to sleep by holding down the Play/Pause button (older iPod models may vary).3.
The JBL On Time Micro system can be put to sleep by pressing the Power button.4.
Note: If you choose the last song on your iPod/iPhone, please place the iPod/iPhone in repeat mode, which will ensure that the iPod/iPhone will continue playing past
the last song.
JBL ON TIME MICRO USER GUIDE

9
Screen Contrast/Brightness
Press the Menu/Up Level button until you reach the Top Menu screen.1.
Use Up/Down arrows to select Display and press Enter.2.
Use Up/Down arrows to select Brightness or Contrast. Press Enter.3.
Adjust settings using Up/Down arrows.4.
Sleep Timer
Press the Menu/Up Level button until you reach the Top Menu screen.1.
Use Up/Down arrows to select Sleep and press Enter.2.
Use Up/Down arrows to select minutes and press Enter.3.
The sleep timer is started and the unit will power off when the timer reaches zero.4.
Snooze Timer Set
Press and hold the Snooze button for 3 seconds until you reach the Set Snooze Timer screen.1.
Use Up/Down arrows to select minutes and press Enter.2.
Snooze feature will use this value the next time it is activated.3.
Note: To set brightness to Auto, press the Down arrow until Auto is highlighted.
WWW.JBL.COM
English

10 JBL ON TIME MICRO USER GUIDE
REMOTE NAVIGATION
Button Function
Turns main unit power on and off. Button is active in any menu state.
Preset the hot key. A single press brings up the preset screen from any menu. Repeated presses cycle through the preset list to the next
preset slot. Press and hold for 2 seconds when listening to the radio and the Now Playing screen is displayed, to store current radio station.
Volume Increase. Display changes to Volume screen. Increases volume level, turns Amps on if off, then increases volume. If in snooze
mode, cancels snooze mode and turns Amps on. Times out back to current menu.
Volume Decrease. If in snooze mode, no action. If not in snooze mode and Amps are on, displays changes to Volume screen and decreases
volume level. Times out back to current menu. Does not turn Amps on if off.
Enter or Selection Confirmation button. Confirms selection on any JBL On Time™Micro settings screen. If Now Playing screen is displayed,
returns to last-used menu screen.
Scroll Up/Tune Up. Moves highlighted box up on any JBL On Time Micro menu setting screen. Increases digit value when setting Time
(hours and minutes) and Snooze Timer. In radio mode, manually increases tuning frequency; hold for Seek.
Scroll Down/Tune Down. Moves highlighted box down on any menu setting screen. Decreases digit value when setting Time (hours and
minutes) and Snooze Timer. In radio mode, manually decreases tuning frequency; hold for Seek.
Menu or Up Level button. If Now Playing screen is displayed, takes user to top-level menu screen. If in menu settings, steps up one level to
previous field or menu screen. Hold for 2 seconds to return to Now Playing screen.
Alarm hot key. Takes user to Alarms settings of menu tree. Button is active in any menu state. If alarm is sounding, turns alarm off. When
viewing alarms list, enables or disables selected alarm.
Snooze button and Snooze Timer setting hot key. If alarm is sounding, enables snooze mode. Press and hold for 2 seconds to enter Snooze
Timer setting screen.
Directly switches the JBL On Time Micro source to iPod/iPhone.
Sends Scroll Down command to iPod/iPhone navigation. Works in iPod/iPhone navigation only.
Sends Scroll Up command to iPod/iPhone navigation. Works in iPod/iPhone navigation only.
Cycles to next source. AM FM iPod/iPhone AUX.
A single press starts sleep time countdown, using currently set timer. Press and hold for 2 seconds to enter Sleep Timer setting screen
(similar to base unit).
Next Track in iPod/iPhone navigation only. Does not affect JBL On Time Micro menu navigation or function.
Previous Track in iPod/iPhone navigation only. Does not affect JBL On Time Micro menu navigation or function.
Enter/Select in iPod/iPhone navigation only. Does not affect JBL On Time Micro menu navigation or function. Similar function to the center
button of the iPod/iPhone.
Menu/Up Level in iPod/iPhone navigation only. Does not affect JBL On Time Micro menu navigation or function. Similar function to the
Menu button of the iPod/iPhone.
Play/Pause/Mute button. When iPod/iPhone is the active source, a single press sends the Play/Pause command to the iPod/iPhone. When
AM, FM or AUX is the active source, a single press mutes audio/amp on the JBL On Time Micro system.

11
JBL ON TIME™MICRO MENU TREE
Clock Display Sleep
HOT KEY POINT
(on remote)
HOT KEY POINT
(on remote or base unit)
Press and hold for 2 sec at
any point in menu structure,
to return to now Playing
screen.
set sleep timer:
15-30-60
WWW.JBL.COM
English
A Selection command
displays setting
confirmation and returns
state to Top Level Menu
screen.
A Selection command
returns state to display
menu screen.
A Selection command
displays setting
confirmation and returns
state to Top Level Menu
screen.
A Selection command
displays setting
confirmation and returns
state to Top Level Menu
screen.
Region
Set Language:
English
Spanish
French
German
Italian
Dutch
Set Radio Type:
U.S.
Europe
Japan
Now Playing
(ON)
Now Playing
(Off)
Alarm
AL1-AL7
Enable/
Disable
Select Alarm
Hr
Min
MO/TU/
WED/TH/FR/
SA/SU/WK/
ED/WE
AM
FM
iPod/
iPhone
Aux
Tone
A Selection command
displays setting
confirmation and returns
state to Top Level Menu
screen.
set day
12H 24H
HR HR
Min Min
am/pm Adjust Adjust
Brightness Contrast

12
JBL ON TIME™MICRO MENU TREE (CONT.)
PRESET
HOT KEY POINT
(on remote or base unit)
SOURCE
HOT KEY POINT
(on remote or base unit)
SNOOZE
HOT KEY POINT
(hold button for 3 sec on base unit)
JBL ON TIME MICRO USER GUIDE
AM FM iPod/
iPhone Aux
Preset 1-10
Select and
begin playing
preset station
Press and hold Preset
button while listening to
radio to store current
station. Select slot 1-10 and
press enter to store.
set snooze
timer
SNOOZE
A Selection command
displays setting
confirmation and returns
state to Top Level Menu
screen.

13
SPECIFICATIONS TROUBLESHOOTING
JBL ON TIME™MICRO SOUND QUALITY
Symptom Possible Problem Solution Note
No sound from the
JBL On Time™Micro unit No power to the unit Make sure the wall power outlet or power strip
has power. Make sure all switches for outlet/
power strip are on and that all switches for speaker
system are on.
Is the display on? If not,
power is not getting to
your JBL On Time Micro;
try the solutions shown.
Incorrect source selection Make sure the correct source is selected; choose
FM radio as a source. Turn up the volume. Check
the system with a known good source, such as your
iPod/iPhone. Connect an Aux In cable (sold sepa-
rately) to the headphone jack on your iPod/iPhone.
No sound or weak signal from
the AM/FM radio Bad reception from current location
Interference
Reposition your JBL On Time Micro unit until you
find better reception.
Check surrounding area for any possible
interference; wrap up any excess cables.
If you are still getting a weak signal
from AM broadcasts, connect the
external AM antenna to the AM
antenna jack.
Sound comes from one
side/channel only iPod/iPhone or audio cable is not seated
properly Make sure the iPod/iPhone or any Aux In cable is
seated all the way into the JBL On Time Micro unit.
Distortion (static, crackling or
hissing sounds) Noise may be caused by interference
from a monitor, cell phone or other
transmitting device
JBL On Time Micro unit is being over-
driven by an amplified audio source
Volume level may be too high
Turn monitor off to see whether noise is eliminated.
Move JBL On Time Micro unit’s cables farther away
from monitor.
Make sure the unit is connected to an appropriate
source device. Make sure all signal cables are
inserted snugly into receptacles.
Check volume of source device; some devices
will distort the output signal if the volume is set to
maximum.
Too much bass or treble Check the EQ setting on your iPod/
iPhone or source device We recommend that the source device EQ be set
to Flat or Off.
JBL On Time Micro unit emits
a loud hum or buzzing noise Aux In cable (if used) is not plugged
in properly Check input cable connection.
Speaker system experiences
radio frequency interference
or picks up a radio station
Aux In cable (if used) may be picking up
interference Wrap up excess input cable to make it as short
as possible.
Purchase a ferrite clamp and attach it over the
input cable; a clamp can be purchased at your local
electronics store.
Frequency Response: 70Hz – 20kHz
Power Consumption: 30 Watts maximum
JBL On Time™Micro Transducer: Phoenix SE
1-3/4" (45mm) x 2 (full range per channel)
Power: 2 x 6 Watts
Input Impedance: >5k Ohms
Signal-to-Noise Ratio: >80dB
Input Sensitivity: 350mV RMS for rated power output
Power (USA/Canada): 120 Volts, 60Hz AC
Power (Europe/UK): 220 – 230 Volts, 50Hz or 60Hz AC
Power (Japan): 100 Volts, 50Hz or 60Hz AC
Power (Australia): 240 Volts, 50Hz or 60Hz AC
UL/CUL/CE-Approved
Dimensions: 8" x 8" x 4-9/16"
(W x D x H) (203mm x 203mm x 116mm)
Weight: 1.8 lb (0.8kg)
Remote Battery: CR2025
WWW.JBL.COM
DO NOT DISPOSE OF ELECTRICAL APPLI-
ANCES AS UNSORTED MUNICIPAL WASTE;
USE SEPARATE COLLECTION FACILITIES.
Contact your local government for informa-
tion regarding the collection systems available.
If electrical appliances are disposed of in landfills
or dumps, hazardous substances can leak into the
groundwater and get into the food chain, damaging
your health and well-being.
IMPORTANT: Use UM4/AAA/LR03 alkaline-type
nonrechargeable batteries only.
English
Pb

14 JBL ON TIME MICRO USER GUIDE
TROUBLESHOOTING
CHARGING AND SYNCING
Symptom Possible Problem Solution Note
iPod/iPhone will not charge Wrong adapter is used Make sure correct adapter is used for your specific
iPod/iPhone model.
The iPod/iPhone is not making full
contact with the docking station Make sure the iPod/iPhone is seated securely into
the docking station.
Symptom Possible Problem Solution Note
Clock is not set to correct time Incomplete setup Be sure to follow the clock setting procedure
through, to the end. A confirmation screen will be
displayed when set completely.
JBL On Time Micro unit does
not retain memory settings
when there is a power outage,
or if the unit is unplugged
There are no batteries installed in
the unit
Batteries may be low
Make sure you install three AAA batteries in the
base of the JBL On Time Micro unit.
If you have installed three AAA batteries, replace
them, as they may be defective.
CLOCK SET AND CLOCK MEMORY

28
WICHTIGE SICHERHEITSHINWEISE!
BITTE LESEN SIE FOLGENDE HINWEISE VOR DER ERSTEN INBETRIEBNAHME SORGFÄLTIG DURCH:
Beachten Sie diese Sicherheitshinweise und alle Warnungen; heben Sie die Bedienungsanleitung auf.
•
Benutzen Sie dieses Produkt nicht in der Nähe von Wasser.
•
Verwenden Sie zur Reinigung nur ein weiches Tuch.
•
Schlitze und Öffnungen im Gehäuse dienen der Entlüftung und sorgen für zuverlässigen Betrieb. Daher dürfen sie nicht abgedeckt werden.
•
Stellen Sie keine offenen Flammen (z.B. Kerzen) auf oder in die Nähe dieses Gerätes auf.
•
Beachten Sie bitte geltende Umweltrichtlinien: Entsorgen Sie alte Batterien ordnungsgemäß.
•
Dieses Gerät darf nur bei gemäßigten Umweltbedingungen betrieben werden.
•
Stellen Sie das Produkt nicht in der Nähe von Wärmequellen auf (Heizstrahler, Heizkörper, Öfen aber auch starke Endstufen usw.).
•
Netzleitungen sollten so verlegt werden, dass niemand auf sie tritt oder durch irgendwelche Gegenstände eingeklemmt werden. Besonders vorsichtig sollte
•
man mit Netzkabeln an der Stelle umgehen, wo das Kabel aus dem Gerät kommt (Knick- und Bruchgefahr!).
Verwenden Sie ausschließlich Zubehör, das der Hersteller empfiehlt.
•
Sie sollten dieses Produkt während eines Gewitters oder einer längeren Nutzungspause (z.B. während des Urlaubs) vom Stromnetz trennen.
•
Überlassen Sie bitte Reparaturen unbedingt qualifizierten Servicetechnikern. Trennen Sie das Gerät sofort vom Stromnetz und suchen Sie anschließend
•
eine autorisierte Werkstatt auf wenn Sie ein defektes Netzkabel oder einen beschädigten Netzstecker entdecken, Gegenstände oder Flüssigkeiten ins
Gehäuse eingedrungen sind, das Gerät Regen oder Wasser ausgesetzt wurde, das Gerät nicht einwandfrei arbeitet oder heruntergefallen ist.
Möchten Sie das Gerät vollständig ausschalten, müssen Sie das Netzkabel aus der Steckdose ziehen.
•
Gerätspezifische Informationen (z.B. Serien- und Modellnummer) finden Sie auf der Unterseite des Gerätes.
•
Setzen Sie Batterien keiner großen Hitze (z.B. direkte Sonneneinstrahlung oder Feuer) aus.
•
Stellen Sie keine Gefäße mit Flüssigkeit (z.B. Blumenvasen) auf oder in der Nähe des Geräts und/oder dessen Stromversorgung auf.
•
ENTFERNEN SIE DIE GEHÄUSEABDECKUNG NICHT – ES HERRSCHT STROMSCHLAGGEFAHR: IM GEHÄUSE GIBT ES KEINE KOMPONENTEN, DIE SICH
•
VOM BENUTZER WARTEN LASSEN. BETRAUEN SIE NUR QUALIFIZIERTE FACHLEUTE MIT REPARATUREN UND KUNDENDIENSTARBEITEN.
Entfernen Sie niemals die Fontabdeckungen der Lautsprecher – hier gibt es keine Komponenten, die der Benutzer selbst warten kann.
•
WICHTIGE HINWEISE ZUM UMGANG MIT ELEKTRISCHEN GERÄTEN:
Bevor Sie externe Tonquellen anschließen sollten Sie dieses Gerät unbedingt ausschalten. Auf diese Weise vermeiden Sie Schäden durch statische
Elektrizität oder versehentliche Kurzschlüsse beim Verkabeln.
JBL ON TIME MICRO USER GUIDE

29
Konformitätserklärung
Wir, Harman Consumer Group, Inc.
8500 Balboa Blvd.
Northridge, CA 91329
USA
und unsere europäische Vertretung
Harman Consumer Group International
2, route de Tours
72500 Chateau du Loir
Frankreich
erklären in eigener Verantwortung, dass dieses Produkt den unten
aufgeführten Standards und Richtlinien entspricht.
Gerätetyp: iPod Docking-Station mit integrierter Weckfunktion
Modell(e): OT Micro
Eingehaltene Standards und Richtlinien:
2004/108/EC - Elektromagnetische Verträglichkeit (EMV)
2006/95/EC - Niederspannungsrichtlinie
2004/32/EC - Umweltschutzrichtlinien für Strom verbrauchende
Geräte
Für dieses Produkt gültige Euronorm-Standards:
EN 55013:2001+A1:2003+A2:2006
EN 55020:2007
EN 61000-3-2:2006
EN 61000-3-3:1995+A1:2001+A2:2005
EN 60065:2002+A11:2008
EN 60825-1:2007
Richard Metcalfe
Produktmanager
Château du Loir, Frankreich 09/09
WARNUNG: SETZEN SIE DIESES
GERÄT KEINER FEUCHTIGKEIT UND KEINEM
BLITZSCHLAG AUS - ES HERRSCHT FEUER-
GEFAHR.
WARNUNG: SCHÜTZEN SIE DIESES
GERÄT VOR SPRITZWASSER UND SETZEN SIE
KEINE GEFÄSSE MIT FLÜSSIGKEITEN (Z.B.
BLUMENVASEN) DARAUF AB.
DAS AUSRU-
FUNGSZEICHEN
IM DREIECK
KENNZEICHNET
WICHTIGE
HINWEISE.
ACHTUNG: IM GEHÄUSE GIBT
ES KEINE KOMPONENTEN, DIE
SICH VOM BENUTZER WARTEN
LASSEN. BETRAUEN SIE NUR
QUALIFIZIERTE FACHLEUTE MIT
REPARATUREN UND KUNDEN-
DIENSTARBEITEN.
DAS BLITZSYMBOL
IM DREIECK WARNT
VOR GEFÄHRLICHER
SPANNUNG
INNERHALB DES
GEHÄUSES.
ENTFERNEN SIE DIE GEHÄUSEABDECKUNG
NICHT – ES HERRSCHT STROMSCHLAGGEFAHR
WICHTIG:
SIE MÜSSEN DEN PASSENDEN ADAPTER INSTALLIEREN BEVOR
SIE DEN iPod/iPhone EINSETZEN. STELLEN SIE BITTE SICHER,
DASS DIE DOCKING-BUCHSE DES iPod/iPhone UND DER ENT-
SPRECHENDE STECKER DIESES JBL PRODUKTS KORREKT AUF-
EINANDER AUSGERICHTET SIND. ACHTEN SIE NICHT DARAUF,
KÖNNTE DIE DOCKING-SCHNITTSTELLE SCHADEN ENNEHMEN
– DER iPod/iPhone IST DANN UNBRAUCHBAR.
ACHTUNG:
Deutsch
WWW.JBL.COM

30
JBL ON TIME™MICRO
Die JBL On Time™Micro Docking-Station mit integrierten Hochleistungs-Lautsprechern und Radiowecker wird die Art wie Sie Radio hören,
Ihren iPod/iPhone verwenden aber auch wie Sie in der Früh geweckt werden grundlegend ändern.
Das JBL On Time Micro-System ist eine wahre Zeitmaschine: Stellen Sie sich einmal vor, Sie werden von Ihrem Lieblings-Radiosender oder
Ihre ganz persönlichen Musikhits von Ihrem iPod/iPhone sanft geweckt – kein nervender Piepton, kein mieser Radioempfang. Dieses kompakte
Lautsprecher-Docksystem ist ein wahrer Sound-Center: Schließen Sie Ihren iPod/iPhone, MP3-Player oder eine beliebige andere Tonquelle an
und genießen Sie seinen klaren und zugleich kräftigen Klang. Hinzu kommen ein integrierter Radio-Empfänger und ein vielseitiger Wecker, der
selbst den schlimmsten Morgenmuffeln die frühe Morgenstunde versüßt: Er lässt sich so programmieren, dass er zu verschiedenen Uhrzeiten
„Sie“ und „Ihn“ mithilfe unterschiedlicher Radiostationen oder iPod/iPhone-Musiktiteln weckt.
Im Lieferumfang enthalten ist eine Infrarot-Fernbedienung, die Ihnen volle Kontrolle über das iPod bietet – und zwar von überall aus in Ihrem
Wohnraum.
EVERCHARGE TOPOLOGY
JBL On Time Micro lädt Ihr iPod/iPhone automatisch auf - und zwar selbst dann, wenn das System ausgeschaltet ist. Der Systemspeicher
wird dabei von Batterien gespeist und erhält so seinen und kann Sie so selbst bei einem Stromausfall zuverlässig wecken.
COMPUTER-OPTIMIERTER EQUALIZER (COE)
JBL On Time Micro wurde am Computer optimiert und bietet so eine räumliche und zugleich detailreiche Klangbühne.
OPTIMIERTE DRUCKKAMMER-KONSTRUKTION (OCT)
Die proprietäre Druckkammer-Konstruktion des JBL On Time Micro sorgt für saubere und präzise Tonwiedergabe – selbst bei hoher Lautstärke.
DISPLAY
Das große, hintergrundbeleuchtete LC-Display lässt sind leicht ablesen und erleichtert die Navigation. Dabei wird die Helligkeit automatisch an
das Umgebungslicht angepasst
JBL ON TIME MICRO USER GUIDE

31
2
JBL ON TIME™MICRO AUSPACKEN
Packen Sie das System vorsichtig aus und überprüfen Sie den Inhalt.
Apple-Adapter
Infrarot-
Fernbedienung
SCHNELLINSTALLATION
Legen Sie - wenn nötig - den Apple-Adapter in die Docking-Einheit ein. Stecken Sie Ihr iPod/iPhone in den Adapter.
•
Legen Sie drei AAA-Batterien ins Batteriefach auf der Geräteunterseite ein, um den internen Speicher auch bei einem Stromausfall mit Energie zu versorgen.
•
Schließen Sie die externe MW-Antenne an, um den Radioempfang zu verbessern.
•
Wickeln Sie die UKW-Antenne auseinander, um den Empfang zu verbessern.
•
Stecken Sie das Netzteil in eine Strom führende Dose und das andere Kabelende in die Buchse „DV In“.
•
Möchten Sie eine zusätzliche Tonquelle verwenden, verbinden Sie diese mit dem Anschluss „Aux In” (Kabel separat erhältlich).
•
JBL On Time™Micro Netzteil MW-Antenne
Aux In Stromanschluss
(DC In)
UKW-Antenne
Deutsch
WWW.JBL.COM

32
Hinweis: Wird während der Uhrzeit-Einstellung 2 Sekunden lang keine Taste betätigt, schaltet das Gerät um ins „Now/Playing“-Menü. Drücken Sie auf die Enter-, eine
der Pfeiltasten oder die Menu/Up Level-Taste, um mit den Einstellungen fortzufahren.
BEDIENELEMENTE
Uhrzeit einstellen
Drücken Sie auf die Menu/Up Level-Taste, um das Hauptmenü anzuzeigen (Sie müssen unter Umständen mehrmals auf diese Taste1. drücken – je nachdem im welchem Untermenü Sie sich gerade befanden).
Markieren Sie mit den Pfeiltasten den Eintrag „Clock“. Bestätigen Sie mit „Enter“.2. Markieren Sie mit den Pfeiltasten das gewünschte Uhrzeit-Format (12- oder 24-Stunden-Format). Bestätigen Sie mit „Enter“.3. Stellen Sie mit den Pfeiltasten die Stunde ein. Bestätigen Sie mit „Enter“. Nun werden die Minuten hervorgehoben dargestellt.4. Stellen Sie mit den Pfeiltasten die Minuten ein. Bestätigen Sie mit „Enter“. Der Eintrag AM/PM wird nun hervorgehoben dargestellt.5. Stellen Sie mit den Pfeiltasten den Wochentag ein. Bestätigen Sie mit „Enter“. Der interne Wecker ist eingestellt!6.
Steuerelemente
Netzschalter (Power) Pfeiltaste nach oben (Select Up)
Vorprogrammierte
Radiosender (Preset) Pfeiltaste nach unten (Select Down)
Alarm Menü/Eine
Ebene nach oben
(Menu/Up Level)
Quelle
(Source) Eingabetaste (Enter)
Navigation
JBL ON TIME MICRO USER GUIDE
Lautstärke - (Volume Down) Lautstärke + (Volume Up)

33
Musik abspielen
Wählen Sie mit der Source-Taste die gewünschte Tonquelle aus:1. iPod/iPhone, AM (MW), FM (UKW) oder AUX.
Erhöhen Sie die Lautstärke mithilfe der „+“-Taste.2. Mit „-“ stellen Sie leiser.3.
Radiosender wählen
Ist der interne Radioempfänger bereits aktiviert, können Sie mit den beiden Pfeiltasten die1. Empfangsfrequenz einstellen. Halten Sie eine der Tasten gedrückt, um nach dem nächsten
empfangswürdigen Sender automatisch zu suchen.
Ist das Radio nicht ausgewählt, betätigen Sie bitte mehrmals die Taste „Source“ bis FM (MW)2. oder AM (UKW) im Display angezeigt wird.
Stellen Sie mit den Pfeiltasten den gewünschten Sender ein. Halten Sie eine der beiden Tasten3. gedrückt, um nach dem nächsten empfangswürdigen Sender zu suchen.
Senderspeicher verwenden
Möchten Sie den gerade spielenden Sender abspeichern, halten Sie bitte die Taste „Preset“ 21. Sekunden lang gedrückt. Auf dem Display erscheint das „Radio Preset“-Menü.
Wählen Sie mit den Pfeiltasten einen freien Speicherplatz für den neuen Sender aus.2. Bestätigen Sie mit „Enter“. Der Radiosender ist gespeichert!
Einen gespeicherten Sender abrufen
Drücken Sie einmal auf „Preset“, um die Liste der vorprogrammierten Radiosender aufzurufen.1. Markieren Sie mit den Pfeiltasten den gewünschten Sender. Bestätigen Sie mit „Enter“.2. Die entsprechende Empfangsfrequenz wird eingestellt und der Sender wiedergegeben!
Netzschalter (Power)
Pfeiltaste nach oben (Select Up)
Vorprogrammierte
Radiosender (Preset)
Pfeiltaste nach unten (Select Down)
Alarm
Menü/Eine
Ebene nach oben
(Menu/Up Level)
Quelle
(Source)
Eingabetaste (Enter)
Sprache/Region
Drücken Sie mehrmals auf die „Menu/Up Level“-Taste, um zum Hauptmenü1. zu gelangen.
Wählen Sie mit den Pfeiltasten den Eintrag „Region“ aus und bestätigen Sie mit „Enter“.2. Stellen Sie mit den Pfeiltasten die gewünschte Sprache ein. Bestätigen Sie erneut mit „Enter“.3. Wählen Sie mit den Pfeiltasten das gewünschte Radio-Empfangsband aus. Bestätigen Sie mit4. „Enter“.
Deutsch
WWW.JBL.COM
Other manuals for ON TIME MICRO
3
Table of contents
Languages:
Other JBL Docking Station manuals

JBL
JBL JBL On Stage Micro User manual

JBL
JBL 10950-0113-001 User manual

JBL
JBL On Call 5310 User manual

JBL
JBL ON TIME 200P User manual

JBL
JBL ON STAGE 200iD User manual

JBL
JBL JBL On Stage Micro User manual

JBL
JBL OnBeat Rumble User manual

JBL
JBL smartbase User manual

JBL
JBL ON TIME MICRO User manual

JBL
JBL on stage II User manual

JBL
JBL OnBeat RIZE User manual

JBL
JBL JBL On Stage Micro User manual

JBL
JBL ON TIME MICRO User manual

JBL
JBL ON STAGE IV User manual

JBL
JBL On Call 5310 User manual

JBL
JBL On stage Quick start guide

JBL
JBL ON TIME 400lHD User manual

JBL
JBL ON STAGE MICRO III User manual

JBL
JBL ON STAGE 400P User manual

JBL
JBL ON STAGE 400P User manual