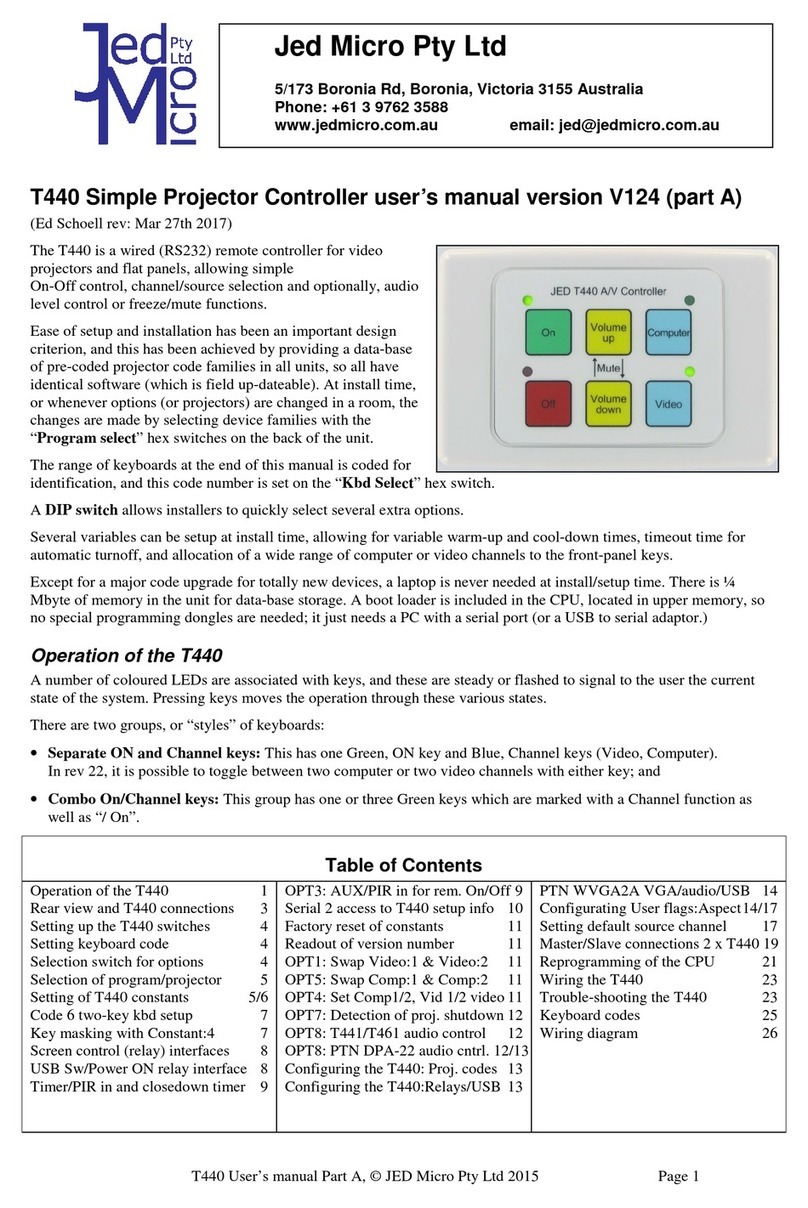
Jed Micro Pty T430 User manual

T440 User’s manual Flat panel part © JED Micro Pty Ltd Page 1
Jed T430/T440 Projector Controller user’s manual version V142F part B
(Ed Schoell rev Sept 6
th
. 2018 … Flat panel only code version.)
Table of Contents
Active2Touch 1
AHA/ Hitachi LCD 3
BenQ LCD, Clevertouch & eBoard 5
CommBox LCD monitor 7
HDi70 LCD panel 8
Hisense TV (RC5 protocol) via IR 9
Hitachi LCD 10
IT LCD 10
LG LCD/Plasma TV 11
Mitsubishi LCD 15
NEC LCD TV & Sherwood Plas 16
Panasonic LCD panels 21
Panasonic Plasma panels 23
Plasma LCD TV (IR) 24
Philips BDL LCD/LED panels 25
Pioneer Plasma panels 26
Promethean ActivPanel LCD 30
Samsung Plasma/LCD panels 31
Sharp 35
Mitsubishi with Sharp codes 43
Sharp LCD via LAN 43
Smart LCD 45
Soniq LCD 46
Sony LCD 47
2-Touch/CTOUCH 51
ViewSonic LCD 52
Active2Touch: Code 74
Channel codes are:
Input1 := 89 + 65 + 03 + 0E; // Computer1 VGA
Input2 := 89 + 65 + 09 + 08; // Computer2 HDMI 3
Input3 := 89 + 65 + 05 + 0C; // Video1 HDMI 1
Input4 := 89 + 65 + 07 + 0A; // Video2 HDMI 2
Input5 := 89 + 65 + 09 + 08; // HDMI 3
Input6 := 89 + 65 + 0B + 06; // HDMI 4
Input7 := 89 + 65 + 0E + 03; // HDMI FRONT
Input8 := 89 + 55 + 04 + 1D; // YPbPr
Input9 := 89 + 55 + 0D + 14; // AV1
Input10 := 89 + 55 + 12 + 0F; // AV2
Input11 := 89 + 55 + 0A + 17; // AV3
Input12 := 89 + 55 + 15 + 0C; // AV4
Setting T430/T440 systems to control a Projector or LCD device
The default setting is for Projectors
Note: When a nit is re-loaded with a new firmware file, the nit is reset to a “PROJECTOR” setting.
•To set the T430/T440 for projector control, set DF on the rotary switches SW2 and SW3 and switch
off all o tion switches.
Push the Reset button and the green LED blinks for 2 seconds;
•To set the T430/T440 for LCD control, set DF on the rotary switches SW2 and SW3 and turn ON
O tion SW8 only.
Push the Reset button and the green LED blinks for 2 seconds
The device is now ready to be set to a code and option setting. Don’t forget to press the RESET switch again.

T440 User’s manual Flat panel part © JED Micro Pty Ltd Page 2
Input13 := 89 + 65 + 0D + 04; // OPS
Input14 := 89 + 55 + 19 + 08; // SV
Any one of these codes can be set into Constant:0/Constant:1 for computer codes and Constant:2/Constant:3 for video
codes. (The default is to have Computer1 (above) as the “Computer” channel and Video1 as the “Video” channel.
Setting OPT1 switch ON will swap Video1 and Video2 channels. Setting OPT5 switch ON will swap Computer 1 and
Computer 2 sources.)
•On panel connection blink codes supported;
•Audio Mute is supported, with a toggle function.
RS232 connections to AHA LCD
These use a 9-pin-D9 female on the panel, male on cable. Communications is at 38400 baud 8N1.
Function/Direction T440 “projector”
Connection
Panel Port Connector
Ground Ground 9-pin D-sub pin 5
Data from T440 to projector Tx 9-pin D-sub pin 3 (RXD)
Reply data from projector to T440 Rx ** 9-pin D-sub pin 2 (TXD)
Plus 9 volt CTS/DTR to projector N/C N/C
After installation wiring of any projector to a T440, use a multimeter to check voltages of –9 on BOTH TX and RX pins
in any installation, as described in the troubleshooting part of this manual.
3
D-sub 9 male
solder side
4 25 1
9 8 7 6

T440 User’s manual Flat panel part © JED Micro Pty Ltd Page 3
AHA LCD touchscreen, 55”, 65”, 70”, 75”, 84”: Code 9C
(similar to LG)
Also Hitachi HITFHD6516/PC, HILF75101 LED interactive
(also Code 9C )
Channel codes are:
Input1 := 'kb 00 07'; //Computer1 RGB-PC
Input2 := 'kb 00 0a'; //Computer2 HDMI-2
Input3 := 'kb 00 0b'; //Video1 HDMI-3 HD
Input4 := 'kb 00 09'; //Video2 HDMI-1
Input5 := 'kb 00 0c'; // DisplayPort
Input6 := 'kb 00 0e'; // OPS On board PC
Input7 := 'kb 00 0d'; // USB (Arrow keys needed on IR remote to access files on USB)
Input8 := 'kb 00 08'; // DVI-D
Any one of these codes can be set into Constant:0/Constant:1 for computer codes and Constant:2/Constant:3 for video
codes. (The default is to have Computer1 (above) as the “Computer” channel and Video1 as the “Video” channel.
Setting OPT1 switch ON will swap Video1 and Video2 channels, making HDMI-1 the video default. Setting OPT5
switch ON will swap Computer 1 and Computer 2 sources.)
•On panel connection blink codes supported;
•Audio Mute is supported, but not Freeze.
An alternate set of strings has been released for the FHD6514, 6514PC and 6516. These resemble the standard
Hitachi projector codes. These are accessed with code 3C . (Rev V123)
Channel codes are:
Input1 := BE + EF + 03 + 06 + 00 + 6E + D2 + 01 + 00 + 00 + 20 + 01 + 00; //Computer1 VGA
Input2 := BE + EF + 03 + 06 + 00 + 0E + D2 + 01 + 00 + 00 + 20 + 03 + 01; //Computer2 HDMI 2
Input3 := BE + EF + 03 + 06 + 00 + 0E + D2 + 01 + 00 + 00 + 20 + 03 + 00; //Video 1 HDMI 1
Input4 := BE + EF + 03 + 06 + 00 + FE + D2 + 01 + 00 + 00 + 20 + 00 + 00; //Video OPS
•On panel connection blink codes supported;
•Audio Mute is supported, but not Freeze.
RS232 connections to AHA LCD
These use a 9-pin-D9 female on the panel, male on cable. Communications is at 9600 baud 8N1.
Function/Direction T440 “projector”
Connection
Panel Port Connector
Ground Ground 9-pin D-sub pin 5
Data from T440 to projector Tx 9-pin D-sub pin 3 (RXD)
Reply data from projector to T440 Rx ** 9-pin D-sub pin 2 (TXD)
Plus 9 volt CTS/DTR to projector N/C N/C
** Note, the measured return voltage in rest state from the projector is only -0.9 volts, not the usual -5 to -9 volts.
However the positive swing of voltage is OK.
3
D-sub 9 male
solder side
4 25 1
9 8 7 6

T440 User’s manual Flat panel part © JED Micro Pty Ltd Page 4
BenQ LCD 1: RP550+, RP551+, RP650+, RP651+, RP700+: Code 4E
RS232 codes have not been found on the net, but have been supplied directly by BenQ Australia.
Channel codes are:
Input1 := '801s' + 22h +'000' + 0Dh; // Computer1 RGB 2: VGA analog-RGB
Input2 := '801s' + 22h +'002' + 0Dh; // Computer2 HDMI 2
Input3 := '801s' + 22h +'003' + 0Dh; // Video1 AV * (OPT1 swaps Video1 & Video 2)
Input4 := '800s' + 22h +'001' + 0Dh; // Video2 HDMI 1 * (OPT1 swaps Video1 & Video 2)
* T440: OPT6 switch ON will use S-Video in place of HDMI. T430: uses HDMI as Video2.
Input4 := '801s' + 22h +'005' + 0Dh; //Video2 S-Video
Input5 := '800s' + 22h +'004' + 0Dh; // YPbPr Component
Input6 := '800s' + 22h +'006' + 0Dh; // DVI
Input7 := '800s' + 22h +'007' + 0Dh; // DisplayPort
Input8 := '800s' + 22h +'008' + 0Dh; // SDI
Input9 := '800s' + 22h +'009' + 0Dh; // Multimedia
Input10 := '800s' + 22h +'010' + 0Dh; // Network
Input11 := '800s' + 22h +'011' + 0Dh; // USB Display
Any one of these codes can be set into Constant:0/Constant:1 for computer codes and Constant:2/Constant:3 for video
codes. (The default is to have Computer1 (above) as the “Computer” channel and Video1 as the “Video” channel.
Setting OPT1 switch ON will swap Video1 and Video2 channels, making S-Video the video default. Setting OPT5
switch ON will swap Computer 1 and Computer 2 sources.)
•On panel connection blink codes supported;
•Audio Mute is supported, but not Freeze.
It is necessary to set the following in the “Tools” menu (4
th
):
•Control setting -> RS232;
•Monitor ID -> 1;
•Power save -> Off
There is no volume level indication on the LCD image.
RS232 connections to BenQ LCD with D9 male on the LCD
The reply signal from the LCD screen is disabled between transmitted messages, so the usual test with a multimeter can
give confusing results, as BOTH the LCD Rx (line into the Rx input) and Tx (reply line from the LCD) measure
approximately zero volts and both show a DC resistance of about 5K to ground. The LCD Tx line only outputs a +/- 5
volts waveform when a message is replied to, and then goes back to zero.
These use a 9-pin-D9 male on the LCD, female on cable. Comms is at 9600 baud, 8 bits, Odd parity, 1 stop.
Function/Direction T440 “projector”
Connection
“Serial” Port Connector
Ground Ground 9-pin D-sub pin 5
Data from T440 to projector Tx 9-pin D-sub pin 2 (RXD)
Reply data from projector to T440 Rx 9-pin D-sub pin 3 (TXD)
After installation wiring of any projector to a T440, use a multimeter to check voltages of –9 on BOTH TX and RX pins
in any installation, as described in the troubleshooting part of this manual.
8
1 2 3 4 5
6 7 9
D-sub 9 female
solder side

T440 User’s manual Flat panel part © JED Micro Pty Ltd Page 5
BenQ LCD 2: RP840G: Code 4F at 38400 baud
RS232 codes have not been found on the net, but have been supplied directly by BenQ Australia.
Channel codes are:
Input1 := AA + BB + CC + 02 + 03 + 00 + 05 + DD + EE + FF; // Computer1 VGA 1 analog-RGB
Input2 := AA + BB + CC + 02 + 04 + 00 + 06 + DD + EE + FF; // Computer2 VGA 2
Input3 := AA + BB + CC + 02 + 02 + 00 + 04 + DD + EE + FF; // Video1 AV
Input4 := AA + BB + CC + 02 + 06 + 00 + 08 + DD + EE + FF; // Video2 HDMI 1
Input5 := AA + BB + CC + 02 + 0B + 00 + 0D + DD + EE + FF; // Computer3 VGA 3
Input6 := AA + BB + CC + 02 + 07 + 00 + 09 + DD + EE + FF; // HDMI 2
Input7 := AA + BB + CC + 02 + 05 + 00 + 07 + DD + EE + FF; // HDMI 3
Input8 := AA + BB + CC + 02 + 09 + 00 + 0B + DD + EE + FF; // HDMI 4? This slot reserved for HDMI 4
Input9 := AA + BB + CC + 02 + 08 + 00 + 0A + DD + EE + FF; // PC ... Don't know what this is
Input10 := AA + BB + CC + 02 + 0A + 00 + 0C + DD + EE + FF; // Android, looks like a Network
Input11 := AA + BB + CC + 02 + 0E + 00 + 10 + DD + EE + FF; // Android+, looks like a Network
Input12 := AA + BB + CC + 02 + 11 + 00 + 13 + DD + EE + FF; // DisplayPort
TV := AA + BB + CC + 02 + 01 + 00 + 03 + DD + EE + FF;
Any one of these codes can be set into Constant:0/Constant:1 for computer codes and Constant:2/Constant:3 for video
codes. (The default is to have Computer1 (above) as the “Computer” channel and Video1 as the “Video” channel.
Setting OPT1 switch ON will swap Video1 and Video2 channels. Setting OPT5 switch ON will swap Computer 1 and
Computer 2 sources.)
•
On panel connection blink codes supported;
•
OPT7 handshake mode is available (but has not been tested to date);
•
Audio Mute is supported, but not Freeze.
It may be necessary to set communications active in the LCD panel’s menu system.
BenQ LCD 3: Benq RP840G, Clevertouch, eBoard LCD: Code 5E at 9600 baud
Channel codes are:
Input1 := AA + BB + CC + 02 + 03 + 00 + 05 + DD + EE + FF; // Computer1 VGA 1 analog-RGB
Input2 := AA + BB + CC + 02 + 07 + 00 + 09 + DD + EE + FF; // Computer2 HDMI 2
Input3 := AA + BB + CC + 02 + 06 + 00 + 08 + DD + EE + FF; // Video1 HDMI 1
Input4 := AA + BB + CC + 02 + 05 + 00 + 07 + DD + EE + FF; // Video2 HDMI 3
Inputs 9, 10, 11 and 12 (above) are also covered.
RS232 connections to BenQ LCD with D9 male on the LCD
The reply signal from the LCD screen is disabled between transmitted messages, so the usual test with a multimeter can
give confusing results, as BOTH the LCD Rx (line into the Rx input) and Tx (reply line from the LCD) measure
approximately zero volts and both show a DC resistance of about 5K to ground. The LCD Tx line only outputs a +/- 5
volts waveform when a message is replied to, and then goes back to zero.
These use a 9-pin-D9 male on the LCD, female on cable. Comms is at 38400 baud, 8 bits, Odd parity, 1 stop.
Function/Direction T440 “projector”
Connection
“Serial” Port Connector
Ground Ground 9-pin D-sub pin 5
Data from T440 to projector Tx 9-pin D-sub pin 2 (RXD)
Reply data from projector to T440 Rx 9-pin D-sub pin 3 (TXD)
After installation wiring of any projector to a T440, use a multimeter to check voltages of –9 on BOTH TX and RX pins
in any installation, as described in the troubleshooting part of this manual.
8
1 2 3 4 5
6 7 9
D-sub 9 female
solder side

T440 User’s manual Flat panel part © JED Micro Pty Ltd Page 6
CommBox LCD monitor with touchscreen interface
These screens are interfaced via an IR transmitter or a wired connection sending in an un-modulated pulse sequence
identical to an IR transmission (but without the 38khz carrier) into a 3.5mm jack on the back (marked IR).
Code A2 Modulated IR to CommBox , requires an IR bug either sending IR from the front or via a hole in the rear.
Code A3 UnModulated IR-like pulses to CommBox via 3.5mm jack in back.
IR command codes:
Input1FunctionCode := $0025; // Computer1: VGA
Input2FunctionCode := $0026; // Computer2: DVI
Input3FunctionCode := $0023; // Video1: Composite
Input4FunctionCode := $0027; // Video2: HDMI 1
Input5FunctionCode := $0028; // HDMI 2
Input6FunctionCode := $0022; // Component
Input7FunctionCode := $0024; // S-Video
Any one of these codes can be set into Constant:0/Constant:1 for computer codes and Constant:2/Constant:3 for video
codes. (The default is to have Computer1 (above) as the “Computer” channel and Video1 as the “Video” channel.
Setting OPT1 switch ON will swap Video1 and Video2 channels, making HDMI 1the video default. Setting OPT5
switch ON will swap Computer 1 and Computer 2 sources.)
This can be used with a variety of keyboards:
•
With a “Code 9” keyboard, with buttons selecting “Video” and ‘Computer;
•
With “Code 0” or “Code 5” input-only select keyboards;
•
With a “Code B-L” or “Code B-P” keyboard, with buttons selecting “Video” and “Computer1” and “Computer2”
with Volume control keys;
•
NO Panel connection blink codes and OPT7 handshake modes are available;
•
No mute/freeze commands are provided; and
•
Volume key presses send 5 consecutive Vol Up or Vol Down commands.

T440 User’s manual Flat panel part © JED Micro Pty Ltd Page 7
HDi70 Panel, “23” client ID no.: Code 73 at 115200 baud
RS232 codes have been supplied by an installer.
Channel codes are:
Input1 := 99 + 23 + 0B + 01 + F4 + AA; //Computer1 VGA1
Input2 := 99 + 23 + 0C + 01 + F3 + AA; //Computer2 VGA2
Input3 := 99 + 23 + 0E + 01 + F1 + AA; // Video1 HDMI 1
Input4 := 99 + 23 + 0F + 01 + F0 + AA; // Video2 HDMI 2
Input5 := 99 + 23 + 10 + 01 + EF + AA; // HDMI 3
Input6 := 99 + 23 + 08 + 01 + F7 + AA; // AV
Input7 := 99 + 23 + 0A + 01 + F5 + AA; // YPbPr
Input8 := 99 + 23 + 0D + 01 + F2 + AA; // VGA3
Input9 := 99 + 23 + 06 + 01 + F9 + AA; // VGA4
Input10 := 99 + 23 + 11 + 01 + EE + AA; // ops
Input11 := 99 + 23 + 27 + 01 + D8 + AA; // USB
Any one of these codes can be set into Constant:0/Constant:1 for computer codes and Constant:2/Constant:3 for video
codes. (The default is to have Computer1 (above) as the “Computer” channel and Video1 as the “Video” channel.
Setting OPT1 switch ON will swap Video1 and Video2 channels. Setting OPT5 switch ON will swap Computer 1 and
Computer 2 sources.)
•
No on panel connection blink codes supported;
RS232 connections to
HDi70
LCD with D9 female on the panel
Comms is at 115200 baud, 8 bits, no parity, 1 stop. Male on cable.
Function/Direction T460 “projector”
Connection
Panasonic Serial Port
Connector
Ground Ground 9-pin D-sub pin 5
Data from T440 to panel Tx 9-pin D-sub pin 3 (RXD)
Reply data from panel to T440 Rx 9-pin D-sub pin 2 (TXD)
Plus 9 volt CTS/DTR to projector N/C N/C
After installation wiring of any projector to a T460, use a multimeter to check voltages of –9 on BOTH TX and RX pins
in any installation, as described in the troubleshooting part of this manual.
3
D-sub 9 male
solder side
4 25 1
9 8 7 6

T440 User’s manual Flat panel part © JED Micro Pty Ltd Page 8
Hisense RC5-code LCD TV via IR – Code AC
These panels are controlled via an IR emitter. It has the default address for a TV of “00”. A typical TV model is 24F33
and family. Unfortunately Hisense do not seem to know which IR codes apply to which model, and insist that this
model uses a completely different NEC-format IR protocol, which they supplied. We have verified the RC5 protocol
works with the 24F33 model.
An IR code is provided to access the “Source” menu and subsequent presses roll through available sources. Stopping on
the selected on automatically selects that one after about a 2 second delay. No OK button or arrow keys are needed for
selection. A Code 1 keyboard works well with this (Off, Source/On, Vol. Up, Vol Down). The LED associated with this
key blinks OFF momentarily as the function executes.
IR command codes:
SourceFunctionCode := $0038;
On a T440, Code 1 keyboard, the Volume Up and Volume Down keys send a burst of 5 signals, so the volume steps up
or down in groups of 5.
The red and green LEDs follow the current state of the projector. If the projector gets out of step with the controller (eg
by the projector being ON when the red OFF led is showing), pressing the ON button will get it back into step, and then
pressing OFF once will send the “POWER” IR message twice, with a 1-second separation, leaving both OFF.
Because there is no feedback serial path to the controller, OPT7 status read-back is not possible. (Freeze and mute are
not supported. Two-button-mute mode is not supported either.)
Wiring: The IR transmitting bug is wired to the IR output socket
J2 with the shield of the cable connected to the ground pin and
the centre conductor to the “+IR” pin. The signal is current
limited (24mA pulses), so no series resistors are needed in the
cable.
As the IR bug wire is only 2M long it will usually be extended,
and CAT5 cable is OK for this, but it must be via its own twisted
pair (colour plus colour-with-white). (We have successfully
tested this with 50M of CAT5E cable.)
If the CAT5 connector and cable is used runs from CAT5
connector J6, the IR signal runs
via a twisted pair of wires via this cable, but link L1 must be
moved from Tx (it’s position
in RS232 mode) to IR (as needed for IR mode).
T430: If using a T430, the keyboard has an ON/Source key and no Volume keys. The IR functions allow power On/Off
and source change only. Operation is the same as above.
If OPT4 is OFF, no source changes occur (for a V1 keyboard).
If OPT4 is ON, then a “source” command is sent with each press of the On / Source key. (V3 keyboard.)
(Note: the IR connector has to be requested at ordering time… it is not part of a normal T430 build.)

T440 User’s manual Flat panel part © JED Micro Pty Ltd Page 9
(Hitachi HITFHD6516/PC, HILF75101 LED interactive See page 1)
Hitachi HILFU75202 LCD touchscreen: (Code 9E )
(similar to LG)
This screen is similar to AHA (page 1) but has different codes for VGA and power commands. It communicates at
115200 baud.
Channel codes are:
Input1 := 'kb 00 05'; //Computer1 VGA
Input2 := 'kb 00 0a'; //Computer2 HDMI-2
Input3 := 'kb 00 0b'; //Video1 HDMI-3 HD
Input4 := 'kb 00 09'; //Video2 HDMI-1
Input5 := 'kb 00 0c'; // DisplayPort
Input6 := 'kb 00 07'; // OPS On board PC
Any one of these codes can be set into Constant:0/Constant:1 for computer codes and Constant:2/Constant:3 for video
codes. (The default is to have Computer1 (above) as the “Computer” channel and Video1 as the “Video” channel.
Setting OPT1 switch ON will swap Video1 and Video2 channels, making HDMI-1 the video default. Setting OPT5
switch ON will swap Computer 1 and Computer 2 sources.)
•
On panel connection blink codes supported;
•
Audio Mute is supported, but not Freeze.
IT LCD 1: Code 8C
RS232 codes have not been found on the net, but have been supplied directly by Electroboard Australia.
In codes below an IDT (second byte) of “00” is sent a s a global command to all addressed devices.
Channel codes are:
Input1 := 07 + 00 + 02 + 'MIN' + #00 + 08; //Computer1 VGA DB15 (Note: #xx indicates a dec. no)
Input2 := 07 + 00 + 02 + 'MIN' + #10 + 08; //Computer2 HDMI 2
Input3 := 07 + 00 + 02 + 'MIN' + #09 + 08; //Video 1 HDMI 1
Input4 := 07 + 00 + 02 + 'MIN' + #11 + 08; //Video 2 HDMI 3
Input5 := 07 + 00 + 02 + 'MIN' + #12 + 08; //HDMI 4
Input6 := 07 + 00 + 02 + 'MIN' + #13 + 08; //DisplayPort 1
Input7 := 07 + 00 + 02 + 'MIN' + #16 + 08; //DisplayPort 2
Input8 := 07 + 00 + 02 + 'MIN' + #14 + 08; //IPC/OPS
Any one of these codes can be set into Constant:0/Constant:1 for computer codes and Constant:2/Constant:3 for video
codes. (The default is to have Computer1 (above) as the “Computer” channel and Video1 as the “Video” channel.
Setting OPT1 switch ON will swap Video1 and Video2 channels. Setting OPT5 switch ON will swap Computer 1 and
Computer 2 sources.)
•
On panel connection blink codes supported;
•
Audio Mute is supported, but not Freeze.
RS232 connections to IT LCD: not available at this time.
Comms is at 115200 baud, 8 bits, Odd parity, 1 stop.
After installation wiring of any projector to a T440, use a multimeter to check voltages of –9 on BOTH TX and RX pins
in any installation, as described in the troubleshooting part of this manual.

T440 User’s manual Flat panel part © JED Micro Pty Ltd Page 10
LG LCD/Plasma display/TV (Code 90, 91, 93, 94 & 97, 98, 99 and 9A )
In the back of each “Owner’s manual” is a list of “input select” codes … examine this table to determine the family. If
input select uses “kb” codes, select the codes 18 and 19 below.
If “xb” is shown, use the table on the next page for input select.
“kb” family input select codes
There are over a 100 different displays in the “kb” LG family, and codes 90 TO XXX cover the “kb” codes group (see
the user manuals).
Group 1 Code 90 on the switches:
PC to “kb 00 0” for PLASMA monitor: MU-40PA15*, 42/50PM1M**, 42PM3MV**, MU-60PZ30***,
MU-0PZ40***, MU-42/50PZ41V**, MU-42/50PZ44***, MU-42/50/60PZ90***
Function code “kb” strings, code 90 Comments
Input1/Computer1
'kb 00 0' + 0D RGB-PC
Input2/Computer2 'kb 00 4' + 0D RGB-2 / DVI
Input3/Video1 'kb 00 2' + 0D AV1 Video/S-Vid * OPT1 swaps Video1 &Video2
Input4/Video2 'kb 00 9' + 0D HDMI-2* * OPT1 swaps Video1 &Video2
Input5 'kb 00 4' + 0D Component 1 Video YPbPr
Input6 'kb 00 1' + 0D Component 2 Video YPbPr
Input7 'kb 00 6' + 0D RGB-DTV / Component
Input8 'kb 00 9' + 0D HDMI-2 / DVI-PC
* T440: OPT6 switch ON will use S-Video in place of HDMI/DVI. T430: uses HDMI as Video2.
Any one of these codes can be set into Constant:0/Constant:1 for computer codes and Constant:2/Constant:3 for video
codes. (The default is to have Computer1 (above) as the “Computer” channel and Video1 as the “Video” channel.
Setting OPT1 switch ON will swap Video1 and Video2 channels. Setting OPT5 switch ON will swap Computer 1 and
Computer 2 sources.)
Group 2 Code 91 on the switches for Plasma Monitor/Digital TV:
PC to kb code 5 for PLASMA: MU-50PM10, MU-42PM11, MU-42PM12*, RU-42/50PX10, RU-42/50PX11,
RU-42/50PX/20, MW-71PY10*, MW-71PY10**, RT-42/50PZ60/70***, R4U-42/50/60PZ61/71, MU-60PZ95*
Function code “kb” strings, code 91 Comments
Input1/Computer1
'kb 00 5' + 0D RGB-PC
Input2/Computer2 'kb 00 6' + 0D DVI-DTV
Input3/Video1 'kb 00 1' + 0D AV1 Video/S-Vid * OPT1 swaps Video1 &Video2
Input4/Video2 'kb 00 9' + 0D HDMI * * OPT1 swaps Video1 &Video2
Input5 'kb 00 3' + 0D Component 1 Video YPbPr
Input6 'kb 00 4' + 0D Component 2 Video YPbPr
Input7 'kb 00 7' + 0D Video 3
Input8 'kb 00 8' + 0D Video 4
Input9 'kb 00 9' + 0D HDMI
TV 'kb 00 0' + 0D TV Digital
TV Channel Up 'mc 00 00' + 0D Use IR command PR+ CH+
TV Channel Down 'mc 00 01' + 0D Use IR command PR- CH-
* T440: OPT6 switch ON will use S-Video in place of HDMI. T430: uses HDMI as Video2.Any one of these codes can
be set into Constant:0/Constant:1 for computer codes and Constant:2/Constant:3 for video codes. (The default is to have

T440 User’s manual Flat panel part © JED Micro Pty Ltd Page 11
Computer1 (above) as the “Computer” channel and Video1 as the “Video” channel. Setting OPT1 switch ON will swap
Video1 and Video2 channels.)
Group 3 Code 93 on the switches for Digital TV (or Monitor only), 94 on the switches for Analog TV:
PC to “kb 00 7” for LCD/PLASMA TV: 42LC2DR, 32/37/42LC7D*, PLASMA: 50PB2DR, 42/50/60PB4D,
42/50PC1***, 42/50PC5D*, 42/50/60PM4M/MA, 50PX1D***, 50PX2DC**, 42PX3D****, 42/50PX4D***,
42PX5D***, 50PX4DR, DU-50PX10*, DU-42PX12X*, *, 50/60PY2DR*, DU-42/50PZ60***, DU-42/50PZ70***
Choice of codes 93h (Monitor or Digital TV) or 94h (Analog TV) determines TV type.
Function code “kb” strings, code 90 Comments
Input1/Computer1
'kb 00 7' + 0D RGB-PC
Input2/Computer2 'kb 00 8' + 0D HDMI-1 / DVI-DTV
Input3/Video1 'kb 00 1' + 0D AV1 Video/S-Vid * OPT1 swaps Video1 &Video2
Input4/Video21 'kb 00 9' + 0D HDMI * * OPT1 swaps Video1 &Video2
Input5 'kb 00 4' + 0D Component 1 Video YPbPr
Input6 'kb 00 5' + 0D Component 2 Video YPbPr
Input7 'kb 00 6' + 0D RGB-DTV / Component
Input8 'kb 00 9' + 0D HDMI-2 / DVI-PC
TV Channel Up 'mc 00 00' + 0D Use IR command PR+ CH+
TV Channel Down 'mc 00 01' + 0D Use IR command PR- CH-
* T440: OPT6 switch ON will use S-Video in place of HDMI. T430: uses HDMI as Video2.
Any one of these codes can be set into Constant:0/Constant:1 for computer codes and Constant:2/Constant:3 for video
codes. (The default is to have Computer1 (above) as the “Computer” channel and Video1 as the “Video” channel.
Setting OPT1 switch ON will swap Video1 and Video2 channels. Setting OPT5 switch ON will swap Computer 1 and
Computer 2 sources.)
TV := 'kb 00 0' + 0D; // TV Digital (Code 93 selects)
TV := 'kb 00 1' + 0D; // TV Analog (Code 94 selects)
Aspect Ratio settings See following for common aspect commands.
“xb” family input select codes
The newer “xb” family, with codes 97 & 98, 99 & 9A, and use a two hex digit pair after the ASCII select string, with
the top 4 bits (top digit)(5x, 6x, 9x, 2x, 4x) selecting an input type (AV, Component, etc) and the low 4 bits the input
number (x0 or x1).
Choice between codes 97 or 98 (and between 99h or 9Ah) determines TV type, Analog or Digital. So 97 and 99 are
Digital TV, and 98 and 9A are for Analog TV.
Note re Plasma TV models 42/50PQ10**, 42/50PQ11**, 42/50PQ20**, 42/50PQ30**, 42/50PQ31, 42/50PQ60**,
50PS30**, 60PS40**, 50PS60** … We have two manuals for these, one showing them as 'xb 00 50', i.e. Group 4
below, and showing them as 'xb 00 60', i.e. group 5 below. We suggest trying both drivers for one that works to select
RGB.
Group 4: Codes 97 and 98: (first column in table below) uses code 'xb 00 50' + 0D for RGB/VGA PC input used as
“Computer1”.LCD: 32/42/47/52LB9D**, 26/32/37/42LG3***, 32/42/47LG5***, 32/42/47/52LG6**,
42/47/52LG7***
PLASMA: 42/50PQ2***, 42/50PQ6***, 50PS3***, 60PS4***, 60PS6***, 42/50PB4D*, 50/60PY3D**
Group 5: Codes 99 and 9A: (second column in table below) uses code 'xb 00 60' + 0D for RGB/VGA PC input used as
“Computer1”. Typical models are: LCD: 32CL20, 32/42/47CL40, 42/47LB7RF*, 32/42/47/52LB9R*, 26LC2R*,
26/27/32/37/42LC2***, 32/37/42LC2D, 32LC25R*, 26/32LC3R*, 26/32/37/42LC4R*, 26/32/37/42LC7R*,
19/22/26/32LD3**, 32/37/42/47LD4**, 42/47/55LD5**, 32/37/42/47/55LD6***, 32/37/42LE2***, 32LE3***
32/42/47/55LE4***, 22/26/32/37/42/47/55LE5***, 22/26LE6***, 32/37/42/47/55LE7***, 42/47/55LE8***,

T440 User’s manual Flat panel part © JED Micro Pty Ltd Page 12
32/37/42/47LF11, 47LF21, 32/37/42LF25**, 32/42/47LF51**, 22/26/32/37/42/47LG1***, 32/37/42LG2***,
19/22//26/32/37/42LG2***, 19/22/26/32/37/42/47LG3, 26/32LG40, 32/37/42/47/52LG5***, 32/37/42/47/52LG60,
32/42/47/52LG70, 47LG90, 42/47LGX, 22/26/32/37/42LH2***, 19/22/26/32/37/42/52LH2***, 32/37/42/47LH3***,
32/37/42/47LH30**, 42/47LH300C, 32/37/42LH35FD, 32/37/42/47/55LH4***, 32/37/42/47/55LH5***,
32/37/42/47LH70**, 47/55LH8***, 42/47/55LH9***, 22/26/32LK3**, 32/37/42/47LK4**, 42/47/55LK5**,
32/39/42/47/55/60LN541C, 32/39/42/47/55/60LN549E, 32/42LP560M, 19/22LS4D*, 19/22LU40**, 19/22/26LU5***,
19/22/26/32LV25**, 26/32/37/42/47/55LV3***, 32/42/47/55LV3***, 32/42/47/55LW45**, 19/22/26/32LV25,
26/32LV30**, 32/42LV33**, 32/37/42/47/55LV35**, 22/26/32/37/42/47/55LV55**, 32/42LV34**,
32/42/47/55LW45**, 42/47LW54**, 42/47LW57**, 42/47/55LW65**, 47/55LW77**, 47/55LW95**, 47/55LW98**,
72LW99**, 32LX2R*, 42/47/55LX6***, 47/55LX9***, 22/29/32/39/42/47/55/60/65LY340C, 42/47/55/65LY540S,
42/47/55LZ96** , 60PC4R*, 32/37/42/47/55SL8***, 42/47SL9***, 42/47/55/60WL30MS, M197WD, M227WD,
M237WD, M2901S, M3204C, M3801S, M4212C, M4712C.
PLASMA: 42/50PA45**, 42/50PA49**, 50/60PA65**, 42PC1***, 42PC1RV*, 42/50PC3***, 42PC3D, 42PC3DV,
50PC3D, 42PC3R*, 60PC4R*, 32PC5DVC, 42PC5RV*, 32/42/50PC5***, 42PC7R*, 42/50PG1***, 42/50PG10**,
42/50PG2***, 42/50PG20**, 42/50PG25, 42/50/60PG30**, 50/60PG60, 42/50PJ250, 42/50PJ3**, 42/50PJ550,
42PJ650, 50/60PK2**, 50PK3**, 50/60PK5**, 50/60PK7***, 50/60PK9***, 42/50PM1/3M**, 42/50PQ10,
42/50PQ20, 42/50PQ30**, 42/50PQ31, 42/50PQ35**, 42/50PQ60**, 42PQ65**, 50/60PS10, 42/50PS20**, 50PS30**,
50/60PS60**, 50PS65**, 50/60PS70**, 50/60PS80**, 42/50PT25**, 42/50PT35**, 50/60PV25**, 42/50PW35**,
42/50PW45**, 50/60PX9***, 60PY3RF*, 50/60PZ55**, 50/60PZ57**, 50/60PZ2**, 50/60PZ57**, 50/60PZ95**.
It is recommended that installers examine the RS232 control tables towards the end of all LG manuals and find the “xb”
command, and check the allocation for the top 4 bits on the RGB command. Then use Group 1 or Group 2 commands
as appropriate. Note: Some panels are listed in two different manuals, with different codes allocated. Also, we have
found some panels need latest firmware upgrades to communicate at all. If your panel turns on and off but will not
change channels, try other codes from this group. If nothing helps, call LG for an upgrade.
We have also found some panels support both “kb” and “xb” command sets. Also, some panels which show “xb”
support in the manual ONLY have “kb” support. LG lies!
Another, older, group uses an “i” as a leading character for the source setting string: these are NOT drivable
with these drivers, although they could be added if required.
Function code Group 4
“xb” strings,
code 97, 98
Group 5
“xb” strings,
code 99, 9A
Comments
97 or 99 DTV
98 or 9A ATV
Input1/Computer1
'xb 00 50' + 0D 'xb 00 60' + 0D RGB-PC
Input2/Computer2 'xb 00 91’ + 0D 'xb 00 91’ + 0D HDMI-2 (Changed at V097)
Input3/Video1 'xb 00 20’ + 0D 'xb 00 20’ + 0D AV1 Video/S-Video * OPT1 swaps Video1 &Video2
Input4/Video2 'xb 00 90’ + 0D 'xb 00 90’ + 0D HDMI-1 * * OPT1 swaps Video1 &Video2
Input4/Video2 'xb 00 21’ + 0D 'xb 00 21’ + 0D AV2 if OPT6 On * OPT1 swaps Video1 &Video2
Input5 'xb 00 30’ + 0D 'xb 00 30’ + 0D S-Video (some only)
Input6 'xb 00 40’ + 0D 'xb 00 40’ + 0D Component 1 Video YPbPr
Input7 'xb 00 41’ + 0D 'xb 00 41’ + 0D Component 2 Video YPbPr
Input8 'xb 00 70’ + 0D 'xb 00 70’ + 0D HDMI/DVI (some only)
Input9 'xb 00 80’ + 0D 'xb 00 80’ + 0D HDMI/DVI (some only)
Input10 'xb 00 90’ + 0D 'xb 00 90’ + 0D Select HDMI-1
Input11 'xb 00 91’ + 0D 'xb 00 91’ + 0D HDMI-2 / SDI / DTV
Input12 'xb 00 92’ + 0D 'xb 00 92’ + 0D HDMI-3
Input13 'xb 00 93’ + 0D 'xb 00 93’ + 0D HDMI-4
Input14 'xb 00 A0’ + 0D 'xb 00 A0’ + 0D HDMI-PC (some only)
Input15 'xb 00 A1’ + 0D 'xb 00 A1’ + 0D HDMI-2 / SDI / DTV
Input16 'xb 00 B0’ + 0D 'xb 00 B0’ + 0D SuperSign

T440 User’s manual Flat panel part © JED Micro Pty Ltd Page 13
Input17 'xb 00 C0’ + 0D 'xb 00 C0’ + 0D DisplayPort(DTV) (some only)
Input18 'xb 00 D0’ + 0D 'xb 00 D0’ + 0D DisplayPort(PC) (some only)
TV Channel Up 'mc 00 00' + 0D 'mc 00 00' + 0D Use IR command PR+ CH+
TV Channel Down 'mc 00 01' + 0D 'mc 00 01' + 0D Use IR command PR- CH-
* T440: OPT6 switch ON will use AV2 Video in place of HDMI. T430: uses HDMI as Video2.
Any one of these codes can be set into Constant:0/Constant:1 for computer codes and Constant:2/Constant:3 for video
codes. (The default is to have Computer1 (above) as the “Computer” channel and Video1 as the “Video” channel.
Setting OPT1 switch ON will swap Video1 and Video2 channels. Setting OPT5 switch ON will swap Computer 1 and
Computer 2 sources.)
TV := 'xb 00 00’ + 0D; // TV Digital (Code 97 or 99 selects)
TV := 'xb 00 10’ + 0D; // TV Analog (Code 98 or 9A selects)
Aspect Ratio settings
Use the procedure shown in Part A of the T430/T440 manual:
SetAspect1 := 'kc 00 01' + 0D; // Normal 4:3
SetAspect2 := 'kc 00 02' + 0D; // 16:9
General comments
These panels can be used with a number of keyboards:
•
With a “Code 9” or “Code B” keyboard, with buttons selecting “Video” and ‘Computer”, with “Volume Up/Dn”;
•
With a “Code E” keyboard, with buttons selecting “TV”, “Video” and “Computer”, with TV channel Up/Down
and Volume control keys. (The TV channel commands send incremental (i.e. up and down) commands), so the
limits are set in the panel.)
•
No OPT7 handshake mode is provided. Power on panel connection blink codes available.
•
Freeze command is not available.
RS232 connections to LG LCD, LG Plasma and Zenith flat screens
These use a 9-pin-D9 male on the panel, female on cable. Coms is at 9600, 8N1
Function/Direction T440 “projector”
Connection
Fujitsu “Control” Port
Connector
Ground Ground 9-pin D-sub pin 5
Data from T440 to projector Tx 9-pin D-sub pin 2 (RXD)
Reply data from projector to T440 Rx 9-pin D-sub pin 3 (TXD)
Plus 9 volt CTS/DTR to projector N/C N/C
After installation wiring of any projector to a T440, use a multimeter to check voltages of –9 on BOTH TX and RX pins
in any installation, as described in the troubleshooting part of this manual.
Some have clamp diodes on signal lines so voltages may be limited to -0.7 volts and plus 5v signal pulses.
Some might use reverse 2/3.
8
12345
6 7 9
D-sub 9 female
solder side

T440 User’s manual Flat panel part © JED Micro Pty Ltd Page 14
Mitsubishi LCD: LDT321V, LDT323V, LDT422V, LDT461V2, MDT521S, MTD651S,
MTD652S: (Code 48 )
(
MDT321S , LDT462V, LDT551V see NEC Multeos below)
RS232 codes are at:
http://www.mitsubishielectric.com.au/assets/vis/RS232_485_LAN_Serial_Command_Control_MDT652S.doc.pdf
Function code NEC LCD 00_r/00_v
and M40/46 (old codes)
Comments
Input1/Computer1 '00_r3' + 0D Computer1 RGB 1 VGA analog-RGB
Input2/Computer2 '00_r4' + 0D RGB/HV into BNC sockets
Input3/Video1 '00_v1' + 0D Composite Video * OPT1 swaps Video1 &Video2
Input4/Video2 '00_r1' + 0D HDMI * * OPT1 swaps Video1 &Video2
* T440: OPT6 switch ON will use S-Video in place of HDMI. T430: uses HDMI as Video2. S-Video code:
'00_v3' + 0D
Input5 '00_v2' + 0D Component 1 Video YPbPr (RCA)
Input6 '00_r1' + 0D HDMI
Input7 '00_r2' + 0D DVI-D
Input8 '00_r5' + 0D Network
Input9 '00_v3' + 0D S-Video
Any one of these codes can be set into Constant:0/Constant:1 for computer codes and Constant:2/Constant:3 for video
codes. (The default is to have Computer1 (above) as the “Computer” channel and Video1 as the “Video” channel.
Setting OPT1 switch ON will swap Video1 and Video2 channels, making S-Video the video default. Setting OPT5
switch ON will swap Computer 1 and Computer 2 sources.)
•
On panel connection blink codes supported on M40/M60 and all with new codes;
•
OPT7 handshake mode is not available with old codes, but is on M40/M60 and all with new codes;
•
Mute and Freeze is not supported at all;
RS232 connections to Mitsubishi LCD with D9 (not sighted, taken from manual)
These use a 9-pin-D9 male on the plasma, female on cable. Comms is at 9600 baud, 8 bits, Odd parity, 1 stop.
Function/Direction T440 “projector”
Connection
“Serial” Port Connector
Ground Ground 9-pin D-sub pin 5
Data from T440 to projector Tx 9-pin D-sub pin 2 (RXD)
Reply data from projector to T440 Rx 9-pin D-sub pin 3 (TXD)
Plus 9 volt CTS/DTR to projector N/C N/C
After installation wiring of any projector to a T440, use a multimeter to check voltages of –9 on BOTH TX and RX pins
in any installation, as described in the troubleshooting part of this manual.
8
1 2 3 4 5
6 7 9
D-sub 9 female
solder side

T440 User’s manual Flat panel part © JED Micro Pty Ltd Page 15
NEC LCD: (Code 60 ) Old codes for: 3000/3210/4000/4010/4020/4610/4620/
5220/5710/6520P/L, SC40/SC46, M40/M46 Old T1, Old T2
(See 64/65/66 below for Multeos new drivers.)
NEC Plasma: (Code 60 ) 42XC10/42XP10, 50XC10/50XP10, 60XC10/60XP10
In the back of each user’s manual is a list of typical channel selection messages, and manuals of NEC LCD panels are
available at http://www.nec-display-solutions.co.uk/c/g/uk/en/Service/Home/index.html
Function code NEC LCD 00_r/00_v
and M40/46 (old codes)
Comments
Input1/Computer1 '00_r2' + 0D D-SUB VGA
Input2/Computer2 '00_r3' + 0D RGB/HV into BNC sockets
Input3/Video1 '00_v1' + 0D Composite Video 1 * (OPT1 swaps Video1 & Video2)
Input4/Video2 '00_h1' + 0D HDMI * Some only * (OPT1 swaps Video1 & Video2)
Input5 '00_v2' + 0D Component DVD/DV on BNC
Input6 '00_v4' + 0D Video 2 *some only
Input7 '00_r1' + 0D DVI-D digital
Input8 '00_h1' + 0D HDMI * Some only
Input9 '00_v3' + 0D S-Video
* T440: OPT6 switch ON will use S-Video in place of HDMI. T430: uses HDMI as Video2.
Any one of these codes can be set into Constant:0/Constant:1 for computer codes and Constant:2/Constant:3 for video
codes. (The default is to have Computer1 (above) as the “Computer” channel and Video1 as the “Video” channel.
Setting OPT1 switch ON will swap Video1 and Video2 channels, making S-Video the video default. Setting OPT5
switch ON will swap Computer 1 and Computer 2 sources.)
•
No blink codes supported;
•
OPT7 handshake mode is not available with old codes, but is on M40/M60 and all with new codes;
•
Freeze is not supported at all;
•
Turn off ECO mode of the panel to enable On/Off control (some only)
•
Switch “INPUT DETECT” to “NONE” to prevent channel changing when non-selected signals come and go;
•
“DVI MODE” may need to be setup to control type of input signal expected on that input;
•
“S-VIDEO MODE” should be set to “SEPARATE” so users can select between Composite Video and S-Video
sources (some only).
NEC LCD: (Code 64 HDMI 1, Code 65 HDMI 2), Mit Code 66, Global 68
Multeos and Multisync models LCD3210, LCD3215, LCD4215, LCD4615, LCD5710,
LCD8205, MDT652S, M401/M461/M521, P401, P402, P461, P462, P521, P552, P553,
P701, P702, P703, S401, S461, S521, V321, V322, V422, V423, V461, V462, V463,
X464UN/UNV, V551, V552, V651, V652, V3212, V801, X431BT, X461HB, X461S,
X461UN, X463UN, X551S, X551UN, X554UN/UNS
Mitsubishi MDT321S (no HDMI)
Mitsubishi LCD: LDT462V, LDT551V, MDT652S Code 66 has HDMI as Video 2
In the back of each user’s manual is a list of typical channel selection messages.
Function code M40/46 Multeos Comments

T440 User’s manual Flat panel part © JED Micro Pty Ltd Page 16
Input1/Computer1 '00600001' Select RGB-PC
Input2/Computer2 '00600002' RGB/HV into BNC sockets
Input3/Video1 '00600005' Composite Video * (OPT1 swaps Video1 & Video2)
Input4/Video2 '00600004' Code $64 HDMI/DVD * * (OPT1 swaps Video1 & Video2)
Input4/Video2 '00600011' Code $65 HDMI * * (OPT1 swaps Video1 & Video2)
Input4/Video2 '00600003' Code $66 HDMI * * (OPT1 swaps Video1 & Video2)
Input5 '00600006' Video 2
Input6 '0060000C' Component 1
Input7 '0060000E' Component 2
Input8 '00600003' RGB 1 or 2: DVI-D
Input9 '00600004 HDMI (Set only) * Some only
Input10 '00600011' HDMI VESA * Some only
Input11 '00600009' DisplayPort * Some only (OLDER)
Input12 '0060000F' DisplayPort (recent)
Input13 '0060000D' Option
Input14 '00600010' DisplayPort 2
Input15 '00600011' HDMI 2
Input16 '00600080' DisplayPort 3
TV '0060000A'
TV Channel Up '008B0001'
TV Channel Down '008B0002'
•
T440: OPT6 switch ON will use S-Video in place of HDMI. T430: uses HDMI as Video2.
•
On panel connection blink codes supported with new codes;
•
OPT7 handshake mode is available with new codes;
•
Audio control (Volume up/down keyboards, codes 2, 9, B, and E) is ONLY supported in M40/M46 Multeos
mode and all with new codes (Code 64 ). NOTE: Variable audio control and audio mute is only available
to the speaker-level drive. It is NOT able to control the line-level audio out to the RCA connectors. Use
on-screen setup to manually allocate audio inputs to channels;
•
Two-yellow button “Mute” command is available on “64/65 ” code displays, but ONLY to the audio and only
to the speaker drive. No picture mute is provided;
•
Freeze is not supported at all;
•
Turn off ECO mode of the panel to enable On/Off control (some only)
•
Switch “INPUT DETECT” to “NONE” to prevent channel changing when non-selected signals come and go;
•
“DVI MODE” may need to be setup to control type of input signal expected on that input;
•
“S-VIDEO MODE” should be set to “SEPARATE” so users can select between Composite Video and S-Video
sources (some only).
•
TV control (keyboard code ‘E’) is only available for M40/M46 in Multeos mode. It uses incremental Up and
Down buttons.
NEC LCD E-Series: Code 68
Global version of above, no audio, audio mute or reply mode.

T440 User’s manual Flat panel part © JED Micro Pty Ltd Page 17
NEC LCD E-Series: Code 67
E324, E424, E464, E554, E654
Control codes for this range are at: http://www.hdtvreview.com/pdf/nec-e654-quickstart.pdf and
http://au.nec.com/en_AU/media/docs/products/displays/ExternalControlManual-E-Series_en.pdf
(Unfortunately not all info is in these documents, e.g. reply to GET commands and absolute volume codes.)
Function code E-series codes Comments
Input1/Computer1 '00600001' Select RGB-PC DB15 *(OPT5 swaps Video1 & Video2)
Input2/Computer2 '00600012' HDMI 2 *(OPT5 swaps Video1 & Video2)
Input3/Video1 '00600005' Composite Video * (OPT1 swaps Video1 & Video2)
Input4/Video2 '00600011' HDMI 1 * (OPT1 swaps Video1 & Video2)
Input5 '00600013' HDMI 3
Input6 '0060000C' Component Video YPbPr (RCA)
Input7 '00600014' USB
TV '0060000A' Digital TV
TV Channel Up '008B0001'
TV Channel Down '008B0002'
•
On panel connection blink codes supported with new codes. (subject to testing);;
•
OPT7 handshake mode is available with new codes. (subject to testing);
•
Audio control (Volume up/down keyboards, codes 2, 9, B, and E) is supported in Incremental mode: and sends
five Inc. or Dec. commands. NOTE: Variable audio control and audio mute is only available to the speaker-
level drive. It is NOT able to control the line-level audio out to the RCA connectors. Use on-screen setup to
manually allocate audio inputs to channels;
•
No picture mute or freeze is provided;
•
Turn off ECO mode of the panel to enable On/Off control (some only)
•
Switch “INPUT DETECT” to “NONE” to prevent channel changing when non-selected signals come and go;
RS232 connections to NEC LCD with D9
These use a 9-pin-D9 male on the plasma, female on cable. Comms is at 9600 baud, 8 bits, Odd parity, 1 stop.
Function/Direction T440 “projector”
Connection
“Serial” Port Connector
Ground Ground 9-pin D-sub pin 5
Data from T440 to projector Tx 9-pin D-sub pin 2 (RXD)
Reply data from projector to T440 Rx 9-pin D-sub pin 3 (TXD)
Plus 9 volt CTS/DTR to projector N/C N/C
After installation wiring of any projector to a T440, use a multimeter to check voltages of –9 on BOTH TX and RX pins
in any installation, as described in the troubleshooting part of this manual.
8
1 2 3 4 5
6 7 9
D-sub 9 female
solder side

T440 User’s manual Flat panel part © JED Micro Pty Ltd Page 18
NEC NLT-40/46FHD100, Sherwood LF-401-TB5 TV/LCD panel (Codes 95 & 96 ),
(Made by “indtek” in Korea as LC-401EB3 and LC-461EB3, also sold by Grundig.)
There are two drivers for this: these are same for Computer and Video, but the TV function can select Full HD Digital
tuner (Code 1C ) or analog tuner (Code 1D )
This family has many members with a range of channel messages.
Channel codes are:
Input1 := 'kb 00 7' + 0D; //Computer1 Select PC-RGB
Input2 := 'kb 00 8' + 0D; //Computer2 Select HDMI-1
Input3 := 'kb 00 2' + 0D; //Video1 AV1 Comp Video * (OPT1 swaps Video1 & Video2)
Input4 := 'kb 00 A' + 0D; // Video2 HDMI * (OPT1 swaps Video1 & Video2)
* T440: OPT6 switch ON will use S-Video in place of HDMI. T430: uses HDMI as Video2.
Input4 := 'kb 00 5' + 0D; //Video4 S-Vid *
Input5 := 'kb 00 3' + 0D; // LG_kb; AV2
Input6 := 'kb 00 4' + 0D; // LG_kb; AV3
Input7 := 'kb 00 6' + 0D; // Component
Input8 := 'kb 00 A' + 0D; // HDMI 3 (option)
Any one of these codes can be set into Constant:0/Constant:1 for computer codes and Constant:2/Constant:3 for video
codes. (The default is to have Computer1 (above) as the “Computer” channel and Video1 as the “Video” channel.
Setting OPT1 switch ON will swap Video1 and Video2 channels, making S-Video the video default. Setting OPT5
switch ON will swap Computer 1 and Computer 2 sources.)
TV := 'kb 00 0' + 0D; // TV Digital (Code 95 selects)
TV := 'kb 00 1' + 0D; // TV Analog (Code 96 selects)
This panel can be used with a number of keyboards:
•
With “Code 9” or “Code 8 or A” keyboards, with buttons selecting “Video” and ‘Computer”, with either
“Volume” (code 9) or “Freeze/Mute” (Code A);
•
With a “Code B-L” or “Code B-P” keyboard, with buttons selecting “Video” and “Computer1” and “Computer2”
with Volume control keys; or
•
With a “Code E” keyboard, with buttons selecting “TV”, “Video” and “Computer”, with TV channel Up/Down
and Volume control keys. (The channel commands send incremental (i.e. up and down) commands), so the limits
are set in the panel.)
(Keyboards B and E combine channel keys with “On” keys.)
•
Panel connection blink codes are available but OPT7 handshake mode is NOT.
RS232 connections to Sherwood TV/LCD panel
These use a RG45 on the LCD, female on cable. Comms is at 9600 baud, 8 bits, no parity, 1 stop.
Function/Direction T440 “projector”
Connection
RG45 Connector EIA568A
Ground Ground Pin 3 (orange-white) &
pin 4 (solid blue)
Data from T440 to projector Tx Pin 1, green-white
Reply data from projector to T440 Rx Pin 2, solid green
After installation wiring of any projector to a T440, use a multimeter to check voltages of –9 on BOTH TX and RX pins
in any installation, as described in the troubleshooting part of this manual.

T440 User’s manual Flat panel part © JED Micro Pty Ltd Page 19
NEC Plasma PX-42/50/60/61, MP/VM/VP/VR/XM/XR, 2/3/4/5/6 (Code 14 )
This family has many members with a range of channel messages.
There is a typical RS232 code Operation Manual at: http://www.prokare.com.tr/pdf2/nec_residental_plasma_rs232.pdf
And http://www.nec-display-solutions.co.uk/c/g/uk/en/Service/Home/index.html
Channel codes are:
Input1 := DF + 80 + 60 + 47 + 01 + 07 + 0E; //Computer1 RGB1 / PC1 DB15
Input2 := DF + 80 + 60 + 47 + 01 + 08 + 0F; //Computer2 RGB2 / PC2 5 x BNC
Input3 := DF + 80 + 60 + 47 + 01 + 02 + 09; //Video1 "Video2" RCA Composite Video*
Input4 := DF + 80 + 60 + 47 + 01 + 0C + 13; //Video2 RGB3 DVI-D ) *
* (OPT1 swaps Video1 & Video2)
* T440: OPT6 switch ON will use S-Video in place of HDMI. T430: uses HDMI as Video2.
*Input4 := DF + 80 + 60 + 47 + 01 + 03 + 0A; //Video2 "Video3" S-VIDEO DIN-4
Input5 := DF + 80 + 60 + 47 + 01 + 01 + 08; // "Video1" BNC
Input6 := DF + 80 + 60 + 47 + 01 + 05 + 0C; // HD1 3 x RCA DTV1/Component
Input7 := DF + 80 + 60 + 47 + 01 + 06 + 0D; // HD2 5 x BNC DTV2/Component or SCART1/2
Input8 := DF + 80 + 60 + 47 + 01 + 0C + 13; // RGB3 / PC3 DVI-D
Input9 := DF + 80 + 60 + 47 + 01 + 0E + 15; // HD3 DVI/HDMI (some only)
Input10 := DF + 80 + 60 + 47 + 01 + 1A + 21; // HD4 DVD/HDMI (some only)
Input11 := DF + 80 + 60 + 47 + 01 + 03 + 0A; //Video2 "Video3" S-VIDEO DIN-4
Any one of these codes can be set into Constant:0/Constant:1 for computer codes and Constant:2/Constant:3 for video
codes. (The default is to have Computer1 (above) as the “Computer” channel and Video1 as the “Video” channel.
Setting OPT1 switch ON will swap Video1 and Video2 channels, making S-Video the video default. Setting OPT5
switch ON will swap Computer 1 and Computer 2 sources.)
This panel can be used with a number of keyboards:
•
With a “Code 9” keyboard, with buttons selecting “Video” and ‘Computer”, with “Volume” keys.
•
With a “Code B-L” or “Code B-P” keyboard, with buttons selecting “Video” and “Computer1” and “Computer2”
with “Volume” control keys. (Keyboards combine channel keys with “On” keys.)
•
(There is no point in using a Code 8 or A keyboard, as there is no “Freeze” function on plasma screens.
Panel connection blink codes are available but OPT7 handshake mode in NOT.
Audio mute with 2 Vol keys is available, but not video.
RS232 connections to NEC Plasma with D9
These use a 9-pin-D9 male on the plasma, female on cable. Comms is at 9600 baud, 8 bits, Odd parity, 1 stop.
Function/Direction T440 “projector”
Connection
“Serial” Port Connector
Ground Ground 9-pin D-sub pin 5
Data from T440 to projector Tx 9-pin D-sub pin 2 (RXD)
Reply data from projector to T440 Rx 9-pin D-sub pin 3 (TXD)
Plus 9 volt CTS/DTR to projector “RTS” 9-pin D-sub pin 8(CTS IN)
After installation wiring of any projector to a T440, use a multimeter to check voltages of –9 on BOTH TX and RX pins
in any installation, as described in the troubleshooting part of this manual.
8
1 2 3 4 5
6 7 9
D-sub 9 female
solder side

T440 User’s manual Flat panel part © JED Micro Pty Ltd Page 20
Panasonic LCD panels: (Codes 56, 57 )
(Vol 0->100)
There are many displays covered by these drivers, but to determine the appropriate one to use, please
examine the pages in the user manual of your display to see which is needed. Do a search (Ctrl “F”) for
“9600” (the coms baud rate) to get to the page “Serial Terminals connection”. This or the next page shows
the inputs for this model. Compare these to the table below to see commands needed.
Units with “AV1” available (Code 56 ):
TH-42LF6U, TH-47LF6U, TH-55LF6U, TH-42LF30U, TH-47LF30U, TH-70LF50W,
TH-80LF50W, TH-42LF60U, TH-47LF60U, TH-55LF60U, TH-42LFP30, TH-47LFP30
Input1 := 02 + 'IMS:PC1' + 03; // Computer1 DB15
Input2 := 02 + 'IMS:DV1' + 03; // Computer2 DVI-D
Input3 := 02 + 'IMS:AV1' + 03; // Video1 (not all ... overwrite if nec. with HM1 see below)
Input4 := 02 + 'IMS:HM1' + 03; // Video2 HDMI 1
Input5 := 02 + 'IMS:HM2' + 03; // HDMI 2
Input6 := 02 + 'IMS:AV2' + 03; // AV2
Input7 := 02 + 'IMS:AV2YBR' + 03;
Input8 := 02 + 'IMS:AV2RGB' + 03;
Input9 := 02 + 'IMS:SL1' + 03; // Slot 1
Input10 := 02 + 'IMS:SL1YUV' + 03; // Slot 1
Input11 := 02 + 'IMS:SL1RGB' + 03; // Slot 1
Input12 := 02 + 'IMS:S1A' + 03; // Slot 1A
Input13 := 02 + 'IMS:S1AYUV' + 03; // Slot 1A
Input14 := 02 + 'IMS:S1ARGB' + 03; // Slot 1A
Input15 := 02 + 'IMS:S1B' + 03; // Slot 1B
Input16 := 02 + 'IMS:S1BYUV' + 03; // Slot 1B
Input17 := 02 + 'IMS:S1BRGB' + 03; // Slot 1B
Input18 := 02 + 'IMS:DV1YUV' + 03; // DVI (These codes suspiciously called DVIYUV
Input19 := 02 + 'IMS:DV1RGB' + 03; // DVI (sometimes. This looks like a mis-print.)
Input20 := 02 + 'IMS:DL1' + 03; // DigitalLink
Units with “AV1” un-available (Code 57 ):
TH-42LF5U, TH-47LF5U, TH-42LFE6E, TH-50LFE6E, TH-47LFT30, TH-47LFX6J
As above, except:
Input1 := 02 + 'IMS:PC1' + 03; // Computer1 DB15
Input2 := 02 + 'IMS:DV1' + 03; // Computer2 DVI-D
Input3 := 02 + 'IMS:HM1' + 03; // Video1 overwrite with HDMI 1
Input4 := 02 + 'IMS:HM1' + 03; // Video2 HDMI 1
Any one of these codes can be set into Constant:0/Constant:1 for computer codes and Constant:2/Constant:3 for video
codes. (The default is to have Computer1 (above) as the “Computer” channel and Video1 as the “Video” channel.
Setting OPT1 switch ON will swap Video1 and Video2 channels. Setting OPT5 switch ON will swap Computer 1 and
Computer 2 sources.)
•
On panel connection blink codes supported and OPT7 handshake mode is supported;
•
Enable the RS-232 control access by going to “Setup” then to “Network Setup” then “Control I/F Select” and
set “RS-232”;
•
Audio control 0->100 (Volume up/down keyboards, codes 2, 9, B, and E) is available;
•
Freeze is not supported at all;
This manual suits for next models
1
Table of contents
Other Jed Micro Pty Controllers manuals
Popular Controllers manuals by other brands
Siemens
Siemens Powermite 599 Series Technical instructions
Shinko
Shinko FCD-13A instruction manual
GEPRC
GEPRC SPAN-F722-BT manual

Aprilaire
Aprilaire 75 installation instructions

HEIDENHAIN
HEIDENHAIN QUADRA-CHEK 3000 operating instructions
Control Techniques
Control Techniques COMMANDER SE Quick start quide
