Jeld-Wen JII112 Steel User manual

For best results, nish door and shelf prior to installation (if not already
nished) according to JELD-WEN nishing instructions found at www.
jeld-wen.com. If applying the shelf to a door that is already nished,
verify the nish is in good condition before applying shelf. Re-nish the
door if necessary.
PREPARE SURFACE
1. The shelf can be installed on the door with the door either vertical
or horizontal. Installation may be easiest if the door is layed on a at
padded work surface with exterior side facing up.
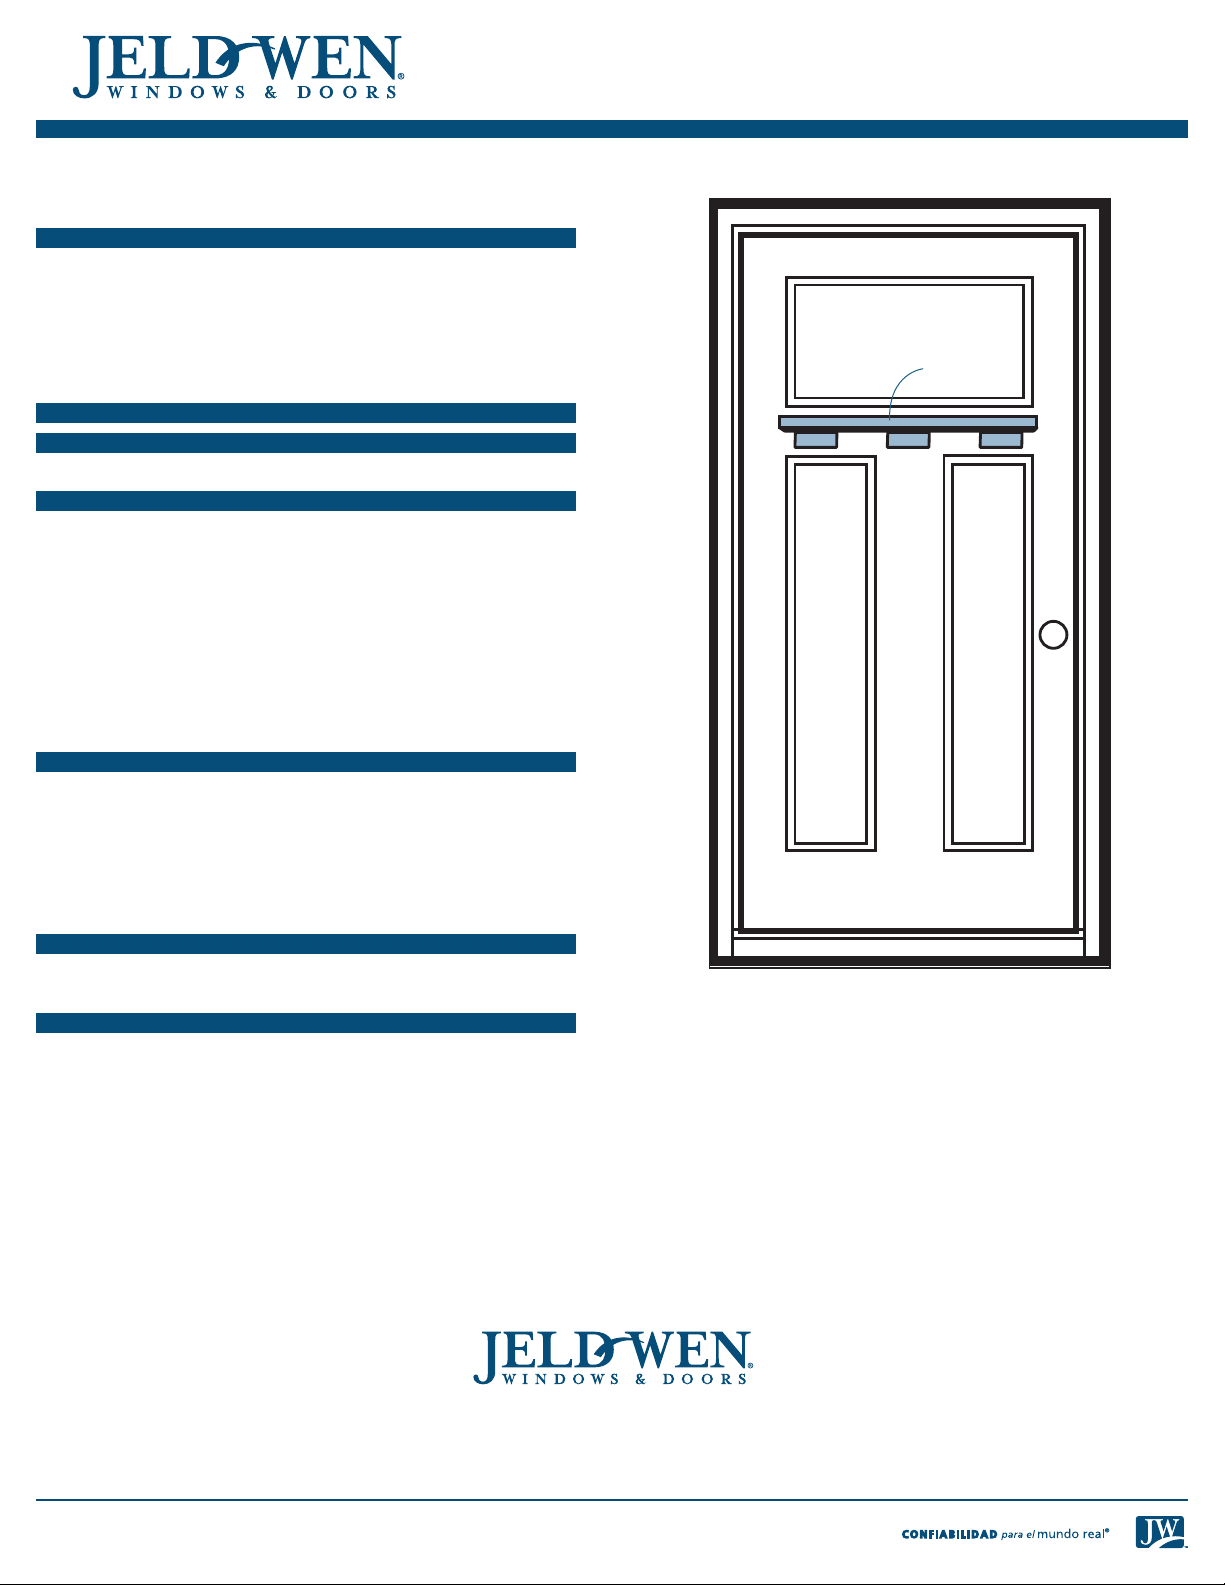
2. Clean the entire surface as shown in the image to the right where the
shelf will be installed. Use a clean towel and a 50% Isopropyl alcohol,
50% water solution and let dry.
POSITION SHELF
Center shelf vertically and horizontally on the cleaned surface and
lightly trace each corner of shelf on the door.
APPLY SHELF
1. Remove the backing paper from the pre-installed adhesive tape.
Once the tape adheres to the door, it cannot be moved. Make sure
it is in the correct position before making contact with the door
surface.
2. Align the shelf with the marks on the door and press the shelf rmly
into place and hold for 15 seconds. Do not disturb for 72 hours.
Note! The shelf is decorative only and not designed to support weight.
INSTALLATION INSTRUCTIONS
for the Craftsman Shelf on Exterior Doors (JII112 Steel)
Thank you for selecting JELD-WEN products. Verify that all parts
of the shelf kit are present and undamaged before installation.
SAFETY AND HANDLING
•ReadandfullyunderstandALLmanufacturers’instructionsbefore
beginning.
•Wearprotectivegear(e.g.safetyglasses,gloves,etc.).
•Forproperadhesion,onlyapplytothedoorwhenconditionsaredry
and at least 50oF. Move the door into favorable conditions if necessary.
IF INJURY OCCURS, IMMEDIATELY SEEK MEDICAL ATTENTION!
KIT INCLUDES
One shelf (with adhesive tape pre-installed)
NEEDED TOOLS AND MATERIALS
•Paddedatsurface(optional)
•Tapemeasure
•Pencil
•Finishingsupplies
•Cleantowels
•Isopropylalcohol
Please visit jeld-wen.com for finishing instructions, warranty and care and maintenance information.
Thank you for choosing
©2013 JELD-WEN, inc.; This publication and its contents are owned by JELD-WEN, inc. and are protected under the U.S. Copyright Act and other intellectual
property laws. All trademarks, service marks, logos and the like (whether registered or unregistered) are owned or controlled by JELD-WEN, inc. or others.
Unauthorized use or duplication of JELD-WEN intellectual property is prohibited.
JELD-WEN reserves the right to change product specications without notice. Please check our website, jeld-wen.com, for current information. (01/13)
Panelorglass
Panel Panel
Shelf
Paraobtenerlosmejoresresultados,déelacabadoalapuertayala
repisa antes de instalarlas (si no venían ya con acabado), siguiendo las
instrucciones de acabado de JELD-WEN que se encuentran en www.
jeld-wen.com. Si está instalando la repisa en una puerta que ya tiene
elacabado,revisequeelacabadoestéenbuenascondicionesantesde
instalar la repisa. Vuelva a dar el acabado a la puerta si es necesario.
PREPARE LA SUPERFICIE
1. La repisa se puede instalar en la puerta estando la puerta en posición
vertical u horizontal. La instalación quizá sea más fácil si la puerta
está acostada en una supercie de trabajo plana y acolchada, con el
lado exterior viendo hacia arriba.
2. Limpie la supercie completa, como se muestra en la imagen de la
derecha, donde se va a instalar la repisa. Use una toallita limpia y una
solución de 50% de alcohol isopropílico y 50% de agua, y deje secar.
MARQUE LA POSICIÓN DE LA REPISA
Centre la repisa vertical y horizontalmente sobre la supercie limpia y marque
suavemente en la puerta, con el lápiz, las cuatro esquinas de la repisa.
ADHIERA LA REPISA
1. Retire el papel protector de la cinta adhesiva previamente colocada.
Una vez que la cinta se adhiera a la puerta, no se podrá volver a
quitar.Cuidequeestéenlaposicióncorrectaantesdehacercontacto
con la supercie de la puerta.
2. Alinee la repisa con las marcas de lápiz hechas en la puerta y presione
la repisa rmemente por 15 segundos para que se adhiera. No las
toque por 72 horas.
¡AVISO! La repisa es decorativa únicamente y no está diseñada para
soportar peso.
INSTRUCCIONES DE INSTALACIÓN
delaRepisaCraftsman(“Artesano”)enPuertasExteriores(JII112Acero)
Gracias por seleccionar los productos JELD-WEN. Revise antes de la
instalación que todas las partes del juego de repisa estén incluidas y
que no se hayan dañado.
SEGURIDAD Y MANEJO
•LeayentiendaperfectamenteTODASlasinstruccionesdelfabricante
antes de comenzar.
•Useequipodeprotección(comogafasdeseguridad,guantes,etc.).
•Paraunabuenaadhesión,aplíquelaalapuertacuandoelambiente
estésecoyalmenosa50oF. Si es necesario, lleve la puerta a otro sitio
en el que haya condiciones favorables.
¡SI OCURRE UNA LESIÓN, BUSQUE AYUDA MÉDICA DE INMEDIATO!
EL JUEGO CONTIENE
Una repisa (con cinta adhesiva previamente colocada)
LAS HERRAMIENTAS Y LOS MATERIALES NECESARIOS
•Supercieplanaacolchada
(opcional)
•Cintademedir
•Lápiz
•Suministrosparaacabado
•Toallitaslimpias
•Alcoholisopropílico
Por favor visite jeld-wen.com/resources para consultar las instrucciones de acabado, la garantía y la información de cuidado y mantenimiento.
Gracias por escoger
© 2013 JELD-WEN, inc. Esta publicación y su contenido son propiedad de JELD-WEN, inc. y están protegidos por la Ley de Derechos de Autor de EE.UU. y otras leyes de
propiedad intelectual. Todas las marcas comerciales, marcas de servicio, logotipos y similares (ya sean registradas o no) son propiedad de JELD-WEN, inc. u otros, o están
controlados por ellos.
Queda prohibido el uso no autorizado o el duplicado de la propiedad intelectual de JELD-WEN.
JELD-WEN se reserva el derecho de cambiar las especicaciones del producto sin previo aviso. Por favor busque información actualizada en nuestra página web, jeld-wen.com. (01/13)
Panelovidrio
Panel Panel
Repisa
Table of contents
Languages:
Popular Indoor Furnishing manuals by other brands

Regency
Regency LWMS3015 Assembly instructions

Furniture of America
Furniture of America CM7751C Assembly instructions

Safavieh Furniture
Safavieh Furniture Estella CNS5731 manual

PLACES OF STYLE
PLACES OF STYLE Ovalfuss Assembly instruction

Trasman
Trasman 1138 Bo1 Assembly manual

Costway
Costway JV10856 manual


