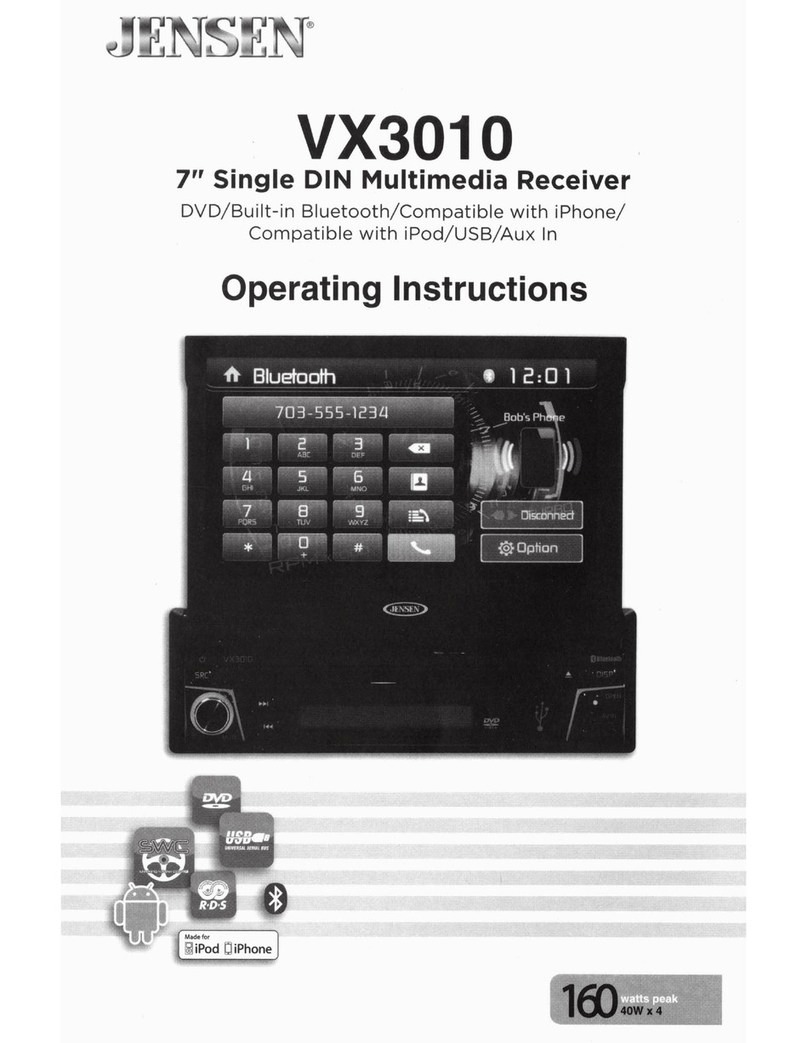
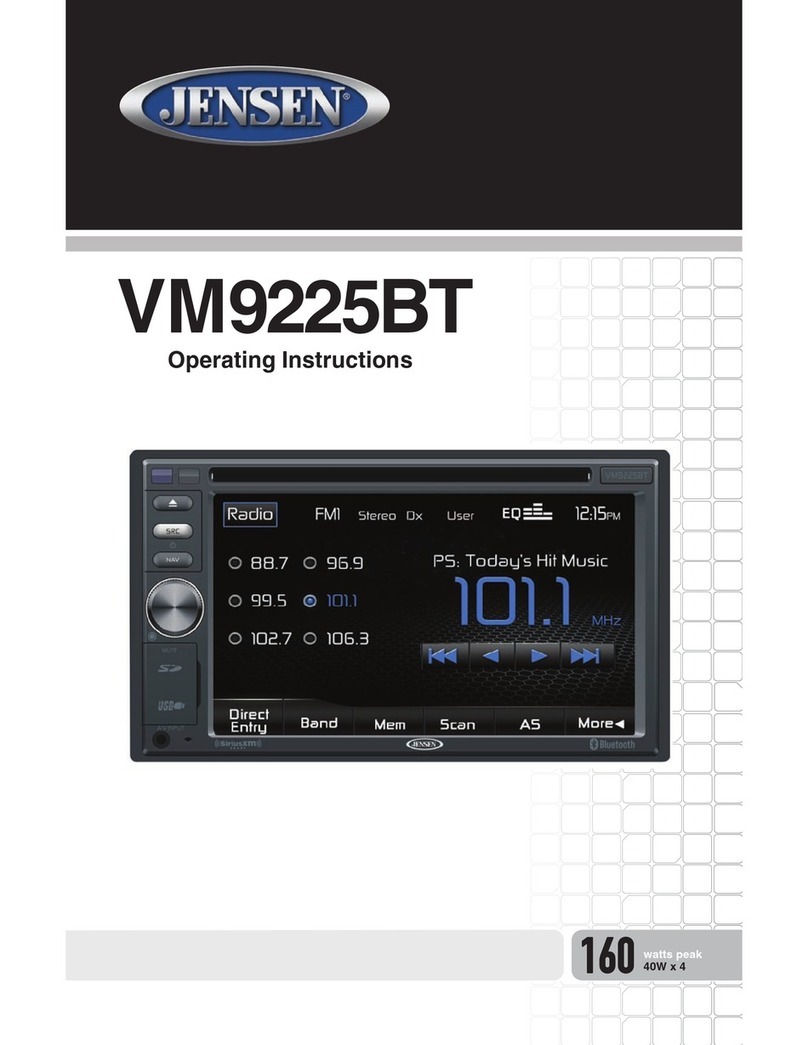
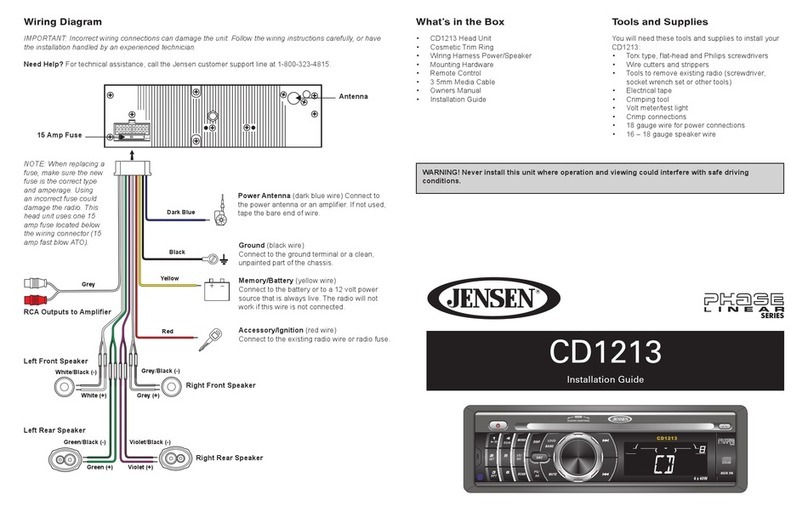
Jensen MP1514BT User manual

MP1514BT
OWNER’s MANUAL
Mobile Audio System
160
watts peak
40W x 4

2
Thank you for choosing a Jensen product. We hope you will nd the instructions
in this owner’s manual clear and easy to follow. If you take a few minutes to look
through it, you’ll learn how to use all the features of your new Jensen MP1514BT
Mobile Audio System for maximum enjoyment.
“Made for iPod” and “Made for iPhone” means that an electronic accessory has
been designed to connect specically to iPod or iPhone, respectively, and has
been certied by the developers to meet Apple performance standards. Apple
is not responsible for the operation of this device or its compliance with safety
or regulatory standards. Please note that the use of this accessory with iPod or
iPhone may aect wireless performance.
iPod and iPhone are trademarks of Apple Inc., registered in the U.S. and other
countries.
Made for:
• iPod touch (1st, 2nd, 3rd, and 4th generation)
• iPod nano (3rd, 4th, 5th, and 6th generation)
• iPod Classic
• iPod with video
• iPhone 4S
• iPhone 4
• iPhone 3GS
• iPhone 3
• iPhone
The Bluetooth® word mark and logos are registered trademarks owned by
Bluetooth SIG, Inc. and any use of such marks by Jensen is under license. Other
trademarks and trade names are those of their respective owners.
WARNING! Never disassemble or adjust the unit.
WARNING! To prevent injury from shock or re, never expose this unit to
moisture or water.
WARNING! Never use irregular discs.
WARNING! When replacing a fuse, the replacement must be the same amperage
as shown on the fuse holder. Never replace a fuse with another fuse
of a dierent value. Do not use a fuse with a higher amperage rating
than the fuse originally supplied with your unit, otherwise damage to
the unit or a re will result.

3
MP1514BT
CONTENTS
FEATURES ���������������������������������������������������������������������������������������������������������������5
INSTALLATION ��������������������������������������������������������������������������������������������������������6
DIN Front/Rear Mount ���������������������������������������������������������������������������������������6
DIN Front Mount (Method A) �����������������������������������������������������������������������������7
DIN Rear Mount (Method B) ����������������������������������������������������������������������������11
USING THE DETACHABLE FACEPLATE�����������������������������������������������������������������12
Removing the Faceplate ����������������������������������������������������������������������������������12
Installing the Faceplate �����������������������������������������������������������������������������������13
WIRING CONNECTIONS ���������������������������������������������������������������������������������������14
CONTROLS AND INDICATORS �����������������������������������������������������������������������������15
REMOTE CONTROL OPERATION ��������������������������������������������������������������������������19
Battery Installation ������������������������������������������������������������������������������������������19
Using the Remote Control �������������������������������������������������������������������������������20
Remote Control Functions �������������������������������������������������������������������������������20
BASIC OPERATION �����������������������������������������������������������������������������������������������24
Switching the Unit On or O ���������������������������������������������������������������������������24
Releasing the Faceplate �����������������������������������������������������������������������������������24
Sound Adjustment Mode ��������������������������������������������������������������������������������24
System Settings ������������������������������������������������������������������������������������������������25
Loudness �����������������������������������������������������������������������������������������������������������26
Changing the Display Panel Information �������������������������������������������������������26
Setting the Clock ����������������������������������������������������������������������������������������������26
Equalizer Presets ����������������������������������������������������������������������������������������������27
Mute ������������������������������������������������������������������������������������������������������������������27
Auxiliary Input ��������������������������������������������������������������������������������������������������27
Factory Reset Function ������������������������������������������������������������������������������������28
RADIO OPERATION ����������������������������������������������������������������������������������������������29
Switching to Radio Mode ��������������������������������������������������������������������������������29
Selecting the Frequency Band ������������������������������������������������������������������������29
Selecting a Station �������������������������������������������������������������������������������������������29
Setting Station Preset Memory Locations �����������������������������������������������������30
Automatic Memory Storing �����������������������������������������������������������������������������30
Radio Data System (RDS) Operation ���������������������������������������������������������������31

4
CD/MP3/WMA OPERATION ���������������������������������������������������������������������������������32
Loading a Disc ��������������������������������������������������������������������������������������������������32
Switching to CD Mode �������������������������������������������������������������������������������������32
Selecting a Track ����������������������������������������������������������������������������������������������32
Pausing or Resuming Playback �����������������������������������������������������������������������32
Previewing a Track �������������������������������������������������������������������������������������������32
Repeating a Track ���������������������������������������������������������������������������������������������33
Playing Tracks in a Random Order ������������������������������������������������������������������33
Ejecting a Disc ��������������������������������������������������������������������������������������������������33
Electronic Skip Protection �������������������������������������������������������������������������������33
Special Functions for MP3 / WMA Discs ����������������������������������������������������������33
Disc Notes ���������������������������������������������������������������������������������������������������������34
USB OPERATION ���������������������������������������������������������������������������������������������������35
MEMORY CARD OPERATION �������������������������������������������������������������������������������36
Selecting Tracks Using the Band Button ��������������������������������������������������������37
iPod®/iPhone® OPERATION ���������������������������������������������������������������������������������38
Selecting a Category ����������������������������������������������������������������������������������������38
Selecting a Track ����������������������������������������������������������������������������������������������38
Pausing Playback ���������������������������������������������������������������������������������������������38
Repeating a Track ���������������������������������������������������������������������������������������������38
Playing Tracks in a Random Order ������������������������������������������������������������������38
Selecting a Track Up/Down �����������������������������������������������������������������������������38
BLUETOOTH® WIRELESS DEVICE OPERATION ����������������������������������������������������39
Pairing Your Mobile Phone ������������������������������������������������������������������������������39
Auto-Reconnection ������������������������������������������������������������������������������������������40
Displaying the Telephone Menu ���������������������������������������������������������������������40
Managing Incoming Calls ��������������������������������������������������������������������������������41
Making Outgoing Calls ������������������������������������������������������������������������������������41
Holding a Call ���������������������������������������������������������������������������������������������������42
Transferring a Call ��������������������������������������������������������������������������������������������42
Bluetooth Wireless Technology Music Function ��������������������������������������������42
Microphone ������������������������������������������������������������������������������������������������������42
SPECIFICATIONS ��������������������������������������������������������������������������������������������������43
TROUBLESHOOTING ��������������������������������������������������������������������������������������������44
CARE AND MAINTENANCE ����������������������������������������������������������������������������������46
COMMON REPLACEMENT PARTS ������������������������������������������������������������������������46
NOTES �������������������������������������������������������������������������������������������������������������������47
5
MP1514BT
FEATURES
• PLL Synthesizer Stereo Radio
• RDS Operation
• CD/MP3/WMA Player
• Automatic Memory Storing
• Fully Detachable Faceplate
• Preset Equalization
• Electronic Skip Protection (ESP) Function
• Memory Card Interface
• USB Interface
• Auxiliary Input Function
• Remote Control
• iPod/iPhone Ready Function
• Bluetooth® wireless technology Hands-free function and A2DP (Advanced Audio
Distribution Prole) Stereo Audio Transmission

6
INSTALLATION
It’s a good idea to read all of the instructions before beginning the installation. We
recommend having your Jensen MP1514BT Mobile Audio System installed by a
reputable installation shop.
Notes:
• Choose a mounting location where the unit will not interfere with the driver.
• Before installing the unit, temporarily connect the wiring. Make sure it is
connected up properly and the unit and the system work properly.
• To ensure proper installation, use only parts included with the unit. The use of
unauthorized parts can cause malfunctions.
• Consult with your nearest dealer if installation requires the drilling of holes or
other modications to the vehicle.
• Install the unit where it does not get in the driver’s way and cannot injure the
passenger if there is a sudden stop, like an emergency stop.
• If the installation angle exceeds 30° from horizontal, the unit might not give its
optimum performance.
30
• Avoid installing the unit where it would be subject to high temperature, such as
from direct sunlight, or hot air from the heater, or where it would be subject to
dust, dirt or excessive vibration.
DIN Front/Rear Mount
This unit can be properly installed either from “Front” (conventional DIN Front-
mount) or “Rear” (DIN Rear-mount installation, utilizing threaded screw holes
at the sides of the unit chassis). For details, refer to the following illustrated
installation methods.
Remove the Transport Screws Before Installation
Before installing the unit, remove the two transport screws.
Remove screws
before installation.

7
MP1514BT
DIN Front Mount (Method A)
Installation Opening
This unit can be installed in any dashboard having an opening as shown below:
Installing the Unit
Be sure you test all connections rst, and then follow these steps to install the unit.
1. Make sure the ignition is turned o, and then disconnect the cable from the
vehicle battery’s negative (-) terminal.
2. Disconnect the wire harness and the antenna.
3. Press the release button on the faceplate and remove the faceplate (see
“Removing the Faceplate”).
4. Remove the outer trim ring from the unit.
5. The two supplied keys release tabs inside the unit’s sleeve so you can remove
it. Insert the keys as far as they will go (with the notches facing up) into the
appropriate slots at the middle left and right sides of the unit. Then slide the
sleeve o the back of the unit.
(1) Faceplate; (2) Outer trim ring;
(3) Sleeve; (4) L key; (5) R key

8
6. Mount the sleeve by inserting it into the opening of the dashboard and bend
open the tabs located around the sleeve with a screwdriver. Not all tabs will be
able to make contact, so examine which ones will be most eective. Bending
open the appropriate tabs behind the dashboard to secure the sleeve in place.
(1) Dashboard (2) Tabs
7. Reconnect the wire harness and the antenna and be careful not to pinch any
wires or cables.
8. Slide the unit into the sleeve until it locks into place.

9
MP1514BT
9. To further secure the unit, use the supplied metal strap to secure the back of
the unit in place. Use the supplied hardware (Hex Nut (M5mm) and Spring
Washer) to attach one end of the strap to the mounting bolt on the back of
the unit. If necessary, bend the metal strap to t your vehicle’s mounting area,
then use the supplied hardware (Tapping Screw and Plain Washer) to attach
the other end of metal strap to a solid metal part of the vehicle under the
dashboard. This strap also helps ensure proper electrical grounding of the
unit.
Note: Install the short threading terminal of the mounting bolt to the back of
the unit and the other long threading terminal to the dashboard.
(1) Metal Strap; (2) Mounting Bolt;
(3) Hex Nut; (4) Spring Washer;
(5) Tapping Screw; (6) Plain Washer
10. Reconnect the cable to the vehicle battery’s negative (-) terminal.
11. Replace the outer trim ring.
12. Install the unit’s faceplate (see “Installing the Faceplate”).

10
Removing the Unit
1. Make sure the ignition is turned o, then disconnect the cable from the
vehicle battery’s negative (-) terminal.
2. Remove the metal strap attached the back of the unit (if attached).
3. Press the release button to remove the faceplate.
4. Lift the top of the outer trim ring then pull it out to remove it.
5. Insert both of the supplied keys into the slots at the middle left and right sides
of the unit, then pull the unit out of the dashboard.

11
MP1514BT
DIN Rear Mount (Method B)
Note: The outer trim ring, sleeve and the metal strap are not used for method B
installation.
If your vehicle is a Nissan or Toyota, follow these mounting instructions:
1. Use the screw holes marked T (Toyota), N (Nissan) located on both sides of the
unit to fasten the unit to the factory radio mounting brackets supplied with
your vehicle.
Side View showing
Screw Holes marked
T, N
2. To fasten the unit to the factory radio mounting brackets, align the screw
holes on the bracket with the screw holes on the unit, and then tighten the
screws (5x5mm) on each side.
Dashboard or Console
Screw
Factory Radio
Mounting Bracket
Screw

12
USING THE DETACHABLE FACEPLATE
Removing the Faceplate
1. Press the (release) button on the faceplate and pull o the faceplate.
Release Button
Faceplate
2. Keep the faceplate in the protective case.
Faceplate
Protective Case

13
MP1514BT
Installing the Faceplate
To install the faceplate, insert the faceplate into the housing and make sure it is
properly installed. Otherwise, the display may appear to be abnormal or some
buttons will not function properly.
Handling Precautions
1. Do not drop the faceplate.
2. Do not put pressure on the display or control buttons when detaching or re-
installing the faceplate.
3. Do not touch the contacts on the faceplate or on the main unit body. It may
result in poor electrical contact.
4. If any dirt or foreign substances adhere to the contacts, they can be removed
with a clean and dry cloth.
5. Do not expose the faceplate to high temperatures or direct sunlight.
6. Keep away any volatile agents (e.g. benzene, thinner, or insecticides) from
touching the surface of the faceplate.
7. Do not attempt to disassemble the faceplate.

14
WIRING CONNECTIONS
Line Out Jacks
Fuse (15A)
Radio Antenna
MAIN UNIT
Left channel WHITE
Right channel RED
Microphone Out
Connector A
1. NO CONNECTION
2. NO CONNECTION
3. NO CONNECTION
4. MEMORY +12V (YELLOW)
5. AUTO ANTENNA OUTPUT (BLUE)
6. NO CONNECTION
7. +12V (TO IGNITION KEY) (RED)
8. GROUND (BLACK)
Connector B
1. REAR RIGHT SPEAKER (+) (VIOLET)
2. REAR RIGHT SPEAKER (-) (VIOLET/
BLACK)
3. FRONT RIGHT SPEAKER (+) (GRAY)
4. FRONT RIGHT SPEAKER (-) (GRAY/
BLACK)
5. FRONT LEFT SPEAKER (+) (WHITE)
6. FRONT LEFT SPEAKER (-) (WHITE/
BLACK)
7. REAR LEFT SPEAKER (+) (GREEN)
8. REAR LEFT SPEAKER (-) (GREEN/BLACK)

15
MP1514BT
CONTROLS AND INDICATORS
1. 2 / INT (Introduction) Button
During disc play, press this button to sample or scan the introduction, or rst
10 seconds, of each track on the disc. By using this option, you can quickly
choose the track(s) on the disc that you prefer. When the desired track is
recognized, press the button again to cancel the introductory mode.
2. (Release) Button
Press this button to release the faceplate from the chassis.
3. 1 / (Pause/Play) Button
Press this button to pause playback. Press this button again to resume
playback.
1 2 5 7 9 11
36810 12 14
13 15 16
1819
20
4
22
23 17
24
25
21
26
RESET
MEMORY CARD

16
4. (Eject) Button
When pressed, disc play is stopped and the disc is automatically ejected. The
CD icon will disappear from the display panel and the unit will revert to
radio operation. If the disc is not removed from the unit, it will automatically
be reloaded within 10 seconds to prevent accidental disc damage. The CD
icon will remain displayed to indicate a disc is still loaded in the unit. If the
disc eject button is pressed during radio operation, the disc is automatically
ejected and radio play continues uninterrupted.
Note: Always remove the disc from the unit when the disc player is not to be used for
an extended period of time to prevent accidental disc damage and to
preserve disc life.
5. 3 / RPT (Repeat) Button
When playing an audio CD press the button to continuously repeat the same
track. Press the button again to turn the repeat function o.
When playing MP3/WMA disc, press the button to select one of the following
modes: RPT ONE (repeats the current track), REP DIR (repeats the tracks
contained in the directory), and REP OFF which cancels the repeat function.
6. (tune/seek/track up) / Button
During disc play, this button is used to quickly select the end of a particular
track in the forward direction. With each press of the button, the next
higher track number will be selected as shown on the display panel. Press and
hold the button to advance rapidly in the forward direction as indicated by
the elapsed time display.
In Bluetooth mode, press this button to answer a call.
7. / MUTE Button
Press this button to turn the unit ON. Press and hold to turn the unit OFF.
When the unit is ON, momentarily press the button to mute the audio.
Momentarily press the button again to unmute the audio.
8. EQ (Equalizer) Button
The Equalizer applies preset sound eects to the unit’s audio output signal.
Pressing the EQ button allows selection of one of ve operating modes: Flat,
Classic, Pop Rock, and EQ O.
9. DISP (Display) Button
Press this button to change the information appearing on the LCD display. The
unit will display AM/FM frequency information, time, program information (if
the radio is tuned to FM frequencies) or track information (during CD/MP3/
WMA playback).

17
MP1514BT
10. Volume Knob (when rotated) / SELECT Button (when pressed)
Rotate the knob to increase or decrease the volume. VOL appears on the
display panel, followed by the setting number.
When pressed, the knob performs the Select function. This button is used
to select the audio function (bass, treble, balance, fade or loudness) to be
adjusted. Press the button once to select bass adjustment (BAS appears on
the display panel). Pressing the button additional times will select treble
adjustment (TRB), balance (BAL R-L), fader (FAD R-F), loudness (LOUD ON/
OFF), and return to volume (VOL). The display returns to the normal indication
5 seconds after the last adjustment or when another function is activated.
11. Remote Sensor
Detects signals from the remote control.
12. PTY (Program Type) /ENTER / CONN (Connect) Button
Press the PTY button to access the program type related search function.
When the PTY function is enabled, turn the rotary knob to display a category
(news, sports, talk, weather, jazz, oldies, country, Top 40, classic rock, soft rock,
public, etc.). The unit will search for radio programming that contains the
desired topic.
In Bluetooth mode, press and hold this button to connect or disconnect the
unit and wireless phone.
13. Disc Slot
With the label surface facing up, fully insert a compact disc into the slot until
the load mechanism engages.
Note: This unit is designed to play standard 5” (12 cm) Compact Discs ONLY. Do not
attempt to use 3” (8 cm) CD-Singles in this unit, either with or without an
adapter, as damage to the player and/or disc can occur. Such damage will not
be covered by the Warranty on this product.
14. Liquid Crystal Display Panel
The Liquid Crystal Display (LCD) panel displays the band and radio station
frequency. If the station transmits music information this will also be
displayed. This information usually consists of song title and artist. Also the
radio can display PTY categories such as news, sports, talk etc.
15. Auxiliary Input Cover
Front panel cover which when open allows the connection of a USB device,
iPod, iPhone or auxiliary input device for playback of music les.
16. Auxiliary Input Jack
Accepts a 3.5 mm jack which can accept signals from various
audio/video devices.
17. USB Port
Allows for the connection of a USB device.

18
18. BAND / SEARCH / iPod-MENU Button
Press this button to select or change the radio band (FM1, FM2, FM3 or AM).
Press and hold this button to access the Auto-Store Tuning feature.
If an iPod or iPhone is connected, press this button to initiate a
category search.
19. (tune/seek/track down) / Button
During disc play, this button is used to quickly select the beginning of a
particular track in the backward direction. With each press of the button,
the next lower track number will be selected as shown on the display panel.
Press and hold the button to advance rapidly in the reverse direction as
indicated by the elapsed time display.
In Bluetooth mode, press this button to hang up or reject an incoming call.
20. 6 / DIR+ Button
Used to access MP3/WMA discs with a folder hierarchy. The button will access
folders in an ascending level. This button is nonfunctional if the disc only
contains individual tracks.
21. 5 / DIR- Button
Used to access MP3/WMA discs with a folder hierarchy. The button will access
folders in an descending level. This button is nonfunctional if the disc only
contains individual tracks.
22. 4 / RDM (Random) Button
During disc play, press the button to play the tracks on the disc in a random or
shued order (RDM ON appears on the display panel). In Random play mode,
pressing the Next button ( ) will also select tracks in a random order instead
of the normal progression. Pressing the Previous button ( ) will also select
tracks in random order. The Random Play mode can be cancelled by pressing
the button again (RDM OFF appears on the display panel).
23. MODE / PAIR Button
Press this button to select radio, auxiliary device or disc play. When a CD is
loaded, pressing this button will revert to radio operation; the disc icon ( )
will still be displayed, indicating a disc is still loaded in the unit. Pressing the
button again will return to disc play, but the current track will start from the
point it was stopped.
In Bluetooth mode, press this button to initiate pairing.
24. 1 - 6 Preset Buttons
Six numbered preset buttons store and recall channels for each band. The
preset number will appear in the lower right corner of the display panel when
the preset button is pressed.
25. SD Memory Card Slot
The SD memory card slot is located behind the front panel. Insert an SD card
to play back music les.
26. Reset Button
The reset button is located behind the front panel. Press this button to reset
the system settings to the factory default settings.

19
MP1514BT
REMOTE CONTROL OPERATION
Battery Installation
The remote control comes with a battery already
installed with a Pull Tab to prevent battery discharge.
Remove the Pull Tab before attempting to use the
remote control.
Note: The remote control will only operate this device.
It is not a universal remote control and will not
control other equipment.
To replace the battery:
1. While holding the remote control, insert your
thumbnail into the battery door side notch (1) and
index ngernail into battery door upper notch (2).
Slide the battery holder open.
2. Install one CR2025 battery (1).
Note: Make sure that the proper polarity (+ or -) is
observed.
3. Slide the battery holder back into the remote control until it locks.
Remote Control
Back View
Protective Pull Tab (Clear Plastic)
(1) (2)
CR2025
3V
(1)

20
1. (Power On/O) / MUTE Button
Press this button to turn the unit ON. Press and hold to turn the unit OFF.
When the unit is ON, momentarily press the button to mute the audio.
Momentarily press the button again to unmute the audio.
2. VOL (Volume Up) Button
Press this button to increase the volume.
For MP3/WMA operations, press this button to select the characters A to Z,
blank, 0 to 9, _, -, +.
3. MODE / PAIR Button
This button enables selection of either the radio, auxiliary device or disc play.
When a CD is loaded, press this button to revert to radio operation; the disc
icon ( ) will still be displayed, indicating a disc is still loaded in the unit. Press
this button again to return to disc play. The current track will start from the
point where it was stopped.
In Bluetooth mode, press this button to initiate the pairing process.
VOL MODE
SEL
VOL
PAUSE
ST/MO
INT RPT
RDM DIR DIR
5
1 3
6
2
4
iPod-MENU
EQ PTY
AS/PS DISP SCAN
CONNECT
78 9
0
BAND
LOUD
MUTE PAIR
Using the Remote Control
1. Point the remote control handset to the remote sensor.
2. Press the function keys on the handset to control the system.
Remote Control Functions
3
12
4
5
6
8
7
9
11
20
21
22
19
18
17
10
16
12
13
14
15
Table of contents
Languages:
Other Jensen Car Receiver manuals

Jensen
Jensen JCD2010 User manual

Jensen
Jensen VX7010 User manual

Jensen
Jensen JHD3630BT User manual

Jensen
Jensen VM8012 User manual

Jensen
Jensen CDH900 User manual

Jensen
Jensen PADIN4 User manual

Jensen
Jensen DV2007 User manual

Jensen
Jensen JHD36A User manual

Jensen
Jensen cd3010x User manual

Jensen
Jensen JCD2006 User manual

Jensen
Jensen MCD 5110 User manual

Jensen
Jensen VX3014 Datasheet

Jensen
Jensen JCD3050 User manual

Jensen
Jensen VX6020 User manual

Jensen
Jensen Portable CD Player User manual

Jensen
Jensen JCKFM1 User manual

Jensen
Jensen VX7024 User manual

Jensen
Jensen JHD3510 - Heavy Duty CD Receiver User manual

Jensen
Jensen DV2007 User manual

Jensen
Jensen JWM1A User manual