Jered Systems Galaxy Comet User manual

USER GUIDE
Galaxy Drum Lights by Jered Systems - Est. 2007 Florida, USA


DEFINITIONS
LED Module - Small black box that you mount to your drum and attach to
your power supply and LED strip. Operate via the included remote. Controls
your LEDs and senses the vibrations of you tapping your drums to enable the
trigger feature.
Triggered Mode - The action of the light system responding to the tap of your
drums by either flashing a preset color or momentarily displaying a selected
pattern.
Always-On Mode - Disable the trigger function and present a static light effect
with a color or pattern of your choosing.
Crosstalk - A LED Module picking up the vibrations from another drum
adjacent to the drum the unit is attached to. This is caused from failure to dial
in the sensitivity of the unit, and improper placement of the LED Module itself.
Galaxy LED Strip - LED strip custom designed for Galaxy Comet systems.
Power Supply - Included 12V DC power supply
Galaxy Drum Lights by Jered Systems - Est. 2007 Florida, USA

PARTS OVERVIEW
Galaxy Drum Lights by Jered Systems - Est. 2007 Florida, USA

Galaxy Drum Lights by Jered Systems - Est. 2007 Florida, USA

INSTRUCTIONS
For video walkthroughs, please visit our Tutorial Videos page at
www.galaxydrumlights.com
Assembly:
Step 1 (Standard Triggers) : Place LED Module onto the shell of your drum
close to the top drumhead and facing you utilizing the adhesive backing
Galaxy Drum Lights by Jered Systems - Est. 2007 Florida, USA
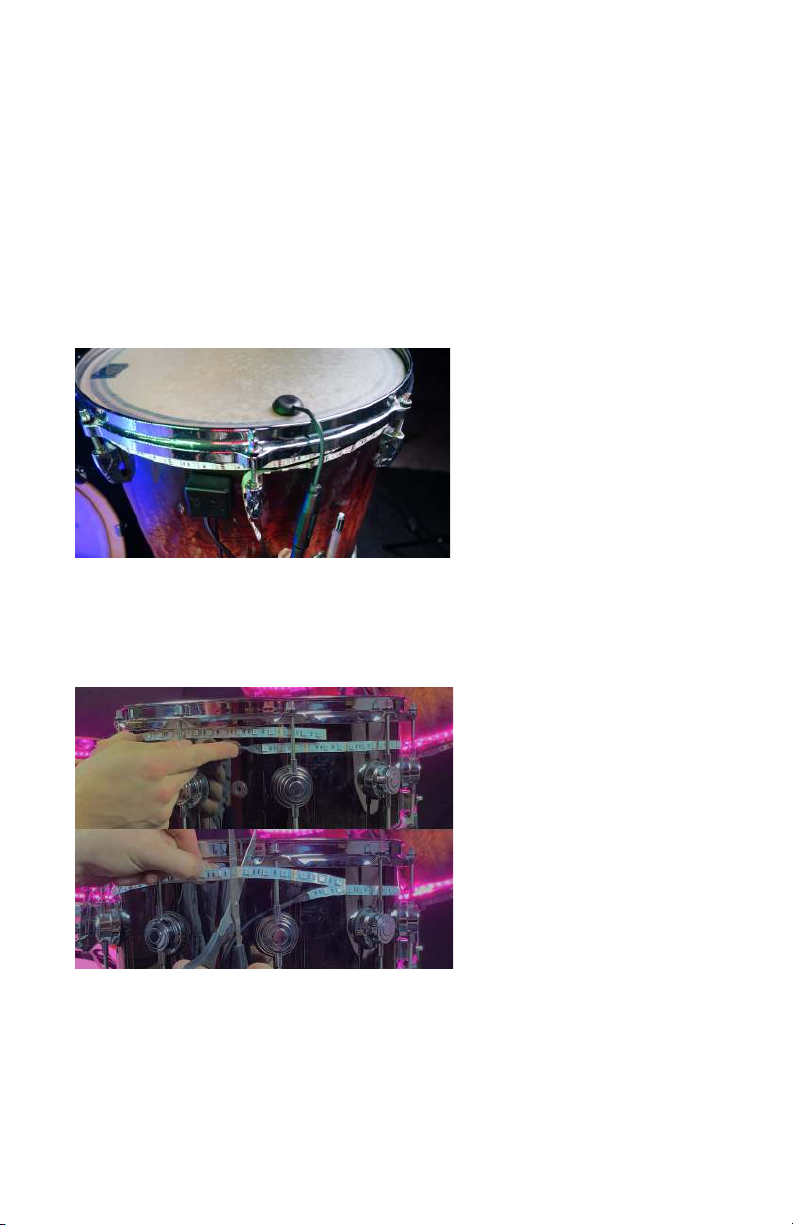
Step 1 (Extended Triggers) : Place LED Modules onto the shell of your drum
close to the top drumhead and facing you utilizing the adhesive backing.
Attach the extended piezo pad provided by your extended trigger directly
where you want precise feedback of tapping your drums. Extended triggers
allow for the LED Modules to sense your tapping more precisely. For instance
with the picture below, instead of the LED Module sensing vibrations from the
entire drum shell, it will only trigger the drum light when tapping directly onto
the drumhead.
Step 2: Attach your Galaxy LED Strip to your drums using the adhesive
backing.
Step 3: Cut your Galaxy LED Strip to the desired length matching the diameter
of your drum. Make your adjustment cuts at the soldering points of the
Galaxy LED strip (every 3rd LED).
Galaxy Drum Lights by Jered Systems - Est. 2007 Florida, USA

Step 4: Assemble your Galaxy Drum Light by attaching the included Galaxy
LED Strip and Power Source to your Galaxy Comet LED Module. Once
assembled, plug in your Galaxy Drum Light System and begin utilizing the
included Button Remote.
Galaxy Drum Lights by Jered Systems - Est. 2007 Florida, USA

Operation: Button Remote
Step 1: Point the Button Remote to your LED Module to operate the drum
light settings.
TRIGGERED & ALWAYS-ON Mode: Press the PLAY button to toggle
between TRIGGERED and ALWAYS-ON. The status LED on the LED
Module will shine “blue” when in ALWAYS-ON, and your choice of
color in TRIGGERED mode.
SLEEP MODE: Press the POWER button to pause your light show.
The LEDs will shut off and the status LED on the LED Module will
blink “red”. Press the POWER button again to exit sleep mode.
COLOR OPTIONS: Select one of the 20 preset colors. When
selecting a color on ALWAYS-ON mode, the status LED on
the LED Module will continue to shine “blue”. On
TRIGGERED mode, the status LED will display the selected
color.
COLOR ADJUSTMENT: Raise or lower the RGB values of
your selected color. The status LED on the LED Module will
blink “yellow” twice when reaching maximum or minimum
values. On TRIGGERED mode, the status LED will flash the
change in color and display when tapping your drum.
PRESETS FOR ALWAYS-ON MODE: Access 5 preset
patterns when utilizing ALWAYS-ON mode.
Galaxy Drum Lights by Jered Systems - Est. 2007 Florida, USA
SPEED CONTROL (ALWAYS-ON MODE): Change the speed of your
selected pattern. The status LED on your LED Module will blink
“yellow” twice when reaching maximum or minimum values.
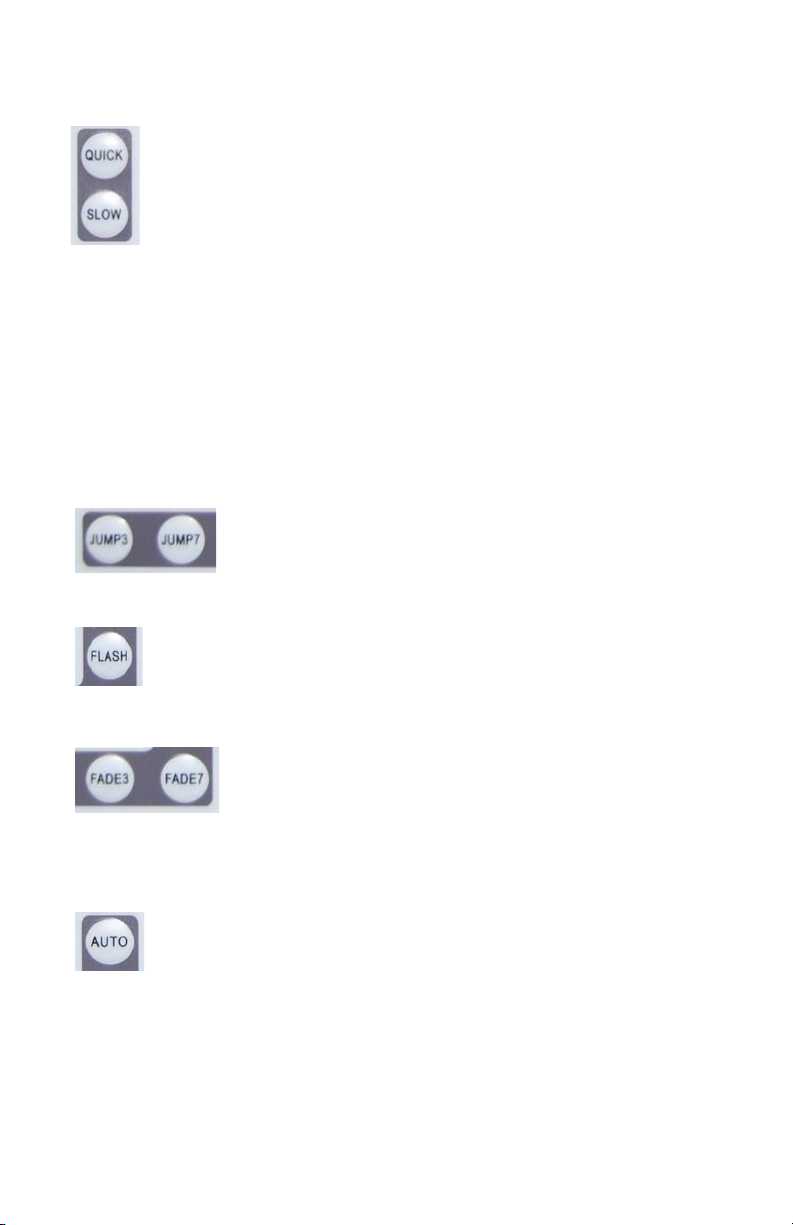
TRIGGER SENSITIVITY (TRIGGERED MODE): Press QUICK to
decrease or SLOW to increase trigger sensitivity. The status LED on
your LED Module will blink “yellow” twice when reaching maximum or
minimum values.
NOTE*** Proper trigger sensitivity is imperative when utilizing multiple drum
lights. This prevents “Crosstalk” - LED Modules picking up the vibrations from
another drum adjacent to the drum the unit is attached to. This is caused from
failure to dial in the sensitivity of the unit, and improper placement of the LED
Module itself.
PRESETS FOR TRIGGERED MODE: Access 2 preset
patterns when utilizing TRIGGERED mode.
FLASH FOR TRIGGERED MODE: Display an always-on glow of your
selected color, which will flash brighter when tapping your drum.
FADE FOR TRIGGERED MODE: Fade-out at the end of the
light flash activated from tapping your drum. Press FADE3
to decrease and FADE7 to increase fade duration. The
status LED on your LED Module will blink “yellow” twice
when reaching maximum or minimum values.
SAVE CURRENT SETTINGS: Press AUTO to save your current
pattern and color settings. The status LED on your LED Module will
blink “yellow” twice verifying your settings being saved. the “save
settings” feature is not available when your Galaxy drum light is in “sleep
mode”.
Galaxy Drum Lights by Jered Systems - Est. 2007 Florida, USA

CUSTOM SAVE USER SETTINGS: Once you’re
ready to save your custom color or pattern,
press the POWER button to activate “sleep
mode”. The status LED on your LED Module will
blink “red”. Press one of the six DIY buttons to
save your custom pattern or color settings to
that particular button. The status LED on your LED Module will blink “yellow”
twice verifying your settings have been saved. Exit “sleep mode” to continue
normal operation.
Galaxy Drum Lights by Jered Systems - Est. 2007 Florida, USA
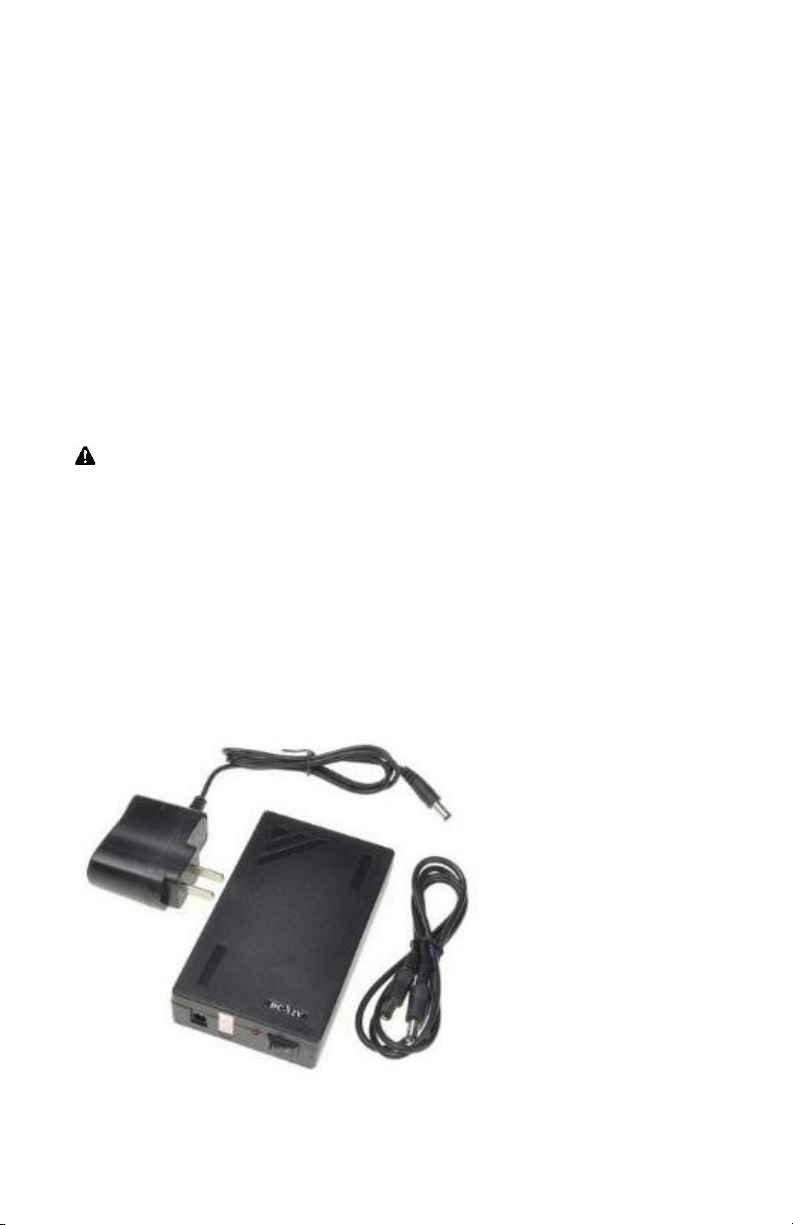
BATTERY CHARGE AND MAINTENANCE
Galaxy Drum Light systems provide the option of being powered by Power
Supply or Battery Pack .
Charging:
Before charging your battery pack, ensure it is unplugged from the LED
Module. Plug battery to the charger and set the On/Off switch to “On”. The
wall charging unit light will display “red” when charging, then “green” when
charge is complete.
Only use the charger included in your Galaxy Battery Pack. Failure to
do so may cause damage to equipment and person, voiding all included
Galaxy Drum Light warranties.
Maintenance:
When not in use, keep Battery Pack and Charger in a dry, cool, and safe place
with the On/Off switch set to “Off”. Failure to do so will depreciate the life of
the battery cells resulting in decreased functionality over time.
.
Galaxy Drum Lights by Jered Systems - Est. 2007 Florida, USA

TROUBLESHOOTING
1. My drum lights won’t light up.
- Ensure power cable is fully seated in the LED Module and connection to the
Galaxy LED Strip is properly aligned “ tab to notch”.
- Tap the LED Module to ensure it’s not functioning on trigger mode.
- If using the Galaxy Battery Pack, ensure battery is fully charged and properly
maintained.
2. My drum lights won’t trigger in Triggered Mode.
- Ensure the LED Module is properly placed near the drum head striking
surface.
- Check your remote settings. Review Operation: Button Remote
Galaxy Drum Lights by Jered Systems - Est. 2007 Florida, USA

DOCUMENT REVISIONS
Date
Version
Number
Document Changes
01/28/2016
1.01
Initial Dra
02/19/2019
1.02
Revisions
08/26/2019
1.03
Revisions
Galaxy Drum Lights by Jered Systems - Est. 2007 Florida, USA
Table of contents


