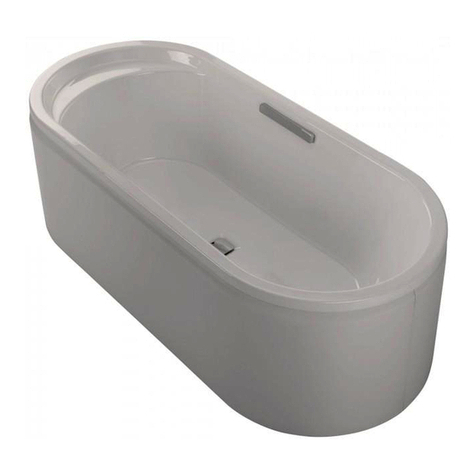
Jetta DADOquartz Series Installation instructions

INSTALLATION INSTRUCTIONS | JETTA CORPORATION
PAGE | 2
TABLE OF CONTENTS
GENERAL INSTALLATION INSTRUCTIONS...................................................................................................................................................3
INSPECTION:...........................................................................................................................................................................................3
GENERAL INSTALLATION INSTRUCTIONS...................................................................................................................................................3
ROUGH-IN: .............................................................................................................................................................................................4
SITE PREPERATION:............................................................................................................................................................................4
PREPARATIONS: .................................................................................................................................................................................4
FREESTANDING INSTALLATION INSTRUCTIONS .........................................................................................................................................5
© 2019 Jetta Corporation. All rights reserved. REV 04/2019
WWW.JETTACORP.COM 1(800) 288-7771

INSTALLATION INSTRUCTIONS | JETTA CORPORATION
PAGE | 3
GENERAL INSTALLATION INSTRUCTIONS
INSPECTION:
IMPORTANT: READ AND FOLLOW ALL INSTRUCTIONS PRIOR TO INSTALLATION AND SAVE
THESE INSTRUCTIONS FOR FUTURE USE.
Inspecting of this product is the responsibility of person receiving the tub and should be done immediately upon receipt.
The person inspecting the tub is responsible for ensuring that the unit is free of defect or damage.
Jetta is not responsible for failure or damage that should have been discovered during proper inspection.
Transit damage is the responsibility of the carrier. If the unit is damaged – Do Not refuse the shipment. The damage must be documented
on the delivery ticket prior to signing and Jetta notified immediately. Detailed pictures are required for freight claims. Minor damage
must be reported to Jetta within 48 hours of delivery and prior to being delivered to job site.
Delivery of the tub to a job site will be seen as acceptance of quality.
Any damage that occurs at the job site or during installation is the responsibility of the installer, after installation is the responsibility of the
product owner.
Immediately upon receiving your Jetta DADOquartz® bath, inspect it thoroughly for accuracy or damage.
oCheck to ensure the bathtub is the unit you ordered and that its dimensions and drain position correspond to your plans.
oTo prevent scratches, always protect the surface.
oCheck color match before installation.
oPlease note that shrinkage lines, air holes, casting marks and blemishes on the underside of the product (where they cannot be seen
when turned upright) do not adversely affect performance or aesthetics and are not considered defects.
oIf there is protective plastic sheet covering the surface of your bathtub, it should only be removed for inspection and replaced until the
installation is complete. When necessary during the installation process the plastic can be peeled back to install the drain. The plastic
should also be peeled back in areas where it could become snagged during the installation process.
oDo not sit on the edge of the bathtub.
oNothing should be placed in bath that would scratch or break it.
oWorkmen in bath should be in stocking feet only.
IMPORTANT: MANUFACTURER WILL NOT BE LIABLE FOR THE REMOVAL OR RE-INSTALLATION OF THE BATHTUB IF THERE IS A
FAILURE TO FOLLOW THE MANUFACTURERS RECOMMENDED PRE-INSTALLATION AND INSTALLATION PROCEDURES, FAILURE TO
FOLLOW THE MANUFACTURERS RECOMMENDATIONS COULD RESULT IN THE WARRANTY BEING VOIDED.
© 2019 Jetta Corporation. All rights reserved. REV 04/2019
WWW.JETTACORP.COM 1(800) 288-7771

INSTALLATION INSTRUCTIONS | JETTA CORPORATION
PAGE | 4
GENERAL INSTALLATION INSTRUCTIONS
ROUGH-IN:
Test fit the tub and verify dimensions. Carefully level the unit using shims if needed.
SITE PREPERATION:
oThe site should be cleared of debris and vacuumed. This will ensure that the bathtub is leveled properly.
oCheck if the floor is leveled and solid. The level should be in a range that can be compensated for using shims. An
average sized bathtub can weigh as much as 1000 lbs when full, the floor must be able to support this weight.
oAn opening of 6” x 6" should be provided in the floor for the bathtub drain and overflow. Make sure there are no
obstructions in this space.
oThe plumbing rough-in for both the drain and the supply lines should be completed by a licensed plumber before the
bathtub is moved into its final position.
PREPARATIONS:
Before installing a new DADOquartz® bathtub, we strongly recommend following the installation check list and hiring a
certified plumber to handle the installation.
oVisually inspect the bathtub to make sure it has not been damaged during transport. In case of damage, do not
proceed with the installation.
oMake sure the bathtub is the model that you ordered, that its dimensions are correct, and that the location of the
drain corresponds to the plans.
oTo protect the bathtub during installation, cut a piece cardboard or other protective material and place it in the
bottom of the bathtub.
© 2019 Jetta Corporation. All rights reserved. REV 04/2019
WWW.JETTACORP.COM 1(800) 288-7771

INSTALLATION INSTRUCTIONS | JETTA CORPORATION
PAGE | 5
GENERAL INSTALLATION INSTRUCTIONS
INSTALLATION OF FREESTANDING BATHTUBS (ELEMENT) AND DRAIN
Note: For ease of installation, Jetta recommends using our Above the Floor Drain Kit (Drain Kit) . Adherence to all plumbing codes is
the responsibility of a licensed plumber.
1. Temporarily position the bathtub in the desired location, ensuring that the drain hole is aligned to the floor drain and
then draw the contour of the bathtub on the ground. If the floor drain is not installed yet, trace its location through the
hole of the bathtub, then move the bathtub to a safe place, to install floor drain according to guidelines. Reposition the
bathtub and ensure that the trace lines are followed.
2. Drill a 4" hole in your wooden subfloor
or leave a 6"x 6" open space in your
concrete slab.
3. Measure the distance from the inside
of the P-trap to the top of
the floor or slab. (P-Trap not included)
4. Cut the ABS or PVC 1 ½" pipe 3 inches
shorter than the distance
between the floor/slab and the P-trap.
5. Apply glue to the outside of the ABS or
PVC 1 ½" pipe and to the inside of the P-
trap. Insert the pipe into the P-trap.
6. Apply glue to the outside of the ABS or
PVC 1 ½" pipe and to the inside of the
Drain kit insert.
7. Slide the Drain Kit on the ABS or PVC 1
½" pipe making sure it sits flat on the
floor. *
© 2019 Jetta Corporation. All rights reserved. REV 04/2019
WWW.JETTACORP.COM 1(800) 288-7771

INSTALLATION INSTRUCTIONS | JETTA CORPORATION
PAGE | 6
8. Insert the Drain cap firmly into the
Drain Kit.
9. Secure the Drain Kit to the
subfloor/concrete with screws or
cement.
1. Install your flooring surface
around the opening of the
Drain Kit.
11. Remove the Drain cap with a channel
lock plier.
12. Apply provided lubricant inside the
Drain kit. Please only proceed with this
step once the pressure test has been
performed, if needed.
13. Affix the appropriate tailpiece to the
waste & overflow. Ensure the
measurement between the base of the
Drain kit and the P-trap will
accommodate the tailpiece.
Warning: Do not cut the brass tailpiece
as this may cause leakage.
© 2019 Jetta Corporation. All rights reserved. REV 04/2019
WWW.JETTACORP.COM 1(800) 288-7771

INSTALLATION INSTRUCTIONS | JETTA CORPORATION
PAGE | 7
16. Leave the bathtub in this position for
at least 24 hours before use.
14. Apply provided lubricant halfway up
the tailpiece and position the bathtub
and tailpiece in line with the Drain Kit.
15. With caution, slowly insert the bath-
tub tailpiece into the Drain Kit.
17. Water test the bathtub for leaks.
If unit is within the limited factory warranty, contact Jetta Corporation at (800)
288-7771 with your purchasing information on hand so we may serve you better.
Visit WWW.JETTACORP.COM/FAQs for additional troubleshooting tips.
© 2019Jetta Corporation. All rights reserved. REV 04/2019
WWW.JETTACORP.COM 1(800) 288-7771
Other manuals for DADOquartz Series
1
Table of contents
Other Jetta Bathtub manuals
Popular Bathtub manuals by other brands

Bibby Sterilin
Bibby Sterilin Stuart SWB6D Instructions for use

Woodbridge
Woodbridge BM400 Installation and care guide

MAAX
MAAX 105359 installation instructions

Woodbridge
Woodbridge BM500 Installation and care guide

Kohler
Kohler K-1375-LM Homeowner's guide

American Standard
American Standard Elevate RHO 2576102 owner's manual