Jettaus Z500 series User manual

Z500 SERIES NOTEBOOK PC
QUICK STARTGUIDE
April 2003

2
Thispageisintentionallyleftblank.

3
CONTENTS
Z500 SERIES NOTEBOOK PC ......................................................................1
QUICK START GUIDE....................................................................................1
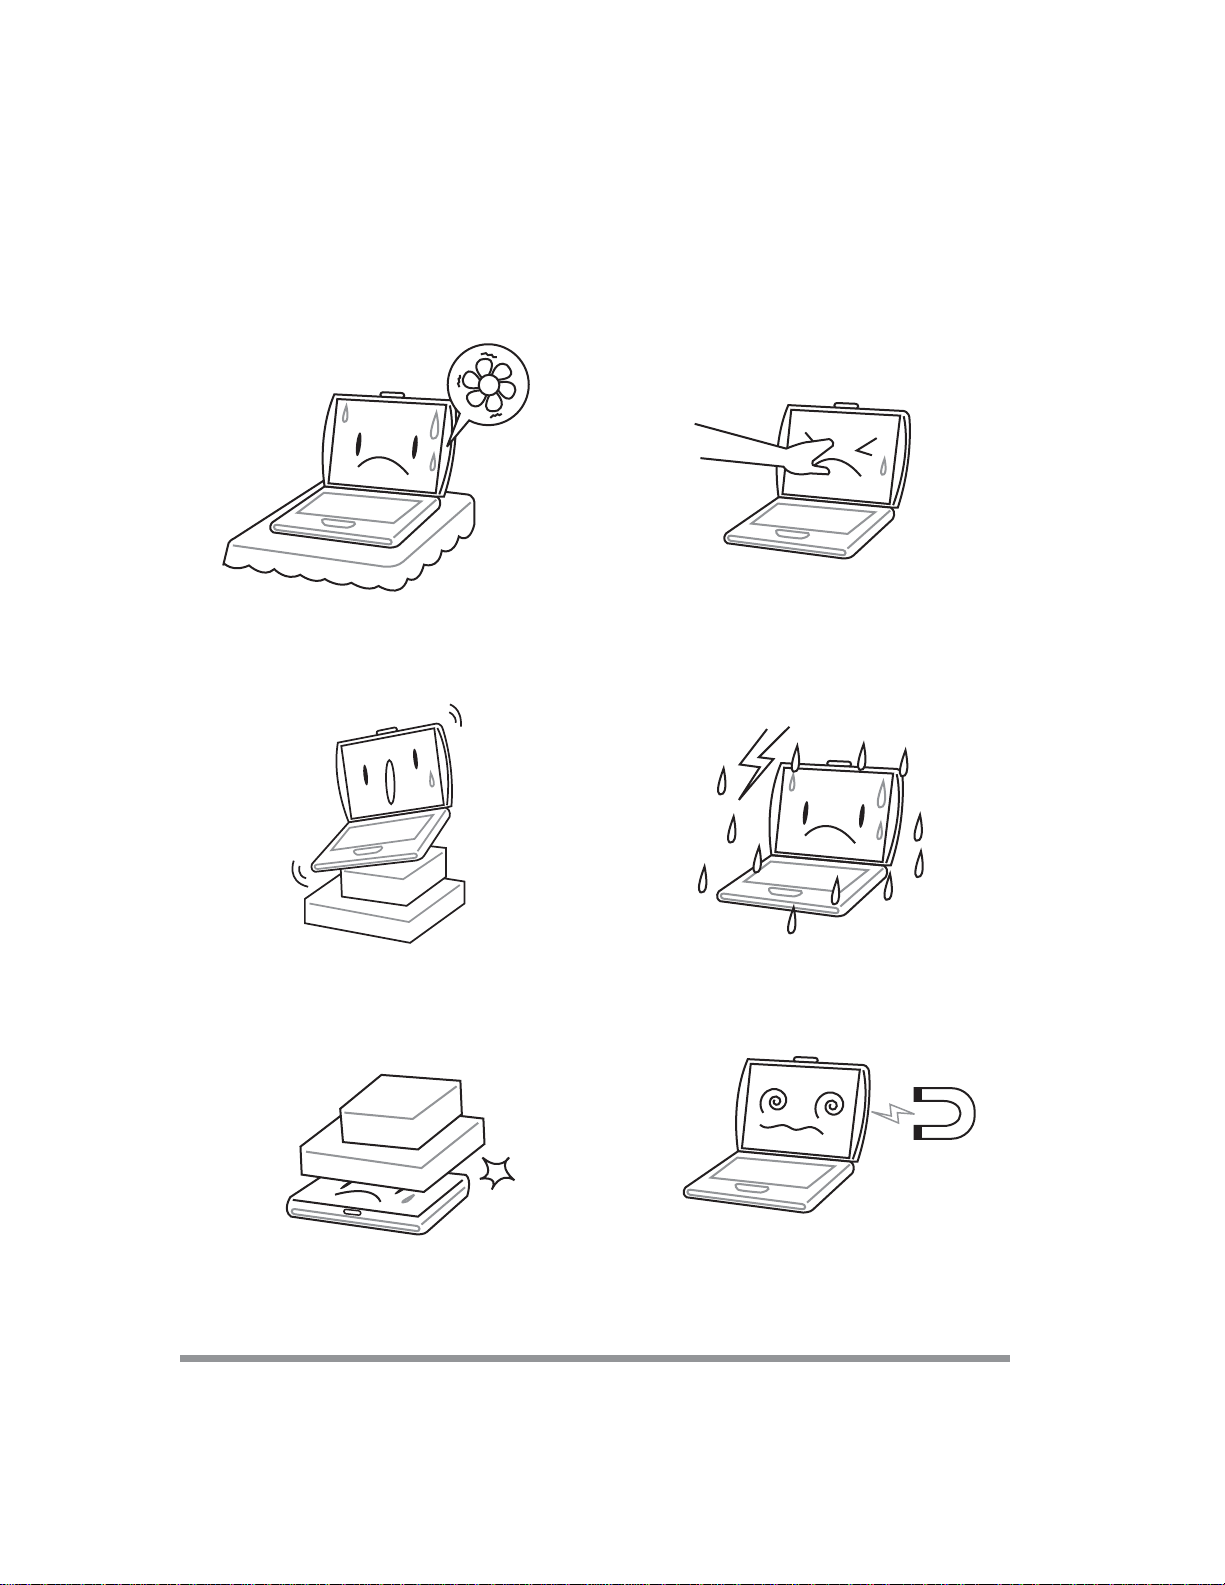
TAKING CARE OF YOUR
NOTEBOOK PC ........................................................................................4
1 BEFORE YOU START ..............................................................................7
1-1 Making sure you have everything...................................................7
1-2 Finding where everything is located ..............................................8
1-2-1 OPENINGTHEDISPLAYPANEL.................................................................... 8
1-2-2 TOPCOMPONENTS...................................................................................... 9
1-2-3 FRONTPANELCOMPONENTS ....................................................................11
1-2-4 LEFT-SIDEPANELCOMPONENTS ............................................................. 12
1-2-5 RIGHT-SIDEPANELCOMPONENTS ........................................................... 13
1-2-6 BACKPANELCOMPONENTS..................................................................... 14
1-2-7 BOTTOMCOMPONENTS ............................................................................ 15
2 GETTING STARTED ...............................................................................17
2-1 Power Sources...............................................................................17
2-1-1 CONNECTINGTHEPOWERADAPTERS .................................................... 17
2-1-2 RECHARGINGTHEBATTERY ..................................................................... 18
2-1-3 REPLACINGTHEBATTERY ........................................................................ 19
2-2 Starting Your Notebook PC ...........................................................20
2-2-1 POWER ON ................................................................................................. 20
2-2-2 BOOTSEQUENCE ...................................................................................... 21
2-2-3 BIOSSETUPUTILITY .................................................................................. 21
3 TROUBLESHOOTING ............................................................................22
3-1 Identifying the Problem..................................................................22

4
TAKING CARE OFYOUR
NOTEBOOKPC
Topreventpossibleoverheatingofthecomputer’spro-
cessor,makesureyoudon’t blocktheopeningspro-
videdforventilation.
DONOTplaceordropobjectsonthecomputerand
DONOTapplyheavypressureonit. DONOTsubjectthecomputertomagneticfields.
DONOTplaceonunevenorunstableworksurfaces.
DONOTpressortouchthedisplaypanel.
DONOTuseyournotebookcomputerunderharsh
conditions.

5
DONOTplacenearfireorothersourcesofheat. DONOTtamperwiththebatteries.Keepthemaway
fromchildren.
DONOTexposetodirectsunlight. DONOTuseorstoreinextremetemperatures.
Avoidsuddenchangesintemperatureorhumidityby
keepingitawayfromA/Candheatingvents. DONOTexposethecomputertorainormoisture.

6
DONOTexposetodustand/orcorrosivechemicals. DONOTslamyournotebookshutandneverpickup
orholdyournotebookbythedisplay.
DONOTspraywaterorany othercleaningfluids
directlyonthedisplay. Ifyouaretravelingwithyourcomputer,rememberto
carryitashandluggage.Do notcheckitin asbag-
gage.

7
1 BEFOREYOU START
1-1 Making sure you have everything
Whenyou receiveyour notebook PC,unpackitcarefully,andcheckto makesure you
havealltheitemslisted below.For apre-configuredmodelyoushould havethe follow-
ing:
• NotebookComputer
• Lithiumionbattery
• AC adapter withAC power cord
• DriverandApplicationsCD
• QuickStartGuide orUserGuide
Dependingupontheconfigurationof yournotebook,you mayhave alsoreceivedthe
followingitems:
• CD-ROMApplication CD
• DVDApplicationCD
• DVD/ CD-RWComboApplication CD
• DVD-RWApplicationCD
Onceyou havecheckedandconfirmedthat yournotebook systemiscomplete, read
throughthefollowingpagestolearnaboutallofyour notebookcomponents.

8
1. BEFORE YOU START
1-2 Finding where everything is located
1-2-1 OPENING THE DISPLAY PANEL
1. Slidethe latchlocatedat thetop ofthe displaypanel tothe right.This releases the
lockingmechanism andraisesthedisplayslightly.
2. Liftthe displaybackwards,beingcarefulnottotouchthescreen, untilit isat a
comfortableviewingangle.
Display
Panel
Latch

9
1. BEFORE YOU START
1-2-2 TOP COMPONENTS
The following is a brief description of your notebook’s top components.
Display Panel
The display panel is a color LCD panel with back lighting for the display of text and
graphics.
Keyboard
Afull-size keyboard with dedicated Windows keys.
Stereo Speakers
The built-in dual speakers allow for stereo sound.
Suspend/Resume/
Power On Button
Scroll Button TouchPad
Pointing Device
Built-in
Speaker
Built-in
Speaker
Status Display
Indicators
Keyboard
Display Panel
Instant Keys

10
1. BEFORE YOU START
Status Display Indicators
The Status display indicator lights correspond to specific components of your notebook.
(See suspend notebook activity without powering off, resume your notebook from
suspend mode, and power on your notebook when it has been shut down from Win-
dows. (See Suspend/Resume/Power On Button in 2-3-1 Power On for more
information.)
Touchpad Pointing Device
The Touchpad pointing device is a mouse-like cursor control with four buttons (left,
right, and two scroll buttons).
Suspend/Resume/Power On Button
This button turns your notebook pc on and off as well as put it to sleep. (See Suspend/
Resume/Power On Button in 2-3-1 Power On for more information.)
Instant Keys
The two instant keys allow you to launch your favorite email and internet applications
with the touch of a button.

11
1. BEFORE YOU START
1-2-3 FRONT PANEL COMPONENTS
The following is a brief description of your notebook’s front panel components.
Built-in Stereo Speakers
The built-in dual speakers allow for stereo sound.
Memory Card Reader
The memory card reader offers the fastest and most convenient method to transfer
pictures, music and data between your notebook pc and flash compatible devices such
as digital cameras, MP3 players, mobile phones, and PDAs.
Infrared Port
The fast IrDA-compatible port allows you to communicate wirelessly with another
IrDA-compatible infrared device without a cable.
Display Panel Latch
The display panel latch locks and releases the display panel.
Built-in
Speaker
Built-in
Speaker
Display Panel Latch
Memory
Card
Reader
Infrared
Port

12
1. BEFORE YOU START
1-2-4 LEFT-SIDE PANEL COMPONENTS
The following is a brief description of your notebook’s left-side components.
USB Ports (V2.0)
The four USB ports allow you to connect Universal Serial Bus devices.
The leftmost USB port is disabled when your notebook PC is
connected to an optional Port Replicator.
IEEE 1394 Port
The 1394 port is used to connect between your and a peripheral such as a digital video
camera.
PC Card Slot
The PC Card Slot allows you to install one Type II PC Card.
Audio-In Jack
The audio-in jack allows audio sources to be recorded by your computer.
Microphone Jack
The microphone jack allows you to connect an external mono microphone.
Headphone Jack
The headphone jack allows you to connect headphones or external speakers with
amplifer.
PC Card
Slot
PC Card
Eject Button
USB
Ports
IEEE
1394
Port
Headphone
Jack
Microphone
Jack
Audio-in
Jack
POINT

13
1. BEFORE YOU START
1-2-5 RIGHT-SIDE PANEL COMPONENTS
The following is a brief description of your notebook’s right-side components.
Lithium ion Battery Bay
The internal battery pack can be removed for installation of a fully charged battery pack.
(See 2-1-3 Replacing the Battery for more information.)
Optical Drive
The OpticalDrive allows you to play back a media disc.
Optical Drive Eject Button
The OpticalDrive Eject Button allows you to open the Optical Drive tray to remove or
install a DVD, CD-R, or CD-ROM.
Emergency Optical Drive Tray Release
The Emergency Optical Drive Tray Release allows you to open the Optical Drive tray
without powering on your notebook.
Power Adapter Port
The power adapter port allows you to plug in theAC adapter to power your notebook
and charge the internal Lithium ion battery.
Lithium ion
Battery Bay Optical
Drive
Optical Drive
Eject Button
Emergency
Optical Drive
Tray Release
Power Adapter
Port

14
1. BEFORE YOU START
1-2-6 BACK PANEL COMPONENTS
The following is a brief description of your notebook’s back panel components.
Modem (RJ-11) Port
The modem (RJ-11) port is used to attach a telephone line to the internal 56K modem.
LAN Port (RJ-45)
The LAN port is designed to support a 10/100/1000 Base-T standard RJ-45 plug.
Port Replicator Interface
The Port Replicator interface extends the functionality of your notebook by providing
ports to connect PS/2 devices, an external monitor, a serial device, a parallel device,
USB devices, a LAN (RJ-45) cable, an external audio source, and an AC adapter.
Parallel Port
The parallel port allows you to connect parallel devices, such as a printer. (This is also
sometimes referred to as an LPT port.)
External Monitor Port
The external monitor port allows you to connect an external monitor.
S-Video/TV Out Port
The S-video/TV out port allows you to connect to video devices such as, a television,
projector, or a VCR.
External
Monitor
Port
Ethernet
Port
(RJ-45)
Parallel
Port
Modem
Port
(RJ-11)
TV-out
Port
Port Replicator
Interface
Kensington
Lock Slot

15
1. BEFORE YOU START
1-2-7 BOTTOM COMPONENTS
The following is a brief description of your notebook’s bottom panel components.
Lithium ion
Battery Bay
Memory
Compartment
Optical
Drive
Bay
Main Unit &
Configuration
Label
Hard Disk
Drive Bay
Mini-PCI
Card
Cover
Kensington Lock Port
The Kensington lock slot allows you to secure your notebook to an immovable object
through an optional security cable.

16
1. BEFORE YOU START
Optical Drive Bay
The internal hard disk drive is accessible through the hard disk drive bay.
Main Unit and Configuration Label
The configuration label shows the model number and other information about your
notebook. In addition, the configuration portion of the label has the serial number and
manufacturer information that you will need to give your support representative. It
identifies the exact version of various components of your notebook.
Memory Compartment
The memory compartment contains the system RAM.
Lithium ion Battery Bay
The battery bay contains the internal Lithium ion battery. It can be opened for the
removal of the battery when stored over a long period of time or for swapping a dis-
charged battery with a charged Lithium ion battery.
Hard Disk Drive Bay
The internal hard disk drive is accessible through the hard disk drive bay.

17
2 GETTING STARTED
2-1 Power Sources
Your notebookPC has twopossible powersources:aprimaryLithiumion batteryoran
AC adapter.
2-1-1 CONNECTING THE POWER ADAPTERS
TheAC adapter provides powerfor operatingyour notebook PCand charging the
battery.
Connecting the AC Adapter
1. PlugtheDC outputcableinto theDC powerjackof your notebook PC.
2. PlugtheAC adapterintoanAC electricaloutlet.
Switching from AC Adapter Power to Battery Power
1. Be surethat youhave atleast one charged battery installed.
2. RemovetheACadapter.Your notebookwillautomaticallyswitchfromDCpower
tobatterypower.
TheLithiumionbattery isnotchargeduponpurchase.Initially,you
will need toconnect theAC adapterto use your notebook PC.
POINT

18
2. GETTING STARTED
2-1-2 RECHARGING THE BATTERY
TheLithiumion batteryisrechargedinternally usingtheACadapter.Torechargethe
battery, make surethebattery that needsto be chargedisinstalled in yournotebookPC
and connect theAC .
Thereis nomemoryeffecton theLithium ionbattery,thereforeyoudo notneed to
dischargethebatterycompletelybeforerecharging.Thechargetimeswillbesignificantly
longerif yournotebook PCis inuse whilethe batteryis charging.Ifyouwantto charge
thebattery morequickly,putyour notebookPC intoSuspend mode,or turnit offwhile
theadapter ischarging thebattery.
Low Battery State
Whenthebattery isrunninglow, alowbattery notificationmessagewill appear.Ifyou
do notrespond to the lowbattery message, thebatteries will continueto discharge until
they are toolow to operate.When this happens, your notebook PCwill go intoSus-
pend mode.There is no guarantee that yourdata will besaved oncethe notebook
reachesthispoint.
To protectyournotebook PC fromdamage,use onlythepower
adapterthat came withthenotebook PC because each power
adapter has itsown poweroutput rating.
Onceyour notebook PCgoes intoDeadBatterySuspendmodeyou will beunableto
resume operation untilyou provide a sourceof power either froman adapter, ora
charged battery. Once you haveprovided power, you will needto pressthe Suspend/
Resume button toresume operation. IntheDead BatterySuspend mode, yourdata can
bemaintained forsometime, butif apowersource isnot providedpromptly, thePower
indicatorwillstopflashingandgo out,meaningthatyou havelostthe datathat was not
stored. Once you providepower, you can continue to useyour notebook PC while an
adapteris chargingthebattery.
Shorted Battery
TheStatus Indicatorpanelusesasymbol insidethe batteryoutline oftheBatteryLevel
indicatortodisplay theoperatinglevel availableinthat battery.If thisdisplayshows a
ShortedBattery, itmeans thatthebattery isdamagedand must bereplaced so itdoes
notdamageany other partsofyour notebook PC.
CAUTION

19
2. GETTING STARTED
POINT
POINT
2-1-3 REPLACING THE BATTERY
Thisnotebook PCfeaturesarechargeablebridge batterythatallows forfastwarm
swapping ofbatteries.Allyouneedis an additionalbatteryand youcan havea fully
charged spareto swapwithone thatis notchargedwithouthaving tocloseallyour
applications andpowering downyourcomputer.
1. Havea chargedbattery readyto install.
2. Press[F1] whileholdingdown [FN] toplaceyournotebook PCinsuspend mode
and disconnect theAC adapter.
Thebridge batterymaintainsmemoryinsuspend modefor upto5
minutes,morethanenough time for youtoswap batteries.
Chargeyour notebookPCforatleast24 hours beforeusing it for
thefirsttime. Doingsoinsuresthatthebridgebatteryisfully
chargedso thatno data islostduring a warmswap.
3. Slidethe batteryreleaselatchwhilepullingthebattery fromthebay.
4. Removethe batteryfrom thebay.
5. Slidethe newbatteryintothebay.The pinswillautomaticallyalignwiththeconnec-
tor.
6. Pressthe batteryin untilthe batteryreleaselatchsnapsinto place.
7. Plugin theACadapterand pressthe resume/suspend/poweronbutton.
IftheLithiumionbatteryconnectoris notfullyseated,youmay
notbeableto use your notebookPCor charge yourbattery.

20
2. GETTING STARTED
2-2 Starting Your Notebook PC
2-2-1 POWER ON
Suspend/Resume/Power On Button
Thesuspend/resume/power onswitch isused toturn onyour notebookfrom itsoff
state.Once youhave connectedyourACadapteror chargedtheinternalLithiumion
battery, youcanpoweron your notebook.
Whenyou turn on yournotebook be sure youhave a power
source.This meansthatatleastone batteryis installedand
charged, orthat theAC adapter is connectedwithAC power.
Pressthe suspend/resume/on buttonlocated abovethekeyboard toturn on yournote-
book.Ifyou need totakeanextendedbreak, you mayeitherplace it inSuspendmode
orturnitoffdirectly.
Donotcarry your notebookaroundwith the poweronor subject
itto shocksor vibration,asyouriskdamagingyour notebook.
When you poweron your notebook, itwill perform aPower On SelfTest (POST) to
checktheinternal partsandconfigurationforcorrectfunctionality.Ifafault isfound,
yournotebook PCwill emit anaudiowarning and/oran errormessage willbe displayed.
Dependingonthe natureof theproblem,you maybe abletocontinueby startingthe
operatingsystem orby enteringthe BIOSsetup utilityand revising thesettings.
Aftersatisfactorycompletionof thePower OnSelfTest(POST), yournotebook will
loadyouroperating system.
Neverturn off yournotebook duringthePowerOn SelfTest
(POST),or an unrecoverable error mayoccur.
POINT
CAUTION
CAUTION
Table of contents
Other Jettaus Laptop manuals