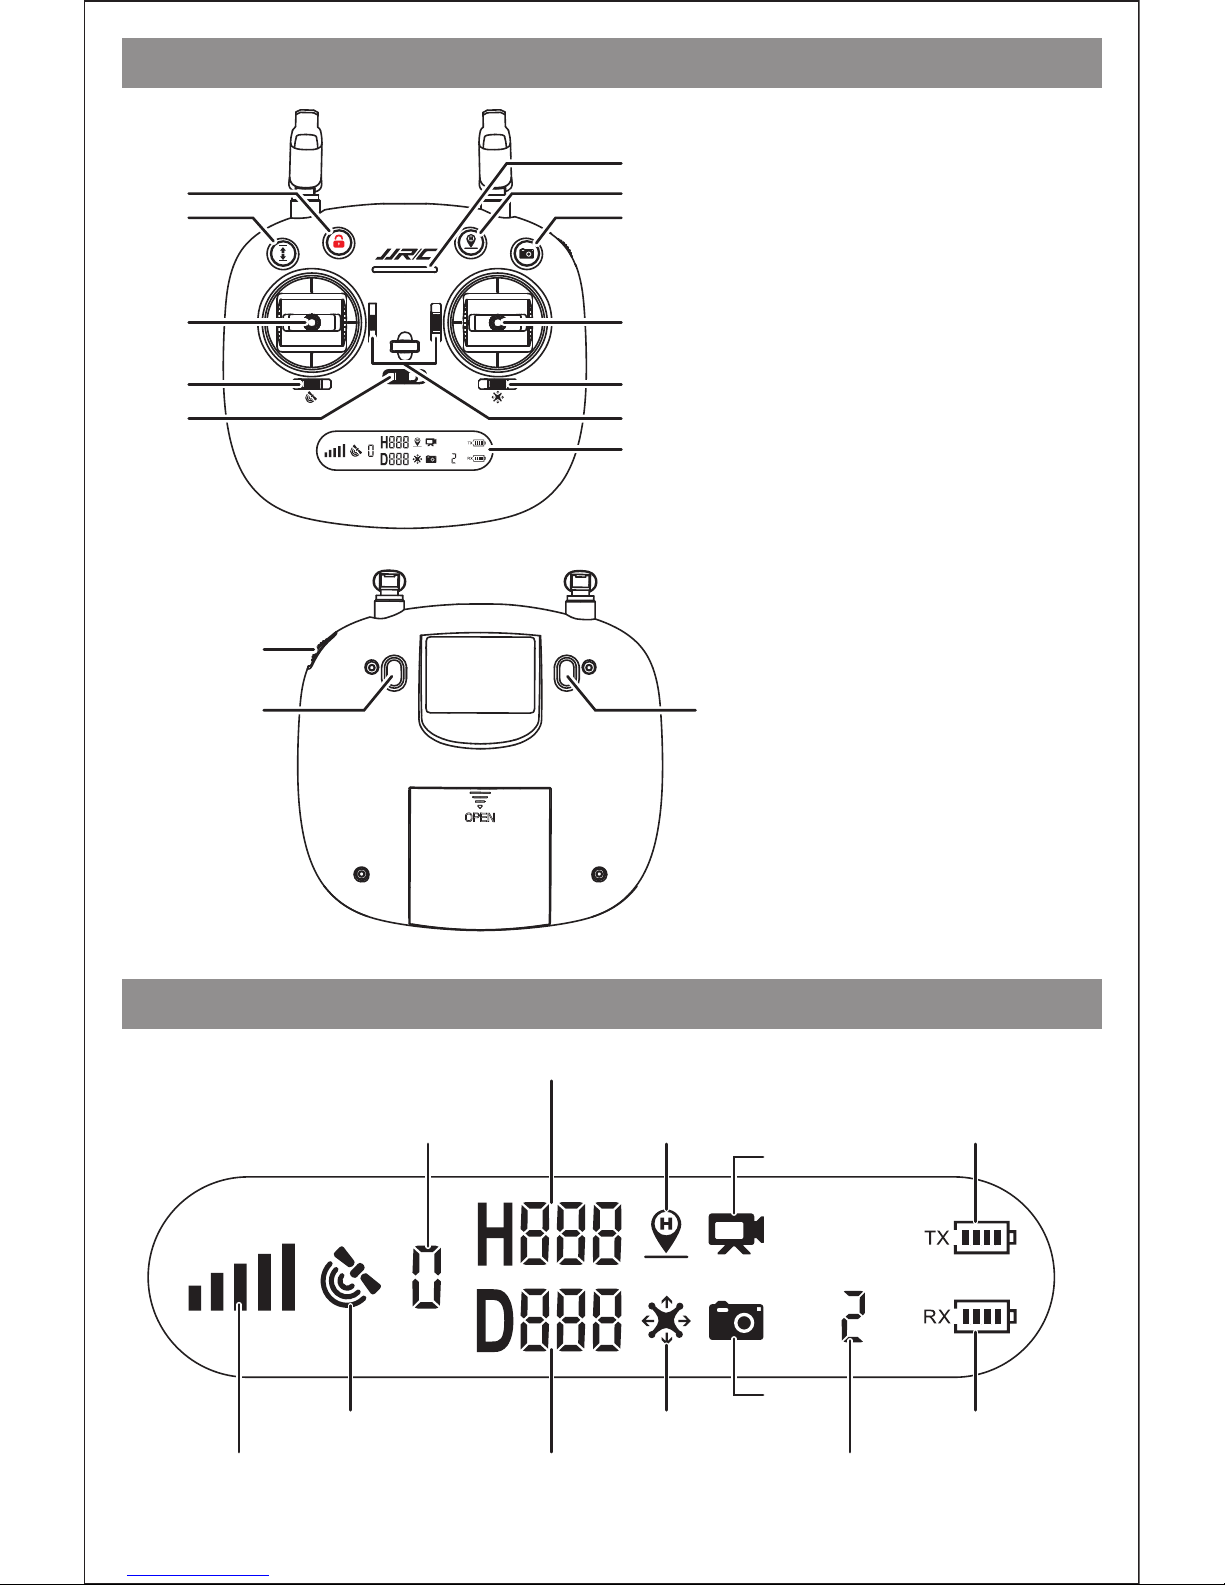
Remote Controller Status Indicator
No.
1
2
3
4
5
Remote Controller Status
Indicator lights flash quickly.
Signal strength on LCD screen is less than
two grids or no displaying; and the remote
controller makes steady beep...beep...beep
sound.
The remote controller is under signal connection
status.
The remote controller is in low voltage status.
Please replace with a fully charged battery.
1.The distance between drone and remote
controller is so long that the signal is weak.
2.The battery is removed after the drone
connects to the remote controller.
Indication
Indicator lights flash slowly with steady beep..
beep sound and the battery legend “ ”on
LCD screen flashing.
Battery legend “ ” on LCD screen is as
shown, with steady beep..beep...beep sound.
Battery is running out “ ” ; the drone will return
when the altitude is over 100m or the distance is
over 300m.
Battery legend “ ” on LCD screen is as
shown, with steady long beep sound.
Battery is low “ ” ; the drone will return when
the altitude is over 15m or the distance is over
15m; if either the flying altitude or flying distance
is less than 15m, the drone will land on the spot.
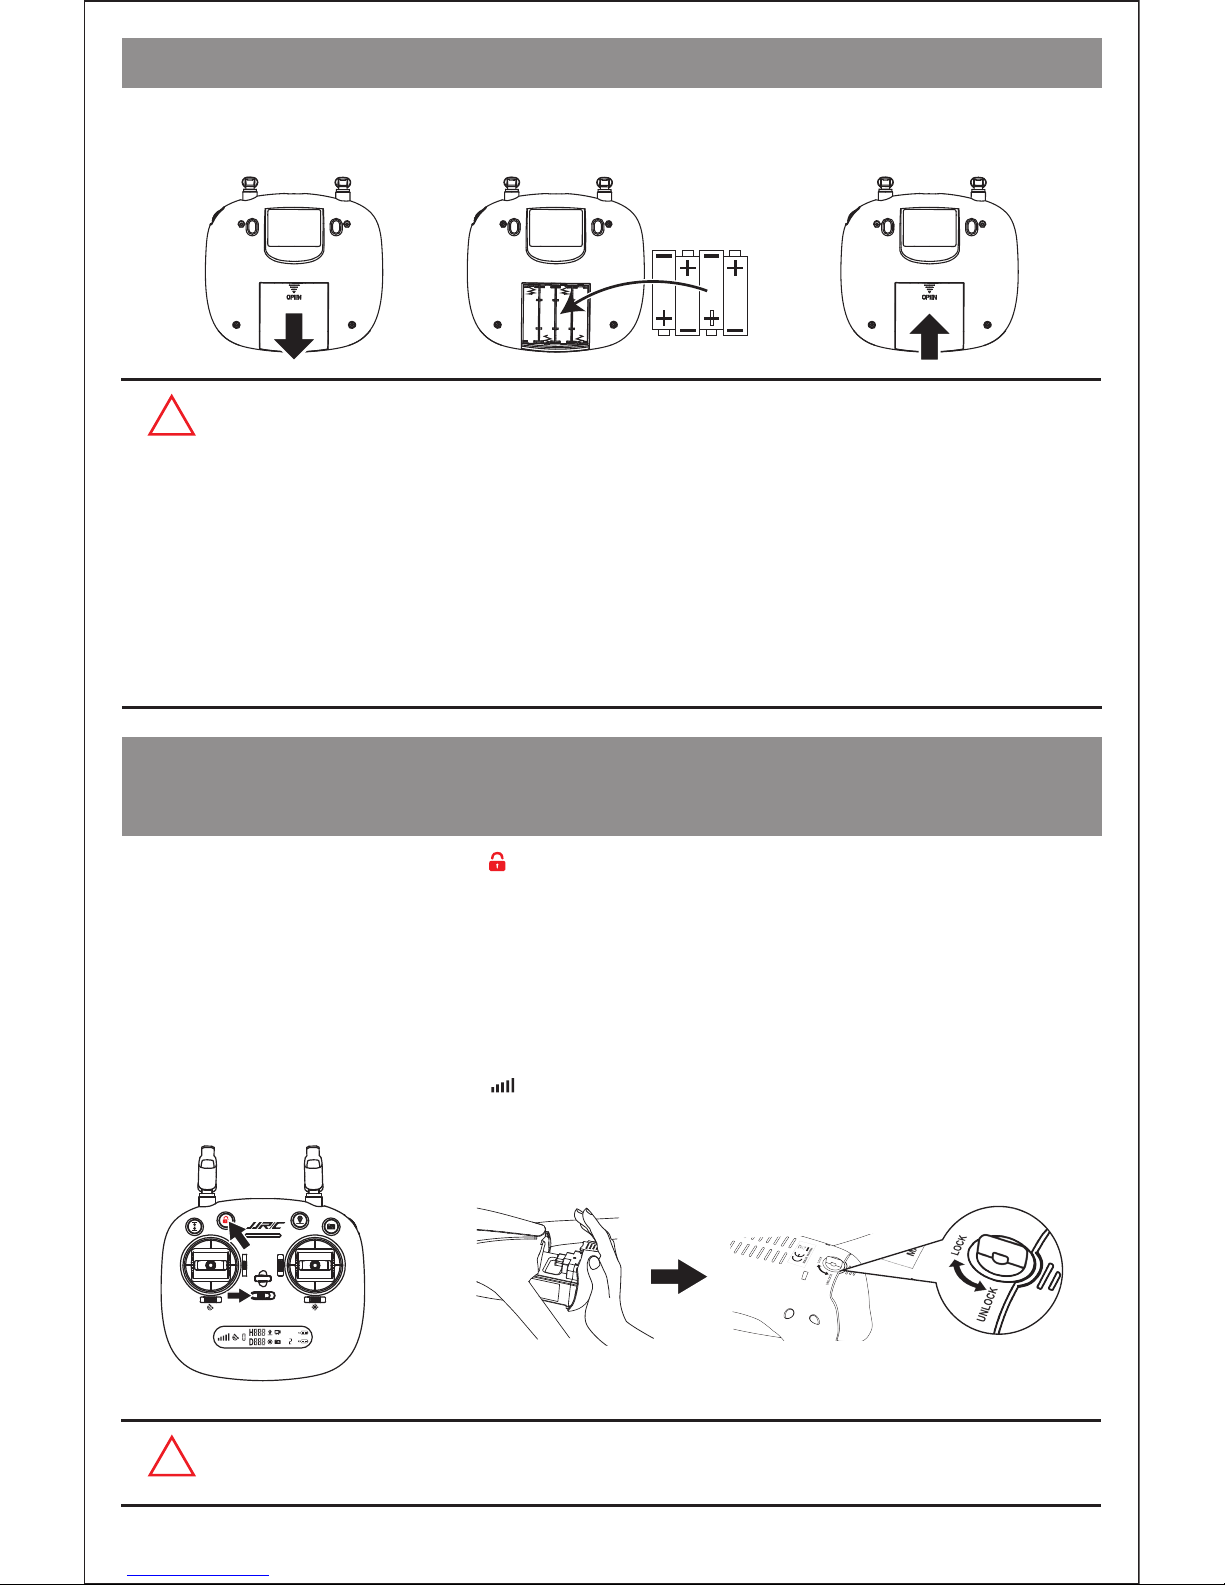
!Warm tips: All remote controllers have been calibrated when manufacturing.
Remote controller calibration is requested only if pilots find that the remote
controller joysticks are not working normally.
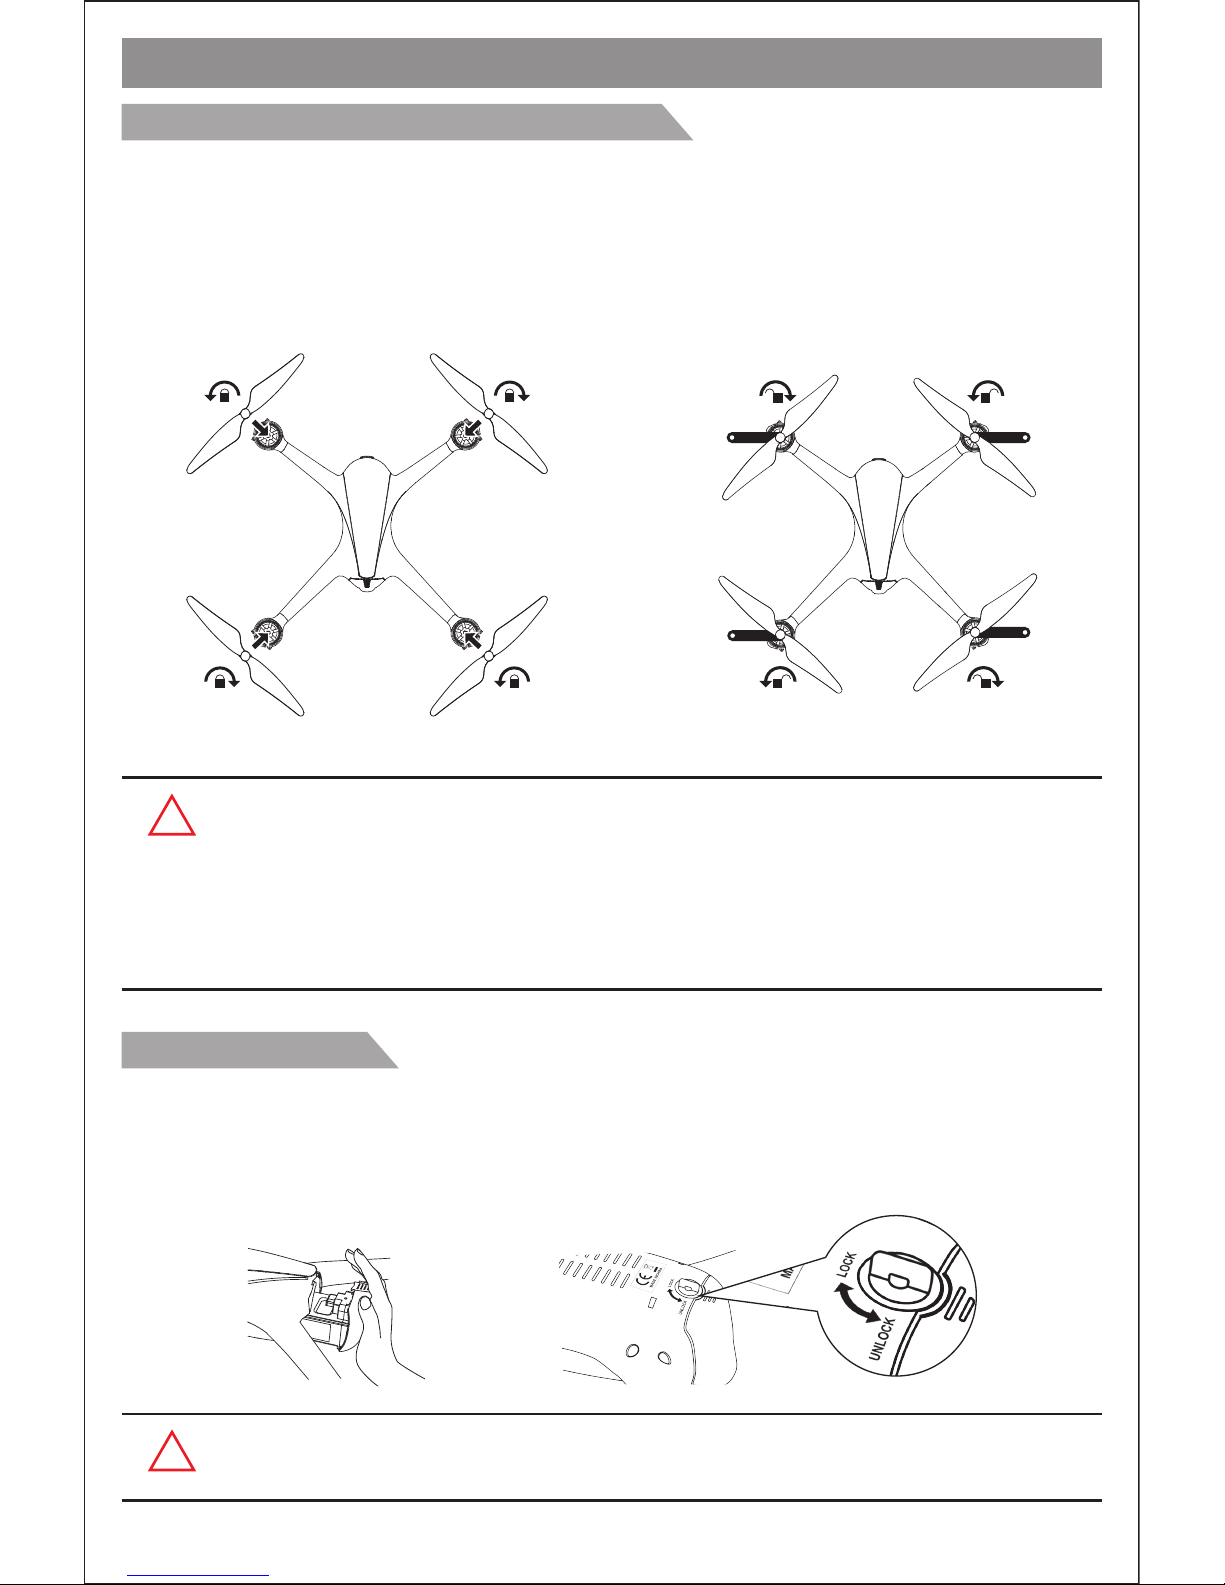
Attention: Please do not power on your drone when calibrating the joysticks.
Step 3. Then, again, press the calibration button “ ” for 3 seconds (indicated as pic.3). The remote
controller will send out 3 beep sounds and the indicator light of the remote controller turns from
flashing slowly to quickly, which means that the joystick calibration is completed.
Pic.1 Pic.2 Pic.3
OFF ON
A B A B
Model
OFF ON
A B A B
Model
OFF ON
A B A B
Model
-9-