5 5 5 5 5 5 5
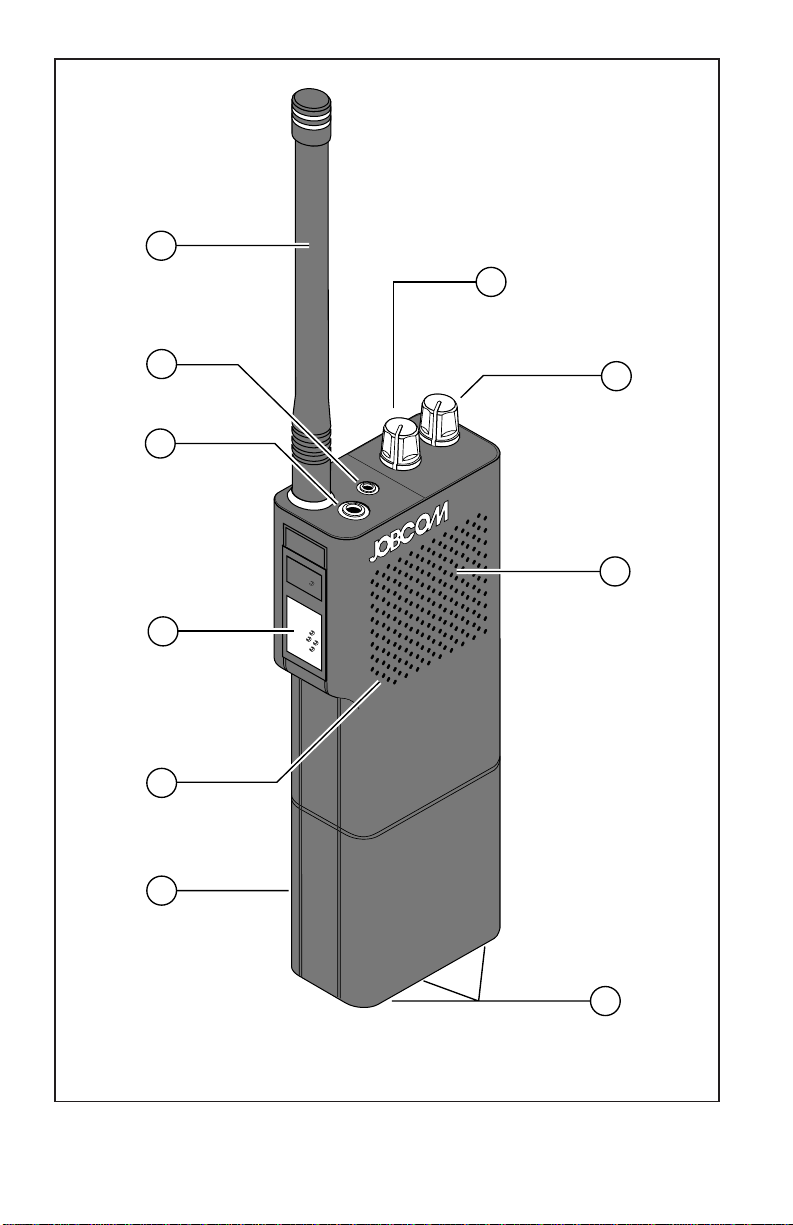
OPERATING CONTROLS
5 SPEAKER
The speaker allows you to hear calls on
your channel. Note that the speaker can
be muted using the squelch control.
6 MICROPHONE
The microphone allows your voice to be
heard in other radios. Hold the radio
about two inches away while talking into
the front grille. Shouting does not
improve listener reception.
7 SQUELCH CONTROL
NOISE
The squelch control knob can mute noise
in the absence of an incoming radio
signal. To silence noise, rotate the
squelch control knob clockwise until noise
first occurs. Then rotate the knob counter-
clockwise to the point that noise stops.
QUIET CALL (QC)
If the JBX unit is equipped with an
RTS-5PA module, you can turn on Q
squelch by rotating the squelch control
fully counterclockwise until the switch
clicks. The radio will then stay quiet until
it receives a call from a unit that transmits
your Q code.
Wait until the channel is free before
transmitting, to avoid interfering with
other users. Listen for others talking on
the channel by rotating the squelch
control clockwise out of the Quiet all
click position.
When the PTT button is pressed, the Q
code is automatically transmitted with
your broadcast, independent of the
squelch control setting.
8 AUDIO JACK
The audio jack can be used to connect
optional accessories, such as a remote
speaker/microphone or an earphone.
NOTE: The remote speaker/ microphone
(RSM-3X) has a two-plug
connector. Insert the smaller
plug into the charge jack.
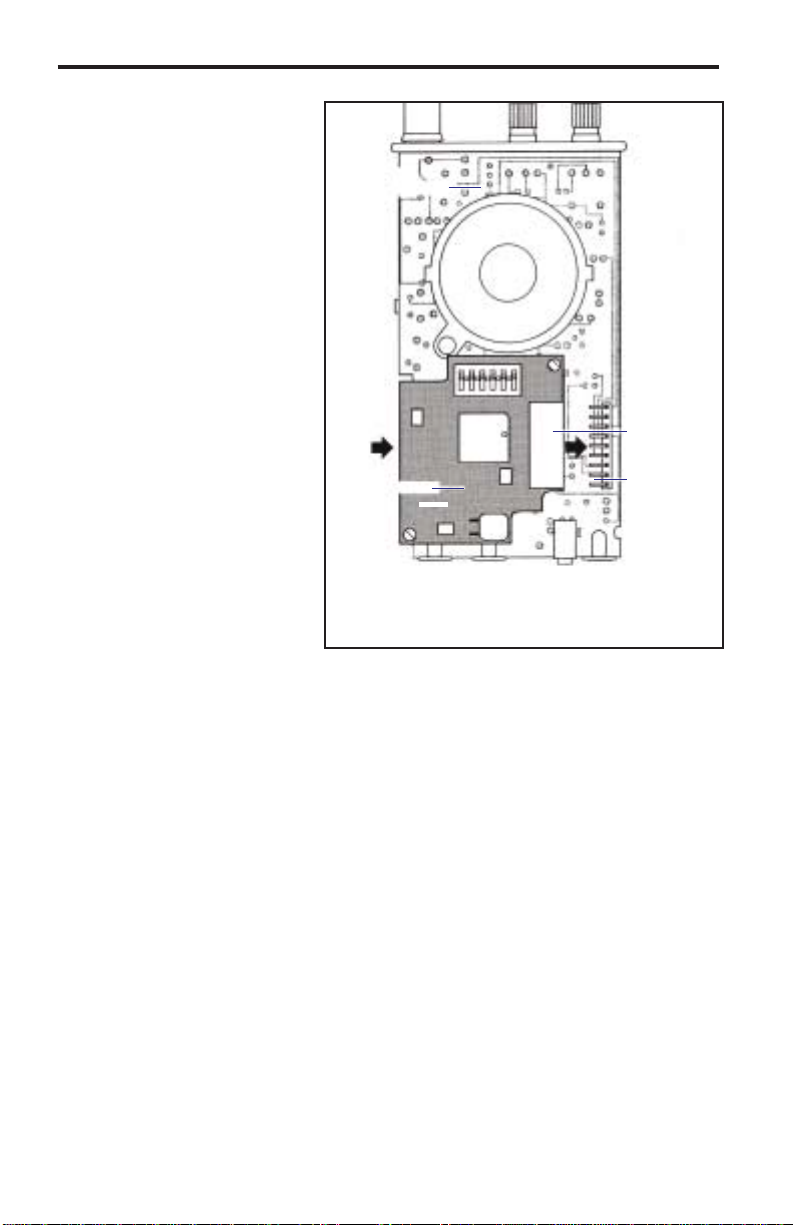
9 BATTERY DOOR
This door covers the battery compart-
ment, holding the battery pack in place.
Refer to FIG-2 (page 6) as you continue
reading.
To remove the battery door, unlock the
door latch at the bottom of the radio using
your thumbnail or a coin. When the latch
is unlocked, the color "red" shows. Slide
the door away.
To install the door, align it with the battery
compartment (the doors top edge faces
the antenna). Place the door against the
compartment and slide the door up, into
the slots shown in FIG-2. Then lock the
door latch.
10 DROP-IN CHARGER
CONTACTS
See FIG-1, left. Three charger contacts,
visible through the bottom of the radio
case, allow the battery pack to be
charged with an optional RITRON drop-in
charger. You may charge the battery
pack inside or out of the radio case.
Plug the drop-in charger into an 110 VA
outlet. Set the portable or battery into the
charger, three contacts facing down, with
each battery contact resting on a charger
contact pin.
An optional "fast rate" drop-in charger unit
charges the standard battery in less than
two hours. For a list of optional battery
chargers, refer to the "Accessories"
section (page 9).
TROUBLESHOOTING
PROBLEM
The radio does not work at all.
Reception is poor.
Noise or "hiss" sounds in the
radio
You cannot hear calls from other
radios.
Your calls cannot be heard in
other radios.
Radio performance falls off after
only a short time each day.
The batteries lose their charge
sooner than expected.
The battery loses its charge sooner
than expected.
You cannot screen out calls from
users outside of your Quiet Call
group.
You cannot hear Quiet Call calls
while your radio is in Quiet Call
s uelch.
Others in your Quiet Call group
cannot hear your Quiet Call
messages.
page 5
page 8
POSSIBLE SOLUTION(S)
Make sure the battery is installed correctly, as shown in
FIG-2 (pages 6).
echarge or replace the battery. (See note 1 on the
next page.)
Move to a different location. (Note 2.)
otate the squelch control fully CW, then CCW to
the point that noise disappears. (Note 3.)
Adjust the squelch control as stated above. (Note 3.)
Make sure your radio operates on the same
frequency as the radio(s) you want to hear. (Note 4.)
echarge or replace the battery. (Note 1.)
Make sure your radio operates on the same freq-
uency as the radio(s) you want to call. (Note 4.)
echarge or replace the battery. (Note 1.)
See the battery section below. Also, refer to page 6,
"Charging."
Conserve the battery. (Note 5.)
If the radio is used in extreme cold, warm the radio
under your coat. (Note 6.)
eplace the battery. (Note 1.) Also, refer to page 6,
"Charging."
Use an optional high capacity battery.
otate the squelch control CCW into the click position.
Confirm that your portable is equipped with a Quiet Call
module. (Note 7.)
Program your Quiet Call module with the same code as
the calling radio(s) use. (Note 7.)
Verify that your portable is equipped with a Quiet Call
module. (Note 7.)
Program your Quiet Call module with the same code as
the radios you want to call use. (Note 7.)
If you have trouble operating the JBX handheld, review the "Operating Controls"
section. If you think the radio is malfunctioning, check the table below.
GENE AL
BATTE Y
QUIET CALL