7
Telephone 01204 574 764 www.jamesrobertshaw.co.uk
PUMA INSTALLATION GUIDE 2012
QualityMemberships
COugar
THE NEXT GENERATION
The top-of-the-range product within The TopLine Collection. Both
the awning fabric and the components are protected completely
maximum width of 6500mm with two folding-arms. Upto 7000mm
width can be achieved in a single width with three folding-arms. The
COUGAR can also be equipped with a variable valance option. The
strongest full-cassette awning manufactured in the UK.
The Flexible Semi-Cassette
The CARACAL is extremely compact, can be mounted very
quickly and offers perfect protection of the awning fabric.
The maximum projection is 3000mm with a maximum width
of 6000mm. Ideally suited for the shading of balconies and
terraces.
The Slender Cassette Awning
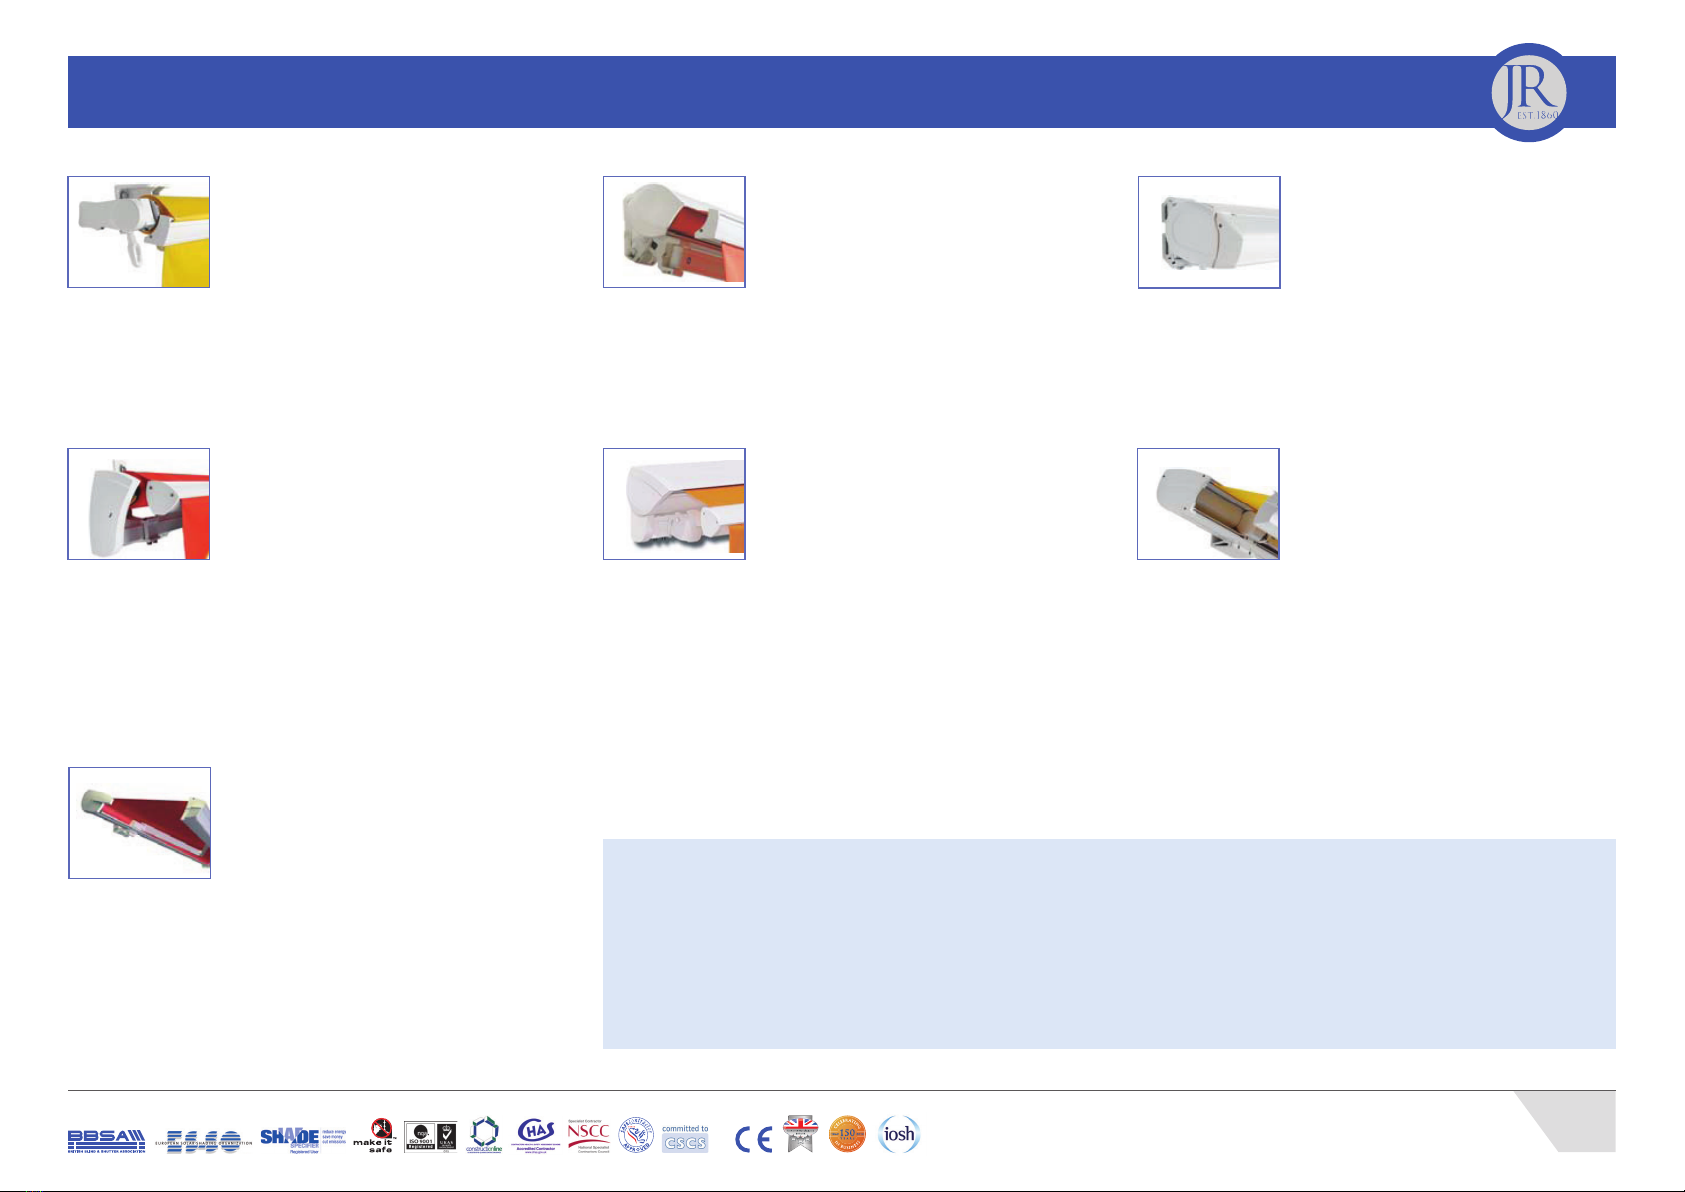
The PUMA is the top-of-the-range product in this family of
awnings. The fabric and mechanics are completely and
permanently protected from the effects of the weather. The
maximum projection is 3000mm with a maximum width of
5000mm with two folding arms. For mounting on difficult
facades as well as balcony roofs, specially designed
mounting brackets are available.
The latest edition to our Folding-Arm
Awning family
The Attractive Standard Awning
The classic CHEETAH awning is characterised by advanced
technology, with an extremely attractive price performance
ratio. A small number of system parts and their easy
handling reduce the production time and therefore also the
production costs for the awning manufacturer. The CHEETAH
awning is highly resistant to corrosion.
The Superior Awning
The all purpose semi-cassette awning for large area sun
screening solutions enables projections of up to 4000mm
and widths of up to 6500mm with just two folding arms.
The elegant and compact awning offers protection of the
fabric against dust and water and can be easily mounted on
its mounting tube base. The PANTHER is the all purpose
sun awning thanks to its numerous options such as slewing
mechanism, crossed arms and variable valance.
The Next Generation
The COUGAR represents the No.1 product in the Topline
awning family. Both the awning fabric and the components
are protected completely against the weather. The
maximum projection is 4000mm with a maximum width of
6500mm with two articulated arms. Up to 7000mm in
width can be achieved in a single length with three
articulated arms. The PANTHER is particularly attractive
when equipped with the variable valance.
The Awning For All Occasions
This basic model is a quality designed open articulated-arm
awning. The maximum projection is 4000mm with a
maximum width of 6500mm with only two arms. Up to
7000mm in width can be achieved in a single length with
three articulated arms. With a few additional components,
the JAGUAR can be equipped with additional cross-over
arms and variable valance.
Table of Contents:
1) Basic Information
2) Explanation of the Notices
3) Validity
4) Safety
5) Proper Intended Use
6) Product Information
7) Operation
8) Cleaning / Care
9) Maintenance
10)Dismounting
11)CE - Conformity
12)Product Identification
FOLDING-ARM AWNING
I
User Guide
FOLDING-ARM AWNING
I
User Guide
The latest edition to our Folding-Arm Awning family, the
Zephyr is a modern designed, full cassette awning with many
special features. It bridges the gap perfectly between the
Puma and Cougar models, representing excellent value for
money! With its contemporary design and futuristic
appearance, the Zephyr is designed with Italian innovation,
German engineering and British manufacturing experience. Its
clean lines, corners and edges replace the rounded shapes of
earlier years, and conforms with contempory architecture,
accomidating the design trends of the future.
Other products in
our External Blind
range include:
• Drop-Arm Awnings
• Conservatory Roof Awnings
• Umbrella Systems
• Canopies & Walkways
• Vertical Awnings
• Terrace Awnings
• Side Awnings
• Cafe / Promo Banners
• External Venetian Blinds
• Domestic Roller Shutters
Folding-Arm Awning User Guide
puma
THE SLENDER CASSETTE
AWNING
The PUMA is the top-of-the-range product within The SwingLine
Collection. The fabric and mechanics are completely and permanently
3000mm with a maximum width of 5000mm with two folding-arms.
The Flexible Semi-Cassette
The CARACAL is extremely compact, can be mounted very
quickly and offers perfect protection of the awning fabric.
The maximum projection is 3000mm with a maximum width
of 6000mm. Ideally suited for the shading of balconies and
terraces.
The Slender Cassette Awning
The PUMA is the top-of-the-range product in this family of
awnings. The fabric and mechanics are completely and
permanently protected from the effects of the weather. The
maximum projection is 3000mm with a maximum width of
5000mm with two folding arms. For mounting on difficult
facades as well as balcony roofs, specially designed
mounting brackets are available.
The latest edition to our Folding-Arm
Awning family
The Attractive Standard Awning
The classic CHEETAH awning is characterised by advanced
technology, with an extremely attractive price performance
ratio. A small number of system parts and their easy
handling reduce the production time and therefore also the
production costs for the awning manufacturer. The CHEETAH
awning is highly resistant to corrosion.
The Superior Awning
The all purpose semi-cassette awning for large area sun
screening solutions enables projections of up to 4000mm
and widths of up to 6500mm with just two folding arms.
The elegant and compact awning offers protection of the
fabric against dust and water and can be easily mounted on
its mounting tube base. The PANTHER is the all purpose
sun awning thanks to its numerous options such as slewing
mechanism, crossed arms and variable valance.
The Next Generation
The COUGAR represents the No.1 product in the Topline
awning family. Both the awning fabric and the components
are protected completely against the weather. The
maximum projection is 4000mm with a maximum width of
6500mm with two articulated arms. Up to 7000mm in
width can be achieved in a single length with three
articulated arms. The PANTHER is particularly attractive
when equipped with the variable valance.
The Awning For All Occasions
This basic model is a quality designed open articulated-arm
awning. The maximum projection is 4000mm with a
maximum width of 6500mm with only two arms. Up to
7000mm in width can be achieved in a single length with
three articulated arms. With a few additional components,
the JAGUAR can be equipped with additional cross-over
arms and variable valance.
Table of Contents:
1) Basic Information
2) Explanation of the Notices
3) Validity
4) Safety
5) Proper Intended Use
6) Product Information
7) Operation
8) Cleaning / Care
9) Maintenance
10)Dismounting
11)CE - Conformity
12)Product Identification
FOLDING-ARM AWNING
I
User Guide
FOLDING-ARM AWNING
I
User Guide
The latest edition to our Folding-Arm Awning family, the
Zephyr is a modern designed, full cassette awning with many
special features. It bridges the gap perfectly between the
Puma and Cougar models, representing excellent value for
money! With its contemporary design and futuristic
appearance, the Zephyr is designed with Italian innovation,
German engineering and British manufacturing experience. Its
clean lines, corners and edges replace the rounded shapes of
earlier years, and conforms with contempory architecture,
accomidating the design trends of the future.
Other products in
our External Blind
range include:
• Drop-Arm Awnings
• Conservatory Roof Awnings
• Umbrella Systems
• Canopies & Walkways
• Vertical Awnings
• Terrace Awnings
• Side Awnings
• Cafe / Promo Banners
• External Venetian Blinds
• Domestic Roller Shutters
Folding-Arm Awning User Guide
ChEETah
THE ATTRACTIVE STANDARD
AWNING
The classic CHEETAH awning is characterised by advanced technology,
with an extremely attractive price performance ratio. A small number
of system parts and their easy handling reduce the production time
and therefore also the production costs for the awning manufacturer.
The CHEETAH awning is highly resistant to corrosion.
The Flexible Semi-Cassette
The CARACAL is extremely compact, can be mounted very
quickly and offers perfect protection of the awning fabric.
The maximum projection is 3000mm with a maximum width
of 6000mm. Ideally suited for the shading of balconies and
terraces.
The Slender Cassette Awning
The PUMA is the top-of-the-range product in this family of
awnings. The fabric and mechanics are completely and
permanently protected from the effects of the weather. The
maximum projection is 3000mm with a maximum width of
5000mm with two folding arms. For mounting on difficult
facades as well as balcony roofs, specially designed
mounting brackets are available.
The latest edition to our Folding-Arm
Awning family
The Attractive Standard Awning
The classic CHEETAH awning is characterised by advanced
technology, with an extremely attractive price performance
ratio. A small number of system parts and their easy
handling reduce the production time and therefore also the
production costs for the awning manufacturer. The CHEETAH
awning is highly resistant to corrosion.
The Superior Awning
The all purpose semi-cassette awning for large area sun
screening solutions enables projections of up to 4000mm
and widths of up to 6500mm with just two folding arms.
The elegant and compact awning offers protection of the
fabric against dust and water and can be easily mounted on
its mounting tube base. The PANTHER is the all purpose
sun awning thanks to its numerous options such as slewing
mechanism, crossed arms and variable valance.
The Next Generation
The COUGAR represents the No.1 product in the Topline
awning family. Both the awning fabric and the components
are protected completely against the weather. The
maximum projection is 4000mm with a maximum width of
6500mm with two articulated arms. Up to 7000mm in
width can be achieved in a single length with three
articulated arms. The PANTHER is particularly attractive
when equipped with the variable valance.
The Awning For All Occasions
This basic model is a quality designed open articulated-arm
awning. The maximum projection is 4000mm with a
maximum width of 6500mm with only two arms. Up to
7000mm in width can be achieved in a single length with
three articulated arms. With a few additional components,
the JAGUAR can be equipped with additional cross-over
arms and variable valance.
Table of Contents:
1) Basic Information
2) Explanation of the Notices
3) Validity
4) Safety
5) Proper Intended Use
6) Product Information
7) Operation
8) Cleaning / Care
9) Maintenance
10)Dismounting
11)CE - Conformity
12)Product Identification
FOLDING-ARM AWNING
I
User Guide
FOLDING-ARM AWNING
I
User Guide
The latest edition to our Folding-Arm Awning family, the
Zephyr is a modern designed, full cassette awning with many
special features. It bridges the gap perfectly between the
Puma and Cougar models, representing excellent value for
money! With its contemporary design and futuristic
appearance, the Zephyr is designed with Italian innovation,
German engineering and British manufacturing experience. Its
clean lines, corners and edges replace the rounded shapes of
earlier years, and conforms with contempory architecture,
accomidating the design trends of the future.
Other products in
our External Blind
range include:
• Drop-Arm Awnings
• Conservatory Roof Awnings
• Umbrella Systems
• Canopies & Walkways
• Vertical Awnings
• Terrace Awnings
• Side Awnings
• Cafe / Promo Banners
• External Venetian Blinds
• Domestic Roller Shutters
Folding-Arm Awning User Guide
Jaguar
THE AWNING FOR ALL
OCCASIONS
The standard TopLine model is a quality designed non-cassette
maximum width of 6500mm with two folding-arms. Upto 7000mm
width can be achieved in a single width with three folding-arms.
With a few additional components, the JAGUAR can be equipped
with additional cross-over arms and a variable valance option. The
strongest non-cassette awning manufactured in the UK.
The Flexible Semi-Cassette
The CARACAL is extremely compact, can be mounted very
quickly and offers perfect protection of the awning fabric.
The maximum projection is 3000mm with a maximum width
of 6000mm. Ideally suited for the shading of balconies and
terraces.
The Slender Cassette Awning
The PUMA is the top-of-the-range product in this family of
awnings. The fabric and mechanics are completely and
permanently protected from the effects of the weather. The
maximum projection is 3000mm with a maximum width of
5000mm with two folding arms. For mounting on difficult
facades as well as balcony roofs, specially designed
mounting brackets are available.
The latest edition to our Folding-Arm
Awning family
The Attractive Standard Awning
The classic CHEETAH awning is characterised by advanced
technology, with an extremely attractive price performance
ratio. A small number of system parts and their easy
handling reduce the production time and therefore also the
production costs for the awning manufacturer. The CHEETAH
awning is highly resistant to corrosion.
The Superior Awning
The all purpose semi-cassette awning for large area sun
screening solutions enables projections of up to 4000mm
and widths of up to 6500mm with just two folding arms.
The elegant and compact awning offers protection of the
fabric against dust and water and can be easily mounted on
its mounting tube base. The PANTHER is the all purpose
sun awning thanks to its numerous options such as slewing
mechanism, crossed arms and variable valance.
The Next Generation
The COUGAR represents the No.1 product in the Topline
awning family. Both the awning fabric and the components
are protected completely against the weather. The
maximum projection is 4000mm with a maximum width of
6500mm with two articulated arms. Up to 7000mm in
width can be achieved in a single length with three
articulated arms. The PANTHER is particularly attractive
when equipped with the variable valance.
The Awning For All Occasions
This basic model is a quality designed open articulated-arm
awning. The maximum projection is 4000mm with a
maximum width of 6500mm with only two arms. Up to
7000mm in width can be achieved in a single length with
three articulated arms. With a few additional components,
the JAGUAR can be equipped with additional cross-over
arms and variable valance.
Table of Contents:
1) Basic Information
2) Explanation of the Notices
3) Validity
4) Safety
5) Proper Intended Use
6) Product Information
7) Operation
8) Cleaning / Care
9) Maintenance
10)Dismounting
11)CE - Conformity
12)Product Identification
FOLDING-ARM AWNING
I
User Guide
FOLDING-ARM AWNING
I
User Guide
The latest edition to our Folding-Arm Awning family, the
Zephyr is a modern designed, full cassette awning with many
special features. It bridges the gap perfectly between the
Puma and Cougar models, representing excellent value for
money! With its contemporary design and futuristic
appearance, the Zephyr is designed with Italian innovation,
German engineering and British manufacturing experience. Its
clean lines, corners and edges replace the rounded shapes of
earlier years, and conforms with contempory architecture,
accomidating the design trends of the future.
Other products in
our External Blind
range include:
• Drop-Arm Awnings
• Conservatory Roof Awnings
• Umbrella Systems
• Canopies & Walkways
• Vertical Awnings
• Terrace Awnings
• Side Awnings
• Cafe / Promo Banners
• External Venetian Blinds
• Domestic Roller Shutters
Folding-Arm Awning User Guide
paNThEr
THE SUPERIOR AWNING
The all purpose semi-cassette awning for large area sun screening
upto 7000mm with three folding-arms. The elegant and compact
can be easily installed on its square bar installation base. The
PANTHER is the all purpose sun folding-arm awning thanks to its
numerous options such as the option of additional cross-over arms
and a variable valance option. The strongest semi-cassette awning
manufactured in the UK.
The Flexible Semi-Cassette
The CARACAL is extremely compact, can be mounted very
quickly and offers perfect protection of the awning fabric.
The maximum projection is 3000mm with a maximum width
of 6000mm. Ideally suited for the shading of balconies and
terraces.
The Slender Cassette Awning
The PUMA is the top-of-the-range product in this family of
awnings. The fabric and mechanics are completely and
permanently protected from the effects of the weather. The
maximum projection is 3000mm with a maximum width of
5000mm with two folding arms. For mounting on difficult
facades as well as balcony roofs, specially designed
mounting brackets are available.
The latest edition to our Folding-Arm
Awning family
The Attractive Standard Awning
The classic CHEETAH awning is characterised by advanced
technology, with an extremely attractive price performance
ratio. A small number of system parts and their easy
handling reduce the production time and therefore also the
production costs for the awning manufacturer. The CHEETAH
awning is highly resistant to corrosion.
The Superior Awning
The all purpose semi-cassette awning for large area sun
screening solutions enables projections of up to 4000mm
and widths of up to 6500mm with just two folding arms.
The elegant and compact awning offers protection of the
fabric against dust and water and can be easily mounted on
its mounting tube base. The PANTHER is the all purpose
sun awning thanks to its numerous options such as slewing
mechanism, crossed arms and variable valance.
The Next Generation
The COUGAR represents the No.1 product in the Topline
awning family. Both the awning fabric and the components
are protected completely against the weather. The
maximum projection is 4000mm with a maximum width of
6500mm with two articulated arms. Up to 7000mm in
width can be achieved in a single length with three
articulated arms. The PANTHER is particularly attractive
when equipped with the variable valance.
The Awning For All Occasions
This basic model is a quality designed open articulated-arm
awning. The maximum projection is 4000mm with a
maximum width of 6500mm with only two arms. Up to
7000mm in width can be achieved in a single length with
three articulated arms. With a few additional components,
the JAGUAR can be equipped with additional cross-over
arms and variable valance.
Table of Contents:
1) Basic Information
2) Explanation of the Notices
3) Validity
4) Safety
5) Proper Intended Use
6) Product Information
7) Operation
8) Cleaning / Care
9) Maintenance
10)Dismounting
11)CE - Conformity
12)Product Identification
FOLDING-ARM AWNING
I
User Guide
FOLDING-ARM AWNING
I
User Guide
The latest edition to our Folding-Arm Awning family, the
Zephyr is a modern designed, full cassette awning with many
special features. It bridges the gap perfectly between the
Puma and Cougar models, representing excellent value for
money! With its contemporary design and futuristic
appearance, the Zephyr is designed with Italian innovation,
German engineering and British manufacturing experience. Its
clean lines, corners and edges replace the rounded shapes of
earlier years, and conforms with contempory architecture,
accomidating the design trends of the future.
Other products in
our External Blind
range include:
• Drop-Arm Awnings
• Conservatory Roof Awnings
• Umbrella Systems
• Canopies & Walkways
• Vertical Awnings
• Terrace Awnings
• Side Awnings
• Cafe / Promo Banners
• External Venetian Blinds
• Domestic Roller Shutters
Folding-Arm Awning User Guide
ZEphyr
THE LATEST EDITION TO OUR
FOLDING-ARM AWNING COLLECTION
The ZEPHYR is a modern designed full cassette folding-arm awning,
bridging the gap perfectly between the Puma and Cougar models. With its
contemporary design and futuristic appearance, the ZEPHYR is designed
with Italian innovation, German engineering and British manufacturing
experience. Its clean lines, corners and edges replace the rounded
shapes of earlier years, and conforms with contemporary architecture,
accommodating the design trends of the future.
The Flexible Semi-Cassette
The CARACAL is extremely compact, can be mounted very
quickly and offers perfect protection of the awning fabric.
The maximum projection is 3000mm with a maximum width
of 6000mm. Ideally suited for the shading of balconies and
terraces.
The Slender Cassette Awning
The PUMA is the top-of-the-range product in this family of
awnings. The fabric and mechanics are completely and
permanently protected from the effects of the weather. The
maximum projection is 3000mm with a maximum width of
5000mm with two folding arms. For mounting on difficult
facades as well as balcony roofs, specially designed
mounting brackets are available.
The latest edition to our Folding-Arm
Awning family
The Attractive Standard Awning
The classic CHEETAH awning is characterised by advanced
technology, with an extremely attractive price performance
ratio. A small number of system parts and their easy
handling reduce the production time and therefore also the
production costs for the awning manufacturer. The CHEETAH
awning is highly resistant to corrosion.
The Superior Awning
The all purpose semi-cassette awning for large area sun
screening solutions enables projections of up to 4000mm
and widths of up to 6500mm with just two folding arms.
The elegant and compact awning offers protection of the
fabric against dust and water and can be easily mounted on
its mounting tube base. The PANTHER is the all purpose
sun awning thanks to its numerous options such as slewing
mechanism, crossed arms and variable valance.
The Next Generation
The COUGAR represents the No.1 product in the Topline
awning family. Both the awning fabric and the components
are protected completely against the weather. The
maximum projection is 4000mm with a maximum width of
6500mm with two articulated arms. Up to 7000mm in
width can be achieved in a single length with three
articulated arms. The PANTHER is particularly attractive
when equipped with the variable valance.
The Awning For All Occasions
This basic model is a quality designed open articulated-arm
awning. The maximum projection is 4000mm with a
maximum width of 6500mm with only two arms. Up to
7000mm in width can be achieved in a single length with
three articulated arms. With a few additional components,
the JAGUAR can be equipped with additional cross-over
arms and variable valance.
Table of Contents:
1) Basic Information
2) Explanation of the Notices
3) Validity
4) Safety
5) Proper Intended Use
6) Product Information
7) Operation
8) Cleaning / Care
9) Maintenance
10)Dismounting
11)CE - Conformity
12)Product Identification
FOLDING-ARM AWNING
I
User Guide
FOLDING-ARM AWNING
I
User Guide
The latest edition to our Folding-Arm Awning family, the
Zephyr is a modern designed, full cassette awning with many
special features. It bridges the gap perfectly between the
Puma and Cougar models, representing excellent value for
money! With its contemporary design and futuristic
appearance, the Zephyr is designed with Italian innovation,
German engineering and British manufacturing experience. Its
clean lines, corners and edges replace the rounded shapes of
earlier years, and conforms with contempory architecture,
accomidating the design trends of the future.
Other products in
our External Blind
range include:
• Drop-Arm Awnings
• Conservatory Roof Awnings
• Umbrella Systems
• Canopies & Walkways
• Vertical Awnings
• Terrace Awnings
• Side Awnings
• Cafe / Promo Banners
• External Venetian Blinds
• Domestic Roller Shutters
Folding-Arm Awning User Guide
CaraCal
THE FLExIbLE SEMI-CASSETTE
The CARACAL is extremely compact, can be installed very quickly
suited for the shading of balconies and terraces.
The Flexible Semi-Cassette
The CARACAL is extremely compact, can be mounted very
quickly and offers perfect protection of the awning fabric.
The maximum projection is 3000mm with a maximum width
of 6000mm. Ideally suited for the shading of balconies and
terraces.
The Slender Cassette Awning
The PUMA is the top-of-the-range product in this family of
awnings. The fabric and mechanics are completely and
permanently protected from the effects of the weather. The
maximum projection is 3000mm with a maximum width of
5000mm with two folding arms. For mounting on difficult
facades as well as balcony roofs, specially designed
mounting brackets are available.
The latest edition to our Folding-Arm
Awning family
The Attractive Standard Awning
The classic CHEETAH awning is characterised by advanced
technology, with an extremely attractive price performance
ratio. A small number of system parts and their easy
handling reduce the production time and therefore also the
production costs for the awning manufacturer. The CHEETAH
awning is highly resistant to corrosion.
The Superior Awning
The all purpose semi-cassette awning for large area sun
screening solutions enables projections of up to 4000mm
and widths of up to 6500mm with just two folding arms.
The elegant and compact awning offers protection of the
fabric against dust and water and can be easily mounted on
its mounting tube base. The PANTHER is the all purpose
sun awning thanks to its numerous options such as slewing
mechanism, crossed arms and variable valance.
The Next Generation
The COUGAR represents the No.1 product in the Topline
awning family. Both the awning fabric and the components
are protected completely against the weather. The
maximum projection is 4000mm with a maximum width of
6500mm with two articulated arms. Up to 7000mm in
width can be achieved in a single length with three
articulated arms. The PANTHER is particularly attractive
when equipped with the variable valance.
The Awning For All Occasions
This basic model is a quality designed open articulated-arm
awning. The maximum projection is 4000mm with a
maximum width of 6500mm with only two arms. Up to
7000mm in width can be achieved in a single length with
three articulated arms. With a few additional components,
the JAGUAR can be equipped with additional cross-over
arms and variable valance.
Table of Contents:
1) Basic Information
2) Explanation of the Notices
3) Validity
4) Safety
5) Proper Intended Use
6) Product Information
7) Operation
8) Cleaning / Care
9) Maintenance
10)Dismounting
11)CE - Conformity
12)Product Identification
FOLDING-ARM AWNING
I
User Guide
FOLDING-ARM AWNING
I
User Guide
The latest edition to our Folding-Arm Awning family, the
Zephyr is a modern designed, full cassette awning with many
special features. It bridges the gap perfectly between the
Puma and Cougar models, representing excellent value for
money! With its contemporary design and futuristic
appearance, the Zephyr is designed with Italian innovation,
German engineering and British manufacturing experience. Its
clean lines, corners and edges replace the rounded shapes of
earlier years, and conforms with contempory architecture,
accomidating the design trends of the future.
Other products in
our External Blind
range include:
• Drop-Arm Awnings
• Conservatory Roof Awnings
• Umbrella Systems
• Canopies & Walkways
• Vertical Awnings
• Terrace Awnings
• Side Awnings
• Cafe / Promo Banners
• External Venetian Blinds
• Domestic Roller Shutters
Folding-Arm Awning User Guide
Other Products Within The James Robertshaw External Blind Collection:
Café / Promo Barriers
Canopies, Walkways &
Market Stalls
Drop-Arm Awnings
External Roller Blinds
External Venetian Blinds
Freestanding Awnings
Umbrellas & Parasols
Pergola Awnings
Roof Awnings
Shade Sails
Side Awnings
Terrace Awnings
Traditional Victorian Box Jobs
Vertical Awnings