JTS WA-88 User manual

R
WA-88
UHF PLL Wireless Portable Active Speaker

Installation Guide
Features
Specification
Panel Identification
Wireless Module
CD/MP3 Player Operation
Safety Instructions
01
02
03
06
08
09
13
TABLE OF CONTENTS
Thank you for choosing the wireless systems. In order to obtain the best
efficiency from the systems, you are recommended to take a few minutes to read
this instruction manual carefully.

Installation Guide
TVTV
TIME REPE AT
BASS
MID TREBL E
POWER
ECHO VOLUME
MIN MAX
TIME REPE AT
BASS
MID TREBL E
TIME REP EAT
BASS
TIME REP EAT
BASS
POWER
PT-920BG
(Optional)
-+
TELEVISON
AMPLIFIER
Speaker or
WA-88 EXA
UHF PLL Wireless
Expansion Active Speaker
WA-88 Expansion Passive Speaker
WA-88
Expansion Passive Speaker
24V BATTERY
AC ADAPTOR
PROFESSIONAL COMPUTER
KARAOKE SYSTEM
DC 24-28V
EXT. DC IN
+
-
DC FUSE
8A/250V
SWITCH
ONLY forWireless Microphone
AC FUSE : T2AL/250V
AC INPUT
ON OFF
AC POWER
BA
GUITAR
AUX./GUITAR
.
. .
..
200
150
100
50
Mh-8800Gi
(Wireless Receiver)
Toreduce the risk of elec trical shock, do not removethe
cover(or back). No user serviceable parts inside; refer
servicing to qualied personnel.
Toreduce the risk of re or electrical shock , do not expose
this appliance to rain or moisture.
CAUTION:
WARNING:
RISK OF ELECTRIC SHOCK
DO NOT OPEN
CAUTION
FLASH: CHARGING
LIGHT: FULL
FLASH: LOW VOLTAGE
LIGHT: NORMAL VOLTAGE
GREEN
RED
(US-8001DB)
(Optional)
01

Features
1. A portable active speaker with slot-loading CD module, ECHO sound-effect processor
with Time/Depth/Echo volume control,Treble/Bass control, Guitar input and AUX
in/output with volume control, two wired microphones inputs with independent volume
control, PLL wireless module with wireless microphone voice priority function, and
extending speaker output.
2. Using AC 115 or 230 power that contains 120 Watts(4Ω) output.
3. Adopting bi-amp design with high quality active crossover, and 8-inch woofer that
provide the best sound quality.
4. The Power amplifier uses IC circuit design that not only provides high efficiency and
better sound quality, but also protects overheat and short circuit.
5. Adopting high-quality, toroidal transformer design.
6. Using medium-density wood fiberboard as the speaker box.
7. Detachable wheels and trolley create the convenience for free moving.
8. Equipped with speaker floor stand socket for heightening use.
9. Equipped with USB & SD card function, Slot-loading CD player with LCD display can
withstand 180 degree swing and falter,which is suitable to use in any kind of outdoor
environment.
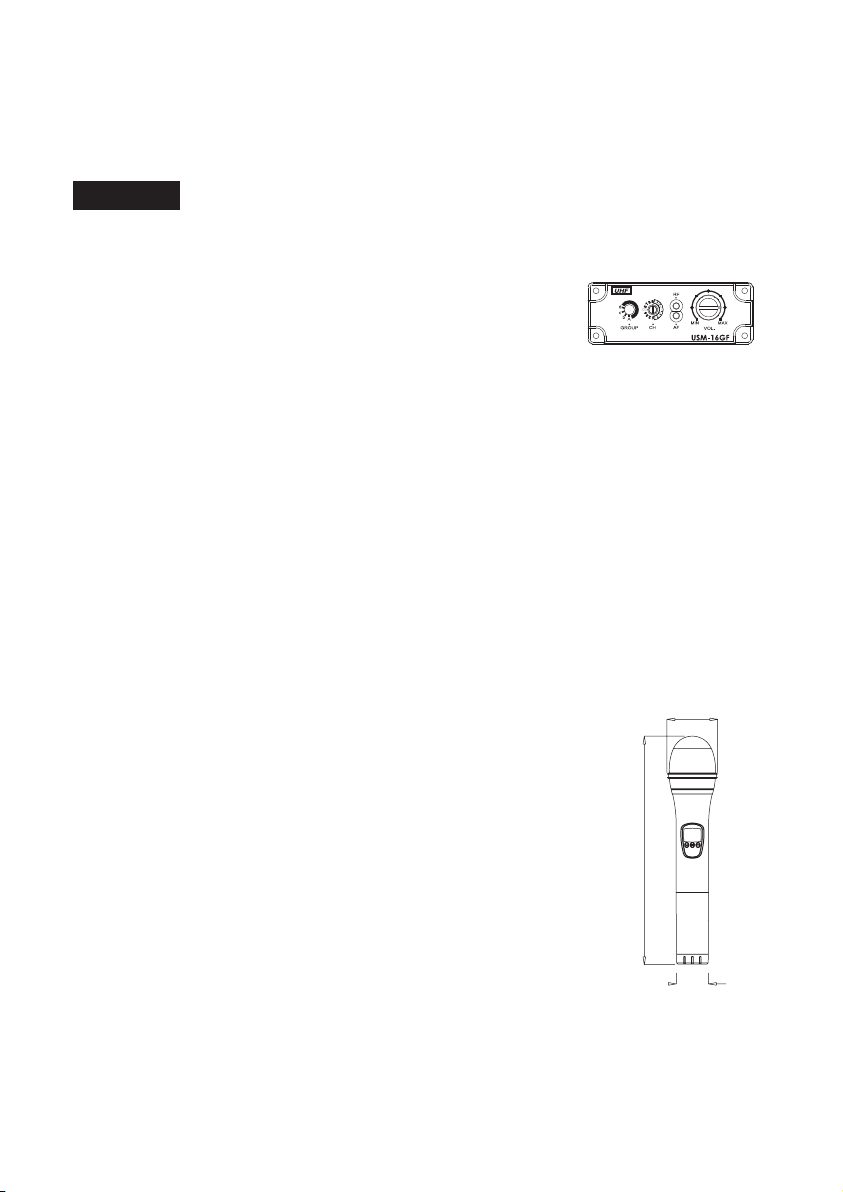
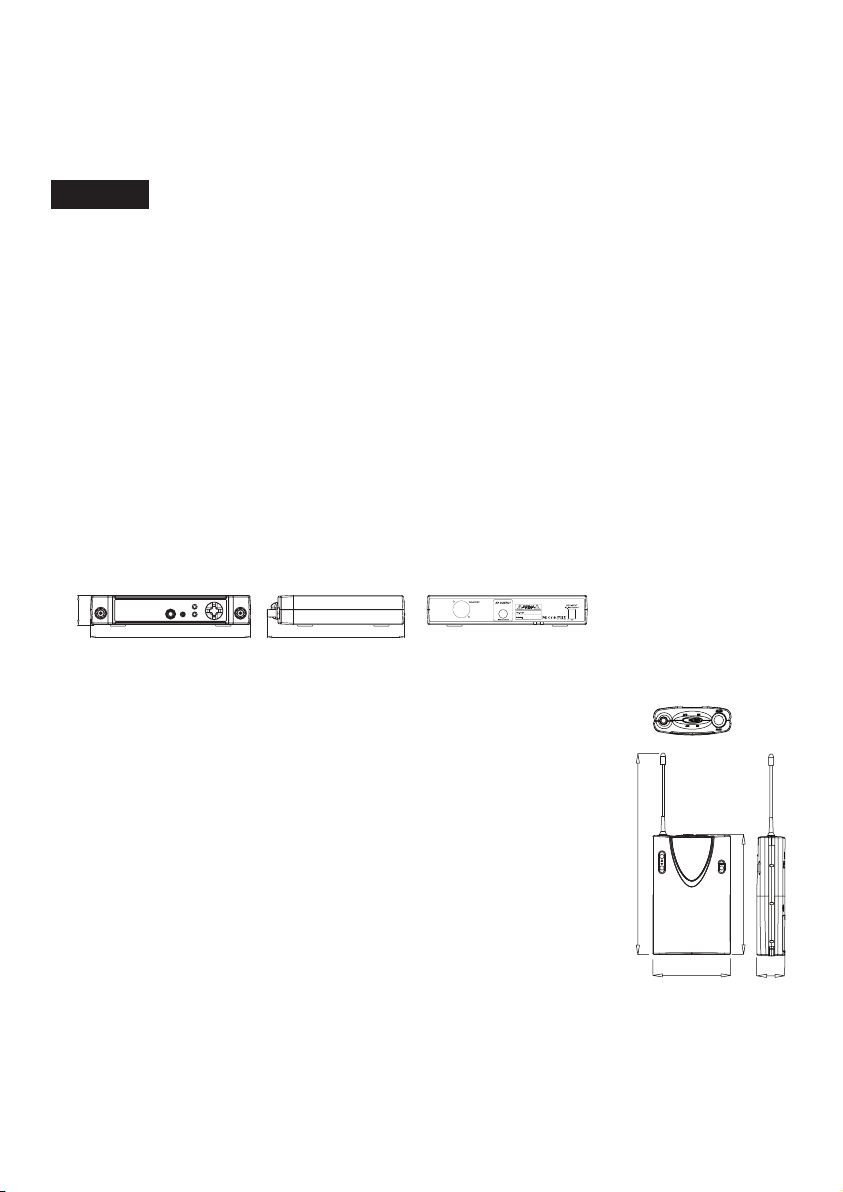
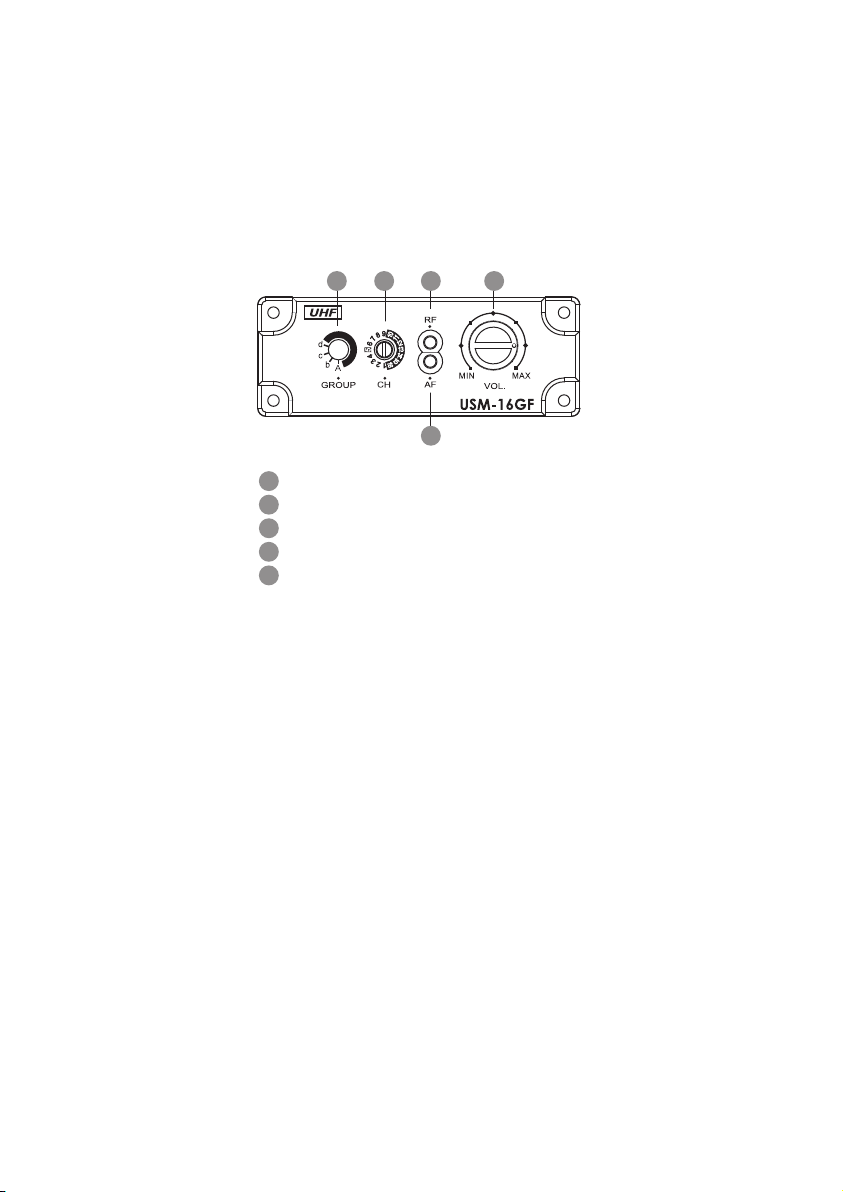
10. PLL UHF wireless microphone system, which is able to reach over 80M without any
interference.
11. Two sealed lead-acid batteries with automatic charging design.The charger will be
activated immediately when AC power is plugged in,and AC power switch is in "ON" .
12. Two rechargeable batteries with 12V/5Ahr capacity each that could be used over 3.5
hours with in general volume & over 7.5 hours with low volume.
13. Uninterrupted power supply (UPS) design that will automatic switch to DC battery
without any effect when pulling out the AC power cable.
14. Two-steps LED charger indicator (Red and Green LED) with low voltage detection. It
would flash red light when charging, and light red when full charged, and would light
green when the voltage is normal, and flash green light under the low voltage.
15. Independent power switch for CD/MP3 player that could extend the battery using time.
16. Removable battery
17. Optional US-8001DB equipped with detachable BNC antenna.
Notice:
1. Please charge the rechargeable batteries more than 8 hours for first time operation.
2. Please refresh the batteries every three months when not using. The batteries will be
damaged if left unused for a long time. (over three months)
3. Refresh the rechargeable battery before operation each time to ensure the best
performance.
02

Specication
03
WA-88
AC Power : 115V or 230V
DC power : 24V~30V
Lead-acid Battery : 12V/5AH*2
Woofer : 8” 8Ω/100W
Tweeter : piezoelectric
Echo Time (ms) : 49.2/98.3/147.5/196.6
Sensitivity of MIC1/MIC2 : -47dB/600Ω
Sensitivity of AUX IN/GUITAR : -11dB/10K
AUX Output : -3dB/600Ω
Treble Control : ±10dB at 10KHz
Bass Control : ±10dB at 100Hz
Power Output : 120W
Power Consumption : 180VA
THD% : <0.5% at 1 Watt output
S/N ratio : >60dB at 50W output
Build-in Audio : CD module
Control Switcher : ECHO, Priority, Power
Rotary switch : MIC1, MIC2,AUX,TIME,
DEPTH, ECHO Vol,
TREBLE, BASS, MASTER
Dimension : 310mm(W)*515mm(H)*380mm(D)
Weight : 24.6Kg
Removable battery
Detachable BNC antenna

Specication
04
Standard
Frequency Preparation.......
Carrier Frequency Range...
RF Outputs........................
Stability.............................
Frequency Deviation..........
LCD Display......................
Controls............................
Spurious Emissions...........
Audio Frequency Response
Battery..............................
Mh-8800Gi
UHF PLL Handheld Transmitter
PLL Synthesized Control
502~960 MHz
10mW
±10KHz
±48KHz
Channel, Battery Fuel Gauge,
Swnsitivity
Power On/Off, Mode Setting,
AF Level, Channel Up/Down
Lock-on Mode
<-60 dBC
50~16,000 Hz
UM3, AA 1.5V*2
USM-16GF
UHF PLL Diversity Receiver Module
Frequency Range.......
Frequency Stability.....
S/N Ratio...................
RF Receiption............
Mute..........................
Controls.....................
Operation Voltage......
Output Connector.......
Dimension(mm)..........
502~960 MHz
±10KHz
>100dB
Antenna diversity
Noise and Pilot Tone Squelch
AF/RF LED indicators at line out
12-18VDC
0dB / 4.7kΩ (40kHz Div)
84mm(W)* 31mm(H)* 140mm(D)
φ54.4
φ34.5
246

05
Specication
Frequency Preparation.......
Carrier Frequency Range...
S/N Ratio..........................
T.H.D................................
Display..............................
Display Contents...............
Controls............................
Audio Output Level............
AF Output Impedance........
Squelch.............................
Operation Voltage..............
Output Connector...............
Dimension(m/m).................
US-8001DB
PLL Synthesized Control
502~960 MHz
> 105dB
<0.6%@1KHz
LED
Antenna A/B, RF/AF Status
Power On/Off, Channel Selecting, Audio Level
-12dB
600Ω
Pilot Tone, Noise and Mute
12-18 VDC, 150mA
1 Balanced XLR socket
1 Unbalanced Ø6.3mm phone jack
210mm (W)* 40mm (H)* 181mm (D)
UHF PLL Dual Channel Diversity Receiver
Optional
181210
40
PT-920BG
UHF PLL Handheld Transmitter
Frequency Preparation..........
Carrier Frequency Range......
RF Outputs...........................
Stability................................
Frequency Deviation.............
LCD Display.........................
Controls...............................
Output connector..................
Spurious Emissions..............
Audio Frequency Response..
Battery.................................
PLL Synthesized Control
502~960 MHz
10mW
±10KHz
±48KHz
Battery Fuel Gauge
Power On/Off, AF Level,
Channel Up/Down, Lock-on Mode
4P mini XLR
<-50 dBC
40~18,000 Hz
UM3, AA 1.5V*2
25
68
106
192

Panel Identication
24
21
10
16
17
19
18 25 20 22 15
11 12 13
23
7 6 5
8 9
4
3 2 1
DC 24-28V
EXT. DC IN
+
-
DC FUSE
8A/250V
SWITCH
ONLY for Wireless Microphone
AC FUSE : T2AL/250V
AC INPUT
ON OFF
AC POWER
BA
AUX./GUITAR
.
. .
..
200
150
100
50
To reduce the risk of electrical shock, do not remove the
cover(or back). No user serviceable parts inside; refer
servicing to qualied personnel.
To reduce the risk of re or electrical shock, do not expose
this appliance to rain or moisture.
CAUTION:
WARNING:
RISK OF ELECTRIC SHOCK
DO NOT OPEN
CAUTION
FLASH: CHARGING
LIGHT: FULL
FLASH: LOW VOLTAGE
LIGHT: NORMAL VOLTAGE
GREEN
RED
14
06

WA-88 BACK PANEL
■ Volume and Effect Control
1. Master volume control: for all sound except AUX input/output
2. Bass tone control: for all sound except AUX input/output
3. Treble tone control: for all sound except AUX input/output
■ Echo Function
4. Echo ON/OFF:
5. Echo volume control:
6. Echo time delay control: for MIC1/MIC2 and wireless module
7. Echo repeat control: for MIC1/MIC2 and wireless module
■ Wired Microphone Control
8. MIC1 input (φ6.3 phone jack): with independent volume control and echo effect
9. MIC2 input (φ6.3 phone jack): with independent volume control and echo effect
10. MIC1 volume control: for MIC1 input
11. MIC2 volume control: for MIC2 input
■ AUX Function
12. AUX volume control: for Guitar and AUX input & output
13. Guitar input
14. AUX input & output: with RCA jack
■ Power & Battery Function
15. Main Power Switch
16. AC Power Switch:Only when AC Power switch is in “ON”, the external AC
power will connect to the system.
17.3P type AC power socket: whatever power switch is in “ON” or not, as soon as
AC power is connected, and AC power switch is in “ON”, it will charge the
batteries.
Charger Indicator Status
Red and Flashing: Charging
Red and Light: Full
Green and Flashing: Low Voltage
Green and Light: Normal Voltage
Notice:
Normally charging would take between 6 to 8 hours to be full charged
18.External 24V battery input: Outside DC input would not charge the batteries.
19.AC Fuse:T2AL/250V for AC input
20.DC Fuse: 8A/250V for DC input
■ Wireless Module and Control
21. Wireless module: with independent volume control and echo effect
22. Wireless Microphone priority switch: Switching to “ON”, all other sound source
will be eliminated as soon as wireless microphone begins being used.
■ CD/MP3 Player Module and Extended Speaker
23. CD/MP3 player module: with independent power switch
24. US-8001DB Dual channel diversity receiver. (Optional)
25. Extended speaker terminal (φ6.3 phone jack): suggested using 8Ω external
speaker since it will be parallelly connected with internal speaker.
07

08
Wireless Module
Group Selector
Channel Selector
RF LED
Wireless MIC Volume Control
AF LED
3
4
5
2
1
5
23 41

09
1. POWER :ON : Press Power to switch on the power. OFF:Press and hold Power to
switch off the power.
2. SD / USB / CD : Press this key will changed to USB, SD or CD mode.
3. FB : Select backward. Then press “ PLAY / PAUSE “ back to normal playing.
4. FF : Select forward. Then press “ PLAY / PAUSE “ back to normal playing.
5. FOLDER : Select files. Available for playing MP3 format. Press each FOLDER key a
time, it will change to next catalogue.
6. REV : Press to desired previous track number.
7. F.WD : Press to desired next track number.
8. PLAY / PAUSE : Press once stat to play, press again pause to stop.
9. STOP/ EJECT : Press to stop playing and press to disk ejected gradually.
10. Infrared window:Pick up signal from the remote controller.
11. USB Connector
12. SD Connector : Accepts SD Card and MMC Card.
13. LCD Display :
■ MP3:When being MP3 mode, the display panel shows MP3.
■ CD:When being CD mode, the display panel shoes CD.
■ When in playing mode, it display , when pausing, the panel shows
■ REPEAT 1:When repeatedly playing the single track, it shows REPEAT 1.。
■ REPEAT ALL:When all songs at the folders are playing repeatedly, it shows
REPEAT ALL .
■ REPEAT FOLDER : When it appears REPEAT FOLDER, it refers to playing the tracks
repeatedly from a specific folder.
■ SHUFFLE:When Random playback.
■ PROGRAM:When playback program tracks.
■ MEMORY:When playback memory tracks.
■ A→B:When repeat playing between A and B.
■ Under the MP3 mode, it will appear the folder numbers.
■ :Display the current playing track.
■ : :Display the time for the current playing track.
CD/MP3 Player Operation
FOLDER
CD
MP3REPEAT ALL1 PROGRAMSHUFFLE
BA
1 13
2 5 3 4 6 7 8 9 14
11 10 12

10
14. VOLUME :
■ This player can accepts 12 cm discs like CD, CD-R, CD-RW , MP3 disks and USB
and SD / MMC reader playing, but please do not intend to play the CD-ROM / CD-I /
CDV, 8 cm discs or computer CD.
■ This player can accepts format MP3 and WMA
■ Insert a disc into disc slot with the playback side down and playback starts automati
cally. Track number and playing time will be displayed.
■ To pause playback or normal playback, press PLAY/PAUSE or press on the
remote controller,
■ Press REV, F.WD, or on the remote controller, for desired next or previous
track number. CD player will continue playback while display selected tracks.
■ To stop playback, press STOP/EJECT or press once on the remote controller.
Press STOP/EJECT once to stop playback, LCD will show total track numbers and
total time played. Press again to stop CD play. Press 3rd disc will quietly eject. Press
fourth disc will be inserted again.
■ Press FB, FF or or on the remote controller, to activate fast forward or reverse
Until desired section is located.
■ : Play the catalogue with MP3 file to change the select catalogue,
To select the catalogue with MP3 form in playing program, may use
key in the face plate or remote controller to select next catalogue.
Press each key a time; it will change to next catalogue
Note :
■ When inserts the disk into CD player or takes out the disk, it is necessary to let CD
player insert disk and return automatically. It is prohibited to push or take out the disk
by hand before the disk completely return from CD player, thus will cause the machine
to be broken down and unable to operate normally.
SD / MMC Card
■ Insert SD Card or MMC Card into the insert hole of SD/MMC CARD in the face plate.
Pull the card to get stuck with the tenon. It then finished the assembly. When taking
out the card, please push the card to the bottom and then release to shout it out.
Please don’t use the force to pull it out. If so, it will damage the card and the machine.
■ Press SD / USB / CD or SD / USB / CD on the remote controller. Selects SD then
press PLAY / PAUSE or on the remote controller to playing.
As for other playing operation way, please refer to the operation way in PLAYING
and THE FUNCTIONS RESPECTIVELY ON THE REMOTE CONTROLLER.
USB
■ Insert USB into the insert hole of USB in the face plate. If don't need to use USB, may
take it off directly.
■ Press SD / USB / CD or SD / USB / CD on the remote controller. Selects USB then
press PLAY / PAUSE or on the remote controller to playing.
As for other playing operation way, please refer to the operation in PLAYING and
THE FUNCTIONS RESPECTIVELY ON THE REMOTE CONTROLLER.
FOLDER
FOLDER
FOLDER

11
■ EJECT : Press to stop playing and press to disk ejected gradually.
■ can memorize the self-set playing procedure.
1. To play the ordinary music of CD, USB SD Card: Press key a time, and then
select the number 0~9 from the combination key, for example: press 2 and 3, then
LCD will display "23", then press Confirm key to complete memory setup; LCD
will display "23:01".
If press "5" again, and press key, LCD will display "05:02", and so it has set "23"
and "05" as memorized songs. And press play key, it will play all of the memo
rized songs. Meanwhile, LCD indicator will display "MEMORY" and the playing song
numbers. If want to cancel all of the memorized songs, press key for 2 times
repeatedly.
2. To play MP3 form of CD, USB, SD Card: Press key once, and select the song
numbers 0~9 from the catalogue of combination key, for example: press 2 and then
press Confirm key, and then press 3, and then press key, then LCD will display
02 03:01", so it has set up 02 as memorized in the catalogue, 03 is the song in the
catalogue and 01 is the first memorized song. Repeat this way to operate and
memorized more songs. After confirmation the memorized playing songs, then press
play key to play all the memorized songs. Meanwhile, LCD indicator will display
"MEMORY" and the playing song number. If want to cancel all of the memorized
songs, press key for 2 times repeatedly
■ : A random selection is played from alive labile tracks. Press and LCD
it shows SHUFFLE. Then press or can selection from alive labile
tracks.
PROG
PROG
PROG
RAN RAN
PROG
PROG
THE FUNCTIONS RESPECTIVELY ON THE REMOTE CONTROLLER

12
■ : Repeat mode.
1. To play the ordinary music of CD, USB SD Card: Press once LCD it shows REPEAT
ALL : Repeat by the songs in all. Press again LCD it shows REPEAT 1 : Repeat by
the song in the folder. Press the 3rd time, LCD display will eliminate the word
REPEAT, and cancel Repeat Playing function.
2. To play MP3 form of CD, USB, SD Card: Press each key a time; it will change
to〝 REPEAT ALL 〞, 〝 REPEAT FOLDER 〞,〝 REPEAT 1 “, the last to cancel
Repeat Playing function.〝 REPEAT FOLDER 〞: Repeat all the songs in the folder.
■ Numeral 0 ~ 9 : Select numerals. Selects the track from numerals.
■ : Play the catalogue with MP3 file to change the select catalogue, and LCD
display will show catalogue item. Press one time can change one
catalogue item.
■ : PLAY / PAUSE. Press once is pause and LCD it shows . Press again to play
and LCD it shows .
■ :Stop to play。
■ : Skip to the former track.
■ : To next track.
■ : Press once to activate fast reverse. Presses again cancel fast reverse. Then
Press , back to normal play.
■ : Press once to activate fast forward. Presses again cancel fast forward. Then
Press , back to normal play.
■ : Selection USB, SD or CD. Then press to start playing.
■ : It is the zone memory function. During Playing State, press
A point will start to memorize. Press again to memorize B point, and
stop memorizing at the same time, and start repeating playing point A - B
Memory Zone. Press again to cancel A→ B Function.
■ : ON / OFF Mute.
■ : confirmation : Execution.
■ When using the remote controller, the remote controller shall be appointed to the
receiving hole of face plate. The optimal receiving distance is 3 meters. (the
available distance is 5 meters.) The batteries ( model CR2025 3V) shall be put into
the remote controller.
■ Battery installation of remove controller
1. Press and hold the tenon located on lower left-hand corner of the rear remote controller,
pull out the battery set by the slot at the right.
2. Place the battery〈positive electrode faces upwards〉according to its correct polarity.
3. Push the battery compartment back to the fixed position.
RAP
RAP
FOLDER
FOLDER
CD
USB/SD
AB AB

13
While setting up and installing this machine
■ Do not wet the machine
Do not exposure to rain, or heavy humidity to prevent fire or electric shock.
■ Confirming the intensity of the place for setting the machine
Install the machine in a place that can bear one’s own weight or steady shelf.
It can prevent the machine from causing casualties or property loss while
dropping.
■ Do not touch the loudspeaker terminal
High impendence of loudspeaker terminal can reach the voltage of 110V,
please do not touch it, in order to avoid electric shock.
■ Do not involve the cable
While pulling out the plug, please don’t involve the cable; the electric wire
damage is apt to cause the fire. Be sure to hold the plug to pull out.
■ Do not damage the cable
Do not prune, twist, damage or change the cable definitely. Moreover avoid
using it in the place close to electric heater and do not place a heavy object
and machine itself on the cable may cause electric shock and fire.
■ Do not use the voltage of power out of appointing
Limit the use of the voltage of the power stipulated in the machine, if use
higher voltage will cause electric shock or fire.
■ Pay attention to the place to set up
Avoiding installing the machine on the moist and dust, airtight space, the
directly sunlight penetrates or close to the electric heater, the place of soot or
the vapor is apt to cause electric shock or fire.
■ While moving the machine, please pull out the plug
It may cause electric shock or fire if not pulling out the plug while moving the
machine.
Safety Instructions

14
While using this machine
■ When in case there are unusual states to take place
While using the machine that is stating any abnormal state, please get in
touch with the distributor as quickly as possible after closing the power and
pulling out the plug at once,
Please do not continue using the machine, it may cause electric shock or fire,
● If find that the machine smolders or smells until strange smell.
● When if there are water or object fall into the machine.
● If at the time of the machine drops or outer housing damage.
● If at the time of the electric cable or wire damage.
● When the machine emits the unusual sound or has no sound.
■ When thunders & lightning occurring, do not touches the plug
Do not touch the plug while the thunder & lightnign occurring, it may cause
shock by electricity.
■ Do not put any object into the machine
Do not put any object; it may cause the spark or electric shock.
■ Clean up the plug and socket
If the dust is piled up on the plug and socket for a long time, it is apt to cause
the fire, Please clean up regularly and insert the plug firmly on the socket.
■ When maintain and do not use this machine for a long time
When maintain and do not use this machine for a long time, please must pull
out the plug in order to consider safty and may cause shocking by electricity
and fire.
■ Do not open the upper housing of machine or overhaul the inside by oneself
In order to avoid shocking by electricity, should not open the upper housing of
machine definitely,because it contains the high voltage of parts in the
machine. The movements such as inside Overhauling, adjustment and
repairing, etc., please trust the distributor to deal with it.
■ Before turn on the power of machine, please adjust volume to the lowest level
■ Do not place any article on the machine
Please do not place any article on the machine, it may drop and cause
personnel’s injury carelessly.
■ The sound is unstable for a long time (twist), please do not use it
This is a sign of a trouble; it is apt to cause loudspeaker generating heat and
fire to use continuously.
■ Clean up the inside regularly
Notify your distributor to clean up the machine regularly. if the dust is piled up
on the machine for a long time it is apt to cause damage & fire.


R
WA-88
59504-212-03
PROFESSIONAL CO., LTD.
No. 148, 9th Industry Road, Ta-Li Industrial Park,
Taichung City, Taiwan, R.O.C.
Tel: 886-4-24938803 Fax: 886-4-24914890
E-mail: [email protected]
www.jts.com.tw
Table of contents
Other JTS Speakers manuals