manuals.online logo
Brands
  1. Home
  2. •
  3. Brands
  4. •
  5. JVC
  6. •
  7. Camcorder
  8. •
  9. JVC GY-DV300U - 1/3" 3-ccd Dv Camcorder User manual

JVC GY-DV300U - 1/3" 3-ccd Dv Camcorder User manual

Other manuals for GY-DV300U - 1/3" 3-ccd Dv Camcorder

7

This manual suits for next models

1

Other JVC Camcorder manuals

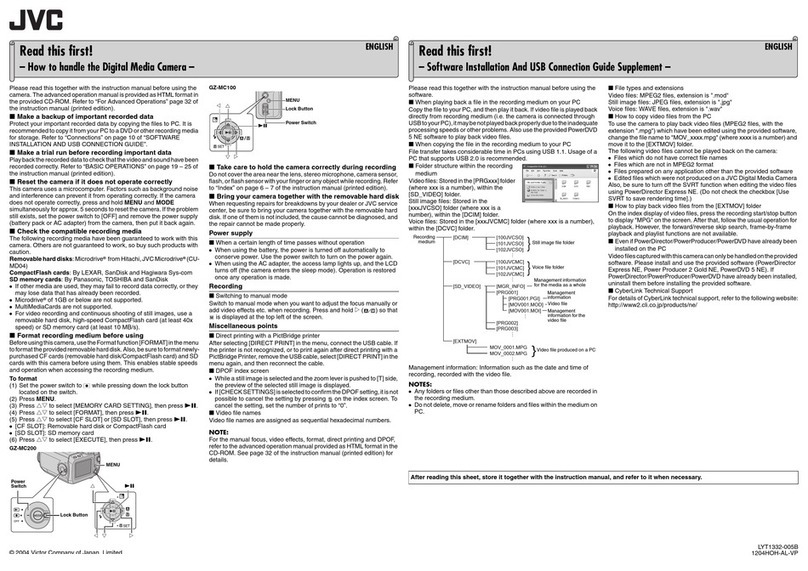
JVC GR-DVF11U User manual

JVC

JVC GR-DVF11U User manual

JVC GR GR-DV4000 User manual

JVC

JVC GR GR-DV4000 User manual

JVC GR-AX237UM User manual

JVC

JVC GR-AX237UM User manual

JVC GR-DV3000 User manual

JVC

JVC GR-DV3000 User manual

JVC GR-D60EK User manual

JVC

JVC GR-D60EK User manual

JVC EverioR GZ-R495 Operating and maintenance manual

JVC

JVC EverioR GZ-R495 Operating and maintenance manual

JVC Streamcorder GY-DV300 User manual

JVC

JVC Streamcorder GY-DV300 User manual

JVC GR-D370AH User manual

JVC

JVC GR-D370AH User manual

JVC GR-FX15 User manual

JVC

JVC GR-FX15 User manual

JVC GR-DF570 User manual

JVC

JVC GR-DF570 User manual

JVC GY-HM180U User manual

JVC

JVC GY-HM180U User manual

JVC Everio GZ-HM30 Operating and maintenance manual

JVC

JVC Everio GZ-HM30 Operating and maintenance manual

JVC GR-SXM470A User manual

JVC

JVC GR-SXM470A User manual

JVC GY-DV5000 Installation and operating instructions

JVC

JVC GY-DV5000 Installation and operating instructions

JVC GR-DV33 User manual

JVC

JVC GR-DV33 User manual

JVC GR-SXM277UA User manual

JVC

JVC GR-SXM277UA User manual

JVC GZ-MS95AH Manual

JVC

JVC GZ-MS95AH Manual

JVC LYT0844-001A User manual

JVC

JVC LYT0844-001A User manual

JVC Everio GZ-MG680 User manual

JVC

JVC Everio GZ-MG680 User manual

JVC GR-D33 - MiniDV Camcorder With 16x Optical... User manual

JVC

JVC GR-D33 - MiniDV Camcorder With 16x Optical... User manual

JVC GR-DA30UC User manual

JVC

JVC GR-DA30UC User manual

JVC GR-X5U User manual

JVC

JVC GR-X5U User manual

JVC Connected Cam GY-HC500U User manual

JVC

JVC Connected Cam GY-HC500U User manual

JVC Digital Movie Camera with Hard Drive User manual

JVC

JVC Digital Movie Camera with Hard Drive User manual

Popular Camcorder manuals by other brands

Vivitar DVR 830XHD owner's manual

Vivitar

Vivitar DVR 830XHD owner's manual

Panasonic HX-WA20PP Service manual

Panasonic

Panasonic HX-WA20PP Service manual

Sony HDR-AS10 operating guide

Sony

Sony HDR-AS10 operating guide

Canon FS1 instruction manual

Canon

Canon FS1 instruction manual

Sharp VL-H400S Operation manual

Sharp

Sharp VL-H400S Operation manual

Panasonic AJ-D900WAP operating instructions

Panasonic

Panasonic AJ-D900WAP operating instructions

Samsung VP-D6550 Owner's instruction book

Samsung

Samsung VP-D6550 Owner's instruction book

Sony Handycam HDR-FX1E operating instructions

Sony

Sony Handycam HDR-FX1E operating instructions

Sony Handycam HDR-FX1000 Specifications

Sony

Sony Handycam HDR-FX1000 Specifications

Naxa NDC-402 instruction manual

Naxa

Naxa NDC-402 instruction manual

LG L320-BN owner's manual

LG

LG L320-BN owner's manual

Vivitar DVR 865HD user manual

Vivitar

Vivitar DVR 865HD user manual

Toshiba CAMILEO Z100 user guide

Toshiba

Toshiba CAMILEO Z100 user guide

Panasonic NV-VS40B operating instructions

Panasonic

Panasonic NV-VS40B operating instructions

Canon RC 260 instructions

Canon

Canon RC 260 instructions

Sony Handycam DCR-DVD7E operating guide

Sony

Sony Handycam DCR-DVD7E operating guide

Brinno TimeLapse TLC200 user manual

Brinno

Brinno TimeLapse TLC200 user manual

MYDLINK DCS-6100LH Quick installation guide

MYDLINK

MYDLINK DCS-6100LH Quick installation guide

manuals.online logo
manuals.online logoBrands
  • About & Mission
  • Contact us
  • Privacy Policy
  • Terms and Conditions

Copyright 2025 Manuals.Online. All Rights Reserved.

Release button
KA-DV300U /
Streamproducer
Quick-Start
For KA-DV300 firmware
version 104 and
Streamproducer 2.0
JVC wants you to get the most out of your GY-
DV300 with the KA-DV300 Network Pack. If
you have any questions, concerns or
problems, please feel free to contact our
Network Product Specialist at: [email protected]
Supported Accessory Cards:
•Operating Voltage: 3.3 VDC
•Max. Current: 300 mA @ 5V
As of October 2002, the KA-DV300 supports the following
accessory cards:
•Wired LAN:
oSocket Communications
(www.socketcom.com)
US: EA2900-117 (Rev. C)1
Europe: EA2903-162 (Rev. C)1
Asia: EA2906-194 (Rev. C)1
revision number on the upper-right of the
product label.
•Wireless LAN:
oTRENDNet (www.trendware.com)
TEW-16PC, revision 0.8.3 or later
(discontinued)
TEW-201PC
oLinksys (www.linksys.com)
WCF112
•CF Memory:
oSanDisk (www.sandisk.com)
SDCFB-16 ~ SDCFB-2561
1– requires CF type I or type II to PCMCIA adapter
2– requires CF Type II to PCMCIA adapter
Attaching the KA-DV300 to the GY-
DV300
1. Insure that the GY-DV300 power is off.
2. Slide the connector cover located on the bottom of the GY-
DV300 in the direction as shown by the arrow located next to
the connector cover.
3. Align the hook on the KA-DV300 with the cutout on the rear
of the GY-DV300 below the battery compartment.
4. Rotate the KA-DV300 upward toward the GY-DV300 until a
positive ‘click’ is heard and felt.
5. To remove the KA-DV300 Network Pack, press the release
button on the front of the pack and pull away from the
camera.
Inserting Accessory Card
1. Insure that the GY-DV300 power is OFF.
2. Insert the accessory card in the KA-DV300.
The card can only be inserted in one direction. Do not
force the card into the slot.
3. Turn on the power to the GY-DV300.
4. The status of the inserted card is displayed on the LCD
and/or viewfinder screen.
NOTES:
•When turning the power on, the card status display will
flash during initialization.
•Inserting a card with the power ON may result in damage
to the card.
Wired Connections, Single Camera to
Single Computer
DHCP: OFF DHCP: OFF
IP Address: 192.168.100.101 IP Address: 192.168.100.102
Netmask: 255.255.255.0 Netmask: 255.255.255.0
Both IP addresses must be within the same network group
and have the same subnet mask, as shown by the shading
above. In this example, the Network Group is 192.168.100.
When connecting directly from the camera to a computer,
operation is assured if the following conditions are met:
•DHCP should be OFF.
•If DHCP is off, the IP address of the camera and the
computer must be unique, but in the same Network
Group.
•The Netmask of both the camera and computer
must be the same.
•A CAT-5 crossover cable is used between the
camera and computer if no switch or hub is present.
•Under most conditions, the computer LAN card
should be set for no proxy server. Please refer to
the KA-DV300 Users Guide for information
regarding this setting if troubles are encountered.
Wireless Connections, Single Camera
to Single Computer
In a similar manner to the wired connection, when connecting
directly from the camera to a computer using a wireless link
without an access point, operation is assured if the following
conditions are met:
•DHCP must be OFF.
•The IP address of the camera and the computer
must be unique, but in the same Network Group.
•The Netmask of both the camera and computer
must be the same
•set the WLAN AD HOC MODE to ON.
•The WLAN ESS ID on both the KA-DV300 and the
computer must be the same. The camera default
ESS ID is ‘wireless-lan’.
•The KA-DV300 and the computer must be set to
use the same channel (WLAN CH).
•Under most conditions, the computer LAN card
should be set for no proxy server. Please refer to
the KA-DV300 Users Guide ‘Setting a Proxy Server’
for information regarding this setting if troubles are
encountered.
Hook
Installing Streamproducer
If your computer meets the minimum requirements discussed on
Page 5 of the Streamproducer Users Guide and does not have a
previous version of Streamproducer installed (if it does, follow the
directions on Page 7 of the Streamproducer Users Guide for
removing it) you can proceed with the automatic installation.
1. Insert the Streamproducer CD ROM into your computers CD
drive. If Setup is not started automatically, click on ‘Start’ and
then ‘Run’. Run the file ‘Startup.exe’ from the CD-ROM.
2. From the opening window, you choose whether to continue
with an English or Japanese installation. For this discussion,
English was selected.
3. The next window
enables you to
select what
portions to
install. Click
“Install
Streamproducer:
4. The installation
will continue
automatically.
When asked, we
recommend installing the software into the default folder, as
shown below.
5. You will be given an opportunity to select which models of
JVC cameras you will be connecting to. Even if you only
have one camera type, we recommend installing the
software for all camera types, as shown here:
6. All files required for use are installed in a single step,
including the required CODECs and Streamcapture, the
plug-in for using Internet Explorer. When the installation
completes, you will have to reboot your computer, which can
be done automatically by selecting this option and clicking
“Finish”.
Connecting with Streamproducer
Connecting to the camera with JVC’s Streamproducer supports
the following features:
•Real-time viewing of up to four cameras or .asf files,
with audio.
•Remote control and setup of all connected cameras
and network packs.
•Capturing (saving to PC disk drive) the output from any
connected camera.
•Connections to multiple cameras using a single
instance of Streamproducer.
•Instant switching between cameras and files when
streaming.
•Publishing point for a media server.
•Stream to up to 10 clients.
The following example shows how to connect to a single camera
using Streamproducer:
1. Open Streamproducer.
2. In and one of the viewable windows, click the ‘Camera’ icon.
3. In the IP address window, enter the address of the desired
camera, as shown here, click ‘OK’.
4. Enter the camera name. Although we recommend that it
does, this name
does not have to
match the name
assigned to the
camera in the
cameras menu.
The name entered
here is used to
create a folder on
the PC where captured scene files are stored.
5. Click ‘OK’. The camera output will appear in the window in
about two seconds.
Please refer to the Streamproducer Users Guide for instructions
on streaming using Streamproducer
Connecting with a Web Browser
Connecting to the camera with A Web Browser supports the
following features:
•Real-time viewing of camera output, with audio.
•Remote control and setup of camera and network
pack.
•Capturing (saving to PC disk drive) camera output
•Connections to multiple cameras using multiple
instances of the Web browser (each instance can
connect to only one camera)
•Publishing point for a media server.
•Stream to a single client.
NOTE: Installation of Streamproducer is required before a Web
Browser connection can be established.
The following example shows how to connect to the camera using
Microsoft Internet Explorer:
1. Open Internet Explorer
2. Enter the cameras IP address in the address bar as shown
here
3. Press ‘Enter’ or click ‘Go’
4. If a valid connection between your computer and the GY-
DV300/KA-DV300 exists, you should see the camera login
screen, shown here.
Note that this screen
will not be shown if
you have previously
logged into the camera
and selected the
‘Remember my
Password’ option.
5. Once a user name and
password have been
entered, the
NETWORK SETUP
screen, shown here,
will be visible.
6. To view or cast the camera output, click ‘STREAM
CAPTURE’. The view window, shown at right, will open.
Please refer to the Streamproducer Users Guide for instructions
on streaming using Streamcapture
Determining the Casting URL
To determine the casting URL (the address that clients use to
view the stream)
when using
Streamproducer,
click on the
‘CONNECTIONS’
tab. Any URL
shown is valid.
When connection, a
client must use both
the URL and port
as shown in the
window.
To determine the casting URL (the address that clients use to
view the stream) when using Streamcapture with Internet
Explorer, from the Streamcapture window, shown previously,
click ‘PROP’, then click ‘CAST’. Any URL listed is valid. When
connection, a client must use both the URL and port as shown
in the window.