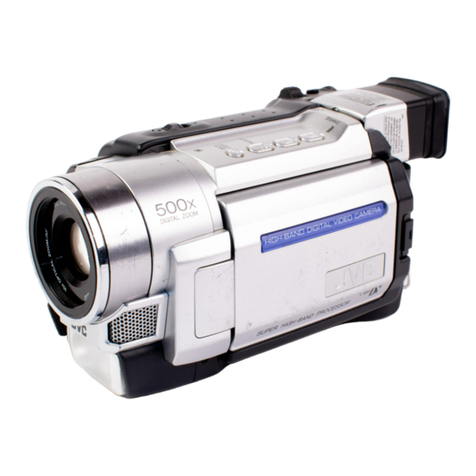
JVC GZ-HD40 - Everio Camcorder - 1080p User manual

1
HD HARD DISK CAMCORDER
Model GZ-HD40/GZ-HD30
PC OPERATION GUIDE
EN
For Windows®Users
You Can Do This..................................3
Software Installation ...........................6
Connecting the Camera to the PC .....8
File Backup on the PC.........................9
File Backup on the PC from the
Specified Media................................10
File Backup on the PC without Using
Software............................................11
Playing Back Files on the PC ...........13
Creating a Video Disc
(DIRECT DISC) .................................15
Creating a Video Disc (Using
Software) ..........................................16
Editing and Creating a Video Disc
(Basic Editing)..................................19
Editing and Creating a Video Disc
(Advanced Editing) ..........................23
Editing and Viewing on a TV
(AVCHD)............................................25
Editing and Viewing on a TV (SD-
VIDEO) ..............................................28
FAQ.....................................................32
For Macintosh Users
You Can Do This................................33
Connecting the Camera to the
Macintosh .........................................34
File Backup on the Macintosh..........35
Editing High-Definition videos with
iMovie ‘08 (AVCHD) .........................37
Editing High-Definition videos with
iMovie HD (SD-VIDEO).....................40
FAQ.....................................................44
For All Users
Folder Structure and Extensions .....45
Customer Support Information ........47
JVC Software License Agreement ...48

2
Preparation
◆For Windows users
•
Install the software included in the provided CD-ROM (P.xx).
•To create a Blu-ray disc
➡Use a recordable Blu-ray disc drive.
•To create a high definition DVD (AVCHD disc) or a DVD video disc with standard picture quality.
➡Use a recordable DVD drive.
◆For Macintosh users
•
Install the software included in the provided CD-ROM (P.xx) to view the backed up file in QuickTime
Player or to edit in iMovie HD or Final Cut Pro.
•
Use commercially available software to edit video or create a disc.
To play back a video disc
◆To play back a Blu-ray disc
➡Use a commercially available Blu-ray disc player etc.
◆To play back an AVCHD video disc
➡Use a DVD burner (CU-VD50, sold separately), commercially available device and software (the
supplied PowerDVD, etc.) that supports AVCHD format.
If you insert the disc into other device, you may not be able to remove it.
◆To play back a DVD video disc
➡Use a commercially available DVD player etc.
(With some device, correct playback may not be possible.)
◆To play back a DVD created using a DVD burner (SD-VIDEO disc)
➡Use a DVD burner (CU-VD50, sold separately).
Concerning operation, refer to the instruction manual supplied with the devices.
Caution
•
The supplied software is not capable of x.v.Color.
If you wish to edit videos on a computer, set the [x.v.Color] to [OFF] in the video menu on your
Everio before the recording.
•
The supplied software supports x.v.Color for video in AVHCD format, but color information is not
retained in the edited sections.
•
The i.LINK Connection cannot be used to import recorded files.
Use the USB Connection.

3
Windows®1
You Can Do This
After recording video or still images, you can save them onto your computer and use the supplied
software to play back, edit or create discs.
Settings
You can set each item in detail.
nSaving, playback, copying and editing is easy with PowerCinema
Help
You can view detailed instructions on the
Internet.
lDIRECT BACK UP: Easy save operation from your Everio
You can save the videos that you have recorded onto your
computer by pressing DIRECT BACK UP button.
lBACK UP: Save operation from your computer
You can select HDD of the camera or microSD card and save the
newly recorded videos onto your computer.
lDIRECT DISC: Saving on a DVD with an operation from your Everio
You can save the newly recorded videos on a DVD and create an
AVCHD disc by pressing DIRECT DISC button.
For Windows®Users

4
nEdit with PowerDirector! nCreate a disc with PowerProducer!
nMake the most of your still images with Digital Photo Navigator!
<NOTES>
•If you are having trouble operating the supplied software, contact customer support (P.47).
•For details on how to create a disc for videos that you have edited on your computer, see the
following web site:
http://www2.cli.co.jp/products/ne/
l[Functions] for creating discs or editing
[Copy Files]:
You can select and copy the desired video file.
[Advanced Editing]:
You can select the desired video file and edit it with
PowerDirector.
[Delete]:
You can select and delete video files that you no longer require.
(You cannot delete files in the camera.)
[Create Disc]:
You can select the desired video file and create a disc with
PowerProducer. You can also create Blu-ray discs.
nPlaying back a disc with PowerDVD
You can play back DVD video discs and AVCHD discs that you have created.
You can play back AVCHD discs or DVD videos with standard
picture quality.
(You cannot play back Blu-ray discs or SD-VIDEO discs.)

5
OS:
Either one of the following OS should be pre-installed (32-bit):
•Windows®XP Home Edition (SP2)
•Windows®XP Professional (SP2)
•Windows Vista®Home Basic
•Windows Vista®Home Premium
CPU:
•Intel®Pentium®4, at least 3.2 GHz
•Intel®Pentium®M, at least 1.8 GHz
•Intel®CoreTM Duo, at least 1.66 GHz
•Intel®CoreTM 2 Duo (Recommended for editing video in SD-VIDEO format)
•Intel®CoreTM 2 Duo at least 2.4 GHz (Recommended for editing video in AVCHD format)
RAM:
•[XP] At least 1 GB
(2 GB or more recommended)
•[Vista] At least 2 GB
Free hard disk space:
•At least 750 MB for installation
•For creating Blu-ray disc, at least 30 GB
(60 GB or more recommended)
Connector:
USB 2.0 connector
Sound card:
Direct Sound compatible sound card
Display:
•Must be capable of displaying at least 1024 x 768 (XGA) in high color 16 bit or higher
(1280 x 1024 (SXGA) or higher is recommended)
•Intel/nVidia/ATI MPEG-2 HD DxVA compatible card
System Requirements
Supplied software
CyberLink BD Solution :
•PowerCinema NE for Everio
•PowerDirector 6 NE
•PowerProducer 4 NE
•PowerDVD 7 NE
Digital Photo Navigator :
•Digital Photo Navigator

6
Windows®2
Software Installation
Preparation:
•Quit any other software you are using.
(Check that there are no other application icons on the status bar.)
Load the provided CD-ROM into the PC.
After a moment, the [SETUP] screen appears. If the [SETUP] screen does not appear, double-
click the CD-ROM icon in [My Computer].
2
1
Click [Easy Installation].
l
If you want to specify the type of
software to install or the installation
destination folder etc., select
[Custom Installation].
Follow the instructions on the screen
to install the software.
3
Click [Yes].
lDigital Photo Navigator
installation starts.
4
Select the desired language and
click [OK].

7
5
Click [Yes].
lCyberLink BD Solution
Installation starts
Click [Finish].
7
◆When installation is completed
lThe installed software is displayed
in [All Programs] – [CyberLink BD
Solution].
lFor details on the supplied software,
see the software Instruction
Manuals, User's Guides, Help and
Readme.
The backup destination folder
[MyWorks] for files is created on the
hard disk drive that has the most free
space.
8
PowerCinema NE for Everio
PowerDirector 6 NE
PowerProducer 4 NE
PowerDVD 7 NE
<NOTE>
•If you select [Easy Installation], icons are created on your desktop for Digital Photo Navigator and
PowerCinema only.

8
Windows®3
Connecting the Camera to the PC
Preparation:
•Close the LCD monitor to turn off the camera.
AC Adapter
DC Connector
To AC Outlet
USB Cable USB Connector
USB Connector
<NOTES>
•Never disconnect the USB cable while the access lamp on the camera lights or blinks.
•Do not turn off the camera when the USB cable is connected, to prevent malfunctions of the PC.
•Connect the camera directly to the PC, not through a hub.
•Do not use an extension USB cable.
•When you copy files from the PC to the recording medium on the camera, do not include any other
files than those recorded on the camera.
•Do not delete, move, or rename the files and folders in the camera from the PC.
◆When you have finished operation
Always follow the procedures below when disconnecting the camera, or turning off the camera/PC
power. Failing to do so may cause damage to the camera and PC.
1) Confirm that the access lamp on the camera does not light or blink. (If the access lamp lights or
blinks, wait until it is turned off before proceeding.)
2) Double-click the [Safely Remove Hardware] or [Unplug or Eject Hardware] icon in the status bar.
3) Select [USB Mass Storage Device] or [USB Disk], and then click [Stop].
4) Click [OK].
5) Disconnect the USB cable.
6) Turn off the camera and PC.

9
Windows®4-1
File Backup on the PC
This method uses the software on the CD-ROM to back up files onto your PC.
Video files that have never been backed up onto the PC are automatically selected and backed up.
Preparation:
•Install the software.
•Connect the camera to the PC.
Open the LCD monitor to turn on the camera.
3
1
•A dialog box is displayed on the PC
screen. However, you do not need
to use the dialog box. File copy
starts automatically.
•When the progress bar disappears,
the process is complete.
<NOTE>
•When backup is performed, [Everio
Backup] folder is created in the
[MyWorks] folder, and the files are
backed up inside these folder.
On the camera,
press the DIRECT BACK UP button.
2

10
Windows®4-2
File Backup on the PC from the Specified Media
You can select what to copy (HDD or microSD card) and save the files that are inside onto your
computer.
Preparation:
•Install the software.
•Connect the camera to the PC.
Open the LCD monitor to turn on the camera.
2
1
On the camera,
select [BACK UP].
3
On the PC,
Click [EVERIO_HDD] or
[EVERIO_SD].
•When the progress bar disappears,
the process is complete.
<NOTE>
•You can also select [Backup] on the PowerCinema screen. In this case, first select [PLAYBACK ON
PC] on the camera.

11
Windows®4-3
File Backup on the PC without Using Software
Preparation:
•Connect the camera to the PC.
On the PC, create a folder to back
up files into.
2
1
Open the LCD monitor to turn on the camera
3
On the camera,
select [PLAYBACK ON PC].
4On the PC,
Double-click [EVERIO_HDD] or
[EVERIO SD].

12
5Select the folder that you want to
back up, and drag & drop it into the
folder you created in step 1.
•AVCHD:
Folder that contains video files in
AVCHD format (gSh). If you want to
back up files individually, open this
folder, and drag & drop files such as
[PRG001] one by one
•SD_VIDEO:
Folder that contains video files in
SD-VIDEO format (RU). If you want
to back up files individually, open
this folder, and drag & drop files
such as [PRG001] one by one.
•DCIM:
Folder that contains still image files.
If you want to back up files individu-
ally, open this folder, and drag &
drop files such as [PIC 0001.JPG]
one by one.
<NOTE>
•For further details on the use of
folders, see page xx.

13
Windows®5
Playing Back Files on the PC
Preparation:
•Install the software.
•Connect the camera to the PC.
Open the LCD monitor to turn on the camera.
2
1
On the camera,
select [PLAYBACK ON PC].
•A dialog box is displayed on the PC
screen. However, you do not need
to use the dialog box. PowerCinema
starts automatically.
3
Click [Browse Videos] (for video
playback) or [Browse Pictures] (for
still image playback).
4Click the media that contains
desired files.

14
5Click the desired file.
If you click Sort by/Filter by/View by,
searching options are displayed.
•Sort by:
The order of files is rearranged
according to item that you selected.
•Filter by:
Files are filtered according to the
item that you selected.
•View by:
You can change the number of
thumbnails on a screen.
For more information on detailed op-
erations of the software, refer to their
Read me or CyberLink web site.

15
Windows®6-1
Creating a Video Disc (DIRECT DISC)
1Press the DIRECT DISC button
•PowerCinema starts.
2
3After the DVD writing finishes, exit PowerCinema and disconnect the camera.
You can use the DIRECT DISC button to save videos on a DVD. The videos that you have not
previously saved on a DVD with this operation are selected automatically and saved.
Preparation:
!Install the software.
#(Everio) Set the mode switch to !.
$(Everio) Set [STREAM FORMAT] to [AVCHD] in the [BASIC SETTINGS], .
%(Everio) Connect the camera to your computer and turn the power back on again (P. xx)
Set a new DVD and click [Yes].
Disc supported for creation Requirements
AVCHD Disc (High-definition) •Recordable DVD drive (and supported, recordable DVD media)
•Video in AVCHD format (gSh)

16
Windows®6-2
Creating a Video Disc (Using Software)
Click [Advanced Functions].
•
If you do not know which operation
to perform, click [Help]. To use
[Help], your computer needs to be
connected to the Internet.
Double-click the PowerCinema icon.
•PowerCinema starts.
2
3
1
Click [Backup Folder].
Disc supported for creation Requirements
Blu-ray Disc (High-definition) l Recordable Blu-ray disc drive (and supported, recordable Blu-
ray media)
l Video (all picture qualities)
AVCHD Disc (High-definition) l Recordable DVD drive (and supported, recordable DVD media)
l Video (all picture qualities)
DVD Disc (Standard Quality)
Preparation:
•Install the software.

17
!Check the check box of the
desired file.
#Click [Next].
Click [Create Disc].
•PowerProducer starts.
4
5
6
7Check that the data has been completely imported
to PowerProducer and the screen in step 8 has been
displayed, and then exit PowerCinema.
!Select the disc that you want to
create
•To create a Blu-ray Disc, click [DVD].
•To create an AVCHD Disc, click
[AVCHD].
•To create a DVD video, click [DVD].
•If you do not know which
PowerProducer operation to perform
or function to use, click this.
#Click .

18
The disc creation starts.
◆To finish
➡Exit PowerProducer.
8
9
Registered file
•Four titles are created.
Click .
Click .
<NOTES>
•
Video conversion can take a long time when creating a DVD video, or when creating an AVCHD disc
using RU quality video.
•
Depending on the type of commercially available player or recorder, some discs created on a
computer may not play back correctly.
•
Depending on the type of computer, it may take more than 10 times the normal time taken to write a
video.
•
Depending on the type of computer, the computer may fail to erase recorded discs.
If this occurs, use [Disc Utilities] – [Erase a Disc] in PowerProducer to erase the discs before use.
•
Use the type of disc recommended by the drive manufacturer.

19
Windows®7-1
Editing and Creating a Video Disc (Basic Editing)
Click [Advanced Function].
•
If you do not know which operation
to perform, click [Help]. To use
[Help], your computer needs to be
connected to the Internet.
2
3
Double-click the PowerCinema icon.
•PowerCinema starts.
1
Click [Backup Folder].
Disc supported for creation Requirements
Blu-ray Disc (High-definition) l Recordable DVD drive (and supported, recordable Blu-ray media)
l Video (all picture qualities)
AVCHD Disc (High-definition) l Recordable DVD drive (and supported, recordable DVD media)
l Video (all picture qualities)
DVD Disc (Standard Quality)

20
!Check the check box of the file
you want to edit.
#Click [Next].
Click [Advanced Editing].
•PowerDirector starts.
•Exit PowerCinema.
4
5
6
•Click [Help] if you do not know which
PowerDirector operation to use.
Track
!Check that [Aspect ratio] in the
[Edit] menu is [16:9].
•If you change the aspect ratio during
the editing, the editing will not be
saved.
#Select the thumbnails, and drop
them onto the video track.
•To perform advanced editing
➡(P.xx–xx)
$Click [Produce].
Other manuals for GZ-HD40 - Everio Camcorder - 1080p
2
This manual suits for next models
1
Table of contents
Other JVC Camcorder manuals

JVC
JVC GR-D246 User manual

JVC
JVC GR-AX1027 User manual

JVC
JVC GR-D93US Administrator Guide

JVC
JVC GC-PX10 User manual

JVC
JVC GR-DV801 User manual

JVC
JVC GZ-MG21U User manual

JVC
JVC GZ-MG575EK User manual

JVC
JVC Everio GZ-E200 Operating and maintenance manual

JVC
JVC GR-AX830 User manual

JVC
JVC GR-VF1EG User manual