JVC GZ-MG70US User manual

MasterPage: Cover
GZ-MG70U
LYT1493-001A EN
ENGLISH
HARD DISK CAMCORDER
GETTING STARTED 7
VIDEO RECORDING &
PLAYBACK 22
MENU SETTINGS 48
52
To deactivate the demonstration,
set “DEMO MODE” to “OFF”.
(墌pg. 48)
For Customer Use:
Enter below the Model No.
(located on the bottom of the
camera) and Serial No. (located
on the battery pack mount of the
camera). Retain this information
for future reference.
Model No.
Serial No.
REFERENCES
INSTRUCTIONS
STILL IMAGE RECORDING
& PLAYBACK 28
ADVANCED OPERATIONS 31
M5E6US.book Page 1 Tuesday, August 9, 2005 9:07 AM

2 EN
MasterPage: Body_Left
Built-in Hard Disk
This hard disk camera records images to a
large, built-in hard disk drive (HDD) instead of a
DV tape like conventional video cameras. This
enables extended hours of high-resolution,
MPEG2 video recording.
Various Recording Modes
You can select the most suitable recording mode
for picture quality, image size, recording time,
and computer environment. (墌pg. 62)
Enjoying Various Playback Features
Unlike tape operation, playback is simple and
easy in this camera since no time is needed for
rewinding or fast forward operations.
Playlist, playback effects,
and other functions are
also available for
enjoying many different
types of playback.
Editing Files on your PC
USB 2.0 enables the
smooth transfer of video
and still images to a
computer. With the
bundled image editing
software, you can easily
edit video and create your own DVDs. (Refer to
“Read this first!” and the software installation
and USB connection guide.)
Flash
You can record still images in dark places more
easily. The flash fires automatically during still
image recording. (墌pg. 31)
Direct Printing
If your printer is
compatible with
PictBridge, still images
can be printed easily by
connecting the camera
with USB cable directly to the printer. (墌pg. 47)
Major Features of this Camera
ALL SCENES
01 NOV 10.05 11:30AM
02 NOV 15.05 11:00PM
03 NOV 25.05 11:00AM
PLAYLIST CONTENTS
M5E6US.book Page 2 Tuesday, August 9, 2005 9:07 AM

EN 3
MasterPage: Reference_Heading0_Right
GETTING STARTED 7
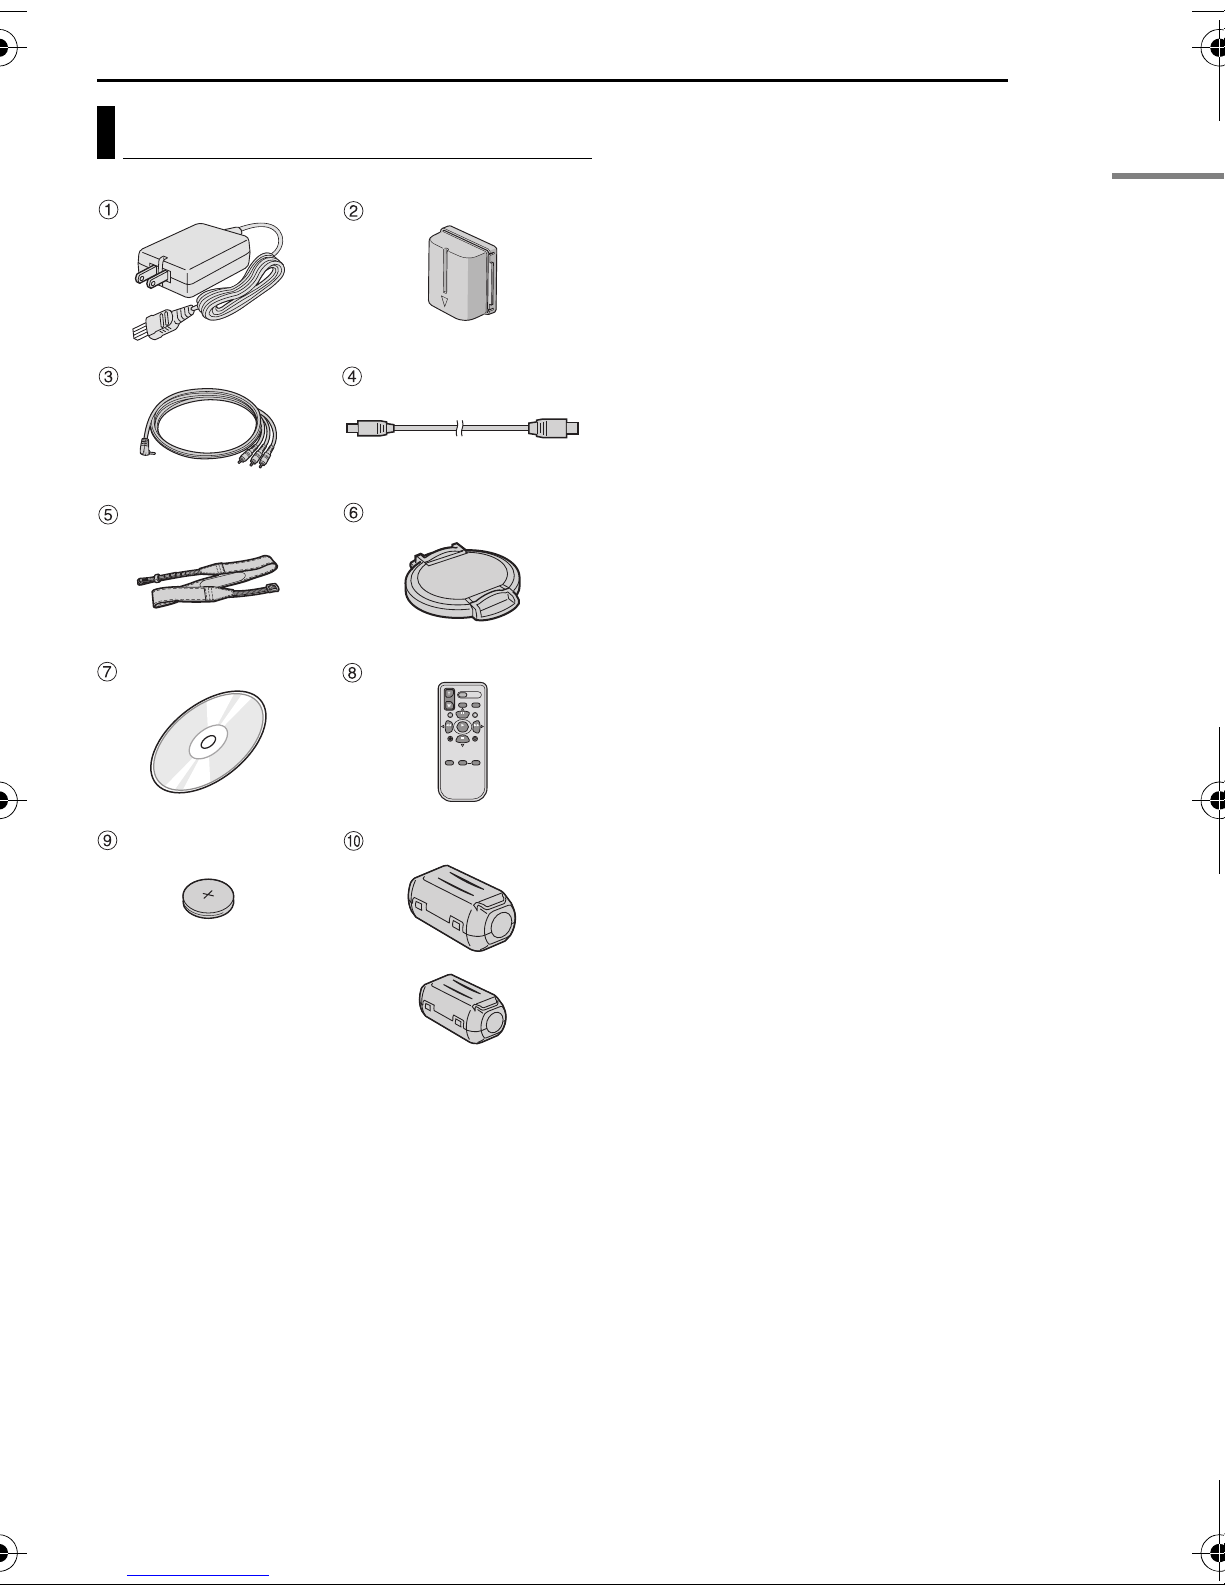
Provided Accessories ...................................... 7
Index .............................................................. 10
Power ............................................................. 14
Operation Mode ............................................. 16
Language Setting .......................................... 17
Date/Time Settings ........................................ 18
Brightness Adjustment of the Display ............ 18
Grip Adjustment ............................................. 19
Tripod Mounting ............................................. 19
Inserting/Removing an SD Card .................... 19
Formatting a Recording Medium ................... 20
Selecting a Recording Medium ...................... 21
Remaining Space on the Recording Media ... 21
Drop Detection ............................................... 21
VIDEO RECORDING & PLAYBACK 22
Video Recording ............................................ 22
Zooming ..................................................... 23
Video Playback .............................................. 24
How to Use the Scroll Bar ......................... 25
Date Index Screen ..................................... 25
Various Playback Operations .................... 25
Playback Zoom .......................................... 25
Connecting to a TV, VCR or VDR .................. 26
Playback on a TV ...................................... 26
Dubbing to a VCR (or DVD Recorder) ....... 26
Playback Using the Remote Control .............. 27
STILL IMAGE RECORDING & PLAYBACK 28
Still Image Recording ..................................... 28
Zooming ..................................................... 28
Continuous Shooting ................................. 28
Still Image Playback ...................................... 29
Slide Show ................................................. 29
Index Screen of Still Image Files ............... 29
How to Use the Scroll Bar ......................... 30
Date Index Screen ..................................... 30
Image Rotation .......................................... 30
Playback Zoom .......................................... 30
ADVANCED OPERATIONS 31
RECORDING FEATURES ..................................... 31
Backlight Compensation ................................ 31
Spot Exposure Control ................................... 31
Flash .............................................................. 31
Manual Settings in MSET Menu .................... 32
How to Select a Menu Item ....................... 32
Manual Exposure ....................................... 32
Manual Focus ............................................ 33
White Balance ........................................... 34
Shutter Speed ............................................ 35
Program AE ............................................... 36
Effect ......................................................... 36
PLAYBACK FEATURES ....................................... 37
Wipe or Fader Effects .................................... 37
Playback Effects ............................................ 37
MANAGING FILES ............................................. 38
Viewing File Information ................................ 38
Protecting Files .............................................. 38
Deleting Files ................................................. 39
Cleaning Up a Recording Medium ................. 40
Copying/Moving Still Image Files ................... 41
Resetting the File Number ............................. 42
Creating Play List ........................................... 42
Playing Back Play List ................................... 43
DPOF Print Setting ........................................ 46
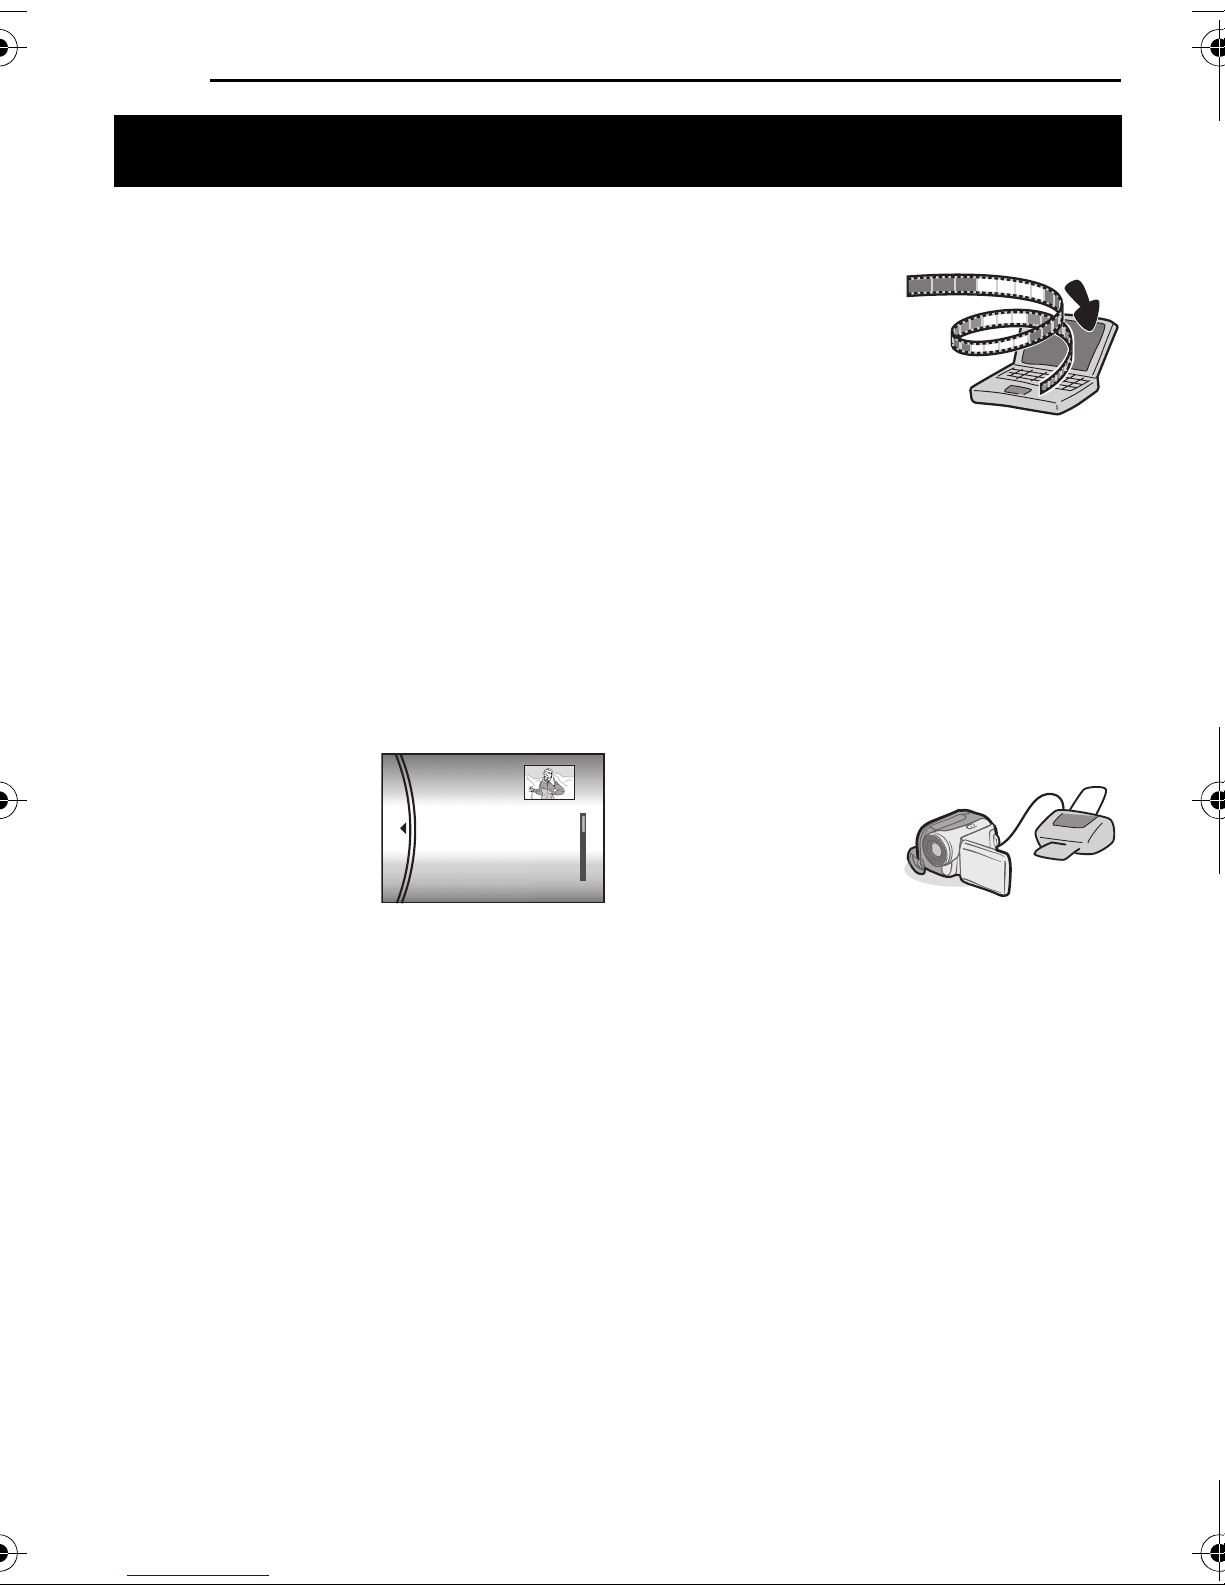
Direct Printing with a PictBridge Printer ......... 47
MENU SETTINGS 48
Changing the Menu Settings ......................... 48
Common Menus for All Modes ...................... 48
Video Recording Menus ................................ 50
Video Playback Menus .................................. 50
Still Image Recording Menus ......................... 51
Still Image Playback Menus ........................... 51
REFERENCES 52
Troubleshooting ............................................. 52
Warning Indications ....................................... 54
Cleaning the Camera ..................................... 56
Cautions ......................................................... 57
Specifications ................................................. 60
TERMS ............................................... Back cover
Contents
M5E6US.book Page 3 Tuesday, August 9, 2005 9:07 AM

4 EN
MasterPage: Safty_Left
SAFETY PRECAUTIONS
Dear Customer,
Thank you for purchasing this hard disk camera.
Before use, please read the safety information
and precautions contained in the pages 4 – 5 to
ensure safe use of this product.
WARNING: TO PREVENT FIRE OR SHOCK
HAZARD, DO NOT EXPOSE THIS UNIT TO
RAIN OR MOISTURE.
CAUTIONS:
●This camera is designed to be used with
NTSC-type color television signals. It cannot
be used for playback with a television of a
different standard. However, live recording and
LCD monitor playback are possible anywhere.
●Use the JVC BN-VF707U battery pack and, to
recharge it or to supply power to the camera
from an AC outlet, use the provided multi-
voltage AC adapter. (An appropriate
conversion adapter may be necessary to
accommodate different designs of AC outlets in
different countries.)
CAUTION
RISK OF ELECTRIC SHOCK
DO NOT OPEN
CAUTION: TO REDUCE THE RISK OF ELECTRIC SHOCK,
DO NOT REMOVE COVER (OR BACK).
NO USER-SERVICEABLE PARTSINSIDE.
REFER SERVICING TO QUALIFIED SERVICE PERSONNEL.
The lightning flash with arrowhead symbol, within an
equilateral triangle, isintended to alert the user to the
presence of uninsulated "dangerous voltage" within the
product'senclosure that may be of sufficient magnitude
to constitute arisk of electric shock to persons.
The exclamation point within an equilateral triangle is
intended to alert the user to the presence of important
operating and maintenance (servicing) instructionsin
the literature accompanying the appliance.
NOTES:
●The rating plate and safety caution are on the
bottom and/or the back of the main unit.
●The serial number plate is on the battery pack
mount.
●The rating information and safety caution of the
AC adapter are on its upper and lower sides.
When the equipment is installed in a cabinet or
on a shelf, make sure that it has sufficient space
on all sides to allow for ventilation (10 cm (3-15/
16") or more on both sides, on top and at the
rear).
Do not block the ventilation holes.
(If the ventilation holes are blocked by a
newspaper, or cloth etc. the heat may not be able
to get out.)
No naked flame sources, such as lighted candles,
should be placed on the apparatus.
When discarding batteries, environmental
problems must be considered and the local rules
or laws governing the disposal of these batteries
must be followed strictly.
The apparatus shall not be exposed to dripping or
splashing.
Do not use this equipment in a bathroom or
places with water.
Also do not place any containers filled with water
or liquids (such as cosmetics or medicines, flower
vases, potted plants, cups etc.) on top of this unit.
(If water or liquid is allowed to enter this
equipment, fire or electric shock may be caused.)
M5E6US.book Page 4 Tuesday, August 9, 2005 9:07 AM

EN 5
MasterPage: Safty_Right
IMPORTANT SAFETY INSTRUCTIONS
1. Read these instructions.
2. Keep these instructions.
3. Heed all warnings.
4. Follow all instructions.
5. Do not use this apparatus near water.
6. Clean only with dry cloth.
7. Do not block any ventilation openings. Install in
accordance with the manufacturer’s instructions.
8. Do not install near any heat sources such as
radiators, heat registers, stoves, or other
apparatus (including amplifiers) that produce
heat.
9. Only use attachments/accessories specified by
the manufacturer.
10. Use only with the
cart, stand, tripod,
bracket, or table
specified by the
manufacturer, or
sold with the
apparatus. When a
cart is used, use
caution when
moving the cart/
apparatus combination to avoid injury from tip-
over.
11. Unplug this apparatus during lightning storms or
when unused for long periods of time.
12. Refer all servicing to qualified service
personnel. Servicing is required when the
apparatus has been damaged in any way, such
as power-supply cord or plug is damaged, liquid
has been spilled or objects have fallen into the
apparatus, the apparatus has been exposed to
rain or moisture, does not operate normally, or
has been dropped.
Do not point the lens directly into the sun. This
can cause eye injuries, as well as lead to the
malfunctioning of internal circuitry. There is also a
risk of fire or electric shock.
CAUTION!
The following notes concern possible physical
damage to the camera and to the user.
Carrying or holding the camera by the LCD
monitor can result in dropping the unit, or in a
malfunction.
Do not use a tripod on unsteady or unlevel
surfaces. It could tip over, causing serious
damage to the camera.
CAUTION!
Connecting cables (Audio/Video, S-Video, etc.) to
the camera and leaving it on top of the TV is not
recommended, as tripping on the cables will
cause the camera to fall, resulting in damage.
M5E6US.book Page 5 Tuesday, August 9, 2005 9:07 AM

6 EN
MasterPage: Safty_Left
Before Using this Camera
This camera records video in MPEG2 format
compliant with SD-VIDEO format.
Remember that this camera is not compatible
with other digital video formats.
Remember that this camera is intended for
private consumer use only.
Any commercial use without proper permission is
prohibited. (Even if you record an event such as a
show, performance or exhibition for personal
enjoyment, it is strongly recommended that you
obtain permission beforehand.)
Do not strike or shake the hard disk.
Before recording important video, be sure to
make a trial recording.
Play back your trial recording to make sure the
video and audio have been recorded properly.
Make a backup of important recorded data
Protect your important recorded data by copying the
files to PC. It is recommended to copy it from your
PC to a DVD or other recording media for storage.
Refer to the software installation and USB
connection guide.
Important notes when requesting repair or
inspection
When the camera is repaired or inspected, data
may be erased, and the hard disk may be formatted.
Back up all data before requesting repair or
inspection.
If a problem occurs with the SD Memory Card,
bring the card together with the camera.
When requesting repairs for breakdowns by your
dealer or JVC service center, be sure to bring your
camera together with the SD Memory Card. If one
of them is not included, the cause cannot be
diagnosed, and the repair cannot be made properly.
Important notes for destroying and disposing of
camera
When formatting or erasing data using the camera
or PC functions, only the file administration
information is changed. The data is not completely
erased from the hard disk. If you want to completely
erase all of the data, we recommend either using
commercially available software that is specially
designed for that purpose, or by physically
destroying the camera with a hammer etc.
Also read “Cautions” on pages 57 to 59.
●Manufactured under license from Dolby
Laboratories. “Dolby” and double-D symbol are
trademarks of Dolby Laboratories.
●
MascotCapsule is registered trademark of HI
CORPORATION in Japan.
Copyright © 2001 HI CORPORATION. All rights
reserved.
●Other product and company names included in
this instruction manual are trademarks and/or
registered trademarks of their respective holders.
M5E6US.book Page 6 Tuesday, August 9, 2005 9:07 AM

EN 7
GETTING STARTED
MasterPage: Heading0_Right
GETTING STARTED
aAC Adapter AP-V14U
bBattery Pack BN-VF707U
cAudio/Video Cable
dUSB Cable (Refer to the software installation
and USB connection guide.)
eShoulder Strap (See page 8 for attachment)
fLens Cap (See page 8 for attachment)
gCD-ROM
hRemote Control Unit RM-V730U
iLithium Battery CR 2025* (for remote control
unit)
jCore Filter for Cables (See page 9 for
attachment)
Large (x 1): USB Cable
Small (x 1): DC Cord
* A lithium battery is pre-installed in the remote
control unit at time of shipment (with insulation
sheet). To use the remote control unit, remove the
insulation sheet.
NOTES:
●In order to maintain optimum performance of the
camera, provided cables may be equipped with
one or more core filter. If a cable has only one
core filter, the end that is closest to the filter
should be connected to the camera.
●Make sure to use the provided cables for
connections. Do not use any other cables.
Provided Accessories
M5E6US.book Page 7 Tuesday, August 9, 2005 9:07 AM

8 EN GETTING STARTED
MasterPage: Body_Left
Attaching the Shoulder Strap
Follow the illustration.
1Open the velcro strip.
2Thread the strap through the eyelet.
3Fold it back and thread it through the strap
guide and the buckle.
●To adjust the length of the strap, loosen and then
tighten the strap in the buckle.
4Slide the strap guide fully towards the eyelet.
5Close the velcro strip.
Attaching the Lens Cap
To protect the lens,
attach the provided lens
cap to the camera as
shown in the illustration.
NOTE:
To confirm the lens cap is
on correctly, make sure the
cap is flush to the camera.
3
4
5
2
1
Strap Guide
Buckle
Eyelet
Place here during
recording.
M5E6US.book Page 8 Tuesday, August 9, 2005 9:07 AM

GETTING STARTED EN 9
GETTING STARTED
MasterPage: Start_Right
Attaching the Core Filter
Attach the core filters to the cables. The core
filter reduces interference.
1Release the stoppers on both ends of the
core filter.
2Run the cable through the core filter, leaving
approx. 3 cm of cable between the cable plug
and the core filter.
Wind the cable once around the outside of the
core filter as shown in the illustration.
●Wind the cable so that it is not slack.
3Close the core filter until it clicks shut.
NOTES:
●Take care not to damage the cable.
●When connecting a cable, attach the end with the
core filter to the camera.
LCD Monitor
Pull on the end of the LCD monitor and open
the LCD monitor fully. It can rotate 270°.
Stopper
Wind once.
Core Filter
3 cm (1-3/16")
M5E6US.book Page 9 Tuesday, August 9, 2005 9:07 AM

10 EN
MasterPage: Heading0_Left
GETTING STARTED
Index
A
TTENTION:
●Be careful not to cover b, c, d, e, fand gduring
shooting.
●Be careful not to cover Yduring playback.
M5E6US.book Page 10 Tuesday, August 9, 2005 9:07 AM

GETTING STARTED EN 11
GETTING STARTED
MasterPage: Start_Right
Controls
aMode Switch [MODE] (墌pg. 16 – 17)
bFlash Button [FLASH] (墌pg. 31)
cInformation Button [INFO/ ] (墌pg. 38)
dPlay/Pause Button [49] (墌pg. 24, 29)
eForward Search Button [ (
5
)] (墌pg. 25)/
Right Button [ ]/Auto/Manual Mode Switch
[/](墌pg. 16 – 17)
fForward Skip Button [ ] (墌pg. 25)/Down
Button [ ]/Manual Set Button [ SET]
(墌pg. 32)
gReverse Search Button [ (
3
)] (墌pg. 25)/
Left Button [ ]
hMenu Button [MENU] (墌pg. 48)
iDelete Button [ ] (墌pg. 39)
jReverse Skip Button [ ] (墌pg. 25)/Up
Button [ ]/Backlight Compensation Button
[](墌pg. 31)/Spot Exposure Control
Button (墌pg. 31)
kPower Switch [OFF, , ] (墌pg. 16)
lLock Button (墌pg. 16)
mLCD Lock Button
nZoom Lever [T /W ] (墌pg. 23)
Speaker Volume Control (墌pg. 24)
oRecording Start/Stop Button (墌pg. 22, 28)
pBattery Release Button [BATT.] (墌pg. 14)
Connectors
The connectors are located beneath the covers.
QS-Video Output Connector [S] (墌pg. 26)
RAudio/Video Output Connector [AV]
SUSB (Universal Serial Bus) Connector (Refer
to the software installation and USB
connection guide.)
TDC Input Connector [DC] (墌pg. 14)
Indicators
UPower/Charge Lamp [POWER/CHARGE]
(墌pg. 14, 16)
VAccess Lamp [ACCESS] (Lights up or blinks
when you access to any files. Do not turn off
the power or remove the battery pack/AC
adapter while accessing to files.)
Other Parts
WReset Hole [RESET] (墌pg. 52)
XLCD Monitor
YSpeaker (墌pg. 24)
aBattery Pack Mount (墌pg. 14)
bCamera Sensor
cLens
dRemote Sensor (墌pg. 27)
eStereo Microphone
fFlash (墌pg. 31)
gFlash Sensor
hShoulder Strap Eyelet (墌pg. 8)
iGrip Strap (墌pg. 19)
jSD Card Cover [OPEN] (墌pg. 19)
kStud Hole (墌pg. 19)
lTripod Mounting Socket (墌pg. 19)
M5E6US.book Page 11 Tuesday, August 9, 2005 9:07 AM

12 EN GETTING STARTED
MasterPage: Body_Left
Indications on LCD Monitor
During both Video and Still Image Recording
aSelected Operation Mode Indicator (墌pg. 17)
: Auto Mode
: Manual Mode
bTele Macro Mode Indicator (墌pg. 50)
cApproximate Zoom Ratio (墌pg. 23, 50)
dZoom Indicator (墌pg. 23, 50)
eIris Lock Indicator (墌pg. 31, 32)
fWhite Balance Indicator (墌pg. 34)
gBrightness Control Indicator (墌pg. 18, 49)
hBattery Indicator (墌pg. 54)
iDate/Time (墌pg. 49)
jSelected Medium Indicator (墌pg. 21, 49)
kDrop Detection Indicator (墌pg. 21)
lManual Focus Adjustment Indicator
(墌pg. 33)
mEffect Mode Indicator (墌pg. 36)
nProgram AE Mode Indicator (墌pg. 36)
oShutter Speed (墌pg. 35)
: Nightalive Indicator
p±: Exposure Adjustment Indicator (墌pg. 32)
: Backlight Compensation Indicator
(墌pg. 31)
: Spot Exposure Control Indicator
(墌pg. 31)
During Video Recording only
aMode Indicator (墌pg. 17)
bWide Mode Indicator (墌pg. 50)
cWind Cut Indicator (墌pg. 50)
dPicture Quality: [U] (ultra fine), [F] (fine), [N]
(normal), [E] (economy) (墌pg. 50)
eRemaining Time (墌pg. 22, 62)
fCounter (墌pg. 49)
g7REC: (Appears during recording.)
(墌pg. 22)
79: (Appears during record-standby mode.)
(墌pg. 22)
hDigital Image Stabilizer (DIS) Indicator
(墌pg. 50)
During Still Image Recording only
aMode Indicator (墌pg. 17)
bISO sensitivity (GAIN) (墌pg. 51)
(When set to [AUTO], there is no indication.)
cFocus Icon (墌pg. 28)
dImage Size: 1600 (1600 x 1200), 1280 (1280
x 960), 1024 (1024 x 768), 640 (640 x 480)
(墌pg. 51)
ePicture Quality: FINE (fine) or STD (standard)
(墌pg. 51)
fFlash Mode Indicator (墌pg. 31)
gRemaining Number of Shots (墌pg. 63)
h: Continuous Shooting Mode Indicator
(墌pg. 28)
iShooting Icon (墌pg. 28)
jSelf-Timer Recording Indicator (墌pg. 51)
11:30AM
NOV 10, 2005
[0h56m]
FINE
PHOTO
M5E6US.book Page 12 Tuesday, August 9, 2005 9:07 AM

GETTING STARTED EN 13
GETTING STARTED
MasterPage: Start_Right
During Video Playback
aMode Indicator (墌pg. 17)
bPlay List Playback Indicator (Appears when
play list is played back. 墌pg. 43)
cPicture Quality: [U] (ultra fine), [F] (fine), [N]
(normal), [E] (economy) (墌pg. 50)
dPlayback Mode (墌pg. 24)
U: Playback
9: Pause
5
: Forward High-Speed Search
3
: Reverse High-Speed Search
9U : Forward Slow-Motion
Y9 : Reverse Slow-Motion
(The number on the left shows speed.)
eCounter (墌pg. 49)
fVolume Level Indicator
gBattery Indicator (墌pg. 54)
hDate (墌pg. 49)
iSelected Medium Indicator (墌pg. 21, 49)
jEffect Mode Indicator (墌pg. 36)
kWipe/Fader Effect Indicator (墌pg. 37, 50)
During Still Image Playback
aMode Indicator (墌pg. 17)
bFolder/File Number
cSlide Show Playback Indicator (墌pg. 29)
dBattery Indicator (墌pg. 54)
eDate/Time (墌pg. 49)
fSelected Medium Indicator (墌pg. 21, 49)
gEffect Mode Indicator (墌pg. 36)
NOTE:
When the mode indicators disappear or blink, the
functions of those modes are not available. Such a
phenomenon also occurs when the LCD monitor is
turned 180°. (墌pg. 9)
NOV 10, 2005
11:30AM
NOV 10, 2005
M5E6US.book Page 13 Tuesday, August 9, 2005 9:07 AM

14 EN GETTING STARTED
MasterPage: Body_Left
This camera’s 2-way power supply system lets
you choose the most appropriate source of
power. Do not use provided power supply units
with other equipment.
Charging the Battery Pack
1Set the power switch to OFF.
2With the arrow on the battery pack pointing
downward, push the battery pack slightly against
the battery pack mount.
●If the battery mount cover is attached, remove it
by sliding BATT.
3Slide down the battery pack until it locks in
place.
4Connect the AC adapter to the camera.
5Plug the AC adapter into an AC outlet. The
power/charge lamp on the camera blinks to
indicate charging has started.
6When the power/charge lamp goes out,
charging is finished. Unplug the AC adapter from
the AC outlet. Disconnect the AC adapter from
the camera.
To detach the battery pack
While sliding BATT., remove the battery pack.
* Provided
Power
To AC outlet
Power/Charge Lamp
Battery Pack Mount
AC Adapter
Open the cover.
Power Switch
To DC connector
Lock Button
BATT.
Arrow
Battery Pack
Required charging time
Battery pack Charging time
BN-VF707U* Approx. 1 hr. 30 min.
BN-VF714U Approx. 2 hr. 40 min.
BN-VF733U Approx. 5 hr. 40 min.
M5E6US.book Page 14 Tuesday, August 9, 2005 9:07 AM

GETTING STARTED EN 15
GETTING STARTED
MasterPage: Start_Right
NOTES:
●This product includes patented and other
proprietary technology and will operate only
with JVC Data Battery. Use the JVC BN-
VF707U/VF714U/VF733U battery packs. Using
generic non-JVC batteries can cause damage
to the internal charging circuitry.
●If the protective cap is attached to the battery
pack, remove it first.
●During charging, the camera cannot be operated.
●Charging is not possible if the wrong type of
battery is used.
●Make sure to use the battery pack with the arrow
( ) mark. The camera does not turn on with the
battery pack without the arrow ( ) mark.
●When charging the battery pack for the first time
or after a long storage period, the power/charge
lamp may not light. In this case, remove the
battery pack from the camera, then try charging
again.
●If the battery operation time remains extremely
short even after having been fully charged, the
battery is worn out and needs to be replaced.
Please purchase a new one.
●Since the AC adapter processes electricity
internally, it becomes warm during use. Be sure to
use it only in well-ventilated areas.
●Using the optional AA-VF7 battery charger, you
can charge the BN-VF707U/VF714U/VF733U
battery pack without the camera.
●After 5 minutes has elapsed in record-standby
mode, the camera will automatically turn off its
power supplied from the AC adapter. In this case,
the battery charge starts if the battery is attached
to the camera.
Using the Battery Pack
Perform steps 2– 3in “Charging the Battery
Pack” (墌pg. 14).
Maximum continuous recording time
* Provided
NOTES:
●Recording time is reduced significantly under the
following conditions:
• Zoom or record-standby mode is engaged
repeatedly.
• Playback mode is engaged repeatedly.
●Before extended use, it is recommended that you
prepare enough battery packs to cover 3 times the
planned recording time.
A
TTENTION:
●Before detaching the power source, make sure
that the camera’s power is turned off. Failure to do
so can result in a camera malfunction.
●If the camera is subjected to electrostatic
discharge, turn the power off before using it again.
Battery pack Recording time
BN-VF707U* Approx. 50 min.
BN-VF714U Approx. 1 hr. 50 min.
BN-VF733U Approx. 4 hr. 20 min.
M5E6US.book Page 15 Tuesday, August 9, 2005 9:07 AM

16 EN GETTING STARTED
MasterPage: Body_Left
Data Battery System
You can check the remaining battery power and
the recordable time.
1Make sure the battery is attached.
2Open the LCD monitor fully.
3Press INFO/ repeatedly, and the battery
status screen appears.
●It is displayed for approx. 3 seconds if the
button is pressed and released quickly, and for
approx. 15 seconds if the button is pressed
and held for several seconds.
●If “COMMUNICATING ERROR” appears
instead of the battery status even though you
tried to press INFO/ several times, there
may be a problem with your battery. In such a
case, consult your nearest JVC dealer.
●The recordable time display should only be
used as a guide. It is displayed in 10 minute
units.
Using AC Power
Perform step 4in “Charging the Battery Pack”
(墌pg. 14).
NOTE:
The provided AC adapter features automatic voltage
selection in the AC range from 110 V to 240 V.
About Batteries
DANGER! Do not attempt to take the batteries
apart, or expose them to flame or excessive
heat, as it may cause a fire or explosion.
WARNING! Do not allow the battery or its
terminals to come in contact with metals, as this
can result in a short circuit and possibly start a
fire.
To resume the original function of the
accurate battery power indication
If the battery power indication differs from the
actual operating time, fully charge the battery,
and then run it down. However this function may
not work properly if the battery was used for a
long period of time under extremely high/low
temperature condition or charged too many
times.
To turn on the camera, set the power switch to
or while pressing down the lock button
located on the switch.
●The power/charge lamp turns on.
To turn off the camera, set the power switch to
OFF.
Set the appropriate operation mode according to
your preference using the power and MODE
switches and ( / ) button.
1 Power Switch Position
Set the power switch for recording ( ) or
playback ( ) while pressing down the lock
button.
Operation Mode
LCD Monitor
Power Switch
MODE Lock Button
Power/Charge Lamp
1
2
3
4
Power Switch
Power Off
Playback
Recording
M5E6US.book Page 16 Tuesday, August 9, 2005 9:07 AM

GETTING STARTED EN 17
GETTING STARTED
MasterPage: Start_Right
2 Recording/Playback Mode
Select the recording/playback mode using the
MODE switch.
: Video mode (墌pg. 22, 24)
: Still image mode (墌pg. 28, 29)
3 Auto/Manual Mode
Press and hold ( / ) to switch the auto/
manual recording mode. When manual mode is
selected, the indicator appears on the LCD
monitor.
To return to the auto recording mode
Press and hold ( / ) again so that the
indicator appears.
4 Power-Linked Operation
When the power switch is set to , you can
also turn on/off the camera by opening/closing
the LCD monitor.
The language on the display can be changed.
(墌pg. 48, 49)
1Set the power switch to or .
2Press MENU. The menu screen appears.
3Press / to
select [DISPLAY], then
press 49.
4Press / to
select [LANGUAGE],
then press 49.
5Press / to
select the desired
language, then press
49.
6Press MENU to return to the normal screen.
Auto mode:
You can record without using
special effects or manual
adjustments.
Manual mode:
Manual recording is possible by
setting various functions.
(墌pg. 31 – 37)
Language Setting
CAMERA SETTING
BASIC SETTING
REC MEDIA SETTING
DISPLAY
QUALITY
WIDE MODE
WIND CUT
SCENE COUNTER
LANGUAGE
CLOCK ADJUST
BRIGHT
DATE/TIME
M5E6US.book Page 17 Tuesday, August 9, 2005 9:07 AM

18 EN GETTING STARTED
MasterPage: Body_Left
The recording start date/time is recorded on the
video/still image file and it can be checked by
pressing INFO/ during playback.
(墌pg. 24, 29)
In addition, you can find the desired file by the
date index screen. (墌pg. 30)
1Set the power switch to or .
2Press MENU. The menu screen appears.
3Press / to
select [DISPLAY], then
press 49.
4Press / to
select [CLOCK
ADJUST], then press
49. The month is
highlighted.
5Press / to input
the month, then press
49. Repeat to input the
day, year, hour and
minute.
6Press MENU to
return to the normal screen.
Built-in Clock’s Rechargeable Lithium
Battery
If the camera is not used for approx. 3 months,
the clock’s lithium battery will become
discharged and the date/time stored in memory
will be lost. When this occurs, first connect the
camera to an AC outlet using the AC adapter for
over 24 hours to charge the clock’s rechargeable
lithium battery. Then perform the date/time
setting before using the camera.
Note that the camera can be used without
setting the date/time.
The brightness of the display can be adjusted.
1Set the power switch to or while
pressing down the lock button located on the
switch.
2Open the LCD monitor fully. (墌pg. 9)
3Press MENU. The menu screen appears.
4Press / to select [DISPLAY], then press
49.
5Press / to select
[BRIGHT], and press 49.
The brightness control
indicator appears.
6Press / until the appropriate brightness
is reached.
7Press 49 to clear the brightness control
indicator from the display.
Date/Time Settings
CAMERA SETTING
BASIC SETTING
REC MEDIA SETTING
DISPLAY
QUALITY
WIDE MODE
WIND CUT
LANGUAGE
CLOCK ADJUST
BRIGHT
DATE/TIME
SCENE COUNTER
CLOCK ADJUST
JAN 31
AM
11 07:
DATE TIME
2005
Brightness Adjustment of the
Display
M5E6US.book Page 18 Tuesday, August 9, 2005 9:07 AM

GETTING STARTED EN 19
GETTING STARTED
MasterPage: Start_Right
1Adjust the velcro strip.
2Pass your right hand
through the loop and grasp
the grip.
3Adjust your thumb and
fingers to easily operate
the recording start/stop
button, power switch and
zoom lever. Be sure to
fasten the velcro strip to
your preference.
To attach the camera to a
tripod, align the direction
stud and screw to the
mounting socket and
stud hole on the camera.
Then tighten the screw
clockwise.
●Some tripods are not
equipped with studs.
You can use an SD card as a recording medium
in the SD slot. See page 62 for the guaranteed
media to work with this camera.
1Make sure the camera’s power is off.
2Open the SD card cover.
3To insert an SD card, firmly insert it with its
clipped edge first.
To remove an SD card, push it once. After the
SD card comes out of the camera, pull it out.
●Do not touch the terminal on the reverse side of
the label.
4Close the SD card cover.
To protect valuable files
Slide the write/erase protection tab on the side
of the SD card in the direction of “LOCK”. This
prevents the SD card from being recorded over.
To record on this SD card, slide the tab back to
the position opposite to “LOCK” before inserting
it.
NOTE:
Before using a new SD card, it is necessary to
format the card. (墌pg. 20)
A
TTENTION:
Do not insert or remove the SD card while the
camera is turned on, as this may cause the data on
the SD card to be corrupted or cause the camera to
become unable to recognize whether or not the SD
card is installed.
Grip Adjustment
Tripod Mounting
Inserting/Removing an SD Card
SD Card (optional)
Clipped Edge
SD Card Cover [OPEN]
Label
Write/Erase
Protection Tab
SD Slot
M5E6US.book Page 19 Tuesday, August 9, 2005 9:07 AM

20 EN GETTING STARTED
MasterPage: Body_Left
You can format (initialize) the built-in hard disk
(HDD) or SD cards. You have to format the
newly-purchased SD cards with this camera
before using them. This enables stable speeds
and operation when accessing the recording
medium. Be aware that all files and data
including protected files will be erased.
(墌pg. 38)
1Set the power switch to or .
2Press MENU. The menu screen appears.
3Press / to select
[REC MEDIA SETTING],
then press 49.
4Press / to select
[FORMAT], then press
49.
5Press / to select
[HDD] or [SD], then
press 49.
6Press / to select [EXECUTE], then
press 49.
●To cancel the formatting, select [CANCEL], then
press 49.
To make it more
difficult to recover the
data on the hard disk
Even if you format the
hard disk or erase the
data on the hard disk,
sometimes the erased
data can be recovered by using data recovery
software etc. that are commercially available.
By pressing the 49 button while selecting
[HDD] and holding down the button in step 5,
you can erase the data on the hard disk in a
format that is difficult to recover. Moreover, by
repeating this procedure, you can make the data
even more difficult to recover.
●When formatting in this way, a formatting progress
bar is displayed.
●If the formatting progress bar does not appear,
select [CANCEL] and try again from step 4.
CAUTION:
Do not remove the SD card or perform any other
operation (such as turning off the power) during
format. Also, be sure to use the provided AC
adapter, as the data on the recording medium may
be corrupted if the battery becomes exhausted
during format. If the data on the recording medium
becomes corrupted, format it again.
NOTE:
Do not format the recording medium on the PC.
Make sure to format the recording medium on the
camera.
Formatting a Recording Medium
DIS
CAMERA SETTING
BASIC SETTING
REC MEDIA SETTING
DISPLAY
QUALITY
WIDE MODE
VIDEO MODE
IMAGE MODE
FORMAT
CLEAN UP
COPY/MOVE
M5E6US.book Page 20 Tuesday, August 9, 2005 9:07 AM
This manual suits for next models
1
Table of contents
Other JVC Camcorder manuals

JVC
JVC GR-DVL28 User manual

JVC
JVC GR-DV3 User manual

JVC
JVC GZ-HD7E/EK User manual

JVC
JVC Everio GZ-HM960 Instructions for use

JVC
JVC LYT0944-001A User manual

JVC
JVC GY-HM790CHU User manual

JVC
JVC LYT0275-001A User manual

JVC
JVC GR-D340E System manual

JVC
JVC GZ-R435BE Operating and maintenance manual

JVC
JVC GZ HD10 - Everio Camcorder - 1080p Manual

JVC
JVC GR-D22 User manual

JVC
JVC GZ-MG57US User manual

JVC
JVC GR-X5AA User manual

JVC
JVC GR-DVL9800A User manual

JVC
JVC GY-HM750CHU User manual

JVC
JVC GR-DVA1 User manual

JVC
JVC KY-F550 User manual

JVC
JVC GR-DVL145 User manual

JVC
JVC GR-SZ7000 User manual

JVC
JVC GZ-MG35U - Everio Camcorder w/25x Optical... User manual