JVC HR-XVS20E User manual

2EN SAFETY FIRST
Safety Precautions
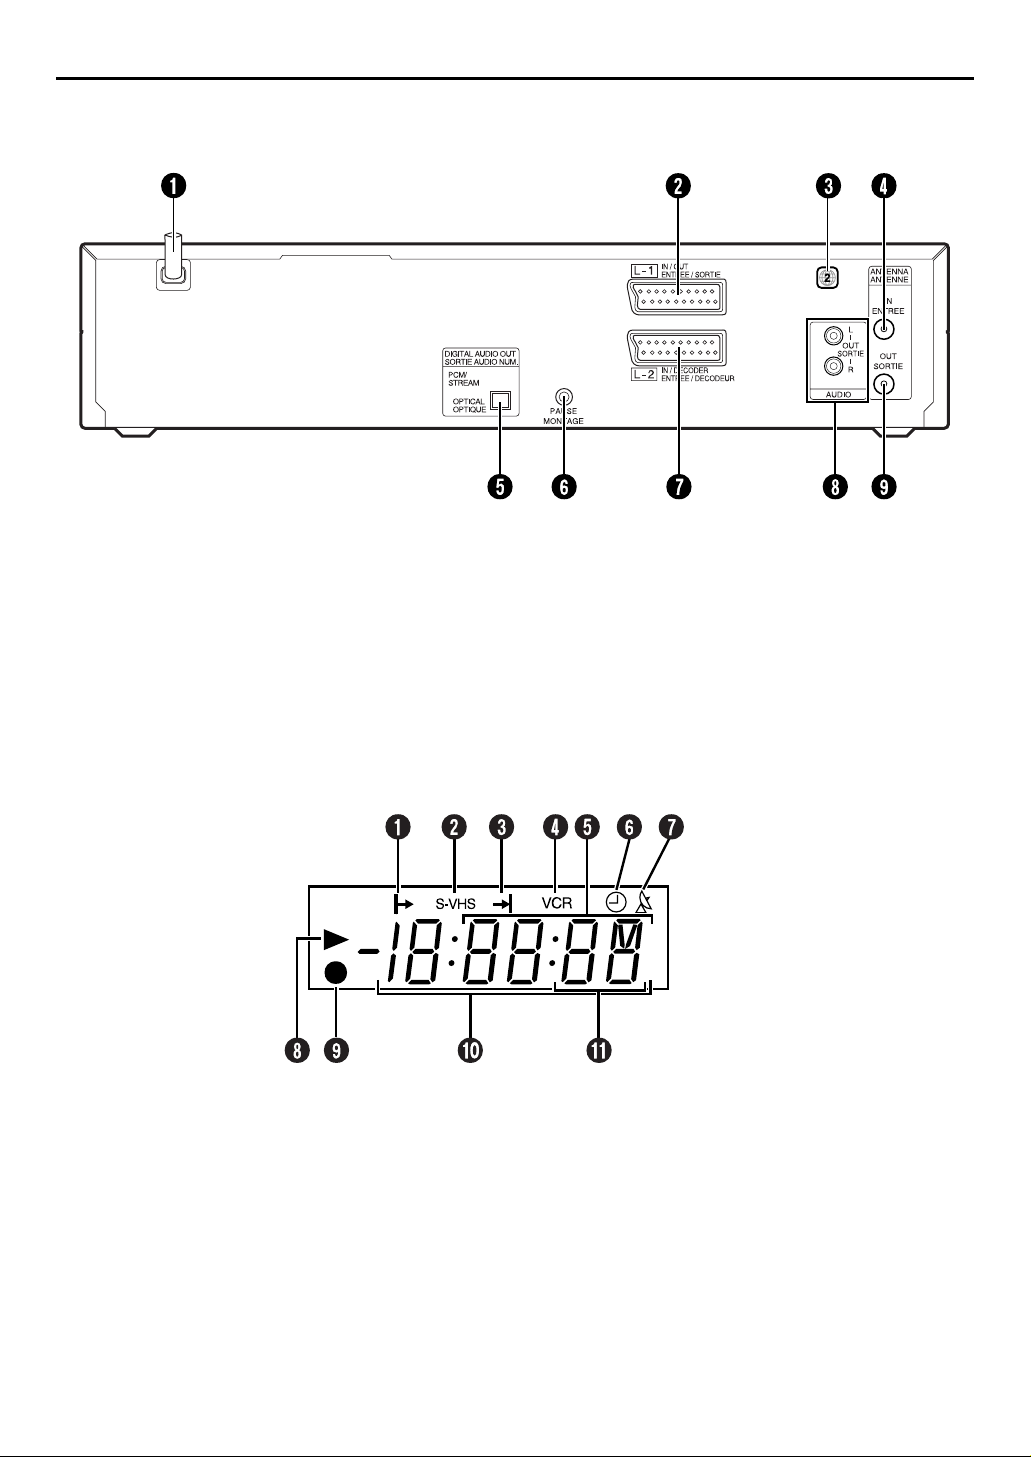
The rating plate and the safety caution are on the rear of
the unit.
WARNING: DANGEROUS VOLTAGE INSIDE
WARNING: TO PREVENT FIRE OR SHOCK
HAZARD, DO NOT EXPOSE THIS
UNIT TO RAIN OR MOISTURE.
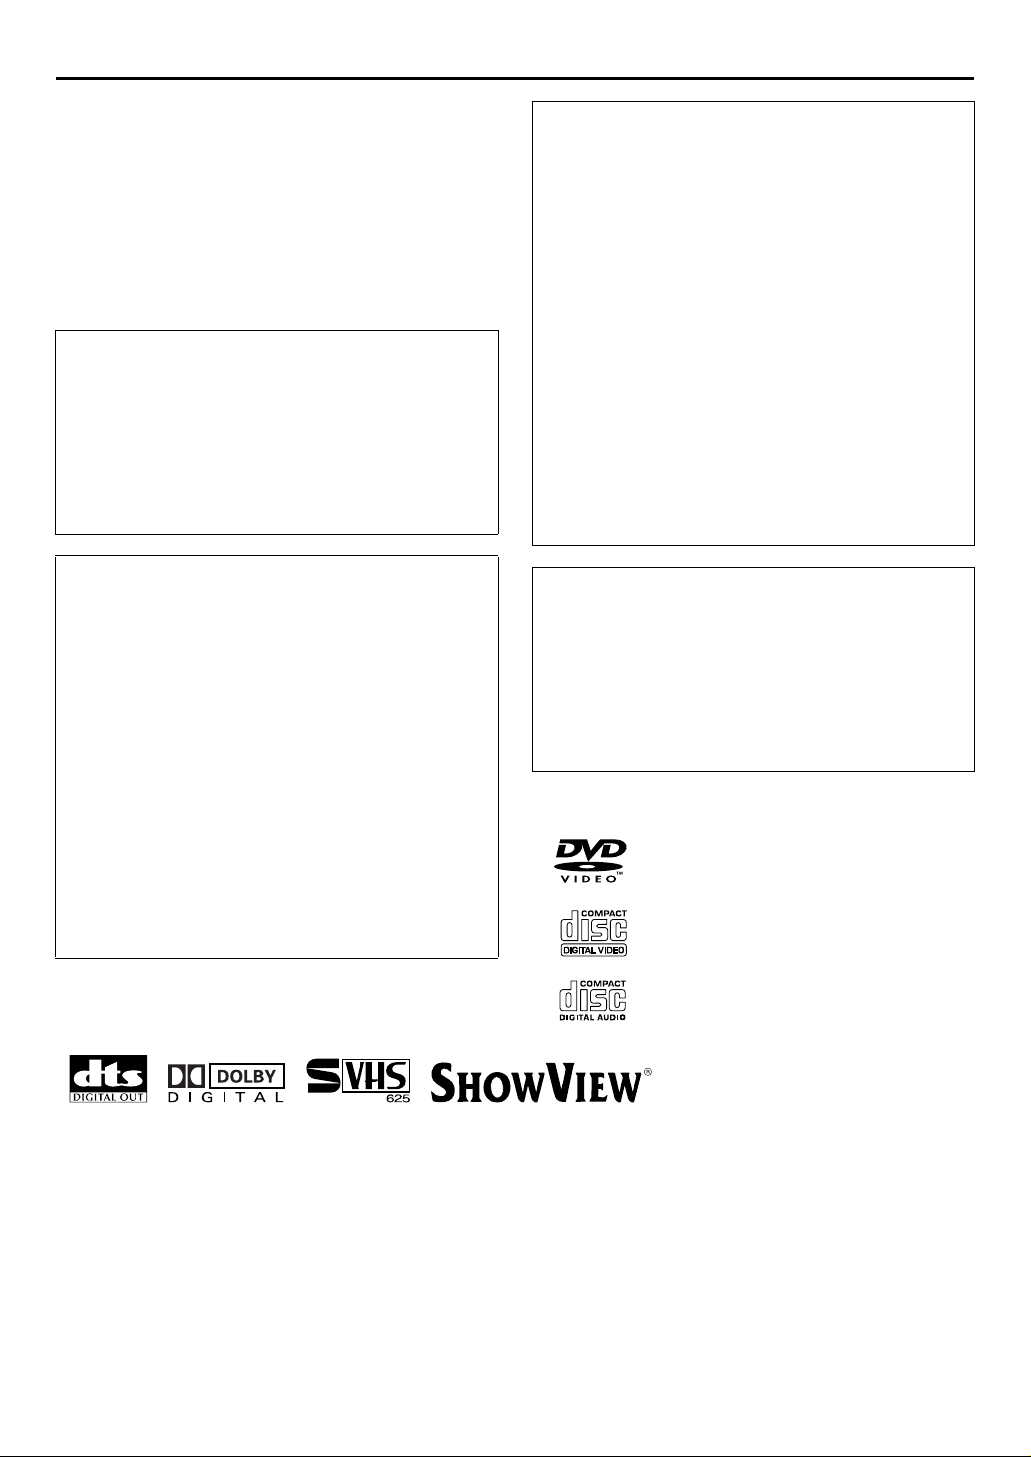
Use only discs marked with the following.
●Manufactured under license from Dolby Laboratories. “Dolby” and the double-D symbol are trademarks of Dolby Laboratories.
Confidential unpublished works.
●“DTS” and “DTS Digital Out” are trademarks of Digital Theater System, Inc.
●Cassettes marked “S-VHS” and “VHS” can be used with this unit. However, S-VHS recordings are possible only with cassettes
marked “S-VHS”.
By using the S- VHS ET function, it is possible to record and play back with S-VHS picture quality on VHS cassettes with this unit.
●SHOWVIEW is a registered trademark of Gemstar Development Corporation. The SHOWVIEW system is manufactured under licence
from Gemstar Development Corporation.
●This product incorporates copyright protection technology that is protected by method claimes of certain U.S. patents and other
intellectual property rights owned by Macrovision Corporation and other rights owners. Use of this copyright protection technology
must be authorized by Macrovision Corporation, and is intended for home and other limited viewing users only unless otherwise
authorized by Macrovision Corporation. Reverse engineering or disassembly is prohibited.
CAUTION
8When you are not using the unit for a long period
of time, it is recommended that you disconnect the
power cord from the mains outlet.
8Dangerous voltage inside. Refer internal servicing
to qualified service personnel. To prevent electric
shock or fire hazard, remove the power cord from
the mains outlet prior to connecting or
disconnecting any signal lead or aerial.
CAUTION
A DVD/VCR IS A CLASS 1 LASER PRODUCT.
HOWEVER THIS DVD/VCR USES A VISIBLE LASER
BEAM WHICH COULD CAUSE HAZARDOUS
RADIATION EXPOSURE IF DIRECTED. BE SURE TO
OPERATE THE UNIT CORRECTLY AS INSTRUCTED.
WHEN THIS DVD/VCR IS PLUGGED INTO THE
WALL OUTLET, DO NOT PLACE YOUR EYES CLOSE
TO THE OPENING OF THE DISC TRAY AND OTHER
OPENINGS TO LOOK INTO THE INSIDE OF THIS
DVD/VCR.
USE OF CONTROLS OR ADJUSTMENTS OR
PERFORMANCE OF PROCEDURES OTHER THAN
THOSE SPECIFIED HEREIN MAY RESULT IN
HAZARDOUS RADIATION EXPOSURE.
DO NOT OPEN COVERS AND DO NOT REPAIR
YOURSELF. REFER SERVICING TO QUALIFIED
PERSONNEL.
WARNING (S-VHS deck only)
There are two different types of SECAM colour
systems: SECAM-L, used in FRANCE (also called
SECAM-West), and SECAM-B, used in Eastern
European countries (also called SECAM-East).
1. This unit can also receive SECAM-B colour
television signals for recording and playback.
2. Recordings made of SECAM-B television signals
produce monochrome pictures if played back on a
video recorder of SECAM-L standard, or do not
produce normal colour pictures if played back on a
PAL video recorder with SECAM-B system
incorporated (even if the TV set is SECAM-
compatible).
3. SECAM-L prerecorded cassettes or recordings made
with a SECAM-L video recorder produce
monochrome pictures when played back with this
unit.
4. This unit cannot be used for the SECAM-L standard.
Use a SECAM-L recorder to record SECAM-L
signals.
IMPORTANT
8Please read the various precautions on pages 2 and
3 before installing or operating the unit.
8It should be noted that it may be unlawful to re-
record pre-recorded tapes, DVDs, or discs without
the consent of the owner of copyright in the sound
or video recording, broadcast or cable programme
and in any literary, dramatic, musical, or artistic
work embodied therein.
DVD
(8 cm /12 cm disc)
Video CDs
(8 cm /12 cm disc)
Audio CDs
(8 cm /12 cm disc)

EN 3
When the equipment is installed in a cabinet or a shelf,
make sure that it has sufficient space on all sides to allow
for ventilation (10 cm or more on both sides, on top and
at the rear.)
When discarding batteries, environmental problems must
be considered and the local rules or laws governing the
disposal of these batteries must be followed strictly.
Failure to heed the following precautions may result in
damage to the unit, remote control or video cassette.
1. DO NOT place the unit —
— in an environment prone to extreme temperatures
or humidity.
— in direct sunlight.
— in a dusty environment.
— in an environment where strong magnetic fields are
generated.
— on a surface that is unstable or subject to vibration.
2. DO NOT block the unit’s ventilation openings or
holes.
(If the ventilation openings or holes are blocked by a
newspaper or cloth, etc., the heat may not be able to
get out.)
3. DO NOT place heavy objects on the unit or remote
control.
4. DO NOT place anything which might spill on top of
the unit or remote control.
(If water or liquid is allowed to enter this equipment,
fire or electric shock may be caused.)
5. DO NOT expose the apparatus to dripping or
splashing.
6. DO NOT use this equipment in a bathroom or places
with water. Also DO NOT place any containers filled
with water or liquids (such as cosmetics or medicines,
flower vases, potted plants, cups, etc.) on top of this
unit.
7. DO NOT place any naked flame sources, such as
lighted candles, on the apparatus.
8. AVOID violent shocks to the unit during transport.
MOISTURE CONDENSATION
Moisture in the air will condense on the unit when you
move it from a cold place to a warm place, or under
extremely humid conditions—just as water droplets form
in the surface of a glass filled with cold liquid. Moisture
condensation on the head drum will cause damage to the
tape. In conditions where condensation may occur, keep
the unit turned on for a few hours to let the moisture dry.
For Italy:
“It is declared that this product, brand JVC, conforms
to the Ministry Decree n. 548 of 28 Aug.’95 published
in the Official Gazette of the Italian Republic n. 301 of
28 Dec.’95”
The STANDBY/ON 1button does not completely
shut off mains power from the unit, but switches
operating current on and off. “`” shows electrical
power standby and “!” shows ON.
Video tapes recorded with this unit in the LP/EP (Long
Play/Extended Play) mode cannot be played back on a
single-speed video recorder. (S-VHS deck only)
A
TTENTION
To mobile phone users:
Using a mobile phone in the vicinity of the unit may
cause picture vibration on the TV screen or change
the screen to a blue back display.
On placing the unit:
Some TVs or other appliances generates strong
magnetic fields. Do not place such appliance on top
of the unit as it may cause picture disturbance.

4EN CONTENTS
SAFETY FIRST 2
Safety Precautions ............................................... 2
DISC INFORMATION 5
About Discs ......................................................... 5
INDEX 8
INSTALLING YOUR NEW UNIT 12
Basic Connections ............................................. 12
INITIAL SETTINGS 13
Auto Set Up ....................................................... 13
Preset Download ............................................... 15
Monitor Set (DVD deck) .................................... 17
Language ........................................................... 18
T-V LINK 21
T-V Link Functions ............................................ 21
OPERATIONS ON S-VHS DECK 22
Basic Playback .................................................. 22
Playback Features .............................................. 23
Basic Recording ................................................ 26
Recording Features ............................................ 27
B.E.S.T. Picture System ...................................... 29
SHOWVIEW®Timer Programming ....................... 30
Express Timer Programming .............................. 32
Automatic Satellite Programme Recording ......... 35
OPERATIONS ON DVD DECK 36
Basic Playback .................................................. 36
Playback Features .............................................. 37
Playback Features with Play Set Up Menu ......... 45
Parental Lock .................................................... 50
About MP3 Disc ................................................ 54
Basic Playback .................................................. 55
Playback Features with Play Set Up menu ......... 56
EDITING (S-VHS DECK) 58
Edit From A Camcorder ..................................... 58
Edit To Or From Another Video Recorder .......... 59
Output/Input Set ................................................ 60
Dubbing (from DVD to S-VHS) .......................... 62
EDITING (DVD DECK) 63
Digital Audio Dubbing ...................................... 63
REMOTE CONTROL 64
Remote Control Functions ................................. 64
SYSTEM CONNECTIONS 66
Connecting To A Satellite Receiver .................... 66
Connecting/Using A Decoder ............................ 68
Connecting To A Dolby Digital Decoder or
An Amplifier With A Built-in DTS
(DVD deck only) ............................................ 69
SUBSIDIARY SETTINGS 70
Mode Set (S-VHS deck) ...................................... 70
Mode Set (DVD deck) ........................................ 75
Tuner Set ........................................................... 78
Clock Set ........................................................... 84
Video Channel Set ............................................. 86
TROUBLESHOOTING 87
QUESTIONS AND ANSWERS 91
SPECIFICATIONS 92
LIST OF TERMS 93

EN 5
DISC INFORMATION
About Discs
Playable Discs
You can use the discs with the following logos for playback only.
●Discs other than the above cannot be played back.
●DVD video discs have a region number. Discs whose region
number includes “ALL” or “2” can be played back on this unit.
●Operation and audio quality of this unit is not guaranteed for
discs that do not conform to the Compact Disc specification
(CD-DA).
Before you play back a CD, check for the CD logo and read
the notes on the package to confirm that it conforms to the
Compact Disc specification.
●Depending on the intentions of the author of the software,
recording conditions of DVD discs and Video CD discs may
be restricted. Since this unit plays back discs according to the
intentions of the author of the software as indicated on the
disc, some functions may not operate as commanded.
●When switching from the first layer to the second layer of
double-layered DVD VIDEO discs, the image and sound may
be momentarily distorted. This is not a malfunction.
Unplayable Discs
The following types of discs cannot be played using this unit.
Do not attempt to play back any kind of disc that is damaged
(cracked, warped, or repaired with adhesive tape) or discs in
unusual shapes (heart-shaped, octagonal, or other forms). If such
discs are accidentally played back, it may cause noise that can
lead to speaker damage.
●CD-ROM discs (including PHOTO-CD and CD-G)
●DVD AUDIO discs
●Super Audio CDs (SACD)
●1.3-GB double density CDs (DDCD)
●High density CDs (HDCD)
The following discs also cannot be played back.
●Discs which have a region number other than “2”
●DVD+RW formatted discs
●DVD-RW formatted discs
●DVD-RAM
●DVD-R
Region Number
The world is divided into 6 regions for DVD VIDEO discs. DVD
VIDEO discs are assigned a region number to indicate which
region they may be played back in. A disc cannot be played back
on this unit unless the region number of the disc matches that of
the unit. The region number for this unit is “2”. Only discs
whose region number includes “2” can be played back such as
shown below.
Examples of DVD VIDEO labels which can be played back using
this unit.
Marks of discs in this instruction manual
DVD VIDEO Video CD
Music CD
CD-DA
files
CD-R
CD-DA/
MP3 files
CD-RW
CD-DA/
MP3 files
CD-ROM
MP3 files
Allows operation
with a DVD VIDEO
disc.
Allows operation
with a CD-R/RW
disc.
Allows operation
with a Video CD
disc.
Allows operation
with a disc
including MP3 files.
Allows operation
with a Audio CD
disc.
Allows operation
with a CD-ROM
disc.
ALL 252 5
3
4
23
2
1
6
5
4

6EN DISC INFORMATION (cont.)
DVD VIDEO Marks
Sometimes marks are printed on a DVD disc and/or on its
packaging to indicate information regarding the contents and
functions of a disc. Check marks indicating the contents and
functions of a disc. Note, however, that in some cases a disc may
not include a mark even for a function it supports.
Marks related to video
Marks related to audio
File Structure of Discs
DVD VIDEO
Typically, DVD VIDEO discs are made up of larger units called
“titles”. Each title has a number (title number) that can be used
to select desired titles. Titles are further divided into units called
“chapters”. Each chapter has a number (chapter number) that
can also be used to select desired chapters. Note that some discs
are not divided into titles and chapters.
Audio CD/Video CD
Typically, Audio CD discs are divided into separate tracks each
containing one song. Each track is assigned a number. For
example, the third track is Track 3. The same is true for Video CD
discs.
NOTE:
Video CD discs that support Playback Control (PBC)
The still image or motion image which follows a menu screen is
called a “scene”. Each scene has a scene number.
For more details, refer to “Locating a desired scene using the
menu of the Video CD with PBC” (墌pg. 37).
Mark Description
Number of subtitles
Number of angles
Recorded under the standard 4:3 aspect
ratio
Screen includes black bands at top and
bottom of image which has a standard 4:3
aspect ratio (letter box)
Video playback is in Wide video mode
(16:9) on wide televisions, but in letter
box on televisions with standard 4:3
aspect ratio.
Video playback is in Wide video mode
(16:9) on wide televisions, but pan and
scan is used on televisions with standard
4:3 aspect ratio (either the left or right side
of the image is cut-out).
Mark Description
Number of audio tracks
Dolby Digital mark
Dolby Laboratories has developed a
digital surround system for the home. This
mark indicates that you may enjoy 5.1-
channel audio (front left and right, center,
rear left and right, and a channel for LFE
(Low-Frequency Effects).
DTS (Digital Theater System)
You can enjoy DTS audio if you connect
the amplifier with a built-in DTS decoder
to the DIGITAL AUDIO OUT connector of
the unit.
Title1 Title2
Chapter 1 Chapter 2Chapter 1Chapter 3Chapter 2
Track 1 Track 4Track 3Track 2

EN 7
Placing a Disc
1Open the disc tray.
Press xon the DVD deck to open the disc tray.
●Pressing the button again closes the disc tray.
●Do not block the disc tray with your hand while it is opening
or closing as this may result in hardware failure.
●Do not place unplayable discs or any object other than a disc
in the disc tray.
●Do not press down strongly on the disc tray or place any heavy
objects on it.
2Place the disc.
Place the disc in the disc tray
with the label side facing up.
●Since disc size changes depending
on the disc to be played back, be
sure to correctly align the disc with
the grooves for its size. If the disc is
not in its groove, it may be
scratched or otherwise damaged.
●To insert an 8 cm disc, place it
according to the inner groove.
Care and Handling of Discs
How to handle discs
When handling a disc, do
not touch the surface of the
disc. Since discs are made
of plastic, they are easily
damaged. If a disc gets dirty,
dusty, scratched or warped,
the images and sound will
not be picked up correctly,
and such a disc may cause the unit to malfunction.
Label side
Do not damage the label side, stick paper to or use any adhesive
on its surface.
Storage
Make sure that discs are kept in their cases. If discs are piled on
top of one another without their protective cases, they can be
damaged. Do not put discs in a location where they may be
exposed to direct sunlight, or in a place where the humidity or
temperature is high. Avoid leaving discs in your car!
Maintenance of discs
If there are fingerprints or other dirt
adhering to a disc, wipe with a soft dry
cloth, moving from the center outwards.
If a disc is difficult to clean, wipe with a
cloth moistened with water. Never use
record cleaners, petrol, alcohol or any
anti-static agents.
CAUTION
Sometimes during playback, noise or images may be garbled.
This is sometimes due to the disc. (It may not be up to
industry standards.)
These symptoms are caused by the discs, not by the
malfunction of the unit.

8EN INDEX
FRONT VIEW
AS-VHS Eject Button (x) 墌pg. 22, 26
BS-VHS Cassette Loading Slot
CS-VHS Indicator 墌pg. 22, 26
DDVD Indicator 墌pg. 36
EDisc Tray
FDVD Eject Button (x) 墌pg. 36
GS-video/Video/Audio Input Connectors
(S-VIDEO/VIDEO/AUDIO) 墌pg. 58
HSTANDBY/ON Button (1) 墌pg. 13
IS-VHS/DVD Button 墌pg. 22, 26, 36
JInfrared Beam Receiving Window
KFront Display Panel 墌pg. 9
LRecord Button (7) 墌pg. 26
MProgramme Button (PR +/–) 墌pg. 26
NStop Button (8) 墌pg. 22, 26, 36
OPlay Button (4) 墌pg. 22, 36
PRewind Button (3) 墌pg. 22, 23, 38
QFast Forward Button (5) 墌pg. 22, 23, 38
To access covered connectors, pull and open the
connector cover.

EN 9
REAR VIEW
AMains Power Cord 墌pg. 12
BL-1 Input/Output Connector (L-1 IN/OUT)
墌pg. 12, 59, 66, 67
CRegion Number Label 墌pg. 5
DAntenna Input Connector (ANTENNA IN)
墌pg. 12
EDigital Audio Output Connector
(DIGITAL AUDIO OUT) 墌pg. 63
FRemote Pause Connector (PAUSE) 墌pg. 58
GL-2 Input/Decoder Connector
(L-2 IN/DECODER) 墌pg. 59, 66, 67
HAudio Output Connectors
(AUDIO OUT (L/R))
IAntenna Output Connector (ANTENNA OUT)
墌pg. 12
FRONT DISPLAY PANEL
AStart Time Indicator ( V) (S-VHS deck only)
墌pg. 32
BS-VHS Indicator (S-VHS deck only) 墌pg. 71, 73
CStop Time Indicator (v) (S-VHS deck only)
墌pg. 32
DVCR Indicator (S-VHS deck only) 墌pg. 27
EChannel/Clock
Remain Display (S-VHS deck only) 墌pg. 28
Mode Display (L-1, L-2, F-1, S-1 or SAT*)
(S-VHS deck only)
* When “L-2 SELECT” is set to “SAT” (墌pg. 61), “SAt” appears
instead of “L-2”.
F“Timer” Indicator (S-VHS deck only)
墌pg. 31, 33
GAutomatic Satellite Programme Recording
Indicator (N) (S-VHS deck only) 墌pg. 35
HPlay Indicator
IRecord Indicator (S-VHS deck only)
JMulti-information window* (DVD deck)
Counter Display (S-VHS deck)
* The current group/title/track/chapter number(s), time and status
information.
KTape Speed (SP/LP/EP) (S-VHS deck only)
墌pg. 26

10 EN INDEX (cont.)
ON-SCREEN DISPLAY (S-VHS deck)
When “O.S.D.” is set to “ON” (墌pg. 72), various operational indicators appear on the TV screen.
For On-screen display for DVD deck, refer to “Checking the DVD function status” (墌pg. 44).
AOperation Mode Indicators
BTape Speed (SP/LP/EP)
CTape Direction
DIndex Mark Indicator (MARK) 墌pg. 26
ECounter Display
FTape Remaining Time Indicator 墌pg. 28
GAudio Mode Display 墌pg. 25
HTape Position Indicator
The tape position indicator
appears on the TV screen
when you press 3or
5from the Stop mode or
perform an Index Search.
(墌pg. 24) The position of
“q” in relation to “0”
(beginning) or “+” (end)
shows you where you are
on the tape.
NOTE:
Depending on the type of tape being used, the tape position
indicator may not appear correctly.
IVPS/PDC Indicator 墌pg. 31, 33
JType of Broadcast 墌pg. 28
KCurrent Day/Month/Year
LClock Display
MChannel Position Number and Station Name/
Auxiliary Input Indicator (L-1, L-2, F-1, S-1 or
SAT*)
* When “L-2 SELECT” is set to “SAT” (墌pg. 61), “SAT” appears
instead of “L-2”.
NS-VHS ET Indicator
(S-VHS ET : ON/S-VHS ET : OFF) 墌pg. 71
O“Cassette Loaded” Mark
Beginning End

EN 11
REMOTE CONTROL
AS-VHS Button 墌pg. 22, 26
BTV/S-VHS/DVD switch 墌pg. 17
CMenu Button (MENU) 墌pg. 37
DAuto Tracking Button (p) 墌pg. 25
SP/LP/EP Button 墌pg. 26
Top Menu Button (TOP MENU) 墌pg. 37
EStop Time Button (STOP +/–) 墌pg. 32
Display Button (DISPLAY) 墌pg. 44
Digest Button (DIGEST) 墌pg. 42
FStart Time Button (START +/–) 墌pg. 32
Repeat Button (REPEAT) 墌pg. 46 – 49, 56 – 57
Zooming Button (ZOOM) 墌pg. 41
GNumber Keys 墌pg. 26, 30, 55
HDaily Button (DAILY) 墌pg. 31, 33
IVPS/PDC Button 墌pg. 31, 33
JReset Button (0000) 墌pg. 28
Cancel Button (&) 墌pg. 34
KPlay Button (4) 墌pg. 22, 36
LRewind Button (3) 墌pg. 22, 23, 38
MStop Button (8) 墌pg. 22, 26, 36
NRecord Button (7) 墌pg. 26
OReverse Skip/Index Button (2) 墌pg. 24, 36
Prt Button 墌pg. 13
TV/VCR Programme Button (TV/VCR PR +/–)
墌pg. 65
QSet Up Menu Button (SET UP MENU) 墌pg. 17
R3D-PHONIC Button 墌pg. 43
STV Volume Button (TV %+/–) 墌pg. 65
TDVD Button 墌pg. 36
USTANDBY/ON Button (1) 墌pg. 13
VTV Muting Button (^) 墌pg. 65
Audio Monitor Button (A.MONITOR) 墌pg. 25
WTV/VCR Button 墌pg. 27
XDate Button (DATE +/–) 墌pg. 32
Subtitle Button (SUB TITLE) 墌pg. 39
Angle Button (ANGLE) 墌pg. 40
YProgramme Button (PR +/–) 墌pg. 26
ZProgramming Button (PROG) 墌pg. 30, 32
aTimer Button (#) 墌pg. 31, 33
bWeekly Button (WEEKLY) 墌pg. 31, 33
cProgramme Check Button (") 墌pg. 34
dAutomatic Satellite Programming Button
(REC LINK) 墌pg. 35
eAuxiliary Button (AUX) 墌pg. 58
fFast Forward Button (5) 墌pg. 22, 23, 38
gPause Button (9) 墌pg. 23, 26
hForward Skip/Index Button (6) 墌pg. 24, 36
iOK Button 墌pg. 14
jwe
Button 墌pg. 17
kDisplay Button (– –:– –) 墌pg. 28
lSkip Search Button ( ) 墌pg. 24
DVD Picture Button (DVD PICTURE) 墌pg. 43
The glow-in-the-dark buttons shown in grey on the
illustration above are helpful when using the remote control
in darkened rooms.
Buttons with a small dot on the left side of the name can also
be used to operate your TV. (墌pg. 65)
How To Use
The remote control can operate most of your unit’s functions,
as well as basic functions of TV sets of JVC and other brands.
(墌pg. 65)
●Point the remote control toward the receiving window.
●The maximum operating distance of the remote control is
about 8 m.
NOTES:
●When inserting the batteries, be sure to insert in the correct
directions as indicated under the battery cover.
●If the remote control doesn’t work properly, remove its
batteries, wait a short time, replace the batteries and then
try again.

12 EN INSTALLING YOUR NEW UNIT
Basic Connections It’s essential that your unit be properly connected.
ACheck the contents.
Make sure the package contains all of the accessories
listed in “SPECIFICATIONS” on page 92.
BSituate the unit.
Place the unit on a stable, horizontal surface.
CConnect the unit to TV.
The connection method you use depends on the type of
TV you have.
RF Connection
8To connect to a TV with NO AV input connectors —
ADisconnect the TV aerial cable from the TV.
BConnect the TV aerial cable to the ANTENNA IN
connector on the rear panel of the unit.
CConnect the provided RF cable between the
ANTENNA OUT connector on the rear panel of the
unit and the TV’s aerial connector.
AV Connection
8To connect to a TV with AV input connectors —
AConnect the aerial, unit and TV as per “RF
Connection”.
BConnect an optional 21-pin SCART cable between the
L-1 IN/OUT connector on the rear panel of the unit
and the TV’s 21-pin SCART connector.
CSet the output mode for the L-1 IN/OUT connector
depending on type of your TV. (墌left column)
DConnect the unit to mains.
Plug the end of the mains power cord into a mains outlet.
Make AV connection if your TV has a 21-pin AV input
connector (SCART) in order to reduce the possibility of
interference. With AV connection, you can enjoy stereo
playback of video tapes if you are using a stereo TV.
In addition, if you connect the unit to the TV’s RGB
connectors, set the output mode for the L-1 IN/OUT
connector so that the RGB signal is output from the unit.
When the DVD deck is selected, press and hold 8until
the desired mode appears on the front display panel.
YC: Select when your TV is compatible with the Y/C
signal. Y/C signal is output from the unit. Also
set “L-1 OUTPUT” to “S-VIDEO”. (墌pg. 60)
RGB: Select when your TV is compatible with the
RGB signal. RGB signal is output from the unit.
NOTES:
●Set your TV to the VIDEO (or AV), Y/C, or RGB mode
according to the type of your TV’s SCART connector.
●For switching the TV’s mode, refer to the instruction
manual of your television.
Aerial connector
Back of TV
21-pin SCART
connector
TV aerial
cable
RF cable
(provided)
21-pin SCART
cable
(not provided)
Mains power cord
Mains outlet
Back of unit
L-1 IN/OUT
ANTENNA
IN
ANTENNA
OUT
THESE STEPS MUST BE COMPLETED BEFORE ANY
VIDEO OPERATION CAN BE PERFORMED.
After the connection is completed, perform “Auto Set
Up” on page 13.

EN 13
INITIAL SETTINGS
Auto Set Up
Auto Channel Set/Auto Clock Set/
Auto Guide Program Number Set
ATurn on the unit.
Press 1on the unit or remote control. The Country Set
display appears on the TV screen.
BSelect your country.
NOTES:
●If you have selected BELGIUM or SUISSE, go to step C.
●If you have selected MAGYARORSZÁG, CESKÁ REPUBLIKA,
POLSKA or OTHER EASTERN EUROPE, press OK. The Clock
Set screen appears. Set the clock manually (墌pg. 84), then
go to step D.
●If you have selected any other country name, go to step D.
After the 1button on the unit or remote control is pressed
for the first time to power on the unit, by simply selecting
your country*, the Auto Set Up function sets the tuner
channels, clock** and Guide Program numbers
automatically.
* If you live in Belgium (BELGIUM) or Switzerland (SUISSE), you also
need to select your language.
**If you live in Hungary (MAGYARORSZÁG), Czech Republic
(
C
ESKÁ REPUBLIKA), Poland (POLSKA) or other countries in
Eastern Europe (OTHER EASTERN EUROPE), set the clock
manually.
Before starting, make sure of the following:
●The TV aerial cable should be connected to the unit.
●The unit’s mains power cord should be connected to a
mains outlet.
●The TV should be set to its AV mode (with AV connection
墌pg. 12) or UHF channel 36 (with RF connection
墌pg. 12).
●Slide the TV/S-VHS/DVD switch to the right.
NOTE:
If you have connected your TV to
the unit with RF connection and
the on-screen display appearing
on UHF channel 36 looks
distorted, perform “Video
Channel Set” on page 86.
Press rt to move the
highlight bar (pointer) to your
country’s name.
(Example) DEUTSCHLAND is
selected.

14 EN INITIAL SETTINGS (cont.)
CSelect the language.
NOTE:
The selected language is only available on the screen for S-VHS
deck.
Set manually the on-screen language for the DVD deck.
(墌pg. 19)
DPerform Auto Set Up.
Press OK. The AUTO SET/T-V LINK display appears on
the front display panel and/or on the TV screen.
On the front display panel
Press rt to select “Auto” and press OK or e.
●When you have connected the unit to a TV offering T-V Link
via a fully-wired 21-pin SCART cable (墌pg. 12) and the TV is
turned on, the unit automatically performs the Preset
Download (墌pg. 15) even if you select “Auto” or “AUTO
SET” for Auto Set Up function.
EConfirm/Set video channel.
With RF Connection
The video channel that is
shown on the display panel is
your video channel. Press OK.
●If you have selected
MAGYARORSZÁG, CESKÁ
REPUBLIKA, POLSKA or
OTHER EASTERN EUROPE in
step Bon page 13, “2” appears
instead of “1”.
●To view picture signals from the unit, set your TV to the video
channel.
With AV Connection
Press PR – until the display
panel shows “1 – –” (or
“2 – –”). Now the video
channel is set to off. Then press OK.
●To view picture signals from the unit, set your TV to its AV
mode.
NOTES:
●In the area where no TV station transmits a PDC (Programme
Delivery Control) signal, the unit can perform neither Auto
Clock Set nor Auto Guide Program Number Set.
●If there is a power cut, or if you press 1or SET UP MENU
while Auto Set Up is in progress, Auto Set Up will be
interrupted; be sure to turn off the unit power once and try
again from step A.
●Auto Clock Set may not function properly depending on the
reception condition.
●If no sound accompanies the picture or the audio sounds
unnatural on some channels that have been stored by Auto Set
Up, the TV system setting for those channels may be incorrect.
Select the appropriate TV system for those channels.
(墌pg. 81, “INFORMATION”)
Press OK. The Language Set
display appears on the TV
screen.
Press rt to move the
highlight bar (pointer) to the
language of your choice.
(Example) DEUTSCH is selected.
On the on-screen display
Press rt to move the
highlight bar (pointer) to
“AUTO SET” and press OK or
e.
“Auto” blinks on the front display panel; do NOT press
any button on the unit or remote control until the front
display panel shows either the display as illustrated in
step Eor “– –:– –” as illustrated on page 16.
●If you are using the on-screen
display, the AUTO SET
screen will appear. As Auto
Set Up progresses, the “q”
mark on the TV screen
moves from left to right.
Beginning End
A
TTENTION
Once you have performed Auto Set Up, even if the unit’s
memory backup has expired, all the stored stations and their
Guide Program numbers remain in the unit’s memory and the
unit will not perform Auto Set Up again. The unit performs
only Auto Clock Set when the unit is turned on.
If you have moved to a different area, perform each setting as
required.
●Video channel setting (for RF connection users) 墌pg. 86
●Tuner setting 墌pg. 78
●Clock setting 墌pg. 84
If a new station starts broadcasting in your area, perform
tuner setting (墌pg. 78) and, if necessary, video channel
setting (墌pg. 86).
After “Auto Set Up” is completed, perform “Monitor
Set (DVD deck)” on page 17.

EN 15
Preset Download
Auto Channel Set by Downloading
from TV/Auto Clock Set/Auto Guide
Program Number Set
NOTES:
●For details, refer to the instruction manual of your TV.
●In the area where no TV station transmits a PDC (Programme
Delivery Control) signal, the unit can perform neither Auto
Clock Set nor Auto Guide Program Number Set.
●If there is a power cut, or if you press 1or SET UP MENU
while downloading or set up is in progress, it will be
interrupted; be sure to turn off the unit power once and try
again from the beginning.
●Auto Clock Set may not function properly depending on the
reception condition.
●On this unit, the characters available for station names (ID) are
A–Z, 0–9, –, f, + and I(space). Some names of downloaded
stations may differ from those of your TV. (墌pg. 82)
If you have connected the unit to your TV via the AV connection
(墌pg. 12), the unit will automatically perform Preset
Download instead of the Auto Set Up in step Don page 14.
After downloading, the unit sets the clock and Guide Program
numbers automatically.
APerform Preset Download.
Press OK. The AUTO SET/T-V LINK display appears on
the front display panel and/or on the TV screen.
On the front display panel
Press rt to select “CH – –” and press OK or e.
BSet the video channel.
Set the video channel to off manually. (墌pg. 86)
ATTENTION
You can use this function only with a TV offering T-V Link,
etc.* Be sure to use a fully-wired 21-pin SCART cable.
* Compatible with TVs offering T-V Link, EasyLink, Megalogic,
SMARTLINK, Q-Link or DATA LOGIC via fully-wired 21-pin SCART
cable. The degree of compatibility and available functions may
differ by system.
●Slide the TV/S-VHS/DVD switch to the right.
●Perform steps Ato Cof “Auto Set Up” on page 13 before
continuing.
On the on-screen display
Press rt to move the
highlight bar (pointer) to
“T-V LINK” and press OK or
e.
Preset positions on the front display panel increase from
“CH1”; do NOT press any button on the unit or remote
control until the front display panel shows clock time,
“(CH) 1” or “– –:– –” as illustrated on page 16.
●If you are using the on-screen
display, the T-V LINK screen
will appear. Then the GUIDE
PROG SET screen will appear
during Guide Program
Number Set. When Preset
Download is completed,
“COMPLETED” appears for
about 5 seconds, then the
normal screen appears.
●If you press any button on the
unit or remote control while
downloading is in progress, it
will be interrupted.
After “Preset Download” is completed, perform
“Monitor Set (DVD deck)” on page 17.

16 EN INITIAL SETTINGS (cont.)
Results of Auto Set Up/Preset Download appear on the front display panel
If both Auto Channel Set and Auto Clock Set have been performed successfully, the
correct current time is displayed.
Turn on the TV and select its video channel or AV mode, then make sure that all necessary stations
have been stored in the unit’s memory by using the PR button(s).
●If station names (ID – 墌pg. 83) have also been stored in the unit’s memory, the station name will
be displayed at the top left corner of the TV screen for about 5 seconds when the unit is tuned to
a different station.
●If you want to set the tuner manually such as to add or skip channels, to change channel
positions, or to set or change station names, see pages 80 – 83.
If Auto Channel Set has succeeded but Auto Clock Set has not, “1” (channel position) is
displayed.
ATurn on the TV and select its video channel or AV mode, then make sure that all necessary
stations have been stored in the unit’s memory by using the PR button(s).
●If station names (ID – 墌pg. 83) have also been stored in the unit’s memory, the station name will
be displayed at the top left corner of the TV screen for about 5 seconds when the unit is tuned to
a different station.
●If you want to set the tuner manually such as to add or skip channels, to change channel
positions, or to set or change station names, see pages 80 – 83.
BPerform “Clock Set” on page 84.
If both Auto Channel Set and Auto Clock Set have failed, “– –:– –” is displayed.
Make sure the cables are connected properly and turn off the unit’s power once, then turn the unit’s
power back on again.
The Country Set display appears on the TV screen; perform “Auto Set Up” on page 13 or “Preset
Download” on page 15 again.
IMPORTANT
●To check if the Guide Program numbers have been set correctly, perform the SHOWVIEW Timer Programming. (墌pg. 30) (S-VHS
deck only)
●In certain reception conditions, station names may not be stored correctly, and auto Guide Program Number Set may not work
properly. If the Guide Program numbers are not set properly when you timer-record a TV programme using the SHOWVIEW
system, the unit will record a TV programme of a different station. When programming the timer using the SHOWVIEW system, be
sure to check the desired channel is selected correctly. (墌pg. 30, “SHOWVIEW®Timer Programming”) (S-VHS deck only)
●Your unit memorizes all detected stations even if reception of some of them is poor. You can delete those stations with an
unacceptable picture. (墌pg. 81, “Delete A Channel”)
INFORMATION
Language for the on-screen display (S-VHS deck)
Auto Set Up also selects the language automatically for the on-screen display depending on the Country setting you have made in
step Bon page 13 (unless you have selected BELGIUM or SUISSE), as shown below.
If you want to change the language setting manually, see “On-screen Language Set (S-VHS deck)” on page 18.
Language for the on-screen display (DVD deck)
Set manually the on-screen language for the DVD deck. (墌pg. 19)
Just Clock
Your unit is equipped with the Just Clock function which provides accurate time keeping through automatic adjustments at regular
intervals, by reading data from a PDC signal. If you want to take advantage of this function, simply set it to “ON”. (墌pg. 84, “Just
Clock”)
SUOMI ]SUOMI DANMARK ]DANSK NEDERLAND ]NEDERLANDS
PORTUGAL ]ENGLISH ÖSTERREICH ]DEUTSCH GREECE ]ENGLISH
DEUTSCHLAND ]DEUTSCH CESKÁ REPUBLIKA ]CEcTINA OTHER WESTERN EUROPE]ENGLISH
POLSKA ]POLSKI ITALIA ]ITALIANO OTHER EASTERN EUROPE ]ENGLISH
NORGE ]NORSK MAGYARORSZÁG ]MAGYAR
SVERIGE ]SVENSKA ESPAÑA ]CASTELLANO

EN 17
Monitor Set
(DVD deck)
You can select the monitor type depending the TV used
when you play back DVD VIDEO discs recorded for
wide-screen TVs.
ATurn on the unit.
Press 1.
BSelect the DVD deck.
On the unit
Press S-VHS/DVD repeatedly so that the DVD indicator
lights up.
On the remote control
Press DVD so that the DVD indicator lights up.
CAccess the DVD menu screen.
DSelect the mode.
ESelect the mode setting.
Press we
to select the desired setting.
FReturn to the normal screen.
Press SET UP MENU.
* The default setting is bold in the table below.
●Turn on the TV and select the video channel (or AV
mode).
●Slide the TV/S-VHS/DVD switch to the right.
APress SET UP MENU.
BPress we
to move the
arrow to “DISPLAY”.
Press rt to move the arrow
to “MONITOR TYPE”.
8MONITOR TYPE
16:9 WIDE: Select this when you connect the unit
to a wide-screen TV with 16:9 aspect
ratio. The unit automatically adjusts
the screen width of the output signal
correctly when playing back a 4:3
image source.
4:3PS: Select this when you connect the unit
to a TV with 4:3 aspect ratio. When
you play back a 16:9 image recorded
on a DVD VIDEO disc, the left and
right sides of the image are
automatically cut off. Depending on
the disc, it may not be possible to
play back in this mode. In that case,
set to “4:3LB”.
4:3LB: Select this when you connect the unit
to a TV with 4:3 aspect ratio. When
you play back a 16:9 image recorded
on a DVD VIDEO disc, it is displayed
with black bands at the top and
bottom of the screen.
Pan&Scan/Letter Box
In general, DVD VIDEO disc are produced for a wide-screen
TV with 16:9 aspect ratio.
Material with this ratio will not fit to a TV with 4:3 aspect
ratio. There are two styles to display the image, “Pan&Scan”
(PS) and “Letter Box” (LB).
Pan&Scan
The right and left side of the image are
cut off. The image fills the screen.
Letter Box
Black bands appear at the top and
bottom of the image.The image itself
appears in 16:9 aspect ratio.

18 EN INITIAL SETTINGS (cont.)
Language On-screen Language Set (S-VHS deck)
This S-VHS deck offers you the choice to view on-screen
messages in 13 different languages. Though Auto Set Up
selects the language automatically (墌pg. 16), you can
change the language setting manually as required.
ATurn on the unit.
Press 1.
BSelect the S-VHS deck.
On the unit
Press S-VHS/DVD repeatedly so that the S-VHS indicator
lights up.
On the remote control
Press S-VHS so that the S-VHS indicator lights up.
CAccess the Main Menu screen.
Press SET UP MENU.
DAccess the Country Set screen.
ESelect your country.
Press rt to move the highlight bar (pointer) to your
country’s name, then press OK or e.
FSelect the language.
GReturn to the normal screen.
Press SET UP MENU.
●Turn on the TV and select the video channel (or AV
mode).
●Slide the TV/S-VHS/DVD switch to the right.
Press rt to move the
highlight bar (pointer) to
“AUTO CH SET”, then press
OK or e.
Press rt to move the
highlight bar (pointer) to the
language of your choice.
●You do not have to press OK;
pressing OK enters AUTO SET/
T-V LINK screen.

EN 19
On-screen Language Set (DVD deck)
This DVD deck offers you the choice to view on-screen
messages in 3 different languages. You can change the
language setting manually as required.
ATurn on the unit.
Press 1.
BSelect the DVD deck.
On the unit
Press S-VHS/DVD repeatedly so that the DVD indicator
lights up.
On the remote control
Press DVD so that the DVD indicator lights up.
CAccess the DVD menu screen.
DSelect the mode.
ESelect the mode setting.
Press we
to select the desired setting.
FReturn to the normal screen.
Press SET UP MENU.
Menu/Audio/Subtitle Language Set
(DVD deck only)
Some DVD discs contain the DVD menu display, audio,
subtitle in the multiple languages. With these discs, you
can set the default language as you like.
●The procedure shows how to set “MENU LANGUAGE”
on the DVD menu screen as an example.
ATurn on the unit.
Press 1.
BSelect the DVD deck.
On the unit
Press S-VHS/DVD repeatedly so that the DVD indicator
lights up.
On the remote control
Press DVD so that the DVD indicator lights up.
CAccess the DVD menu screen.
DSelect the mode.
ESelect the mode setting.
Press we
to select the desired setting.
●See “Language Code List” (墌pg. 20).
FReturn to the normal screen.
Press SET UP MENU.
NOTE:
When the selected language is not available on the disc, the
disc’s default menu language is played back.
APress SET UP MENU.
BPress we
to move the
arrow to “LANGUAGE”.
Press rt to move the arrow
to “ON SCREEN
LANGUAGE”.
APress SET UP MENU.
BPress we
to move the
arrow to “LANGUAGE”.
Press rt to move the arrow
to “MENU LANGUAGE”.

20 EN INITIAL SETTINGS (cont.)
Language Code List
AA
AB
AF
AM
AR
AS
AY
AZ
BA
BE
BG
BH
BI
BN
BO
BR
CA
CO
CS
CY
DA
DZ
EL
EO
ET
EU
FA
FI
FJ
FO
FY
GA
GD
GL
GN
GU
HA
HI
HR
HU
HY
IA
IE
Afar
Abkhazian
Afrikaans
Ameharic
Arabic
Assamese
Aymara
Azerbaijani
Bashkir
Byelorussian
Bulgarian
Bihari
Bislama
Bengali, Bangla
Tibetan
Breton
Catalan
Corsican
Czech
Welsh
Danish
Bhutani
Greek
Esperanto
Estonian
Basque
Persian
Finnish
Fiji
Faroese
Frisian
Irish
Scots Gaelic
Galician
Guarani
Gujarati
Hausa
Hindi
Croatian
Hungarian
Armenian
Interlingua
Interlingue
IK
IN
IS
IW
JI
JW
KA
KK
KL
KM
KN
KO
KS
KU
KY
LA
LN
LO
LT
LV
MG
MI
MK
ML
MN
MO
MR
MS
MT
MY
NA
NE
NL
NO
OC
OM
OR
PA
PL
PS
PT
QU
RM
Inupiak
Indonesian
Icelandic
Hebrew
Yiddish
Javanese
Georgian
Kazakh
Greenlandic
Cambodian
Kannada
Korean (KOR)
Kashmiri
Kurdish
Kirghiz
Latin
Lingala
Laothian
Lithuanian
Latvian, Lettish
Malagasy
Maori
Macedonian
Malayalam
Mongolian
Moldavian
Marathi
Malay (MAY)
Maltese
Burmese
Nauru
Nepali
Dutch
Norwegian
Occitan
(Afan) Oromo
Oriya
Panjabi
Polish
Pashto, Pushto
Portuguese
Quechua
Rhaeto-Romance
RN
RO
RU
RW
SA
SD
SG
SH
SI
SK
SL
SM
SN
SO
SQ
SR
SS
ST
SU
SV
SW
TA
TE
TG
TH
TI
TK
TL
TN
TO
TR
TS
TT
TW
UK
UR
UZ
VI
VO
WO
XH
YO
ZU
Kirundi
Rumanian
Russian
Kinyarwanda
Sanskrit
Sindhi
Sangho
Serbo-Croatian
Singhalese
Slovak
Slovenian
Samoan
Shona
Somali
Albanian
Serbian
Siswati
Sesotho
Sundanese
Swedish
Swahili
Tamil
Telugu
Tajik
Thai
Tigrinya
Turkm en
Tagalog
Setswana
Tonga
Turki sh
Tsonga
Tatar
Twi
Ukrainian
Urdu
Uzbek
Vietnamese
Volapuk
Wolof
Xhosa
Yoruba
Zulu
This manual suits for next models
1
Table of contents
Other JVC DVD VCR Combo manuals