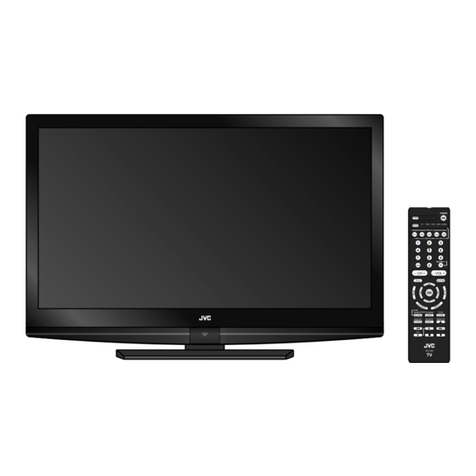
JVC LT-32DY8ZJ User manual

INSTRUCTIONS
ENGLISH
LT-32DY8ZJ
WIDE LCD PANEL TV
Digital Video
Broadcasting
D V
B
Trade Mark of the DVB Digital Video Broadcasting
Project (1991 to 1996) Number: 4898
©2007 Victor Company of Japan, Limited 0807TKH-VT-VT
50093735

-1-
Contents
Safety Precautions .................................. 2
Preparation............................................ 2
Important Instruction............................... 4
Information for Users on Disposal of Old
Equipment ................................................ 5
Where to install........................................ 6
Important Information ............................. 7
RemoteControl Buttons .......................... 8
Peripheral EquipmentConnections ........ 9
LCDTV andControl Buttons.................. 10
Features ..................................................11
GettingStarted....................................... 12
InitialSettings ........................................ 14
T-VLINK............................................... 15
Basic Operations ................................... 16
Turning the TV On/Off .......................... 16
Operating while watching DTV.............. 18
EverydayOperation ............................. 18
Digital Teletext ..................................... 19
DTVMenus ............................................. 20
Timers (DTV Timer Recording)........... 20
Configuration Menu............................. 22
Edit PR List.......................................... 24
Installation ........................................... 25
Common Interface .............................. 27
Analogue TV Menu System ................... 27
Picture menu ....................................... 27
Sound menu........................................ 28
Feature menu ...................................... 28
Install menu ........................................ 29
Source menu....................................... 32
Other Features ....................................... 32
TVStatus.............................................. 32
Mute Indicator ...................................... 32
Freeze Picture...................................... 32
Zoom Modes ....................................... 32
Analogue Teletext .................................. 33
To operate Teletext .............................. 33
To select a page of Teletext ................. 33
To Select Index Page........................... 33
Searching for a teletext page while
watching TV ......................................... 33
To Select Double Height Text .............. 34
To Reveal “concealed” Information ..... 34
To Stop Automatic Page Change......... 34
To Select a Subcode Page .................. 34
To exit Teletext...................................... 34
Fastext and Toptext............................. 34
ConnectPeripheralEquipment ............. 35
High Definition..................................... 35
Via The Scart ....................................... 35
ViaAerial Input ..................................... 35
Decoder............................................... 35
TVAnd Video Recorder........................ 35
Playback NTSC ................................... 35
Copy Facility ........................................ 35
Search For And Store The Test Signal Of
The Video Recorder ............................ 35
Camera And Camcorder ..................... 36
Connect The Decoder To The Video
Recorder.............................................. 36
Connecting Headphones.................... 36
Connecting External Equipment ......... 36
Tips ......................................................... 36
Care of the Screen .............................. 36
Poor Picture ......................................... 36
No Picture............................................ 36
Sound .................................................. 36
Remote Control ................................... 36
No Solution.......................................... 36
If the TV will not be turned on .............. 36
AntennaConnections ............................ 37
Peripheral EquipmentConnections ...... 37
Specifications ........................................ 38
32815_1899SUK_MB22_UK_IDTV.p65 07.09.2007, 15:141

-2-
SafetyPrecautions
Preparation
Use this device in moderate climates.
Please read the following recommended
safetyprecautions carefully for your safety.
1.Power Source
The TV set should be operated only from a
220-240 V AC, 50 Hz outlet. Ensure that you
select the correct voltage setting for your con-
venience.
2.Power Cord
Do not place the set, a piece of furniture, etc.
on the power cord (mains lead) or pinch the
cord. Handle the power cord by the plug. Do
not pull out the plug by tugging the cord and
never touch the power cord when your hands
are wet as this could cause a short circuit or
electric shock. Never make a knot in the cord
or tie it with other cords. The power cords
should be placed in such a way that they are
not likely to be stepped on.A damaged power
cord can cause fire or give you an electric
shock. When it is damaged and needs to be
changed, it should be done by qualified per-
sonnel.
3.Moisture and Water
Do not use this device in a humid and damp
place (avoid the bathroom, the sink in the
kitchen, and near the washing machine). Do
not expose this equipment to rainor water, as
this may be dangerous and do not place ob-
jects filled with liquids, such as flower vases,
on top. Avoid from dripping or splashing.
If any solid object or liquid falls into the cabi-
net,unplugtheTVandhaveitcheckedbyquali-
fied personnel before operating it any further.
4.Cleaning
Before cleaning, unplug the TV set from the
wall outlet. Do not use liquid or aerosol clean-
ers. Use soft and dry cloth.
5. Ventilation
The slots and openings on the TV set are in-
tended for ventilation and to ensure reliable
operation.Topreventoverheating,theseopen-
ings must not be blocked or covered in any-
way.
6. Heat and Flames
The set should not be placed near to open
flames and sources of intense heat, such as
anelectricheater. Ensurethatnonakedflame
sources, such as lighted candles, are placed
ontopoftheTV.Batteriesshallnotbeexposed
to excessive heat such as sunshine, fire or
the like.
7. Lightning
In case of storm and lightning or when going
on holiday, disconnect the power cord from
the wall outlet.
8. Replacement Parts
Whenreplacementpartsarerequired,besure
the service technician has used replacement
parts which are specified by the manufacturer
or have the same specifications as the origi-
nal one. Unauthorized substitutions may re-
sult in fire, electrical shock, or other hazards.
9. Servicing
Please refer all servicing to qualified person-
nel. Do not remove the cover yourself as this
may result in an electric shock.
10.WasteDisposal
Instructions for waste disposal:
•Packagingandpackagingaidsarerecyclable
and should principally be recycled. Packag-
ing materials, such as foil bag, must be kept
away from children.
•Battery, including those which are heavy
metal-free, should not be disposed of with
household waste. Please dispose of used
battery in an environmentally sound manner.
Find out about the legal regulations which
apply in your area.
•Cold cathode fluoresant lamp in LCD PANEL
contains a small amount of mercury; please
32815_1899SUK_MB22_UK_IDTV.p65 07.09.2007, 15:142

-3-
follow local ordinates or regulations for dis-
posal.
11. Disconnecting the Device
The mains plug is used to disconnect TV set
from the mains and therefore it must remain
readily operable.
12. Headphone Volume
Excessive sound pressure from earphones
and headphones can cause hearing loss.
13. Installation
To prevent injury, this device must be securely
attached to the wall in accordance with the
installation instructions when mounted to the
wall (if the option is available).
"TheLCDpanelisveryhightechnologyprod-
uctwithaboutamillionthinfilm transistors,
givingyoufinepicturedetails.Occasionally,
a few non-active pixels may appear on the
screenasafixedpointofblue,greenorred.
Pleasenotethat thisdoesnotaffecttheper-
formanceofyourproduct."
“DONOTLEAVEYOURTVATSTANDBYOR
OPERATING WHEN YOU LEAVE YOUR
HOUSE.”
Dear Customer,
This apparatus is in conformance with the valid European directives and
standards regarding electromagnetic compatibility and electrical safety.
European representative of Victor Company
of Japan, Limited is:
JVC Technology Centre Europe GmbH
Postfach 10 05 52
61145 Friedberg
Germany
32815_1899SUK_MB22_UK_IDTV.p65 07.09.2007, 15:143

-4-
ImportantInstruction
For your own safety read following instruction carefully before attempting to connect this unit to
the mains supply.
MAINS(AC)OPERATION
The wires in this mains lead are coloured in
accordance with the following code :
BLUE-NEUTRAL
BROWN-LIVE
As the colours of the wires in the mains lead
of this appliance may not correspond with
the coloured markings identifying the
terminals in your plug, proceed as follows:
The wire which is coloured blue must be
connected to the terminal which is marked
with the letter N or coloured black.
The wire which is coloured brown must be
connected to the terminal which is marked
with the letter L or coloured red.
No connection is to be made to the earth
terminal of the plug.
If a 13 Amp (BS 1363) Plug is used a 5Amp
Fuse must be fitted, or if any other type of
Plug is used a 5 Amp Fuse must be fitted,
either in the Plug of Adaptor, or on the
Distribution Board.
CAUTION
TO PREVENT ELECTRIC SHOCK DISCONNECT
FROM THE MAINS BEFORE REMOVING COVER.
NO USER SERVICEABLE PARTS INSIDE. REFER
SERVICINGTO QUALIFIED SERVICEPERSONNEL.
SAFETYPRECAUTION
THISEQUIPMENTMUSTBEDISCONNECTEDFROM
THE MAINS WHEN NOT IN USE. DO NOT ALLOW
THISUNITTOBEEXPOSEDTORAINORMOISTURE.
GREEN
&
YELLOW
(Earth)
FUSE
BLUE
(Neutral)
BROWN
(Live)
32815_1899SUK_MB22_UK_IDTV.p65 07.09.2007, 15:144

-5-
WARNING
• Do not allow children to hang from the TV, place their
elbows on the TV or lean against the TV. Doing so may
cause the TV to fall over and lead to injuries.
[European Union]
This symbol indicates that the electrical and electronic equipment should not be disposed as
general household waste at its end-of-life. Instead, the product should be handed over to the
applicable collection point for the recycling ofelectrical and electronic equipment for proper
treatment, recovery and recycling in accordance with your national legislation.
By disposing of this product correctly, you will help to conserve natural resources and will
help prevent potential negative effects on the environment and human health which could
otherwise be caused by inappropriate waste handling of this product. For more information
about collection point and recycling of this product, please contact your local municipal
ofce, your household waste disposal service orthe shop where you purchased the product.
Penalties may be applicable for incorrect disposal of this waste, in accordance with national
legislation.
If you wish to dispose of this product, please visit our web pagewww.jvc-europe.comto
(Business users)
obtain information about the take-back of the product.
If you wish to dispose of this product, please do so in accordance with applicable national
[Other Countries outside the European Union]
legislation or other rules in your country for thetreatment of old electrical and electronic
equipment.
Attention:
This symbol is only
valid in the European
Union.
InformationforUsersonDisposalofOldEquipment
CAUTION:
• Securely plug the power cord into anAC outlet to avoid electric shock or damage to the unit.
• Make enough room for inserting and removing the power plug. Place the TV as close to the
outlet as possible. The main power supply for this TV is controlled by inserting or removing
the power plug.
• The power switch on the right side of the TV does not fully isolate the TV from the main
power supply.
• If youdo not use this TV for a long period of time, be sure to disconnect thepower plug from
theACoutlet.
32815_1899SUK_MB22_UK_IDTV.p65 07.09.2007, 15:145

-6-
Wheretoinstall
WARNING
•OnlyuseaVESA200x400compatiblemountingunit(optional)wheninstallingthisTVonthe
wall.
• Make sure the TV is installedon the wallbya skilledinstaller.
Locatethe TV away from direct sunlightand strong lights, soft, indirect lighting is recommended
for comfortable viewing. Place on a sturdy platform, the mounting surface should be flat and
steady, it should then be secured to the wall with a sturdy tie using the hook on the back of the
TV, this will prevent it from falling over. Use curtains or blinds to prevent direct sunlightfalling on
the screen.
A floor and table topstand are available forthis television, orand angledbracketwhich enables
the TV to be wall-mounted.
The LCD display panels are manufactured using an extremely high level of precision technol-
ogy, however sometimes some parts of the screen may be missing picture elements or have
luminous spots. This is not a sign of a malfunction.
Make sure the TV is located in a position where it cannot be pushed or hit by objects, as
pressure will break or damage the screen.
Leave offthe cover of the rear of the TV when mounting the TV on the wall.
Distance Recommendation
Install the TV on solid horizontal surface such as a table or desk.
For ventilation, leave a space of at least 10 cm free all around the set. To prevent any fault and
unsafe situations, please do not place any objects on top of the set.
32815_1899SUK_MB22_UK_IDTV.p65 07.09.2007, 15:146

-7-
Important Information
Please take note
EXCLUSION CLAUSE
JVC shall under no circumstances be liablefor loss and/ordamage to the product caused
by:
•fire;
• earthquake;
• accidental damage;
• intentional misuse of the product;
• use of the product in improper conditions;
• loss and/or damage caused to the product whilst in the possession of a third party;
• any damage or loss caused as a result of the owner’ s failure and/or neglect to followthe
instructions set out in the owner’s manual;
• any loss or damage caused directly as a result of misuse or malfunction of the product
when used simultaneously with associated equipment;
Furthermore, under no circumstances shall JVC be liable for any consequential loss and/
or damageincluding but not limited to the following, loss of profit, interruption of business,
the loss of recorded data whether caused during normal operation or misuse of the
product.
WARNING!NEVERLEAVEA
STATIONARY IMAGE ON THE
SCREEN
IfstationaryimagesgeneratedbyTELETEXT,
CHANNEL IDENTIFICATION LOGOS,
COMPUTERDISPLAYS,VIDEOGAMES,ON
SCREEN MENUS, etc. are left on the TV
screen for any length of time, they could
become permanently ingrained.
Ifyouuseyour televisiontodisplaycompletely
still images, or moving pictures which have a
permanent still image superimposed e.g.
broadcast network logos, it is always
advisabletoreduceBOTHthebrightnessand
contrast settings.
Care and disposal
Cleaningthescreenandcabinet...
Turnoffthepower,cleanthescreenand
cabinet with a soft, dry cloth. We
recommend that you do not use any
proprietary polishes or solvents on the
screen or cabinet as this may cause
damage.
Disposal...
When the set reaches the end of its
useful life please dispose of it in
accordance with Local Government
Regulations or at a recycling centre.
32815_1899SUK_MB22_UK_IDTV.p65 07.09.2007, 15:147

- 8 -
Remote Control Buttons
/ I = (Standb ) button
TV / VCR / DVD Switch
Number buttons
AV button
Colour button
MENU = Menu button
= Cursor Up button
OK button
= Cursor Right button
BACK = Back button
= Volume - /+ buttons
GUIDE button
TV/RADIO = No Function
= SUBTITLE button
I/II = No Function
= H per Sound On/Off button
ZOOM = Zoom button
buttons
DTV / VCR / DVD / Teletext Control buttons
P buttons
= Cursor Down button
= Teletext button
= Cursor Left button
TV / DTV button
= Information Button / T-V Link in
Program Menu
= Mute button
3
0(18
%$&.
7230(18
79
9
&
5
'
9
'
7
9
$9
2.
79'79
=220
50&6
ENG-JVC (LT-32DY8ZJ)-32815W-RC RM C1899S-MB22-UK IDTV-(10052537)-50114839.p65 18.09.2007, 15:328

-9-
Video Input
Audio Inputs (L/R)
Headphone
Audio Line Outss
SPDIFF (DigitalAudio Out)
EXT-6AudioInput
Antenna
Component Video (Y, Pb, Pr) Inputs (EXT-3)
AudioInputs L / R (EXT-3 / 5)
Scart 1
Scart 2
For service use only
HDMI Inputs
CI (Common Interface) Slot
PeripheralEquipmentConnections
EXT-4
EXT-3 EXT-1 EXT-2
EXT-6(HDMI2)
EXT-5(HDMI1)
32815_1899SUK_MB22_UK_IDTV.p65 07.09.2007, 15:149

-10-
FRONTVIEW
REARVIEW
LCDTVandControlButtons
Remote Control Sensor
Power Lamp
C
O
M
M
O
N
I
N
T
E
R
F
A
C
E
SIDEVIEW
TV / AV
MENU/OK
P
+
-
TV/AV
MENU/OK
PROGRAMME UP
PROGRAMME DOWN
VOLUME UP
VOLUME DOWN
POWER SWITCH
Note: If the power lamp is unlit,
press the power switch.
32815_1899SUK_MB22_UK_IDTV.p65 07.09.2007, 15:1410

-11-
Features
• Remote controlled colour television.
• DTV(Digital terrestrial broadcasting (DBV-T))
• 100 programmes from VHF, UHF bands or cable channels can be preset.
• It can tune cable channels.
• Connecting HDMI Devices is available.
• Controlling the TV is very easy by its menu driven system.
• It has 2 Scart sockets for external devices (such as video, video games, audio set, etc.)
• Stereo sound system (German+Nicam).
• Full function Teletext.
Fastext (1000 Pages), TOP text.
• Headphone connection.
• Direct channel access.
•A.P.S. (Automatic Programming System).
• All programmes can be named.
• Forward or backward automatic tuning.
• Sleep timer.
• Child Lock.
• Automatic sound mute when no transmission.
• NTSC Playback.
•AV in is available.
• When no valid signal is detected, after 5 minutes the TV switches itself automatically to stand-
by mode.
• PLL (Frequency Search).
• 3D Comb Filter (Optional).
•Audio Outs.
32815_1899SUK_MB22_UK_IDTV.p65 07.09.2007, 15:1411

-12-
GettingStarted
Follow Step 1 to 7 to set up your TV:
Step 1: Checking the accessories supplied
• Remote control unit x 1
•AA/R6batteryx2
Step 2: Inserting batteries
• Remove the battery cover located on the back of the remote controlby gently pulling upwards
from the indicated part.
• Insert twoAA/R6 drycell or equivalent type of batteries inside.
• Replace the battery cover.
NOTE: Remove the batteries from remote control when it is not to be used for a long
period.Otherwise it can be damaged due to any leakage of battery.
Old batteries must be disposed in a designated area. If performance of the remote control
reduces, replace the batteries with thecorrect type. Do not combine a used, old battery ora new
one or mixed battery types. Remove dead batteries immediately to prevent acid from leaking
into the battery compartment.
32815_1899SUK_MB22_UK_IDTV.p65 07.09.2007, 15:1412

- 13 -
The stan can be remove by loosing the screws with a screw river when mounting the TV on
a wall.
Sprea a soft cloth on a flat table an then place the TV on the cloth with the screen facing
ownwar s when you remove the stan .
Leave off the cover over the CI slot of the TV before mounting the TV on the wall.
Step 3: Connecting the Aerial
It is necessary to connect aerial to watch TV. You can connect the aerial to your TV as illustrate
below.
Please see Peripheral Equipment Connections section for connections to other evices.
&RQQHFWWKHDHULDO
$(5,$/
ENG-JVC (LT-32DY8ZJ)-32815W-RC RM C1899S-MB22-UK IDTV-(10052537)-50114839.p65 14.09.2007, 09:3513

-14-
InitialSettings
IftheTVwillnotbeturnedon,pressthestandby
button on the remote control.
When theTV is first turned on, it goes into the
initial settings mode. Follow the instructions
on the screen display to make the initial set-
tings.
Note: If the TV does not gointo the initial settings mode this
is because your TV has already been turned on for the first
time. (Perform the initial settings with “INSTALLATION”
(see page 25) in the DTV menu and “AUTOSTORE” (Ana-
logue) (see page 30) in the PROGRAM menu.)
Because this is the first time that DTV(Digital
terrestrial broadcasting (DVB-T)) has been
used, there are no channels stored in the
memory and below information will be dis-
played on the screen.
1. Press the [OK] button to start the auto-
matic search.
PR List Empty. Start automatic search
.
OK
The DTV will automatically tune to the UHF
transmission channels 21 to 68 looking for
digital terrestrial TV broadcasts and display-
ing the names of channels found. This pro-
cess will take about five minutes. To cancel
searching, you can press MENU button atany
time during the process.
HINT: Depending on the reception conditions
in your particular area, you may find that the
list of channels found includes one or more
repeated names. This is because the receiver
may detect and store some channels, includ-
ing those it cannot receive clearly, from adja-
centareasalongsidethestrongchannelsfrom
a transmitter nearby. This is not a problem
and theweaker channels can be deleted from
the receiver later, as described in - Edit PR
List section.
MENU
When the automatic search has finished,
theEDITPRLISTmenuappears.
• If you want to, you can now edit the
programme numbers (PR) using the EDIT
PR LIST function. For details, see “Edit PR
List” section.
• If you do not want to edit programme num-
bers (PR), go to the next step.
2.PresstheMENUbutton.
The EDIT PR LISTmenu disappears and the
following message appears.
Do youwant to search for
analogue channels?
Yes
No
If you select “Yes”,Analogue terrestrial broad-
castingAUTOPROGRAMwindowisdisplayed.
When you cancel the AUTO PROGRAM, se-
lect country setting then press the BLUE but-
ton.
Country Options are available as following:
D(Germany),DK (Denmark), E (Spain), F
(France), SF (Finland), UK (United Kingdom),
GR(Greece),HUN(Hungary),I (Italy),N(Nor-
way), NL (Netherlands), P (Portugal), PL (Po-
land), S (Sweden),SL (Slovenia),SK (Slovak),
TR(Turkey),EIR(Ireland),NIR(NorthIreland),
LUX (Luxemburg), CRO (Croatia), BL (Bul-
garia), ? (Other), A(Austria), B (Belgium), CH
(Switzerland), CZE (Czech).
32815_1899SUK_MB22_UK_IDTV.p65 07.09.2007, 15:1414

-15-
Country
Language
Auto Program
UK
Ok
Cancel
PLEASE CHECK ANTENNA CABLE
AUTO. PROGRAMMING SYSTEM
PresstheBLUEbuttontocancelAPSifyou do
not want to delete your existing programme
list.
To continue APS, first select the country by
pressing
/
button, next press / button
to move the language menu for selecting the
language by pressing
/
button, and then
press the RED button.
UK
P 03 - C 04
63.75 MHz
6%
63.75 MHz
Cancel
APS is running...
After initial aps is finalized, a programme list
will appear on the screen. In the programme
list you will see the programme numbers and
names assigned to the programmes.
P02 BBC 2
P03 ITV
P04 CH4
P05 CH5
P06 ----
P07 ----
P08 ----
P09 ----
P10 ----
P11 ----
P12 ----
P13 ----
P14 ----
P15 ----
P16 ----
P17 ----
P18 ----
P19 ----
P20 ----
Name
Delete
Insert
APS
P01 BBC 1
Program Table
If you do not accept the locations and/or the
programme names of programmes, you can
changetheminProgramtable.Fordetails see
the Program table section.
IfyoudonothaveaT-VLINKcompatibleVCR,
press MENU button to exit the menu.
If you have a T-V LINK compatible VCR con-
nected to the EXT-2 terminal, press “ ” but-
ton to display T-V LINK menu. Then follow the
operating procedure “Downloading data to
VCR” in the following T-V LINK section.
T-V LINK
When a T-V LINK compatible VCR connected
to the EXT-2 terminal on the TV, it is easier to
set up the VCR and to view videos. T-V LINK
uses the following features:
To use T-VLINK functions
A “T-V LINK compatible VCR” means a JVC
videocassetterecorderwiththeT-VLINKlogo,
or with one of the following logos. For details
see your VCR instruction manual.
“Q-LINK”(Atrademark ofPanasonicCorpora-
tion)
“Data Logic” (A trademark of Metz Corpora-
tion)
“Easy Link” (A trademark of Philips Corpora-
tion)
“Megalogic” (A trademark of Grundig Corpo-
ration)
32815_1899SUK_MB22_UK_IDTV.p65 07.09.2007, 15:1415

-16-
“SMARTLINK” (AtrademarkofSonyCorpora-
tion)
OnlyVCRequipmentsarecorresponded with
"T-VLINK".
Downloading datatoVCR:
The VCR will automatically download the reg-
istered data on the TV channels from the TV.
This means you do not need to set up the
programme channels on your VCR manually.
The “T-V LINK” menu will be displayed when
you press the “ ” button while PROGRAM
menu is displayed.
(
Continue
Download TV -> Device
Cancel
IfyoudonothaveaT-VLINKcompatibleVCR,
select Cancel and press “ ” or “OK” buttonto
exit the menu.
Select Continue and press “ ” or “OK” button
to start downloading data to VCR. “TRANS-
FER” is displayed in the menu.
Transfer...
Download TV -> Device
If “Feature not available...” is displayed, down-
load was not performed correctly. Before try-
ing to download again, check that:
• The VCR power is turned on.
• The VCR is T-V LINK compatible.
• The VCR is connected to EXT-2.
• The scart cable is fully wired.
DirectREC:
You can easily record to VCR the images that
you are watching on the TV. For details, read
the manual for your VCR. Use your VCR con-
trols you can not carry out Direct REC using
yourTVcontrol.
When you press the following buttons ( / I,
,TV/DTV, ,AV,MENU, (SUBTITLE),
GUIDE,BACK, / ,numberbuttons)
during recording, a message appears ask-
ing if you want to stop recording or not. Press
OKbuttonto stoprecordingor BLUEbuttonto
continue recording.
DonotturntheTVoffinthefollowingcases:
• When recording images from an external
device connected to TV (For example
camcorder).
• When recording a TV channel after it has
been unscrambled on a decoder.
• When recording a TV channel by using the
TV’s output because the VCR’s own tuner
can not properly receive that channel.
• When recording DTV
TV autopower on/VCR image view:
WhentheVCRstartsplaying,theTVautomati-
cally turns on and images from EXT-1 and
EXT-2 appear on the screen.
ThisfunctiondoesnothappenifyourTV’smain
power is turned off. Set your TV’s main power
to on (StandByMode).
BasicOperations
You canoperate your TV using both the re-
mote controland TVbuttons.
Turning the TV On/Off
• Turn on the power switch on the right side of
theTV.
• The power lamp lights red and the TV
switches to standby mode.
• Press the STANDBY button on the remote
control handset.
• The power lamp lights green and the TV
switches on.
Note:
• You can also press the / button
on the TV to turn the TV on from the standby
mode.
32815_1899SUK_MB22_UK_IDTV.p65 07.09.2007, 15:1416

-17-
•IfyouturnthepowerswitchoffwhentheTVis
on,you canswitch on theTV again by press-
ing the power switch.
Turning the TV Off
• Press the STANDBY button on the remote
control unit.
• The TV switches to standby mode and the
power lamp lights red.
• Press the power switch on the right side off
theTV.
• The TV turns off and main power lamp goes
off.
Note:
• The power switch does not fully isolate the
TV from the main power supply. To turn the
main power supply off completely, discon-
nect the power plug from theAC outlet.
YoucanoperateyourTVusingboththeremote
control and the buttons on the TV.
Operationwiththe buttonsonthe TV
VolumeSetting
• Press “ -” button to decrease volume or
“+” button to increase volume, so a vol-
ume level scale (slider) will be displayed at
the middle of the bottom on the screen.
Programme Selection
• Press “ ” button to select the next pro-
gramme or “ ” button to select the previ-
ous programme.
Switchinginput mode
• Pressing TV/AV button will change the input
mode.
Entering Main Menu
•PressMENU/OK button to enter Mainmenu.
In the Main menu select submenu using
“ ” or “ ” button and enter the sub-
menuusing“ -”or“ +”button.To learn
the usage of the menus, refer to the Menu
System sections.
Operation with Remote Control
The remote control of your TV is designed to
control all the functions of the model you se-
lected. The functions will be described in ac-
cordance with the menu system of your TV.
Functions of the menu system are described
in following sections.
VolumeSetting
Press “ +” button to increase volume.
Press “ -” button to decrease volume.
A volume level scale (slider) will be displayed
in the middle at the bottom of the screen.
40
Programme Selection (Previous or next
programme)
• Press “ ” button to select the previous
programme.
• Press “ ” button to select the next
programme.
Programme Selection (direct access):
Press digit buttons on the remote control to
select programmes between 0 and 9. TV will
switch to the selected programme. To select
programmes between 10 - 99, press the digit
buttons consecutively which programme you
want to select (eg. for programme 27, first
press 2 and then 7). When it is late to press
second digit button only the first digit
programme will be displayed. The limit of the
delay time is 3 seconds.
Example: PR6 press 6, PR12 press 1
and 2.
Press directly the programme number to
reselect single digit programmes.
Hint: The channel list numbers are assigned by the broad-
casters. Because not all channels are broadcast free-to-air
and stored by the receiver, the channel list numbers do not
run continuously. The fifteenth channel in the list, for ex-
ample, may not be channel number 15 but channel number
17.
Hint: If you enter a number which does not correspond to a
stored channel, the next valid channel number is selected
instead. If you enter a number greater than the highest
numbered channelin thechannel list, the DTV will selectthe
last channel in the list.
32815_1899SUK_MB22_UK_IDTV.p65 07.09.2007, 15:1417

-18-
Operatingwhilewatching
DTV
Pressing the TV/DTV button at any time while
watching television programmes will switch
the TV set between displaying the digital ter-
restrial television broadcasting and its nor-
mal analogue broadcasting.
It is also used to switch to the last watched
DTV from the EXT mode. For example; if a
DVD player is connected witha SCART cable
and powered on, then the DTV will automati-
cally switch to EXT mode. The DTV will switch
to the last watched DTV if DVD player is
switched off or TV/DTV button is pressed.
EVERYDAY OPERATION
WhileusingtheDTVto thefull,therearegreat
many buttons to use in different situations.
Many of the menu screens displayed by the
DTV have reminders as to which button do
what, at the base of the screen. In addition,
manyscreenshavefurtherhelpavailablewhich
is displayed when the button is pressed,
as prompted at the bottom of the screen.
INFORMATIONBANNER
Whenever you change channel, using the
/ buttons or the number buttons,
an information banner is displayed at the bot-
tom of the screen. This will remain on the
screen for approximately three seconds. The
information banner can also be displayed at
any time while watching TV by pressing the
buttononthe remote control. Pressingthe
button again removes the banner..
Hint: Not all channels broadcast the programme
data. If the name and times of theprogramme isnot
available then “No Information” is displayed in the
information banner.
Theinformationbannergivesanumberoffacts
on the channel selected and the programmes
on it. The name of the channel is displayed,
along with its channel list number and an in-
dication of the strength of the signal received
on this tuning channel.
The name and the start and finish time of the
programme currently showing on the selected
channel are given, and the current time.
Icons are also displayed in the information
banner if this channel is a favourite channel.
favorite channel icon
If the selected channel is locked, you must
enter the correct four digit code to view the
channel.
ELECTRONICPROGRAMMEGUIDE(EPG)
Another wayof selecting a channel is withthe
electronic programme guide, or EPG. Like the
Channel List, the EPG screen displays a list
of the stored channels along with information
on what programmes are being broadcast.
Using the Electronic Programme Guide
EPG can display 8 days programme guide,
but in some areas only current and next
programme guide is displayed.
By using EPG, you can selectthe channel and
setthe reminderfor theprogramme which you
do not want to miss.
To display the EPG screen, press the GUIDE
button while watching DTV.
You can exit the EPG screen by pressing the
GUIDE button again or the MENU button.
32815_1899SUK_MB22_UK_IDTV.p65 07.09.2007, 15:1418

-19-
Current date and time
Channel listings
Selected date and time
Programme name and broadcast time
Brief description of the programme
• The programme name, broadcast time and
a briefdescription ofthe programme are dis-
played for the programme chosen from the
channel listings.
ChoosingChannel
1.Press“ ”or“ ” buttonstochoosethe
channel.
2.PressOKbutton.
The selected channel is displayed.
Programme Reminders
You can easily set the reminder so that you
willnotmisstheprogrammeyouwanttowatch.
1.Press“ ”or“ ”buttonstochoosethe
channel.
2. Press the Red and Green buttons to
changethetimeandYellowandBlue but-
tonstochangethedate.
3.Press“ ”or“ ”buttonsandthen“ ”
or “ ” buttons to choose the
programme you want to watch.
4. Pressthe OKbutton.
The reminder icon will be displayed on the
right side of the chosen programme name
and the setting is completed.
When the TV is being watched, it automati-
cally changes to the channel of the reminded
programme when the start time of the sched-
uled programme is reached.
• This function does not work while you are
watching analogue TV, peripheral equip-
ments or when the TV is in standby mode or
when the main power is switched off.
To cancel the remindersetting
Display the EPG screen, choose a
programme which has the reminder icon, and
press the OK button.
Note:
• Reminder events are ignored if any timer
event is active at that time.
• You can not set the reminder for the
programme which has already started.
• “No Information” is displayed for the
programme or channel which doesnot have
anyinformation.Youcannotsetthereminder
for these programmes.
DISPLAYINGTHESUBTITLES
With DTV, some programmes are broadcast
withsubtitles.Subtitlescanbedisplayedwhen
watching these programmes.
• Press the (SUBTITLE) button when
watching DTV.
“Subtitle ON” appears at the top-left of the
screenand, ifprogramme has subtitles, the
subtitles are displayed.
•Whenthe (SUBTITLE)buttonispressed
again, “Subtitle OFF” appears and the sub-
titles disappear.
Subtitle ON
Subtitle OFF
DIGITAL TELETEXT
With DTV, in addition to pictures and sound,
you can also watch digital teletext.
Digital teletext is sometimes broadcast at the
same time as normal broadcasting.
1. Press the button.
The digital teletext information appears.
2. Operate it with the colour buttons,
/ / / buttons andOKbutton.
The operation method may differ depending
on the contents of the digital teletext.
Follow the instructions displayed on digital
teletext screen.
• When “Press SELECT” or similar message
appears on the screen, press the OK button.
• When the (Text) button is pressed, the
TV returns to television broadcasting.
32815_1899SUK_MB22_UK_IDTV.p65 07.09.2007, 15:1419
Table of contents
Other JVC LCD TV manuals

JVC
JVC InteriArt LT-17C88SJ User manual

JVC
JVC DynaPix LT-32DX7SJ User manual

JVC
JVC LT-24VH4905 User manual

JVC
JVC LT-26DE1BJ/AX User manual

JVC
JVC LT-32HG25J User manual

JVC
JVC LT-20BW7BW User manual

JVC
JVC InteriArt 0205MKH-VT-VT User manual

JVC
JVC LT-Z26S2 User manual

JVC
JVC RM-C1305-1H User manual

JVC
JVC LT-42P300 User manual

JVC
JVC BlackCrystal JLC-42BC3000 User manual

JVC
JVC LT-40X776/S User manual

JVC
JVC LT-32P300 - 31.5" LCD TV User manual

JVC
JVC LT-32G4 User manual

JVC
JVC LT-55VAO9235 User manual

JVC
JVC LT-19A1 User manual

JVC
JVC LT-32FXD7 User manual

JVC
JVC DynaPix LT-42DV8BG User manual

JVC
JVC LT-26DF7BC User manual

JVC
JVC LT-26DR7BU User manual