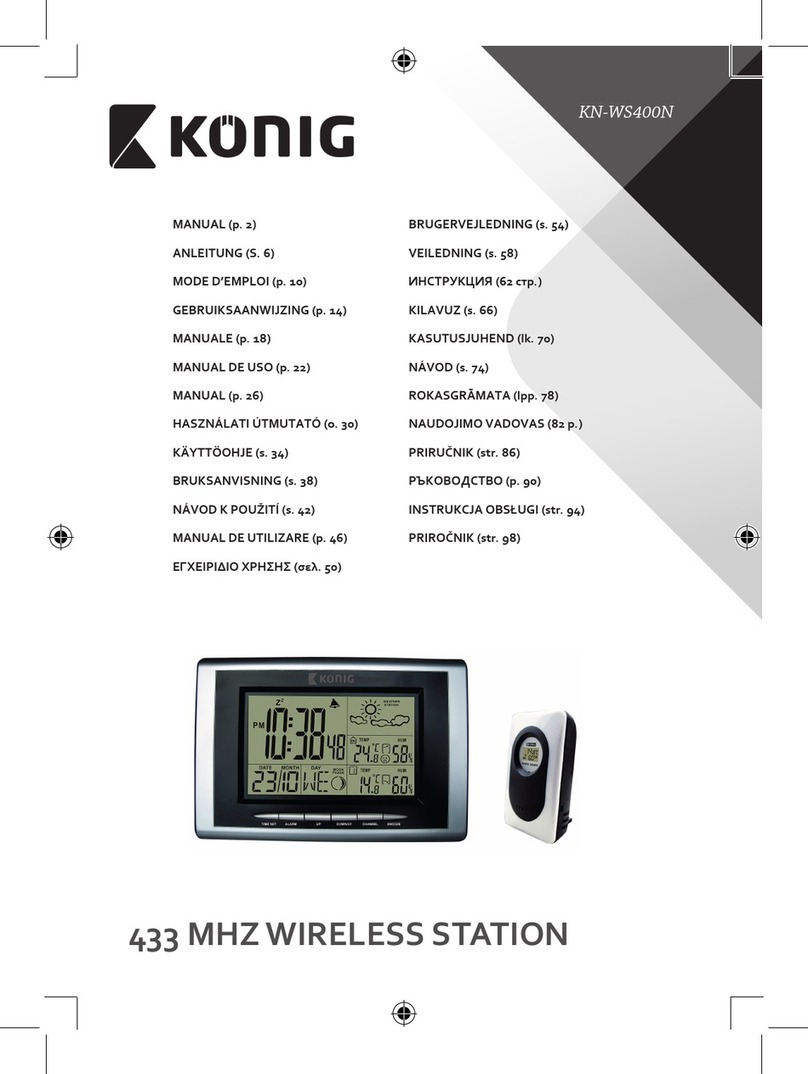
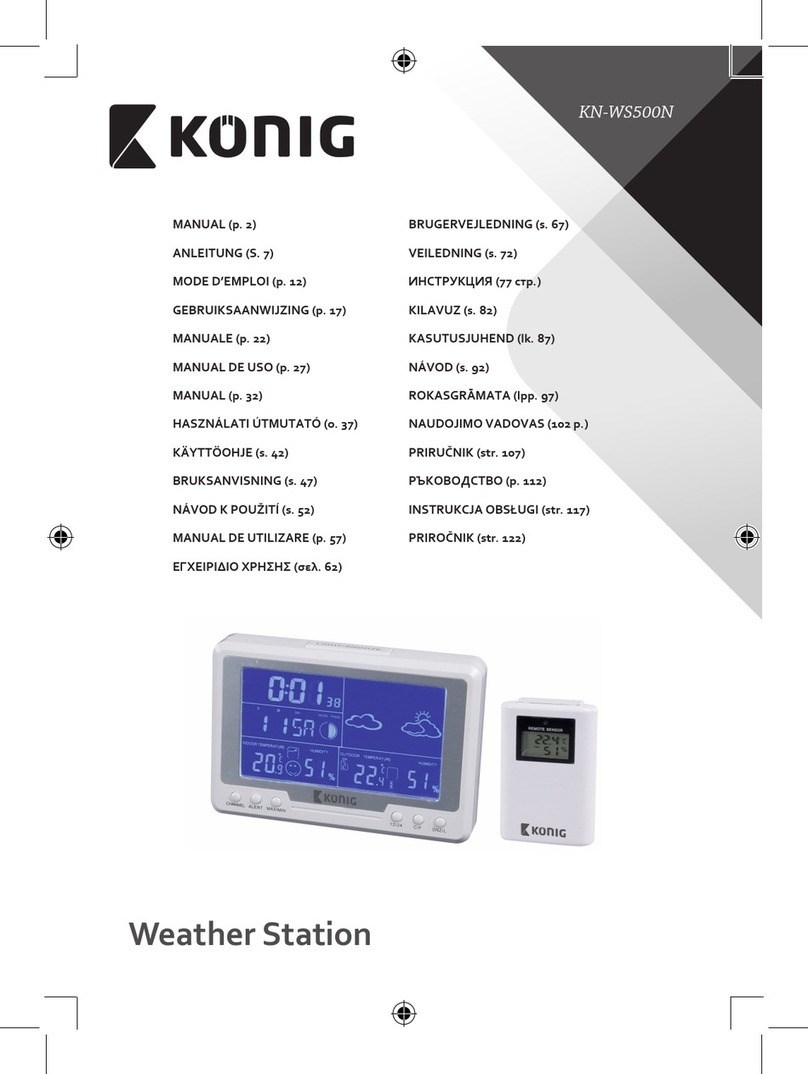
König KN-WS510N User manual

KN-WS510N
MANUAL (p. 2)
ANLEITUNG (S. 11)
MODE D’EMPLOI (p. 20)
GEBRUIKSAANWIJZING (p. 29)
MANUALE (p. 38)
MANUAL DE USO (p. 47)
MANUAL (p. 56)
HASZNÁLATI ÚTMUTATÓ (o. 65)
KÄYTTÖOHJE (s. 74)
BRUKSANVISNING (s. 83)
NÁVOD K POUŽITÍ (s. 92)
MANUAL DE UTILIZARE (p. 101)
ΕΓΧΕΙΡΙΔΙΟ XPHΣHΣ (σελ. 110)
BRUGERVEJLEDNING (s. 119)
VEILEDNING (s. 128)
ИНСТРУКЦИЯ (137 стр.)
KILAVUZ (s. 146)
KASUTUSJUHEND (lk. 155)
NÁVOD (s. 164)
ROKASGRĀMATA (lpp. 173)
NAUDOJIMO VADOVAS (182 p.)
PRIRUČNIK (str. 191)
РЪКОВОДСТВО (p. 200)
INSTRUKCJA OBSŁUGI (str. 209)
PRIROČNIK (str. 218)
Weather Station

ENGLISH
2
Unit Overview
Press [SET] to enter setting mode.
Press [ALARM] to enter alarm mode.
In setting mode, press [A, MAX/MIN, °C/°F] for up-direction.
In normal clocking mode, press [A, MAX/MIN, °C/°F] to cycle
through the display for indoor and outdoor temperature, indoor
humidity, maximum, minimum and current value.
Press and hold [A, MAX/MIN, °C/°F] for 2 seconds to change to
Fahrenheit (°F) or Celsius (°C).
In setting mode, press [V, CHANNEL, CLEAR] for down-direction.
In normal clocking mode, press [V, CHANNEL, CLEAR] to cycle
through the display for outdoor temperatures for Channel 1,
Channel 2 and Channel3.
Max/Min value of indoor & outdoor temperature display, press [V,
CHANNEL, CLEAR] to clear the Max/Min record.
In normal clocking mode, press to adjust the backlight.
When the alarm is sounding, press to enter snooze.
ON/OFF radio
In radio mode, press [+] for up-direction, press [–] for down-
direction
Preset +/–
Volume control

ENGLISH
3
LCD Display
1. Weather forecast, moon phase reading, Comfort Level.
2. Time display (12/24H optional).
3. Date display, display range: January 1, 2011 to December 31, 2099.
4. Dual-alarm clock, the week and snooze alarm setting selected.
5. Indoor humidity.
6. Outdoor temperature display, and trends for the Max/Min recorded.
7. 433 MHz Wireless frequency to receive 3 channels of outdoor temperature.
8. Indoor temperature display, and trends for the Max/Min recorded.
9. Radio (PLL radio, FM frequency display).
Outdoor Sensor
1. LCD display
2. Hole for wall mounting
3. Battery compartment
4. Iron holder

ENGLISH
4
GETTING STARTED
BACK UP POWER
The 3x 1.5 V AAA batteries can act as a backup power supply for the main unit.
1. Remove the battery casing.
2. Insert the batteries, matching the polarities.
3. Press RESET after each battery changed.
NOTE: Do not use rechargeable batteries. We recommend that you use
alkaline batteries with this product for longer usage and lithium batteries in
temperatures below freezing.
AC/DC adapter
The adapter powers the unit. Plug the adapter into a socket, making sure the
adapter is not obstructed and is easily accessible by the unit.
To completely disconnect from the power, the adapter should be disconnected
from the main unit.
NOTE: The main unit and adapter should not be exposed to wet conditions. No
objects lled with liquid, such as vases, should be placed on the main unit or
adapter.
Set outdoor sensor
1. Remove the screws from the battery casing.
2. Insert the 3 AAA batteries, matching the polarity (+/–).
3. Select a channel: CH1/CH2/CH3.
4. Replace the battery casing and secure the screws.
5. Select the temperature, units: °C/°F.
6. Place the outdoor sensor less than 20 m from the main unit, and the sensor
should be positioned in an open area away from trees or other obstructions.
QUICK USER GUIDE
CLOCK/CALENDAR
Date setting
• Press [SET] for setting data, also the year, month and day will be ashing.
• Press UP or DOWN to change values in settings. Hold for more than two
seconds to adjust, the frequency will be 8 Hz.

ENGLISH
5
Time setting
• Press [SET] the set the clock.12H will be ashing, press UP or DOWN to
change to 12/24HR format.
• Press [SET] to set the time mode. The hour will be ashing, press UP or
DOWN to change in the time settings. Hold it for more than two seconds to
adjust; the frequency will be 8 Hz.
• Press [SET] to nish the time settings.
NOTE:
1) In date and time setting mode, it will automatically return to time mode, if
no key is pressed for 1 minute, and the settings used will be the last time
setting, the week will automatically adjust with the date change.
2) The order of the time settings is: year, month, day, 12/24HR format, hour,
minute.
ALARM CLOCK
To set the alarm
Dual-alarm function, you can set a daily alarm time, and the alarm tone.

ENGLISH
6
Press [Alarm]
Press [Alarm]
Hour ash
press AV
Press [Set] and enter
to dock mode
Press [Set] and enter
to minute mode
Press [Set],
press AV to
choose date
Press [Set],
enter music
mode
Press [Set] and enter to day
mode will ash
Press AV to switch the display.
The alarm symbol displayed
means alarm is open
Press AV to choose
4kinds of “BB” sound
Press [RADIO] to enter
radio mode
“BB” sound
asalarm
Radio as
alarm
Press [Set] to nish
Press to select the
radio saved label
Minute ash,
press AV
display
display
Note:
1) If the alarm clock is not set, --:-- is displayed, if the alarm clock is set, the
display will show the alarm time and alarm symbols. Press the [ALARM] key
to continue, the alarm can be switched on and o; if in the o mode, it will
display --:--.
2) In the alarm setting mode, if 1 minute passes without pressing the button, it
will automatically return to the clock, and the current setting will take eect.
3) If the alarm clock is a radio model, the alarm tone will be the last used radio
frequency, if the radio has not been listened to, when the alarm time is
reached, it will automatically turn on the radio, if there is no key pressed,
after 20minutes the radio will automatically switch o. You can also press
the [RADIO] button to turn it o.

ENGLISH
7
SNOOZE
• If choose Buzzer as alarm sound
a) When the alarm is ringing, press the [SNOOZE] button, the alarm will turn
o after 5 minutes, then the alarm will sound again every other 5minutes
and repeat 5 times, then stop.
b) When the alarm is ringing, if any key is no pressed, it will turn o after
sounding for 1 minute, then the alarm will sound again every other
1minute and repeat 5times, then stop.
• If choose Radio as alarm sound
When the alarm is ringing, the radio sound will continue for 20 minutes and
then automatically turn o. You can press [Radio] to turn o the alarm.
• Others
a) When the alarm is ringing, press any key except [SNOOZE], it will be turn o
the alarm.
b) In snooze mode, if you have entered setting mode, then it will exit snooze
mode.
• When the alarm is sounding, it will be o no key pressed or pressing.
• When the alarm is sounding, if [SNOOZE] is pressed it will sound again after
5minutes and there will be a snooze mark on the display. It will switch o
after ringing for 5minutes, and will repeat 5times.
• In snooze mode, if have entered a set state, then it will exit the snooze
process.
• In any mode, when the alarm goes o, press any key to turn o the alarm
tone (press snooze key to enter snooze).
RADIO FUNCTION
Search radio stations
• Press [RADIO] to enter radio selection, the radio mark will be ashing.
• Press [tuning] by hand to select radio frequency, [+] is for up-direction, [–]
is for down-direction. Hold for a few seconds to enter auto-search mode.
Preset the radio station
• If you wish to select the radio station you like, press [SET] to save. FM will be
ashing. Press [preset] to save the channel (total of 10 channels), press [SET]
to conrm and save. Then press [RADIO] to turn o the radio and return to
normal display.

ENGLISH
8
Select the radio station
• In radio mode, press [preset] to select a saved station to listen to.
WEATHER FORECAST
This product forecasts the next 12 or 24 hours of weather within a radius of
30km.
Sunny Cloudy Rainy
Notes:
• The weather forecast based on the atmospheric pressure may vary slightly
from the actual weather situation.
• The weather forecasts from this unit are predictions that cover the next
12to 24 hours. It may not necessarily reect the current situation.
MOON PHASE
When the calendar is set press UP or DOWN to view the moon phase for the
next/previous day.
• Press and hold UP or DOWN to scan through the years (2010 to 2099).
Waxing Crescent First quarter Waxing Gibbous Full moon
Waning Gibbous Last quarter Warning Crescent
TEMPERATURE, HUMIDUTY and COMFORT LEVEL
Temperature and Humidity
The weather station displays indoor and outdoor reading for:
• Current, minimum and maximum temperatures, relative indoor humidity;
• The trend lines are shown next to the temperature and humidity readings.
The trend is shown as follows:
RISING STEADY FALLING

ENGLISH
9
To view the temperature and humidity
• In clock mode, press [A, MAX/MIN, °C/°F] to change indoor and outdoor
temperature and indoor humidity in Max/Min, or the current value. When
displaying indoor and outdoor temperature and indoor humidity in Max/
Min, press [A, MAX/MIN, °C/°F] to clear indoor and outdoor temperature
and humidity records.
• In clock mode, press [A, MAX/MIN, °C/°F] to cycle through the display of
outdoor temperatures on channel 1, channel 2, channel 3.
• In clock mode, press [A, MAX/MIN, °C/°F] and hold for 2seconds to select
Fahrenheit (°F) or Celsius (°C).
Comfort level
• Comfort level indicator.
• The comfort zone icon indicates how comfortable the climate is based on
current temperature and humidity measurements.
Dry Comfortable Wet

ENGLISH
10
CAUTION
RISK OF ELECTRIC SHOCK
DO NOT OPEN
Safety precautions:
To reduce risk of electric shock, this product should ONLY be opened by an authorized
technician when service is required.
Disconnect the product from mains and other equipment if a problem should occur.
Do not expose the product to water or moisture.
Maintenance:
Clean only with a dry cloth.
Do not use cleaning solvents or abrasives.
Warranty:
No guarantee or liability can be accepted for any changes and modications of the product or damage caused due to
incorrect use of this product.
General:
Designs and specications are subject to change without notice. All logos, brands and product names are trademarks or
registered trademarks of their respective holders and are hereby recognized as such.
This manual was produced with care. However, no rights can be derived. König Electronic can not accept liability for any
errors in this manual or their consequences.
Keep this manual and packaging for future reference.
Attention:
This product is marked with this symbol. It means that used electrical and electronic products should not be
mixed with general household waste. There is a separate collections system for these products.
This product has been manufactured and supplied in compliance with all relevant regulations and directives, valid for all
member states of the European Union. It also complies to all applicable specications and regulations in the country of
sales.
Formal documentation is available upon request. This includes, but is not limited to: Declaration of Conformity (and
product identity), Material Safety Data Sheet, product test report.
Please contact our customer service desk for support:
via website: http://www.nedis.com/en-us/contact/contact-form.htm
via telephone: +31 (0)73-5993965 (during oce hours)
NEDIS B.V., De Tweeling 28, 5215 MC ’s-Hertogenbosch, THE NETHERLANDS

DEUTSCH
11
Überblick über die Gerätefunktionen
Drücken Sie [SET], um in den Einstellmodus zu gelangen.
Drücken Sie [ALARM], um in den Weckmodus zu gelangen.
Drücken Sie im Einstellmodus [A, MAX/MIN, °C/°F] um nach oben
zu gelangen.
Drücken Sie im normalen Uhrzeitmodus [A, MAX/MIN, °C/°F],
um auf dem Display zwischen Innen- und Außentemperatur,
Raumluftfeuchtigkeit und den Maximal-, Minimal- und aktuellen
Werten zu wechseln.
Halten Sie [A, MAX/MIN, °C/°F] zwei Sekunden lang gedrückt,
um zwischen einer Anzeige in Fahrenheit (°F) oder Celsius (°C) zu
wechseln.
Drücken Sie im Einstellmodus [V, CHANNEL, CLEAR], um nach
unten zu gelangen.
Drücken Sie im normalen Uhrzeitmodus [V, CHANNEL, CLEAR],
um auf dem Display zwischen Kanal 1, Kanal 2 und Kanal 3 für die
Außentemperatur zu wechseln.
Wenn die Maximal-/Minimalwerte für die Außen- und
Innentemperatur angezeigt werden, drücken Sie [V, CHANNEL,
CLEAR], um diese Werte zu löschen.
Drücken Sie im normalen Uhrzeitmodus, um die
Hintergrundbeleuchtung einzustellen. Wenn der Alarm ertönt,
drücken Sie , um die Schlummerfunktion zu aktivieren.
Radio ein-/ausschalten
Drücken Sie im Radiomodus [+], um nach oben zu gelangen und
[–], um nach unten zu gelangen

DEUTSCH
12
Preset +/–
Lautstärkeregler
LCD Display
1. Wettervorhersage, Mondphasen, Komfortlevel.
2. Zeitanzeige (Format 12/24h).
3. Datumsanzeige, Anzeigenbereich: 1. Januar 2011 bis 31. Dezember 2099.
4. Dual-Radiowecker, Anzeige der gewählten Weckeinstellungen.
5. Raumluftfeuchtigkeit.
6. Anzeige der Außentemperatur, Maximal-/Minimalwerte.
7. Frequenz von 433MHz um kabellos auf drei Kanälen die Außentemperatur
zu empfangen.
8. Anzeige der Innentemperatur, Maximal-/Minimalwerte.
9. Radio (PLL-Radio, FM-Frequenzanzeige).
Außensensor

DEUTSCH
13
1. LCD display
2. Aussparung für Wandmontage
3. Batteriefach
4. Metallhalterung
ERSTE SCHRITTE
RESERVEENERGIEVERSORGUNG
Die 3x 1,5 V AAA-Batterien fungieren als Reserveenergieversorgung für das
Gerät.
1. Önen Sie das Batteriegehäuse.
2. Setzen Sie die Batterien unter Beachtung der richtigen Polarität ein.
3. Drücken Sie nach jedem Batteriewechsel RESET.
HINWEIS: Verwenden Sie keine auadbaren Batterien. Für eine längere
Betriebsdauer empfehlen wir Ihnen, diesen Wecker mit Alkalibatterien zu
betreiben. Verwenden Sie bei Temperaturen unter dem Nullpunkt bevorzugt
Lithiumbatterien.
Netzteil
Das Netzteil versorgt das Gerät mit Energie. Stecken Sie das Netzteil in eine
Steckdose und stellen Sie sicher, dass das Netzteil nicht verstellt und leicht
zugänglich ist.
Trennen Sie das Netzteil vom Gerät, um dieses vollständig von der
Netzspannung zu trennen.
HINWEIS: Das Gerät und das Netzteil sollten nicht mit Wasser oder Feuchtigkeit
in Berührung kommen. Platzieren Sie keine mit Wasser gefüllten Gegenstände,
wie Vasen, auf dem Gerät oder dem Netzteil.
Außensensor
1. Entfernen Sie die Schrauben von der Klappe des Batteriefaches.
2. Setzen Sie drei AAA-Batterien unter Beachtung der Polarität (+/–) ein.
3. Wählen Sie einen Kanal: CH1/CH2/CH3.
4. Schließen Sie das Batteriefach wieder und ziehen Sie die Schrauben fest.
5. Wählen Sie die Temperatureinheit: °C/°F.
6. Positionieren Sie den Außensensor nicht weiter als 20m von der Station
entfernt. Der Sensor sollte in freiem Gelände platziert und nicht von
Bäumen oder anderen Gegenständen verdeckt werden.

DEUTSCH
14
KURZANLEITUNG
UHR/KALENDER
Einstellung des Datums
• Drücken Sie [SET], um das Datum einzustellen, Jahr, Monat und Tag blinken
auf.
• Drücken Sie NACH OBEN oder NACH UNTEN, um die Einstellungen
vorzunehmen. Halten Sie die Tasten länger als zwei Sekunden gedrückt, um
die Einstellungen vorzunehmen. Die Frequenz beträgt 8 Hz.
Einstellung der Zeit
• Drücken Sie [SET], um die Uhr zu stellen. Die Anzeige blinkt auf. Drücken
Sie NACH OBEN oder NACH UNTEN, um zwischen dem 12- und dem
24h-Format zu wechseln.
• Drücken Sie [SET], um Einstellungen im Zeitmodus vorzunehmen. Die
Stunden blinken auf. Drücken Sie NACH OBEN oder NACH UNTEN, um
Änderungen vorzunehmen. Halten Sie die Tasten länger als zwei Sekunden
gedrückt, um die Einstellungen vorzunehmen. Die Frequenz beträgt 8 Hz.
• Drücken Sie [SET], um die Einstellungen zu beenden.
HINWEIS:
1) Wenn länger als eineMinute lang keine Taste gedrückt wird, kehrt das Gerät
automatisch vom Einstellungsmodus in den normalen Zeitmodus zurück.
Die zuletzt vorgenommene Einstellung wird angezeigt. Die Anzeige der
Woche passt sich automatisch an das eingestellt Datum an.
2) Die Zeiteinstellung wird in folgender Reihenfolge vorgenommen: Jahr,
Monat, Tag, 12/24h-Format, Stunde, Minute.
WECKER
Den Wecker einstellen
Duale Weckfunktion, Sie können einen täglichen Weckruf und das Wecksignal
einstellen.

DEUTSCH
15
Drücke [Alarm]
Drücke [Alarm]
Stunden
blinken AV
Drücke [Set] für
Einstellung Wecker
gelangen
Drücke [Set], um die
Minuteneinzustellen
[Set] drücken,
dann AV für
Datumswahl
[Set] drücken
für Wecksignal-
auswahl
Drücke [Set], um die Tage
einzustellen blinkt
Drücke AV, um auf dem
Display hin- und herzuwechseln.
Weckersymbol bedeutet der
Wecker ist aktiv
Drücke AV für
Wechsel zwischen
4Wecksignalen
Drücke [RADIO] für
Radiomodus
Wecksignal„BB“
Radio als
Wecker
[Set] drücken, zum
Beenden Einstellungen zu
beenden
Drücke für Auswahl
gespeicherter Sender
Minuten
blinken AV
display
display
Hinweis:
1) Wenn keine Weckzeit eingestellt ist, wird --:-- angezeigt. Wenn der Wecker
gestellt ist, werden die Weckzeit und ein Wecksymbol angezeigt. Drücken
Sie [ALARM], um fortzufahren. Der Wecker kann ein- und ausgeschaltet
werden. Wenn der Wecker ausgeschaltet ist, wird --:-- angezeigt.
2) Wenn beim Einstellen des Weckers eineMinute lang keine Taste gedrückt
wird, wird automatisch die Uhrzeit angezeigt. Die zuletzt getätigten
Einstellungen werden aktiv.

DEUTSCH
16
3) Wenn es sich bei dem Modell um einen Radiowecker handelt, so ist das
Wecksignal die zuletzt verwendete Radiostation. Wenn das Radio nicht
benutzt wurde, wird das Radio automatisch eingestellt, sobald die Weckzeit
erreicht wurde. Wenn länger als 20Minuten keine Taste gedrückt wird, wird
das Radio automatisch wieder ausgeschaltet. Sie können auch die Taste
[RADIO] drücken, um es wieder auszustellen.
SCHLUMMERFUNKTION
• Wenn der Summer als Weckton gewählt wurde
a) Wenn das Wecksignal ertönt, drücken Sie die Taste [SNOOZE]. Das
Wecksignal wird für fünfMinuten ausgeschaltet. Danach ertönt das
Wecksignal erneut insgesamt fünfmal nach jeweils fünfMinuten. Danach
schaltet sich der Wecker ab.
b) Das Wecksignal ertönt eineMinute lang, wenn keine Taste gedrückt wird.
Danach ertönt das Wecksignal insgesamt fünfmal nach jeweils einerMinute.
Danach schaltet sich der Wecker ab.
• Wenn Radio als Weckton gewählt wurde
Ist die Weckzeit erreicht, schaltet das Radio für 20Minuten ein und schaltet
danach automatisch ab. Drücken Sie [Radio], um den Wecker sofort wieder
auszustellen.
• Sonstiges
a) Wenn das Wecksignal ertönt können Sie mit jeder beliebigen Taste, außer
[SNOOZE], den Wecker ausschalten.
b) Die Schlummerfunktion wird beendet, sobald Sie den Einstellungsmodus
wählen.
• Der Wecker wird ausgeschaltet, indem eine Taste gedrückt wird oder er
schaltet sich alleine aus.
• Wenn das Wecksignal ertönt und [SNOOZE] edrückt wird, ertönt das
Wecksignal nach fünfMinuten erneut. Auf dem Display erscheint ein
entsprechendes Symbol. Das Wecksignal ertönt fünfMinuten lang. Dies
wiederholt sich fünfmal.
• Wenn Einstellungen während der Schlummerfunktion vorgenommen
werden, wird die Schlummerfunktion beendet.
• Drücken Sie in jedem beliebigem Modus eine beliebige Taste, um den
Wecker auszustellen (Drücken Sie Snooze, um die Schlummerfunktion zu
aktivieren).

DEUTSCH
17
RADIO
Radiostation suchen
• Drücken Sie [RADIO], um Radiostationen zu wählen. Die Radiofrequenz
blinkt auf.
• Drücken Sie [tuning], um die gewünschte Frequenz zu wählen. Drücken Sie
[+], um die Frequenz nach oben zu verstellen und [–], um sie nach unten zu
verstellen. Halten Sie die jeweilige Taste ein paar Sekunden lang gedrückt,
um den automatischen Suchlauf zu starten.
Radiostation speichern
• Wenn Sie die gewählte Radiostation mögen, drücken Sie [SET], um sie
zu speichern. FM blinkt auf. Drücken Sie [preset], um den Radiosender
abzuspeichern (insgesamt zehn Sender). Drücken Sie [SET], um die Wahl zu
bestätigen und endgültig zu speichern. Danach drücken Sie [RADIO], um
das Radio auszuschalten und zur Normalanzeige zurückzukehren.
Radiostation wählen
• Drücken Sie im Radiobetrieb die Taste [preset], um eine der gespeicherten
Radiostationen zu wählen.
WETTERVORHERSAGE
Dieses Gerät kann eine Wettervorhersage über einen Zeitraum von 12 bis 24
Stunden und einen Radius von 30km erstellen.
Sonnig Bewölkt Regnerisch
Hinweise:
• Die Wettervorhersage basiert auf der Messung des atmosphärischen
Druckes.
• Sie kann leicht von den aktuellen Wetterverhältnissen abweichen. Dieses
Gerät liefert Wettervorhersagen für einen Zeitraum von 12 bis 24 Stunden.
Die Wettervorhersage spiegelt möglicherweise die aktuelle Wettersituation
nicht wieder.
MONDPHASEN
Wenn Sie den Kalender eingestellt haben, drücken Sie NACH OBEN oder NACH
UNTEN, um die Mondphasen für den nächsten/vorhergehenden Tag zu sehen.

DEUTSCH
18
• Halten Sie NACH OBEN oder NACH UNTEN gedrückt, um zwischen den
Jahren (2010 bis 2099) zu wechseln.
Zunehmende
Halbmondphase
Erstes Viertel Zunehmender
Dreiviertelmond
Vollmond
Abnehmender
Dreiviertelmond
Letztes Viertel Abnehmende
Halbmondphase
TEMPERATUR, LUFTFEUCHTIGKEIT und KOMFORTLEVEL
Temperatur und Luftfeuchtigkeit
Die Wetterstation liefert die Daten (innen und außen) für:
• Die aktuellen Minimum- und Maximaltemperaturen und die relative
Raumluftfeuchtigkeit;
• Neben Temperatur und Luftfeuchtigkeit werden die Wettertrends
angezeigt. Wie Wettertrends werden wie folgt angezeigt:
STEIGEND BESTÄNDIG FALLEND
Um sich Temperatur und Luftfeuchtigkeit anzeigen zu lassen
• Wird die Uhrzeit angezeigt, drücken Sie [A, MAX/MIN, °C/°F], um zwischen
der Anzeige für Innen- und Außentemperatur und Raumluftfeuchtigkeit
Max/Min oder entsprechenden aktuellen Wert zu wechseln. Wenn
die Innen- und Außentemperatur sowie die Raumluftfeuchtigkeit in
Max/Min angezeigt werden, drücken Sie [A, MAX/MIN, °C/°F], um die
Aufzeichnungen zu löschen.
• Drücken Sie [A, MAX/MIN, °C/°F], um auf dem Display zwischen den
Kanälen 1, 2 und 3 für die Außentemperatur zu wechseln.
• Halten Sie [A, MAX/MIN, °C/°F] zwei Sekunden lang gedrückt, um zwischen
Fahrenheit (°F) und Celsius (°C) zu wechseln.
Komfortlevel
• Anzeige des Komfortlevels.

DEUTSCH
19
• Das Symbol für den Komfortbereich zeigt an, wie angenehm das Klima ist.
Diese Einschätzung basiert auf den aktuellen Messungen zur Temperatur
und Luftfeuchtigkeit.
Trocken Komfortabel Feucht
VORSICHT
STROMSCHLAGGEFAHR
NICHT ÖFFNEN
Sicherheitsvorkehrungen:
Um das Risiko eines elektrischen Schlags zu verringern, sollte dieses Produkt
AUSSCHLIESSLICH von einem autorisierten Techniker geönet werden.
Trennen Sie das Produkt von anderen Geräten, wenn ein Problem auftreten sollte.
Setzen Sie das Gerät nicht Wasser oder Feuchtigkeit aus.
Wartung:
Nur mit einem trockenen Tuch säubern.
Keine Reinigungs- oder Scheuermittel verwenden.
Garantie:
Es kann keine Garantie oder Haftung für irgendwelche Änderungen oder Modikationen des Produkts oder für Schäden
übernommen werden, die aufgrund einer nicht ordnungsgemäßen Anwendung des Produkts entstanden sind.
Allgemeines:
Design und technische Daten unterliegen unangekündigten Änderungen. Alle Logos, Marken und Produktnamen sind
Marken oder eingetragene Marken ihrer jeweiligen Eigentümer und werden hiermit als solche anerkannt.
Diese Bedienungsanleitung wurde sorgfältig verfasst. Dennoch können daraus keine Rechte und Pichten hergeleitet
werden. König Electronic haftet nicht für mögliche Fehler in dieser Bedienungsanleitung oder deren Folgen.
Bitte bewahren Sie Bedienungsanleitung und Verpackung für spätere Verwendung auf.
Achtung:
Dieses Produkt ist mit diesem Symbol gekennzeichnet. Es bedeutet, dass die ausgedienten elektrischen
und elektronischen Produkte nicht mit dem allgemeinen Haushaltsmüll entsorgt werden dürfen. Für diese
Produkte stehen gesonderte Sammelsysteme zur Verfügung.
Dieses Produkt wurde hergestellt und geliefert in Übereinstimmung mit allen geltenden Vorschriften und Richtlinien,
die für alle Mitgliedsstaaten der Europäischen Union gültig sind. Es entspricht allen geltendenVorschriften und
Bestimmungen im Land des Vertriebs.
Eine formale Dokumentation ist auf Anfrage erhältlich. Diese beinhaltet unter anderem, jedoch nicht ausschließlich:
Konformitätserklärung (und Produktidentität), Sicherheitsdatenblatt,Testreport des Produkts.
Wenden Sie sich bei Fragen bitte an unseren Kundendienst:
per Internet: http://www.nedis.de/de-de/kontakt/kontaktformular.htm
per Telefon: Niederlande +31 (0)73-5993965 (während der Geschäftszeiten)
NEDIS B.V., De Tweeling 28, 5215 MC ’s-Hertogenbosch, NIEDERLANDE

FRANÇAIS
20
Vue d’ensemble de l’unité
Appuyez sur [SET] pour entrer en mode de réglage.
Appuyez sur [ALARM] pour entrer en mode de réveil.
En mode de réglage, appuyez sur [A, MAX/MIN, °C/°F] pour passer
à la valeur suivante.
En mode normal de fonctionnement de la station, appuyez sur [A,
MAX/MIN, °C/°F] pour acher tour à tour sur l’écran la température
extérieure et intérieure, le taux d’humidité en intérieur, la valeur
courante ou les maximales et les minimales.
Appuyez et maintenez [A, MAX/MIN, °C/°F] pendant 2secondes
pour basculer des degrés Fahrenheit (°F) aux degrés Celsius (°C).
En mode de réglage, appuyez [V, CHANNEL, CLEAR] pour passer à
la valeur précédente.
En mode normal de fonctionnement de la station, appuyez [V,
CHANNEL, CLEAR] pour acher tour à tour les températures
extérieures du canal 1, du canal 2 et du canal3.
Pour acher la valeur max. ou min. de la température extérieure,
appuyez [V, CHANNEL, CLEAR] pour eacer les enregistrements
des valeurs max. ou min.
En mode normal de fonctionnement de la station,
appuyez pour régler le rétroéclairage. Quand le réveil est
enclenché, appuyez pour activer la fonction de rappel de
réveil.
Allumer ou éteindre la radio
En mode radio, appuyez [+] pour passer à la station suivante,
appuyez [–] pour passer à la station précédente
Table of contents
Languages:
Other König Weather Station manuals
Popular Weather Station manuals by other brands

La Crosse Technology
La Crosse Technology WS-9137 manual

Bresser
Bresser Translucidus instruction manual

Wittime
Wittime WT2022A operating instructions

Hyundai
Hyundai WS 1815 user manual

Fine Offset Electronics
Fine Offset Electronics WH16H instruction manual

La Crosse Technology
La Crosse Technology 308A-146 user manual

Ambient Weather
Ambient Weather WS-7079 user manual

Oregon Scientific
Oregon Scientific BAR808HG user manual

La Crosse Technology
La Crosse Technology WS-7213U instruction manual

Ambient Weather
Ambient Weather EZ-HD-PTP-100 user manual

Auriol
Auriol 4-LD5009 Usage and safety instructions

La Crosse Technology
La Crosse Technology WS-9004U instruction manual