Kalorik RC 41501 User manual

Copies of the I/B. Please reproduce them without any
changes except under special instruction from Team
International USA. The pages must e reproduced and folded
in order to o tain a ooklet A5 (+/- 148.5 mm width x 210 mm
height). When folding, make sure you keep the good
num ering when you turn the pages of the I/B. Don’t change
the page num ering. Keep the language integrity. Print only
what is inside the frame.
Front cover page (first page)
Assem ly page 1/28
Fax +1 305 430 9692
Digital Rice Cooker
Cuiseur de Riz Digital
www.KALORIK.com
RC
41501
120V~60 Hz 700W (5.8A)

Copies of the I/B. Please reproduce them without any
changes except under special instruction from Team
International USA. The pages must e reproduced and folded
in order to o tain a ooklet A5 (+/- 148.5 mm width x 210 mm
height). When folding, make sure you keep the good
num ering when you turn the pages of the I/B. Don’t change
the page num ering. Keep the language integrity. Print only
what is inside the frame.
2 SC 41501 - 120501
Assem ly page 2/28
Fax +1 305 430 9692
IMPORTA T SAFEGUARDS
When using electrical appliances, basic safety precautions should
always be followed, including the following:
1. READ ALL I STRUCTIO S BEFORE USI G!
2.
Check that the voltage in your home corresponds to that stated
on the rating plate of the appliance efore using the appliance.
3. Do not touch hot surfaces. Always use handles or kno s.
4. Use only on a level, dry, and heat-resistant surface.
5. To protect against electric shock, do not immerse cord, plugs, the
appliance, or its control panel in water or other liquids.
6. Close supervision is necessary when the appliance is used y or
near children.
7. Children should e supervised to ensure that they do not play
with the appliance.
8. Do not operate any appliance with a damaged cord or plug or
after the appliance malfunctions or has een damaged in any
manner. Return the appliance to the authorized service facility for
examination, repair, or adjustment.
9. Unplug the appliance from the outlet when not in use and efore
cleaning. Allow it to cool efore putting on or taking off parts,
and efore cleaning the appliance.
10. The use of accessory attachments not recommended y the
appliance manufacturer may result in fire, electric shock, or injury.
11. Do not use outdoors.
12.
Do not let the cord hang over edge of ta le or counter or touch
hot surfaces.
13. Do not place on or near a hot gas or electric urner, or in a
heated oven.
14. Extreme caution must e used when moving an appliance
containing hot oil or other hot liquids.
15. To disconnect, turn all controls to “Off” and remove the plug from
the wall outlet. Do not pull on the cord; use the plug.
16. CAUTIO : To prevent damage or shock hazard, do not cook in
the ase. Cook only in the remova le cooking pot.
17. Do not use the appliance for other than its intended uses which
are cooking rice and steaming food.

Copies of the I/B. Please reproduce them without any
changes except under special instruction from Team
International USA. The pages must e reproduced and folded
in order to o tain a ooklet A5 (+/- 148.5 mm width x 210 mm
height). When folding, make sure you keep the good
num ering when you turn the pages of the I/B. Don’t change
the page num ering. Keep the language integrity. Print only
what is inside the frame.
3 SC 41501 - 120501
Assem ly page 3/28
Fax +1 305 430 9692
18. Always make sure that the outside of the inner cooking pot is dry
prior to use. If the cooking pot is placed inside the cooker when
wet, it may damage or cause the product to malfunction.
19. Oversized foods or metal utensils must not e inserted in the
appliance as they may cause the risk of fire or electrical shock.
20. A fire can occur if the appliance is covered y or touching
flamma le materials including curtains, draperies, walls, and the
like when in operation.
21. Do not clean with metal scouring pads. Pieces can reak off the
pad and touch electrical parts, creating the risk of electrical
shock.
22. Do not store any materials other than manufacturer’s
recommended accessories in this unit when not in use.
23. Do not place any of the following materials inside the unit: paper,
card oard, plastic parts, and the like.
24. If the supplied cord is damaged, it must e replaced y a special
cord or assem ly availa le from the manufacturer or its service
agent.
SAVE THESE I STRUCTIO S
HOUSEHOLD USE O LY
ADDITIO AL IMPORTA T SAFEGUARDS
Caution: Hot surface! This unit generates heat and hot steam during
usage; proper precaution must be taken to prevent the risks of either
burns or injuries on skin contact, fire breakout or damage to
property.
1. This product is not a toy! Please keep out of reach of children and
pets. This product is not intended for use y children, y persons
with reduced physical, sensory or mental capa ilities, or lacking
experience or knowledge, unless they have een given
supervision or instruction concerning the use of the product, y a
person responsi le for their safety. Extra caution is always
necessary when using this product.
2. Should the unit e accidentally immersed in water, immediately
unplug the power cord from the power outlet. Do NOT attempt to

Copies of the I/B. Please reproduce them without any
changes except under special instruction from Team
International USA. The pages must e reproduced and folded
in order to o tain a ooklet A5 (+/- 148.5 mm width x 210 mm
height). When folding, make sure you keep the good
num ering when you turn the pages of the I/B. Don’t change
the page num ering. Keep the language integrity. Print only
what is inside the frame.
4 SC 41501 - 120501
Assem ly page 4/28
Fax +1 305 430 9692
touch the water while the appliance is still plugged into the
power outlet!
3. If the unit stops working properly, disconnect it from the power
supply. Do NOT attempt to repair the malfunctioning unit unless
you are a qualified electrician.
4. Lift the lid carefully and away from your face to avoid scalding.
Allow water to drip into the cooking pot.
5. Always place the unit on a heat resistant surface.
6. Be sure to unplug the power cord when the inner pan is not in the
cooker, or when cooker is not eing used. Remem er that the
"Keep Warm" feature only operates when the power cord is
plugged in.
7. Always place the inner pot inside the cooker efore operating.
Turn the pot gently to the right and left to make sure that the
inner pot is fully inserted.
8. Place the lid on your inner pot while cooking. Keep the lid in
place after serving to prevent your rice from drying out or
discoloring.
9. Keep the ottom of the inner pot and the surface of the heating
plate free of foreign matter to prevent operating malfunctions.
10. The rice should not e left in the rice cooker with the keep warm
function on for more than 24 hours.
11. To prevent damage or deformation, do not use the inner pot on
a stovetop or urner.
12. Caution: to protect against damage or electric shock, DO OT
cook in the base unit, but only in the cooking pot provided!
POLARIZED PLUG I STRUCTIO S
This appliance is equipped with a polarized plug (one lade is wider
than the other). To reduce the risk of electric shock, this plug will fit
into the polarized outlet only one way. If the plug does not properly
fit into the outlet at first, reverse it. If it still does not fit, contact a
competent qualified electrician. Do not attempt to modify the plug in
any way.

Copies of the I/B. Please reproduce them without any
changes except under special instruction from Team
International USA. The pages must e reproduced and folded
in order to o tain a ooklet A5 (+/- 148.5 mm width x 210 mm
height). When folding, make sure you keep the good
num ering when you turn the pages of the I/B. Don’t change
the page num ering. Keep the language integrity. Print only
what is inside the frame.
5 SC 41501 - 120501
Assem ly page 5/28
Fax +1 305 430 9692
SHORT CORD I STRUCTIO S
A short power supply cord is provided to reduce the hazards resulting
from ecoming entangled in or tripping over a longer cord.
Extension cords may e used if care is exercised in their use.
• The electrical rating of the extension cord should e at least that
of the appliance. If the electrical rating of the extension cord is
too low, it could overheat and urn.
• The resulting extended cord should e arranged so that it will not
drape over the counter top or ta letop where it can e pulled
on y children or tripped over.
PARTS DESCRIPTIO

Copies of the I/B. Please reproduce them without any
changes except under special instruction from Team
International USA. The pages must e reproduced and folded
in order to o tain a ooklet A5 (+/- 148.5 mm width x 210 mm
height). When folding, make sure you keep the good
num ering when you turn the pages of the I/B. Don’t change
the page num ering. Keep the language integrity. Print only
what is inside the frame.
6 SC 41501 - 120501
Assem ly page 6/28
Fax +1 305 430 9692
BEFORE USI G THE FIRST TIME
Carefully unpack your rice cooker, discard all packaging, and clean
it according to the instructions outlined in the “CLEANING AND
CARE” section of the manual. Dry all parts thoroughly afterwards.
OPERATIO
Cooking rice:
1. Using the measuring cup provided, measure out the desired
amount of rice. One full, level measuring cup of uncooked rice
will yield 2 measuring cups of cooked rice.
2. Rinse the uncooked rice in a separate container until the water
drains relatively clear.
Note: For softer rice, allow the rice to soak for 10-20 minutes prior to
cooking.
3. Place the rinsed rice in the inner pot.
4. Using the measuring cup provided or the water measurement
lines located inside the inner pot, add the appropriate amount of
water. See the “Rice/Water Measurement Ta le” elow for
suggested rice/water ratios.
5. Making sure that the exterior of the inner pot is clean and dry;
place the inner pot into the rice cooker. Position the lid securely
onto the rice cooker and plug the power cord into a wall outlet.
6. To egin cooking, press the “On/Off” utton, then press the
“White Rice” or “Brown Rice” utton, depending upon the type
of rice eing cooked. The cooking mode indicator lights will
illuminate. Once cooking is complete, the rice cooker will eep 3
times, and then automatically switch to “Keep Warm” mode.
Note: If you wish to cancel your cooking selection, press the
"ON/OFF" utton and reset y pressing the appropriate cooking
utton.
7. After cooking, remove the lid and use the rice paddle to stir the
rice. This will release the excess moisture and give the rice a
fluffier texture. Then, replace the lid and allow the unit to remain
on “Keep Warm” mode for 5-10 minutes. This will ensure optimal
rice texture and moisture level.

Copies of the I/B. Please reproduce them without any
changes except under special instruction from Team
International USA. The pages must e reproduced and folded
in order to o tain a ooklet A5 (+/- 148.5 mm width x 210 mm
height). When folding, make sure you keep the good
num ering when you turn the pages of the I/B. Don’t change
the page num ering. Keep the language integrity. Print only
what is inside the frame.
7 SC 41501 - 120501
Assem ly page 7/28
Fax +1 305 430 9692
8. Press the ON/OFF utton to turn off the rice cooker. If the ON/OFF
utton is not pressed, the rice cooker will remain in “Keep Warm”
mode. It is not recommended to leave rice on “Keep Warm”
mode for more than 12 hours.
U COOKED
RICE
WATER
USI G
MEASURI G
CUP
RICE
WATERLI E
I SIDE POT
APPROX.
COOKED
RICE YIELD
COOKI G TIMES
4 CUPS 7-1/2 4 8 CUPS
White Rice: 35-40 Min.
Brown Rice: 95-110 Min.
6 CUPS 10-1/2 6 12 CUPS
White Rice: 40-45 Min.
Brown Rice: 115-125 Min.
8 CUPS 13-1/2 8 16 CUPS
White Rice: 40-45 Min.
Brown Rice: 115-125 Min.
10 CUPS 16-1/2 10 20 CUPS
White Rice: 45-50 Min.
Brown Rice: 125-130 Min.
Sauté function:
The Sauté function is excellent for stir-frying vegeta les and rowning
meat.
1. Add the ingredients to e sautéed inside the inner pot.
2. Press the “On/Off” utton and then the “Sauté” utton to
preheat the rice cooker. The “On” and “Sauté” indicator lights will
illuminate.
3. Using a long-handled wooden spoon, stir the ingredients until
sautéed to the desired level.
4. Turn off the rice cooker y pressing the “On/Off” utton.
5. Using oven mitts, remove the sautéed food from the rice cooker,
using caution as it will e extremely hot.
otes:
• Brown rice requires a much longer cooking cycle than other rice
varieties due to the extra ran layers on the grains. The “Brown
Rice” function on this rice cooker allows extra time and adjusted
heat settings in order to cook the rice properly.
• To avoid a loss of steam and longer cooking times, do not open
the lid at any point during the cooking process.
• A measuring cup of rice is not equivalent to a US cup of rice.

Copies of the I/B. Please reproduce them without any
changes except under special instruction from Team
International USA. The pages must e reproduced and folded
in order to o tain a ooklet A5 (+/- 148.5 mm width x 210 mm
height). When folding, make sure you keep the good
num ering when you turn the pages of the I/B. Don’t change
the page num ering. Keep the language integrity. Print only
what is inside the frame.
8 SC 41501 - 120501
Assem ly page 8/28
Fax +1 305 430 9692
CAUTIO !
• Do not use the provided rice paddle to sauté. It is not intended to
e used in contact with hot surfaces. Use a long-handled
wooden spoon to stir food while sautéing.
• It is important to turn off the rice cooker after sautéing, as the rice
cooker will not turn off on its own, or switch to keep warm mode.
Steaming Food:
1. Add the desired amount of water into the inner pot (use the ta le
elow for reference)
2. Place the food to e steamed into the steam tray.
3. Place the steam tray inside the rice cooker at the top of the inner
pot. Place the lid securely onto the inner pot.
4. Press the “On/Off” utton and then the “Steam” utton. The 2
cooking mode light indicators will illuminate.
5. Once the suggested amount of time for the recipe has elapsed,
using oven mitts, remove the lid with caution as the escaping
steam will e very hot. Check the food for doneness.
6. Remove the food immediately once cooked. Leaving it in the
rice cooker may cause it to overcook.
7. Press the “On/Off” utton to turn off the rice cooker.
ote: Open the lid only when necessary.
Reference steaming time for vegetables
Vegetable Min. Qty. of water* Steaming time*
Green Beans 1 cup 1 min.
Peas ½ cup 10 min.
Corn 1 cup 1 min.
Cabbage 1 cup 1 min.
Cauliflower 1 cup 1 min.
Broccoli ½ cup 10 min.
Asparagus ½ cup 10 min.
Carrots 1 cup 1 min.
Eggplant 1 ¼ cup 20 min.
Spinach ½ cup 10 min.
Zucchini / Squash ½ cup 10 min.
*
Water quantity and steaming times are for reference only

Copies of the I/B. Please reproduce them without any
changes except under special instruction from Team
International USA. The pages must e reproduced and folded
in order to o tain a ooklet A5 (+/- 148.5 mm width x 210 mm
height). When folding, make sure you keep the good
num ering when you turn the pages of the I/B. Don’t change
the page num ering. Keep the language integrity. Print only
what is inside the frame.
9 SC 41501 - 120501
Assem ly page 9/28
Fax +1 305 430 9692
To Steam Food and Cook Rice Simultaneously:
One of the most convenient features of the rice cooker is its a ility to
cook rice and steam food simultaneously. This feature is ideal for
creating delicious, all-in-one meals.
1. Place the desired amount of rice and appropriate amount of
water into the inner pot.
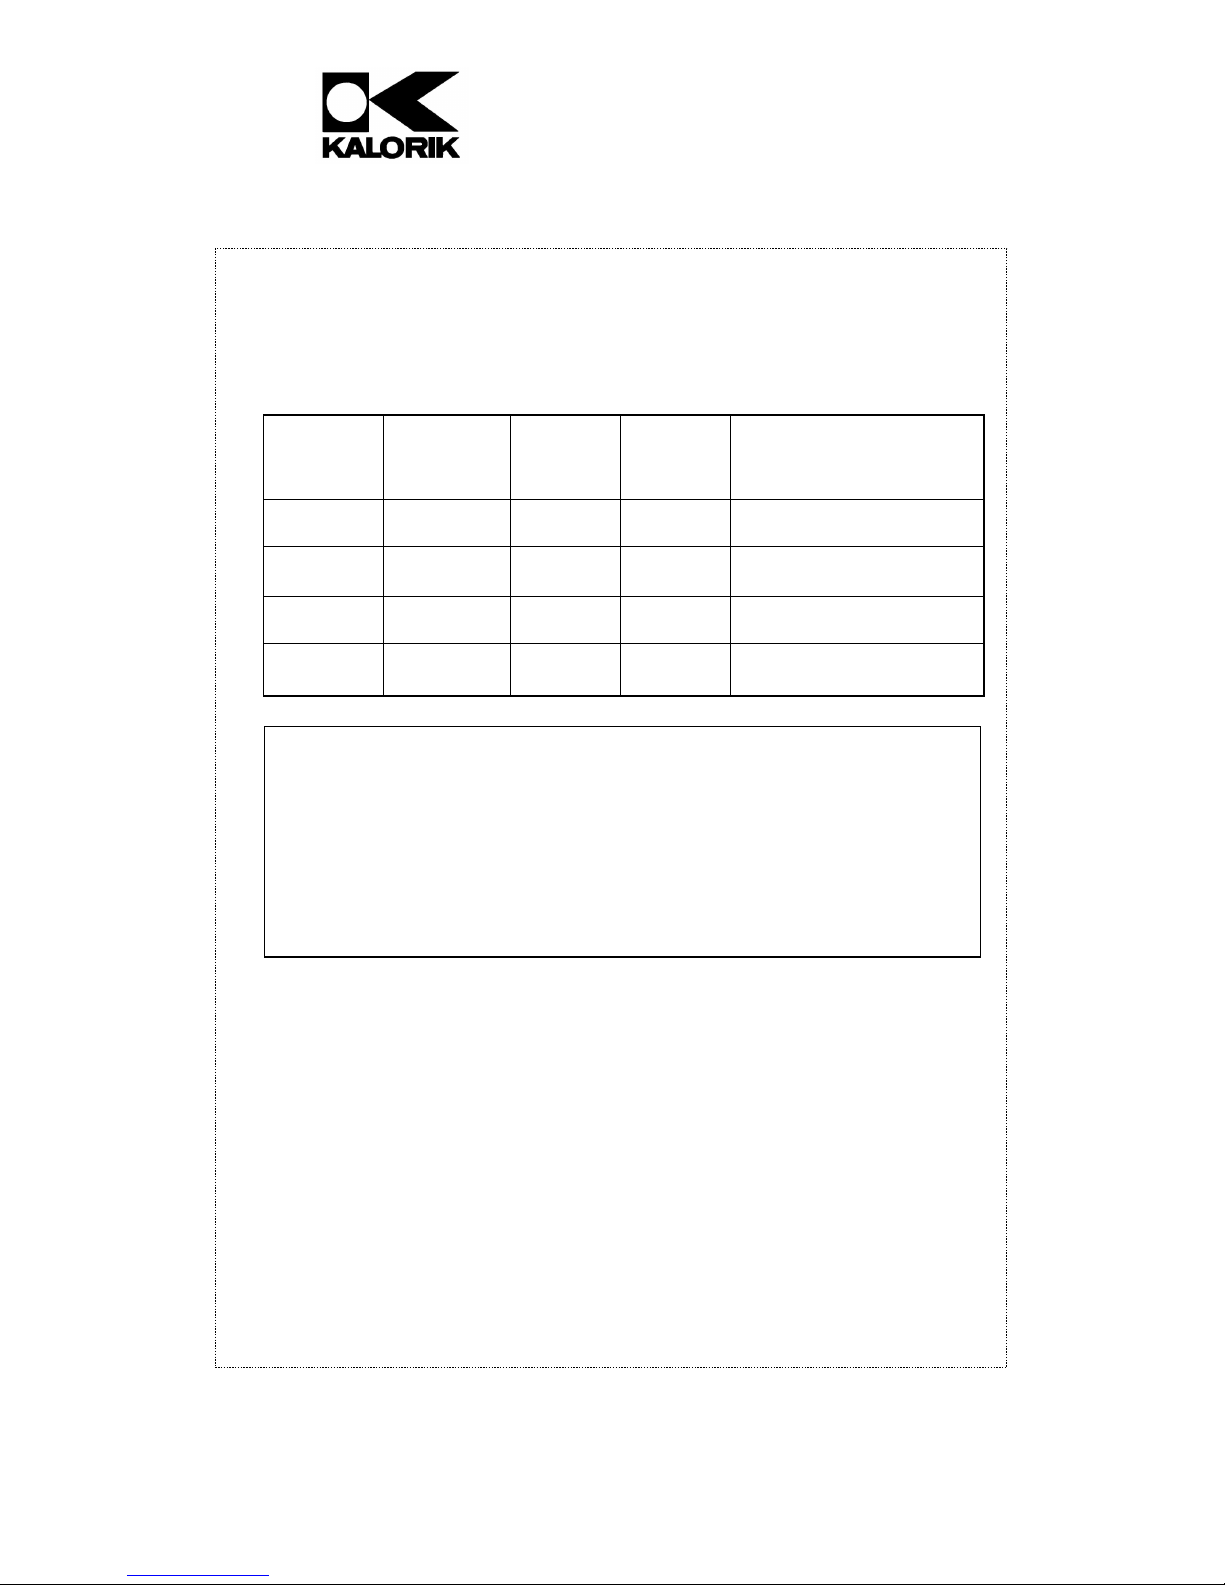
2. Place the inner pot into the unit and start cooking the rice first,
using the “White rice” or “Brown rice” function (use the ta le
a ove to estimate the total cooking time).
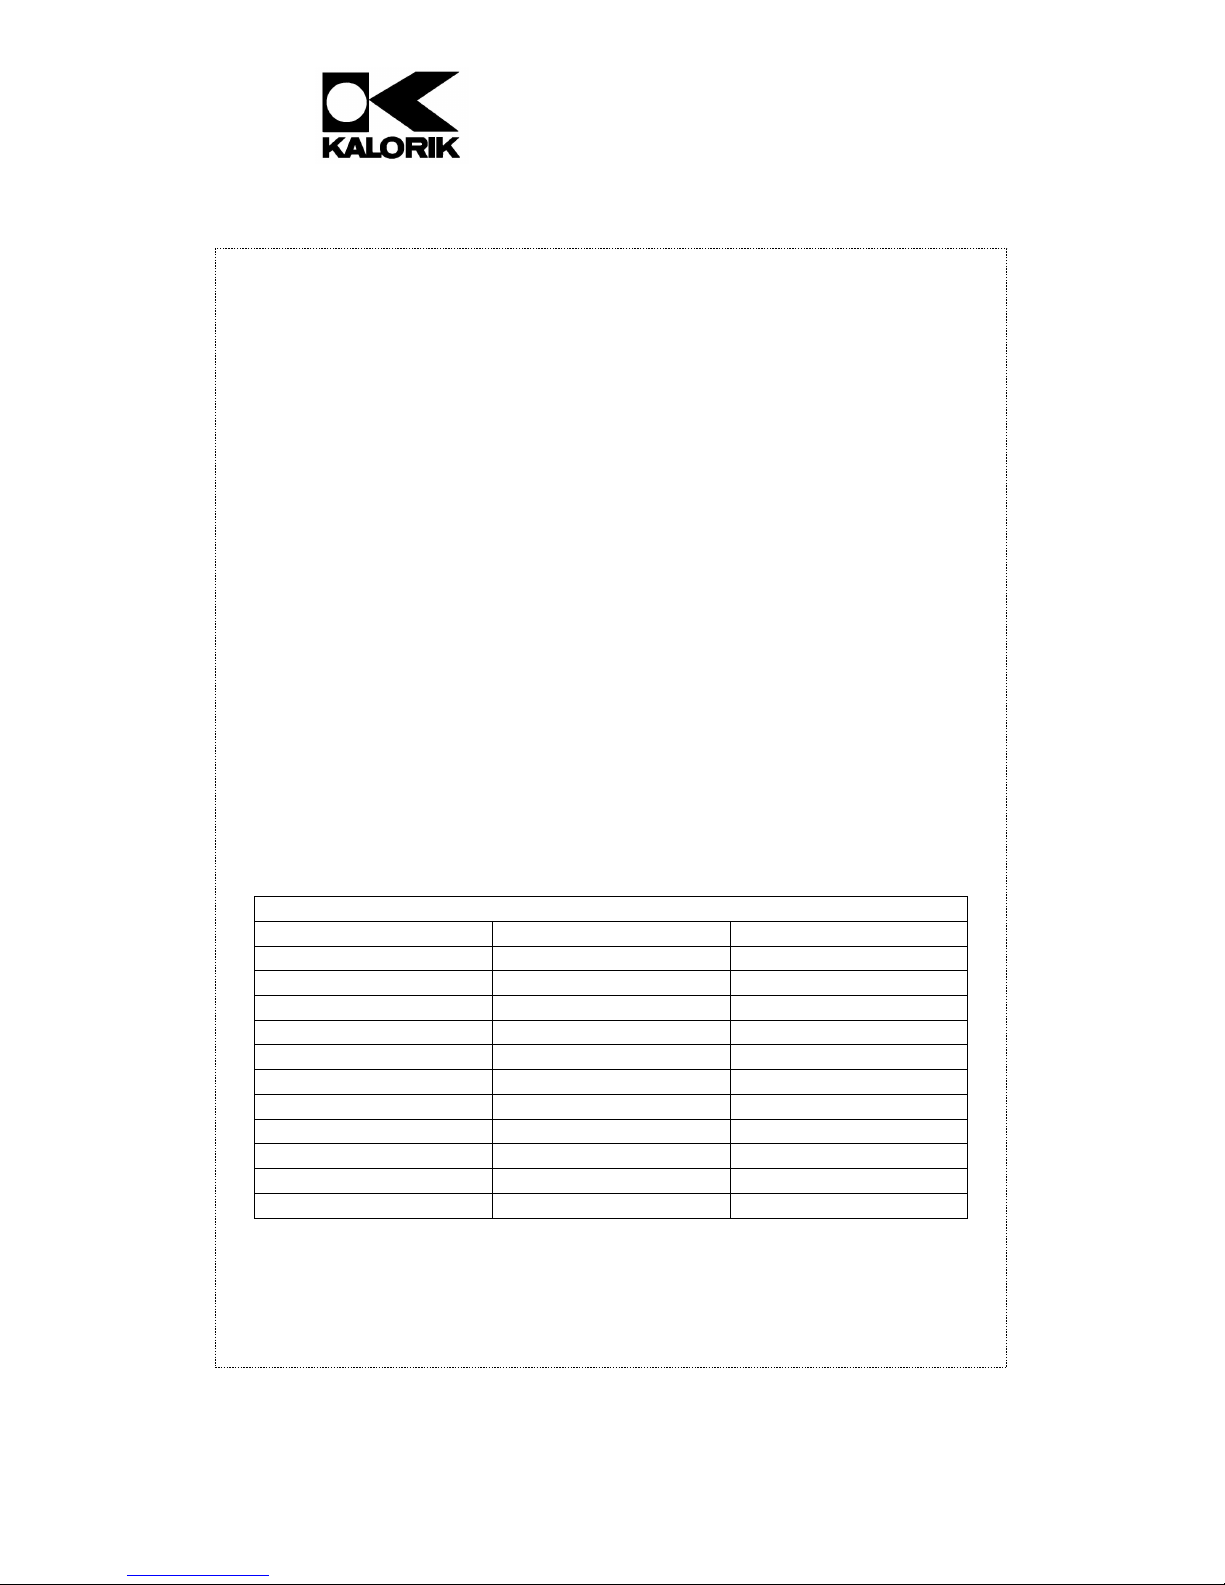
3. Refer to the steaming guide for vegeta les or meats for hints and
approximate steaming times. It is est to insert the food to e
steamed toward the end of the rice cooking cycle so that your
meal is fresh and warm all at once.
4. Place your choice of vegeta les or meat into the steam tray. Lift
the lid, using caution as steam escaping will e extremely hot,
and, using oven mitts, place the steam tray into the rice cooker.
5. Replace the lid and allow the cooker to resume cooking.
6. Once the food has een steamed for the appropriate time,
remove the lid. Use caution when removing the lid as steam
escaping will e extremely hot. Using oven mitts, remove the
inner pot and check the food to make sure that it has een
cooked thoroughly. Exercise extreme caution when removing the
steam tray as it will also e hot!
7. If the rice has not finished cooking, replace the lid of the rice
cooker and allow it to continue to cook until done. Once the rice
is cooked, the rice cooker will eep 3 times and automatically
switch to “Keep Warm” mode.
8. Press the ON/OFF utton to turn off the rice cooker. If the ON/OFF
utton is not pressed, the rice cooker will remain in “Keep Warm”
mode. It is not recommended to leave rice in the cooker on
“Keep Warm” mode for more than 12 hours.
OTE: Do note attempt to cook more than 8 cups of uncooked rice
if steaming and using the rice cooker simultaneously. The steam
tray will not fit!
OTE: You can steam food at any point during the rice cooking
cycle. It is recommended that you steam during the end of the
cycle so that steamed foods do not grow cold or ecome soggy
efore the rice is ready.

Copies of the I/B. Please reproduce them without any
changes except under special instruction from Team
International USA. The pages must e reproduced and folded
in order to o tain a ooklet A5 (+/- 148.5 mm width x 210 mm
height). When folding, make sure you keep the good
num ering when you turn the pages of the I/B. Don’t change
the page num ering. Keep the language integrity. Print only
what is inside the frame.
10 SC 41501 - 120501
Assem ly page 10/28
Fax +1 305 430 9692
CLEA I G A D CARE
• Always press the “On/Off” utton to shut the rice cooker off.
Unplug the appliance and wait for it to cool down efore
cleaning it.
• Remove the lid and take the inner pot out using the handles.
Wash them in hot, soapy water together with the spatula and the
measuring cup. You can immerse them in water, ut never use
scouring pads or a rasive cleansers and materials to clean them.
Rinse thoroughly and then pat them dry with a soft cloth.
• Clean the housing of the cooker with a clean, damp cloth.
Never clean any part of the cooker with a rasive cleansers or
materials. Use a damp cloth or sponge with water and mild dish
detergent. Do not su merge any part of cooker in water. Wash
only the inner pot and the lid in or under water.
• IMPORTANT! The underside of the inner pot needs to e cleaned
after each use!
• Never immerse the appliance in water or any other liquid. Never
fill the inner pot with water to clean it when it is still in the cooker!
• RETRACTABLE POWER CORD: The rice cooker is supplied with a
pull-out, retracta le power cord for convenient storage. Simply
pull out the power cord gently to the desired length, or until a
marking appears on the cord to indicate to stop pulling. Do not
pull further than this marking or it will damage the power cord.
• To retract the cord after use, simply tug on the cord slightly further
y 1-2 inches and the cord will automatically recoil itself ack
into its storage compartment under the ase.
• CAUTIO ! Always hold the plug while retracting the cord. Do not
let the cord retract freely. The cord may jam on the reel or the
loose cord may whip ack and forth, which could cause injury.
Do not allow children to play with the retracta le cord feature as
the cord may cause injury.
• Do not put the glass lid in the refrigerator, otherwise it may crack.
• Do not use the lid if it is chipped, cracked, or severely scratched.
• Do not attempt to repair or replace a damaged power cord!
Contact the manufacturer’s repair center, its service agent, or a
similarly qualified person for repair or replacement of the power
cord.

Copies of the I/B. Please reproduce them without any
changes except under special instruction from Team
International USA. The pages must e reproduced and folded
in order to o tain a ooklet A5 (+/- 148.5 mm width x 210 mm
height). When folding, make sure you keep the good
num ering when you turn the pages of the I/B. Don’t change
the page num ering. Keep the language integrity. Print only
what is inside the frame.
11 SC 41501 - 120501
Assem ly page 11/28
Fax +1 305 430 9692
• Caution! Before starting to cook, always make sure that the
ottom of the inner pot and the surface of the heating plate are
clean and perfectly dry.
• Always insert and then turn the cooking pot left and right to make
sure it sits well on the heating plate inside the rice cooker.
Otherwise the rice cooker will not work and may e damaged.
• Any other servicing should e performed y an authorized
service representative.

Copies of the I/B. Please reproduce them without any
changes except under special instruction from Team
International USA. The pages must e reproduced and folded
in order to o tain a ooklet A5 (+/- 148.5 mm width x 210 mm
height). When folding, make sure you keep the good
num ering when you turn the pages of the I/B. Don’t change
the page num ering. Keep the language integrity. Print only
what is inside the frame.
12 SC 41501 - 120501
Assem ly page 12/28
Fax +1 305 430 9692
WARRA TY
We suggest that you complete and return the enclosed Product
Registration Card promptly to facilitate verification of the date of
original purchase. However, return of the Product Registration Card is
not a condition of these warranties. You can also fill out this warranty
card online, at the following address: www.KALORIK.com
This KALORIK product is warranted in the U.S.A. for 1 year from the
date of purchase against defects in material and workmanship. This
warranty is not transfera le. Keep the original sales receipt. Proof of
purchase is required to o tain warranty performance.
During this period, if the KALORIK product, upon inspection y
KALORIK, is proven defective, it will e repaired or replaced, at
Kalorik’s option, without charge to the customer. If a replacement
product is sent, it will carry the remaining warranty of the original
product.
This warranty does not apply to any defect arising from a uyer's or
user's misuse of the product, negligence, failure to follow KALORIK
instructions noted in the user’s manual, use on current or voltage
other than that stamped on the product, wear and tear, alteration
or repair not authorized y KALORIK, or use for commercial purposes.
There is no warranty for glass parts, glass containers, filter asket,
lades and agitators, and accessories in general. There is also no
warranty for parts lost y the user.
ANY WARRANTY OF MERCHANTABILITY OR FITNESS WITH RESPECT TO
THIS PRODUCT IS ALSO LIMITED TO THE ONE YEAR LIMITED WARRANTY
PERIOD.
Some states do not allow limitation on how long an implied warranty
lasts or do not allow the exclusion of incidental or consequential
damages, so the a ove limitations may not apply to you. This
warranty gives you specific legal rights, and you may also have other
rights which vary from state to state.

Copies of the I/B. Please reproduce them without any
changes except under special instruction from Team
International USA. The pages must e reproduced and folded
in order to o tain a ooklet A5 (+/- 148.5 mm width x 210 mm
height). When folding, make sure you keep the good
num ering when you turn the pages of the I/B. Don’t change
the page num ering. Keep the language integrity. Print only
what is inside the frame.
13 SC 41501 - 120501
Assem ly page 13/28
Fax +1 305 430 9692
If the appliance should ecome defective within the warranty
period and more than 30 days after date of purchase, do not return
the appliance to the store: often, our Customer Service
Representatives can help solve the pro lem without having the
product serviced. If servicing is needed, a Representative can
confirm whether the product is under warranty and direct you to the
nearest service location.
If this is the case, ring the product, or send it, postage prepaid y
the user (all Kalorik customers are responsi le for the initial shipment
ack to the warranty center), along with proof of purchase and a
return authorization number indicated on the outer package, given
y our Customer Service Representatives. Send to the authorized
KALORIK Service Center (please visit our we site at
www.KALORIK.com or call our Customer Service Department for the
address of our authorized KALORIK Service Center).
When sending the product, please include a letter explaining the
nature of the claimed defect.
If you have additional questions, please call our Customer Service
Department (please see elow for complete contact information),
Monday through Thursday from 9:00am - 5:00pm (EST) and Friday
from 9:00am - 4:00pm (EST). Please note hours are su ject to change.
If you would like to write, please send your letter to:
KALORIK Customer Service Department
Team International Group of America Inc.
1400 N.W 159th Street, Suite 102
Miami Gardens, FL 33169 USA
Or call:
Toll Free: +1 888-521-TEAM / +1 888-KALORIK
Only letters can be accepted at this address above. Shipments and
packages that do not have a return authorization number will be
refused.

Copies of the I/B. Please reproduce them without any
changes except under special instruction from Team
International USA. The pages must e reproduced and folded
in order to o tain a ooklet A5 (+/- 148.5 mm width x 210 mm
height). When folding, make sure you keep the good
num ering when you turn the pages of the I/B. Don’t change
the page num ering. Keep the language integrity. Print only
what is inside the frame.
14 SC 41501 - 120501
Assem ly page 14/28
Fax +1 305 430 9692
CO SIG ES DE SECURITE
Pour utiliser un appareil électrique, des précautions élémentaires
sont à respecter, telles que celles énumérées ci-dessous :
1. LISEZ L’E SEMBLE DES I STRUCTIO S AVA T L’USAGE.
2. Avant d'utiliser l'appareil, vérifiez que la tension du réseau
correspond ien à celle notée sur la plaque signalétique de votre
appareil.
3. Ne touchez pas les surfaces chaudes. Utilisez les poignées et les
outons.
4. Utilisez uniquement sur une surface plane, horizontale, sèche et
résistante à la chaleur.
5. Pour éviter les risques d’électrocution, n'immergez pas le cordon,
la fiche, l’appareil ou le panneau de contrôle dans l'eau ou dans
tout autre liquide.
6. Faites particulièrement attention lorsque l’appareil est utilisé par
ou en présence d’enfants.
7. Les enfants doivent être supervisés pour s’assurer qu’ils ne jouent
pas avec l’appareil.
8. Ne faites pas fonctionner l'appareil si son cordon ou sa fiche est
endommagé ou si l'appareil a présenté un dysfonctionnement
ou est endommagé. Retournez l’appareil au centre de service
autorisé pour le faire vérifier ou réparer.
9. Dé ranchez l'appareil de la prise murale lorsqu’il n’est pas utilisé
ou avant de le nettoyer. Laissez-le refroidir avant d’enlever ou
d’ajouter des accessoires ou de le nettoyer.
10. L'utilisation d’accessoires non recommandés par le fa ricant
présente des risques d’incendie, d’électrocution ou de lessure.
11. N'utilisez pas l'appareil à l'extérieur.
12. Ne laissez pas le cordon pendre de la ta le ou du comptoir et
évitez qu’il touche une surface chaude.
13. Ne placez pas l'appareil sur ou près d'un rûleur à gaz ou
électrique ou dans un four chaud.
14. Prenez un maximum de précautions lorsque vous déplacez un
appareil contenant de l’huile chaude ou tout autre liquide
chaud.

Copies of the I/B. Please reproduce them without any
changes except under special instruction from Team
International USA. The pages must e reproduced and folded
in order to o tain a ooklet A5 (+/- 148.5 mm width x 210 mm
height). When folding, make sure you keep the good
num ering when you turn the pages of the I/B. Don’t change
the page num ering. Keep the language integrity. Print only
what is inside the frame.
15 SC 41501 - 120501
Assem ly page 15/28
Fax +1 305 430 9692
15. Pour dé rancher, placez tous les contrôles en position éteinte
(« OFF ») et retirer la fiche de la prise murale. Ne tirez pas sur le
cordon, utilisez la fiche.
16. ATTE TIO : Pour éviter d’endommager ou de provoquer une
décharge électrique, ne cuisinez pas directement dans la ase.
Cuisinez uniquement dans le récipient amovi le.
17. N’utilisez pas l’appareil pour d’autres usages que ceux pour
lesquels il est conçu, c’est-à-dire cuire du riz ou des aliments à la
vapeur.
18. Assurez-vous avant chaque usage quel l’extérieur du pot intérieur
de cuisson soit ien sec. S’il est humide, il pourrait endommager
l’appareil ou le faire mal fonctionner.
19. N’insérez pas de la nourriture de grande taille, ou des ustensiles
en métal dans l’appareil car ils pourraient causer des chocs
électriques.
20. UN risque d’incendie pourrait survenir si l’appareil est recouvert
ou entre en contact avec des matériaux inflamma les, tes que
des rideaux, des draperies, des murs, etc., lorsque l’appareil est
en fonction.
21. Ne nettoyez pas l’appareil avec des tampons à récurer
métalliques. Des morceaux pourraient s’en détacher et entrer en
contact avec des parties électriques, occasionnant un risque de
choc électrique.
22. Ne rangez pas dans l’appareil aucunes autres pièces que celles
fournies ou recommandées par le fa ricant.
23. Ne placez jamais les matériaux suivant dans l’appareil : papiers,
cartons, pièces plastiques et équivalent.
24. Si le cordon fourni est endommagé, il doit être remplacé par un
cordon spécifique ou un assem lage de pièces disponi le
auprès du fa ricant ou de son service agréé.
CO SERVEZ CES I STRUCTIO S
USAGE DOMESTIQUE U IQUEME T

Copies of the I/B. Please reproduce them without any
changes except under special instruction from Team
International USA. The pages must e reproduced and folded
in order to o tain a ooklet A5 (+/- 148.5 mm width x 210 mm
height). When folding, make sure you keep the good
num ering when you turn the pages of the I/B. Don’t change
the page num ering. Keep the language integrity. Print only
what is inside the frame.
16 SC 41501 - 120501
Assem ly page 16/28
Fax +1 305 430 9692
CO SIG ES DE SECURITE ADDITIO ELLES
Attention: surfaces chaudes. Cet appareil génère de la chaleur et de
la vapeur chaude pendant son utilisation ; prenez toutes les
précautions adéquates pour éviter tout risque de brulures par
contact avec la peau, ou blessures, départ de feu et dommages
physiques à la propriété.
1. Ce produit n’est pas un jouet. Tenir hors de portée des enfants et
des animaux. Ce produit n’est pas conçu pour être utilisé par des
enfants, ou par des personnes avec des capacités physiques,
sensorielles ou mentales diminuées, ou ien manquant
d’expérience, à moins que ces personnes soient supervisées ou
formées à l’utilisation de ce produit par une personne
responsa le de leur sécurité. Des précautions supplémentaires
sont toujours à prendre pour l’utilisation de ce produit.
2. Si l’appareil est accidentellement plongé dans l’eau,
dé ranchez le cordon de la prise de courant immédiatement.
N’essayez pas de toucher l’eau si le cordon est toujours
connecté à la prise murale.
3. Si l’appareil devait ne plus fonctionner correctement,
dé ranchez-le de la prise murale, et n’essayez pas de le réparer
à moins d’être un électricien qualifie pour cette tâche.
4. Soulevez précautionneusement le couvercle, en le dirigeant loin
de votre visage, pour éviter de vous ruler, et permettre à l’eau
de condensation de retom er dans le pot intérieur.
5. Placez toujours la mijoteuse sur une surface résistante à la
chaleur.
6. Dé ranchez toujours l’appareil quand le pot intérieur n’est pas
présent, ou quand l’appareil n’est pas utilisé. Rappelez-vous que
la fonction de garde au chaud ne peut fonctionner que quand
l’appareil est connecté à une source de courant électrique.
7. Pour cuire, placez toujours le pot intérieur dans l’appareil avant
de mettre sous tension. Tournez le pot de gauche à droite pour
vous assurer qu’il est parfaitement inséré.
8. Placez le couvercle sur le pot intérieur pendant la cuisson.
Gardez le couvercle en place après le service pour éviter que
votre riz ne sèche ou ne décolore.
9. Gardez le fond extérieur et la plaque de cuisson li res de toutes
matières étrangères, pour éviter tout risque de mal-fonction.

Copies of the I/B. Please reproduce them without any
changes except under special instruction from Team
International USA. The pages must e reproduced and folded
in order to o tain a ooklet A5 (+/- 148.5 mm width x 210 mm
height). When folding, make sure you keep the good
num ering when you turn the pages of the I/B. Don’t change
the page num ering. Keep the language integrity. Print only
what is inside the frame.
17 SC 41501 - 120501
Assem ly page 17/28
Fax +1 305 430 9692
10. Le riz ne doit pas être laissé dans le cuiseur en mode « Garde au
chaud » plus de 24 heures.
11. Pour éviter tout risque de déformation ou dommage, ne placez
pas le pot intérieur sur un ruleur de gazinière ou une plaque de
cuisson électrique.
12. Attention ! Pour éviter tout risque de choc électrique ou
dommage, ne cuisinez jamais de la nourriture directement dans
la base, et bien seulement dans le pot intérieur fourni.
I STRUCTIO S POUR LES FICHES POLARISÉES
Cet appareil est équipé d’une prise polarisée (une des deux tiges
métalliques est plus large que l’autre). Pour réduire le risque de choc
électrique, cette prise ne peut être introduite que d’une seule façon
dans la fiche murale. Si cette prise ne rentre pas correctement dans
la fiche, retournez-la. Si elle ne rentre toujours pas, contactez un
électricien qualifié. ’essayez jamais de modifier vous-même la prise
polarisée.
CO SIG ES CO CER A T LE CORDO
Le cordon d’alimentation de l’appareil est un cordon de type court,
et ce afin de diminuer les risques d’accidents (chute si vous marchez
sur le cordon...). Vous pouvez toutefois utiliser une rallonge si
nécessaire mais:
• Assurez-vous que l'ampérage de la rallonge est égal ou
supérieur à celui de l'appareil. Une rallonge avec un
ampérage inférieur à celui de l'appareil risquerait de
surchauffer et de rûler.
• La rallonge ne doit pas pendre du plan de travail ou de la
ta le afin d'éviter que les enfants ne le tirent ou tré uchent.
AVA T LA PREMIERE UTILISATIO
•
Dé allez soigneusement votre cuiseur de riz, retirer et jetez tous
les éléments d’em allage, et lavez les éléments comme indiqué
plus loin dans la section « NETTOYAGE ET ENTRETIEN».

Copies of the I/B. Please reproduce them without any
changes except under special instruction from Team
International USA. The pages must e reproduced and folded
in order to o tain a ooklet A5 (+/- 148.5 mm width x 210 mm
height). When folding, make sure you keep the good
num ering when you turn the pages of the I/B. Don’t change
the page num ering. Keep the language integrity. Print only
what is inside the frame.
18 SC 41501 - 120501
Assem ly page 18/28
Fax +1 305 430 9692
DESCRIPTIO
1. Poignée du couvercle
2. Couvercle en verre
3. Pot intérieur / bol de cuisson
4. Poignées du cuiseur
5. Corps
6. Cordon rétractable
7. Base
8. Bouton « Riz Brun » (BROW RICE)
9. Bouton « Marche/Arrêt » (O /OFF)
10. Bouton « Riz Blanc » (WHITE RICE)
11. Bouton « Garde au Chaud » (KEEP
WARM)
12. Bouton « Rissolage » (SAUTE)
13. Bouton « Cuisson vapeur » (STEAM)
14. Panier cuisson vapeur
15. Spatule
16. Verre mesureur de riz / doseur
UTILISATIO
Cuire du riz :
1. En utilisant le doseur de riz fourni, mesurez la quantité de riz
souhaitée. Une dose de riz non-cuit rendra deux doses de riz une
fois cuit.
2. Rincez le riz dans un récipient à part, jusqu’à ce que l’eau soit
claire.
Note : pour un riz moins ferme, laissez le riz tremper dans l’eau
pendant 10 minutes
3. Mettez le riz rincé dans le pot intérieur.

Copies of the I/B. Please reproduce them without any
changes except under special instruction from Team
International USA. The pages must e reproduced and folded
in order to o tain a ooklet A5 (+/- 148.5 mm width x 210 mm
height). When folding, make sure you keep the good
num ering when you turn the pages of the I/B. Don’t change
the page num ering. Keep the language integrity. Print only
what is inside the frame.
19 SC 41501 - 120501
Assem ly page 19/28
Fax +1 305 430 9692
4. En utilisant le doseur, ou le marquage à l’intérieur du ol de
cuisson, ajoutez la quantité d’eau appropriée. Référez-vous à la
ta le ci-dessous pour le ratio riz/eau recommandé.
5. Assurez-vous que l’extérieur du ol de cuisson est propre et sec,
puis placez-le dans le cuiseur de riz. Placez le couvercle sur le pot
intérieur et ranchez l’appareil dans une prise murale.
6. Pour commencer à cuire, appuyez sur le outon « On/Off » puis
sur « White Rice » (Riz lanc) ou « Brown Rice » (Riz run), selon le
type de riz étant à cuire. Les voyants lumineux « On » et du
programme sélectionné s’illuminent. Une fois la cuisson terminée,
the cuiseur de riz va émettre 3 signaux sonores ( ips) et passer en
mode KEEP WARM (« Garde au chaud »).
ote : vous pouvez annuler votre sélection à tout moment en
appuyant sur le outon « ON/OFF » (Marche/Arrêta) et en
sélectionnant ensuite le programme approprié.
7. Une fois la cuisson terminée, retirer le couvercle et utilisez la
spatule pour remuer le riz. Cela li èrera l’excès d’humidité et
donnera au riz une texture plus aérée. Cela fait, remettez le
couvercle et laissez le riz en mode garde au chaud pendant 5 à
10 minutes de plus. Cela lui assurera une texture et un degré
d’humidité optimaux.
8. Pressez le outon ON/OFF pour éteindre le cuiseur de riz. Si ce
outon n’est pas pressé, le cuiseur de riz restera en mode de
garde au chaud. Il n’est pas recommandé de laisser du riz au
chaud pendant plus de 12 heures.
Quantité de
riz cru
Quantité
d’eau avec
doseur
iveau
d’eau
dans le
pot
intérieur
Quantité
de riz cuit Temps de cuisson (environ)
4 doses 7-1/2 4 8 doses
Riz lanc: 35-40 Min.
Riz run: 95-110 Min.
6 doses 10-1/2 6 12 doses
Riz lanc: 40-45 Min.
Riz run: 115-125 Min.
8 doses 13-1/2 8 16 doses
Riz lanc: 40-45 Min.
Riz run: 115-125 Min.
10 doses 16-1/2 10 20 doses
Riz lanc: 45-50 Min.
Riz run: 125-130 Min.

Copies of the I/B. Please reproduce them without any
changes except under special instruction from Team
International USA. The pages must e reproduced and folded
in order to o tain a ooklet A5 (+/- 148.5 mm width x 210 mm
height). When folding, make sure you keep the good
num ering when you turn the pages of the I/B. Don’t change
the page num ering. Keep the language integrity. Print only
what is inside the frame.
20 SC 41501 - 120501
Assem ly page 20/28
Fax +1 305 430 9692
OTES:
Le riz run demande un temps de cuisson eaucoup plus long que les
autres variétés de riz, du fait de sa structure de grains composée de
plusieurs couches. La fonction « « Riz run » permet un temps de cuisson plus
long et une température de cuisson adaptée à la cuisson correcte de ce
type de riz.
Pour éviter une perte de vapeur et des temps de cuisson plus long, laissez le
couvercle en place pendant la cuisson.
Une mesure de riz ne correspond pas à une tasse (US Cup) de riz.
Fonction de rissolage :
La fonction de rissolage est un excellent moyen de faire « sauter »
des légumes et de runir des pièces de viande.
1. Ajoutez les ingrédients à sauter dans le pot intérieur, avec un peu
d’huile ou de matières grasses.
2. Pressez le outon « On/Off » puis le outon « Sauté » pour
préchauffer le cuiseur. Les voyants lumineux « On » et du
programme sélectionné s’illuminent Avec une longue cuillère en
ois, remuez les ingrédients dans le pot, jusqu’à ce qu’ils soient
rissolés de la façon souhaitée.
3. Eteignez le cuiseur de riz en appuyant sur « ON/OFF ».
4. Avec des gants de cuisine, retirez les aliments sautés du cuiseur,
en faisant très attention car le cuiseur va être extrêmement
chaud.
ATTE TIO !
• N’utilisez pas la spatule fournie avec la fonction « Sauté », car elle
n’est pas conçue pour entrer en contact avec des surfaces très
chaudes. Utilisez une longue cuillère en ois pour remuer les
aliments.
• Il est important d’éteindre le cuiseur de riz après le rissolage car
l’appareil ne s’éteindra pas de lui-même et n’entrera pas
automatiquement en mode « Garde au Chaud ».
Cuisson à la vapeur :
1. Ajouter la quantité d’eau désirée dans le pot intérieur (voir la
ta le ci-dessous pour référence)
2. Placez les aliments à cuire dans le panier vapeur.
3. Mettez le panier vapeur dans le cuiseur, sur le dessus du pot
intérieur. Mettez le couvercle ien en place par-dessus.
Table of contents
Languages:
Popular Rice Cooker manuals by other brands

WMF
WMF Kuchenminis series operating manual

Philips
Philips HD3126 user manual

Continental Electric
Continental Electric CE23261 instruction manual

Zojirushi
Zojirushi MICOM NL-DSQ10 operating instructions

Sencor
Sencor SRM 1001BK Translation of the original manual

Sunbeam
Sunbeam 4704 Instruction manual with recipes

National
National Rice-O-Mat SR-3NA operating instructions

Panasonic
Panasonic SR-CP108 operating instructions

Philips
Philips HD4745/00 quick start guide

Cuckoo
Cuckoo CRP-HF06 Fuzzy Series operating instructions

Cuckoo
Cuckoo CRP-HS06 Fuzzy Series operating instructions

Elite Gourmet
Elite Gourmet ERC-150 instruction manual