K&K Sound TRI-STAR User manual

92798 Cape Arago Hwy, Coos Bay, OR 97420 | 541-888-3517 | Toll Free 1-800-867-6863 | www.kksound.com
PRODUCT MANUAL
PURE PICKUP + TRI-STAR PREAMP
Thank you for choosing the Tri-Star Preamp + Pure
Pickup System! This system combines the Tri-Star
Pro Preamp with a Pure Mini, Pure Classic, or Pure
12-String Pickup.
For pickup installation, please refer to the included
Pure installation manual. This manual covers preamp
installation only. Please note that the pickups
included with this system are color-coded. Refer to
p. 2 of this manual to ensure that the pickups are
installed in the correct position.
The Tri-Star Preamp is a 3-channel, internally
mounted acoustic guitar preamp. It has been
designed specifically for use with the K&K Pure Mini,
Pure 12 String, or Pure Classic pickup.
The Tri-Star Preamp allows for individual gain control
of the three transducers of the Pure pisckups (with
the Pure Classic the two center pickups are grouped
together) to perfectly balance the pickups to your
guitar and your playing style. It also provides our
proprietary 3-band EQ for the overall signal.
The Tri-Star Pro Preamp adds a master volume
control thumb-wheel and a phase switch for
optimum tone and best feedback rejection.
To achieve individual gain control, we use one
discrete class A operational amplifier/buffer preamp
per pickup head. While the channel for the E -A
string pickup is set at full range, we progressively
add a preset bass-cut to the D-G and B-E channel. At
the D-G channel the bass is reduced only slightly
below 140 Hz. The B-E channel has a much more
dramatic bass cut below 250Hz. As the high strings
do not ring at low frequencies at all, this feature
provides a very sweet and crystal clear transmission
of the high stings that, as a nice by-product,
completely eliminates unwanted pick-attack noise.
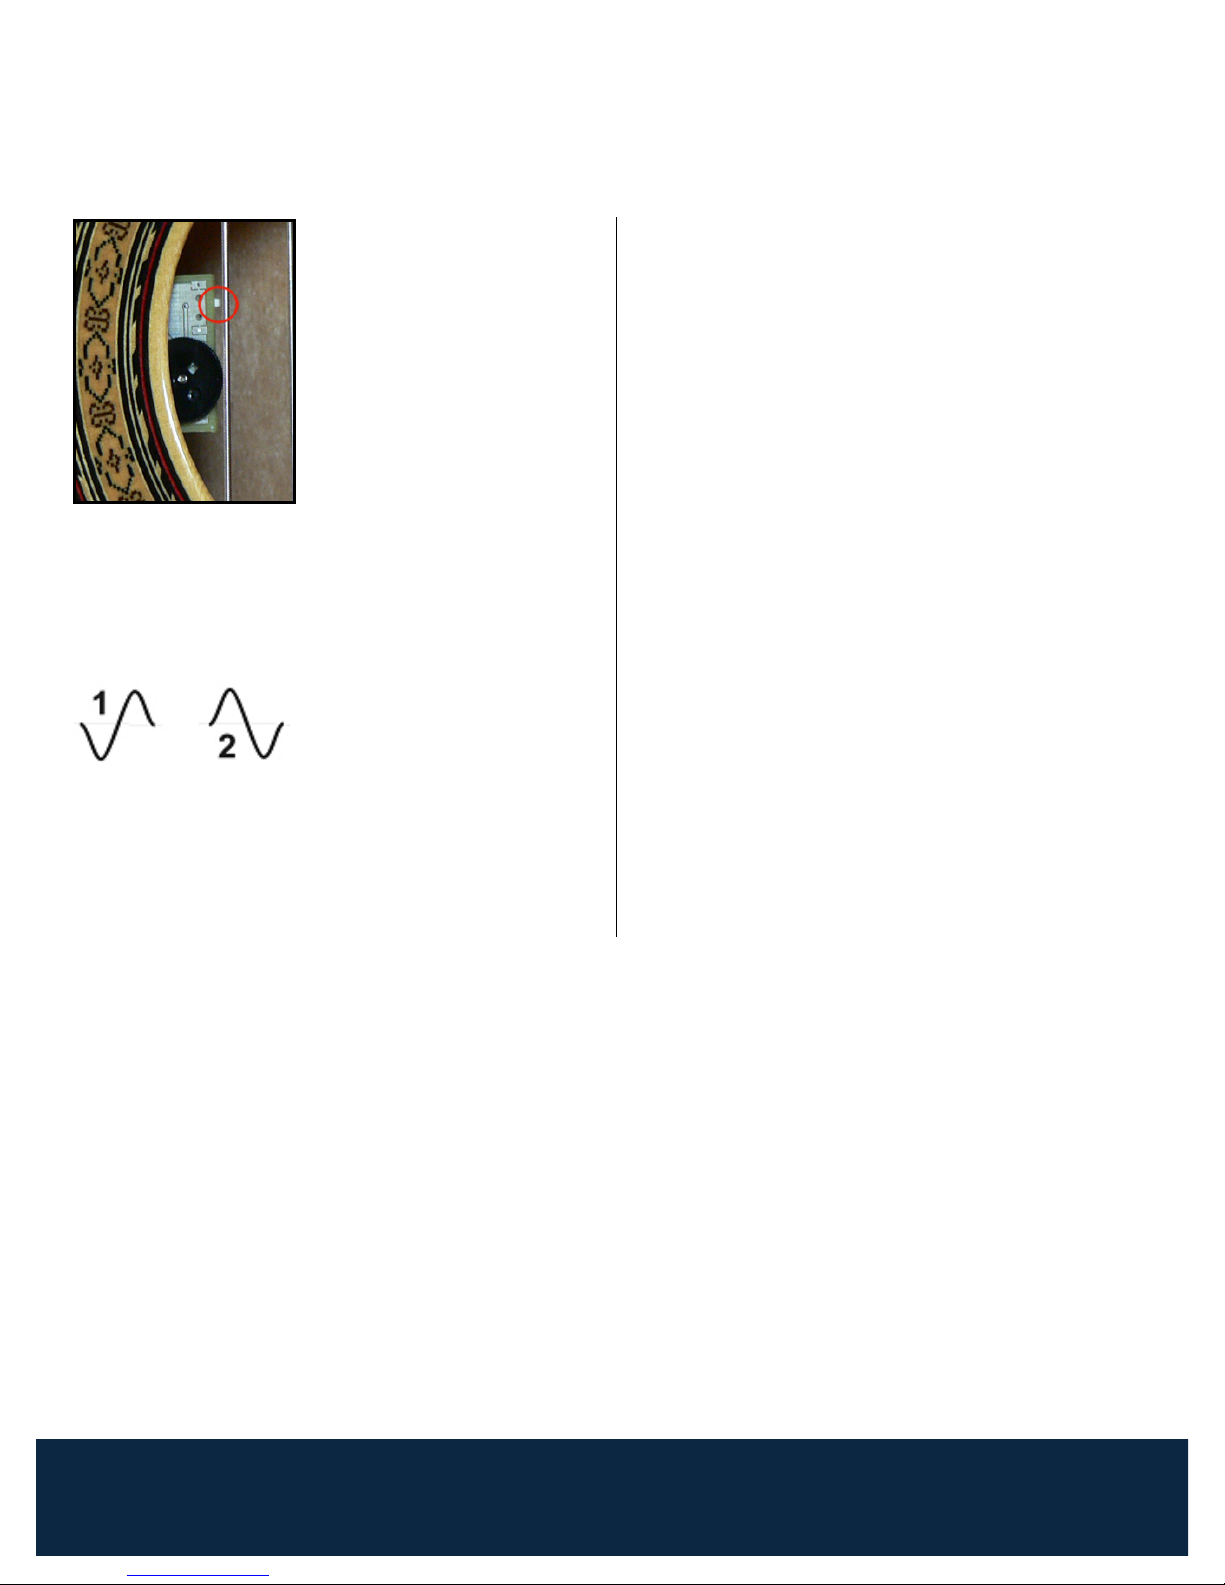
The trim-pot settings on the main circuit board can
be changed with the supplied long screwdriver. In
order to easily reach the trimmers through the sound
hole, we include two mounting wedges that allow for
installing the main preamp board at a 45-degree
angle.
We recommend mounting it this way for the first few
weeks, until you are absolutely sure you’ve achieved
the perfect EQ setting. After this you may consider
removing the wedges and laying the preamp flat on
the bottom for a more unobtrusive installation.

2
92798 Cape Arago Hwy, Coos Bay, OR 97420 | 541-888-3517 | Toll Free 1-800-867-6863 | www.kksound.com
INSTALLATION
1. Widen / drill the endpin hole to 15/32” or 12mm diameter. You may
use ½” for ease of tooling.
We strongly recommend you have this step done by a guitar tech or
luthier who has the proper tools.
2. Locate the big rectangular piece of soft Velcro. This is for the main
circuit board. Attach it to the bottom of the guitar (see position in step
#4).
3. Install the pickups by following the supplied instructions for the pickup.
IMPORTANT: The pickups are pre-soldered to the main circuit board. They are marked with
color stickers:
BLUE = E-A
RED = D-G
YELLOW = B-E
Please make sure to mount the pickups to the corresponding location.

3
92798 Cape Arago Hwy, Coos Bay, OR 97420 | 541-888-3517 | Toll Free 1-800-867-6863 | www.kksound.com
4. Locate the 2 mounting wedges (45-degree angle pieces) and mount
them on the Velcro as shown. They allow the main circuit board to be
in a convenient angle for trim-pot adjustment through the sound hole
using a long screwdriver.
NOTE: We recommend you install the pickup system first, before you
mount the wedges. It provides more clearance to work inside the guitar.
5. Locate the soft Velcro piece that is attached to the battery holder,
remove it and stick it onto the neck-block as shown.
NOTE: When changing the battery, we recommend pulling the complete
battery holder off the Velcro and removing it from the sound hole.
When inserting the battery, make 100% certain that it is inserted properly
and in the right direction. It takes some force to snap it into the contacts!
Tri-Star Pro Preamp only:
Locate the square soft Velcro piece for the master volume control element.
Trim it to fit the bracing in the area shown.
This exact location may differ depending on the guitar model.
Find a large enough spot anywhere on the low e-string side of the sound
hole. It depends on the support bracing around the sound hole.
Stick the Velcro (inside) to this location.

4
92798 Cape Arago Hwy, Coos Bay, OR 97420 | 541-888-3517 | Toll Free 1-800-867-6863 | www.kksound.com
ENDPIN JACK INSTALLATION
1. Unscrew the endpin jack's strap nut.
2. Take off the outer nut and washer. Do not
lose the 2 washers that are still on the jack
body.
3. Find out the thickness of your end block and
set the inner nut accordingly. Note: Copy the
inner nut distance of the previously used
endpin jack.
4. Once nut is in place, screw the screw cap in
as far as it goes. The screw cap does NOT
have to lock to the inner nut to be secure,
simply screw it in as far as it goes.
5. Insert the jack from the inside into the endpin
hole.
Tip: A chopstick or something similar is helpful to get
a hold of the jack to pull it through the hole.
6. Attach outside washer and nut and tighten.
7. Attach the strap nut.
Order of parts on the endpin jack (from outside to
inside):
1. Strap nut (outside)
2. Hex nut with smaller inner hole (outside)
3. Flat washer with smaller inner hole (outside)
4. Tooth washer (inside)
5. Flat washer with bigger inner hole (inside)
6. Hex nut with bigger inner hole (inside)
7. Screw cap (on opposite end, inside)
FINAL STEPS
1. Stick the main circuit board to the mounting wedges and secure the
pickup wires with one cable clip.
2. Note: We recommend attaching the cable clips to the guitar’s
bottom, to a bottom brace or to the side only. Do not secure cables
to the soundboard or to a soundboard brace.
3. (Tri-Star Pro Preamp only: Stick the master volume control board to
the Velcro on the inner edge of the soundboard.)
4. Insert a new 9-volt battery into the holder and stick it onto the Velcro
on the neck block.
5. Secure the endpin jack and volume control wires with the remaining cable clips.
6. Leave the battery holder wires loose to allow for pulling the holder out of the sound hole for battery
change.

5
92798 Cape Arago Hwy, Coos Bay, OR 97420 | 541-888-3517 | Toll Free 1-800-867-6863 | www.kksound.com
HOW THE PHASE SWITCH WORKS
The phase switch on the
master volume control
board of the Tri-Star Pro
Preamp is a white miniature
switch that moves left/right
(2 positions). As long as
your amplification
equipment does not reverse
the phase, the “in phase”
setting should be with the
white switch to the left –
away from the volume
wheel.
What is phase? Phase switches are usually marketed
as a feedback-controlling device, but they accomplish
more than just that. Phase determines at what point
in time a sound wave has its peak or trough.
This picture shows 2
(basically identical) sine
waves, but the wave on the
right (2) is inverted in
respect to the wave on the
left (1). Interestingly, if these two waves were played
back simultaneously from the same speaker-source
with the same volume, they would completely cancel
each other out and no sound would be heard. There
would be silence.
Out-of-phase guitar sound reproduction also suffers,
to a degree, from phase cancellations. Amplification
systems, effect units, or any electronic audio device
may or may not invert the phase in of the signal
coming in. In most cases the manufacturers do not
specify.
Every acoustic instrument projects sound waves in a
certain phase when it is played unplugged. The
phase that is projected from the amplified speaker
source needs to be "in phase" with the acoustic
instrument’s own sound waves or the result will not
be optimal.
An out-of-phase problem is indicated by early
feedback and tinny, unbalanced sound, which may be
tolerable in some tone ranges (positions on the fret
board) and quite noticeable in others, even resulting
in sound cancellations on some notes.
The phase switch allows for instant correction of this
problem. Toggling the phase switch back and forth,
you will notice fuller, warmer and nicely balanced
tone with less feedback in one setting. Test especially
the low E sting up the B on the 7th fret. Phase
problems are easier noticeable in the low register.
The warmer/fuller tone is the correct phase switch
setting. Keep in mind that it may be different with
different amplification systems.
Table of contents
Other K&K Sound Amplifier manuals