manuals.online logo
Brands
  1. Home
  2. •
  3. Brands
  4. •
  5. KANSAI SPECIAL
  6. •
  7. Sewing Machine
  8. •
  9. KANSAI SPECIAL W-8042 User manual

KANSAI SPECIAL W-8042 User manual

Industrial Sawm? Machines
lllansaillpecial
INSTRUCTION
MANUAL
W-8042
TWO NEEDLE, DOUBLE OHAINSTITCH, FLATBED MACHINE
WITH
TOP
COVER THREAD
THIS
MACHINE
IS
WELL
SUITED
FOR
ATTACHING
POCKETS
POR
TROUSERS
AND
JEANS,
W
From the library of: Superior Sewing Machine & Supply LLC
INDEX
1.
Machine
Description
2.
Machine
Specification
3.
Selection
of
Motor
Pulley
4.
Lubrication
5.
Changing
Needles
6.
Threading
7. '
Looper
Break
Down
Mechanism
8.
Adjustment
of
Stitch
Length
9:
Adjustment
of
Differential
Feed
Ratio
10.
Adjustment
of
Feed
Dog
height
11.
Needle
Clamp
Alignment
12.
Needle
Bar
Height
13.
Needle
to
Looper
Distance
14.
Needle
to
Looper
Clearance
15.
Looper
Avoid
Motion
16.
Needle
Guard
17.
Looper
Thread
Take-Up
Adjustment
18.
Needle
Thread
Take-Up
19.
Top
Covering
Looper
Adjustment
From the library of: Superior Sewing Machine & Supply LLC
PAGE 1
•1.
Machine
Description
W8042:
Two
needle double locked
chainstitch
machine
with top cover
thread
for
pocket
attaching.
W8042-1:
Three needle double
chainstitch
machine with top ,
thread
covering
the
center
and
right needles.
High
flat
bed
double
locked
chainstitch
machines
with
top
matic lubrication,
double
disc rotary take-up
and
thread tension
release
mechanism.
Machine
Specifications
number
of
needle
feed
needle
bar
needle
to
W8042
neeaies
2 / 1/4
/differential/
1
1
00
c
1o
1
r-«
/ 4.0
W8042-1
3 j
plain
j10.8 /
4.0
Stitch
length: 8 to
14
stitches
per inch
Needle
bar
stroke:
31mm
Needle type:
UY-128
GAS
itlO
to
y/90
Lubrication
system:
Fully
automatic
Maximum
speed: 4500
stitches
per
minute
From the library of: Superior Sewing Machine & Supply LLC
PAGE
2
Machine
Speed
RPM
Outside
60HZ
Diameter
of
Motor
Pulley
50HZ
5000
85mm
100mm
4500
75mm
90mm
4000
65mm
80mm
Rotation
of
the
pulley
is
counter-clockwise
See
Figure
#1
Figure
1
4.
Lubrication
Use a
straight
mineral
oil
equivalent
to
Tellesso
# 33
Filling
oil
resevoir:
remove
cap A and
fill
with
oil
to
line
B
of
oil
guage.(Fig.2)
Draining
oili
Remove
screw E to
drain
oil.
Drain and
refill
with
fresh
oil
after
the
first
month
of
operation
and
every
six
months
thereafter.
Servicing
filter;
Inspect the
filter
after
10 days
in
operation
there
after
at
one
month
intervals.
(Fig
2)
Clean
or
replace
the
filter
as
necessary.
Figure
2
From the library of: Superior Sewing Machine & Supply LLC
FACE
3
5.
Changing
needles
Loosen the
set
screw
replace
with a
fresh
needle
of
The
scarf
of
the nee He should face the
rear
of
the machine.CFig.
• X
O
Figure
3
VV
O=correct
X=incorrect
6.
Threading
^ Q
Pass
both upper
and
lower
threads
copectly
Adfust
Adjust the tension of thread with the thread tension nut Adjust
SO
that
satisfactory
stitching
can be obtained
at
atension of
as
low
as
practicable.
Figure
4
From the library of: Superior Sewing Machine & Supply LLC
PAGE. 4
7.
Looper
break
down
mechanism
This
machine
is
supplied
with
a
looper-take
down mechanism
to
elimi
nate
the
difficulty
of
threading
multiple
loopers.
Figure
5
Looper
threading
as
follows:
1.
Press
at
point
A
in
fig.
5 to expose the
loopers
for
easy
threading.
2.
Press
up
at
point
B
in
fig.
5,
or
push
loopers
to
the
left
to
return
the
loopers
to
the
operating
position.
From the library of: Superior Sewing Machine & Supply LLC
PAGE
5
.8.
Adjustment
of
feed
length
The
feed
length of this
machine
is adjusted at
2mm
per
stitch
(12
stitches per inch)
when
shipped out
from
the factory.
If
another
stitch
length
is
required,
it
can
be
changed,
wrthrn the limits
specified
in the
specifications
on
page
2.
Figure
6
a.
Loosen
Nut
A
in
Fig.6
b
Turn
screw
B (in
clockwise
direction
stitch
length will
be
smaller
L
tL
counter-clock«ise
direction
the
strtch
length
wrll
be
made
larger.)
c.
Tighten
Nut A
d.
Run
machine, observe
stitch
length.
u-
Repeat
adjustment
until
proper
stitch
length
is
achieved.
From the library of: Superior Sewing Machine & Supply LLC
PAGE- 6
9. Adjustment
of
differential
feed
ratio
Loosen
the nut I
and
raise the connecting crank H for
differentia? ratio,
and
lower
the
crank
for
decreasing
the
differen-
tial
ratio.
Figure
7
10. Adjustment
of
feed dog
height
^
'.ihen
the
feed'dog
is
at
its
"^^Shest
position
the
teeth
^?al-Led
h1°::rfto^::t^?ron^
^^^d^r^^ar^L^^der
It
the
san,e.
height.
( 7
Needle
plate
Figure
8
0 .
8-1.
2imn
•i
.1
1
ir^'
11.
Needle
clamp
alignment
The
needles
must
be
centered in the needle plate holes,
loosen
screw
A
in
Fig.
9.
A
Figure
9
To
adjust
From the library of: Superior Sewing Machine & Supply LLC
PAGE. 7
12.
Needle
bar
height
.•Dimension Yin Fig. 9 should
be
10.8
mm
when
the needle bar
is
at
the
upper
most
position.
To
adjust
loosen
nut
F in
Fig.
9 set
needle
bar
to
correct
height
then
tighten
nut
F.
13.
Distance
between
looper
and
needle
The
distance
between
the
tip
of the looper
and
the
edge
of
the needle,
when
the looper
is
located
at
its
farthest
position
to
Che
right,
must
be
4.0nim
(approximately
5/32)
Fig.
10
a.
b.
c.
d.
Figure
10
Figure
11
(Adjustment)
Loosen
nut
A
(it
has
a
left
hand
thread)
and
nut B
(it
has
aright
hand
thread)
on
connecting
rod
C.
, . / n
Turn the connecting rod C forward or backward to
obtain
t e
sion.
Fig.
11
Re-tighten
both
nuts,
first
nut
A
then
nut
B.
Make
sure
both
ball
joints
are
in
a
vertical
position.
14.
Needle.to
looper
clearance
The
clearance
from
the looper to the needle
when
the looper reaches
the center of the needle, the looper
will
be
dead
against the needle
with
MO
needle
deflection.
Fig.
12
(Adjustment)
r.Move^the'^loopL^holdfr
Lrwards
or
backwards
to
the
proper
position
c.Tighten
screw
E.
-Figure
12-
From the library of: Superior Sewing Machine & Supply LLC
PAGE
8 ^
15.
Looper
avoid
mobion
The
looper avoid motion on
this
loo'per across the
line
is
con?Lled
by
the
looper
avoid
eccentric. It is
located
on
Che
left
hand
side
of
the
looper
thread
take
up cam.
Fig.iJ
The
first
screw
in
the
operating direction A
should
be
on
the
flat
of
the
main
shaft.
;
J ©
Figure
13
16.
Needle
guard
The
needle
guard
of
the
W-8042
is
mounted
on
the
arm
bed
ting
and
is
stationary
But,
on
the
W-8042-1
it
is
mounted
on
the feed
^rocker
so
that
the
position of
the
needle
guard
is
moving
^^^h
the ^
synchronization of the needle
guard
is as follows. needle
iLper
comes
to
the
middle
of
the
^®®^l\scarf
the
tip
should
be
1.0
mm
below
the
top
edge
of the needle
guard
ATig.
1.0
nun
w-8042
ThiridjustLnt
is
made
by
loosening
screw
B
and
turning
screw
C
Tighten
screw
B
CHECK
alignment,
repeat
if
necess
y.
From the library of: Superior Sewing Machine & Supply LLC
PAGE
9
17.
Looper
thread
take-up
adjustment:
a.
Adjust
the
clearance
between
the
looper
thread
retaining
finger
B
and
the
bracket
E to
6--7mm
by
loosening
the
screw F.
Fig.
15
b.
c.
Adjust
the
position
of
the
looper
thread
guide
by
^he
screw^G
so
that
the thread guide hole A
shown
in
Fig.
15
shall
be on
line
of
the
main
shaft.
Figure
15
6-7ni/in
Main
shaft
Timimg
of
looper
thread
adjusting
cam.
Adjust the
screw
B so that the looper thread
looper
thread
adjusting
cam
when
the
needle
point is
on
the
the
looper.
Fig.'16
Figure
16
From the library of: Superior Sewing Machine & Supply LLC
PAGE
10
13.
Needle
thread
take-up
When
tTie
needle
bar
is
at
top
dead
center
point
"C"
of
the
needle
thread
eyelet
must be
at
3 on
the
graduated
scale.
To
adjust
loosen
screw
"C"
and
adjust.
The
amount
of
thread
take-up
can
be
adjusted
by
loosening
screw
"D".
Raise
to
reduce
take-up
amount
or
lower
to
increase
take-up
amount..
(Fig.
17)
r
Figure
17 'i: >
—
(•CMD-
19.
Top
covering
looper
adjustment
a.
Adjust
so
that
the
gap
between
the
front
hook
point
of
the
spreader
looper
arid
the
front
needle
shall
be
0.5
mm
when
the
looper
passes
by
the
front
needle,
and
that
the
hook
point
shall
be
at
the
point
A
on
the
needle
line
3
to
3.5
mm
apart
from
the
front
needle
when
the
looper
is
at
its
left
dead
point.
To
adjust
temporarily
tighten
the
screws
L
and
K.
Covering
thread
guide
wire
must
push
the
top
cover
thread
behind
the
right
needle
just
before
the
needle
bar
reaches
top dead
center.
(Fig.
18)
0,
5tn/m;
I •
Figure
18
From the library of: Superior Sewing Machine & Supply LLC
PAGE
11
(
19
continued.
.
.)
b.
Adjustment
of
spreader
looper.
Adjust
the
distance
between
the
top
face
of
the
needle
plate
and
the
lower
surface
of
the
spreader
looper
to
8
mm.
Also
adjust
the
distance
between
the
underside
of
the
spreader
thread
guide
and
the
top
surface
of
the
spreader
looper
to
0.5
mm.
Adjust
the
distance
between
the
spreader
thread
guide
and
the
*L'
guide
to
1 mm.
0,
5
m/til
4
0m/ni
•777 / /
/;
y !
/!
/-m-rm-r
M
Figure
19
From the library of: Superior Sewing Machine & Supply LLC

Other KANSAI SPECIAL Sewing Machine manuals

KANSAI SPECIAL RX9701J Series User manual

KANSAI SPECIAL

KANSAI SPECIAL RX9701J Series User manual

KANSAI SPECIAL SX Series User manual

KANSAI SPECIAL

KANSAI SPECIAL SX Series User manual

KANSAI SPECIAL DVC-200 SERIES User manual

KANSAI SPECIAL

KANSAI SPECIAL DVC-200 SERIES User manual

KANSAI SPECIAL DX9902-3U User manual

KANSAI SPECIAL

KANSAI SPECIAL DX9902-3U User manual

KANSAI SPECIAL BK-20 User manual

KANSAI SPECIAL

KANSAI SPECIAL BK-20 User manual

KANSAI SPECIAL LX-SP Series User manual

KANSAI SPECIAL

KANSAI SPECIAL LX-SP Series User manual

KANSAI SPECIAL MC 30 User manual

KANSAI SPECIAL

KANSAI SPECIAL MC 30 User manual

KANSAI SPECIAL V Series User manual

KANSAI SPECIAL

KANSAI SPECIAL V Series User manual

KANSAI SPECIAL RX series User manual

KANSAI SPECIAL

KANSAI SPECIAL RX series User manual

KANSAI SPECIAL DX Series User manual

KANSAI SPECIAL

KANSAI SPECIAL DX Series User manual
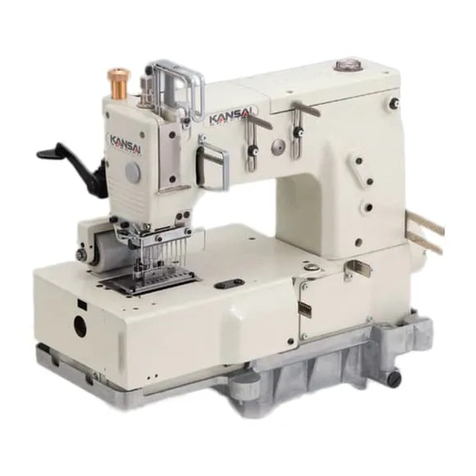
KANSAI SPECIAL WX Series User manual

KANSAI SPECIAL

KANSAI SPECIAL WX Series User manual

KANSAI SPECIAL RX/UTC Series User manual

KANSAI SPECIAL

KANSAI SPECIAL RX/UTC Series User manual

KANSAI SPECIAL BX Series User manual

KANSAI SPECIAL

KANSAI SPECIAL BX Series User manual

KANSAI SPECIAL V 7100 Series User manual

KANSAI SPECIAL

KANSAI SPECIAL V 7100 Series User manual

KANSAI SPECIAL DVK1702B User manual

KANSAI SPECIAL

KANSAI SPECIAL DVK1702B User manual

KANSAI SPECIAL WX8803/UTC User manual

KANSAI SPECIAL

KANSAI SPECIAL WX8803/UTC User manual

KANSAI SPECIAL DPW-1300 Series User manual

KANSAI SPECIAL

KANSAI SPECIAL DPW-1300 Series User manual

KANSAI SPECIAL MZ Series User manual

KANSAI SPECIAL

KANSAI SPECIAL MZ Series User manual

KANSAI SPECIAL DFB Series User manual

KANSAI SPECIAL

KANSAI SPECIAL DFB Series User manual
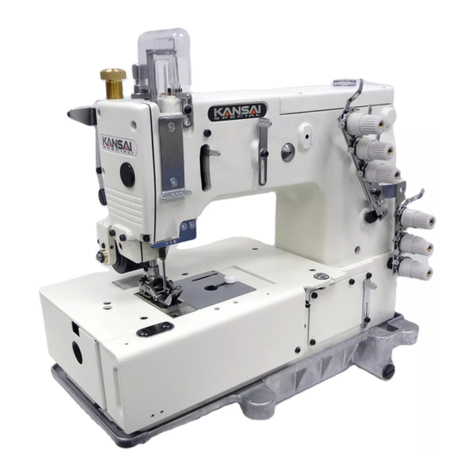
KANSAI SPECIAL MMX Series User manual

KANSAI SPECIAL

KANSAI SPECIAL MMX Series User manual

KANSAI SPECIAL UF Series User manual

KANSAI SPECIAL

KANSAI SPECIAL UF Series User manual

KANSAI SPECIAL DFB MR-S Series User manual

KANSAI SPECIAL

KANSAI SPECIAL DFB MR-S Series User manual

KANSAI SPECIAL SX Series User manual

KANSAI SPECIAL

KANSAI SPECIAL SX Series User manual

KANSAI SPECIAL DFB1412PS User manual

KANSAI SPECIAL

KANSAI SPECIAL DFB1412PS User manual

Popular Sewing Machine manuals by other brands

Singer QUANTUM 9910 Spare parts list

Singer

Singer QUANTUM 9910 Spare parts list

Duerkopp Adler 4182i-1 Instructions for service

Duerkopp Adler

Duerkopp Adler 4182i-1 Instructions for service

DURKOPP ADLER 540 - 100 operating instructions

DURKOPP ADLER

DURKOPP ADLER 540 - 100 operating instructions

Brother XL-2027 user manual

Brother

Brother XL-2027 user manual

DURKOPP ADLER M-Type Delta D867 Additional instructions

DURKOPP ADLER

DURKOPP ADLER M-Type Delta D867 Additional instructions

Brother HE-800B Service manual

Brother

Brother HE-800B Service manual

Brother RH-981A parts manual

Brother

Brother RH-981A parts manual

JUKI LZ-2280A Series instruction manual

JUKI

JUKI LZ-2280A Series instruction manual

Singer Feather Weight II instruction manual

Singer

Singer Feather Weight II instruction manual

Singer 114K103 Instructions for using

Singer

Singer 114K103 Instructions for using

ELNA eXcellence 680+ instruction manual

ELNA

ELNA eXcellence 680+ instruction manual

Duerkopp Adler 910 installation instructions

Duerkopp Adler

Duerkopp Adler 910 installation instructions

Brother JK2700NT Operation manual

Brother

Brother JK2700NT Operation manual

Mitsubishi Electric LU2-4410-B1T-CS instruction manual

Mitsubishi Electric

Mitsubishi Electric LU2-4410-B1T-CS instruction manual

Duerkopp Adler 1230i-6 Instructions for service

Duerkopp Adler

Duerkopp Adler 1230i-6 Instructions for service

Brother XC5434-051 Quick reference guide

Brother

Brother XC5434-051 Quick reference guide

Janome Sewing Machine Instruction book

Janome

Janome Sewing Machine Instruction book

ZOJE A9200L-D4-W-CP Operation manual

ZOJE

ZOJE A9200L-D4-W-CP Operation manual

manuals.online logo
manuals.online logoBrands
  • About & Mission
  • Contact us
  • Privacy Policy
  • Terms and Conditions

Copyright 2025 Manuals.Online. All Rights Reserved.