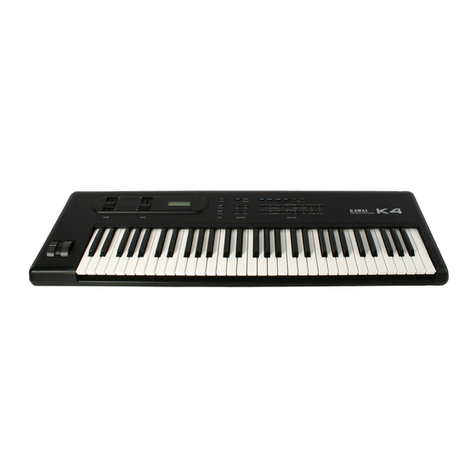
Kawai Synthesizer K4 User manual

KAWAI
Synthesizer
Synthesizer
Module
a
Es
Owner’s
Manual

Thank
you
for
purchasing
the
Kawai
K4/K4r
synthesizer.
This
revolutionary
new
synthesizer
uses
16-bit
sampled
and
synthesized
waveforms
for
optimum
sound
quality.
The
friendly
user-interface
and
parameter
structure
of
the
Kawai
K
series
has
been
retained,
and
new
functions
and
features
added
to
increase
the
K4/K4r
is
music
making
power.
Please
read
this
manual
thoroughly
before
using
the
K4/K4r.
It
has
been
written
to
allow
you
to
get
the
most
out
of
the
instrument's
capabilities
with
the
least
amount
of
effort.

4
4
=
K4
PANEL
LAYOUT
|
[FRONT
VIEW]
OD
CODCOD
D
DOCOO0O0OO
OD
DOODOCOC]D
Kawa
K
<4
[CONTROL
SWITCHES]
PT
en
a
sehen
i
cee
ee
ee
ssc
mo
|
INST
——————
SOURCE
Cc
Cs)
S-COMMON
Cr)
Hy
_—..?.——aaaaaan————
SECTION
ca
anvesYes
;
ona)
;
SEC
ch
LEVEL
"
C2)
Ce
DCA
MOD
<2
:
PLAY
=
MULTIEDIT
i
SINGLE
eorr
oe
jee
eee
oe
ae
ee

Contents
of
Panel
Nomenclature
i
PLAY
Mode
:
Select
Internal
or
Card
MULT!
Patch
(P.
12)
:
Select
Internal
or
Card
SINGLE
Patch
(P.
11)
GD
Gs
:
Select
and
Set
LINK
Play
(P.
15)
PLAY
:
Return
to
PLAY
mode
™
SINGLE
EDIT
Mode
:
Enter
EDIT
mode
(P.
28-33)
:
Select
Value
(P.
28)
PREV
:
Return
to
Previous
Parameter
(P.
28)
RECALL
:
Compare
with
Sound
before
Editing
(P.
28)
:
Perform
WRITE,
followed
by
SAVE
and
LOAD
(P.
26)
Ce)
Cz).
Cs
C4)
=
Select
EDIT
Source
(P.
32)
Co)
Ce)
C)
‘Select
Source
Mute
(P.
32)
Cs)
:
Select
Source
mode,
Pressure,
Wheel,
etc.
(P.
34)
ee
:
Select
Velocity,
KS
(Keyboard
Scaling)
Curve,
etc.
(P.
43)
:
Set
Volume
Envelope
(P.
48)
:
Select
Cutoff,
Resonance,
etc.
(P.
52)
E>
:
Change
Tuning
and
Tone
with
LFO
(P.
40)
ae
:
Set
Waveform
and
Pitch
(P.
46)
Cr)
:
Control
Volume
with
Velocity
and
KS
(P.
49)
:
Change
Tone
in
real
time
(P.
54)
DCF
MOD
PLAY
:
Return
to
PLAY
mode
m@
MULTI
EDIT
Mode
——
SECTION
SELECT———
:
Set
Instrument
(SINGLE)
to
be
edited
(P.
60)
——
SECTION
MUTE
~——
:
Set
MULTI
Section
Mute
(P.
60)
Ca)
—:
Set
MULTI
Instrument
(SINGLE)
(P.
61)
:
Set
Play
Range
(P.
62)
:
Set
MIDI
Channels
for
MULT!
Sections
(P.
63)
Co)
:
Set
Instrument
Level
and
Output
Destination
(P.
64)
PLAY
:
Return
to
PLAY
mode
@
Other
EDIT
Modes
:
Set
DRUM
Section,
Manual
Drums
(P.
66)
:
Set
EFFECT
(K4
only)
(P.
24,
71)
:
Set
Panpot
or
Individual
Output
(K4r
only)
(P.
24,
71)
:
Set
Tuning
and
MIDI
(P.
77)
:
Set
MIDI
Data
Dump
contents
and
Execute
Dump
(P.
82,
88)
PLAY
—:
Return
to
PLAY
mode
Basic
Control
EFFECT/
|
OUTPUT
I
EDIT
ADVANCEM
USER

=
K4/K4r
Synthesizer
Owner's
Manual
Contents
Features
...........:ccccceeeseeeeeees
sch
tag
bobvaadlecOisubseesaedenrtaauseeseaats
2
Names
Of:
Parts
6
sceco
us
insdevnscnccee
sess
tan
ves
vaacienn
wea
ceeeeieiewacees
5
GOMGMES
ses
hetes
steecauteacecdcsteeeddetnousdd
deed
ecitussiactdacaeecietabwsads
6
How
to
use
this
Manual
......................cceccecececsceceeseaenenseeceseces
8
Chapter
1.:
Introduction...................0...c.ceececesceceenecessesucesaeaees
9
1-1.
Instrument
Setup
...................ccccccecseceecseceeeeeeeeceseetanes
10
1.
Making
Connections.
..................cccccecececscesceccesescneseees
10
2.
/LOUGS
VIQVE
sizicisis
seater
vientdosuaadsiee
deck
pacdaueiesetcsasensenen
11
1.
Selecting
a
PLAY
Mode
(SINGLE
or
MULTI)
......................
11
2.
Possibilities
of
MULTI
PLAY
Mode....................0.c0cceseeeee
13
3.
Tuning
and
Transposing
..................cececcescesceccessesesseees
14
BLINK
PLOY
ssssiciuscacsvatsevcdantanvedeachachendesaveenubiviacateersaae
15
BDU
PAY,
ones
cesses
i
iweccerccuns
Gessecidexesoenackenteeneeese
ane
16
6.
Play
Using
a
Computer
or
Sequencer
...................02.00s0008
17
1-3.
The
Fundamentals
of
MIDI...................cccecescsseecseeesueeraee
18
Chapter
2.:
Applications
...................cccccsecesccscceecceceessseseereses
23
2-1.
K4/K4r
Structure
of
Patches...................c.ccccececeeceseenscees
24
2-2.
The
Tone
Editing
Process..................0ssssssccesseseecsereeeeses
25
2-3.
Saving
and
Loading
Data...................0cscccssesececeeeesseneens
26
2-4.
Before
Entering
EDIT
Mode
.....................ceecceescesessecees
28
2-5.
Editing
a
SINGLE
Patch
..................ccccccceeceeseeeceeceeceeeees
29
1.
SINGLE
Patch
Configuration
....................ccccccceeeseeeeseees
29
2.
SINGLE
Patch
Parameters....................2ccceeccseseseseeseeees
33
EDIT
Group
sscavevctcoviaddciccesitatiesacavnpociccdiaundddagvaasvacee
33
COMMON
Group
....................
ccc
ccceccecceccecseceececcereeeees
34
PUIG
BEND
soi
ocshscrcsicanviccvoimanessedvaesawaradesaeoteneuacen
tes
37
LeU
GROUP
co
sesiercesteteesn
canis
teandaudenssaaetoversebcadecnceau.
40
S-COMMON
(Source
COMMON)
Group........................008
43
VEL
(Velocity)
Curve
..................ccccccseeceeesseeeeceeesseesee
44
KS
(Keyboard
Scaling)
Curve...................ccccseesseessseseoes
45
PO
GROUP
wsaeebesisaresy
cevesahacatu
tneunaneeaecaoa
cece
dccoceeits
46
UGA
TOU
isis
cee
ca
etd
ascseve
uses
st.
deere
waptenne
<aevestawSaitenstites
48
DCA
MOD(DCA
Modulation)
Group
.....................0..000.000-
49
DOE
GHOUD
2s
cides
etoaitaseytentauteusttiacseastocstagusdesdede
52
DCF
MOD
(DCF
Modulation)
Group.......................c0002-00
54
Editing
Capabilities
...................ccccceeececcceecesccecceccecees
57
Writing
a
SINGLE
Patch
...............c..cccccecesecseeccceseeeeees
58

7 7
=
K4/K4r
Synthesizer
Owner's
Manual
Contents
2-6.
Editing
a
MULTI
Patch
.................
eee
eee
ee
en
ener
er
eeeenseoees
60
1.
MULTI
Patch
Configuration...................ccccccseceeeeeeeeeneees
60
2.
Using
MULTI
Patches
..................
cc
ceeeeeesee
eee
eeeeeeeereees
60
3.
Choosing
a
Section
to
Edit
................cccecceeseeeeeeeeseereees
60
4.
Editing
Section
Parameters
..................:::::ceeeeceeeereneeeee
61
EDIT
GIO
B
ccisecicacccunvensessetesnéegsessvesdessecdisedthaeauagasas
61
TSE
GrQU
heise
tiiee.
cde
astevai
thee
tacnsenc
tiara
hiaciseseeeee!
61
ZONE
GrOUD
siissiciccuescvanecscseeeceashsdeeedsensdoceeetessaevwecese:
62
SEC
ch
(Section
Channel)
Group...................-.:2eeeeeseeeees
63
LEVEE
Groups
cceccciwiscin
sc yn
eettencincdes
weattatobean
atere
acest
64
Writing
MULTI
Patches
.................cccccceeeseceeeseeeeeeeeeeees
65
2-7.
Editing
Sounds
for
the
DRUM
Section.....................:.000000
66
1.
DRUM
Section
Configuration
........................eeeeeeeeeeee
eee
66
2.
Creating
the
DRUM
Section
Tones
...................ccseseeeeeeens
68
3.
Writing
the
DRUM
Section
................ccccceceeeeeeeeeeeeeeeeees
70
2-8.
EFFECT
(K4)
and
OUTPUT
(K4r)
Settings
....................20000
71
1.
EFFECT
Patches
(K4
only)
.................:cceseeceececeeeeeeeeereee
71
2.
OUTPUT
Patches
(K4r
only)
................c.cceeneceeeeceeeeeeeners
71
3.
Programming
Parameters..............0.c.cececeeceeeeeceeeeenenees
72
4.
Explanation
of
Effect
Types
(K4
only)..............0....:ceeseeeees
74
5.
Writing
EFFECT
and
OUTPUT
Settings
............................
76
2-9.
SYSTEM
Programming..................c.cececeeaececeeerseneeeeerees
77
SYS
(SYSTEM)
Group
.........sccccsoscorsevarsccsccersscssescnsecses
77
TRS
(Transmit)
Group................ccccscesceeeeeeeeeceeneeesseneee
78
RCV
(Receive)
Group
...............:.ccececeecscnecneeeeereeeeeeeees
79
Chapter
3:
Advanced
Applications.....................c.ccscseeseeeeeeeeeceee
81
3-1.
MIDI
DATA
DUMP
....................ccccccececceceececeececeecesnenees
82
3-2.
Play
Using
a
Sequencer
or
Computer
..................-.-.eseeeeee
83
3-3.
MULTI
Real
Time
Play
..............:cccscesseseecereneeeereeeeeeeraees
85
3-4,
MIDI
for
the
Advanced
User....................:sceeseceecereeeeneees
88
PADWGIICES
sics
ci
Sie
ecteicpescenccnisa
i
calatencessiiasendasdacantevesedeces
sve
90
1.
Error
Messages..................cccecescscuccsseceneseeeees
Nucenhesenene
90
2.
Troubleshooting
.................:0csseccecscececseercecesececeeseseencees
91
3.
Parameter
Reference
Chart
................cccscescssecsesceeeseeeneers
91'
4.
DRUM
Section
and
EFFECT
Factory
Settings
........................
92’
De:
DIAM
GHAI
sous
son
diss
noacevauaactinadinaduresduamnasdviaaenes
ageesntenaas
92
MIDI
Implementation
Chart
.................cccscecscsceeereuseceseseeaeeneees
95
INDEX:
sycrtscowses
scutslacucureivousucebicvantas
detestndsssasateresiacsnaniveaee
96
DPOCIICAUONS
is
ivcssbevnsndcaevcetinoneieaaiiacetawnmweadorvanatasuaTacausunce
99
8
8
=
How
to
use
this
manual
This
manual
is
composed
of
three
chapters
and
appendices
as
shown
below.
Chapter
1.:
Introduction
Chapter
2.:
Applications
Chapter
3.:
Advanced
Applications
Appendices
Index
Specifications
e
Instrument
Setup
@
Let's
Play!
@
The
Fundamentals
of
MID!
@
K4/K4r
Structure
of
Patches
@
The
Tone
Editing
Process
@
Saving
and
Loading
Data
e@
Before
Entering
EDIT
Mode:
The
Basics
of
Editing
e
Editing
a
SINGLE
Patch
e@
Editing
a
MULTI
Patch
@
Editing
Sounds
for
the
DRUM
Section
@
EFFECT
(K4)
and
OUTPUT
(K4r)
Settings
@
SYSTEM
Programming
e@
MID!
DATA
DUMP
e@
Play
Using
a
Sequencer
or
Computer
e@
MULTI
Real
Time
Play
e
MID!
for
the
Advanced
User
e
Error
Messages
@
Troubleshooting
e
Parameter
Reference
Chart
e
DRUM
Section
and
EFFECT
Factory
Settings
e
Blank
Chart
e@
MIDI
Implementation
Chart
Page
6°
explains
the
basic
function
of
each
panel
switch
and
the
page
number
for
more
detailed
information.
This
page
pulls
out
and
can
be
seen
while
reading
other
pages.
TO:
A
section
heading
appears
on
the
left
or
right
side
of
each
page,
which
makes
it
easy
to
locate
a
particular
section
of
the
manual.
In
addition,
the
primary
subject
covered
on
each
page
is
shown
in
the
upper
right
corner.

Chapter
1.
Introduction
This
chapter
explains
how
to
set
up
the
K4/K4r
and
the
functions
available
when
playing.
1-1.
Instrument
Setup
1.
Making
Connections
1-2.
Let's
Play!
.
Selecting
a
PLAY
mode
(SINGLE
or
MULTI)
.
Possibilities
of
MULTI
PLAY
Mode
.
Tuning
and
Transposing
.
LINK
Play
.
DRUM
Play
.
Play
Using
a
Computer
or
Sequencer
1-3.
The
Fundamentals
of
MIDI
Ooo
rhwnr
=
NY

10
10
1-1.
Instrument
Setup
1.
Making
Connections:
How
to
set
the
unit
up
quickly
and
easily
(1)
Connect
the
power
adapter
and
keyboard
amp.
(or
headphones)
as
shown
in
below.
DIGITAL
PIANO
S38SE4
&
SSL
WALL
Nl
LINE
IN
KEYBOARD
AMP
TO
HEADPHONE
REAR
PANNEL
+
saa
Note:
The
K4/K4r
has
no
internal
power
amp.
or
speakers.
In
order
to
obtain
sound
output,
you
may
either
use
headphones,
or
connect
it
to
a
keyboard
amp.
or
PA
system.
It
is
possible
to
use
home
radio
cassette
players
or
audio
amps,
but
caution
should
be
paid
to
when
the
power
is
turned
on
and
to
volume,
etc.,
in
order
to
avoid
damage
to
these
appliances.
Turn
the
POWER
switch
at
the
right
of
the
rear
(K4r:
front)
panel
on.
This
display
lasts
only
a
few
seconds.
The
unit
is
now
ready
to
play.
The
K4/K4r
retains
in
memory
the
parameters
in
it
when
the
power
was
ee
turned
off.
When
the
POWER
has
been
turned
on
again,
you
may
call
up
the
patch
that
was
being
played
at
that
time
by
pressing
the
(reca).
(5)
Turn
on
the
power
of
amps
and
other
equipment
connected
to
the
K4/K4r
after
turning
the
K4/K4r
on,
to
protect
the
other
equipment.
CC.
Grand
10
10

"1
11
1-2.
Let's
Play!
First,
let's
take
a
look
at
the
tones
currently
stored
into
the
memory
of
the
K4/K4r.
1.
Selecting
a
PLAY
Mode
(SINGLE
or
MULTI)
With
the
K4/K4r,
each
single
tone
is
referred
to
as
a
SINGLE
Patch,
and
the
combined
setting
of
multiple
patches
is
referred
to
as
a
MULTI
Patch.
=)
bod
Lead
c
oO
oO
=
”
I
co
1)
SINGLE
PLAY
64
different
SINGLE
Patches
may
be
stored
into
the
internal
memory
of
the
K4/K4r.
These
are
stored
into
the
four
banks,
A-D,
each
of
which
can
store
16
patches
(for
a
total
of
64).
Cards
may
also
be
used
to
store
an
additional
64
patches,
16
in
each
of
the
four
banks
from
A-D.
<Procedure>
(1)
Press
(sie)
to
select
SINGLE
PLAY.
(2)
With
every
further
press
of
the
(sme),
the
unit
switches
between
the
INT
(inside
the
unit
itself)
and
EXT
(card)
memories.
1:
INT
(internal)
memory
E:
EXT
(card)
memory
Select
a
bank
from
(«4
too).
Select
a
number
from
C1
)-(C_).
When
switching
between
SINGLE
Patches,
if
the
patches
are
in
the
same
bank,
repeat
step
4.
When
they
are
in
the
same
block,
repeat
steps
3
and
4.
A
SINGLE
Patch
has
now
been
selected.
Note:
The
tone
patch
names
and
numbers
used
in
this
manual
are
not
necessarily
the
same
as
those
on
your
K4/K4r.
11 11

12
12
Seleicting
a
PLAY
mode
2)
MULTI
PLAY
Sixty-four
different
MULTI
Patches
may
be
stored
into
the
internal
memory
of
the
K4/K4r.
Split
and
Layer
play
is
possible
with
a
maximum
of
eight
different
instruments
(See
P.
61).
These
are
stored
into
the
four
banks,
A-D,
each
of
which
can
store
16
patches
(for
a
total
of
64).
Cards
may
also
be
used
to
store
an
additional
64
patches,
16
in
each
of
the
four
banks
from
A-D.
<Procedure>
(1)
Press
(vu)
to
switch
to
MULTI
PLAY.
(2)
With
every
further
press
of
the
(wun),
the
unit
switches
between
the
INT
(inside
the
unit
itself)
and
EXT
(card)
memories.
MUL
TI
TH-i6
HORT
20H
1:
INT
(internal)
memory
:
EXT
(card)
memory
Select
a
bank
from
C_4_)to
C°_).
Select
a
number
from
(_1_)-
C16_).
(5)
When
switching
between
MULTI
Patches,
if
the
patches
are
in
the
same
bank,
repeat
step
4.
When
they
are
in
the
same
block,
repeat
steps
3
and
4.
A
MULTI
Patch
has
now
been
selected.
Note:
MULTI
Patches
contain
numerous
settings.
Pressing
a
few
keys
on
the
keyboard
is
not
enough
to
allow
you
to
determine
what
kind
of
patch
settings
have
been
made:
go
ahead
and
play
the
keyboard
from
one
end
to
the
other,
hitting
the
keys
hard
and
hitting
them
softly,
holding
the
keys
down
after
you
have
pressed
them,
etc.,
to
see
what
the
current
settings
are.
12
12

13 13
Let's
Play!
2.
Possibilities
of
MULTI
PLAY
Mode
This
section
explains
the
basic
functions
of
the
MULTI
PLAY
mode.
o
Pa
ne
i=
i)
©
—
”n
57)
ce
@
SPLIT
The
keyboard
may
be
divided
into
a
maximum
of
eight
segments
and
each
assigned
a
different
(SINGLE
Patch)
tone.
For
instance,
the
low
range
might
be
assigned
to
the
bass,
the
middle
range
to
the
piano
and
the
high range
to
the strings
to
allow
the
playing
of
several
different
tones
on
different
parts
of
the
keyboard
(ID
1-4).
(See
P.
86)
@
VELOCITY
Switch
Tones
may
be
changed
by
varying
the
amount
of
force
applied
to
the
keys
during
play
(at
a
maximum
of
two
settings
per
key).
For
instance,
key
settings
may
be
made
so
that
a
light
strike
will
produce
a
bass
tone,
whereas
a
strong
strike
will
produce
a
chopper
bass
tone.
Differing
tones
may
also
be
combined
to
produce
a
completely
new
tone
(ID
5-8).
(
See
P.
87)
@
LAYER
A
maximum
of
eight
tones
may
be
combined
into
a
single
sound.
A
very
fat
sound
may
be
obtained
by
combining
and
slightly
detuning
similar
tones,
and
a
completely
new
sound
created
by
combining
different
tones
(ID
9-12).
(See
P.
85)
@
MULTI
tone
generator
lf
each
of
the
MIDI
receiving
channels
of
a
MULTI
Patch
is
set
independently,
a
maximum
of
eight
(nine
including
the
DRUM
Section)
MIDI
tone
generator
modules
may
be
created.
The
unit
keyboard
may
be
used
to
play
different
tones
or
control
external
tone
generators
while
the
K4/K4r
is
played
by
a
computer
or
MIDI
sequencer
such
as
the
Q-80
(ID
13-16).
(See
P.
83)
All
of
the
above
functions
may
be
freely
combined
in
a
single
MULT!
Patch.
STRONG
VELOCITY
STRINGS
LIGHT
:
TONE
RANGE
;
7
13
13

14 14
3.
Tuning
and
Transposing
—_-_--—————
ees
m
TUNE
TUNE
enables
fine
tuning
of
the
overall
pitch
of
the
K4/K4r,
and
is
used
when
(Value:
-50
to
0
to
+50)
tuning
the
synthesizer
to
other
instruments,
like
a
piano.
Note:
The
pitch
tuning
of
the
K4/K4r
is
based
on
A3=440
Hz
and
can
be
raised
or
lowered
up
to
a
maximum
of
a
half
tone
(100
cents)
in
increments
of
2
cents.
<Procedure>
(1)
Press
:
(2)
Use
the
VALUE
Slider
or
Cves)and
(-no_)
to
call
up
the
SYS
display.
SYSTEN-HIBI
(3)
Press
several
times
to
call
up
the
TUNE
display.
(4)
Use
the
VALUE
Slider
or
C+¥es))and
(no)
to
fine
tune
the
pitch.
m
TRANSPOSE
The
pitch
of
the
K4/K4r
can
also
be
transposed
up
or
down
in
half
tone
units,
(Value:
-12
to
0
to
+12)
allowing
you
to
finger
in
any
key
as
though
it
were
the
key
of
C.
<Procedure>
(1)
Press
Gysre)
.
(2)
Use
the
VALUE
Slider
or
ves)
and
(x0)
to
call
up
the
SYS
display.
oro
VEN
eMek
|
sone
Press
several
times
to
call
up
the
TRANSPOSE
display.
Set
the
VALUE
Slider,
or
C-no_).
14
14

15
15
LINK
Play/Set
4.
LINK
Play
This
function
allows
patches
to
be
called
up
in
a
specified
order
during
LINK
Play
by
merely
pressing
the
and
(-xo_).
Any
eight
of
the
256
patches
in
the
unit
or
card
may
be
selected
and
stored
regardless
of
whether
they
are
MULTI
or
SINGLE
Patches,
in
the
unit,
or
on
a
card.
i=)
t_
—
i=
i=)
i)
=
”
©
fo
=]
m@
How
to
set
a
LINK
<Procedure>
(1)
Press
Gystem).
(2)
Use
the
VALUE
Slider
or
C-es_)and
(-80_)
to
call
up
the
SYS
display.
Press
several
times
to
call
up
the
LINK
1st
display.
Use
the
VALUE
Slider
or
C+
ves
)and
(_-no_)
to
select
the
first
patch
in
the
LINK.
(5)
For
the
2nd
and
later
patches,
repeat
steps
(3)
and
(4).
(6)
When
there
are
8
or
fewer
patches
to
be
stored
for
a
LINK,
press
C-no_)and
turn
off
every
time
a
patch
is
selected
with
(4).
(7)
Toreturn
to
the
PLAY
mode
while
setting
a
LINK,
first
press
OF
Csincte),
then
chose
the
desired
patch.
15 15

16
9.
DRUM
Play
16
DRUM
Play
The
K4/K4r
provides
a
separate
DRUM
Section
independent
of
SINGLE
Patches
or
the
eight
MULTI
Patch
Sections.
A
Q-80
MIDI
sequencer,
etc.,
may
be
used
to
play
the
DRUM
Section
while
the
keyboard
is
being
played.
m
MANUAL
DRUM
16
The
DRUM
Section
may
be
controlled
from
the
keyboard.
Notes:
There
are
two
DRUM
Sections
available
in
the
K4/K4r
when
a
Card
is
inserted
in
the
Card
Slot.
One
is
Internal,
the
other
is
the
Card
(external).
If
you
select
an
internal
SINGLE
or
MULTI
Patch,
the
internal
DRUM
Section
is
selected.
Selecting
an
external
SINGLE
or
MULTI
Patch
automatically
selects
the
external
DRUM
Section.
To
SAVE
and
LOAD
the
DRUM
Section
to
the
Card,
see
p.
70.
If
the
MIDI
transmit
channel
of
the
controlling
MIDI
instrument
and
the
DRUM
Section
receiving
channel
of
the
K4r
(channel
10
at
time
of
factory
shipment)
are
not
the
same,
no
sound
will
be
produced.
<Procedure>
(1)
Press
to
call
up
the
DRUM
Section.
(2)
Use
the
VALUE
Slider
or
the
Or
(-no_)as
required
to
adjust
the
volume
of
the
DRUM
Section.
Press
Corum
)
to
call
up
the
receiving
channel
set
display.
Use
the
VALUE
Slider
or
the
or
(-no_)as
required
to
set
the
MIDI
receiving
channel.
16

17 17
Let's
Play!
6.
Playing
Using
a
Computer
or
Sequencer
One
way
to
make
effective
use
of
the
K4
MULTI
Section
is
to
use
a
Q-80
or
other
MID!
sequencer,
or
a
computer
for
automatic
play.
In
this
way,
1
or
2
Sections
can
be
played
manually,
while
the
DRUM
Section
can
be
controlled
by
a
Q-80
or
other
MIDI
sequencer
or
a
computer.
(See
P.
83,
88)
i=]
Bom
aat
i=
i=)
oO
—
”
5°]
ca
=
Connection
to
an
external
MIDI
device
The
K4/K4r
controlled
by
an
external
computer
or
recording
with
a
Q-80
MIDI
sequencer
SEQUENCER
COMPUTER
etc.
DRUM
MACHINE
TONE
GENERATOR
MODULE
etc.

20
20
mw
Note
Information
m=
Note
Number
w
Velocity
m@
Aftertouch
m@
Program
Change
=
Control
Change
m=
Pitch
Bend
20
Of
the
different
types
of
performance
data
which
can
be
transmitted
via
MIDI,
the
most
basic
is
the
note
message.
Note
messages
indicate
such
information
as
which
key
has
been
pressed
with
how
much
force,
and
when
it
was
released.
In
order
to
enable
the
control
instrument
to
differentiate
between
keys
when
they
are
played,
a
number
is
assigned
to
each,
called
a
note
number.
Middle
C
(C3)
is
MIDI
note
number
60,
and
each
note
number
corresponds
to
a
half
tone,
or
one
key
on
the
keyboard
(MIDI
divides
the
half
tones
from
C-2
to
G8
into
128
steps,
numbering
them
in
sequence
from
lowest
to
highest).
This
is
a
message
which
tells
with
how
much
force
a
key
on
the
keyboard
was
pressed
(velocity
is
detected
not
by
the
pressure
on
the
key,
but
by
the
speed
of
its
movement
at
the
time
the
note
on
message
is
sent).
Numerous
kinds
of
effects
may
be
obtained
by
pressing
harder
after
a
key
has
once
been
pressed.
Aftertouch
is
a
message
which
transmits
the
amount
of
pressure
with
which
a
key
is
being
pressed.
Most
MIDI
instruments
currently
in
use
allow
settings,
tones,
and
other
data
to
be
programmed.
These
programs
can
be
switched
by
a
message
from
the
master
instrument.
This
type
of
message
is
called
a
program
change.
Since
MIDI
standards
say
only
that
numbers
from
0
to
127
can
be
used
as
program
change
data,
the
items
in
the
tone
memory
that
correspond
to
the
program
change
numbers
are
different
for
every
type
of
instrument.
Besides
information
regarding
when
a
key
has
been
pressed
and
released
and
so
on,
volume,
vibrato,
hold,
portamento
on/off,
damper
and
soft
pedal
on/off,
pan
and
aftertouch
information,
etc.,
are
functions
which
may
be
handled
in
many
different
ways
as
performance
data.
These
are
transmitted
as
control
change
messages.
This
is
a
message
which
tells
just
how
far
the
pitch
bend
wheel
has
been
turned.
The
maximum
amount
of
pitch
bend
is
usually
programmed
in
the
synthesizer's
patch
data.
Therefore,
pitch
range
depth
may
differ
between
instruments.
20

21
21
The
Fundamentals
of
MID!
m
Exclusive
Messages
=
Others
21
While
MIDI
is
a
standard
accepted
world-wide,
in
order
to
get
the
most
out
of
the
different
types
of
equipment
produced
by
different
manufacturers,
each
produces
to
some
extent,
their
own
independent
specifications.
These
are
outside
of
the
specifications
prescribed
by
MIDI,
and
consist
of
messages
for
the
transmission
and
reception
of
information
unique
to
a
particular
piece
of
equipment.
Called
“system
exclusive
messages,”
these
may
be
used
to
exchange
tone
data
between
equipment
produced
by
the
same
manufacturer
and
for
storing
tone
data
to
a
computer.
@
LOCAL
Control
On/Off
LOCAL
Control
is
a
message
for
the
transmission
of
keyboard
and
tone
data
within
the
MIDI
system.
When
LOCAL
Control
is
turned
off,
keyboard
data
is
not
sent
to
the
internal
tone
generator,
but
only
to
the
MIDI
OUT
jack.
This
function
is
often
used
for
the
external
control
of
a
MIDI
tone
generator
module
that
is
different
than
the
keyboard
being
used,
or
to
use
only
the
keyboard
as
a
MIDI
keyboard
controller.
@
All
Notes
Off
This
is
a
message
which
stops
all
sounds
currently
being
produced.
@
Active
Sensing
The
purpose
of
this
message
is
to
prevent
a
bad
cable
or
connection
from
causing
stuck
notes.
@
Reset
This
message
reinitializes
the
unit
while
the
power
is
still
on.
@
Common
This
indicates
the
selection
or
location
of
a
song
when
a
MIDI
sequencer
or
drum
machine
are
being
played
in
sync.
@
Real
Time
This
message
indicates
the
timing
clock
or
start/stop,
etc.,
when
a
synthesizer,
drum
machine
or
other
device
are
being
played
in
sync.
21
So
toad
md
=
oS
[
—
77
©
[=
=)

22
22
Implementation
chart
Data
which
can
be
transmitted
and
received
by
MID!
equipment
includes
only
that
which
is
common
to
both
the
transmitter
and
receiver.
MIDI
is
actually
nothing
more
than
a
standard
which
enables
the
transmission
of
performance
data
via
a
MIDI
cable;
the
implementation
chart
is
merely
a
chart
which
states
what
the
equipment
is
capable
of.
Each
different
type
of
equipment
has
its
own
characteristics,
and
capabilities.
This
goes
for
MIDI
standards
as
well:
some
capabilities
are
not
compatible
with
some
types
of
equipment.
That
is
why
each
MID!
unit
comes
with
a
list
of
the
types
of
data
it
is
capable
of
receiving
and
sending,
called
the
MIDI
implementation.
MIDI
and
rhythm
performance
The
K4/K4r
has
a
rhythm
sound
generator,
and
although
drum
sounds
can
be
played
from
the
keyboard,
it
is
generally
more
practical
to
create
an
ensemble
using
a
Q-80
or
other
MID!
sequencer
or
drum
machine.
The
rhythm
sound
generator
may
be
used
to
create
many
different
kinds
of
tones
simultaneously.
Because
of
the
number
of
drum
sounds
in
the
K4/K4r,
each
sound
is
allocated
to
a
single
note
number
on
the
same
MIDI
channel.
22 22

Chapter
2.
Applications
This
chapter
explains
the
creation
and
editing
of
tone
data,
as
well
as
how
to
combine
the
tones
for
a
variety
of
setting
and
effects.
2-1.
K4/K4r
Structure
of
Patches
2-2.
The
Tone
Editing
Process
2-3.
Saving
and
Loading
Data
2-4.
Before
Entering
EDIT
Mode
2-5.
Editing
a
SINGLE
Patch
.
SINGLE
Patch
Configuration
SINGLE
Patch
Parameters
Editing
a
MULTI
Patch
.
MULTI
Patch
Configuration
Using
MULTI
Patches
.
Choosing
a
Section
to
Edit
Editing
Section
Parameters
Editing
Sounds
for
the
DRUM
Section
DRUM
Section
Configuration
.
Editing
the
DRUM
Section
Writing
the
DRUM
Section
EFFECT
(K4)
and
OUTPUT
(K4r)
Settings
EFFECT
Patches
(K4
only)
OUTPUT
Patches
(K4r
only)
Programming
Parameters
Explanation
of
Effect
Type
(K4
only)
Writing
EFFECT
and
OUTPUT
Settings
SYSTEM
Programming
SYS
(SYSTEM)
Group
.
TRS
(Transmit)
Group
RCV
(Receive)
Group
rN
Dry
NO
'
Nm
ons
Oneawn=
Dwnwa
Nawn
a
INO
1
Other manuals for Synthesizer K4
2
This manual suits for next models
1
Table of contents
Other Kawai Synthesizer manuals

Kawai
Kawai Personal Keyboard MS20 User manual

Kawai
Kawai SX-210 User manual

Kawai
Kawai 16 Bit Digital Percussion Synthesizer XD-5 User manual

Kawai
Kawai PHm Pop Synth Module User manual

Kawai
Kawai 16 Bit Digital Percussion Synthesizer XD-5 User manual

Kawai
Kawai MK 10 User manual

Kawai
Kawai FS680 User manual

Kawai
Kawai K1 Manual

Kawai
Kawai Spectra KC10 User manual

Kawai
Kawai K5000S User manual