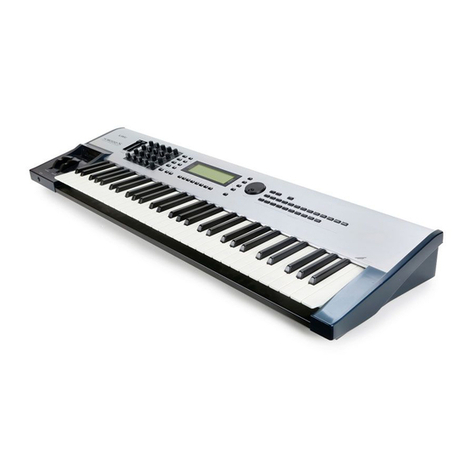
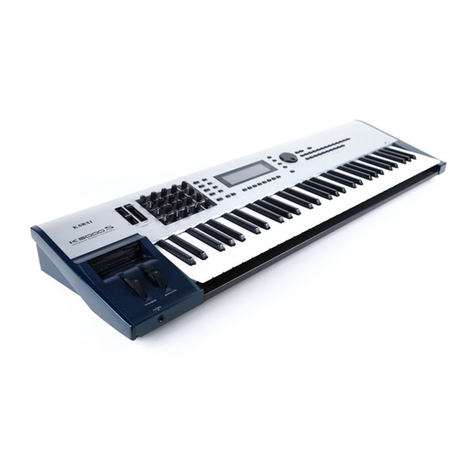
Kawai K5000S User manual

INTRODUCTION 1
K5000S OWNER’S MANUAL

2KAWAI K5000S ADVANCEDADDITIVE SYNTHESIZER
This musical instrument is designed for household use, not commercial use.
FCC Information
This equipment has been tested and found to comply with the limits for a Class B digital device,
pursuant to Part 15 of the FCC Rules. These limits are designed to provide reasonable protection
against harmful interference in a residential installation. This equipment generates, uses and can
radiate radio frequency energy and, if not installed and used in accordance with the instructions, may
cause harmful interference to radio communications. However, there is no guarantee that interference
will not occur in a particular installation.
If this equipment does cause harmful interference to radio or television reception, which can be
determined by turning the equipment off and on, the user is encouraged to try to correct the
interference by one or more of the following measures:
Reorient or relocate the receiving antenna.
Increase the separation between the equipment and the receiver.
Connect the equipment into an outlet on a different electrical circuit from the receiver.
Consult the dealer or an experienced radio/TV technician for help.
Canadian Radio Interference Regulations
This instrument complies with the limits for a class B digital apparatus, pursuant to the Radio
Interference Regulations, C.R.C., c. 1374.
CAUTION
AVIS : RISQUE DE CHOC ELECTRIQUE - NE PAS OUVRIR.
TO REDUCE THE RISK OF ELECTRIC SHOCK, DO NOT REMOVE COVER (OR BACK).
NO USER-SERVICEABLE PARTS INSIDE. REFER SERVICING TO QUALIFIED SERVICE PERSONNEL.
The lighting flash with arrowhead symbol, within an
equilateral triangle, is intended to alert the user to
the presence of uninsulated "dangerous voltage"
within the product's enclosure that may be of
sufficient magnitude to constitute a risk of electric
shock to persons.
The exclamation point within an equilateral triangle
is intended to alert the user to the presence of
important operating and maintenance (servicing)
instructions in the leterature accompanying the
product.
WARNING
TO REDUCE THE RISK OF
FIRE OR ELECTRIC
SHOCK, DO NOT EXPOSE
THIS PRODUCT TO RAIN
CAUTION: TO PREVENT ELECTRIC SHOCK, MATCH WIDE BLADE OF PLUG TO WIDE SLOT, FULLY INSERT.
ATTENTION: POUR EVITER LES CHOCS ELECTRIQUES, INTRODUIRE LA LAME LA PLUS LARGE DE LA
FICHE DANS LA BORNE CORRESPONDANTE DE LA PRISE ET POUSSER JUSQU'AU FOND.

INTRODUCTION 3
Important Safety Instructions
* Read Instructions – This Owner’s Manual contains valuable information that will help you make full
use of the instrument’s many capabilities. All the safety and operating instructions should be read
before the product is operated.
* Retain Instructions – The safety and operating instructions should be retained for future reference.
* Heed Warnings – All warnings on the product and in the operating instructions should be adhered to.
* Follow Instructions – All operating and use instructions should be followed.
* Water and Moisture – The appliance should not be operated or stored near water or other moisture
- for example, near a bath tub, wash bowl, kitchen sink, or laundry tub; in a wet basement; or near
a swimming pool; and the like.
* Power Cord Protection - Power-supply cords should be routed so that they are not likely to be
walked on or pinched by items placed upon or against them, paying particular attention to cords
at plugs, convenience receptacles, and the point where they exit from the product.
* Ventilation – The appliance should be situated so that its location or position does not interfere
with its proper ventilation. For example, the appliance should not be situated on a bed, sofa, rug,
or similar surface that may block the ventilation openings; or similar surface that may block the
ventilation openings; or placed in a built-in installation, such as a bookcase or cabinet that may
impede the flow of air through the ventilation openings.
* Heat – The appliance should be situated away from heat sources such as radiators, heat registers,
stoves, or other appliances (including amplifiers) that produce heat.
* Noise – Keep the appliance away from electrical motors, neon signs, fluorescent light fixtures, and
other sources of electrical noise.
* Shocks – Protect the appliance from physical shocks and impact. Never move it while it is in
operation.
* To reduce the risk of injury, close supervision is necessary when a product is used near a children.
* Do not touch the power plug with wet hands. There is a risk of electrical shock. Treat the power
cord with care as well. Stepping on or tripping over it can break or short-circuit the wire inside.
* Do not place this product on an unstable or slant cart, stand, tripod, bracket, or table. The product
may fall, causing serious injury to a child or adult, and serious damage to the product. Besides, the
unit may malfunction. Use only with a cart, stand or table recommended by KAWAI, or sold with
the product.
* The appliance, in combination with an amplifier and speakers or headphones, may be capable of
producing sound levels that could cause permanent hearing loss. Do not operate for a long period
of time at a high volume level or at a level that is uncomfortable. If you experience any hearing loss
or ringing in the ears, you should consult an audiologist.
* This product may be equipped with a polarized line plug (one blade wider than the other). This is
a safety feature. If you’re unable to insert the plug into the outlet, contact an electrician to replace
your obsolete outlet. Do not defeat the safety purpose of the plug.
* Always turn the power off when the appliance is not in use. The power supply cord of the product
should be unplugged from the outlet when left unattended or unused for long period of time.
Otherwise, fire or other hazards may be caused due to lightning and power-line surges, etc.
* Care should be taken so that objects do not fall and liquids are not spilled into the enclosure
through openings.

4KAWAI K5000S ADVANCED ADDITIVE SYNTHESIZER
* Unplug the appliance and power supply cord from the wall outlet immediately and refer servicing
to qualified service personnel under the following conditions:
a) When the power-supply cord or plug is damaged.
b) If liquid has been spilled, or objects have been fallen into the product.
c) If the product has been exposed to rain or water.
d) If the product does not operate normally by following the operating instructions. Adjust only
those controls that are covered by this manual as an improper adjustment of other controls
may result in damage and will often require extensive work by a qualified technician to restore
the product to its normal operation.
e) If the product has been dropped or damaged in any way.
f) When the product exhibits a distinct change in performance - this indicates a need for service.
* Protect the product from direct sunlight, extremes in temperature (such as inside your car on a
warm day) or humidity, dusty environment, or vibration (especially during transportation).
* Always turn down the volume(s) of all instruments (such as guitar or keyboard) before connecting
or disconnecting to the instrument.
* Make sure that all POWER switches are off before changing equipment connections.
* Check all equipment connections before applying the power.
* Do not connect to the same circuit as a heavy load or equipment that generates line noise.
* Unplug this product from the wall outlet before cleaning.
* Do not use liquid cleaners or aerosol cleaners. Use a damp cloth for cleaning. (Clean the
instrument with a soft cloth, a mild detergent, and lukewarm water.) Never use harsh or abrasive
cleansers or organic solvents.
* Servicing – The user should not attempt to service the appliance beyond that described in the
operating instructions. All other servicing should be referred to qualified service personnel.
* Do not disassemble or attempt to modify the appliance. Opening or removing covers may expose
you to dangerous voltage.

INTRODUCTION 5
CONTENTS
WELCOMETOTHE K5000S..................................................................................................................9
IFYOU NEED HELP... .............................................................................................................................10
K5000S FRONT PANEL ........................................................................................................................11
K5000S REAR PANEL ............................................................................................................................12
GUIDEDTOUR _________________________________ 13
CONNECTIONS ....................................................................................................................................14
PLAYTHE DEMO....................................................................................................................................16
PLAYING SOUNDS................................................................................................................................17
SINGLE SOUNDS............................................................................................................................................................. 17
MULTI SOUNDS...............................................................................................................................................................18
PROGRAMMABLEARPEGGIATOR ...................................................................................................19
SINGLE SECTION _______________________________ 21
SINGLE PLAY ...........................................................................................................................................22
SINGLE EDIT............................................................................................................................................24
COMMON................................................................................................................................................25
DCO...........................................................................................................................................................30
DCO PITCH ENVELOPE................................................................................................................................................31
DCF ............................................................................................................................................................32
DCF (FILTER) ENVELOPE .............................................................................................................................................. 33
DCA ...........................................................................................................................................................35
ADDITIVE.................................................................................................................................................37
HARMONIC LEVEL (DHL) ............................................................................................................................................38
HARMONIC ENVELOPE (DHE) ..................................................................................................................................41
FORMANT FILTER LEVEL (DFL) ..................................................................................................................................44
FORMANT ENVELOPE (DFE) ...................................................................................................................................... 47
MORF...................................................................................................................................................................................50
LFO & COPY............................................................................................................................................51
CONTROL ...............................................................................................................................................53
VOLUME, PITCH BEND,PAN ....................................................................................................................................... 53
KEYANDVELOCITY ZONE.........................................................................................................................................54
CONTROLLERS................................................................................................................................................................55
WRITE .......................................................................................................................................................59

6KAWAI K5000S ADVANCED ADDITIVE SYNTHESIZER
EFFECT SECTION _______________________________ 61
EFFECT PAGE PARAMETERS..............................................................................................................62
ALGORITHMS.........................................................................................................................................65
ALGORITHM 1 .................................................................................................................................................................65
ALGORITHM 2 .................................................................................................................................................................66
ALGORITHM 3 .................................................................................................................................................................66
ALGORITHM 4 .................................................................................................................................................................66
EFFECTTYPES .........................................................................................................................................67
EARLY REFLECTION 1
EARLY REFLECTION 2 ...................................................................................................................................................67
TAP DELAY 1
TAP DELAY 2..................................................................................................................................................................... 68
SINGLE DELAY.................................................................................................................................................................. 69
DUAL DELAY .................................................................................................................................................................... 70
STEREO DELAY ................................................................................................................................................................ 71
CROSS DELAY...................................................................................................................................................................71
AUTO PAN ........................................................................................................................................................................ 72
AUTO PAN & DELAY ..................................................................................................................................................... 73
CHORUS 1
CHORUS 2 .........................................................................................................................................................................74
CHORUS 1 & DELAY
CHORUS 2 & DELAY ...................................................................................................................................................... 75
FLANGER 1
FLANGER 2........................................................................................................................................................................ 76
FLANGER 1 & DELAY
FLANGER 2 & DELAY .....................................................................................................................................................77
ENSEMBLE.......................................................................................................................................................................... 78
ENSEMBLE & DELAY ....................................................................................................................................................... 78
CELESTE.............................................................................................................................................................................. 79
CELESTE & DELAY ...........................................................................................................................................................80
TREMOLO.......................................................................................................................................................................... 81
TREMOLO & DELAY ....................................................................................................................................................... 81
PHASER 1
PHASER 2 ........................................................................................................................................................................... 82
PHASER 1 & DELAY
PHASER 2 & DELAY.........................................................................................................................................................83
ROTARY .............................................................................................................................................................................. 84
AUTOWAH....................................................................................................................................................................... 85
BANDPASS ......................................................................................................................................................................... 86
EXCITER ............................................................................................................................................................................. 87
ENHANCER....................................................................................................................................................................... 87
OVERDRIVE....................................................................................................................................................................... 88
DISTORTION .................................................................................................................................................................... 89
OVERDRIVE & DELAY .................................................................................................................................................... 90
DISTORTION & DELAY.................................................................................................................................................. 91
REVERBTYPES.........................................................................................................................................92
HALL 1
HALL 2
HALL 3 ................................................................................................................................................................................ 92
ROOM 1
ROOM 2
ROOM 3 ............................................................................................................................................................................. 93
PLATE 1
PLATE 2
PLATE 3 ............................................................................................................................................................................... 94
INTRODUCTION 7
REVERSE..............................................................................................................................................................................95
LONG DELAY ...................................................................................................................................................................96
MULTI SECTION ________________________________ 97
MULTI PLAY..............................................................................................................................................98
MULTI EDIT............................................................................................................................................100
COMMON .......................................................................................................................................................................100
SECTION ..........................................................................................................................................................................101
WRITE .....................................................................................................................................................103
COMMON ____________________________________ 105
SYSTEM SECTION................................................................................................................................106
SYSTEM .............................................................................................................................................................................106
FSW (PROGRAMMABLE SWITCHES)......................................................................................................................107
ARPEGGIATOR ...............................................................................................................................................................108
RESET.................................................................................................................................................................................112
BACKUP............................................................................................................................................................................112
MIDI....................................................................................................................................................................................113
DUMP ................................................................................................................................................................................114
DISK SECTION .....................................................................................................................................115
SAVE ...................................................................................................................................................................................115
LOAD.................................................................................................................................................................................117
DELETE..............................................................................................................................................................................118
FORMAT ...........................................................................................................................................................................119
FILE FORMAT LIST.........................................................................................................................................................119
APPENDIX ____________________________________ 121
CYCLICAL (LOOPING)WAVE LIST.........................................................................................................................123

8KAWAI K5000S ADVANCED ADDITIVE SYNTHESIZER

INTRODUCTION 9
WELCOMETOTHE K5000S
The K5000S is an Advanced Additive Synthesizer that combines realtime perfor-
mance features and unique synthesis capabilities into a single unit.
ADVANCEDADDITIVETONE GENERATOR
The K5000 series updates the famous K5 synthesizer tone generator and its
unique additive harmonic synthesis approach. The Advanced Additive Tone
Generator contains 32 source generators, which depending on how they are
used, can yield up to 32 voice polyphony.
PCM samples can also be mixed with additive sources. As few as one or as many as
six sources can be used to make a single sound. For example, a PCM wave of a
piano hammer can be superimposed with the sound of the piano string created by
additive harmonics.
128 BAND FORMANT FILTER
A new addition to the Advanced Additive tone generator is the 128 Band Formant
Filter, which can used as a Parametric EQ or several other configurations. The
Formant Filter is completely controllable by envelopes or LFOs.
MACRO CONTROL
Unique to the K5000S model are the macro controls for major sound parameters,
available on the front panel for instant access. In addition, four user controls are
programmable for each patch.
PROGRAMMABLEARPEGGIATOR
The K5000S Programmable Arpeggiator, features a wide range of control, ideal for
use in Tekno and other modern musical styles.
DIGITAL EFFECTS SYSTEM
The K5000S contains an advanced digital effects processor (DSP), which allows four
individual effects of chorus, delay, distortion, etc., in addition to reverb and a
graphic equalizer.
When playing a single sound, individual sources can be routed to individual effects;
when playing multiple sounds in Multi mode, individual sounds can be routed to
individual effects.

10 KAWAI K5000S ADVANCED ADDITIVE SYNTHESIZER
IFYOU NEED HELP...
Please consult your local Kawai representative or contact the Kawai distributor in
your country.
ABOUTTHE KEYBOARD’S INTERNAL MEMORY
The contents of the keyboard’s internal memory (such as tone data) and system
data may be lost if you turn off the power while writing, saving or loading data.
Do not turn off the power while writing, saving or loading data.
If you have lost your system data, use the following procedure to reload the system
data from the included SYSTEM DISK.
1. Insert the SYSTEM DISK into the disk drive.
2. Press the F2 button beside the LCD.
3. Turn the power on while holding down the F2 button. The installation will
begin.
4. It will take about 8 minutes for the installation. You are now ready to use
the K5000S.
NOTE:
* If you install this SYSTEM disk, the entire memory will be reset to factory preset
setting and your own personalized data you created will be lost. You may not be
able to back up the internal memory. So, we recommend that you save your
important data on a floppy disk.
* It is not possible to copy this STSTEM DISK. Retain the SYSTEM DISK with proper
care.
* The contents of the keyboard’s internal memory may be lost if you turn off the
power while installing system data.
Do not turn off the power while installing system data.
If you lost system data, take the following procedure using the included SYSTEM
DISK and load system data.
ABOUTTHE MEMORY EXPANSION KIT
The K5000S MEMORY EXPANSION KIT may be available in your country. For more
information, please consult your local Kawai representative or contact the Kawai
distributor in your country.

INTRODUCTION 11
K5000S FRONT PANEL
Front Panel Diagram is on an A3 Paper foldout, with the Rear Panel Drawing on
the other side.
THIS PAGE IS ONLY A PLACEHOLDER
VOLUME CONTROLS
These control the output level of the instrument.
There is one for each pair or outputs.
ARPEGGIATOR SECTION
These controls adjust the on-board arpeggiator.
MACRO CONTROLS
Instant control of common parameters.
FUNCTION KEYS
Left and Right, the functions of these keys change on each page.
The functions are written on the screen.
COMMON SECTION
These keys are used for functions common to all modes of operation
BANK SELECT
These keys select any of the Single or Multi banks
QUICK MIDI
Send any MIDI message from here. POWER
It all starts here....
PATCH SELECT
Choose patches from each bank
SINGLE EDIT PAGE SELECT
In Single Edit mode, the Patch Select keys double as editing shortcuts.
SECTION
Switch between different parts of a Multi Patch
VALUE DIAL
The Function keys select a parameter,
the Value Dial changes its value.
MODULATIONWHEEL
PITCH BENDWHEEL
DISK DRIVE
PC-compatible 2HD/2DD
for sounds
HEADPHONE JACK
LCD SCREEN
Shows the status of the the instrument
and the function key names.
ARPEGGIATOR
Turns the Arpeggiator On and Off
SWITCHES
Programmable for
different functions
PORTAMENTO
Turns on Portamento for
sounds that are
programmed for it.
Chimera Runner SynStrg1 GOOM
0 96 +12 97 0 104 0 120
Trns Vol Trns Vol Trns Vol Trns Vol
1234
M07 Moonrise

12 KAWAI K5000S ADVANCED ADDITIVE SYNTHESIZER
K5000S REAR PANEL
Rear Panel Diagram is on an A3 Paper foldout. It is placed here temporarily.
THIS PAGE IS ONLY A PLACEHOLDER
POWER SWITCH
It all starts here...
MIDI IN/OUT/THRU
Connect your other MIDI devices here.
POWER RECEPTICLE
Apply grounded power
(North America: 110/120 V AC, 50/60Hz
Europe, Asia,Australia: 220/240V AC, 50/60Hz)
PROGRAMMABLE FOOTSWITCHES
Footswitches connected here can be programmed for different functions. MAIN OUTPUTS
Mono or Stereo
INDIVIDUAL OUTPUTS
Mono or Stereo, individual sounds
can be routed to these outputs.
If not connected, these signals appear
at the Main Output.
HOLD PEDAL
Connect a sustain pedal here.
EXPRESSION PEDAL
Connect a volume pedal here
for expressive control.

TUTORIAL 13
GUIDED TOUR

14 KAWAI K5000S ADVANCED ADDITIVE SYNTHESIZER
CONNECTIONS
Naturally, the first thing you ought to do with your K5000S is plug it in!
POWER Using the cable provided, connect the POWER jack to an AC outlet.
AUDIO There are two pairs of audio output jacks on the back, plus the PHONES jack on the
front (in front of the Pitch Bend wheel). This gives you a few choices, depending on
what you’re connecting to:
SOLO PLAY
Just plug your headphones into the PHONES jack on the front and go at it. There’s
plenty of power for phones. Use the MAIN volume slider to control the volume.
INSTRUMENTAMPLIFIER
If you are plugging into an amp, connect the MAIN L/MONO output jack on the
rear panel to your amplifier. All sounds will be mixed to this single cable.
STEREO SYSTEM
To connect to a music system or amplified speakers, use the two MAIN outputs (L &
R) to get stereo. You’ll need adapters or adapting cable to convert the 1/4” Phone
jacks on the K5000S to the RCA pin jacks on your stereo. Make sure to connect the
K5000S to a LINE, AUX, or TAPE input on your stereo.
MIXING CONSOLE
If you’ve got more than two inputs available, by all means connect the two MAIN
outputs and the two INDIVidual outputs to your mixer. In this way, you can route
certain sounds (piano, strings) through the reverb unit to the Main Outputs; and
send others (bass drum, bass guitar) directly to the INDIVidual outputs without
reverb, or for special studio processing.
When connections are made to the INDIVidual output jacks, the INDIVidual
volume slider on the front panel becomes active. You can adjust each pair of
outputs independently.
PEDALS
HOLD
Connect a Hold pedal to the HOLD jack on the rear panel. Use a Momentary On
footswitch, like the Kawai model F-1. This acts like a piano-style damper pedal,
sustaining after releasing keys.
EXPRESSION
You can connect a Volume pedal (Kawai model V-20X) to the EXPression jack on
the rear panel.

TUTORIAL 15
PROGRAMMABLE FOOTSWITCHES
You can connect additional momentary footswitches, like the Kawai model F-1, to
the Footswitch jacks as well. These can be programmed to do a range of things,
such as change octave or turn the arpeggiator on and off.
F.SW 2F.SW 1
VOLUME PEDAL
MIDI SEQUENCER
OR
COMPUTER
IN OUT THRU
SPEAKERS OR SOUND SYSTEM
SUSTAIN PEDAL
PROGRAMMABLE
FOOTSWITCH
MIDI There is a full set of MIDI ports on the rear panel of the K5000S: IN, OUT, and THRU
jacks. You don’t need to connect any of them, but if you want to talk to your other
MIDI gear, here’s how to connect them:
EXTERNAL KEYBOARD OR DRUM CONTROLLER
If you want to play the K5000S from another keyboard, MIDI drum or Guitar
controller, connect it to the MIDI IN jack.
You will need to set the K5000S’s Unit Channel to match the input jack and the MIDI
channel the device transmits on. Press SYSTEM, then MIDI (F5), then Unit CH (L2).
SEQUENCER OR COMPUTER
If you want to use the K5000S with a sequencer or computer, you will need two
cables. Connect the MIDI OUT of the K5000S to the MIDI IN of the computer, and
the MIDI OUT of the computer to the MIDI IN of the K5000S
You will need to adjust the K5000S’s Channels (in System of Multi) to match the se-
quencer. Depending on your configuration, you may also want to turn Local Control
OFF – press SYSTEM, then MIDI (F5), then Local (L1).
ADDITIONAL SOUND MODULES
To use the K5000S to control other sound modules, connect a cable from the
K5000S’s MIDI OUT jack to the MIDI IN jack of the other device. If you have more
than one device, you can loop from the MIDI THRU of the first device to the MIDI
IN of the second.

16 KAWAI K5000S ADVANCED ADDITIVE SYNTHESIZER
PLAYTHE DEMO
Now that everything is connected, lets see what the K5000S can do!
In the package with your K5000S is a demonstration diskette. Playing this will give
a good picture of the K5000S’s capabilities.
PLAYINGTHE DEMO
• With the Power OFF, insert the Supplement Disk into the disk drive on the left
side of the instrument.
• Press and hold the F1 button, and while holding, turn on the power.
• The K5000S will startup, and a special Demo Play screen will appear.
[screen]
• Press F2 or F3 to select a song, then press F1 to Play the song.
• Press F1 again to stop.
• Press F2 or F3 to select a new song, or F4 to exit to the K5000S main screen.

TUTORIAL 17
PLAYING SOUNDS
Below is the K5000S Single Play screen. This screen appears after turning on the
power.
ARP UP/DWN2
USR1 Level Pitch SW1 OctUp
USR2 LFO spd Pitch SW2 OctDown
USR3 Vibrato Pitch FSW1 Arpegio
USR4 Panpot Pitch FSW2 -------
A001 Runner e
SINGLE SOUNDS
The K5000S contains two banks of Single sounds – A & D. Press the SINGLE button
to switch between the two banks. Each bank is organized into groups of 10 patches.
There are up to 128 patches available in a bank, but the patch memory can used
up by fewer complex patches.
What happened to B & C? They are used on the companion unit – the K5000W.
CHOOSINGA SINGLE SOUND
• If not already selected, choose the SINGLE bank, using the SINGLE button on
the front panel.
• Choose a group: press one of the buttons labeled 00 – 12 on the front panel.
A menu of the patches in the group appears on the screen.
Single Bank Menu
A005 Driver
A001 Runner A006 Reznator
A002 Gorgizmo A007 Goom
A003 Dist Pulse A008 Heaven
A004 Telmetal A009 Creaturz
• Choose a patch: press one of the buttons labeled 0 – 9 on the front panel.
The single patch appears on the screen.
ARP UP/DWN2
USR1 Level Pitch SW1 OctUp
USR2 LFO spd Pitch SW2 OctDown
USR3 Vibrato Pitch FSW1 Arpegio
USR4 Panpot Pitch FSW2 -------
A001 Runner e
MODIFYINGA SOUND
On the left side of the keyboard are 12 Macro Controls which can be used to in-
stantly change the sound quality. In addition, there are four Assignable controls on
the bottom row – User 1 through User 4. The screen explains the functions of these
controls, as shown in the illustration above.
These do not change the preset values of the patch, which can only be changed by
editing the patch – described starting on page !!!.

18 KAWAI K5000S ADVANCED ADDITIVE SYNTHESIZER
MULTI SOUNDS
Multi Patches are combinations of up to four Single patches. They can be arranged
in layers, key splits, velocity splits, channel splits, or any combination.
CHOOSINGA MULTI
There are 64 Multi patches, M01 – M64.
• Choose the Multi bank: press the MULTI button on the front panel.
• Choose a group: press one of the buttons labeled 00 – 06 on the front panel.
A menu of the patches in the group appears on the screen.
Multi Bank Menu
M10 Komradds M15 E-Normus
M11 Addalogg M16 Raunch
M12 Addalog2 M17 TakeOver
M13 CashFlow M18 Frostbyt
M14 WINBRASS M19 Wilder
• Choose a patch: press one of the buttons labeled 0 – 9 on the front panel.
An individual Multi patch appears on the screen.
Chimera Runner SynStrg1 GOOM
1ch 1ch 1ch 1ch
0 96 +12 97 0 104 0 120
Trns Vol Trns Vol Trns Vol Trns Vol
1234
M07 Moonrise
MODIFYINGA MULTI
On the screen there are Transpose and Volume sliders for each Section, as shown in
the illustration above. Push the button underneath the desired slider, then change
the value with the VALUE dial. The slider image will also move according to your
adjustment.
These do not change the preset values of the patch, which can only be changed by
editing the Multi patch – described starting on page !!!.

TUTORIAL 19
PROGRAMMABLE
ARPEGGIATOR
The Programmable Arpeggiator offers a wide range of options to mix preset control
with live performance. The following explanation only hints at what is possible...
• Press SYSTEM, then F2 (Arp) to reach the Arpeggiator Common Page.
• Set the controls as shown in the screen –
Note (L1) = 48
RangeLo (R1) = C –2
Range Hi (R2) = C 3
Arpeggiator Common Parameter
> Note(UP-RND) 48 RangeLO C -2 <
> Gate 50% RangeHI C 3 <
> Level 100% Play Mode Altnate <
ON INT
Velo Clk Edit
e
• Select Single Patch A006 (Reznator).
ARP UP/DWN2
USR1 HramOdd -------- SW1 HarmMax
USR2 HramEvn -------- SW2 OctUp
USR3 Tremolo -------- FSW1 Arpegio
USR4 Panpot -------- FSW2 HE#1
A006 Reznator e
• Set the Arpeggiator Controls (left of the screen, next to the Macro Controls) as
follows:
Pattern = U/D 2
Mode = Hold and Retrig 1
Speed = around 12 o’clock (straight up)
• Turn on the arpeggiator by pressing the ARPEGGIATOR button – it will light
up red.
• In the lower half of the keyboard, play a four note chord. The notes will
arpeggiate. You can release the keys and the notes will still play.
• You can play a melody on top of this arpeggio with the right hand.

20 KAWAI K5000S ADVANCED ADDITIVE SYNTHESIZER
Other manuals for K5000S
1
Table of contents
Other Kawai Synthesizer manuals

Kawai
Kawai 16 Bit Digital Percussion Synthesizer XD-5 User manual

Kawai
Kawai Synthesize K1RII User manual

Kawai
Kawai K5 User manual

Kawai
Kawai SX-240 User manual

Kawai
Kawai K5000W User manual

Kawai
Kawai K4R User manual

Kawai
Kawai Concert Artist CA15 User manual

Kawai
Kawai Synthesizer K4 User manual

Kawai
Kawai FS680 User manual

Kawai
Kawai K1 User manual

Kawai
Kawai PH50 User manual

Kawai
Kawai PHm Pop Synth Module User manual

Kawai
Kawai K1-II User manual

Kawai
Kawai K 11 User manual

Kawai
Kawai MK 10 User manual

Kawai
Kawai Synthesizer-100F User manual

Kawai
Kawai Personal Keyboard MS20 User manual

Kawai
Kawai MP7 Technical manual

Kawai
Kawai K5000S User manual

Kawai
Kawai DX205 User manual