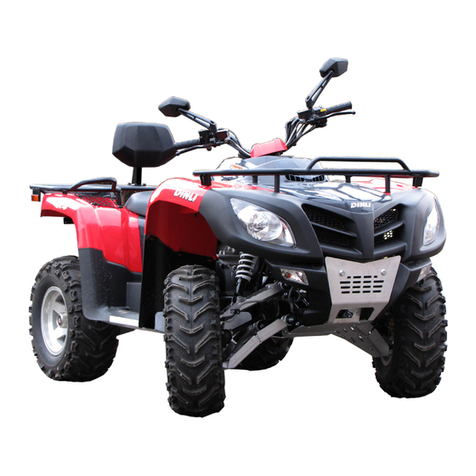
KAYO MOTOR AY70-2 User manual

ZHEJIANG KAYO MOTOR CO., LTD.
WWW.KAYOMOTO.COM
1
Model AY70-2
Service Manual

ZHEJIANG KAYO MOTOR CO., LTD.
WWW.KAYOMOTO.COM
2
Instruction
This manual contains detailed information for AY70-2 (ATV), maintenance, adjustments,
disassembly, installation, inspection points and specifications
Please read the manual carefully and follow the instructions closely when performing
inspections and repairs, this will increase the reliability, performance and overall lifespan of
the vehicle .

ZHEJIANG KAYO MOTOR CO., LTD.
WWW.KAYOMOTO.COM
3
Content
Chapter 1 Maintenance information
Chapter 2 Plastics and Body parts
Chapter 3 Regular Maintenance and adjustment
Chapter 4 Outer parts of engine
Chapter 5 Engine internals
Appendix Electrical schematic diagram
ZHEJIANG KAYO MOTOR CO., LTD.
All contents in this manual are subject to improve and
update without notice.

ZHEJIANG KAYO MOTOR CO., LTD.
WWW.KAYOMOTO.COM
4
Conversion table
Danger/warning/attention
Take the below explanations seriously, it’s important for maintenance, especially important
during engine maintenance.
Danger:Be on high alert for danger.
Warn:Be on alert for moderate danger.
Attention:Be on alert for minor danger.
This manual may contain some potential risks when performing engine work and
maintenance, Please pay close attention to the above explanations, Service technician or
mechanics should have basic mechanical knowledge before performing any service,
maintenance, or inspection.
Item
Unit conversion
pressure
1kgf/cm2=98.0665kPa;1kPa=1000Pa
1PSI=0.0689kgf/cm2
1mmHg=133.322Pa=0.133322kPa
Torque
1kgf·m=9.80665N·m
volume
1mL=1cm3=1cc
1L=1000cm3
Moment
1kgf=9.80665N
Length
1in=25.4mm

ZHEJIANG KAYO MOTOR CO., LTD.
WWW.KAYOMOTO.COM
5
1. Service Information
1.1 Warnings 1.2 VIN Number 1.3 Main parameters list
1.4 Maintenance parameters list 1.5 Torque tightening
1.6 Lubricant, sealant 1.7 Cable, hose and wiring diagram
1.1 Safety precautions
Safety first
1. Wearing work clothes (coveralls), hat and safety boots suitable for the operation. In some
conditions safety glasses, dust masks, gloves and other safety protective supplies are needed
to protect you from injury.
2. Do not run the engine in unventilated places.
3. To prevent burns, do not touch the engine or exhaust until cooled.
4. Battery solution (dilute sulfuric acid) is a strong corrosive agent; contact with the skin,
contact with eyes may cause blindness. If the battery solution accidentally touches clothes or
skin, rinse immediately with clean cold water. If the battery solution is touches eyes, please
flush immediately with plenty clean cold water and get medical treatment as soon as possible.
Battery and battery solution should be kept out of reach of children. Battery charging will
produce flammable and explosive gases, if exposed to a source of fire or spark there is a risk
of explosion or fire. Please charge in well-ventilated places.
5. As gasoline is flammable and explosive. Pay attention to sparks as well as open flames.
Vaporized gasoline may explode if exposed to open flame or sprks , please choose
well-ventilated areas away form these hazards when refueling.
6. Attention, the rear wheel, clutch or other rotating parts and movable parts may clip hands
and clothes during maintenance.
7. Two or more people must constantly greet each other when operating to ensure safety.
Disassembly and installation instructions
1. All the Parts, lubricants oils and fluids must be Kayo brand parts or Kayo recommends.
2. During disassembly, Please sort and separate out the parts and fasteners of each system to
ensure that everything is put back together properly.
3. Clean the vehicle or parts to be serviced before inspection.
4. The Gasket, o-ring, piston pin baffle ring, cotter pin and other one time use parts must be
replaced after disassembling.
5. Snap rings can be deformed if opened too much during disassembly. DO NOT re-use
deformed snap rings.
6. After disassembly and inspection, clean the parts and blow the cleaning agent away with
compressed air before measurement. Grease the moving surface before assembly.
7. During disassembly, check all the necessary specificationss and measure according to
directions in this manual. Make sure measuments and conditions are within specification.
8. Bolts, nuts, screws and other fasteners shall be pre-tightened and then tightened in
accordance with the specified tightening torque in a diagonal sequenece. From large to small,
and from inside to outside.
9. Inspect all rubber parts during disassembly and replace if necessary. In addition, as some
rubber pieces are not resistant to corrosive materials, please keep them from contacting
volatile oils, grease, or liquids.

ZHEJIANG KAYO MOTOR CO., LTD.
WWW.KAYOMOTO.COM
6
10. Smear or inject recommended grease in specific places as service manual.
11. Use special tools for disassembly and installation.
12. Ball bearings can be rotated with finger to confirm whether the rotation is flexible and
smooth. If there are problems as bellow, please replace bearing.
Bearing axial and radial clearance is oversized.
Clean and grease bearings with a tight spots when rotated. If the bearings still feel stuck
after cleaning, replace. If it can’t be cleaned, replace it.
If the bearing is a press fit, and becomes deformed after disassembling, replace it.
13. Bearings should be lubricated or packed with grease before assembly. Take note of the
direction of installation when assembling. When installing open or double-sided dustproof
bearing, make the manufacturer's logo and dimensions outwards.
14. Let the chamfered side towards force direction when install the Snap-ring. Do not use the
rings without elasticity. After assembly, rotate the Snap-ring to confirm that it is firmly
installed in the slot.
15. It’s important to check that all fastening parts are tightened and that functions are
normal after assembling.
16. Brake fluid and coolant can damage surfaces, painted parts, plastic parts, rubber parts,
etc., do not let brake fluid contact to these parts, If brake fluid contacts these parts rinse and
dilute with water immediately.
17. When installing oil seals manufacturer’s mark and sizes face outward.
Check the oil seal before using.
Pay attention not to make oil seal lip curly, do not let burr scratch oil seal lip during
assembly.
Grease the oil seal lip before assembly.
18. When installing rubber hose parts, insert the rubber pipe into the fitting. If there is a
hoseclamp, install the hoseclamp in the hose indentation. Replace rubber hoses if dried,
cracked, or deformed.
19. Keep the inner of engine and brake hydraulic system away from dust and clay.
20. Clean all gasket material from surfaces of before installing new parts or reassembling.
21. Do not bend the cable excessively. Kinked or damaged cables may cause poor response
and inner cables to fray and eventually break.
22. When assembling any protective caps, covers or boots make sure they are seated
correctly in the respective grooves.
Engine Break-in
There is a lot of relative motion components in engine, such as piston, piston ring, cylinder,
mutually meshing gear, etc., it’s very important to have a standard break-in at the beginning
of using. Break-in can help the moving parts adapt to each other, correction work, form a
smooth friction surface which can bear heavy load, by this way the engine will have excellent
performance and reliability.
Recommended break-in time is 20 hours, as follows:
0~10 hours: Operate at no more than ½ throttle, keep gear changes and speed variances to a
minimum. Do not operate for extended amounts of time with a fixed throttle position. Let the
engine cool for 5 to 10 minutes after each hour of operation. Avoid quick acceleration.

ZHEJIANG KAYO MOTOR CO., LTD.
WWW.KAYOMOTO.COM
7
0~20 hours: Operate at no more than 3/4 throttle, Do not operate for extended amounts of
time with a fixed throttle position. Change gears and vary speeds as necessary. Let the engine
cool for 5 to 10 minutes after each hour of operation. Avoid quick acceleration
Note:
During break-in period, inspect for noises and wear and follow maintenance schedule.
After Break-in period is complete schedule the unit for an inspection and service.
1.2 VIN Number
Model
AY70-2
VIN number
Engine number
①VIN number
②Nameplate
③Engine number
1
3
2

ZHEJIANG KAYO MOTOR CO., LTD.
WWW.KAYOMOTO.COM
8
1.4 Specifications, Model information
No.
Item
1
Brand
KAYO
2
Type
AY70-2
3
Name
70cc utility ATV
4
Company
ZHEJIANG KAYO MOTOR CO.,
LTD.
●Dimensions, Vehicle Specifications
1
Dimension(L*W*H)(mm)
1230*800*870
2
Handlebar height(mm)
870
3
Handlebar width(mm)
800
4
Rear height(mm)
650
5
Ground clearance of seat(mm)
635
6
Min. terrain clearance(mm)
85
7
Wheelbase(mm)
900
8
Front track(mm)
640
9
Rear track(mm)
550
10
Turning radius(mm)
1650
11
Turning angle(degree)
38°±2°
12
Net weight(Kg)
76±2
13
Kerb weight(battery+fuel)(Kg)
81
14
Max. Speed Km/h
40(limited speed)
●Engine parameters
No.
Item
1
Starting type
Electric
2
Type
horizontal,Single cylinder, four stroke, oil
cooling
3
Distribution way
SOHC/chain drive
4
Cylinder diameter × mileage
(mm)
47*41.4
5
Compression ratio
8.8 :1
6
Lubrication mode
Combination splash and pressure feed
7
Oil pump type
Rotor
8
Lubricating oil filter type
All-flow filter, paper filter
9
Oil trademark
SAE15W-40
10
Cooling type
Air cooling
11
Cooling fluid
/

ZHEJIANG KAYO MOTOR CO., LTD.
WWW.KAYOMOTO.COM
9
12
Air filter type
Filter with sponge filter element
13
Carburetor
Horizontal plunger type (Jingke PZ19/EPA
state)
14
Tank volume
2L
15
Clutch type
Dry automatic clutch
16
Gearshift method
CVT
17
Gear range
CVT without reverse gear
18
Shift type
R~N~D
19
Reduction ratio
Forward gear D
Reverse gear R
Primary
Gear hub of clutch/primary gear
Single-sta
ge
Gear ratio of forward
gear
Gear ratio of
forward gear
Overall
● Frame
20
Drive sprocket ratio
37/13
21
Output type
Chain drive,rear wheel drive
22
Brake type
Front and rear disc
23
Suspension type
Freestanding double rocker
24
Frame type
Steel tube and steel plate welded type
●Lubrication system
Item
Standard
Limitatio
n
Engine oil
capacity
Change oil
800mL
(No oil filter element replaced
)
-
Change oil
800mL
(replace the oil filter element)
Full capacity
800mL
-
Recommended engine oil
(
original
)
·four-strokes motorcycles SAE-15W-40
For replacements, it must be within
following scope:
·
API classification
:
SG or upper grade
engine oil
·
SAE specification
:
refer to left table
Oil pump
rotor
Radial clearance of inner
and outer rotors
0.07 mm~0.15mm
0.2mm
Radial clearance between
outer rotor and pump body
0.03 mm~0.10mm
0.12mm
Axial clearance between
rotor surface and pump body
0.023 mm
~
0.055 mm
0.12 mm
Oil pressure
1500r/min
,
90
℃
: 200 kPa ~400kPa
,
General 240 kPa
6000r/min
,
90
℃
:600 kPa ~700kPa
,
general 600 kPa
●Air intake system(see engine section)

ZHEJIANG KAYO MOTOR CO., LTD.
WWW.KAYOMOTO.COM
10
●Cooling device (without)
●Wheel (front and rear wheels)
Item
Standard
Limitation
Rim jump
Vertical
1.0mm
2.0mm
Horizontal
1.0mm
1.8mm
Tyre
Residual groove
~
3.0mm
Air pressure
4.0 PSI
~
●Brake system
Item
Standard
Limitation
Front brake(one
with two)
disc thickness
3.5mm
3mm
Brake handle stroke
5~10mm
~
Braking force
400N*m
~
Rear brake
disc thickness
3.5mm
~
Brake handle stroke
10~20mm
~
Braking force
500 N*m
~
●Ignition device
Item
Standard
Ignition method
CDI electric ignition
Sparking plug
Type
Resistor type spark plug
Standard
ATR7C/(torch)
Gap
0.6~0.7mm
Spark character
>8mm, one bar
Spark advance angle
Ignition coil
resistance
Primary
0.43~0.57Ω
Secondary
10.1~11KΩ
Peak voltage
Primary ignition coil
>150V
Pulse
2V
●Light / Instrument / Switch
Item
Standard
Relay insert fuse
15A
Light
Headlight left and right
12V*3W*2
Taillight/brake light
LED
Gear indicator
LED
●Valve mechanism + cylinder cover(see engine section)

ZHEJIANG KAYO MOTOR CO., LTD.
WWW.KAYOMOTO.COM
11
●Cylinder + piston + piston ring + crank connecting link
(see engine section)
1.5 Fastener Torque Specifications
Note: When installing threads, please manually attach 2~3 turns of thread first.
Torque Specifications chart
No.
Item
install position
Bolt
specification
Class
Moment
N*m
1
Engine
Lower
mounting bolt
M8
10.9
37~50
2
Upper
mounting bolt
M8
10.9
37~50
3
Bottom
mounting bolt
M8
8.8
18~25
4
Suspensio
n
Brake bolts
M10*1.25
8.8
35~45
5
Axle of upper
rocker arm
M10*1.25
8.8
35~45
6
Rear rocker
arm bolt
M10*1.25
10.9
58~71
7
Fork axle
M12*1.25
8.8
50~60
8
Brake
Rear disc
M8
8.8
18~25(with
blue thread
sealants)
9
Front disc
M6
10.9
15~20
10
Disc pump
M8
10.9
29~35
11
Front brake tee
M8
8.8
18~25
12
Rear axle
Rear axle
M12*1.25
8.8
55~65
13
Nut
M27*1.5
80~90
14
Chain bolt
M6
8.8
8~12
15
Turning
Clamp locking
bolt
(hexagon)
M8
10.9
18~25
16
Steering
column
locking
M8
8.8
18~25
17
Bolt of lower
raiser
M10*1.5
10.9
50~60
18
Electrical
elements
Battery box
M8
8.8
15~20
19
Muffler
installation
M8
8.8
15~20

ZHEJIANG KAYO MOTOR CO., LTD.
WWW.KAYOMOTO.COM
12
20
Voltage
regulator
ignition coil
M6
8.8
7~11
21
Fuel tank,
body
parts,
plastic
fuel tank
M6
8.8
7~11
22
fuel tank
switch
M6
8.8
7~11
23
Pedal
M8
8.8
18~25
24
Reinforced
pedal
M6
8.8
8~12
25
Plastic screw
TM6
7~11
26
Screw for
headlight and
plastic
ST4.2
3~5
●Tightening moment at specified position - engine(see engine section)
●Engine service tool(see engine section)
●Engine special tool(see engine section)
1.6 lubricating grease and sealant
No.
Position
Effect
Grease
1
Dust cap for rocker arms
lubrication
XHP222
2
Ball joint of rocker arms
3
Steering column bottom
4
Joints of knuckle and wheel hub
5
Installation axle for rear fork
6
Inner sleeves of rear fork
7
Rear axle liner pipe
8
Rear axle bearing and oil seal
9
Steering column clamp
Note: please coat inside of handlebar grip with grip glue before
installing.
Engine operating materials and installation accessories (see engine
section) Engine operating materials includes lubricating oil (engine oil), Grease (butter) and
cooling liquid. The installation accessories contains flat coating glue, screw thread sealant etc.
1.7 Wiring diagram of cable, hosepipe and inhaul cable

ZHEJIANG KAYO MOTOR CO., LTD.
WWW.KAYOMOTO.COM
13
Main cable
Oil tube for front brake
Throttle cable
Oil tube for rear brake
Damper cable

ZHEJIANG KAYO MOTOR CO., LTD.
WWW.KAYOMOTO.COM
14
Headlight
Functional switch
Electrical lock
Reverse gear
display
Neutral display
Stop switch
Brake cable
Positive
pole
Negative
pole
Magneto
connector
Gear indicator
Voltage regulator

ZHEJIANG KAYO MOTOR CO., LTD.
WWW.KAYOMOTO.COM
15
Voltage
stabilizer
Rear
light
CDI
Ignition
coil

ZHEJIANG KAYO MOTOR CO., LTD.
WWW.KAYOMOTO.COM
16
2Plastic body
2.1 Maintenance warnings
2.2 Installation torque
2.3 Seat, front guard, clay, hood, rear body, left and right guard, plastic pedal,
dismounting left and right pedal
2.1 Maintenance cautions
Operation cautions
When replacing plastics parts, please install new warning labels, stickers and riveted
tags to the new plastics.
This chapter is about the dismounting the body plastics.Pipe, inhaul cable should be
equipped according to wiring diagram of cable, hosepipe and inhaul cable.
2.2 Installation torque
M8 bolt:18~25N*m
TM6 bolt:7~11 N*m
M6* bolt:8~12 N*m
2.3 Hood, handlebar, seat, plastic parts (clay, rear body, left and right
guard), front guard, 3.2 Installation torque
2.3.1 Hood
Disassembly
1. Remove the bolts 1 and 2.
2. Push down and gently pull the hood
forward to remove. (Be careful as the
tabs are easy to break)
Installation
In reverse order of disassembly. Locate
tabs into slots and push to lock into
place then install bolts 1 and 2
(note:replace hood plastic if any of the
tabs broke during disassembly)
1/2

ZHEJIANG KAYO MOTOR CO., LTD.
WWW.KAYOMOTO.COM
17
2.3.2 Handlebar
Disassembly
1. Cut off power first. (disconnect
battery)
2. Cut plastic ties first, then pluck
functional switch, stop switch and brake
cable plug in sequence.
3. Loose the fixed bolt from brake bar
by tool and remove rear brake bar.
4. Remove front brake bar as the same
as rear brake bar.
5. Pull the damper cable as picture
shows, then remove it.
6. Remove the bolt from accelerator cap
to remove the throttle cable.
7. Dismounting fixed bolt, then the
lower raiser, remove handlebar at last.
Installation
In reverse order from disassembly, then check if it installed well.
note:1. after installation, check the flame-out switch connector, function switch
connector, brake connector etc., in case of misconnection or looseness.
2.Check if the dumper cable and throttle cable in right position.
3. Front and rear brake in right position, the wiring way refers to the vehicle wiring
diagram.
Function switch
Rear brake
Front brake
Throttle seat
Damper switch
Flame-out switch

ZHEJIANG KAYO MOTOR CO., LTD.
WWW.KAYOMOTO.COM
18
2.3.3 Seat
Disassembly
1. Press the back of the seat cushion meanwhile open the seat cushion hook
2. Lift the seat cushion tail and pull the seat cushion back
Installation
Take it back in reverse order from disassembly.
Check if the seat is installed in place and firm.
(Note: the seat cushion front hook must be installed in the frame limit, and the seat
cushion limit column must be installed in the frame limit.)
2.3.4 Front Bumper
Disassembly
1. Disassemble mounting bolt in order.
2. Remove the front guard.
Installation
Take it back in reverse order from disassembly
(note: if the mounting bolt or nut is broken, replace it to same specification in time)
Seat cushion hook
Mounting bolt

ZHEJIANG KAYO MOTOR CO., LTD.
WWW.KAYOMOTO.COM
19
2.3.5 Plastic Body
Disassembly
1. Disconnect all necessary electrical connectors.
2. Disassemble plastic parts fixing bolts1/2,3/4,5/6,7/8,9/10 in order. note
(2/4/6/8/10 on the other side)
3. Twist the oil cap, remove the plastic parts.
(note: remove the handlebar first before dismount plastic parts.)
安装
Oil tank cap
1
3
2
4
5

ZHEJIANG KAYO MOTOR CO., LTD.
WWW.KAYOMOTO.COM
20
Installation
Intsall the plastic body in reverse order from disassembly.
(note: if the mounting bolt or nut is broken, replace it to same specification in time.
After installation, check headlight connector, electric connector, reverse indicator
connector etc., in case of looseness or misconnect.)
2.3.6 Left and right plastic pedal
Disassembly of right plastic part pedal
1、Remove the foot mounting bolt 1 and 2
2、Take the right plastic pedal
Installation
Take it back in reverse order from disassembly
(note: if the mounting bolt or nut is broken, replace it to same specification in time.)
The removal of the left pedal is the same as the right one.
1
2
6
Table of contents
Other KAYO MOTOR Offroad Vehicle manuals

KAYO MOTOR
KAYO MOTOR AU125 User manual

KAYO MOTOR
KAYO MOTOR HY110AT User manual

KAYO MOTOR
KAYO MOTOR JACKAL 200 User manual

KAYO MOTOR
KAYO MOTOR AU110 User manual

KAYO MOTOR
KAYO MOTOR AU180 User manual

KAYO MOTOR
KAYO MOTOR FOX 70 User manual

KAYO MOTOR
KAYO MOTOR AT125-B User manual

KAYO MOTOR
KAYO MOTOR STORM 150 User manual

KAYO MOTOR
KAYO MOTOR AU200 User manual

KAYO MOTOR
KAYO MOTOR BULL 150 User manual