KEC DVD-2 Operating instructions

MODEL: DVD-2 / DVD-2T
INSTALLATION INFORMATION
& OPERATING INSTRUCTIONS
THIS PRODUCT IS INTENDED FOR PROFESSIONAL INSTALLATION ONLY
FOR MOBILE-SPECIFIC 12 VOLT DC-ONLY OPERATION
PLEASE READ ALL INSTRUCTI ONS BEFORE USING THIS PRODUCT

–2–
IMPORTANT INFORM ATION
TO RE DUCE THE RISK O F ELE CTRI C S HO CK, DO
NOT REMOVE THE CO VE R (OR BACK).
NO USER-S E RVICEABL E PARTS ARE INSIDE.
REFER SERVICI NG TO QUA LI FI ED SE RVICE PE RSON NEL.
This symbol indicates “dangerous voltage”
i ns i de t h e product t hat pr e sent s a ri s k of
electric shock or personal injury.
This symbol indicates impor tant
instruct ions accompanying t he
pr oduct .
CAUTION: DV D P LA YE RS US E AN I NVI SI BLE LA SE R BE AM WHI C H CA N CAU SE HAZ AR DOU S
RADIATIO N EXPOS URE I F DI RECTED.
BE SURE TO OP ERA TE PLAYE R CORRECTLY AS INS TRUCTED.
CAUTIONS
Caution: To pr event electric shock, match wide blade of plug to wide slot, fully inser t.
At t ent i on: Pour évit er les choc s éle ct r iqu es , i nt r oduí r e l a l ame l a p l us l arg e de l a f i c he dans l a bo rn e
corresponda nt e de la pri se et pousser jusqu au fond.
This product sati sfies FCC regul ati ons when shiel ded cables and connect or s are used to connect t he unit to other
equi pm ent . To pr ev en t el ec t r o magn et i c int erf er enc e wit h ele ctr ic applianc es su ch a s r ad ios an d t el ev isi o ns , u se s hiel ded
cables and connect ors for connect ions.
FCC N OTE (for U. S.A):
This equipment has been t est ed and found to comply with the limits for a Class B digit al device, pursuant t o Part 15 of
t he FC C rul es. Thes e limit s a re des ig ne d t o p r ovi de rea sona ble pr ot ec t ion a ga ins t h ar mf ul int erf er enc e in a r es i dent i al
inst alla t ion. Th i s eq ui p me nt genera t es , us es and c an radi at e r adi o f reque nc y ener gy a nd, i f not ins t al l ed and us ed in
accordance wi th the instructions, may cause harmful inter fer ence to radio or television recept ion, whi ch can be
det er mi n ed by t u rni ng t h e equ i pm ent off and on , t he us er is en cour a ge d t o t ry t o corr e ct t he in t erf er en ce b y o ne or mor e
of thef ollowing measures.
•Re orie nt or r el oc at e t he rec eiv i n g ant en na.
•I ncr eas e t he s epar a t ion bet we en t he equi p me nt a nd r ecei ve r.
•Connect thi s equipme nt int o an out let on a ci rcuit diff erent from that to which t he receiver is connected.
•Co nsul t t he de aler or an ex peri e nc ed ra dio/ T V t ec hnicia n f or help .
This cl ass B d igit al ap par at us me et s al l requi rem e nt s of t h e Cana di a n I nt erf ere nc e - - Ca us ing Equi pm en t Reg ul at i on s.

–3–
IMPORTANT SAFETY INSTRUCTIONS
CAUTION: PLEASE RE A D AND OBSERVE ALL WARNINGS A ND INS TRUCTIONS IN THI S OWNER’S
MANUAL AND THOSE MARKED ON THE UNI T.
RETAI N THI S BOOKLET FOR FU TU RE RE FE RE N CE.
This set has been designed and manufact ured to assure per sonal safety. Impr oper use can result in electric shock or fire
haza rd . The saf egu ards inc or p or at ed in t hi s unit wi ll prot e ct you if you ob ser ve t he f oll owing p roc ed ur es f o r inst al l at io n,
us e and s er vic i ng .
This un it is f ul l y t ran si st or i z ed and does not c on t ai n any par t s t ha t c an be r epai r ed by t he u ser.
DO NOT REMOVE THE CABINET COVER, OR YOU MAY BE EXPO SE D TO DANGEROUS VOLTAGE.
REFER SERVICI NG TO QUALI FIED SERVI CE PERSONNEL O NLY.
1. Read owner’s manual
After unpacking t his product, read the owner’s manual carefully, and follow all the operat ing and ot her inst ructions.
2. Pow er Sour ce s
This pr od uc t s hould be o pe r at ed only f r om t h e t yp e of power so ur ce i n dic at e d on t h e ma rki ng label . I f you are not
sure of thet ype of power supply in your home, consult your product dealer or local power company. For prod ucts
int en de d t o opera t e f r om bat t ery power, or ot her s our ces, re f er t o t he ope r at ing i nst r u ct i ons .
3. G r o u n di n g or P ol a r i z at i on
This pr oduct is equipp ed with a polari zed alternating current line plug (a plug having one bl ade wider than the
ot her) . Th is plu g wil l fi t int o t h e power ou t l et o nl y one way. Thi s is a saf et y f eat ur e. I f y ou ar e unabl e t o i ns ert t h e
pl ug f u l ly i nt o t he out le t, t ry rever si ng t h e plug . I f t h e plu g shoul d s t il l f a il t o f it, cont a ct your elect rici an t o repl a ce
yo ur obsolet e out let . Do not d ef eat t h e s af et y pur pos e of t he po l ariz ed pl u g.
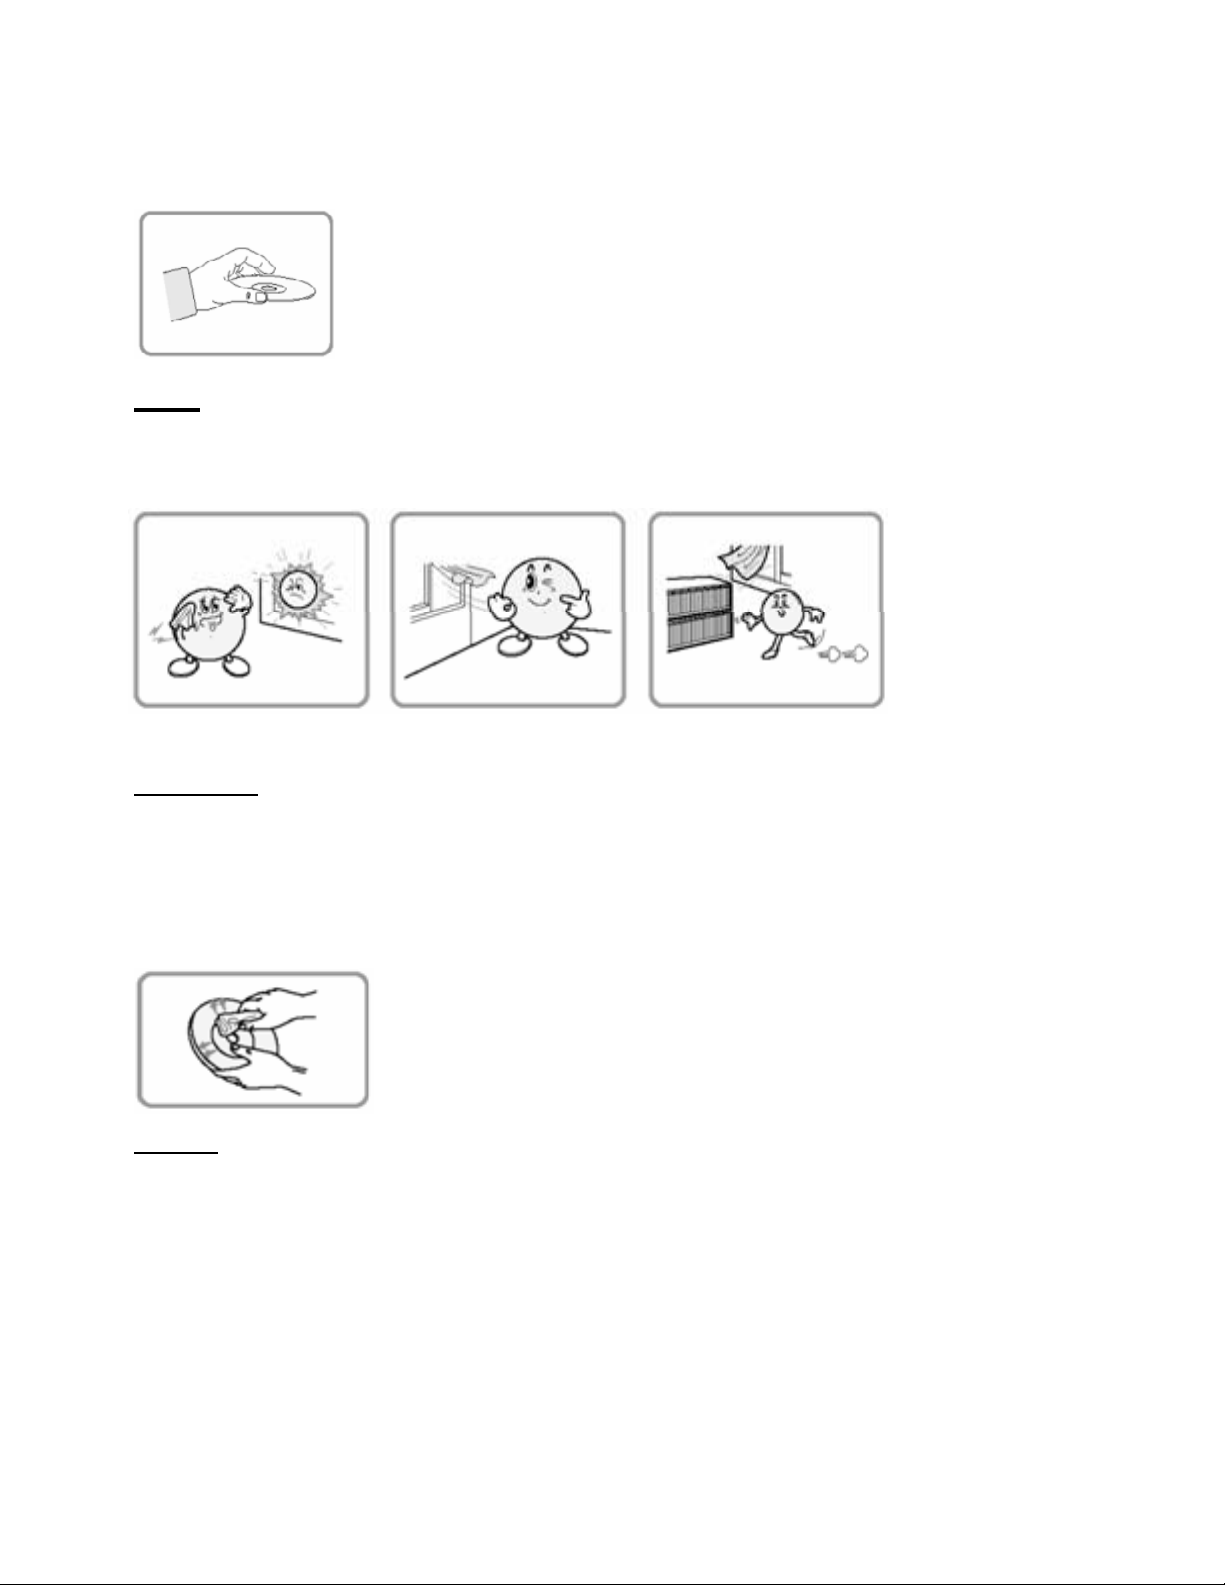
4. V e nt i l ati on
Slot s and open i n gs in t h e c abine t ar e pr ov ide d f or vent i lat ion a nd t o en su r e rel i able op er at i on of t he p roduc t and t o
prot ect it from overheating. Thes e ope nings must not be blocked or covered. The openings should never be
bl oc ke d b y pla cin g t he p roduc t on a b ed, s of a, r ug or ot her s imila r s urf ac e. Thi s pr oduct sh oul d not be plac ed i n a
built -in in st a llat io n s uc h as a b ookc as e or rac k u nl ess pr oper vent i l at io n i s p r ov ided or t he ma nuf ac t ur er ’s
instructions have been adhere d to. In summer, ventilat efor 10 minutes before playi ng Disc. In wint er, play Disc
af t er i g nit i ng t he ca r.
5. Heat
Th e pr oduct shoul d b e s it uat e d away f r om heat sour ces s uc h a s r adiat or s, heat r egi st er s, s t oves , or ot her pr oduct s
includi n g ampl if ie r s ) t hat pr oduce hea t .
6. Wat er an d Moist ur e
Do n ot us e t hi s p roduc t near wat er - f o r exa mple, near a ba t h t ub, wa sh bo wl , k it c hen s ink . or l aundr y t ub ; i n a wet
basement; or near a swimming pool and the like.
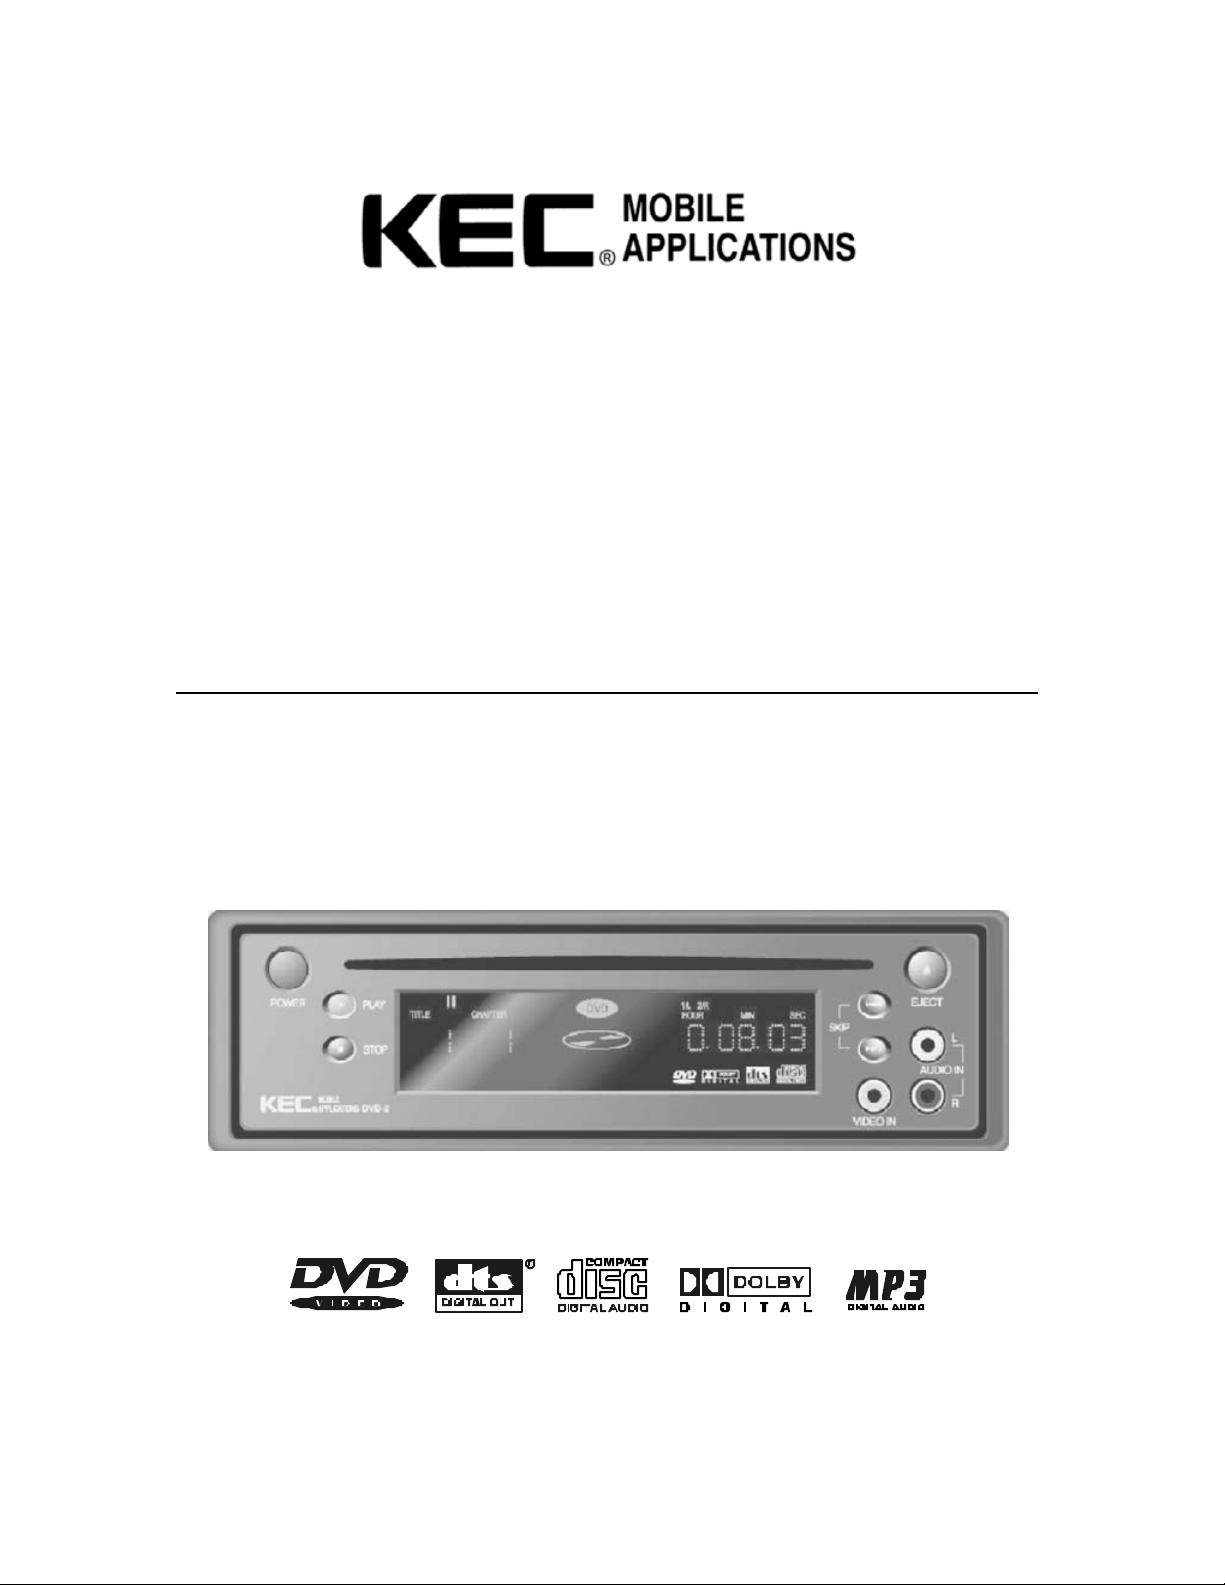
7. Clea ni ng
Un plug t hi s pr oduct f r om t h e wall o ut let bef or e c le ani ng. Do not use l i quid c l ea ners or aeros ol cl ean er s. Us e a
da mp c lo t h f or cl ea ning.
8. Pow er -Cor d Protecti on
Power-supply cords should be rout ed so that they are not likely to be walked on or pinched by it ems placed u pon or
agai ns t t hem, playing pa r t ic ul ar att en t i on t o c or ds at pl ugs , c on veni e nc e r ec ept ac les , and t he point wher e t hey exi t
f r om t he pro du ct .
9. Overloading
Do not overload wall out let s, ext ension cor ds, or integral convenienc e receptacles as thi s can result in a risk of fire
or e lec t ri c s hock.
10. Li ghtni ng
For adde d protection of thi s product dur ing storms, or when it is left unatt ended and unused f or long periods of time,
unpl ug it from t he wal l out le t. Th i s wil l prev en t damag e t o t he prod uc t due t o li ght ning an d p ower - l ine surge s.
11. O bj e ct an d Li qui d En t r y
Nev er push objects of any kind i nto this product through openings as t hey may touch dangerous voltage poi nts or
sh or t -o ut pa rt s t h at could r e sult in a f ire or ele ct r ic shoc k. Ne ve r s pi l l liq ui d of a ny ki nd on t he pro du ct .
12. Attachme nts
Do n ot us e at t ac hment s no t r eco mme nd ed by t he pr oduct manuf act ur e r as t hey ma y cause hazard s.

–4–
IMPORTANT SAFETY INSTRUCTIONS
13. Accessories, Carts, and Stands
Do n ot pl ace t hi s pr od uc t o n an un st a bl e c art , st an d, t ri pod, brack et, or t a bl e. The prod uc t may f al l,
ca us in g s er ious i nju r y t o a chi l d or adult , and se r ious da ma ge t o t he p roduc t . Us e o nl y wit h a ca rt, st and,
t r i po d, br ack et , or t abl e r ec omme nd ed b y t he man uf a ct ur e r, or so ld wit h t he pr oduc t . Any mount i ng of
t he pro du ct sh ould f ol low t he ma nuf ac t ur er ’s i ns tr u ct i ons, and s hould use a mo un t ing acc es s ory
recomme nd ed by t h e manuf ac t u rer . A pr oduc t and c art co mbi n at i on shoul d be mov ed wi t h care. Q uic k st o ps ,
ex ce ss ive f orc e, and u ne ve n s ur f ac es may caus e t he p r oduc t a nd c art co mbin at i on t o ov ert ur n.
14. Disc Sl ot
Keep your f ingers wel l clear of t he disc slot as i t is closing. It may cause ser ious personal injury.
15. Burden
Do n ot pl ace a he av y obj ec t o n o r st ep on t he pr oduc t . Th e o bject may f al l , ca usi ng ser i ous pe rs on al inj ury a nd
serious damag e to the product.
16. C onnecti ng
When you connect the product t o other equipment , t urn off t he power and unpl ug all of t he equipment from the wall
outlet. Failure to do so may cause an elect ric shock and seri ous per sonal injury. Read the own er’s manual of the
ot her equ ipme nt caref ul l y a nd f oll ow t he i n st r uct i ons wh en m ak ing a ny conn ec t io ns .
17. Sound Volume
Reduc e t he volume to the minimum level bef ore you turn on the product. Ot herwise, sudden high volume sound
may caus e hea r in g or spea ke r d am ag e.
18. Sou nd Dist or tion
Do not al low the product to output distor ted sound for a longtime. It may cause speaker overheating and fi re.
19. La ser Be am
Do n ot lo ok i nt o t he op enin g of t he di sc tra y or v ent i l at i on op ening of t h e produ ct t o se e t he so ur ce of t h e l aser
beam. It may cause sight damage.
20. Disc
Do n ot us e a c r acked, def o r med , or r epaire d di s c. Thes e d i s cs ar e eas i l y br ok en an d m ay c ause seri o us per s onal
injury and product malfunct ion.
21. Dam age Requi r i ng Ser vice
Un plug t hi s pr oduct f r om t h e wall out l et and r ef e r ser vici ng t o q uali f i ed se r vi ce per s onnel un der t he f ol l owing
co nd it i ons :
a) When the power- supply cord or plug is dama ged.
b) If li q uid has be en sp i ll ed, o r o bject s hav e f al l en int o t he pr od uct .
c) If the product has been expos ed to rain or water.
d) If t h e pro duc t doe s not ope rat e n or mal l y by f ollowi ng t he ope r at in g i nst ructio ns . Adj us t o nly t hos e c ont ro ls t hat
are covered by the operating instruct ions as an improper adjustment of other contr ols may result in damag e and will
of t en r equir e ext ens iv e wor k by a q ualif ied t echnic i an t o r est ore t h e pr oduct t o it s normal oper at i on.
e) If the product has been dropped or damaged in any way.
f ) Whe n t he pr od uct exhi bit s a d ist inct c hange i n perf or manc e-t hi s in di c at es a ne ed f or s erv ic e.
22. Servicing
Do n ot at t emp t t o s ervice t his pr oduct y our se lf a s op eni ng or r emovi n g co ver s ma y ex pos e you t o danger o us
voltage or other hazards. Ref er all servi cing t o qualif ied service personnel.
23. Repl ac em e nt pa r ts
Whe n repl ac eme nt par t s ar e r equir ed, be sur e t he serv i ce t echni c i an has us ed r epla c e ment p ar t s speci f i e d by t he
manufact urer or have the same characteristics as the original par t. Unaut horized substit utions may result in f ire,
el ec t ri c s hock, or ot he r h az ar ds.
24. Safety Che ck
Upon completion of any service or repairs to thisproduct, askthe service technician to perform safety checks to
determine t hat the product is in proper operat ing condit ion.

–5–
TABLE OF CONT ENT S
Important Information 2
Important Safety Instructions 3
Ta bl e Of Conte nt s (this page) 5
Gener al Information About Di scs 6
Care & Storage Of Discs 7
De s cr i pt i o n
Fr ont Panel 8
Fr ont Panel Display 9
Rear Panel 10
Import ant Safet y I nstruct ions Regar ding The DC I N Jacks 11
Acce ssor ie s 11
Remot e Cont roller 12
Installing Batteries In The Remote Controller 14
Using The Re mot e Cont roller 14
Batt er y Handling Pr ecaution 14
Remot e Cont roller Handling Precautions 14
Connections
Video Connections To TV Or Monitor 15
Audio Connections 16
Antenna Connection (DVD-2T Only) 17
Setting The DVD-2T For Air Or Cable Channel Reception 17
Before Playi ng A Disc 18
Playing A Disc (DVD/VCD/CD) 19
Playing An MP3 OR WMA Audio File 20
DVD-2 Setup Menus
General Information 21
Language Setup Menu 22
Restoring Factory Defaults 22
Video Setup Menu 23
Audio Setup Menu 24
Parental Control Password & Rating Setup Menu 25
Advanced Operation & Special Features
DV D T it le Me nu s 26
DVD Dis c Menu s 26
MODE But ton – Repeat ing Chapt er s, Ti tles Or Tr acks 26
A–B But ton – Repeati ng A Select ed Section 27
ZOOM Button – Magnifying The Screen 27
ANGLE Bu tto n – Vi ewing Scenes From Dif fering Angl es 27
PBC – Playback Control 27
GOTO Button – Locating A Specific Point On The Disc 28
Viewing JPEG Files 28
Reference
Specif ications 29
Menu Structure 29
Tr oubl eshoot ing Guide 30
KEC Mobile Applications Tri-Mode Re mote Controller # RC9799 31

–6–
GENERAL INFORMATION ABOUT DISCS
DVD’s (Digi tal Versati le Discs) can record up to 135 mi nut es’ of video, 8 diff er ent language audio t racks and subtitles in
up t o 32 languages.
You ca n enj oy ci nem a - lik e video an d cry st al cle ar soun d wi t h MPE G - 2 co mpre ss i on t e ch no l ogy an d Dol by Di git al
su r r oun d.
Important Note About Region Numbers
This DV D Play er an d most DV D Di scs are co de d by reg ion. Thes e r egi on al code s mus t be mat c he d i n or d er f or t h e dis c
to be played.
If a dis c’ s r egi on nu mber (which indic ates its playable area) does no t mat ch t h e regi on n umb er of t hi s DVD Play er , d i sc
playb ac k wi l l n ot be all owed by t he pl aye r.
Discs with a region number of 0 may be played on any DV D Player.
Th e r eg ion nu mb e r of t hi s DVD Play er is l a beled on t he r ear panel of t h e main un i t .
This DV D pl ayer ’ s r egion number is 1.
Discs That Can Be Played
WMA (Wind ows Media Audio files
JPEG/ JPG ( Joi n t P hot og r aphi c Ex per t s G roup f il es)
Discs That Cannot Be Played
•This DV D Pl ay er can n ot pl ay LD, CD- G, CD- I , CD-ROM, DVD- RO M.
•This DV D Play er might n ot pla y dis cs ob t aine d out sid e t he r egi on .
(When ∅appears on screen, it indicates that an invalid but ton press.)
Copy Protection
•Most commercial DVD discs are encrypted to prevent disc copying.
•This pr od uc t incorp or at es c opyr i gh t prot ec ti on t ec hno logy t h at is pro t ect ed b y t he met hod s of cl a ims of cert ai n U. S .
patents and ot her intellectual pr opert y rights owned by Macr ovision Cor poration, and is i ntended for home and
ot her l i mi t ed v iewin g u se s unl ess o t herwis e a ut hori z ed by Macr ov isi o n Co rp or at i on. Rev er s e engi n eeri n g or
disasse mbly is prohibi ted.
•This pr od uc t is man uf act ured wit h t ec hn ica l c oo per at ion f r om Dol by Labo rat ori es .
This symb ol and trademark are reserved f or Dolby Laboratories.
©Dolby Laboratories Inc. All rights Reserved.

–7–
CARE & STORAGE OF DISCS
How to handle a disc
•Be c ar ef ul i n h an dli ng t h e disc . A s li ght f l a w might af f ect t he pict u r e on t he s cr een .
•You ca n r em ov e a d is c f rom i t s st o rage case wi t hout di ff ic ult y by press ing t he ce nt e r of
t he hol de r.
•Please refer tothe illustrati on on the left and do not t ouch the sur face of disc when
moving it.
•Do n ot past e p aper or adhe siv e t ap e ont o t he di sc.
•Be careful not to leave fingerprints or st ains on the disc. Wash your hands bef ore
handling the disc.
Cauti on Be car eful not to leave dirt or other substances on the disc.
Do not at tempt to play a cracked or scratched disc.
Disc St orage
Do no t expos e t o d irect
s unl i gh t .
Keep in a cool ventilated
area.
St or e ver tic al ly i n a c l ean
pr ot e ct i ve ja ck et.
Important Note
Exposing the DVD Player or a DVD Disc to a sudden temperature shift from cold to warm may lead to condensation
(Dew For mation) on the surface of the disc or ont he lens of the player .
This condensation may cause the player t ot emporar ily mal f unc t io n or temporarily deli ver poor performance.
To c lear u p t hi s pr oble m, t u r n t h e play er on and al l ow it t o warm up. Any mo ist ur e wi ll ev apor a t e in an hour or t wo an d
pr op er op er at i on wi ll be res t o r ed.
How To Clean Th e Disc
Cl ea n t he disc f r om t h e c en t er t o t he ou t si de us i ng a cl ean s oft cl ot h t hat has been
slightly dampe ned with a mild detergent solut ion.
Follo w up wit h anot her c lean d ry sof t clo t h.
Refer e nc e
Do not use thinner, benzene, commercial det ergent, alcohol or el ect rostatic-prevention spray. All of these might cause
ir r epar abl e da ma ge t o t he dis c.

–8–
DESCRIPTION – FRONT PANEL
1 POWER Turns the power On/Off( Whe n powe r is Of f, AUX In puts ar e On)
( DVD-2T: Press repeat edly to cycle bet ween Disc Pl ay, TV Tu ner & Of f)
2 Di sc Sl ot Discs are inserted and ej ected her e
3 EJECT Ejects the disc
4 STOP Stops disc play
5 PLA Y Begins di sc pl ay
6 SKIP Use t o skip to the next or pr evious scene or music track
( DV D-2T: Advan ce s to th e n ext or pr eviou s ch anne l)
7 Display Window Displays information about the current state of the DVD player and disc
8 AUX Inputs Auxiliary Video/Audio Inputs
These inputs are “live” whenever power is off
9 Tr im Plat e

–9–
DESCRIPTION – FRONT PANEL DISPLAY
1 DVD/S VC D/VCD/C D/PBC/MP3 I ndicates th e t yp e of th e disc i n t he player
2 Disc Gr aphi c Animati on indi ca te s t hat a d isc i n t he p layer is spin ni ng
3 Play/ Pause I ndicates the cur rent oper at ion mode
4 Repeat /All I ndicates the cur rent repeat pl ay mode
5 Chapter/Track Indicates the chapter and/ortrack of thedisc being played
6 Angle Indicates that thecurrent selection may be viewed at multiple
angles
7 Time Indicates time information & displays information about operation
(DVD-2T: Indicat es channel when in TV mode)
8 Dolby Digital Indicates that theaudio of the disc under play is Dolby Digital

–10–
DESCRIPTION – REAR PANEL
1 12V DC INPUT For use with optional 12V DC cigar jack cable
2 MAIN 12V DC INPUT Connect to source of 12V DC power with the supplied cable
3 R- LI NK I N/ OUT Allows remote control of any KEC Mobile Applicat ions video product in
the R-LINK chain even if it is hidden fr om view.
4 EXTERNAL REMO TE For connection of the optional RE5MC Remot e Sensor Cable
5 S- VI DEO Use an S-Video Cable (n ot su ppli ed ) tothisjacktothe S-Video jackon
your TV/Moni tor
6 VIDEO OUT Connect a video cable from this jack to the Video Input jack on your
TV / Mo nit or
7 AUDIO OUT Connect RCA audio cabl es (left & ri ght) f rom these jacks to the
corresponding Audio Input jacks on your TV/Monitor
8 DIGITAL AUDIO OUT Use a digital coaxial cabl e (no t pr ovide d) to connect the player to a
compatible Dolby Digit al and/ or DTS Decoder
9 ANTENNA INPUT JACK
(DVD-2T ONLY) 75ΩConnector fora TV Antenna

–11–
IMPORTANT NOTICE TO INSTALLERS:
Permanent (hard-wired) DC installations should be performed only by qualified personnel. DC Power
for the DVD Players should be wired through the IGNITION or ACCESSORY switch ONLY (Power
should not be available to the DVD Pl ayer when the vehicl e is not r unni ng for an extended p er iod of
time). Connection directly to thebattery will result in eventual battery discharge due to the trickle
charge necessary for the Remote Control Power On and Auxiliary Input functions.
IMPORTANT SAFETY INSTRUCTIONS REGARDING THE DC IN JACKS
War ni ng:
For temporary (non hard-wired) Vehicle Use:
1. Connect the DVD player to 12V power wit h an approved cigarett e plug.
2. Unplug the DVD player when you are not using it to prevent electric discharge.
War ni ng:
For Home Use:
•Use the correct AC/ DC Adaptor ( DC 12V, 2A) when using the DVD pl ayer with AC power.
ACCESSORIES

–12–
DESCRIPTION – REMOTE CONTROLLER

–13–
1. POWE R ( al so o n t h e DV D - 2 f ro nt pa ne l )
Presstoturn the DVDplayer ON/OFF.
PO WE R O FF au toma ticall y a ct ivat e s A UX inp ut s.
DV D-2T Only: Press r epeate dly to cycle thr ou gh
DV D
→
TV
→
AUX.
2. EJECT (also on the DVD-2 front panel)
Presstoeject the disc.
3. S-TITLE
Use to choose and cycle through the available
subtitles. This funct ion will only work if the disc
contains subtit les.
4. LANGUAGE
Use to cycle through soundtracks in various
languages. This funct ion will only work if the disc
has been recorded wi th mult iple language
soundtracks.
5. ANG LE
Use to access various camera angles. This
funct ion will only works if the disc has been
recorded wit h multi ple camera angles.
6. TITLE
Displ ays t he tit les on the disc under play.
7. ME N U
Displays the menus ofthe disc being played.
8. MO DE
Use to choose pl ay or repeat mode.
9. VOLUME
Ad j u st s th e au di o o ut p ut l e ve l s of t h e D V D- 2 t o
equalize its output wit h other program sour ces in
the vehicl e (VCP, Video Game, et c).
IMPORTANT NOTE: If t he DVD-2 Volume Cont rol
is set to “0”, no sound will be heard regardless of
the sett ings of any other syst em vol ume contr ols.
10. ZOOM
Zooms in on pict ure.
11. A – B
Repeat s t he selected segment.
12. GOTO
Use to go to the track or chapter of the DVD disc
yo u wa nt.
13. MU T E
Cuts off the sound.
14. STOP ( al so on t h e DV D - 2 fr o nt pa ne l )
Stops discplay.
DVD-2T Only: Erases TV channe l from memo ry in
TV mode.
15. PAUSE
CD: The audio will be paused.
DVD: Still fr ame mode. Press repeatedly to
advance t he pict ure frame by fr ame.
DV D-2T On ly: St art s au toma tic ch an ne l s ca n.
16. PLAY ( also on the DVD-2 front pane l)
Pr ess t o beg in di sc pl ay.
DVD-2T Only: Adds the channe l to memory.
17. PREVIOUS ( also on the DVD-2 front pane l)
Press once to go to the start ofthe cu rr en t chapter
(DVD) ortrack (VCD, CD, MP3).
Press again to go to the start of the previous
chapter/track.
18. FR
Press repeat edlyt o fast rever se through t he di sc
from 2Xto 20Xfaster. Audio will be mut ed.
19. NEXT (also on the DVD-2 front panel)
Press to advanceto thenext chapter or track.
20. FF
Press repeat edlyt o fast f or ward through t he di sc
from 2Xto 20Xfaster. Audio will be mut ed.
21. ARROW KEY S / CH+, CH- KEYS
Use to movethrough the desired menu.
DVD-2T Only: Use Up/ Downt o change channels &
Left/Right to fine tunechannels.
22. ENTER
Use to choose t he desired menu it em.
23. SETUP
Press to display the DVD-2’sbuilt-in SETUP
Menus f or Language, Video, Audio and Parent al
Control.
24. SLOW BACK
Press repeat edlyt o slow reverse through the disc
fr om 1/2X to 1/7X slower. A udio wi ll be muted.
25. DISPLAY
Press thebuttontodisplay the disc’s elapsedtime
and total playing time.
Press again to show additional informat ion
incl uding Title #, Chapt er #, Camer a Angle, Audio
settings and Subtitle settings.
Press a 3
rd time toturn offthe display.
DVD-2T Only: Displays th e chan nel bei ng pl ayed .
26. SLOW FORWARD
Press repeat edlyt o slow forward through the disc
fr om 1/2X to 1/7X slower. A udio wi ll be muted.
27. NUMERIC BUTTONS
May be usedto makedirect selectionsfrom
vari ous menu screen s.
DVD-2 T Only: Ma y b e us ed fo r d ire ct en tr y of t he
desire d channel.
28. TV/ AUX
Press to cyclebetween DVD→AUX pl ayba ck.
DVD-2T Only: Press to cycle through DVD
→
TV
→
AUX.
29. NTSC/PAL
Press STOP button andt hen press NTSC/PAL
buttonto select thedesired mode.
IMPORTANT NOTE: The DVD-2 is preset at the
factor y f or NTSC mode. Do not use this butt on
unless you needto set theplayerfor useoutside
of the USA orother NTSC countries. Please see
Page 23 of this manual for f ur ther i nformation.
NOTE: Buttons 1~2 & 14~20 are duplicated on the Tri -Mode Remote Controller (Part # RC9799) that ispackaged
with all KECMOBILE APPLICATIONSLCD Systems. The RC9799 TRK/CHAPbuttons also function as
Channel +/ - but tons wit h the DVD-2T. (Please seet he Reference Section of th is manual for more infor mation).

–14–
INSTALLING BATTERIES IN THE REMOTE CONT ROLLER
1. Press the tab andlift the battery cover open.
2. I nsert new batt er ies, making sure t hat the correct pol arity is observed.
3. Replace the battery cover.
Usi ng the Rem ote Co ntroll er
The effective operating range of the remote controller is about 23 feet
(7 meters), and 30° off axis left or right from theremote receptor on
the DVD-2 front panel.
Battery Handling Precautions
•Incorrect use of the batteries may cause leakage or corrosion.
•Ensure t hat polarities are correct when inserting batteries.
•Do not subject the batteries to heat or fire. Do not disassemble or
short-circuit the batteries.
•Do not insert exhausted batteries into the remote controller.
•Do not mix diff erent types of batt eri es together. Do not use old batt eri es together with new ones.
•Remove batteries toavoid possible corrosion damage if the remote controller will not be used for a
long time.
•Replace the batte ri es with new o nes i f t he re mote contr oll er do es n ot oper at e smoothly or if the
operating distance becomes too shor t.
•If battery leakage occurs, clean the liquid completely from the remote control before insertingnew
batt eries.
Remote C ontr oll er Handl ing Pr ecauti ons
•Do not expose the remote cont roller t o shock.
•Do not leave the remote controller in ahot or damp place.
•Do not drop liquids or pl ace heavy objects on t he on a remot e cont rol ler.
•Do not disassemble the remote controller.
Special Note on R-Link Operation
If you ar e uti lizing KEC’s R-LINK Syst em, the r emote cont roller may be pointed at t he remot e sensor of any
component (LCD, DVD or VCP) connected in the R-LINK chain.

–15–
CONNECTIONS – VIDEO CONNECTIONS TO TV OR MONITOR
1. Connect the audi o cables between the AUDI O OUT (L/R) jacks on the back of your DVD player and
the corresponding Audio Input jacks on your TV or Monitor(if there is only a single Audio Input jack on
your TV, connect the audiocable from the left jack of your DVD player).
2. Connect the video cable between the VIDEO OUT jack on the back of your DVD player and the
corresponding Video I nput jack on your TV or Moni tor (I f your TV or Monit or has an S-Video jack,
connect this jack for improved picture quality).
Caution:
Be sure to turn of f power t o all units bef ore making any connections.

–16–
CONNECTIONS – AUDIO CONN ECTIONS
•Connect the audi o cables between the Lef t & Right Audio Output jacks on the back of the DVD-2
player and the corresponding Audio Input jacks on your audio system.
•Alternately, connect the audio cables from the back of the DVD-2 toan external audio processor such
as a wireless headphone transmitter or an audio receiver or an FM transmitter.
Caution:
Be sure to turn off power and unplug all units beforemaking any connections.
War ni ng:
Do not set the Di git al Audi o Output of this DVD player t o" PCM" unless you are connect ing t he Digital
Audio jack of this DVD player toan AVdecoder that has Dolby Digital decodingfunction. High volume
sound may damage your hearing as well as speakers.

–17–
IMPORTA NT NO TE CONCERNING MOBILE BROADCAST TE LEVISION RECEPTION:
WHEN USED IN A VEHICLE, TELEVISION BROADCAST RECEPTION WILL BE
ADVERSELY AF FEC TED BY CON DITIONS SUC H AS MOTI ON, CHANGE OF DIRECTION,
ATMOSPHERIC ACTIVITY AND LOCAL SURROUNDINGS.
IT IS THEREFORE LIKELY THAT BROADCAST PICTURE QUALITY WILL BE MARGINAL
WHEN THIS SYSTEM IS USED IN A MOBILE ENVIRONMENT.
CONNECTIONS – ANTENNA CONNECTION (DVD-2T ONLY)
Connect a TV antenna or CATV cable to the 75Ωantenna jack on the back of the DVD-2T. Be sure to
unplug all connections tothe power source beforemaking any other connections.
Setting t he DVD-2T for Ai r or Cable Channel Reception:
For regular antenna use, the TV Mode should be set to “AIR” (Channels 2~69). For CATV use, the TV
Mode should be set to “CABLE” (Channels 1~125).
Procedure:
1. Press the SETUP button on theDVD-2T Remote Controller to call up the SETUP
menu.
2. P re ss t h e Xarrow button to select theVIDEO submenu.
3. Press the ENTER button todisplay the VIDEO submenu.
4. P re ss t h e ARROW button twice t o select TV MODE.
5. If the desired mode (AIR or CABLE) is already correct, press the SETUP buttonto exit the menu
scre en s.
6. If the desired mode (AIR or CABLE) is not selected, press the ENTER buttonand then press the /
arrow butt ons t o highl ight the desired mode.
7. Press the ENTER button and then press the SETUP button to exit the menu screens.

–18–
BEFORE PLAYING A DISC
1. To play a disc, turn on the TV or monitorand select the video input source to which the DVD-2 is
connected (e .g. VIDEO 1, 2 or 3. )
2. If the DVD-2 is connected to a separate sound syst em, tur n on the audi o system and select the audio
input to which t he DVD- 2 i s connected.
3. If desired, go to the SETUP menu and set the playback picture size based on the aspect ratio of the
connected TV or monitor. The available settings are 4:3 Pan & Scan, 4:3Letter Box and 16:9.
Press t he DVD-2’s POWE R but ton. If power is off, insert ing a disc will automatically turn power on.
“L oading” wil l b e displ ayed o n the scree n. If no d isc is in the pl ayer, “L oad ing ” wil l be fol lowed by "No Di sc" .
Press t he EJECT button if you wish to ej ect a disc.
Notes:
•Disc s should alwa ys be inserted wit h the label facing up.
•Whenever ∅i s displayed on screen aft er any button pr ess, it means that the command associat ed
with that button is either not available with the disc that is being played, or that the command is
temporarily unavailabl e because the DVD- 2 is busy carr ying out anot her operation.
•The player will automatically power of f if "No Disc" is displayed on t he screen f or 8 minutes.
Cautions:
•Avoid movement of or shock to the DVD player when a disc is playi ng.
•A disc may be damaged if it is ejected by force.
•Never insert any object other than a disc i n t he slot .
•Certai n funct ions may not oper at e or may operat e diff er ently dependi ng on t he disc.
Ref er to the notes accompanying the disc.

–19–
PLAYING A DVD DISC (DVD/VCD/CD)
Insert the DVD disc
•Make sure that the disc's label is facing up.
•Sliding a disc i nto t he sl ot au to mati cally begi ns play.
To stop, press the STOP button
To t empor ari ly int errupt pl ayback, press the PAUSE but ton.
Pressi ng the PAUSE button repeat edly wi ll advance t he movie fr ame by frame
To resume play again, press the PLAY button
Last Po siti on Memory:
The DVD-2 memorizes the last disc location whenthe STOP button is pressed.
Pressing the PLAY button will resume playback of t he movie from t he point where you left of f.
Last Position Memory will funct ion even if the POWER is turned off. When power is restored, the DVD-2
will locat e the previous posit ion and begin playback.
Please not e that eject ing t he disc cl ears the memory.
Cautions:
•"No Disc" will be displayed onthe screen if a disc is inserted upside down, or if a damaged or
otherwise unplayable disc is inser ted.
•"REGION ERROR” is displayed on the screen if adisc from a region different from the player is
inserted.

–20–
PLAYING AN MP3 OR WMA AUDIO FILE
Insert the MP3 or WMA disc.
•Make sure that the disc's label is facing up (r ecor de d side facing do wn).
•Insert the disc into the slot.
As t he disc is being scanned, “Loading” will be displayed. In approximat ely 25 seconds (longer with
more comple x discs), it will be recognized as an MP3 or WMA disc, a directory will be displayed on
screen and the 1
st
song will automatically be played
•Press the STOP button to stop play.
•Press the PAUSE but ton t o t empor ari ly stop pl ay. To resume play, pr ess t he PLAY butt on again.
To Play a Desired Track
1. Use t he ARROW butt ons to hi ghlight the song or track that you
want, then press the ENTER but ton. The selected song will be
played.
2. You can also use the NUMERIC (0~9) buttons to directly select a
song by entering its number.
•12 tracks can be displayed on the screen.
To see additional tracks, use the ARROW buttons.
•Press the PREV/NEXT buttons to play the previous or next track.
•Navi gate to select ions in other fol ders by using the ARROW and ENTER but tons.
Notes Concerning MP3 Files
•MP3 files must have been recorded on the disc inISO 9660 or JOLIETformat.
•The following charact ers will not be recognized in MP3 filenames: (\ / : * ! " < > | )
•Some MP3 discs may not be recognized depending on the recording conditions.
This manual suits for next models
1
Table of contents