Kedcom FY-2000/R User manual
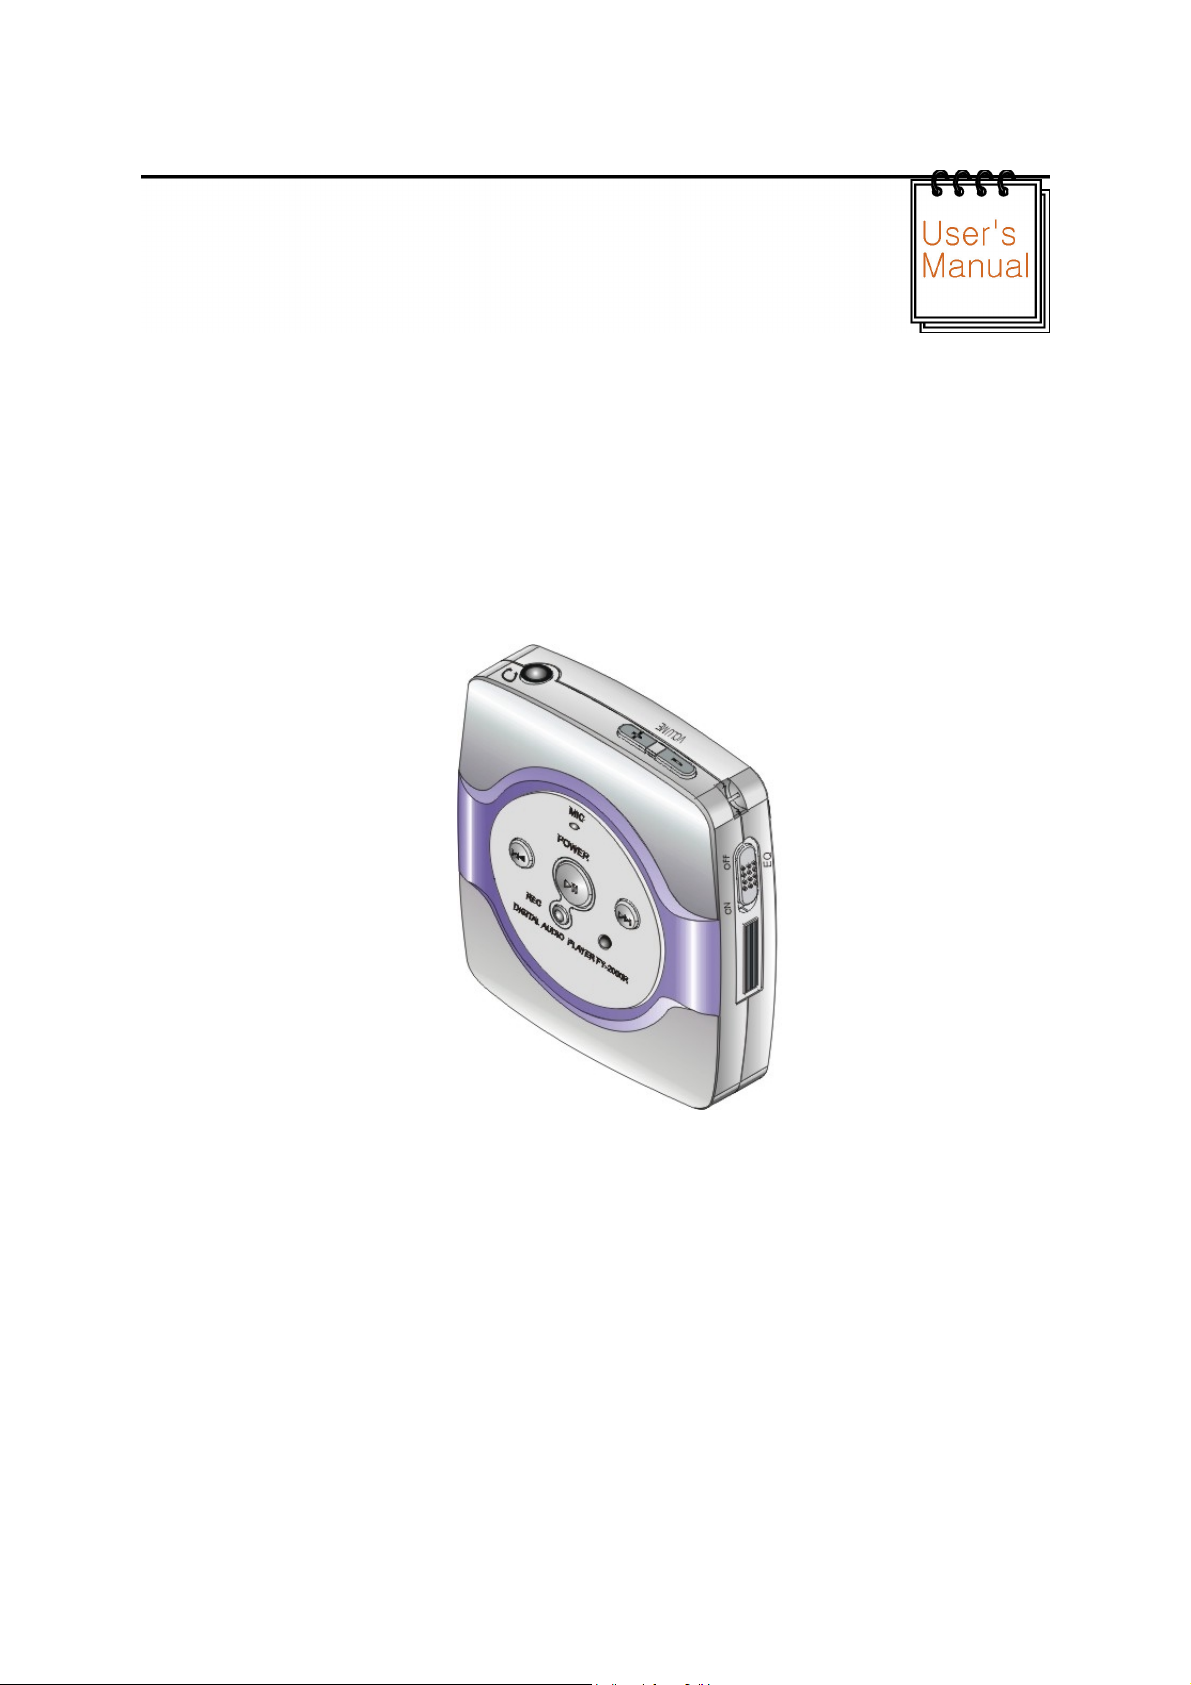
FY-2000/R User’s Manual
Kedcom Co., Ltd.
FCC COMPLIANCE STATEMENT:
This device complies with part 15 of the FCC Rules. Operation is subject to the following two conditions:
(1) This device may not cause harmful interference, and (2) this device must accept any interference
received, including interference that may cause undesired operation.
INFORMATION TO USER:
This equipment has been tested and found to comply with the limits of a Class B digital device, pursuant to
Part 15 of the FCC Rules. These limits are designed to provide reasonable protection against harmful
interference in a residential installation. This equipment generates, uses and can radiate radio frequency
energy and, if not installed and used in accordance with the instructions, may cause harmful interference to
radio communications. However, there is no guarantee that interference will not occur in a particular
installation; if this equipment does cause harmful interference to radio or television reception, which can
be determined by turning the equipment off and on, the user is encouraged to try to correct the interference
by one or more of the following measures:
1. Reorient / Relocate the receiving antenna.
2. Increase the separation between the equipment and receiver.
3. Connect the equipment into an outlet on a circuit difference from that to which the receiver is
connected.
4. Consult the dealer or an experienced radio/TV technician for help.
CAUTION: Changes or modifications not expressly approved by the manufacturer responsible for
compliance could void the user’s authority to operate the equipment
Table of content
Parts name and accessories
1. MP3 Player body name
2. Accessories name
How to use MP3 Player Smart Card
1. How to use the SMART CARD
2. Connecting SMART CARD and MP3 Player
Connecting to a PC
1. Connecting to a PC
Setup File Manager
1. Configuring ECP Mode on PC
2. Setup File Manager Program
Using File Manager
1. Formatting Smart Card
2. Functions of each menu
3. Downloading MP3 File Form PC to MP3 Player
4. Uploading files in MP3 Player to PC
5. Deleting files
MP3 Player playback and special features
1. Playback and recording with MP3 Player
2. MP3 Player LED display
Saving MP3 Player to Audio CD music
1. Setup CDex.
2. Using Cdex
Product specifications.
1. Product specifications
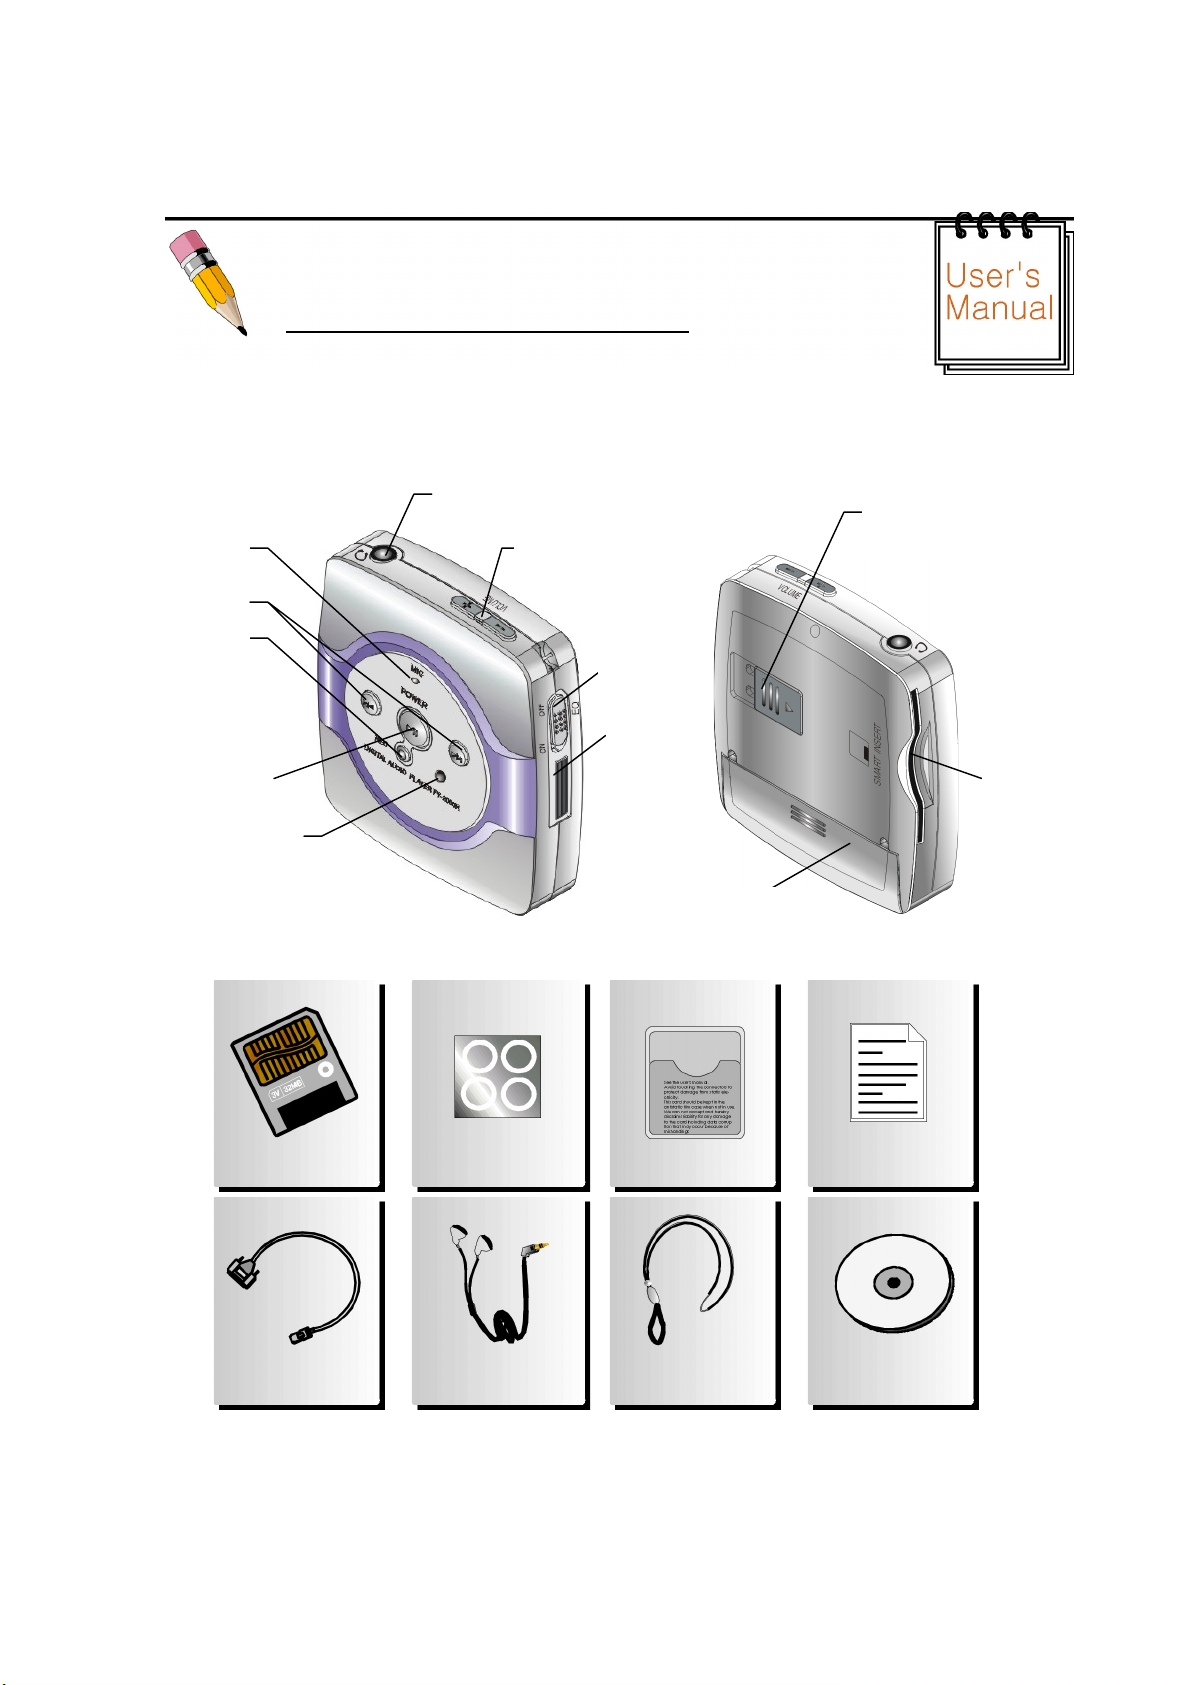
Parts Name and Accessories
1. MP3 Player Body Name
2. Accessories Name
Memory erase
Smart Card prevention sticker Plastic bag for SMC KEY user’s manual
PC connection cable Earphone Necklace C D
EARPHONE JACK
VOLUME BUTTON
EQ BUTTON
PC JACK
MIC
PLAY/PAUSE BUTTON
RECORDER BUTTON
LED
SMART CARD OPEN SWITCH
BATTERY
SMART CARD
SKIP BUTTON
How to Use MP3 Player Smart Card
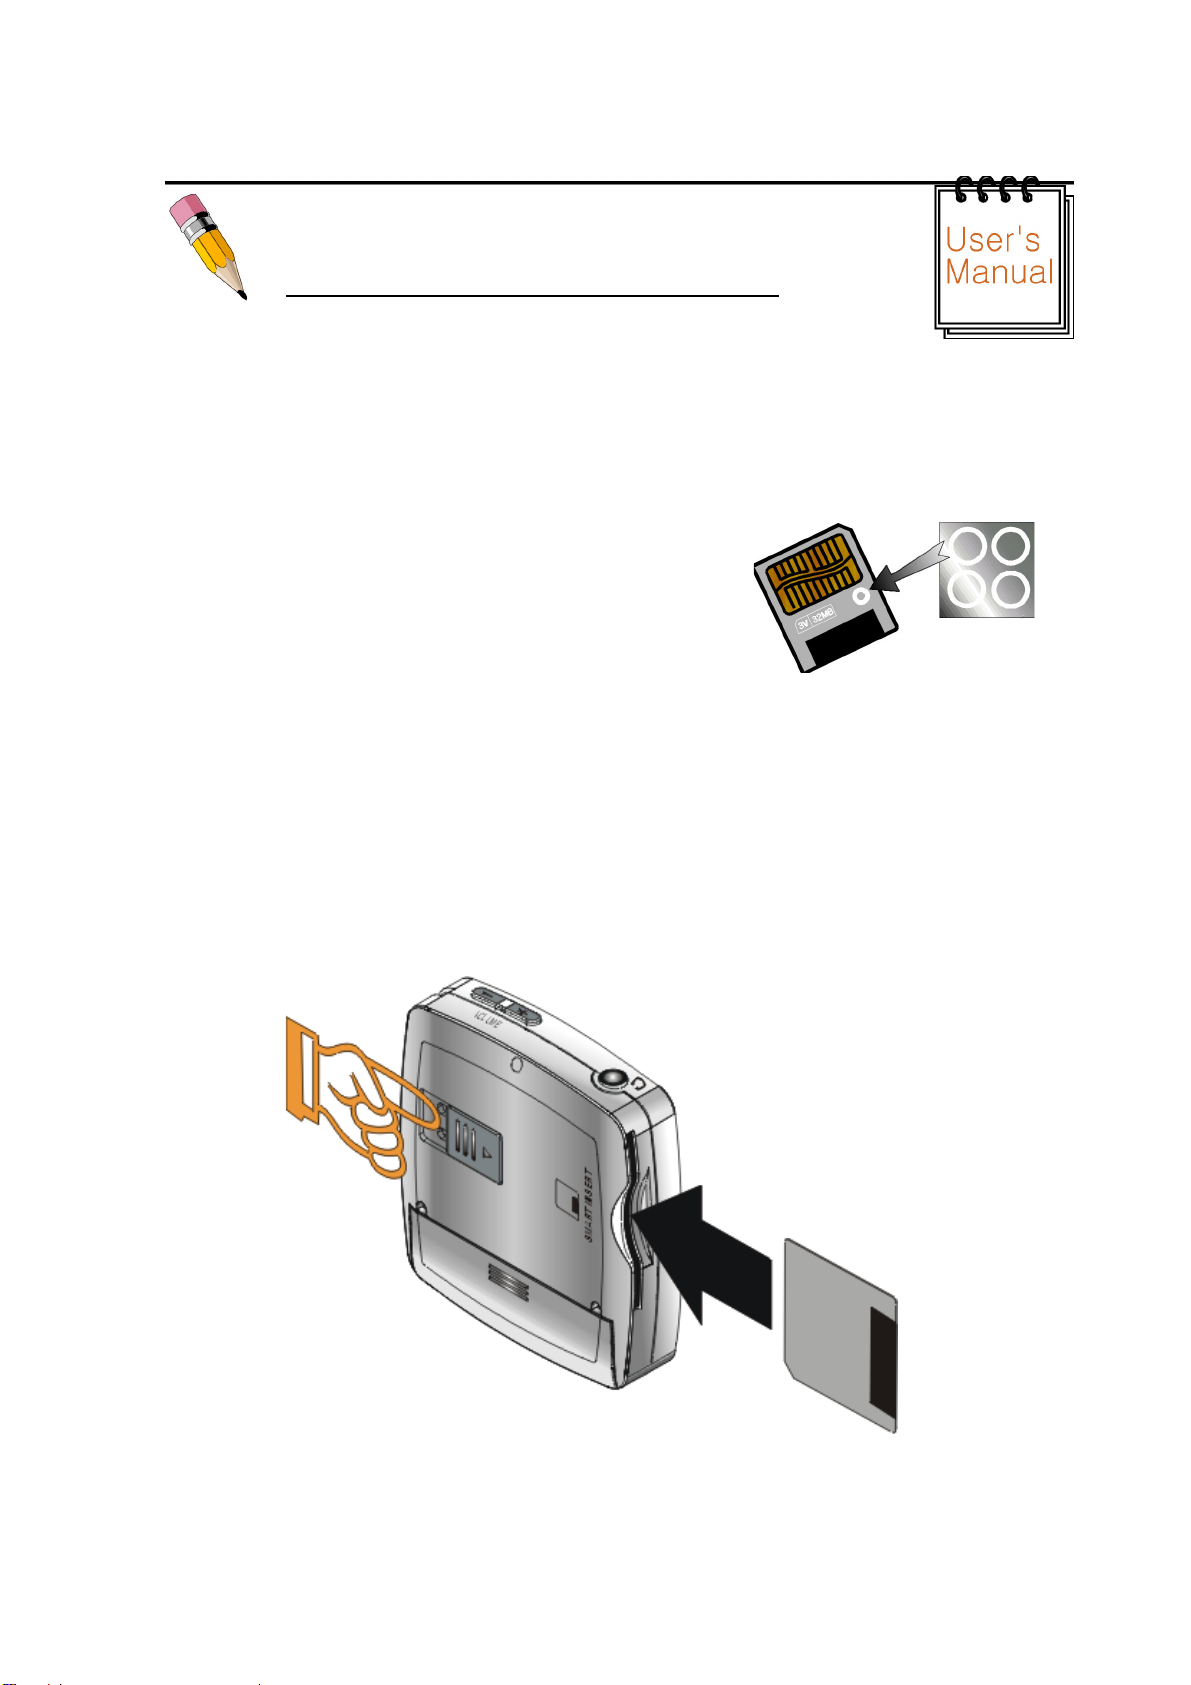
1. How to Use The Smart Card
)SMART CARD is a portable and read/write possible fresh type RAM, which is widely used in MP3 players, digital
cameras and digital movie cameras. This product can use 16 Mbyte and 32 Mbyte SMART Card.
)In order to keep music files stored on smart card permanently, put the
memory erase protection sticker on the side of the SMART card as
shown in the figure beside.
1. Connecting Smart Card and MP3 Player
)Insert smart card into MP3 player as shown in the following figure.
)Remove smart card by sliding the smart card switch of the product.
Connecting to a PC
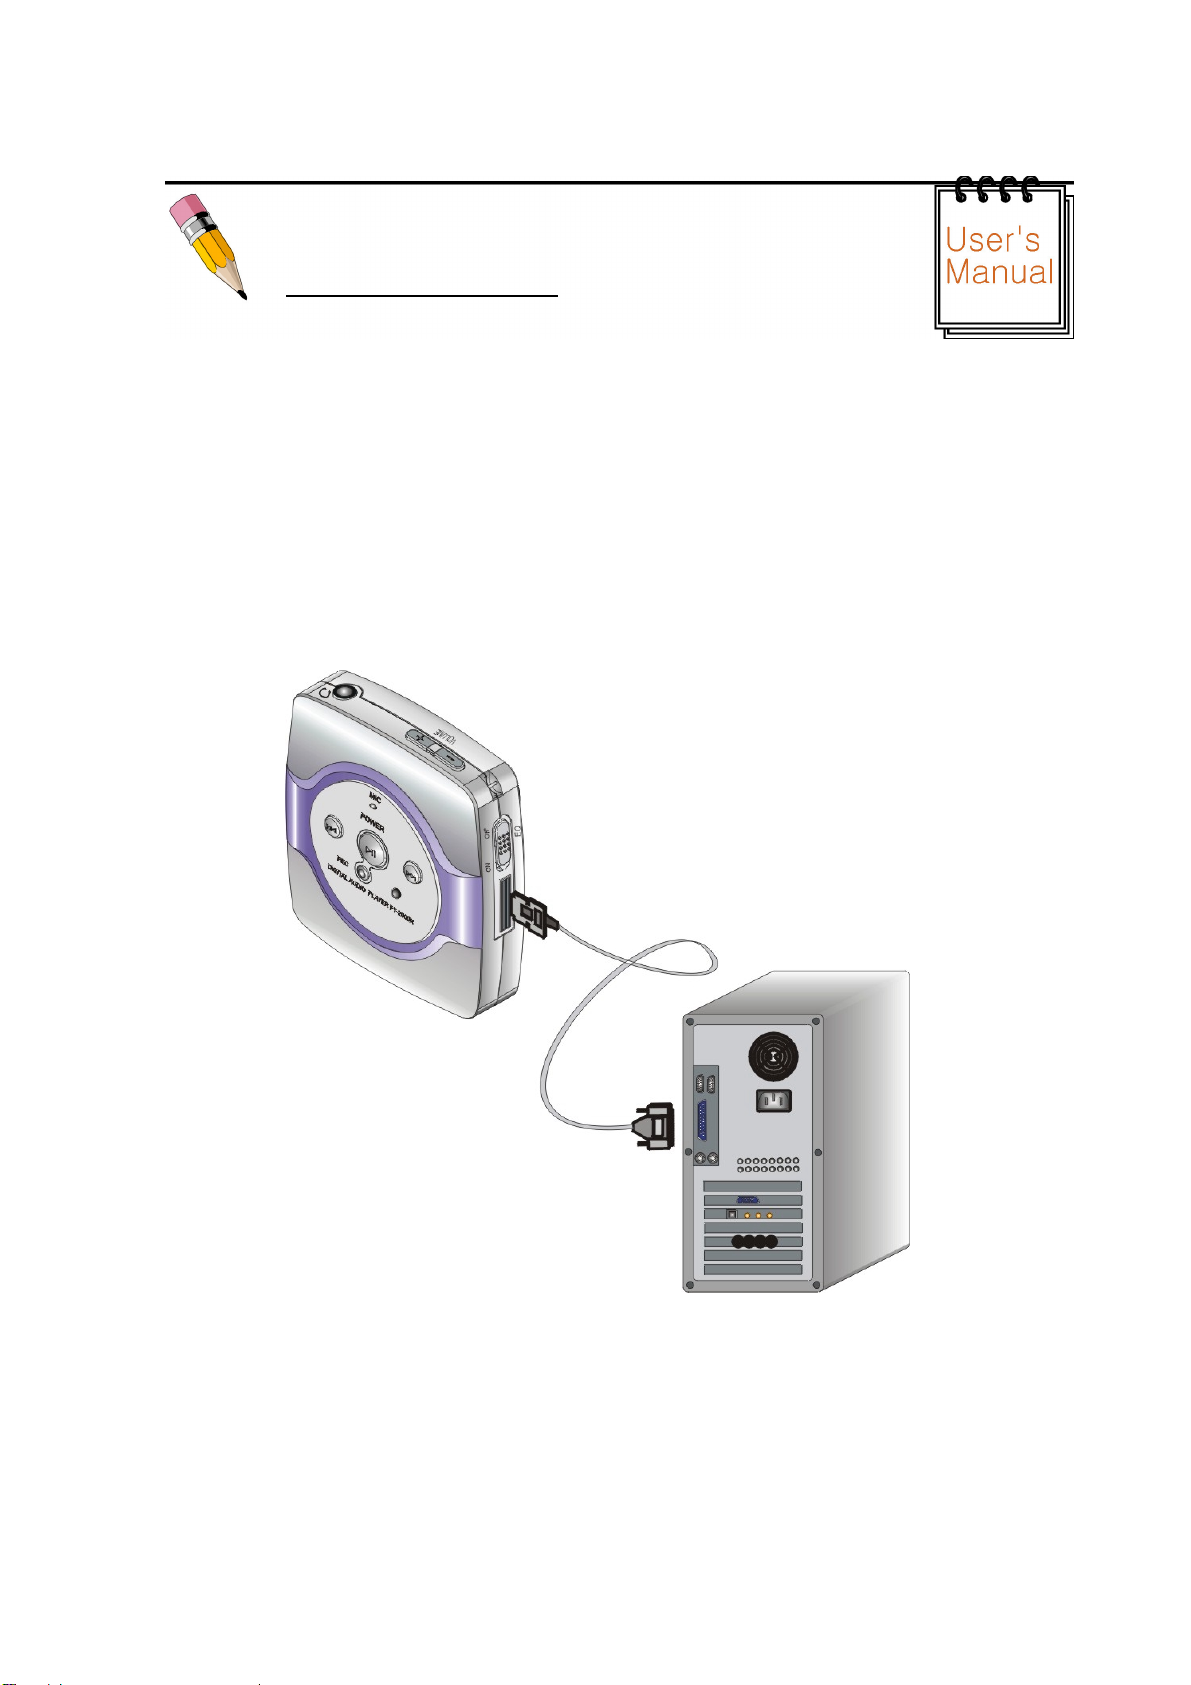
1. Connecting to a PC
)Connect the parallel cable provided with accessories to the printer port of the PC and to MP3 Player. Please
disconnect the PC from the mains when performing the above connection.

Setup File Manager
1. Configuring ECP Mode on PC
) Connect MP3 player to the printer port and support ECP mode of printer mode.
) Perform the following procedures to change ECP mode.
- Turn on the PC, and press DEL or F2 key in RAM test screen to move to Setup screen.
- Move to print port configuration screen (integrated peripherals or peripheral setting).
- Change print port to ECP Mode.
- Save the changes and reboot.
2. Setup File Manager Program
)Insert the provided software CD into CD-ROM driver and double-click
" File Manager Install" file on the CD to run the installation program.
)Press “Next” button to move to the next step
)When destination location window is displayed, the user can choose a
directory to install the software. If no modification is made, the program
will be installed in “C: \Program Files\File Manager” directory. Press
“Next” button to move to the next step
)Clicking “Next” button will register the program in accessories of Windows,
and will install the program
(An icon is automatically created on the Desktop).
Using File Manager
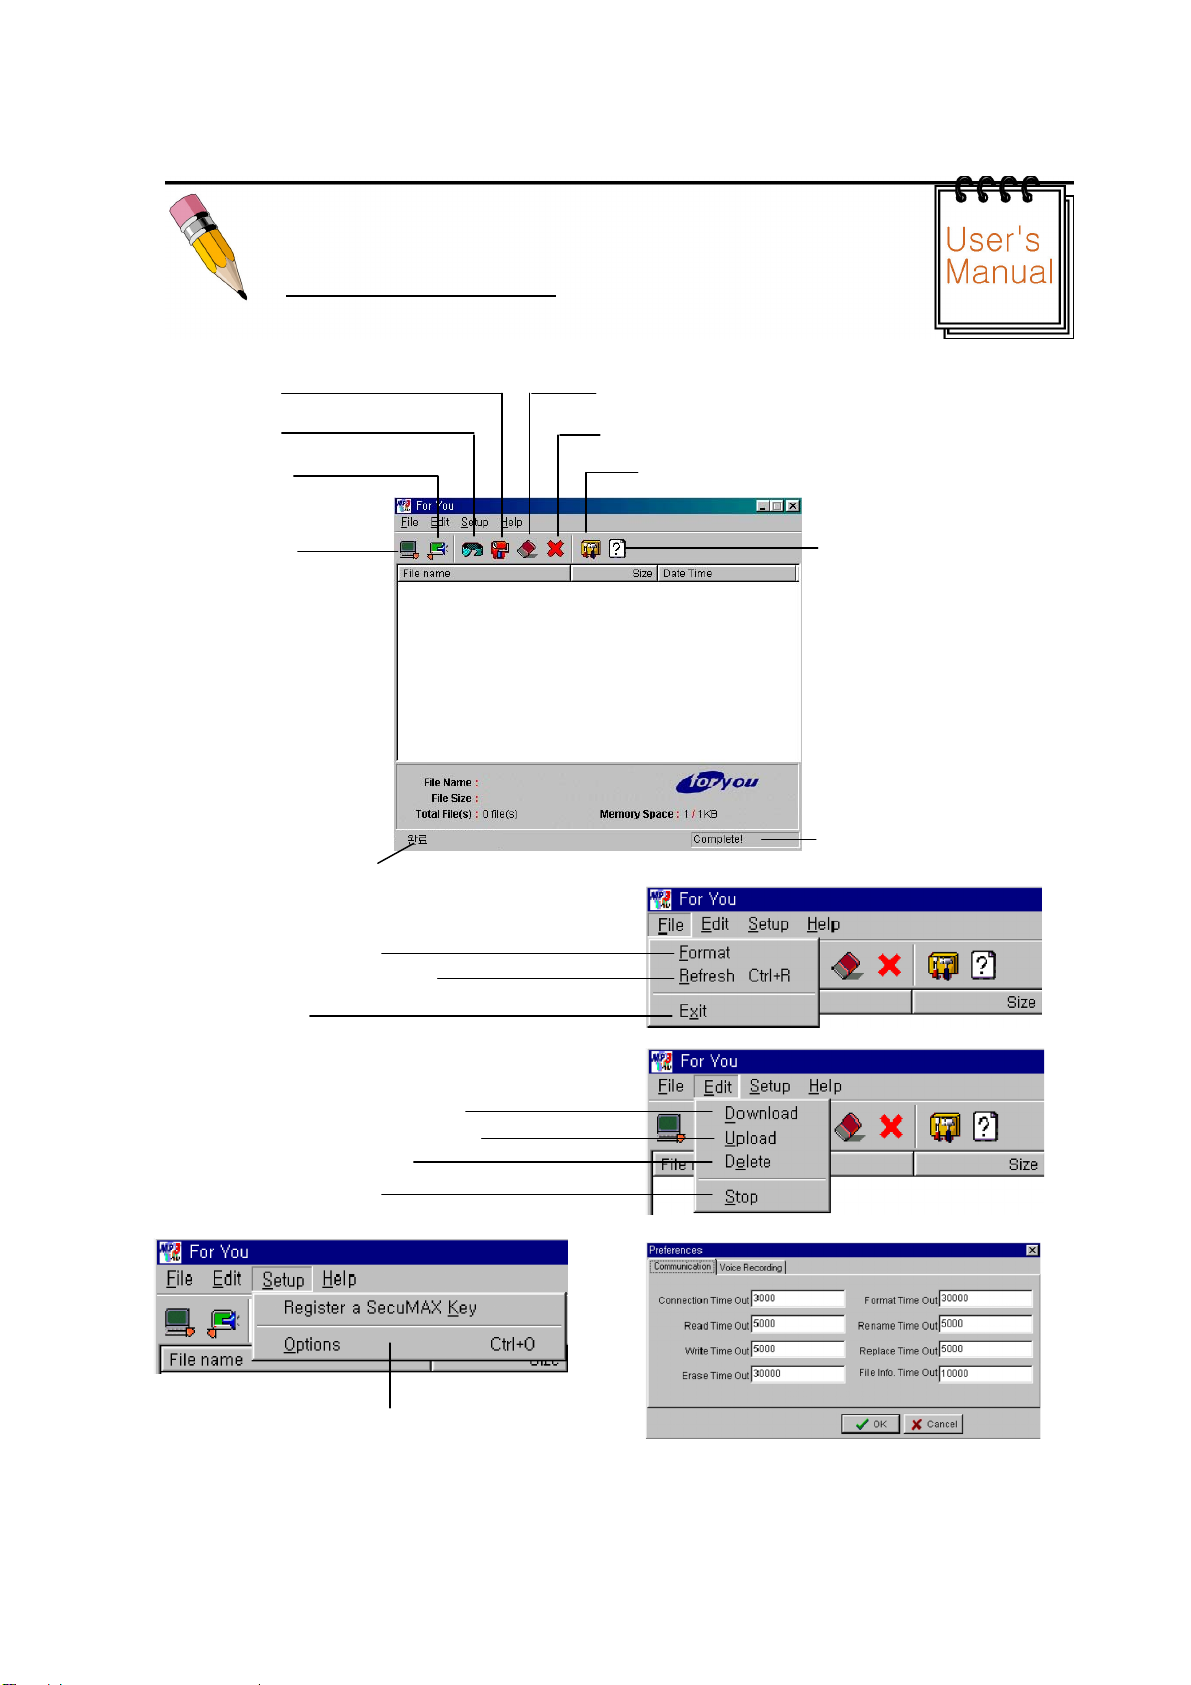
1. Functions of Each Menu
FormatSmartCard. DeleteselectedfilesinMP3Player
Recallfileinformation Stopthecurrentwork
Copy files from the PC Move th Option screen
to MP3 Player
Copy files from the PC
To MP3 Player
Move th Help item
Display file information stored in MP3 Player
Data transfer display window
Display program connection state.
Format Smart card.
Refresh Smart card information.
Exit program.
Copy MP3 file to MP3 Player
Copy MP3 file in MP3 Player to the PC
Delete selected files
Stop the current work
Move to option screen

2. Formatting Smart Card
- Select File, and then “Format”
(Orpress button)
¾First Time, using The Smart Card, Formatting Smart Card
Necessarily
3. Downloading MP3 file from PC to MP3 Player
- Double click “File Manager” icon.
- Select Edit and then “Download” button.
(orpress button)
- Select the file to download by left clicking on it in the file
window of the Computer.
- Copy the file by clicking Open button.
4. Uploading Files in MP3 Player to PC
- Select the file to Upload
- Select Edit, and then “Upload” button.
(Or press button)
- Select the directory to save on the PC and press Save
button.
5. Deleting File
- Select the files to delete from the file list.
- Select Edit, and then “Delete” button.
(Or press button)
MP3 Player Playback and Special Features
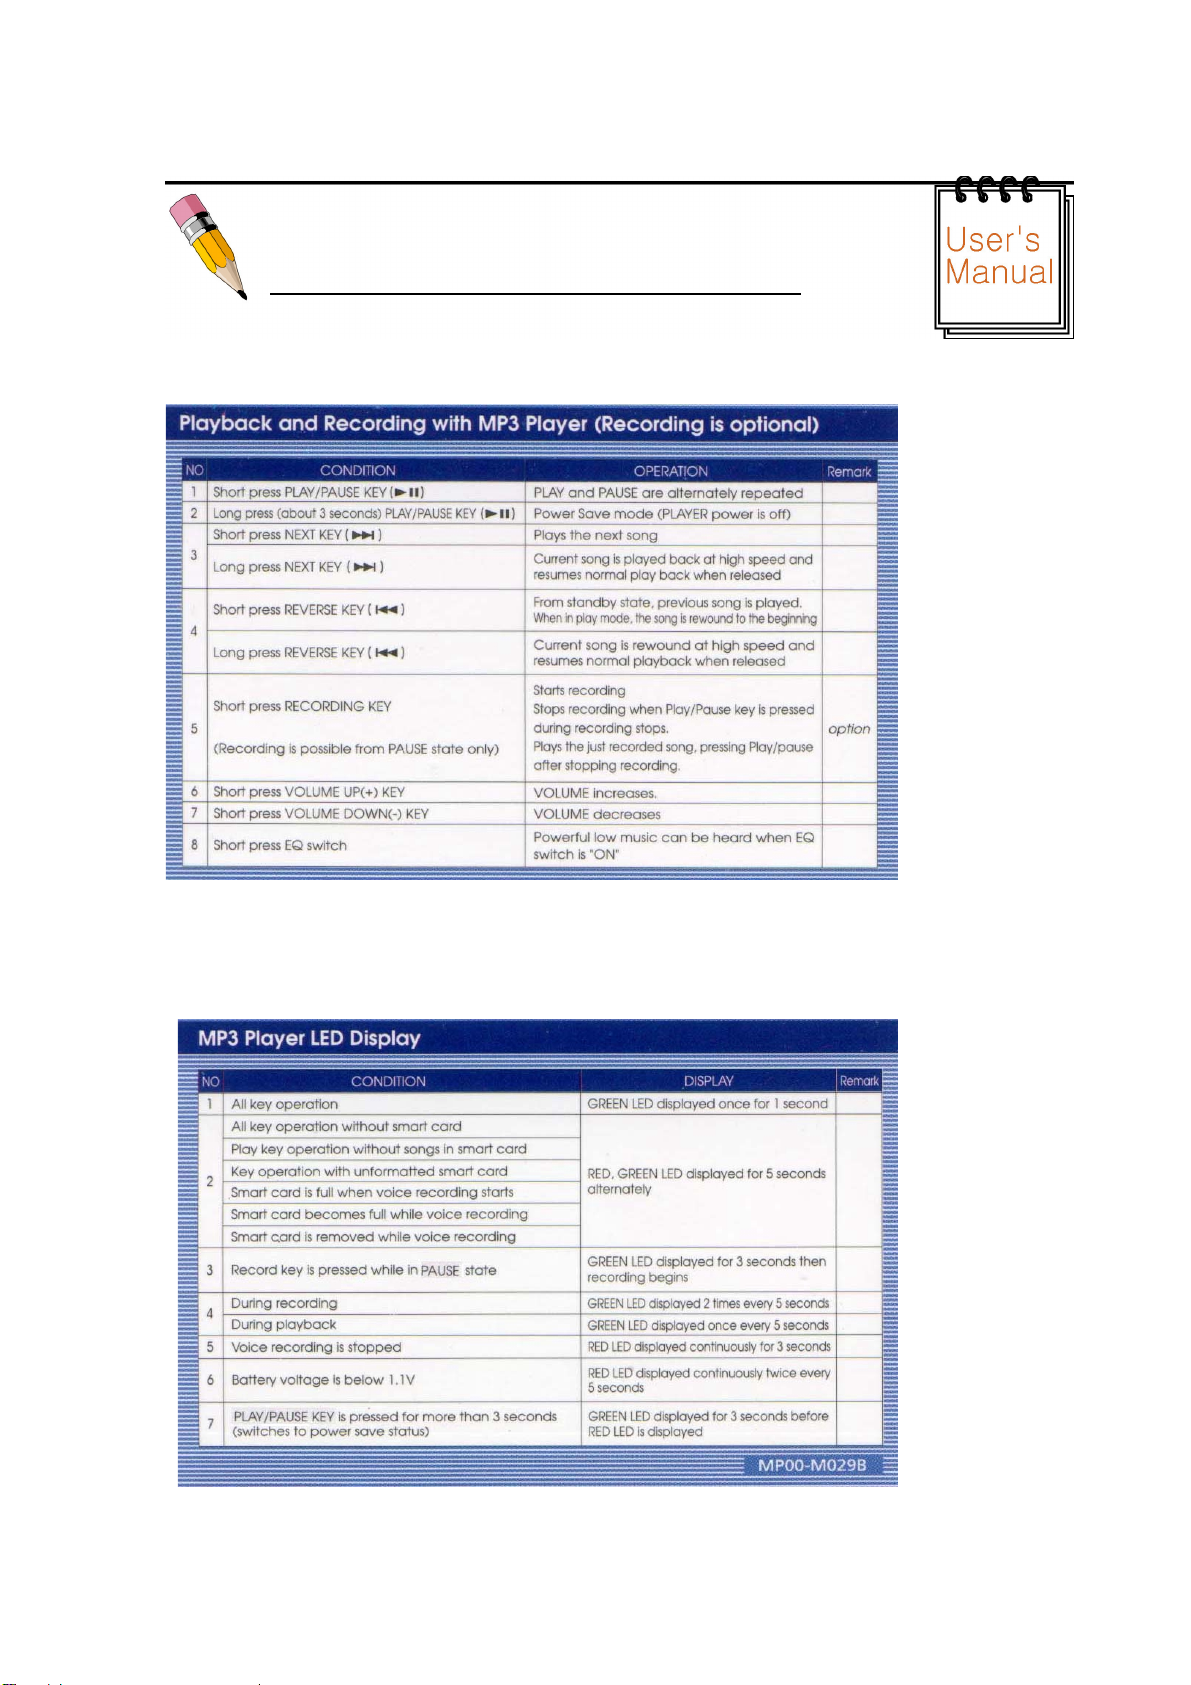
1. Playback and Recording with MP3 Player
)If MP3 Player does not operate when Play/Pause key is pressed, please check the battery
2. MP3 Player LED Display
Table of contents


