Kelty MANTRA 6 User manual

YOUR KELTY TENT SHOULD INCLUDE:
2
1 TENT BODY
1 TENT FLY
2 LONG PRECURVED
DAC DA17 POLES 1 SMALL STAKE SACK CONT
AINING:
• 19 ALUMINUM TENT STAKES
• 4 GUYLINES WITH ADJUSTERS
• 1 SET OF INSTRUCTIONS
WARNINGS
WARNING: KEEP ALL FLAME AND HEAT SOURCES
AWAY FROM THIS TENT FABRIC.
• This tent is made with flame resistant fabric which meets CPAI-84
specifications. IT IS NOT FIREPROOF.The
fabric will burn if left
in continuous contact with any flame source. The application of any
foreign substance to the tent fabric may render the flame-resistant
properties ineffective.
ADDITIONAL WARNINGS
•
This tent must be properly ventilated in all weather conditions. In extr
eme
weather conditions, snow could obstruct airflow and cause asphyxiation
unless cleared frequently.
• Never use fuel-burning, oxygen consuming devices (i.e. heaters, lanterns,
cooking stoves or other flame sources) inside your tent.
• Never leave children unattended inside a tent.
• Anchor your tent securely to provide additional security from changing
climatic conditions. Snow pegs, skis and/or heavy rocks may be
necessary to supplement tent stakes and guy cords
1 SHORT PRECURVED DAC DA17
POLE
1 SILVER FLY POLE
Before you Start 2
Pitching your Tent 3-7
Designer’s Notes 7
Notes and Warranty 8
INSTRUCTION INDEX
DA17 SERIES
MANTRA 6 & 7
Floor saving
Foot print available

4
5. Using one of the GOLD poles, follow the seam
directly under the pole to a corner (figure 4A).
Figure 5A Figure 5CFigure 5B
7. Repeat steps 5 and 6 on opposite side of the tent.
The gold poles should cross over each other twice. The tent will
start taking shape at this point.
8. Using the BLACK pole, follow the seam directly
under the pole to the center of either the front or
back of the tent (figure 6).
Figure 4A
6. Insert the spring pins on the black webbing
located by the floor seams at each corner of the
tent into the end of the pole (figures 5A, 5B and
5C). Repeat for the other gold pole on the SAME side.
Figure 6
3
SETTING UP YOUR TENT
2. Spread the tent body on the ground.
3. Slide a long GOLD pole through a long pole sleeve
that parallels the long side of the tent (figures 2A
and 2B). Repeat for the other long pole and other long pole
sleeve.
Figure 1A Figure 1B Figure 1C
1. Assemble the poles (figures 1A, 1B and 1C).
Avoid having the shockcord snap the pole sections together,
this can damage the poles.
Figure 2A Figure 2B
4. Slide short BLACK pole through the short pole sleeve
that crosses over the center of the tent (figure 3A).
Make sure the black pole lays over the two gold poles.
Figure 3A

ATTACHING THE FLY
12. Find the zippers in the fly. This will be the vestibule
over the entrances at the front of the tent. Drape
the fly over the tent body with the zippers over the
doors (figure 9).
Figure 9
6
13. Slide the silver pole through the sleeve on the
underside of the fly just above the door/vestibule
area (figure 10A).
14. Insert spring pins at the front corners of the tent
into the ends of the silver poles (figure 10B).
Figure 10B
Figure 10A
11. Stake the tent down (figures 8A and 8B)!
Figure 8A Figure 8B
Figure 7A Figure 7B
• IF YOU’RE HAVING A HARD TIME
STAKING INTO THE GROUND, USE
ROCKS TO ANCHOR DOWN YOUR
TENT. (SEE ILLUSTRATION)
• TO GET THE TAUTEST PITCH, START AT
ANY CORNER, THEN MOVE TO THE
DIAGONAL CORNER FOR EACH STAKE.
STAKING TIPS
5
9. Insert the spring pins on the black webbing located
by the floor seams at the center of the tent into the
end of the BLACK pole. Repeat for the other side of the
black pole.
10. Attach clips located at the seams of the tent to the
corresponding poles above each (figures 7A and
7B). NOTE: Clips are color coded for each pole.

NOTES & TIPS
6235 LOOKOUT ROAD, BOULDER CO 80301
800.423.2320 • FAX 800.504.2745 • WWW.KELTY.COM
8
WARRANTY
•Fire near your tent is a NO-NO. Your tent can burn. Never
cook in your tent or use candles for light inside.
• To minimize UV damage from the sun, don’t keep tent set up for
long periods of time or when not in use.
• The fly is equipped with closable vents. Opening these vents
increases flow-through ventilation.
• If you pitch the tent in a wind, anchor the tent before you put the
poles in. Gear alone probably won’t hold down your tent even in
winds as light as 25mph. Many tents have been destroyed by
unexpected winds rolling them away with gear inside! In strong
winds you will want to anchor every stake loop and guyout.
• The best way to use rocks for staking and guying out in rocky ter-
rain is to find one large and one small rock. Tie a piece of cord
from your stake or guy-out point around the small rock, set the
large rock on top of the cord right next to the small rock, pull
back until it’s tight. (See p. 4)
• Leaving the fly on the tent when you take it down is sometimes
handy. Packing the tent and fly as a single connected unit speeds
setup and the tent will be immediately protected from rain when
you pull it out next time.
Before packing you should dry out the tent and fly. This way you
won’t have to carry water rolled into the tent and it will help
keep the tent from mildewing.
Kelty takes pride in its workmanship and undertakes to manufacture the best possible
products. Therefore, we warranty all Kelty products against defects in materials or work-
manship during your lifetime. Since no Kelty product is indestructible, it does not cover
defects attributable to or resulting from normal wear and tear, natural hazard damage
(ie: weather, animals), abuse or alteration (ie: ultra violet (u.v.) damage on tents, exhaust-
ed zippers). Service under our warranty is available to the original purchaser by returning
the product to any authorized Kelty dealer or by contacting our customer service depart-
ment at 1-866-349-7225 (1-866-FIX-PACK) for return authorization. We require that all
products returned for warranty and repair be properly cleaned.
If after inspection we
determine that the product was defective, we will repair or replace it free of
charge. If your Kelty product needs service or repair that is not covered under
warranty we will provide the necessary service at a reasonable charge. This
warranty gives you, the original purchaser, specific legal rights. You may also
have other rights, which vary from state to state.
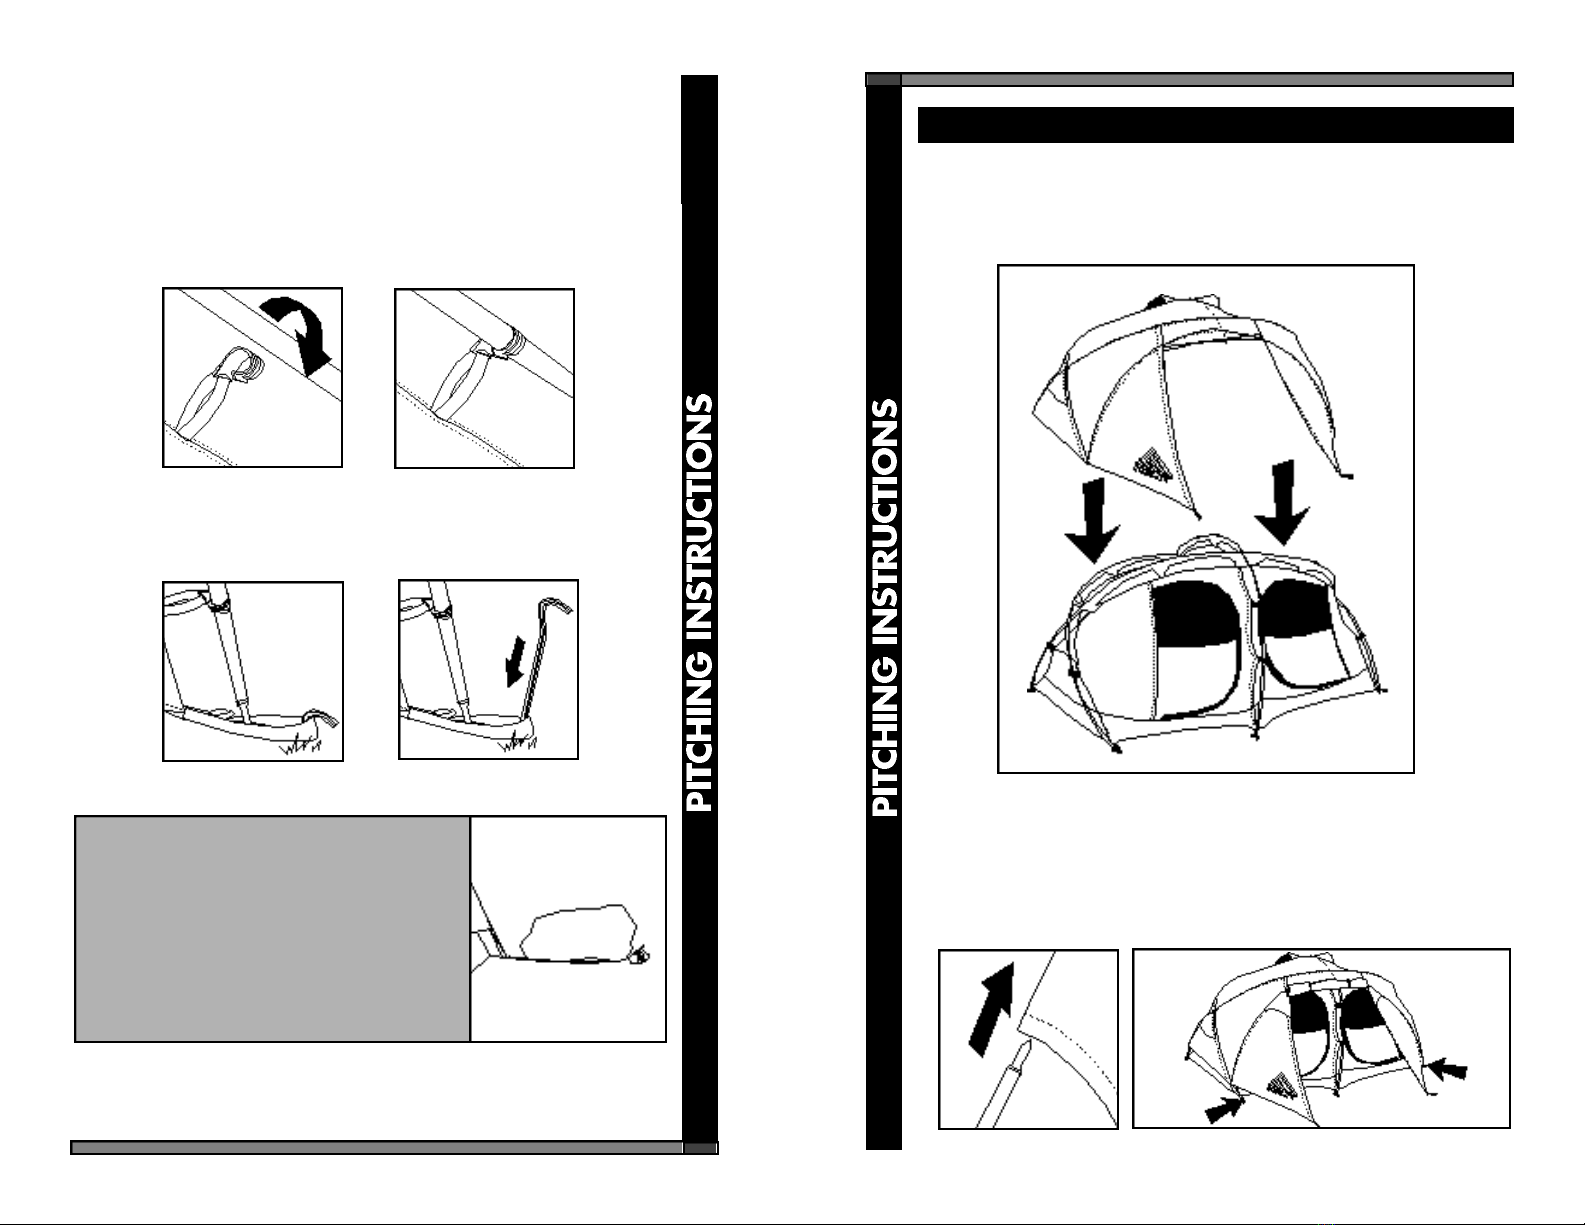
13. Clip the buckles on the fly to the buckles at each
corner of the tent body (figures 11A and 11B).
14. Stake out the vestibule at the front of the tent so
that it is taut.
15. Cinch the webbing on the fly buckles at each
corner of the tent.
Figure 11A Figure 11B
7
DESIGNER’S NOTES
STAKE YOUR TENT DOWN! REALLY!
This manual suits for next models
1
Other Kelty Tent manuals