manuals.online logo
Brands
  1. Home
  2. •
  3. Brands
  4. •
  5. Kenmore
  6. •
  7. Cooktop
  8. •
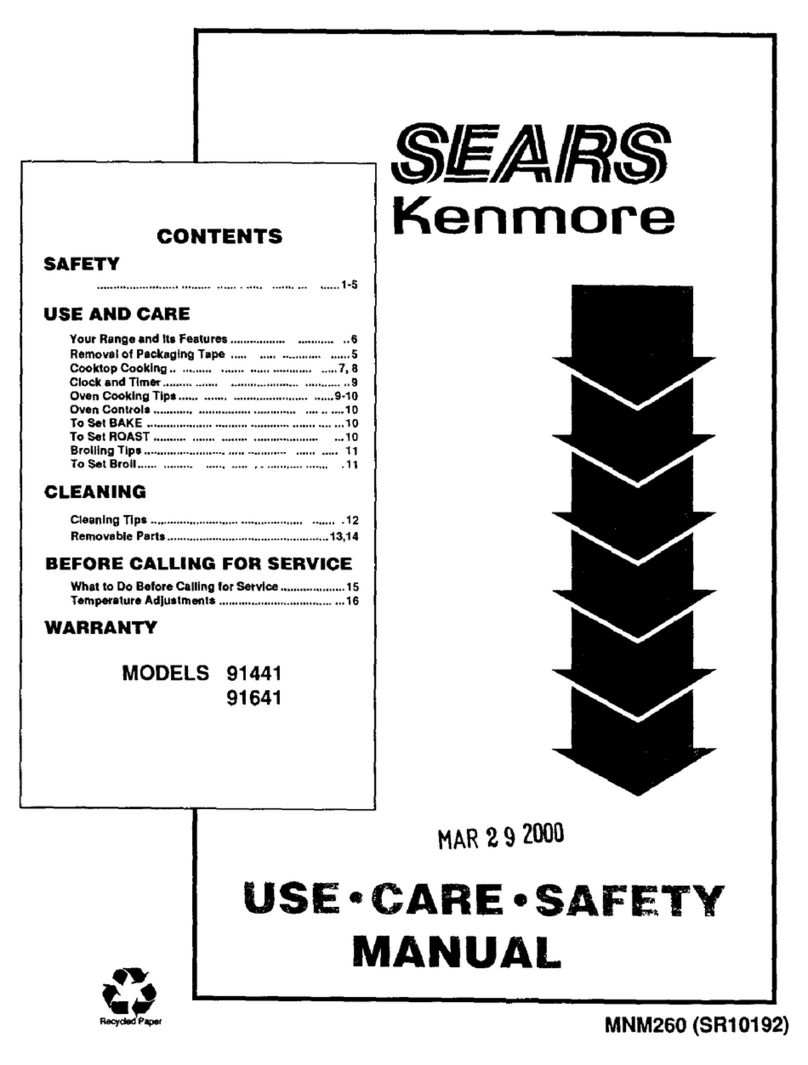
  9. Kenmore Sears 93081 User manual

Kenmore Sears 93081 User manual

This manual suits for next models

2

Other Kenmore Cooktop manuals

Kenmore 3247 - Elite 36 in. Gas Cooktop User manual

Kenmore

Kenmore 3247 - Elite 36 in. Gas Cooktop User manual

Kenmore 642911 Use Installation instructions

Kenmore

Kenmore 642911 Use Installation instructions

Kenmore 790.4283 User manual

Kenmore

Kenmore 790.4283 User manual

Kenmore 45520 Installation instructions

Kenmore

Kenmore 45520 Installation instructions

Kenmore 79042742405 User manual

Kenmore

Kenmore 79042742405 User manual

Kenmore 790.4510 User manual

Kenmore

Kenmore 790.4510 User manual

Kenmore 43420 Use Installation instructions

Kenmore

Kenmore 43420 Use Installation instructions

Kenmore 22-41283 User manual

Kenmore

Kenmore 22-41283 User manual

Kenmore Gas cooktop User manual

Kenmore

Kenmore Gas cooktop User manual

Kenmore 79043493400 User manual

Kenmore

Kenmore 79043493400 User manual

Kenmore ELITE 911.44022 User manual

Kenmore

Kenmore ELITE 911.44022 User manual

Kenmore 79041283000 User manual

Kenmore

Kenmore 79041283000 User manual

Kenmore 91131 Use Installation instructions

Kenmore

Kenmore 91131 Use Installation instructions

Kenmore 3241 - 30 in. Gas Cooktop User manual

Kenmore

Kenmore 3241 - 30 in. Gas Cooktop User manual

Kenmore 30" User manual

Kenmore

Kenmore 30" User manual

Kenmore 79043820000 User manual

Kenmore

Kenmore 79043820000 User manual

Kenmore 61011 Use Installation instructions

Kenmore

Kenmore 61011 Use Installation instructions

Kenmore 790.3102 Series User manual

Kenmore

Kenmore 790.3102 Series User manual

Kenmore Gas cooktop User manual

Kenmore

Kenmore Gas cooktop User manual

Kenmore 318201433 User manual

Kenmore

Kenmore 318201433 User manual

Kenmore 79032333000 User manual

Kenmore

Kenmore 79032333000 User manual

Kenmore 790.31113 User manual

Kenmore

Kenmore 790.31113 User manual

Kenmore 93521 Use Installation instructions

Kenmore

Kenmore 93521 Use Installation instructions

Kenmore 93521 Use Installation instructions

Kenmore

Kenmore 93521 Use Installation instructions

Popular Cooktop manuals by other brands

Fisher & Paykel CE302CBX2 manual

Fisher & Paykel

Fisher & Paykel CE302CBX2 manual

Whirlpool GJC3634RB00 parts list

Whirlpool

Whirlpool GJC3634RB00 parts list

Whirlpool ACH7324/BLV Use, care and installation guide

Whirlpool

Whirlpool ACH7324/BLV Use, care and installation guide

Frigidaire Professional FPDF4085KF Important safety instructions

Frigidaire

Frigidaire Professional FPDF4085KF Important safety instructions

Bonnet OPTIMUM 700 Technical instructions

Bonnet

Bonnet OPTIMUM 700 Technical instructions

Jenn-Air JGCP430 installation instructions

Jenn-Air

Jenn-Air JGCP430 installation instructions

Bompani BO374AA/E User instructions

Bompani

Bompani BO374AA/E User instructions

Kleenmaid cooking GCTK9011 Instructions for use and warranty details

Kleenmaid

Kleenmaid cooking GCTK9011 Instructions for use and warranty details

Waldorf RN8603E-B Technical data sheet

Waldorf

Waldorf RN8603E-B Technical data sheet

Whirlpool SMP658CNEIXL quick guide

Whirlpool

Whirlpool SMP658CNEIXL quick guide

Electrolux E36IC80ISS - 36" Induction Cooktop Wiring diagram

Electrolux

Electrolux E36IC80ISS - 36" Induction Cooktop Wiring diagram

Wolf CI243C/B Use and care guide

Wolf

Wolf CI243C/B Use and care guide

Fulgor Milano F5PGK305S1 installation instructions

Fulgor Milano

Fulgor Milano F5PGK305S1 installation instructions

Wells WV-2HFG owner's manual

Wells

Wells WV-2HFG owner's manual

Samsung NA36N9755 installation manual

Samsung

Samsung NA36N9755 installation manual

Miele KM 404 operating instructions

Miele

Miele KM 404 operating instructions

Lacor 69562 Instructions for use and maintenance

Lacor

Lacor 69562 Instructions for use and maintenance

Keating Of Chicago MG-2 manual

Keating Of Chicago

Keating Of Chicago MG-2 manual

manuals.online logo
manuals.online logoBrands
  • About & Mission
  • Contact us
  • Privacy Policy
  • Terms and Conditions

Copyright 2025 Manuals.Online. All Rights Reserved.

Kenmore
ELECTRIC RANGE OWNER'S MANUAL
models 93081 93088
CONTENTS
iNSTALLATION
CARE AND USE
Important Safety Instructions
Features of Your Range
Surface Cooking:
Surface Cooking Guide
Canning Tips
Oven:
Clock/Timer
Control Settings
Baking, Baking Guide
Roasting, Roasting Guide
Broiling, Broiling Guide
Self-Cleaning Instructions
Care & Cleaning
Thermostat Adjustment
1
,i ,, L...............................................
PROBLEM SOLACER
The Problem Solver lists causes of
minor operating problems that you can
correct yourself.
WARRANTY
iNSTALLATiON UNSTRUCTIONS
iMPORTANT: SAVE FOR THE LOCAL ELECTRICAL INSPECTOR'S USE
EiectricamRequirements
CAUTION, FOR PERSONAL SAFETY:
DO NOT USE AN EXTENSION CORD WITH THIS
APPLIANCE.
REMOVE HOUSE FUSE OR OPEN CIRCUIT
BREAKER BEFORE BEGINNING INSTALLATION.
This appliance must be supplied with the proper
voltage and frequency, and connected to an individual
properly grounded branch circuit, protected by a cir-
cuit breaker or time delay fuse, as noted on the rating
plate. (Rating plate is located on door frame_)
Wiring must conform to National Electric Codes.
If the electric service provided does not meet the above
specifications, it is recommended that a licensed elec-
trician install an approved outlet.
Because range terminals are not accessible after range
is in position, use flexible service conduit or cord_
Step t
Preparethe Opening
1t/2" spacing is recommended from the range to adja-
cent vertical walls above the cooktop surface°
Allow 30" minimum clearance between surface units
and bottom of unprotected wood or metal top cabinet,
and 15" minimum between countertop and adjacent
cabinet bottom.
"Yourrange, like many other household items, is
heavy and can settle into soft floor coverings such
ascushioned vinyl or carpeting. When moving the
rangeonthistype offlooring, use care,and it isrecom-
mended that thesesimple and inexpensiveinstructions
be followed.
The range should be installed on a sheet of plywood
(or similar material) as follows: When the floor cover-
ing ends at the front of the range, the area that the
range will rest on should be built up with plywood to
the same level or higher than the floor covering. This
will allow range to be moved for cleaning or servicing.
Step 2
Prepare for E_ectricaaConnection
Use a 3-conductor, or if required, a 4-conductor range
cord set as noted below_
For Ranges Less than or Equal to 11.1 KW
9-5255 3 cond. 4' 50A-125/250V
9-5237 4 cond. 4' 50A-125!250V
4
OUTLET BOX INSTALLED LEFT OF _ OF RANGE
(_ OF RANGE
WALL. _ "_" "_"_ 7',_" "'_"-_
CORD---J
Step 3
1, Locate connector block at the bottom rear of range
and remove rear wiring cover°
2. Directly below the connector block is a hole with a
knockout ring for accommodating conduit fittings°
Brackets provided are used to support the flexible cord
strain relief, which must be securely attached to the
cord set.
WIRING COVER //_
(SHOWN REMOVED) ///
STRAIN RELIEF ._/1" ,_
BRACXETS ,_ _L"_ I"
(PROVIDED WITH {_"_'][I ]
RANGECORDSEt, IT_IIII
Step 4
The following procedures
should be used for copper or
aluminum wire connection:
1. Copper Wiring
Connect the neutralorgrounded
wire ofthe supply circuittothe
neutralterminal ofthe connec-
tor block, locatedin the center_
The power leads must be con-
nected to the outside (brass
colored) terminals°
Power Cord Installation--
Insert screw through power
cordterminal so thatthe screw
passes through connector block
terminal and engages nut.,
Tighten screw securely.
Cable Direct Installation--
Clamp bare wires between the
connector block terminal and
movable nuts with screws
tightened securely°
WARNING: CONNECTOR BLOCK IS APPROVED
FOR COPPER WIRE CONNECTION ONLY.
2. Aluminum Wiring
A. Connect lengthofcopperbuildingwiretorange ter-
minal block_
B. Splice copper wires to aluminum wiring using
special connectors designed and U L. approved for
joining copper to aluminum, and follow the connector
manufacturer's recommended procedure closely_
NOTE: Wire used, location and enclosure of splices,
etc., must conform to good wiring practice and local
codes.
WARNING
o RANGE MUST BE SECURED BY ANTI-TIP
BRACKET SUPPLIED.
=SEE INSTRUCTIONS TO INSTALL.
,, UNLESS PROPERLY INSTALLED, RANGE
COULD BE TIPPED BY STEPPING OR SIT-
TING ON DOOR. INJURY MIGHT RESULT
FROM SPILLED HOT LIQUIDS OR FROM
RANGE ITSELF.
Step 5
SpeciamGroundingInstructions
WARNING:
1. If local codes do not permit
grounding through neutral,
disconnect the strap, located at
the bottom of connector block,
from the frame and cut off to pre-
vent contact with the range body
To ground range frame, a 4th
grounding lead must be con-
nected to range frame in accord-
ance with local codes, using only
ground lug and screw°
I
4_h GROUNDING LEAD 0UND
LUG
2. Mobile Home installation--If this range is provided
with a 3-conductor cord or cable assembly, or if local
codes do not permit grounding through the neutral, the
grounding strap must be removed and the 3-conductor
cord or cable assembly must be replaced by a
4-conductor cord as follows:
A. Remove the 3-conductor cord by removing the strain
relief and terminal lugs from the connector block.
B. Attach the 4.-conductor cord as described in STEP
5.1, except attach 4th wire to previous location of the
grounding strap.
Step 6
Anti-Tip Bracket
Installation
An ANTI-TIP bracket is
supplied with instruc-
tions for installation in a
variety of locations. The
instructions include a
template, a parts list and Bracket Installation Template
a list of tools necessary to complete the installation.
Read the IMPORTANT SAFETY INSTRLICTIONS and
the instructions that fit your situation before beginning
installation.
Attachment to wall
Bracket
Screw must enter wood or metal Wall plate
1
Step 7
Leveling the Range
The range must be leveled° Leveling feet are located
on each corner of the base of the range. Remove the
storage drawer and rotate the leveling feet in or out as
required. To remove drawer, pull it out all the way, tilt
up the front and remove it. To replace, insert glides at
back of drawer beyond stop on range glides. Lift drawer
if necessary to insert easity_
One of the rear leveling feet will engage the ANTI-TIP
bracket (allow for some side to side adjustment). Allow
a minimum clearance of 118" between the range and
the leveling foot that is to be installed intothe ANTI-TIP
brackeL
Step 8
Final Check
Be sure all switches are in the "off" position before leav-
ing the range°
5
iMPORTANT SAFETY iNSTRUCTiONS
Read anninstructions before using this appliance.
When using electrical appliances, basic safety pre-
cautions should be followed,including the following:
oUsethis appliance only for its intended useas
described in this manual,
oBe sure your appli-
ance is properly in-
stalled and grounded
by aqualified technician
in accordance with the
provided installation
instructions.
oDon't attempt to
repair or replace any
part of your range un-
less it is specifically
recommended in this
book. Allother servicing
should be referred to a qualified technician°
• Before performing any service, DISCONNECT
THE RANGE POWER SUPPLY AT THE HOUSE-
HOLD DISTRIBUTION PANEL BY REMOVING
THE FUSE OR SWITCHING OFF THE CIRCUIT
BREAKER.
oDo not leavechildren
alone--children should
not be left alone or unat-
tended in an area where
an appliance is in use,
They should never be
allowed to sitor stand on
anypartofthe appliance°
•Don'tallow anyoneto
climb, stand or hang
on the door, drawer or
range top. They could
damage the range and
even tip it over, caus-
ing severe personal
injury.
WARNmNG:To
prevent accidental tip,
ping of the range, attach it tothe wall orfloor by in-
stallingtheANTI-TIPbracketsupplied°Tocheckifthe
bracketis installed and engagedproperly,remove
the drawerand inspectthe rear levelingleg. Make
sure it fits securely intothe slotin the brackeL
Ifyoupurlthe rangeoutfrom the wallfor any reason,
make surethe rear leg isreturnedto its positionin
the bracketwhenyou push the range back.
•CAUTION: ITEMS OF INTEREST TOCHILDREN
SHOULD NOT BESTORED INCABINETS ABOVE
A RANGE OR ON THE BACKSPLASH OF A
RANGE--CHILDREN CLIMBING ON THE RANGE
TO REACH ITEMS COULD BE SERIOUSLY
INJURED.
• Never wear loose-
fitting or hanging gar-
ments while using the
appliance. Flammable
materialcould be ignited
if brought incontact with
hotheatingelementsand
maycausesevereburns.
•Use only dry pot holders--moist or damp pot
holders on hot surfaces may result in burns from
steam. Do not let pot holders touch hot heating
elements, Do not use a towel or other bulky cloth,
o Never use your ap-
pliance for warming or
heating the room.
°Keep hood and
grease filters clean to
maintain good venting
andtoavoidgrease fires.
....,-, .._.:.., oStorage in or on ap-
__/_ pliance--Flammable
_=_.-"_' materials should not be
_'7"_K_ _i! stored inan ovenornear
__-'_ _ surface units,
_ _ _ ° Do not let cooking
............................ grease or other flare.
mable materialsaccumulate in or nearthe range.
6
oDo not use water on grease fires. Never pick
up a flaming pan. Smother flaming pan on sur-
face unit bycovering pan completely with well-
fitting lid, cookie sheet
or flat tray, Flaming
grease outside a pan
can be put out by
covering with baking
soda or, if available, a
multi.purpose dry
chemical or foam type
fire extinguisher.
•Do not touch heating
elements or interior
surface of oven. These
surfaces may be hot
enough to burn even
though they are dark in color.During and after use,
do not touch, or let clothing or other flammable
materialscontact surface units,areasnearby surface
unitsor any interior areaof the oven; allowsufficient
time for cooling, first. Potentially hot surfaces
include the cooktop and
areasfacingthe cooktop,
oven vent opening and
surfaces near the open-
ing, and crevicesaround
the oven door. Remem-
ber: The inside surface
of the oven may be hot
whenthe doorisopened_
• When cooking pork,
follow the directions ex-
actly and always cook the meat to an internal
temperature of at least 170°EThis assures that, in
the remote possibility that trichina may be present
in the meat, it will be killed and the meat wiltbe safe
to eaL
Oven
,, Stand away from range when opening oven
door. Hot air orsteam which escapes can cause
burns to hands, face and/or eyes.
oDon't heat unopened
food containers in the
oven. Pressure could
build up and the con-
tainer could burst,
causing an injury.
oKeepovenvent ducts
unobstructed.
oKeep oven free from grease buildup.
..: °Place oven shelf in
desired position while
oven is cool. If shelves
must be handled when
hot, do not let pot holder
contact heating units in
the oven.
°Pulling out shelf to
the shelf stop is acon-
venience in lifting heavy foods. It is also a
precaution against burns from touching hot sur-
faces of the door or oven walls.
oWhen usingcooking or roasting bags in oven,
follow the manufacturer's directions_
oDo not use your oven to dry newspapers. If
overheated, they can catch fire.
Self-Cleaning Oven
o Do not clean door gasket. The door gasket is
essential for a good seal. Care should be taken not
to rub, damage or move the gasket°
_o oDo not use oven
cleaners. No commer-
cial oven cleaner or oven
liner protective coatingof
any kind should be used
in or around any part of
the oven.
o Clean only parts listed in this Owner's Manual.
oBefore self-cleaning the oven, remove broiler
pan and other utensils.
(continued ne_t page_
7
mMPORTANTSAFETY mNSTRUCTIIONS(continued)
Surface Cooking Units
•:ik q:,o j"'._,, o Use proper pan size
....._ :,. --This appliance isequip-
:ped with one or more sur-
face units of different
size. Select utensils hav-
ing flat bottoms large
enough to cover the
surface unit heating ele-
ment. The use of under-
sized utensils will expose
a portion of the heating element to direct contact and
may result in ignition of clothing. Proper relationship
of utensil to burner will also improve efficiency (see
pages 12-13)o
• Never leave surface
units unattended at
high heat settings. Boil-
over causes smoking
and greasy spillovers that
may catch on fire.
=Don't use aluminum
foil to line drip pans or
anywhere in the oven
except as described in
this book. Misuse could
result in a shock, fire
hazard or damage to the
range.
• Be sure drip pans
and vent ducts are not
covered and are in
"_ "place. Their absence
during cooking could damage range parts and
wiring.
°Only certain types of glass, glass/ceramic,
earthenware or other glazed containers are
suitable for range-top service; othersmay break
becauseofthesudden changeintemperature.(See
section on "Surface Cooking" for suggestions.)
oKeep an eye on foods
MEDIUM HIGH heats.
° To minimize burns,
ignition of flammable
materials, and spillage,
the handle of a container
should be turned toward
the center of the range
without extending over
nearby surface units.
oAlways turn surface
unit to OFF before re.
moving utensil.
being fried at HIGH or
=To avoid the possibility of a burn or electric
shock, always becertain that the controls for all
surface units areat OFF position and a!lcoils are
cool before attempting to lift or removethe unit.
°Don't immerse or soak removable surface
units. Don't put them in a dishwasher. Do not self-
clean the surface units in the oven.
oWhen flaming foods under the hood, turn the
fan off. The fan, if operating, may spread the
flame.
o Foods for frying should be as dry as possible.
Frost on frozen foods or moisture on fresh foods can
cause hot fat to bubble up and over sides of pan.
•Use little fat for effective shallow or deep-fat
frying. Filling the pan too full of fat can cause
spillovers when food is added,
oIf a combination of oils or fats will be used in
frying, stir together before heating, or as fats melt
slowly.
=Always heat fat slowly, and watch as it heats.
°Use deep fat thermometer whenever possible
topreventoverheating fatbeyondthe smoking point.
SAVETHF E INSTRU WON$
8
Energy=SavingTips
SurfaceCooking
o For best use of energy, use cooking utensils of
medium weight aluminum, tight-fitting covers, and flat
bottoms which completely cover the heated portion of
the surface unit.
o Cook fresh vegetables with a minimum amount of
water in a covered pan..
o Watch foods when bringing them quickly to cooking
temperatures at HIGH heal When food reaches cook-
ing temperature, reduce heat immediately to lowest set-
ting that will keep it cooking°
o Use residual heat with
surface cooking whenever
possible° For example,
when'cooking eggs in the
shell, bring water and
eggs to boil, then turn to
OFF position and cover
with lid to complete the
cooking.
= Always turn surface unit OFF before removing
utensil°
o Use correct heat for cooking task ..... high heats to
start cooking (if time allows, do not use high heat to
start), medium high--quick brownings, medium--slow
frying, low--finish cooking most quantities, warm--
double boiler heat, finish cooking, and special for small
quantities.
o When boiling water for
tea or coffee, heat only the
amount needed. It is not
economical to boil a con-
tainer futl of water for only
one or two cups.
Oven Cooking
o Preheat the oven only when necessary. Most foods
will cook satisfactorily without preheating. If you find
preheating is necessary, watch the indicator light, and
put food in the oven promptly after the light goes out..
= Always turn oven OFF before removing food.
= During baking, avoid frequent door openings° Keep
door open as short a time as possible if it is opened°
• Cook complete oven
meals instead of just one
food item Potatoes, other
vegetables and some des-
serts wilt cook together
with a main-dish casse _
role, meat loaf, chicken or
roasL Choose foods that
cook at the same temper-
ature and in approximately
the same time.
= Use residual heat in oven whenever possible to finish
cooking casseroles, oven meals, etco Also add rolls or
precooked desserts to warm oven, using residual heat
to warm them.
9
Featu s of YourRange
Mode s 93081
93088
Feature Index
1 Model and Serial Numbers
2 Surface Unit Controls
Explained
on page
4
11
3 "ON" Indicator Lights for 1!
Surface Units
4 Oven Selector Control 16
5 Oven Temperature Control 16
6 Oven Cycling Light 16
7 Automatic Oven Timer 15
Clock and Minute Timer
8 Door Latch 23
9 Oven Locked Light 23
10 Oven Cleaning Light 23
11 Ptug-tn Surface Units 26
(May be removed when
cleaning under unit°)
Explained
Feature Index on page
12 Chrome-Plated Drip Pans 26
13 Oven 'Vent Duct (Located 25
under right rear surface unit.)
14 Oven Interior Light (Comes 25
on when door is opened,)
15 Broil Unit 21
16 Bake Unit (May be lifted 17
gently for wiping oven floor.)
17 Oven Shelves 16
t8 Oven Shelf Supports (Letters 16
A, B, C and D indicate cooking
positions for shelves as
recommended in cooking guides°)
t9 Broiler Pan and Rack 21
20 Storage Drawer 28
t0
Surface Cooking
See Surface Cooking Guide on pages 12 and 13.
SurfaceCookingwith InfiniteHeatControls
Your surface units and controls are designed to give
you an infinite choice of heat settings for surface unit
cooking.
At both OFF and HI positions, there is a slight niche so
control "clicks" at those positions; "click" on HI marks
the highest setting; the lowest setting is between WM
and OFE In a quiet kitchen, you may hear slight
"clicking" sounds during cooking, indicating heat
settings selected are being maintained.
Switching heats to higher settings always shows a
quicker change than switching to lower settings_
How to Set the ControBs
Step 1: Grasp control
knob and push in_
Step 2: Turn either clock-
wise or counterclockwise
to desired heat setting.
Control must be pushed
in to set only from OFF
position. When control
is in any position other
than OFF, it may be ro-
tated without pushing in.
Be sure you turn control to OFF when you finish
cooking.. An indicator light will glow when ANY heat on
any surface unit is ono
Cooking Guidefor UsingHeats
HI--Quick start for cooking; bring water to boil,.
MED HI (?')--Fast fry, pan broil; maintain fast boil on
large amount of food.
MED (4)--Saute and brown; maintain slow boil on large
amount of food.
LOW (3)mCook after starting at HI; cook with little water
in covered pan°
WM--Steam rice, cereal; maintain serving temperature
of most foods.
NOTE:
1. At HI, MED H1 (7), never leave food unattended,.
Boilovers cause smoking; greasy spillovers may catch
fire.
2. At WM, LOW (3), melt chocolate, butter on small unit..
11