OPERATING INSTRUCTIONS (CONT.)
INSTRUCCIONES DE OPERACIÓN
Este aparato es para USO DOMÉSTICO
EXCLUSIVAMENTE y puede enchufarse en
cualquier tomacorriente polarizado de 120 V,
corriente alterna. No use ningún otro tipo de
tomacorriente.
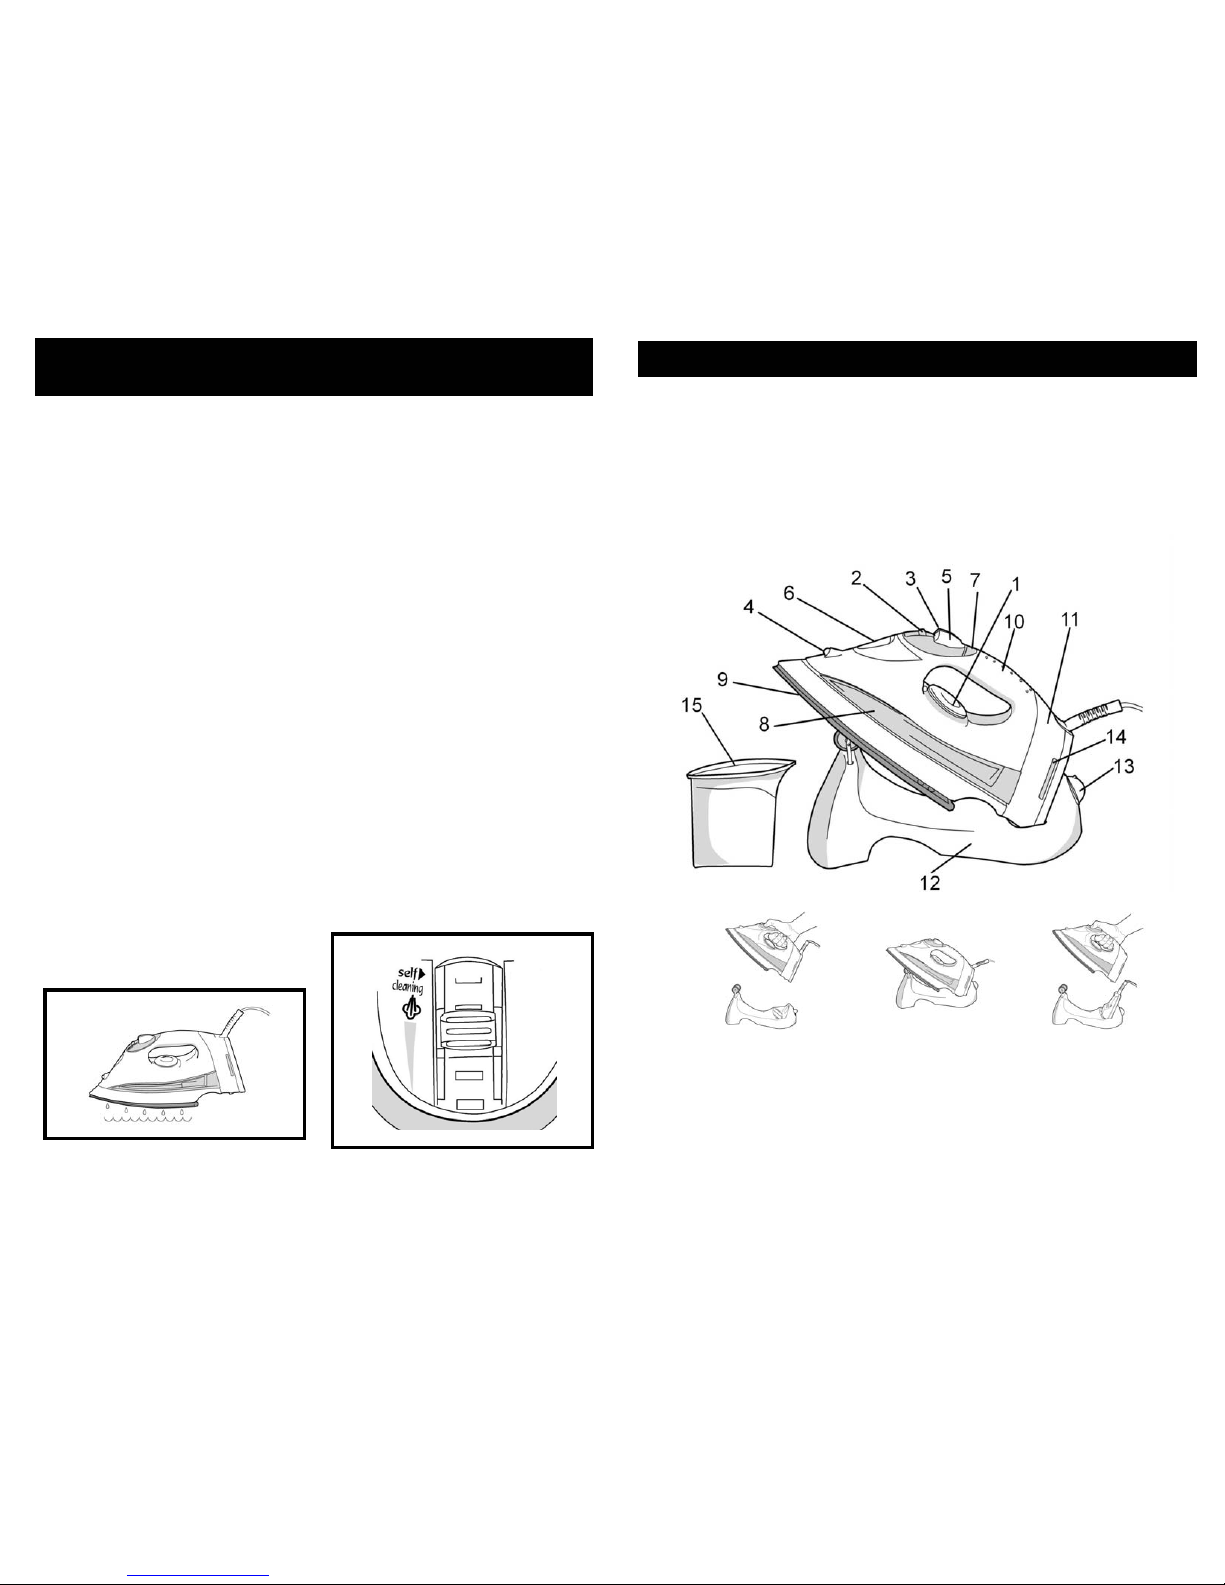
4. Turn the temperature dial to any of
the temperatures within the gray
steam band and allow the iron to
heat for approximately 2 minutes
before ironing. Place iron on its
stand (on a stable, protected
surface) while the iron is warming to
desired temperature.
5. Slide the steam lever up to increase
the amount of steam. When using
extra steam, the iron uses more
water and it may be necessary to fill
the tank more often.
¡ADVERTENCIA! Antes de llenar la
plancha con agua, asegúrese de que no
esté enchufada en el tomacorriente. Se
puede llenar la plancha de agua cuando
está caliente.
NOTE: If the tank runs dry, remove the
plug from wall outlet. Then, fill the iron
with water and re-prime the pump. The
iron may be filled with water while it is
hot.
PLANCHADO EN SECO ¡ADVERTENCIA! PARA IMPEDIR EL
RIESGO DE QUEMADURAS, tenga
cuidado al llenar la plancha con agua.
Pueden producirse quemaduras al entrar
en contacto con las partes metálicas, el
agua caliente o el vapor.
NOTA: Gracias al diseño de la placa
metálica, puede utilizarse agua de la llave
para esta plancha. Sin embargo, en áreas
donde el agua es muy calcárea, se
recomienda usar agua destilada o
desmineralizada.
PRECAUCIÓN: Jamás llene la plancha
con acondicionador para telas, almidones
o cualquier otro tipo de líquido puesto
que éstos dañan el mecanismo de vapor.
No use agua contaminada.
1. Fije el disco de control de temperatura
en “MIN” y deslice la palanca
completamente hacia la izquierda.
2. Inclinando la plancha ligeramente, vierta
agua en la boquilla de llenado poco a
poco. Vea la figura 2. Llene el depósito
de agua hasta el nivel deseado o hasta
llegar a la marca que indica el nivel
“MAX” usando el recipiente de agua.
(Cuando la plancha está derecha, el
depósito azul transparente permite ver
qué cantidad de agua contiene.) NO
sobrellene el depósito.
WATER SPRAY
Pueden utilizarse todas las graduaciones
marcadas en el disco de control de
temperatura para un planchado en seco.
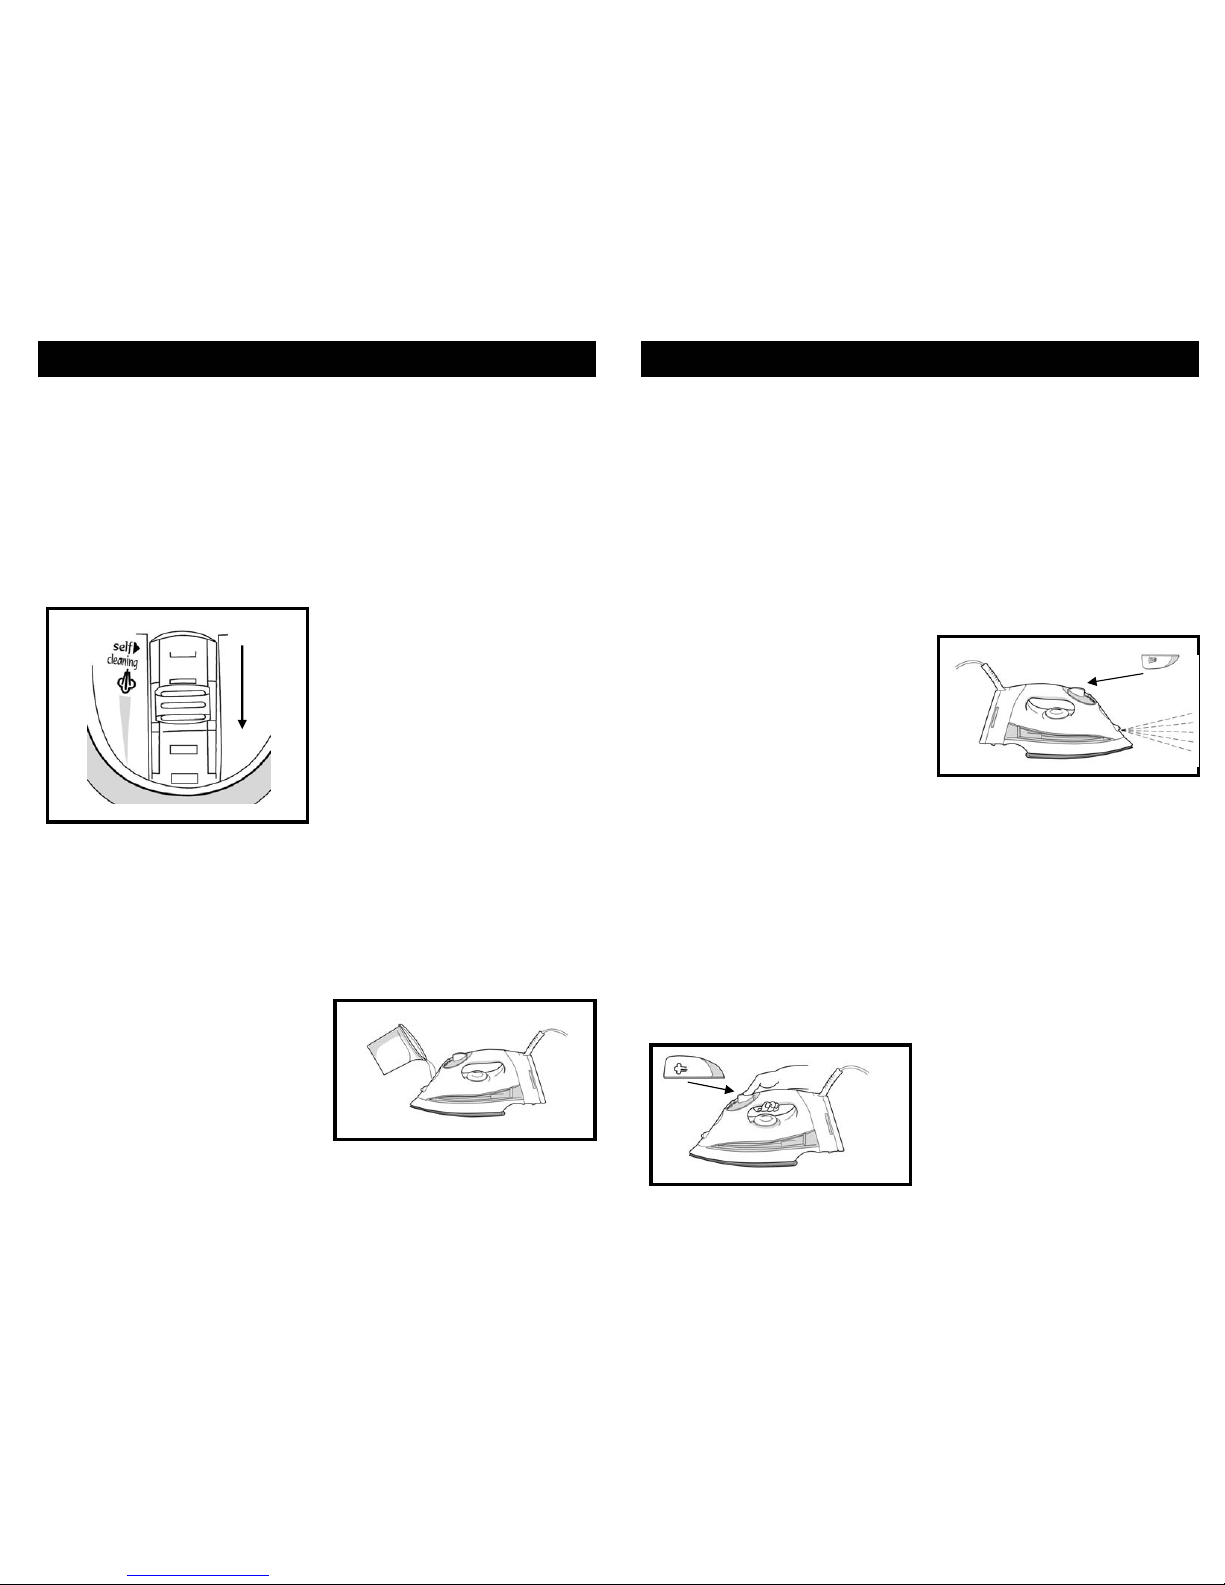
Deslice la palanca del regulador de vapor
completamente hacia abajo, como se ilustra
en la figura 1. Esto interrumpirá el flujo de
vapor si hay agua en el depósito.
The water spray is useful on fabrics with
stubborn wrinkles. Press the spray
button and a jet of water will spray onto
the fabric being ironed. See Figure 4.
The water spray can be used with dry or
steam ironing as desired.
Para planchado en seco:
Abajo
BURST OF STEAM
WARNING! DO NOT aim iron at face,
towards yourself, or anyone else
while using or adjusting steam.
Burns or serious injury may occur.
The burst-of-steam button is useful
when ironing denim, cotton, and linens.
It provides extra, sudden blasts of
steam which aid in removing stubborn
wrinkles.
The burst-of-steam feature can be used
with Dry or Steam ironing as desired.
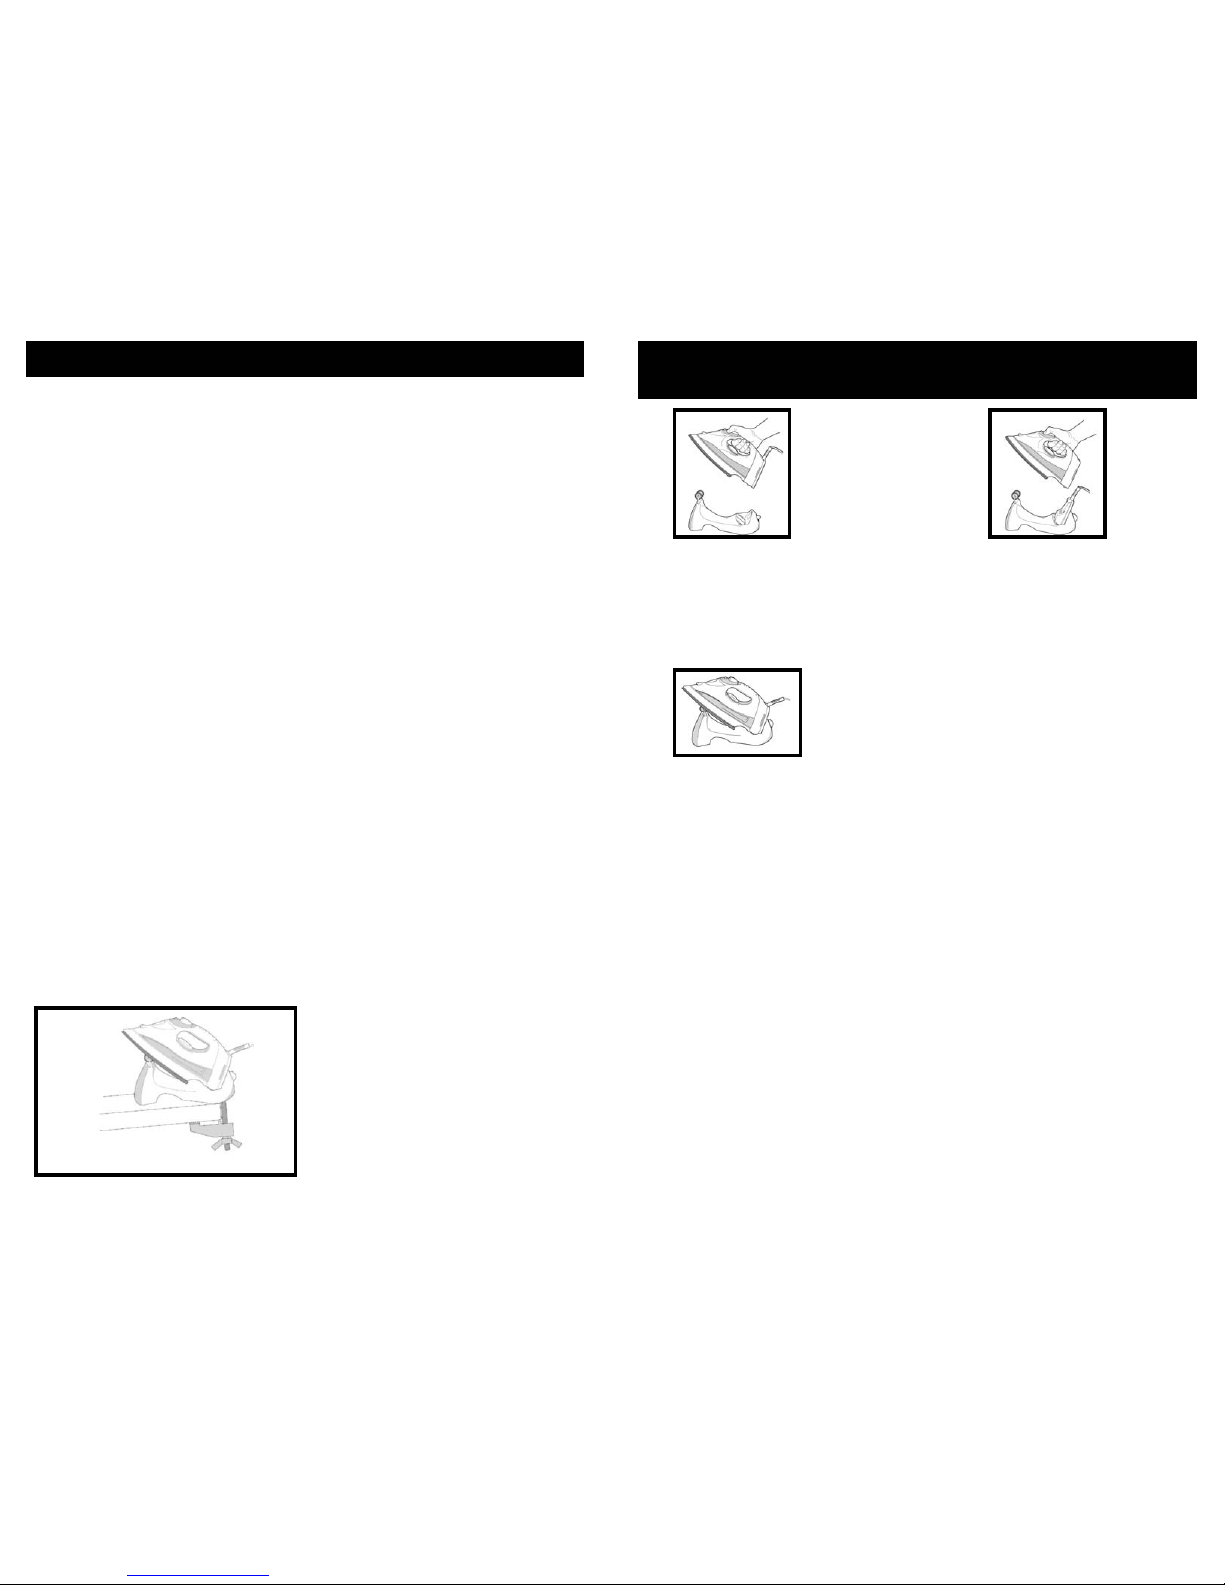
1. Make sure the water tank is at least
1/2 filled with water.
2. Set the temperature dial. Place the
iron on the stand (on a stable,
protected surface) and allow it to
heat for approximately 2 minutes.
3. With the iron in a horizontal position,
press the burst of steam button
several times to prime the pump.
See Figure 3.
Figure 4
1. Fije el disco de control de temperatura
en “MIN” y deslice la palanca del
regulador de vapor completamente
hacia abajo.
2. Conecte el cordón a un tomacorriente
polarizado de 120 V, corriente alterna.
La luz de encendido (“ON”) se iluminará,
lo cual indica que el cordón está
recibiendo corriente eléctrica.
3. Gire el disco de control de temperatura
para fijarlo en la graduación deseada.
(Vea el “Diagrama de Planchado” para
seleccionar la temperatura.)
4. Coloque la plancha en su soporte (sobre
una superficie protegida y estable)
mientras alcanza la temperatura
deseada.
Figura 1
PLANCHADO CON VAPOR
¡ADVERTENCIA! NO ACERQUE la plancha
a su rostro o al de otra persona cuando la
esté utilizando o al momento de ajustar el
vapor ya que pueden producirse
quemaduras o lesiones graves.
3. Conecte el cordón a un tomacorriente
polarizado de 120 V, corriente
alterna.
Figura 2
Figure 3
8
23