manuals.online logo
Brands
  1. Home
  2. •
  3. Brands
  4. •
  5. Kenmore
  6. •
  7. Sewing Machine
  8. •
  9. Kenmore 52 User manual

Kenmore 52 User manual

......
.
...
·(·
~.
-·
'
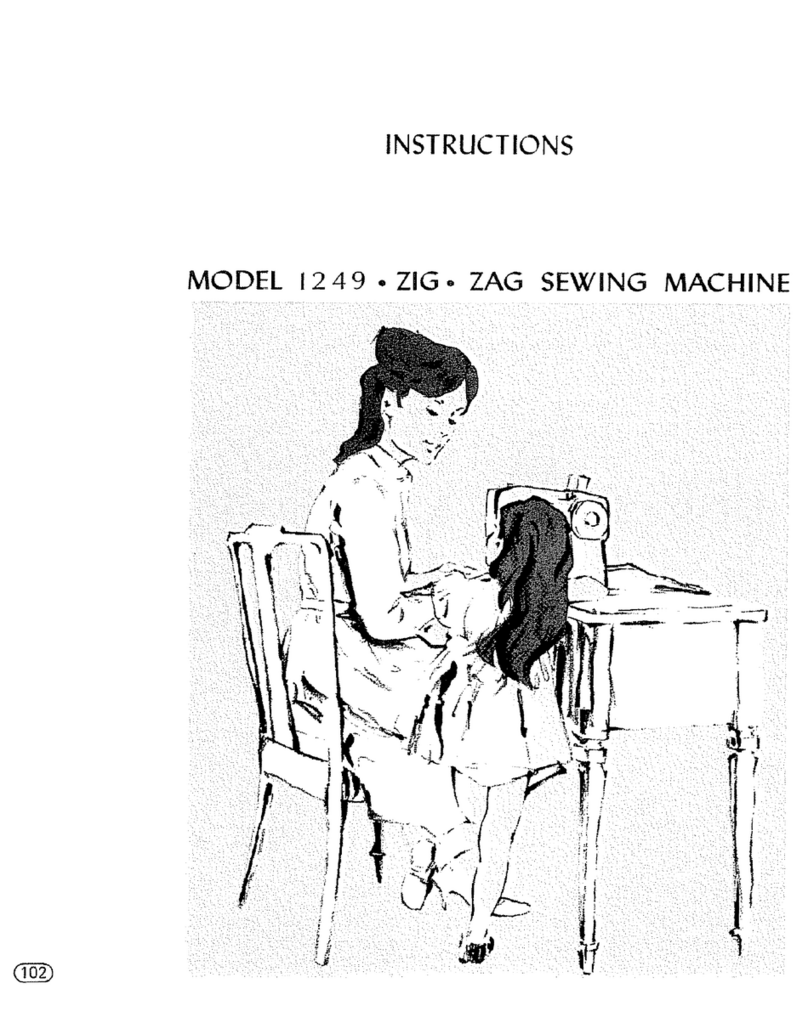
INSTRUCTIONS
.
AUTOMATIC
ZIG
~
ZAG
SEWING
MACHINE
'il
I
TABLE
OF
CONTENTS
Applique
·······································
22
Adjusting
for
Good
Stitch
es ·········· •··········
32
Basting
···•···•········ ·········•···••··········
11
Blind
Stitching
······················•······ ··· ·
19
Bobbin
:
Inserting
&
Threading
··•···· ··· ············· 8
Picking
up
Bobbin
Thread
····•·· ·············
10
Removing
··•···•···························· 6
Winding
···••······•·········· ················ 7
Buttonholes
•···········•······· ···········
20
-
21
Buttons
·•····· ·················· ················
19
Cleaning
&
Oiling
················ ···········
27-
29
Connecting
Mach
i
ne
····························· · 4
Corner
,
turning
···················· ··· ··········
15
Darning
··········· ············ ·•· ··· ·······•··
18
Double
Needle
·····•·······················
24
-
25
Feed
Dog
Control
······························
15
Fastening
a
Seam
······························
11
Foot
Pressure
, a
djusting
··········· ········· ··· ·
10
Identification,
Head
Parts
·······················2-3
Inserting
Disc
···········•· ··········•···········
16
Installing
Machine
Head
in
Cabinet
·······
·····
···
4
Inserting
and
Removing
Material
·····•••··•······
14
lace
,
Sewing
On
•···•·············· ·•···········
22
Needle
:
Needle
& Thr
ead
Chart
········ ············· 5
Placemen
t ···········•·•••·•·•··•···••·····•· 5
Overcasting
········ ·•····•··•···············••·
23
Parts
-list
···••·········••·•··•··•····· ··•··•·••·
33
Presser
Foot,
changing
•·························
15
Sewing
light
······· ••·••·•••·····•··· ··•••··••· 4
Stitch
length
·••·•·•···••··•·····•········•·····
11
Stitch
Width
····· ·······••·•· ·••·•···•··· ·····•·
16
Stitching
:
Decorative
,
Automatic
····· ·· ················ ·
17
Reverse
···· ······••··••·········••·········
11
Straight
···••····••·•· ····•·········· ····
11
,
14
Zigzag
··· ····
•·
·•••••·•······••···
••
··•···•·
16
Synthetics
···········••··•·••····••········· ·
26
Tensions
:
Upper
Thread
··· ·····••·••···•••••···••·····
12
lower
Thread
·•········••·••····•••·•······ ·
13
Threading
:
Bobbin
Case
······· ···•
·'
•·· ···•··········· ·· 8
Upper
Thread
·······••·· ··••··•············· 9
Thread
Selection
·······•·•·•••········••··•····• 5
What
To
Do
···
·
····
·············
··
·········
30
-
31
Writing
and
Monogramming
····· •·····•···•••··•
23
FRONT
VIEW
1.
Hand
Hole
Cover
Plate
8.
Face
Cover
Plat
e 13.
Stitch
Width
and
Buttonhole
Contro
l Knob
2. Presser
Foot
9.
Thread
To
ke-
up
14. Sti
tch
Length
Control
Lever
3. Presser
Foot
Thumb
Scre
w
10
.
Upper
Thread
Guid
es
15.
Thread
Spool
Pin for Bobbin W
in
d
er
4.
Thread
Guid
e 11.
Co
v
er
to
Automati
c De
corat
ing 16. Bobbin
Winde
r Tension Di
sc
5.
Thread
Guide
Stitch
Mechan
is
m 17.
Feed
dog
Control
Knob
6.
Thread
Ten
si
on
A
sse
mbly 12. Bobbin
Winder
A"
embly
18.
Ncmencloture
Plate
7.
Thread
Gu
i
de
2
BACK VIEW
19. Light
Switch
23.
Hand
Wheel
28.
Pre
sser
Foot
Lever
20.
Motor
Mount
i
ng
2
racket
24. Ur:per
Thread
Spool
Pins 29.
Needle
Clamp
Screw
and
Scre
w 25.
Buttcnhole
Reverse
Stitch
30
. Thre
ad
Cutter
21.
Three
Prong
Connector
Le
ng
th
Central
26. Arm
Cover
Plate
31.
Feed
Dogs
22
.
Clutch
Knob 27. Presser
Foot
Knob
32
.
Needl
e
Plate
3
0
...
TF:·
·,
~"
'
'~i2t
\
....
-
..
.
..
t - - -
!,;
-
INSTALLING
MACHINE
HEAD
IN
PORTABLE
AND
CABINET
Loosen
the
two
hinge screws
under
holes in the rear
edge
of
the
machine bed (1) . Raise
hing
e pins in
the
cutout
(2) . Slip machine head
onto
the pins and
tighten
hinge screws securely (3) .
Lower machine head
to
front flap.
La
y the plastic discs over the spool pin hole
on
the
arm cover plate. Screw pins in place. Discs and
ptns are packed in accessory box.
SEWING
LIGHT
The
sewing
light
is
placed inside
the
face cover plate
as
shown. It may be turned
on
.
or
off
by pushing
light switch.
To
change bulb, open the face cover plate
by
swing-
ing
it
open, twist
old
bulb away from you
and
remove.
Then
insert new bulb.
CONNECTING
MACHINE
Push
the
plug
onto
three prong connector over the
machine
motor.
Plug machine
cord
into any
11
0- 120V wall outlet.
When
installed in cabinet, insert
grommet
with cord
in hole in bedplate.
NEEDLE
AND
THREAD
TABLE
THREAD
SI
ZE
I
NEEDLE
I FABRiC
S
IZE
Cotton
80-100
Synthetic
Sheer
cottons
, sil
ks
,
and
synthetics
11
Silk A Fine
laces
Machine
embroidery
Cotton
60-80
Medium
weig
ht
co
tt
ons
Mercerized
50
Medium
weig
ht si
lk
s
Synthetic
14
Silk A M
ediu
m
weight
syot
hetics
Machine
embroidery
Li
ght
weight
woo
lens
Cotton
40-60
Heavy
weight
cottons
Mercerized
50
16 Medium to h
eavy
weight
woolens
Mercerized
h
eavy
dut
y
Heav
y
drap
ery
fabric
s
Cotton
30-50
Heaviest
cottons
as
for
m
en
's
work
clot
hes
Mercerized
heavy
duty
18
Heaviest
woolen
coatin;J
NEEDLE
SIZE
Use
KENMORE
602
1 needles.
The
s1ze
of
the needle
should
conform
co
the
size
of
the thread and
both
should
be suitable
to
the material.
The
same si
ze
thr
ead
sho
uld be used in the
bobb
in
as
on
the
upper part
of
the m
ac
hine for
ordin
ary sewing.
Never u
se
a bent needle
nor
one with a blunt point.
II
I
-
<::ZF
II
This
is
the
exac
t l
engt
h
of
the
ne
e
dle
to
be
used in
you
r
machine.
Comparison
wi th
this i
ll
ustration
will
determin
e
whether
the
needle
you
ha
ve
is
the
correct
one
for
your
machine
. 5
PLACEMENT
OF
NEEDLE
Raise needle bar
to
its highest
po
-
sition
by
turning
hand wheel
tow
ard
y
ou
. Loosen needle clamp screw.
Hold
the
needle
with
flat
side
away
from you.
Sl
ip
the
needle as far
as
it will
go
i
nto
the
needle
cl
a
mp
,
and
tighten
the
thumb
screw.
Flat
side
away
from
y
ou
.
Pull
b
obbin
case
....
straight
out
.
Pull
out
latch.
REMOVING
BOBBIN
CASE
FROM
SHUTTLE
1
6
0
Place thread
on
spool pose.
Draw thread as shown.
Wi
nd thread around bobbin a
few times. Place bobbin
onto
bobbin winder shaft.
Press bobbin winder lever
down
.
WINDING
THE
BOBBIN
l
7
Release clutch
by
turning
clutch knob coward you.
Start machine.
When
bobbin
is
fu
ll
, winding mechanism
scops autOmatically.
Bobbin winder thread
guide
is
adjustable.
If
bobbin
winds
as
illustrated, slightly
;'?};
mo
ve thread guide ro an
arrow direction ro correcc
this situation.
0
Tighten
clutch
knob
and
remove bobbin.
0
INSERTING
BOBBIN
INTO
BOBBIN
CASE
·········
CASE
INTO
SHUTTLE
0
Guide
bobbin
onto
center pin
of
bobbin case.
@ Pull thread
through
sl
ot.
8 Pull thread under tension spring.
f)
Holding
latch, position case into shu.ttle, release latch.
8
THREAO\NG
UPPER
MACHINE
9
PICKING
UP
BOBBIN
THREAD
Raise presser
foot
lever.
Hold
needle thread loosely m left '
hand
and rorate
hand wheel toward you one complete
turn
.
Bring bobbin thread up
by
pulling upper thread. (See
illustration) .
Place threads back under presser foot.
ADJUSTING
THE
~RESSURE
OF
THE
PRESSER
FOOT
Push
down
outer
ring
of
presser
foot
knob (See
illustration) .
This
will release pressure
of
presser
foor.
To
increase pressure, push down inner p
in
until suitable pressure
is
obtained.
For ordinary sewing, the inner pin
should
be about
half
way down.
When
sewing multiple thickness
or
heavy material, reduce the pressure. Increase it when
sewing sheer fabrics.
Insufficient pressure may cause skipped stitches
or
difficulty in
guiding
the fabric.
If
feed
dog
or
presser foot marks appear on the fabric, reduce the
pressure.
10
SETTING
STITCH
LENGTH
The
stitch regulator lever controls the stitch length. Set lever
to
any desired stitch length
position
between 0
and
4 by
turning
knob
clockwise until
the
knob
indicator is aligned with
the
stitch
length
number
desired.
The
red mark
opposite
S indicates the
setting for a satin stitch.
This
will vary slightly
depending
upon
the
type
of
material
to
be sewn.
At
No
. 4
the
longest stitch
is
obtained.
The
size
of
stitch you select will
depend
on
fabric you
are sewing.
To
lengthen stitch, turn the
knob
counter clockwise
until the lever can be lowered
to
the
position
desired.
To
straight
stitch, stitch width control
should
be set
on
0
setting
.
REVERSE
STITCHING
Raise lever for reverse stitching. Lower lever for forward stitching.
It
is
best
to
begin and
end
most
seams
with
reverse stitching
often
called back tacking.
BASTING
For accomplishing quicker, more even a
nd
firmer basting, we
suggest y
ou
regulate
the
machine in
the
following manner; Set
stitch regulator at
No
. 4 for
the
longest possible stitch. Basting
is
~as
ily
removed
by
pulling
bottom
thread.
When
basting very
sheer fabrics, use a paper backing.
;
'·
j
~'
'
i & "
'v:·
=:
~~
..
-·\
·
~
M
)
.
'''
'
h
\~
~
::;
!
,
,-_,
,''
FASTENING
A
SEAM
Be sure
both
threads are drawn back
under
the presser
foot. Lower needle
into
fabric
about
iinch from begin-
ning
'
of
seam. Push stitch length
co
ntrol lever
up
for
reverse stitching. Stitch in reverse until needle reaches
beginning
of
seam.
Move stitch length control lever
down
for forward
stitching
and
complete
seam.
When
you reach
the
end,
raise the stitch length control lever
and
sew back over
t inch
of
completed
seam.
11
0
Fig. 1
PROBLEM
Upper thread
too
tight
Fig. 2
8 Upper thread
too
loose
Fig. 3
ADJUSTING
TENSIONS
A perfect stitch will have threads locked between
the
two layers
of
fabric with
no
loops
on
top
or
bottom
.
(Refer
to
page 32)
REMEDY
;'
5
f
·;
I;'-
Dec
re
aSe
Tension
I,
Increase Tension •
~
5
12
When
sti
tching
is
unsatisfactOry as in
figures 2
and
3,
adjust
the
upper
thread
tension
. Lower
thread
tension
requires
adjustment
less frequently
than
the
upper
thread
tension
.
When
stitch is satisfactOry, as m
figure 1
and
seam is badly puckered,
the
cause may be
tight
tensions
and
both
upper
and l
ower
may
be
adjusted
.
(See page 32)
When
ad
j
usting
the
tension
on
the
bobbin
case,
make
sl
ight
adjustments
with
a screwdriver. (See page 32)
INCREASE
TENSION
DECREASE
TENSIO
N
13
Tu
rn Clockwise.
Turn
Counter
Clockwise.
INSERTING
AND
REMOVING
THE
MATERIAL
For all kinds
of
sewing, consult chart page 5.
Before placing the material
on
the
machine
see
that
:
*T
he presser foot and needle clamp screws
are both tight.
* The sizes
of
needle
and
thread suit the
kind
of
work
tO
be done.
*T
he needle
is
at its highest position.
*
The
ends
of
the
threads have been drawn
about 4 inches
to
the rear
of
the
machine.
*
The
feed dogs are up.
Place material under the presser foot, insert
the
needle into the material by
turning
the
hand
wheel coward you, lower presser
foot
and start sewing. Experiment by sewing
on
the
fabric
tO
be used
tO
determine tension
adjustment and correct stitch settings.
14
To
remove the work, first turn hand
wheel toward you until needle
is
at its
highest position, then raise
the
presser foot,
draw material
to
the rear and cut
off
excess
thread with the thread cutter located
on
the
presser bar.
To
avoid sewing
off
the
end
of
the
material, back tack each seam.
See page 11.
IMPORTANT
: Always turn the
hand
wheel
toward
you!
When
machine is
not
being
used, place a piece
of
material over the feed
dog
and lower the presser foot. Always
have fabric under the presser foot when
operating
the
machine. Operating thread
machine
without
fabric will cause it
to
jam
by forcing lint into
the
shuttle. See pages
28
&
29
.
CHANGING
THE
PRESSER
FOOT
The
various attachment feet available for certain kinds
of
work are ro be fastened ro the presser bar.
To
attach the foot, raise the presser bar ro its highest
position
by
raising the presser foot lever. Loosen the
presser foot
thumb
screw, choose
the
proper foot,
insert from the front.
Tighten
the
screw using the
large screw driver and make sure
that
the
foot
is
secure.
TURNING
A
CORNER
Stop sewing machine with
presser foot.
Turn
fabric.
continue stitching.
FEED
DOG
CONTROL
needle in fabric. Raise
Lower presser
foot
and
The
drop
feed control knob
is
situated
on
the
right
front
of
machine bedplate.
When
knob
is
turned
to
the
right, feed
dog
drops and does
not
pull material.
This
allows
the
operator freedom
of
movement
of
material, as for darning. For regular sewing,
turn
knob
ro the left.
15
~~-
·
=·--·
.,..,-~""""~-·~·····~=-·
·-
~-
·
--·-·~.-
--~~,....,._,.......,._.,.,"""_'
__
"'~'"",...,.,....
.....
.
ZIGZAG
CONTROL
SETTING
STITCH
WIDTH
Insert disc
~
1A.
Turn
the stitch
width
knob
to
the
desired
setting
between 0 and 4
on
the
knob
.
Zigzag
stitch
width
increases from 0
to
4. Straight
stitching
is possible only with control
on
0
setting
.
INSERTING
PATTERN
DISC
1. Pull
auto
matic stitch mechanism cover open.
2. Push cam follower release lever @
to
the
right
and
keep it there
during
insertion.
3.
Grasp
pattern disc and slip disc
onto
the shaft.
Make sure
the
retaining pin @ enters hole in disc.
4.
To
remove pattern disc, reverse the above procedure.
There
are
two
different patterns
on
each disc. A
picture
of
each pattern
is
on
the disc surface.
Position
disc
into
machine with desired pattern facing
up
.
16
lA
16
2A
26
3A
36
4A
46
5A
58 6A 66
7A
AUTOMATIC
DECORATIVE
STITCHING
This machine enables you to sew beautiful decorative and embroidery stitches by means
of
various discs
supp
lied with your machine.
The
movements
of
the
needle are automatically
controlled by the disc. Bas
ic
decorative stitches are made with stitch
widt
h
at
4 and stitch
length at the red mark opposite
S.
The
latter will vary slightly
derending
upon
the type
of
material
to
be sewn. Pattern will be changed
if
using any oth
er
length
or
width. All patterns
a
ls
o can be made with double needle. See page 25.
17
78
DARNING
WITH
PRESSER
FOOT:
1.
Turn
feed
dog
control
to
right.
2.
Press
down
outer ring
of
presser foot knob, see page 10.
With
presser foot knob in
this position, mending, darning, monogram work, etc. may be done.
3. Stretch fabric tightly between two spring embroidery hoops and place under needle.
4. Lower presser bar so thread will have some tension.
When
you start
to
darn, move
fabric back and forth
to
cover darning area.
Then
turn fabric and continue sewing at
right angles
to
the previous stitching. Use medium machine speed. You can make
any length stitches desired. Slow movement
of
fabric will make short darning·
stitches. Fast movement will make long stitches.
5.
When
you finish darning, raise presser foot and remove fabric. Increase pressure
for general sewing by pressing down inner pin '
of
the presser foot knob. Turn
feed
dog
control
to
left.
WITHOUT
PRESSER
FOOT
:
1.
Turn
feed
dog
control
to
ri
ght
.
2. Remove presser foot.
Proceed as directed under steps 3 and 4 above.
5.
When
you finish darning, raise
the
presser foot lever and remove fabric. Replace
presser foot, and increase pressure for general sewing.
Turn
feed
dog
control
to left.
18

Other manuals for 52

1

Other Kenmore Sewing Machine manuals

Kenmore 1351 User manual

Kenmore

Kenmore 1351 User manual

Kenmore 385.11608 Series User manual

Kenmore

Kenmore 385.11608 Series User manual

Kenmore 1560 User manual

Kenmore

Kenmore 1560 User manual

Kenmore 117.552 User manual

Kenmore

Kenmore 117.552 User manual

Kenmore 15 User manual

Kenmore

Kenmore 15 User manual

Kenmore 1521 User manual

Kenmore

Kenmore 1521 User manual

Kenmore 385.15212 Technical Document

Kenmore

Kenmore 385.15212 Technical Document

Kenmore 385.16764 User manual

Kenmore

Kenmore 385.16764 User manual

Kenmore 385.19606 User manual

Kenmore

Kenmore 385.19606 User manual

Kenmore 1347 User manual

Kenmore

Kenmore 1347 User manual

Kenmore 385.19365 User manual

Kenmore

Kenmore 385.19365 User manual

Kenmore 158.17560 User manual

Kenmore

Kenmore 158.17560 User manual

Kenmore 1218 User manual

Kenmore

Kenmore 1218 User manual

Kenmore 385.101118 User manual

Kenmore

Kenmore 385.101118 User manual

Kenmore 16 User manual

Kenmore

Kenmore 16 User manual

Kenmore 385.16231 User manual

Kenmore

Kenmore 385.16231 User manual

Kenmore 1252 User manual

Kenmore

Kenmore 1252 User manual

Kenmore 385 Series User manual

Kenmore

Kenmore 385 Series User manual

Kenmore 1336 User manual

Kenmore

Kenmore 1336 User manual

Kenmore 385.16765 User manual

Kenmore

Kenmore 385.16765 User manual

Kenmore 385.15208 User manual

Kenmore

Kenmore 385.15208 User manual

Kenmore 12332 User manual

Kenmore

Kenmore 12332 User manual

Kenmore 385.16221 User manual

Kenmore

Kenmore 385.16221 User manual

Kenmore Kenmore 385.18630 User manual

Kenmore

Kenmore Kenmore 385.18630 User manual

Popular Sewing Machine manuals by other brands

Universal De Luxe Zig Zag Instruction book

Universal

Universal De Luxe Zig Zag Instruction book

promelectroavtomat XL2120 Service manual

promelectroavtomat

promelectroavtomat XL2120 Service manual

Duerkopp Adler 275 instruction manual

Duerkopp Adler

Duerkopp Adler 275 instruction manual

Singer 241-1 parts list

Singer

Singer 241-1 parts list

Singer 457K parts list

Singer

Singer 457K parts list

Duerkopp Adler 961-16-2 Spare parts

Duerkopp Adler

Duerkopp Adler 961-16-2 Spare parts

Husqvarna HUSKYLOCK 400 Handbook

Husqvarna

Husqvarna HUSKYLOCK 400 Handbook

Beisler 1265-5 Spare parts

Beisler

Beisler 1265-5 Spare parts

Singer 8610 Instruction book

Singer

Singer 8610 Instruction book

Husqvarna Viking Viking Iris user guide

Husqvarna Viking

Husqvarna Viking Viking Iris user guide

Brother BE-0901E-AC Programming instructions

Brother

Brother BE-0901E-AC Programming instructions

Singer 821K70 Instructions for using and adjusting

Singer

Singer 821K70 Instructions for using and adjusting

Mitsubishi Electric PLK-J-CU-20S Technical manual

Mitsubishi Electric

Mitsubishi Electric PLK-J-CU-20S Technical manual

Singer 503 instructions

Singer

Singer 503 instructions

Duerkopp Adler 69-373 Service instructions

Duerkopp Adler

Duerkopp Adler 69-373 Service instructions

Brother BES-1240 Quick reference guide

Brother

Brother BES-1240 Quick reference guide

Pfaff 1216 Instruction book

Pfaff

Pfaff 1216 Instruction book

Brother DB2-B797 instruction manual

Brother

Brother DB2-B797 instruction manual

manuals.online logo
manuals.online logoBrands
  • About & Mission
  • Contact us
  • Privacy Policy
  • Terms and Conditions

Copyright 2025 Manuals.Online. All Rights Reserved.