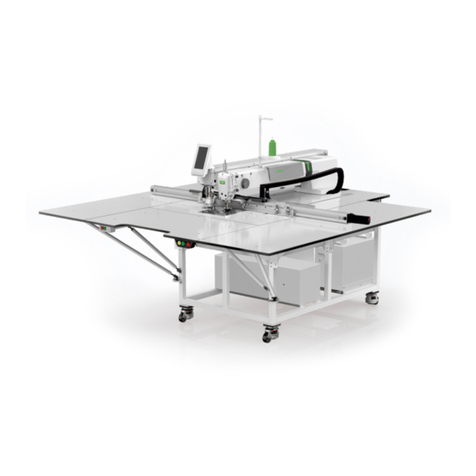
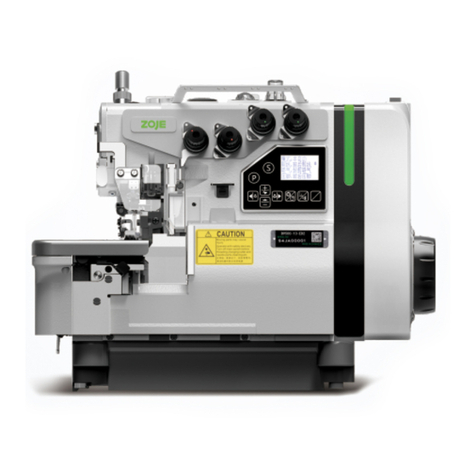
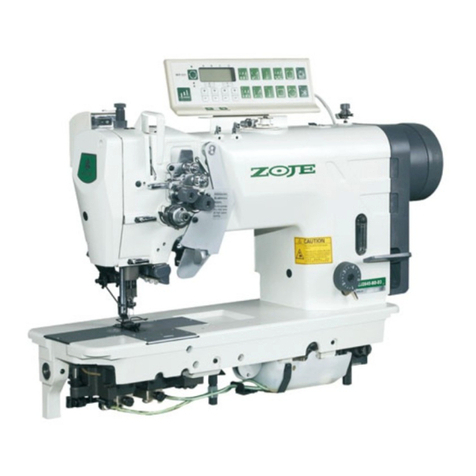
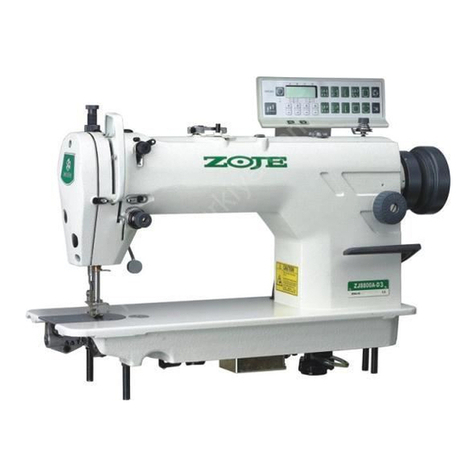
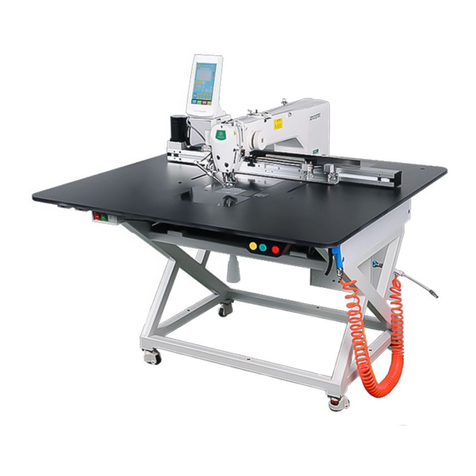
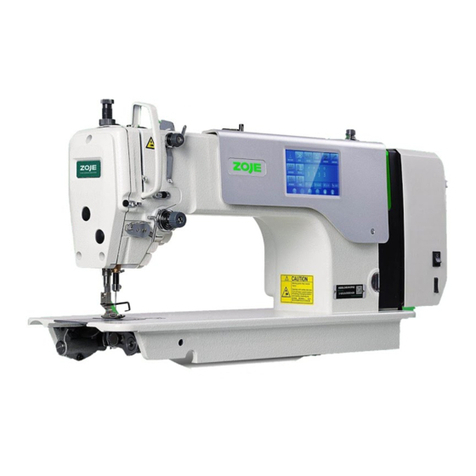
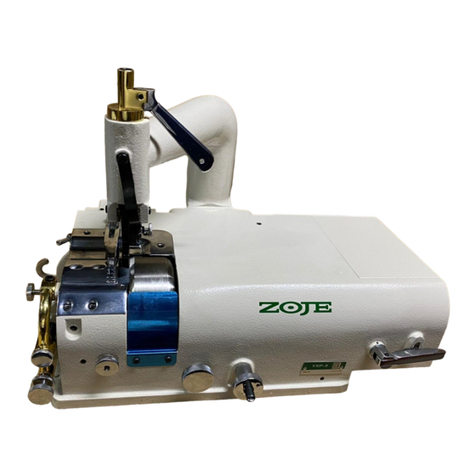
ZOJE ZJ9800 User manual

HIGH-SPEED
LOCKSTITCH
SEWING
MACHINE
ilJJ.Ii~B~~
•
itt=
-¥
•
OPERATION MANUAL
PARTS
BOOK
m
lil·mJI~illfliliRR~f~~~~~61
ZOJE
SEWING
MACHINE
CO.,
L
TO.
From the library of: Superior Sewing Machine & Supply LLC

~
$!i
~
~
]
tJL
Mtr
l't-J
'tl:
~
$
J9!
.................................................................. 1
1 .
±.
!}'jfi
/jt
~
~
'
~
~
........
.........
...
...................................
.
.............
2
2.
~
~
]
tJL
1¥-1
!};:
~
...........................................................
.........
..........
2
3.
4 .
5.
6.
7.
8.
9.
10.
11.
12 .
1
3.
14.
15 .
16 .
17 .
18
.
19.
20.
21.
22.
23 .
24 .
25.
26 .
27.
28 .
2
9.
30.
3
1.
Jll:z;t
J
:t~:fl·
~
1t
a
q~~
·········
·
··
···
.........
··
·
···
..
..................................···4
~~
a
~
!fi:
':l
···
...........................................................................
···
4
:1Jrt
'iEb
•••••••••••••••••.••.•......
...........•••••
•
••
•
••.....•.••••••••••••••••••••.•...........
5
~~
nb
k
i¥-J
i~~
··················································
· · ·
······················6
~~ff
i
S
nb
:li
(
nb~
)
aqi~
~
.ni*-
...................................................
···7
mtt
a9
!fi:
':l/1
~
·....·
..
·
..
·..·..·
..
·
..
·..·..·
..
·
..
·..·..·
..
·
..
··....·
..
·
..
·..·..·
..
·
..
··..9
~
~L
\
(
~~
~
~
ni*-········································································1o
t
r
~etr-J i
.J3
J
i1
............................................................
..
.
..
.............
1o
ffi
)Jt4J
ffi
1J
~
~
-;1"
•••••••••••••••••••••••••••••••••••••••••••••••••••••••••••••
••••
•
••
•
••
•10
iii~
l¥-1
~
~:1:1~
..
.........................................................................
11
~~
~
!lii~
/1
~
··
·
..
................
..
.
..
.
..
........................................
···12
-~*1J
1¥-Ji~~
........................................................................14
~k~
~
aqi~-;1"
••
••••••••••••••••••••••••
••
••
•••
••
••
••
••
•
••
•
••
••••••••••••••••
••
••••
••
•
··
·1
4
~li~f
F
~Ii~
.!l!
a
9
i
~i1
..................................................................16
:fJL
tt
f•
11:.
fli.
)!l
a9
~ ~
..
......................
..
........................................11
1!;1
~ ~
~
i:
J
~
nb
~ ~
!::§1
~
:tJn
..•
..
•
..
•
..
•
..
•
..
•..•..•..•..•..•..••..•....•..•..•..••....•18
~~
B-9
i~m
·························
·
············
·
··
·
··
·
··
· · ·
·
···············
··
··········I9
~
*
.&~
i"r=
··
·
··
·
··
·
·
·····
·
·······························
·
··
·
··
·
··
·
························l9
•
m~t
~
~
J1
~
tl
~
···········································································2t
~~
fl
:
·
························································
·
········
·
·················
2 2
m
fi
~
.1::§
1i~
a'9
*
~
···············
.........
···
..
.
..
.
......
..
..................
.
..
.
....
..
23
~
n
tr-J
fiJf
m
.1::§
5I!
~
.....................................................................24
~
JJ
~
~
J
JJ
1¥-Jiiff
£~
.............................................................25
~~~E
1¥-Ji..ffllm
•••
•
••••••••••••••••••••••••••••••••••••••••••••••••••••••
••••
•••
•
••
•
••••••
26
~
~
~
3if
l'fJ
~
Jj{
~
ft.m
*41l
...
....................................
..
..
..
..................27
~
i{fj
1¥-1
rPJ
~
•••••••••••••••••
•
••••••••••••••••••••••••••
•
••
•
••
•••
•••
•
••
•
••••••
•
•••••••••••
28
ft¥~
m
~
......
··················
··
·.........
······
······
··
·
··
·
··
·
...
·
··
·
··
·
··
·········
···29
~
::)J!ffi
~:tl:7t
.............................
..
.......
..
...................................30
fi
~
]tJLI¥-Jtf&
~
&
1.&11:
7±
~$J9!
.......................................
...............31
From the library of: Superior Sewing Machine & Supply LLC

CONTENTS
Befo
_re opera
ti
on····
··································
·······
······
··
······················
···1
1. Specifications
··········
·····
···
············
··
··
·················
··
···
·····
··············
···
2
2. l_nstallation·
··
···
···
···
···
···
···
···
···
···
···
···
···
···
···
···
···
···
···
···
···
···
···
···
···
···
···
2
3. Adjusting the h
eig
ht
of
the
knee
lifter-········
······
··
·
··
·
··
·········
·············
···
4
4. Installing the thread s
tand·
··
··
·
··
·
··
····
·······················
····
······
········
·
······
4
5. Lubricatio
n····
···········
···
··
······
···
·
····
·
···
···
··············
······
·······
···
·
······
···5
6. Ad
ju
sting the amount
of
oil in the hook
·················
····
···
··
···
·
··
···
·······
··
·6
7. Adjusting the amount
of
oil(
oil splas
he
s) in the hook······
····
····················?
8. Attach
in
g the needle
·····
·
······
··
············
···
···············
······················
···
9
9.
Sett
ing the bobbin
int
o the bobbin
case
"""
..............................
........
.10
10. Adjusting the stitch length
..................
.........
..
.
.....
................
......
..
.10
11.
Pre
sser foot pressu
re·····
····
···
·····
············
···
··
····
····
··· ·····
··
···
·····
······lO
12. Threading the machine head
........
....
.....................
...
..
.
.........
...
......
11
13. Winding
the
bobbin thread
..................
...
.......................................
12
14.
Th
read
ten
sio
n···················································
·····
·······
·······
·····
14
15.
Thr
ead
take-up spring
"·
..
.
..
.
..
..
...............................................
......
14
16. Adjusting
the
thread take-up stroke
.....
....
........
...
..
.....
.....................
16
17. Adjusting the needle stop position
...................................................
17
18.
Oil
ch
eak
and
ad
dition
"'"'"'
..............................
.....
.
.....
.
..
.
.....
.
..
.
oo
•1
8
19. Adjusting
of
the pedaJ
...........................................................
.
......
19
20. Pedal operat.ion
······
···
··
······· ···
············
··
··········
············
··················19
21. One-touch reverse stitching mechanism
................................
.......
......
21
22. W
ipe_t--
···············
·····················
···
············
···
···
······
···
·········
·········
···
22
23.
Needle-to-
h
ook
rel
at
ions
hip····
·····
···
·····
··················
··
·
···
··
······
·· ···
···2
3
24
. Change
of
counter
knife
.....
...
...
..
.......
.
........
.....
....
........................
24
25. Change
of
counter
knife and moving knife
...............
...
..
..........
......
...25
26. Adjustment
of
trimming system
..................
···
.....
....
........................
26
27 . H
eig
ht
and tilt
of
the feed dog...
...............
.......................................
27
28.
Adjusting
the
feed
timing·
........
...
...
...
....
..
..................
...
.............
....
.28
29.
Thread tension r
elease
relea
sing
mechanism
...........
.............
..
......
....
29
30 . Micro-lifting mechanism
of
the
pr
esse
r foot
"""
..............................
30
31
. Caution when
car
rying
or placing the sewing machine
..........
............
..
31
From the library of: Superior Sewing Machine & Supply LLC

~•=~T~~m•~·-~~~·~·••~~~~~0
>•-~•~mme~~·~•~•(IT~)
0
>
-ttm
zHtri#
-
~t:tnatt
.P1Jnna
0
>••~m•~mzHtr.Mremena~~o
>••~m•~~~~~~·*•Mo
>
i~
-~
lt!.ffi
ii
~j!
~
iE
7iffJ
0
>
iFf
7iffri-A
It
iiJlHi
ik
:.l!
~
iE
7iffJ
:it
ft
o
>~m••~~"·
•~~~-~m
.
>••~~~~*~~~~n~~NIE•o
>•~wre•~m~mm.
~~~~~-~~#o
>*•~•~•w•*••~~fra~mft~~**
·
~~.~fta~mM,i#IE•
~~~•~me~~Mn*~m**
·
BEFORE OPERATION
Caution: To avoid malfunction and damage
of
the machjne, confirm the following.
};>
Remove air-vent cap (red color) attached to the sewing machine bed.
};>
Be sure to pourin the oil before using.
};>
Before you put the machine into operation for the first time
after
the set-up , clean it
thoroughly.
};>
Remove all dust gathering during transportation and oil it well.
};>
Confirm that the voltage has been correctly set.
};>
Confirm that the power plug has been properly connected to the power supply.
};>
Never use the machine in the state where the voltage type is different from the designated
one.
};>
Confirm that the direction
of
rotation
of
the motorpulley is correct.
};>
Do
not tilt the sewing machine head toward this side since oil leakage
or
parts breakage
occurs.
A safety switch is installed so
that
the sewing machine cannot
be
operated with the head
tilted. When operation the sewing machine, turn On the power switch after properly setting the head
on the table.
- 1 -
From the library of: Superior Sewing Machine & Supply LLC

Jtl~
iWf4
J!):f
~
l&i'ili~:ii
5000rpm 4000rpm
f&::kttie Smm
i!f~HJ
Ut
DB X 1
9#-18#
DP
X5
16#
-
18#
~tlt18mm
(~(ft)
JJiJII;IljQj~
111tm:
15mm (-Ji);:)
i~JH
~JL
»1:1
z1
1
·
~-
m
nn
it
Jlf
Ft!
*JL
500W
1. Specifications
Application
Thin-medium
material
H
eavy
material
Sewing speed 5000rpm 4000rpm
Stitch length
Ma
x5mm
Needle DB X 1
9#-18#
DPX5
16
#-
18#
Pr
esser foot lift By hand lifter
18
mm
(standard)
By knee lifter 15mm (max.)
Oil ZJ IH
Rated power
so
ow
2.
~~Jmt¥J~~
Installation
Litl:l./lt~~
1)
ntre.t
:It<
ft
1£
a
:t&
J:
atH!!l
.fltm
1ft
J:,
2)~R~~~~
~
Jtl~~~fl
®
~~~A-~
(
~~~~
-
~
),
~~R~~~~
®
m~~
~n
®
~~~B
- ~
<
~•~~~~~~
- ~
)
~Fo:tt<J:~a
®
,
3)
•~••J:~:It<
~~®o
(
m~m~H,a-~re:Jt<~m
®
~J:)
- 2 -
From the library of: Superior Sewing Machine & Supply LLC

0
4)
:I~HJL
~
:itf
f&
fZ.J
®
:Jili
A
m;
tlHili
:fL
P-1
,
.!:§
€?
~
~m~:itf-~
&®a&
~wrem~•~~
till9
.R]M
~tJL~&m
Q)J:o
~•:~-~~~-~-
~~
ft•wm.a
~~~M
i
tH
~~<D~tf.lo
1. I
nstalling
the
oil
pan:
1)
The
oi
l pan s
hould
re
st on the
four
corners
of
the
mac
hin
e
table
groove;
2)
Two rubber s
eat
s
CD
for
support
ing the head
portion
on
the
operator
si
de ® are
fixe
d
on the extended portion
of
the table by hitting
the nails Q), and the other two rubber cushion
se
at
s
Q)
on
the
hinged
side ®
are
fixed by
u
sing
a
rubber
-b
ase
d
adhesive.
T
hen,
oil
pan
@)
is
placed;
3)
R
emove
air
vent
cap
~
attache
d
to
the
mach
ine
bed. (
Be
su
re
to
attach
cap
when
transporting
t
he
machine
h
ead
in
the
state
that
the
machine
he
ad is removed from the
machine
table.)
4)
Fit
hinge ® into the opening in the machine
bed, and fit the machine head to table rubber
hin
ge
®bef
ore
plac
in
g
the
machine
h
ead
on
cushion
s
Q)
on
the
four
corners.
Cau
tion:
If
the
sewing
machine
is
operated
without
removin
g
air
vent
cap
~
.
oil
leaka
ge
from
gearbox
port
ion
d)
may
occur.
-
3-
From the library of: Superior Sewing Machine & Supply LLC

3.
JWi;JJi~Jl::ff-jl'~Ji:(J'1iJ.';J~
Adjusting the height
of
the knee lifter
.&.
f£:lJ.
,
1>HJill:iJ!!
J
JIJL(l'.J
:ll:~
r<i:
iii
J.
i
l1
1d>:iot!
ii!/.Z.JiiJ!iili'I
H\l
fF
.
~
Warning:
Thrn
OFF
the
power
before
starting
the
work
so as
to
prevent
accidents
~
caused
by
abrupt
start
of
the sewing machine.
4.
~?>f!IY-J"tif11&
Installing the
thread
stand
I.
!I!I!H.lnt(l'.Jlii~
t
lli~i\l;IJ
U€
10
~*'
2.
!I!I!Utii!J
l\'ll!!!trCD
llJI;.(
ii!Ji'illi
~
t:
H
r
liliil-*"'"'
1s**,
lt.fr.,
~lli~!IHhllltll
D/Glltllt
,
ill'l;'l'iit~iJ!!JJ~
L.
IN1J\tlf0
'lffi~
())
~lillil!.
1. The standard height of
th
e presser
foot
lift
ed
us
in
g the knee
lift
er
is IOmm.
2.
You
ca
n
adju
st the
pr
esse
r
foot
lift
up
to 15mm using knee lifter
adjust screw
CD.
Caution: Do not operate
th
e sewing
ma
chine s
tate
that
the
pre
sser
foot
@is
lifter
IOmrn or more si nce the
n
ee
dle b
ar
(1)
in
con
tact
with
the
pr
esser
foot Q).
I.
•oo•
~
·lf··~··iJ!!JJIJL8.R
J:
.
2.
!llllii1EI:!!Jlt
CD
iiii1EB!.I\!.
3.
••~•M.
mre•••Ma•w
(l)
•
~
u
.
I.
Assemble the
th
read sta
nd
unit, and insert
it in
the
ho
le in
th
e mac
hine
tab
le.
2.
Tighten locknut
CD
to fix the thread stand.
3 .
For
cei
ling
wiring,
pass the p
ower
co
rd
through s
pool
r
es
t
rod
Q).
-4-
From the library of: Superior Sewing Machine & Supply LLC

5.
:bnifll
Lubrication
&
t:t:
~
:
t:J
T
l!lLtl:
~~]mat~
~)'~t9
~),
TR
:
¥dlji
It!
i1Jj{
zm
¥I*
rr
11
~
0
Warning: Turn
OFF
the power before starting the work
so
as to prevent
accidents
caused
by
abrupt
start
of
the sewing machine.
~~~~JH
JLZ.M,
ti\f-~tttifE~
nil
m
9='
1Ju
nil
1.
t~J.iH3HJL1Vti~,
#st¥IHJL*x
:};ff
J:
0
2.
ffll
r
1Jn
nil
o
at~
~
<D
,
1~
.m
llfHW
f81Ju
nil
{i£
1Ju
A
ZJ
1-5
;j:JL
nil
o
3 .
i~He
nil1Jn
m
¥lh1t
:m
®
at~
~IJ
~
111:
it
0
TR
11
!.lf.
1Ju
nilli
~
at~
-m
,
:YL
M~.JAilBM~-9.1L~
lli*,
-I1L
~
1st
~
~
1m
IE
'ffi'
1JU
ilB
at~~~
o
4.
~m~~JHJLar,
:!ln.*M
:!if
~
iF
ff
®
m¥1JM:IH~7Fm
®
at~r~u
~l
LV-
r ,
iW
:tlHr
nn
M0
¥£~:
1.
-tt
.m
Wr
~~31m
Wt~
-
~at
1iiJ
¥5t
;;g
~m
a~~~JJ;j:JLBf,
TR9CJH:rr3ooo
-
3soo~t7titP
f8ll-€1
~~z.
m¥I1~.m
0
Fill
the
oil
tank
with
oil
for
hook
lubric
ation
before
the
sewing
machine.
1)
Tilt
th
e
machine
b
ea
d
until
it
com
es
in
contact
with
the
head
support
rod.
2)
Remove
oil hole
cap
<D
and
fill
the
oil
tank
with
ZJ
No
.1
us
in
g
the
oiler
s
upplied
with
the
machin
e.
3)
The
amount
of
oil
s
hould
reach up
to
the engraved
marker
line
of
oil
tank
®.
If
the
oil
is filled excessively,
it
will
leak
f
rom
the
air
vent
hole
in
the
oil
tank
or
prop
er
lubrication
w
ill
be
not
performed
.
So
, be careful.
4)
When
you
operate
the
sewin
g machine, r
ef
ill
oil
if
the top end
of
oil
amount
ind
icating
rod®comes down
to
the lower engraved marker
line
of
oil amount
indicating
rod
comes
down to the
lower
engraved
marker
lin
e
of
oil amount
indicating
window®.
-
5-
From the library of: Superior Sewing Machine & Supply LLC

(Caution) J.when )tOu use a
new
sewing machine or a sewing m
ac
hine
after
an
ex
tended
period
uf
disuse. run
your
machine
at
J,OOO
to
3.5
00rp
rn
for tltc
purp<>Se
of
b
reak
-
in
2. Do not remove rut>bcr plng(i)
6.
••
M
hl
~
~•c•
m
~~~m
M
~M~)
Adjusting the amount
of
oil in
the
hook
&
t±:Gl:,
hniJi.ll~H1J=l1
l
t'tJ:Q:~
I
·~
·~I.
iti*W
r
!J.~l
~Jti
t
t}:liH
:i
l
~ft
.
A Warning: Turn OFF t
he
power
before
st
ar
ting
the work
•o
as to
pr
evcn)
accidents
~
caus
ed
by
abrupt start
uf
the
sewi
ng
ma
ch
ine
.
~
#Hhi,
l/
11
&i!l'l1
;\It
ilk
i.I~
-
W!ll!{
'H
<D
:il~
i
l
',
J
•,•;.
I .
~I
]
\'i
fit}
;:
ti
·
~
('"'
:t
H~iJI)
h!E./11
iilt
Ji'(
ulfri~
uma.
•~•aw•.w•
<~
~•
l;IJ)
~~hh.r.tW1>.
(iU!)
J.
~l;!
iJ
~
ilh,.H
iHJJllla!lll
RP
II!#I
(
-f
A':JE
Ill
)
ll·
t.
lt1
·
It
fl!M~illfUi~'''.
;r-iJ:
m.
ilh
i't
Ill.
2. 1
\Cm
RP
I;dl1
(
T-1-:l
r.i
~)
11
1'
. ·
l!!.
·
>k.-f;
f,t
JB:flt
~lrh'Ht~
l1h
IJH:i.
Adj
us
tment
of
the nmu
unL
of
oil
in
th
e h
onk
is perf'ol'mc.d with
oiJ
amount
ncljus
Lm
c.
nL
SC
I
'C
\\.' :I)
I . Adjusunenl
procedure
Tig
h1
cn (I
urn
cloc
kwise
) o
il
amo
unl
adjus
1ment sc•·ew (I) to i
ncrease
the
amou
nl
uf
oil
in the hook,
or
l
oo•c
n (
turn
countercl
oc
kwis
e)
10
decr
e
as
e
il
.
(C
nulion)
I.
When using
RP
ho
ok
(hook fur dry
he
ad)
fo•·
t
he
SS
1ype, be sure to loo
sen
the
HiI amo
un
t adjustment screw
up
to the minimum
so
as
to
reduce the oil
amounL
in the hook.
2.
Never
drain
1he oil
in
the oil
lank
even when
RP
hook (
hook
for dry hcad)
is
us
ed.
-
6-
From the library of: Superior Sewing Machine & Supply LLC

7.
Mf~t.iHrb
-§i
(
ftb~)
IY-Jim1~1Jl!
Adjusting the amount
of
oil
(oil splashes) in the hook
Warning:
Be
extremely
carefu
l
about
the
opera
ti
on
of
the
machine
since
the
am
ount
of
oil
ha
s
to
be
checked
by
turning
the
hook
at
a hi
gh
speed.
<D
Amount
of
oil(oil splashes) confirmation paper
<D
i!IIA(iflli1t)~i-A1t.lfl~lt
E
E
U[
l I
11...-
-------!
1
Q) Position to confirm
th
e amount
of
oil(oil aplashes)
Q>
ilb:ll
Ulbi2E>
~i-Aitl
.
~:k
H
ook
driving shaftfront
~!
J;
h~~
~e~
1 2 ,
cr
~
(')
(')
-
'---
I
Approx.70
mm
70m
m
liti
Oil splashes confirmation paper cl
ose
ly
lit
the
paper
• Use any paper available regardless
of
the material.
*
;r-m~.tt~tt-.Jm•
.
1.
~
li1
(
~
)
Tiff
J
iA
15
'lt
;drit!.i.A:1Hfl~
against
the
waU
surface of
the
bed.
TJiJI
J
M(J()!lliJii
• Place the amount
of
oil (oil splashes)
co
paperunderthe hook.
*teidlil
U!Bil!l
.i.A.'lt
Jll~fifiitJMEUll'im.
:itHi
r
~r
j
2)
~1'-J
~~
I
t-
t
,
iff
fiji
r
i1f
:f1i
,
1m
at~
1f.
?t
11:
~=f.
j~
=l~
*
~~
!l
j
ME~
o
I)
;ti
L
~
It
~
I
P·
l',
~:itt
fj
3
?t
itjl
1C
;{J
tf.J
~
~
o (
~
~
tf.J
1
~11
ijX
:i6
~)
o
2)
~a~wm~~at•~•(M~)•~~m•MA
o
3)
r~ffri-A
iw
f\'~
r
t•
:f€
~ ~ Mo
4)
nil
iil
U\:1!
~
)
Tdfri-A
at
fij]
T:J
5fyo
1.
H
ow
to
confirm
the
amount
of
oil
(o
il
sp
la
s
he
s)
Wh
en
carry
ing
out
the
procedure
described
below
in 2, rem
ove
the
s
lid
e pl
ate
and
take
extreme
caution
not
to allow
your
fingers
to
come
in
contact
with
the
hook.
1) If t
he
machine
has
not
been
s
ufficiently
warmed
up
for
opera
ti
on
,
make
the
machine
run
i
dl
e
for
approximate
ly
three
minutes.
(M
ode
rat
e
intermittent
operat
i
on)
2) Pl
ace
the
amo
unt
of
oil (oil
splashes)
confirmation
paper
under
the hook while
the
sewing
machine
is in op
erat
ion.
-7-
From the library of: Superior Sewing Machine & Supply LLC

3) Confirm
that
oil
exists in
the
oil tank.
4) Confirmation
of
the amount
of
oil should be completed in five seconds. (Check the period
of
time
with a
watch.)
Splashes
of
oil
from
the
hook
J..A.:tE~~~tfj
*Wlidl
/
!W
' '
: :
' '
' '
Approprtato
amount
of
oil(small)
)Jb
fi'i
~~
(Jj\)
~*il-
-
<j:o}!j(:jsj.
,
0.5
- l
mm
J!1*il-: 1-
3mm
thin
an
d
med
i
um
mat
eri
al
:0.5 to Imm
heavy weilht
ma
terial: I
to
3mm
Sp
l
ashes
of
oil
from
the
hook
JAME~~~Iil
*Wlidl
~
:
'
'
/
Approprtato
amount
of
oil(large)
)Jbi!;~~
(;k)
alf;
t-
•t•J!l!:f;t,
1-
l.Smm
J
~
*il-:
2-
4mrn
thin
an
d
medium
m
at
eria
l:
I
10
I
.Smm
heavy weit
htma
terial:
2to
4nun
sewing
product
may
be
sta
ined
with
oil.)
1
)tc
oo
t;-r-~m
:~m~
ifjfJ
-t~~
~ ~
-VIt~~~'
f
fl.tt~
it~:::f'ffg
U:koni:J
.fl
~d>IJrt,~lt~
~
ff-
WE
ttL
im
it
:i:t
~
1Ft
, ~
fj
~~.Mo
2)
ilb
it
(
ilB
~
)
Ell
1iffriA
3
(X~
7C
~1-t:IJRJ
0
2.
Sample
s
howing
the
appropriate
amount
of
oil
1)
Th
e
amount
of
oil
shown
in
the
samp
le
s
on
the
left
s
hould
be
finely
adjusted
in
accor
dance
with
sewing
proc
esses.
Be
careful
not
to
excessively
increase/
decrea
se
t
he
amount
of
oil
in
the
hook.
(if
the
amount
of
oil is too small, the hook
will
be
seized
(t
he
hook
will
be hot).
If
the
amount
of
oil
is
too
much,
the
2)
Adju
st
the
amount
of
oil
in
the
hook
so
that
th
e
oil
amount
(oil
s
pla
sh
es
) s
hould
not
change
while
checking
the
oil
amount
three
times
(on
the
three
s
heets
of
paper
).
-8-
From the library of: Superior Sewing Machine & Supply LLC

8.
lJL
*tf.J
~~Jj
r!
Attaching the needle
Warnin
g:
Turn
OF
F
the
power
before
s
tarting
th
e
work
so as
to
prevent
acc
ide
nt
s
caused
by
abrupt
s
tart
of
th
e
se
wing
m
ac
hin
e.
i~i!l!JffDBx
I
!!X:
DP
xSJ'f.JtJUt
o
i#;fllm~a~*JHHI,
;{Jlfi.fl~~~~~ft~
~
a'~tJLH
o
1.
~i;JJ
=f
~,
tE
Hff7!-~
IJ:lti
r~
2.
:JY
t~
-tJL
~t
IE
:iE
u~
n
<6J
•
=v-
*
tJL
H
tE
tJ
L
~
I·
<D
1!!1
t5
B®
~
rl:iJ
!ffl
flj
®
I¥J
15
,.,
J0
3.
retJLtf
·
M~J
~
t
·
tr:fL(J'g1~~
-
4.
:fi'
~
fJL
~
lili
l
:;E
Ul
t
.r
a:>
s.
rdfJ
iA
~
1·
((~
*:
:fL
©
:££
.li:
~
!RJ
@1¥]
:11
lnJ
0
it~:
~
ffl
*:
i~
tJL~B·
t
,
"!ell
*t1LH
1!!1
$.f}I
!RJ
flu
15,
~
~
~
~
~~7f'fj~
Wtlfi~
~m!~
o
Rm~•m~~.
mremHMm!RJ~~~~•.
-~~
«-
~M~~®••
·
A
needl
e
of
DBxl
or
0P
x5
sho
uld
be
u
sed.
Sel
ect
a
proper
nee
dle
size a
cco
rding
to
the
count
of
th
read and the type
of
material used.
I . Turn
th
e
hand-whee
l until the n
eed
le
bar
r
eaches
the highest point
of
its
st
roke.
2.
Loo
se
n screw (6), and hold needle Q) with
it
s indented
part
® facing
exact
ly to the right
in dir
ect
ion
@.
3 . Insert the needle fully into
the
hole
in
the
needle
bar
in
th
e direction
of
the
arrow until
the end
of
hole is reached.
4 .
Securely
ti
ghten
sc
rew
(6)
.
5.
Ch
eck
that
long gr
oove
©
of
the
needle
is facing
exact
ly to
th
e l
eft
in
direction
@.
C
aution:
When filament
thread
is used,
if
the
ind
ented
part
of
the needle is tilted towa
rd
operator's side, the l
oo
p
of
thread becomes unstable, As a result, hangnail
of
thread
or
thread
breakage
may
occur
.
For
the
th
read
that such phenomenon is
likely
to
occur,
it is
effective
to
attach
the
ne
edle with
it
s
indented
part
slig
htl
y s
lanting
on the re
ar
side.
-9-
From the library of: Superior Sewing Machine & Supply LLC

9.
~JL'ff.J:t(~JJ¥*
Setting
the
bobbin
into
the
bobbin
case
1.
¥-t~·C.\~A.~JFF-1*1;
2.~~M~~~~~~®~~li.
~®n~~lli
o
:i!t-f,
~:ilii:i:1*~•-rM~1L®~sllli;
3.m•~©"·•~
m
••~n~ft~o
1.
In
sta
ll
the
bobbin in the
bobbin
case
so
that
t
he
thread wound
direction
is
clockwise.
2.
P
ass
the
thread
through
thread
sl
it
®,
and
pull
the thread in
direction
®.
By
so
doing
, the thread
will
pa
ss
under
the
tension
spring
and
come
out
from notch
@.
3.
Check
that
the
bobbin rotates in the
direction
of
the arrow when thread © is
pulled.
10.
li-~eEI9iPfP
Adjusting
the
stitch
length
1.
•mMm•m
ro
•n~n~ft~.•¥~••*~•m~~~~A®;
2.
•m~~~~•
*
•~m~*~~~
3.
~---~~*~·
re••••
®
~•~n~ffir~~"·
ft~mMm•mo
1. Turn stitch length dial
00
in the direction
of
the arrow, and align the desired number
to
marker
dot
® on the
machine
arm.
2.
The
dial
calibration
is in millimeters.
3.
When
you
want
to
decrea
se
the
stitch
l
ength
,
turn
s
titch
l
ength
di
al
ro
while
pressing
feed
l
ever
® in
the
direction
of
the
arrow.
11.
ffi
JJ!P
ffi.1J
tl9ili'3il
Presser
foot
pressure
&
1±
~
:
~
7
~
J.l:.
;.]]
fJL
~
~
:9Ht~
i;IJ
,
ilt
*Wit
tuit
zm
~:itt
fJ
~
1'F
o
A
Warning:
T
urn
OFF
the
powe
r
before
s
tarting
the
work
so
as
to
prevent
acciden
ts
caused
by
abrupt
start
of
the
sew
ing
machine.
-
10-
From the library of: Superior Sewing Machine & Supply LLC

1.
ME
t'k~
.ffi
•
-at
®.lllflt
tt
(
ep
A:n
riiJ
>
$t~.ffijJ
-~"'WtJltJ
t
.ffi1J~jft~
I
2.~1flttt
(~B~riiJ)
$t~ffi1JW.
"'WtJltJ
t
.ffijJ~Jljj
I
3.
W"'W
.1511E~i"f.ffiMtHi
®
I
4.
~
-
tim*4ifii
"B"
.
HiWiii"'Wt~tr~~
$11Jlt~32
-
34•*
(4.5Kg)
o
1.
Loosen
nut
a>.
As
you
turn
presser
spring regulator
<D
clockwise(in direction A),
the
presser foot pressure will be increased.
2. As you turn the presser spring regulator counterclockwise(in direction B), the pressure
will be decreased.
3. After adjustment, tighten
nut~.
4. For general fabrics, the standard height
of
the presser spring regulator is 32 to 34mm(4.5kg).
12.
ifiitl~tl~:1i~
Threading
the
machine
head
Warning:
Thm
OFF the power before starting the work so as to prevent accidents caused
by abrupt start
of
the sewing machine.
-
11
-
From the library of: Superior Sewing Machine & Supply LLC

A
~
~
t
~~
~
777777777?dtlr''77777"
B
:
)~S-----...-~~~
W
:n~,
r&JE.flJ~M~l;n®.
®:ntn:~
~Y.
®~~~~
.
6.
~-~~••••~M.
•w~••
®.~
~·~*~~.
~·~*~·
Q)~·ll
:
>
••~~~~*~•~~••-w"~fi•tt•;
>~···~"·
~~00®~~-~~*~-~tt•
.
~-··~~.
~~00®~~
8~~ij*~ft<V
~~ttll.
••~-~~&•m.m~~•n®~•
;
7.
~·~~~~*~"
·
~~~~*~·~®*fi~··
11~
:
1.
•••~"·•a•~~~*~acvzoo~~~~~*~•~.
2.
~ana~"~-~~~~"'
Mffl~~MM·ff~~R~~W*,
re•~M··~
~
~
*mf!J:il!:rr.
-
12-
From the library of: Superior Sewing Machine & Supply LLC

1)
Insert
the
bobbin
deep
into
the
bobbin
winder
spindle
CD
until
it
will
go
no further.
2)
P
as
s
the
bobbin
thread
pulled
out
from
the
spool
rested
on
the
right
s
ide
of
the
thread
stand
following
the
orde
r
as
shown
in
the
figure
on
the
left.
Th
en,
wind
clockw
i
se
the
end
of
the
bobbin
thread
on
the
bobbin
several
times.
(In
case
of
the
aluminum
bobbin,
after
winding
clockwise
the
end
of
the
bobbin
thread
, wind
counterclockwise
the
thre
ad
coming
from the bobbin thread tension several times to wind
the
bobbin thread with
ease.)
3)
Pre
ss
the
bobbin
winde
r trip
latch
Q)
in
the
dire
ction
of@
and s
tart
the
sewing
machine.
The
bobb
in r
otates
in
the
direction
of
C
and
the
bobbin
thread
is
wound
up.
The
bobbin
win
der
spindle
CD
au
tomati
ca
lly
as
soon
as
the
winding
is finish
ed
.
4)
Rem
ove
the
bobb
in
and
cut
the
bobbin
t
hr
ead
with
the
thread
cut
reta
iner
Q)
.
5)
To
adjust
the
winding
a
mount
of
the
bobbin
thr
ead,
l
oose
n
the
setsc
r
ew
®
and
move
the
bobbi
n win
der
adjusti
ng
pl
ate
~
to
the
dir
ec
tion
of®
or
@.
Th
en,
tighten
the
setsc
rew
®.
To
the
direc
tion
of®:
De
cre
ase;
to
the
direction
of
@ : Incr
ease.
6)
In
case
that
the
bobbin
thread
is
not
wound
eve
nly
on
the
bobbin
, l
oosen
the
nut
®
and
turn
the
bobbin
thr
ead
tension
to adju
st
the
hei
gh
t
of
the
t
hr
ead
ten
si
on
disk
([)
.
);>
It
is
the
s
tandard
that
the
cente
r
of
the
bobbin
is
as hi
gh
as
the
center
of
the
thread
ten
s
ion
disk.
);>
M
ove
the
positi
on
of
the
thread
tension
di
sk
([)
to
the
direction
of®
as
s
hown
in the
figure
on
the
l
eft
when
the
windi
ng
amou
nt of
the
bobbin
thr
ea
d
on
the
lo
wer
part
of t
he
bobbin
is
excessive
and
to
the
direction
of®
as
shown
in
the
figure
on
the
l
eft
when
the
winding
amount
of
the
bo
bbin
t
hr
ead
on
the
upper
part
of
the
bobbin
is
excess
ive.
After
the
adjustment,
tighten
the
nut
®.
7)
To
adjust
the
tension
of
the
bobb
in
winder,
turn
the
thread
tension
nut
®.
Caution:
1.
when
winding
the
bobbin
th
rea
d,
start
the
winding
in
the
sta
te
that
the
thread
between
the
bobbin
and
thread
tensio
n
disk
([)
is
ten
se
.
2.
Wh
en
winding
the
bobbin
thread
in
the
state
that
wing
is
not
pe
r
formed,
remove
the
needle
th
r
ead
from
the
thr
ead
path
of
thread
take-up
and
remove
the
bobbin
from
the
hook.
-
13-
From the library of: Superior Sewing Machine & Supply LLC

14.
~tt~*il
f.riPd
~
Thread tension
1.
ffii~5~1J
frtl~~
1)
fB!ii~*jJ~~HJ:CDJIID'i"#~~
<®:1JM)~i;JJ,
ffii~fi9*1J~
2)
fBffii~5~1J~~HJ:CD~at~i
-
~M
(®nrRJ)
!ffl•.
oo~~*JJ
~j};
3)
fB~*JJ!t~HJ:<bl~~©~~ft
• '
ffii~5*1J~~!il;
4)
fB~*JJ!t~HJ:<bl~ti:©~~~
'i;IJ,
ffii~S~1J~jjo
2.
Ji\H.H~
:1J
U9
iJijJ
~
l)ffl~*:1J~U®~~®~~~ft-.
-~*:1J~-;
2)
rf'iJ
tc®
f8
:17
rf'iJ
R~
9!IJ
~
mi
o
1.
Adjusting
the
needle
thread
tension
1) As you turn
thread
tension
nut
CD
clockwise
(in
direction
@),
the
thread
remaining
on
the
needle
after
thread
trimming
will
be
shorter.
2) As you turn
nut
CD
counterclockwise
(in
direction
@
),
the thread
length
will be longer.
3) As you turn thread
tension
nut
Q)
clockwise
(in
direction
©),
the
needle
thread
tension
will be increased.
4)
As you turn
nut
Q)
counterclockwise
(in
direction
@)
,
the
need
le thread
tension
will be
decreased
.
2.
Adjusting
the
bobbin
thread
tension
1) AS
you
turn
tension
adjust
screw
®
clockwise
(in
direction@),
the
bobbin
thread
tension will be increased.
2)
As
you
turn
screw
®
counterclockw
i
se
(in
direction
®).
the
bobbin
thread
ten
s
ion
will be decreased.
15.
~~
ttit
f.riPd
il
Thread take-up s
pring
1.
~E~
..
fl!~ilfrtliJJil:
1)
hiE
f'~
~
1fr
~ u
Q)
;
2)W~~~u®amM~:n~
(~®:n~)R•"·
•~•frtl•~:~t•~*'
-14-
From the library of: Superior Sewing Machine & Supply LLC

(f!
ll
®!JriiJ)
~~JA
·t,
1!l~~
.
H~a~*:h~:ll:-.k
;
3)
re~~
.
u~-:n
<»
~~lf1#1511lJ
(
E!IJ
@
1J
[Rl
)
~
i;IJ
lf1
,
1!}~
~
Wfl'ttl~~ftt~~/j\0
2.
1!J~~~~Il:1J
~~i'i:
I )
MEt~
1E
1ft
tm
!fl
a>
,
~
ti:PJ~
~
~
~
(ID
ftf:
) 1
2)
mt
.r~
~ m
~
n® •
1=t
~
7;tJ
~
~U
l!~j
Q)
I
3)
t~
~
~JH~aT
<»
~
!®i
1t1
ft
11
lllJ
4)
t~
~ ~
ij{
n
<»
!:vJ
~
1t-t
H
11
lllJ
(
f!P
®
11
lllJ
)
~
J9
Jif1
,
1!l~
~ ~
(t1
ryll:
:1J
:m
-
~!X
/J,o
~~
.
m•~wrm.m~m~
s
w•~•o
R~a~~*•~aMdMa~a~~t.t.
71
'
IT:i
~
m
¥r
:ilHr
iflll
~
o
X
•
~~~I¥Ji71l::t.Ju~m,
r.JT~
i;IJ1'J:~tfl~M
8titmlli*
•
Wh
en
th
e
thre
ad
take-up
spring
moves
up
to
midway
,
thread
is
fed
out
from
8
since
the
tens
ion
of
the
thread
take
-
up
sp
r
ing
is
high
.
0
•
1!J~~
m-
}[i;I
J1t=f!J/&.f§
•
Th
e
thread
take-up
spring
works
up
to
the
last
.
•~•i1oi~~~~~~11~:•~•~•~&1J~•Mm.
mw~~®n~~w
.
~
•~•s~•~a~m•~nm~®~••~i;IJ.••~•~•~ffi1J
o
1.
Changing
the s
troke
of
thread
take
-
up
spring
1)
Loosen
se
t
sc
rew
a>
.
2)
As
you
turn
ten
sio
n
po
st
Q)
clockwise(in
direction
@
),t
he
s
troke
of
the
thread
take
-up
spr
in
g will
be
increa
se
d.
3)
As you turn tension post
Q)
counterclockwise(in direction @
),
the stroke will
be
decreased.]
2.
Changing
the
pressure
of
thread
take
-
up
s
pring
<D
1) L
oosen
se
t
sc
r
ew
a>,
and
remove
thread
ten
s
ion
~
.
2)
L
oose
n
setsc
r
ew
@)
.
3)
As
you
turn
ten
sion
po
st
Q)
clockwise(in
direction@)
,
the
pre
ss
ur
e will
be
increased.
-
15-
From the library of: Superior Sewing Machine & Supply LLC

4)
As
you
turn
tens
ion
post
Q)
counterclockwise(in
dir
ection
@
),
the
pres
s
ure
will
be
decrea
se
d.
Us
ually
,
upon
the
machine
coming
out
,
all
the tak
e
-up
s
pri
ng has be
en
adjusted
well
,
only
while
sew sp
ec
ial
material
thread
,
it
need
to
be
adjusted
aga
in.
To
jud
ge
the work
of
the thread
take
-up
spring,
confirm
whethe
r
or
not the thread
take
-up
s
pring
works
up to
the
last
before
needle
thread
is
pull
ed
out
from
®
when
pull
ing
out
needle
thr
ea
d in
the
direction
of
@after
the
pressure
of
the
thr
ea
d take-
up
s
pring
has
been
performed. When it does not
work
up
to the
last,
decrease
the pressure
of
the thread
take
-up
spring.
In
add
ition,
the
stroke
of
the
thread
take-up
spring
is
excess
ively small,
the
spri
ng
doe
s n
ot
work
properly.
For
the
genera
l
fabrics
, a
stroke
of
10
to
13
mm is
proper
.
16.
~~tt~fj;J~
tt:tl
a91JJil
Adjusting
the thread take-up stroke
&
tt~
:
19
Tltli
.tUi;>JJ11Ut'~~;r~~f9J,
m'*W~
li:Z.m¥ll!tfi.f'F.
A Warning: Turn
OFF
the
power
befor
e s
tartin
g the
wor
k so
as
to
pre
vent
. accide
nt
s caused by abrupt
sta
rt
of
the sewing machine.
1.
~
111tJ
W
~Ht.t
,
lliL
:m-
:fl
~
lf:J
<D
~
tc
1J
rRJ
®~f9J
'
L;l.it77c~~~fh
2.
~
ffli
J
tW
Mi
lt
,
lliL
:m-
:fl
~
lf:J
<D
~
::S
.1J
[l:ij
@*:t
qJ
,
L;/.
~9>~~
~iiI
3. ;(:j
~1#:1
<D
J:
(
t
~ ~~ ~l
©~
~u
4'
,c_,
-
~
IJ.t
JJ
:l>T-
liE
{1~
S!t
0
1. Wh
en
se
win
g
heavy
-
weig
ht
materials
,
move
thr
ea
d
guide
<D
to the
left
(in
direction
@ ) to in
crease
the
length
of
thread
pulled
out
by the thread take-up.
2.
When
sewing light-we
ight
materials,
move
thread
guide
<D
to
the right (in dir
ec
tion @ )
to
d
ec
r
ease
the length
of
thread
pulled
out
by
the
thr
ea
d
take-up.
3. Normally,
thr
ea
d
guide
<D
is
positioned
in a way
that
marke
r line © is
aligned
with
the
center
of
the
sc
rew.
-
16-
From the library of: Superior Sewing Machine & Supply LLC

17.
*JL
!f
i·W
11:
1'
$t:lt
i¥JifnJm
Adjusting
the
needle
sto
p
position
&
tt
tJ:
:
:'19
Tllti
11:
~
~JJ
m
(f)~
5'
1-
18}
~
,
i1f
*
f!li
El!
tiff-
Z.
Fo
r'l
:i
t.H'T
1~d'F
o
~
Warn
in
g:
~:~:e~~:at:
5
::~;::::;:::a
:
~a
0
~t::
:
s
~~
i~
~
o:~
cs
h~na:
to
prev
e
nt
)>
M©
IY'.!
17
rfiJ
.n
~
J.
m
~
H¥
11:
tf!
ffii
;
)>
riT.J@t~
:n
rR:J
.nl;f
J
.
m
tt
~ll:tt:ilS;
1.
St
op position
aft
er
thr
e
ad
trimming
1.
WJ
~
m
l'l~
i'f
.u:
m
JYt
1)
~lll'f.JfJL#
~
.ll:tt~:ll&:*
~5'1-J!li'J'.J
~~
F.i.
®lll~~
I'!{]
B
~J
t.\
® -
~'3c
lt-tfJ<){\t
~
;
2)
i
J:
fJ
L'itJ:
7
~
~
IJ
Mi
J:
I'J'.J
i• .ll:
1ft
11.
,
.ft
~
:t
Ut1t:mx--
J
5'
1-
~:ill:
fi
~ii
o
I)
The
standa
rd
n
ee
dle stop
po
s
ition
is
obtain
ed by
ali
g
nin
g marker do
t®
on
the
pu
lley
cove
r with w
hit
e ma
rk
er dot
®o
n the ha
nd-wh
ee
l.
2)
St
op the n
ee
dle in its high
es
t
po
s
ition
, loos
en
sc
r
ew
CD
to perform adjus
tm
e
nt
w
it
hin
the
sl
ot
of
the
sc
r
ew
.
)>
Th
e n
ee
dle stop
timin
g is
advan
c
ed
if
you
move the
sc
rew in
dir
ect
ion ©.
)>T
he ne
edle
stop
timin
g is de
lay
ed
if
you
mo
ve
the
scre
w in dir
ec
tio
n@
.
2.
~;fj
lj
(f.J
~fi
*
l)MfiMMaM
~ ~
~
~
M~mtt~~li:~W
~
~
Wll:
- ~
.
~mtt
CD
~
Wll:z~.~
*nM
~
~m~~illfi~M
o
~
®
:n~n~mtt-Wkm~m~
.
~®:n~n~mttw
11:
-t
t
o!
m
:ilS
o
- 17 -
2.
Lower
s
top
po
si
tio
n
1)
The
lower
ne
edle st
op
po
s
ition
wh
en the pedal is returned to the
ne
utr
al p
os
ition
after
the
front
part
of
the pedal is de
pr
esse
d can
be a
dju
sted as fo
llow
s:
Stop needle
CD
in
it
s lowest position.
Loosen
sc
rew ® , a
nd
make adjus
tm
ent
withjn the slot
of
the
sc
rew. Moving
the
sc
r
ew
in
dir
ec
tion
® advances
the n
ee
dle stop timing. M
ov
ing
the
screw
in
direc
ti
o
n®
delays
th
e timing.
From the library of: Superior Sewing Machine & Supply LLC
Other manuals for ZJ9800
2
Table of contents
Other ZOJE Sewing Machine manuals