manuals.online logo
Brands
  1. Home
  2. •
  3. Brands
  4. •
  5. Kenwood
  6. •
  7. Car Amplifier
  8. •
  9. Kenwood X1200M - Excelon Mono Subwoofer Amplifier User manual

Kenwood X1200M - Excelon Mono Subwoofer Amplifier User manual

Other manuals for X1200M - Excelon Mono Subwoofer Amplifier

1

This manual suits for next models

1

Other Kenwood Car Amplifier manuals

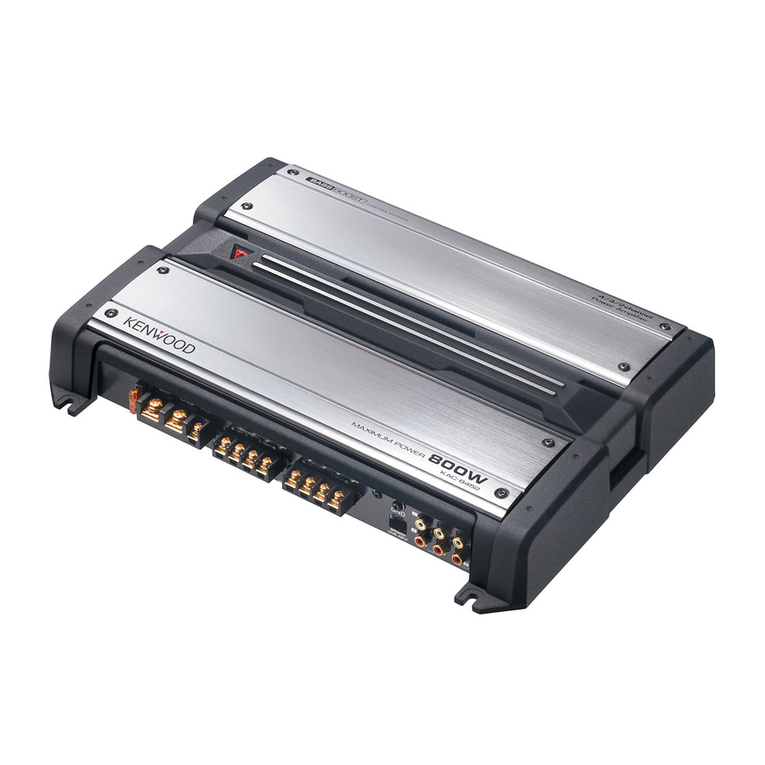
Kenwood KAC-X1D User manual

Kenwood

Kenwood KAC-X1D User manual

Kenwood KAC-X501F User manual

Kenwood

Kenwood KAC-X501F User manual

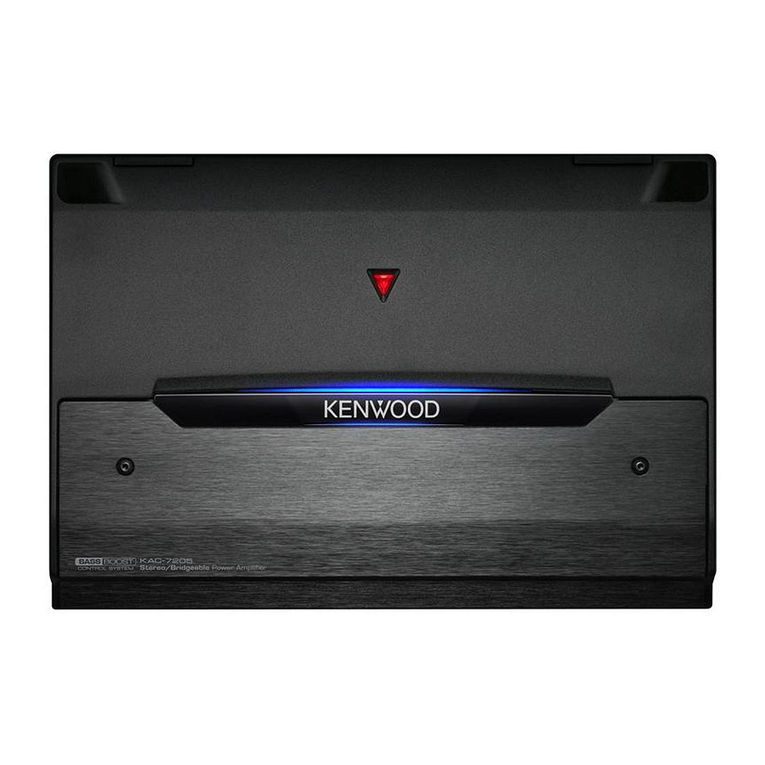
Kenwood KAC-7205 User manual

Kenwood

Kenwood KAC-7205 User manual

Kenwood X500-1 User manual

Kenwood

Kenwood X500-1 User manual

Kenwood KAC-526 User manual

Kenwood

Kenwood KAC-526 User manual

Kenwood KAC-648S User manual

Kenwood

Kenwood KAC-648S User manual

Kenwood KAC-8402 User manual

Kenwood

Kenwood KAC-8402 User manual

Kenwood KAC-821 User manual

Kenwood

Kenwood KAC-821 User manual

Kenwood KAC-9104D User manual

Kenwood

Kenwood KAC-9104D User manual

Kenwood X1200M - Excelon Mono Subwoofer Amplifier User manual

Kenwood

Kenwood X1200M - Excelon Mono Subwoofer Amplifier User manual

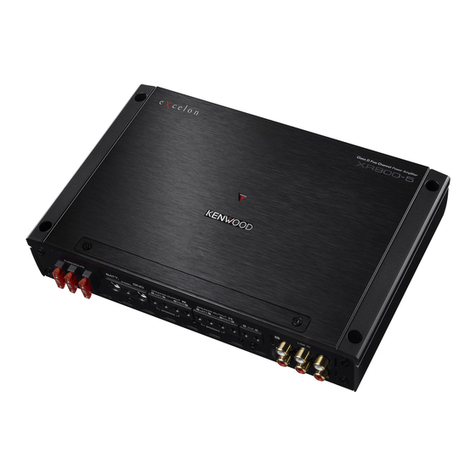
Kenwood XR400-4 User manual

Kenwood

Kenwood XR400-4 User manual

Kenwood KAC-M1804 User manual

Kenwood

Kenwood KAC-M1804 User manual

Kenwood KAC-521 User manual

Kenwood

Kenwood KAC-521 User manual

Kenwood KAC-818 User manual

Kenwood

Kenwood KAC-818 User manual

Kenwood KAC-7205 User manual

Kenwood

Kenwood KAC-7205 User manual

Kenwood KAC-7251/7201 User manual

Kenwood

Kenwood KAC-7251/7201 User manual

Kenwood KAC-X542 - eXcelon Amplifier User manual

Kenwood

Kenwood KAC-X542 - eXcelon Amplifier User manual

Kenwood KAC-X501F User manual

Kenwood

Kenwood KAC-X501F User manual

Kenwood KAC-818 User manual

Kenwood

Kenwood KAC-818 User manual

Kenwood KVT-915DVD User manual

Kenwood

Kenwood KVT-915DVD User manual

Kenwood KAC-718 User manual

Kenwood

Kenwood KAC-718 User manual

Kenwood KAC-8405 User manual

Kenwood

Kenwood KAC-8405 User manual

Kenwood KAC-8401 User manual

Kenwood

Kenwood KAC-8401 User manual

Kenwood KAC-629S User manual

Kenwood

Kenwood KAC-629S User manual

Popular Car Amplifier manuals by other brands

Boss Audio Systems US140 user manual

Boss Audio Systems

Boss Audio Systems US140 user manual

Boss Audio Systems FNX2000 user manual

Boss Audio Systems

Boss Audio Systems FNX2000 user manual

Pioneer GM-D8500M owner's manual

Pioneer

Pioneer GM-D8500M owner's manual

MTX Thunder Marine TM904 user guide

MTX

MTX Thunder Marine TM904 user guide

MTX Thunder TA Super TA92001 Connection guide

MTX

MTX Thunder TA Super TA92001 Connection guide

Lanier 480-0239 Material safety data sheet

Lanier

Lanier 480-0239 Material safety data sheet

Sony XM-405EQX Marketing Specifications Product guide

Sony

Sony XM-405EQX Marketing Specifications Product guide

Jensen XA4150 owner's manual

Jensen

Jensen XA4150 owner's manual

Audiopipe AQX-660.2 owner's manual

Audiopipe

Audiopipe AQX-660.2 owner's manual

Clarion APA2001  APA2001 APA2001 Owners & installation manual

Clarion

Clarion APA2001 APA2001 APA2001 Owners & installation manual

Cyfre CHACDMA-819 installation manual

Cyfre

Cyfre CHACDMA-819 installation manual

Sony XM-7547 Service manual

Sony

Sony XM-7547 Service manual

Alpine PDX11000 - Amplifier Review guide

Alpine

Alpine PDX11000 - Amplifier Review guide

Steg Qx Mos 105.4x user manual

Steg

Steg Qx Mos 105.4x user manual

Jensen PS1220M Installation & operation manual

Jensen

Jensen PS1220M Installation & operation manual

Pioneer GM-5000T owner's manual

Pioneer

Pioneer GM-5000T owner's manual

Sinus Live SL-A1500 manual

Sinus Live

Sinus Live SL-A1500 manual

StetSom V 200.2 user guide

StetSom

StetSom V 200.2 user guide

manuals.online logo
manuals.online logoBrands
  • About & Mission
  • Contact us
  • Privacy Policy
  • Terms and Conditions

Copyright 2025 Manuals.Online. All Rights Reserved.

X1200M
CLASS DMONO POWER
AMPLIFIER.
page 2-7
INSTRUCTION MANUAL
AMPLIFICATEUR MONO CLASSE D • page 8-13
MODE D'EMPLOI
AMPLIFICADOR DE POTENCIA CLASE DMONOFONICO •pagina 14-19
MANUAL DE INSTRUCCIONES
Kenwood Corporation
Take
the
time to read through this instruction manual. Familiarity with
installation and operation procedures will help you obtain the best
performance from your new power amplifier.
For
your
records
Record the
serial
number, found on the back
of
the unit, in the
spaces
designated
on the warranty card, and
in
the space provided below.
Refer
to
the model and
serial numbers whenever you
call
upon your Kenwood dealer for information or
service on the product.
Model
Xl
200M
Serial
number
_
US
Residence
Only
Register
Online
©864-4197-00/00 (KV)
Safetyprecautions
....
WARNING
To
prevent injuryor fire, take the following precautions:
•Mounting and wiring
thiS
product requires skills and experience.
For
safety's
sake,
leave the mounting and wiring
work
to
professionals.
•When extending the ignition, battery. or ground wires, make
sure
to
use
automotive-grade wires orother wires
with
the range
of
14
mm'
(AWG
6)
to
21
mm'
(AWG
4)
to
prevent wire deterioration and damage
to
the
wire
coating.
•
To
prevent ashort circuit. never
put
or leave any metallic objects (such
as
coins or metal tools) inside the unit.
•
If
the unit starts
to
emit smoke or strange smells. turn
off
the power
immediately and consult your Kenwood dealer.
•Do
not
touch the
unit
during use because the surface
of
the
unit
becomes
hot and may cause burns
if
touched.
....
CAUTION
To
prevent damage to the machine, take the following
precautions:
•
Be
sure
the unit
is
connected
to
a
12V
DC
power supply with anegative
ground connection.
•Do not open the
top
or
bottom
covers
of
the unit.
•Do not install the unit
in
aspot exposed
to
direct sunlight or excessive heat
or humidity. Also avoid places with
too
much dust or the
pOSSibility
of
water
splashing.
·When replacing a
fuse,
only
use
a
new
one
with
the prescribed rating. Using a
fuse
with
the wrong rating may cause your
unit
to
malfunction.
o
To
prevent ashort circuit when replacing a
fuse,
first disconnect the wiring
harness.
NOTE
o
if
you experience problems during installation, consult your Kenwood dealer.
•Ifthe
unit
does not seem
to
be working right, consult your Kenwood dealer.
FCC
WARNING
This
equipment may generate or
use
radio frequency energy. Changes or
modifications
to
this equipment may cause harmful interference unless the
modifications
are
expressly approved in
the
instruction manual. The user could
lose the authority to operate this
equipment
if
an unauthorized change or
modification
is
made.
FCC
NOTE
This
equipment
has
been tested and found to
comply
with
the limits for a
Ciass
Bdigital device. pursuant
to
Part
15
of
the
FCC
Rules.
These limits
are
designed
to
provide reasonable protection against harmful interference in
aresidential installation.
This
equipment may cause harmful interference
to
radio communications,
if
it
is
not installed and used in accordance
with
the
instructions. However. there
is
no guarantee that interference will
not
occur in a
particular installation. Ifthis
equipment
does cause harmful interference
to
radio
or television reception. which can be determined by turning the
equipment
off
and on, the user
is
encouraged
to
try
to
correct
the
interference by one or more
of
the follOWing measures:
·Reorient or relocate the receiving antenna.
oIncrease the separation between the equipment and receiver.
•Connect the
equipment
into
an
outlet on acircuit different from that
to
which
the receiver
is
connected.
•Consult the dealer or an experienced radiolTV technician for help.
NOTE
This
Class
Bdigital apparatus complies
with
Canadian
ICES-003.
2
English
Cleaning
the
unit
If
the front panel gets dirty. turn
off
the power and
wipe
the panel
with
adry
silicon cloth or soft cloth.
I
....
CAUTION I
Do not wipe the panel
with
ahard cloth or acloth dampened by volatile
solvents such
as
paint thinner and alcohol. They can scratch the surface
of
the
panel and/or cause
the
indicator letters
to
peel off.
To
prevent battery rise
When the
unit
is
used in the
ACC
ON
position
without
turning
the
engine
ON,
it
depletes the battery.
Use
it after starting
the
engine.
Protection function
The protection function
is
activated in the follOWing situations:
This
unit
is
equipped
with
aprotection function for protecting this unit and your
speakers from various accidents or problems that
can
occur.
When the protection function
is
triggered.
the
PROTECTION
indicator lights and
the amplifier stops operating.
oWhen aspeaker wire may be short-circuited.
oWhen aspeaker
output
contacts ground.
oWhen the
unit
malfunctions and a
DC
signal
is
sent
to
the speaker output.
Wiring
o
Take
the battery wire for this unit directly from
the
battery. Ifit's connected
to
the vehicle's wiring harness. it can cause
blown
fuses etc.
•If a
bUZZing
noise
is
heard from the speakers
when
the
engine
is
running,
connect aline noise filter (optional)
to
each
of
the battery wire.
·Do
not
allow the wire
to
directly contact the edge
of
the
iron plate by using
Grommets.
oConnect the ground wire
to
ametal part
of
the
car
chassis
that acts
as
an
electrical ground passing electricity
to
the
battery's negative eterminal. Do
not
turn
the
power on
if
the ground wire
is
not
connected.
o
Be
sure
to
install aprotective fuse in the
power
cord near
the
battery. The
protective fuse should be the same capacity
as
the unit's fuse capacity or
somewhat larger.
o
For
the power cord and ground,
use
avehicle type (fireproof) power wring
cord
with
acurrent capacity greater than
the
unit's fuse capacity.
(Use
a
power
wiring cord
with
the
range
of
14
mm'
(AWG
6)
to
21
mm'
(AWG
4).
•When more than one power amplifier
are
going
to
be used.
use
a
power
supply wiring wire and protective fuse
of
greater current-handling capacity
than the total maximum current drawn by each amplifier.
Speaker Selection
oThe rated
input
power
of
the
speakers that
are
going
to
be connected should
be greater than the maximum
output
power (in Watts)
of
the
amplifier.
Use
of
speakers having
input
power ratings that
are
less
than
the
output
power
of
the
amplifier will cause smoke
to
be emitted
as
well
as
damage.
·
Use
speakers that have
an
impedance
of
1
()
or greater. When more than one
set
of
speakers
are
going
to
be
used,
calculate the combined impedance
of
the speakers and then connect suitable speakers
to
the
amplifier.
~
;.
O·
40;
C@d'
: : :
40 40
e;
40
ie;
.............
.
...
-------_
...
_--
BO~20
Combined impedance
Installation
Accessories
Part
name
External View Number
of
Items
Self-tapping screws
~
4
(05
x
18mm)
Hexagon Wrench (Large) r1
Hexagon Wrench
(Small)
~
1
Terminal cover (Power terminal) i§Y 1
Installation procedure
Since
there
are
large variety
of
settings and connections possible according to
applications,
read
the instruction manual well to select the proper setting and
connection.
1Remove the ignition
key
and disconnect the negative 8terminal
of
the
battery to prevent short circuits.
2.
Set
the unit according
to
the intended usage
3.
Remove the Dressing cover.
4.
Connect the input and
output
wires
of
the units.
5.
Connect the speaker wires.
6.
Connect the power wire, power control wire and grounding wire following
this order.
7.
Install the installation fittings
in
the unit.
8.
Attach the unit.
9.
Install the remote controller. (Optional accessory)
10.
Attach the Dressing cover.
11.
Connect the negative 8terminal
of
the battery.
I
ACAUTION
I
•Do
not
install in the
below
locations;
(Unstable location,
In
alocation that interferes
with
driving,
In
alocation
that gets wet,
In
adusty location,
In
aplace that gets hot,
In
aplace
that
gets direct sunlight,
In
alocation that gets hit by
hot
air)
•Do
not
install the
unit
under the carpet. Otherwise heat build-up occurs
and the unit may be damaged.
•Install this
unit
in
alocation which allows heat
to
easily dissipate.
Once installed,
do
not
place any
object
on
top
of
the unit.
·The surface temperature
of
the amplifier will become
hot
during
use.
Install
the amplifier in aplace where people,
resins,
and
other
substances that are
sensitive
to
heat will
not
come
into
contact
with
it.
·When making ahole under a
seat,
inside the trunk, or somewhere
else
in
the vehicle, check
that
there
is
nothing
hazardous
on
the opposite side
such
as
agasoline tank, brake pipe, or wiring harness, and be careful
not
to
cause scratches or other damage.
•Do
not
install near the dashboard, rear tray,
or
air bag safety parts.
•The installation to the vehicle should securely fasten the
unit
to aplace
in
which it will
not
obstruct driving.
If
the unit comes
off
due to ashock and
hits aperson or safety part, it may cause injury or
an
accident.
•After installing
the
unit, check to make sure that electrical
equipment
such
as
the brake lamps, turn signal lamps and windshield wipers operate
normally.
I\)
(Xl
0>
3
3
\
Installation board, etc.
(thickness'
15
mm
or more)
Hexagon Wrench
(Small)
f
t
380mm
Dressing cover
320mm
II
06
I
/I<!>tt
I~
'8'
I\)
--J
I\)
3
3
@ @
Hexagon socket
head cap screw
(M4x8mm)
\'f
•Remote controller(Optionalaccessory) Accessories
Remote controller
Self-tapping screw
(026
x
12
mm)
Part
name
External View Number
of
Items
Remote cable
(6.0
m :
197
ft)
~
1
Remote controller
~
1
0"
Mounting bracket
~
1
Self-tapping screws
@)mn>
2
(02.6 x12 mm)
English
3
Connection
IAWARNING I
Remove
the
ignition
key
and
disconnect
the
negative 8terminal
of
the battery
to
prevent short circuits.
CENTER
UNIT
(CD
receiver,
etc.)
RCA
cable'
Power control
wire'
Left
input
Right
input
Subwoofer
(L
+
R)
(~20)
o
Use
the
attached
Hexagon
Wrench.
e
,-(
When
two
subwoofers
are
~-!I!!O!ll_,
..
:connected.
(~40)
Hexagon
wre~
(Smaln"""""r
/1)
e
e
o
~=O
aaaa
BATT.
aND
a
!
Terminal cover
Use
the
attached
Hexagon Wrench.
Protective Fuse'
\Battery
wire'
HeXagOnwr~
(small)~(
A
~n
Wrench
(Large)
A
WARNING
To
prevent fire caused by ashort
in
the
wiring,
connect afusible link or breaker nearby the
battery's positive terminal.
I'Commercially available parts I
1
ACAUTION
1
•
If
sound
is
not
output
normally, immediately
turn power
off
and check connections.
•
Be
sure
to
turn the power
off
before changing
the setting
of
any switch.
·Ifthe fuse blows, check wires for shorts, then
replace the fuse
with
one
of
the same rating.
•Check that no unconnected wires or connectors
are
touching the car body. Do
not
remove
caps from unconnected wires or connectors to
prevent short circuits.
•Connect the speaker wires to appropriate
speaker connectors separately. Sharing
the
negative wire
of
the
speaker or
grounding
speaker wires to
the
metal body
of
the
car can
cause this
unit
to fail.
•After installation, check
that
the brake lamps,
winkers, and wipers work properly.
Dual
voice coilsubwoofer
a
About
the
Lead
Terminals
1.
WireThicknesses
You
can
use
wires with the following thicknesses:
Battery wire and ground wire
..
AWG
4 -
AWG
6
Speaker wire
AWG
8 -
AWG
12
2.Strip
the
wire
Make acut
in
the wire sheath (insulator made from vinyl,
etc.)
at
the
position 10-13
mm
away from the end
of
the
Wire,
and then remove the
unnecessary portion
of
the sheath by twisting it.
3.Install
the
wire
Loosen the screw using the supplied hexagon wrench. Insert the
conductor
of
the wire
in
the terminal hole, and then tighten the
screw.
!)
~
10-13
mm
(3/8" -1/2")
+
~~
..
~b»'O
~&
Hexagon
Wrench
(Large)
4
English
•Remote cable connection (Optionalaccessory)
IIh I I I
1,1j
I
I=
==
0
~f\
r~
~JrJD
0
"@).@)J~
eeee
~~~I()
.-
..
1£'CAUTION I
.
Before
connecting the remote controller
cables,
always turn the
Bass
boost level knob
all
the way to the left.
Remote
cable
(6.0
m .
19.7
ft)
Remote
controller
•
Multi
Amplifierwith Remote cable connection (Optionalaccessory)
LINE
OUT
fiLTER
[~
UFF
RCA
cable'
o
Remote
cable
1
Power
control wire'
CENTER
UNIT
(CD
receiver,
etc.)
Master
amplifier
LINE
OUT
2Q
fiLTER
",e",'""
w"eT
RCA
cable"
[ON
.0.5
L~F
3;.
00.3
[MIN)S
0.2
(MAX]
I
SEN:::;~M
I
f/
Slave
amplifier
IIh JI.Jl1
Jt----W
...JI
~
f\
BATT.
OND
•0
rl~
~"ma
0I"" •
hJ\
eeee
........
""
......
_
..
1£'CAUTION 1
.
Before
connecting the remote controller
cables,
always turn the
Bass
boost
level
knob
all
the way
to
the left.
1*
Commercially available parts 1
You
can
control the
Bass
boost
level
of
the
second
and
subsequent
Slave
amplifiers
simultaneously from the
Master
amplifier.
The
volume
level
of
each
amplifier
is
determined
by
the setting ofthe
Master
amplifier
(INPUT
SENSITIVITY,
boost
level
of
the remote controller).
Setting the
Master
amplifier
1.
Adjust the
INPUT
SENSIVITY
to the output
ofthe center unit to
be
connected.
2.
Set
the
LPF
frequency
and
ISF.
3.
Turn
the
LINE
OUT
FILTER
switch
ON.
Setting theSlave
amplifier
1.
Turn
the
LINE
OUT
FILTER
switch
OFF.
2.
Adjust the
INPUT
SENSIVITY.
•
To
adjust the
Slave
amplifier to the
same
volume
as
the
Master
amplifier, adjust the
INPUT
SENSIVITY
to
0.2
V
(max.).
Slave
amplifier
HeXagOn~r~
(Small)r
•
Use
the
attached
,.,
Hexagon
;/
Wrench.
1
T
o
Ur-L1NEOU-T
------.,
FILTER
2'~'
rON
.0.5
l~
3;.
°0.3
[MIN] 5O.2lMAXl
r
~
1
SEN~'::.WTYM
I
L
OFF
English
5
Controls
The
control
panel locates
under
the front side
cover. Remove
the
cover
to
access
to
its controls for
adjustment.
(See
page
3)
@~
~
-
~
>---
"4
i==== -
@ @
C<T
.,
NOTE
Remote controller
(Optional accessory)
KENWOOD
nil
"'~r
I
!--@
CD
Fuse
(30
Ax
3)
INOTE I
Ifyou can't find the specified capacity fuse at your store etc., consult your
Kenwood dealer.
®
Battery
terminal
G) Powercontrol
terminal
Controls the unit
ON/OFF.
NOTE
Controls the
unit
power.
Be
sure
to
connect it
with
all
the systems.
@)
Ground
terminal
®Speaker
output
terminals
As
this unit accepts speakers
with
a
minimum
impedance
of
1ohm, connect
speakers
with
I-ohm
or higher impedance
to
these terminals.
®REMOTE
terminal
Connects the Remote cable.
NOTE
Use
the Remote cable
of
the optional accessory.
(/)
LINE
IN
terminal
®LINE
OUT
terminal
The audio signal set
with
the
LINE
OUT
FILTER
switch will be output.
®BOOST
LEVEL
(Bass boostlevel) control
Sets
the level by which the
low
frequency range should
be
boosted.
@Powerindicator
(jJ)
FREQUENCY (Bass boostfrequency) control
Sets
the center frequency around which the
low
frequency range should be
boosted.
@THERMAL MANAGEMENTindicator
Lights this indicator
when
the internal temperature
is
high.
@PROTECTION indicator
Lights this indicator
when
the protection function
is
activated.
(See
page
2)
@Powerindicator
When the power
is
turned on, the Power indicator lights.
6
English
@LPF(Low-Pass Filter} FREQUENCYcontrol
This control adjusts the frequency band
output
from this unit.
®ISF (infrasonic filter) control
Ultra
low
frequencies that cannot be reproduced even by asubwoofer
speaker
do
not
become sound
but
become unnecessary oscillations,
which
affect the sound by causing distortion, etc. Setting this control cuts the
frequencies below the respective frequency.
This improves the reproduction performance
of
the speakers by eliminating
unnecessary oscillations
which
will
not
become sound.
@INPUTSENSITIVITYcontrol
Set
this control according
to
the
pre-output
level
of
the center
unit
connected
with
this unit.
NOTE
For
the
pre-output
level, refer
to
the <Specifications> in the instruction
manual
of
the center unit.
@LINE
OUT
FILTER
switch
Changing over the audio signal
output
to
the
LINE
OUT
terminal.
ON
position:
The audio signal adjusted
when
setting
LPF,
INPUT
SENSIVITY
control and
Bass
boost (optional accessory)
is
output
to
the
LINE
OUT terminal.
OFFposition:
The audio signal
input
from the
LINE
IN
terminal
is
output
to
the
LINE
OUT
terminal (through output).
I
ACAUTION
I
The volume
of
the audio
output
to the
LINE
OUT terminal
is
different in
ON
and
OFF
position. Remember this
when
changing the
LINE
OUT
FILTER
switch
from
ON
to
OFF.
Troubleshooting Guide
What might appear to
be
amalfunction
in
your unitmayjust
be
the result
of
slight misoperation ormiswiring.
Before
calling
service,
first
check
the
following
table for
possible
problems.
PROBLEM
"/'
POSSIBLE
CAUSE
SOLUTION
No
sound.
•Input (or output) cables
are
disconnected. •Connect the
input
(or output) cables.
•Protection circuit may be activated. •Check connections by referring
to
<Protection function>.
(Blown fuse.) •Volume
is
too
high. •Replace the fuse and
use
lower volume.
•The speaker cord
is
shorted. •After check the speaker cord and fixing the cause
of
the short,
reolace the
fuse.
The
output
level
is
too
small •The
input
sensitivity adjusting control
is
not
set
to
the correct •Adjust the control correctly referring
to
<Controls>.
(or
too
larqe). position.
The sound quality
is
bad. •The speakers wire
are
connected with wrong
EEl
/8
polarity. •Connect them properly checking the
EEl
/8
of
the terminals
(The sound
is
distorted.) and wires well.
• A speaker wire
is
pinched by ascrew in the car body. •Connect the speaker wire again
so
that it
is
not pinched by
anything.
·The switches mav be set improperlv. •
Set
switches properlv bv referrina
to
<Controls>.
The Remote Controllerdoes •The Remote Cable
is
disconnected. •Connect the Remote Cable securely and correctly.
not
function.
.lPecifications
Specifications subject
to
change withoutnotice.
CEA-2006
RMS
Watts per channel @4ohms, 1 % THO+N
..
Signal
to
Noise Ratio (Reference: 1Watt
into
4ohms)
..
.........
.800 W
xl
.......................................................................
7S
dBA
~,
.....
,.~
c
•.
:
,.
,,'
"'A·2~
.
2400W
Audio Section
Max Power
Output
...
Rated Power
Output
(+B
=14.4
V)
(40)
(20
Hz
-200
1.0
%
THO)...
800 W x 1
(20)(100Hz,1.00/0
nul
1200Wx1
Frequency Response (+0,
-3
dB)
20
Hz
-200
Hz
Sensitivity (rated
output)
(MAX.) . .
..0.2
V
(MIN).
.
50V
Input
Impedance
10
kO
5ignal
to
Noise Ratio... .
105
dB
Low
Pass
Filter Frequency
(-24
-200
Hz
(variable)
Infrasonic Filter Frequency
(-24
15
-40
Hz
(variable)
Bass
Boost Level (Optional accessory)... . 0 -
18
dB
(variable)
Bass
Boost Frequency (Optional accessory).. .
..40
-100
Hz
(variable)
General
Operating Voltage
14.4
V
(11
-
16
Vallowable)
Current
Consumption..
.90 A
Installation
Size
(W x H x
0)
380
x66 x286
mm
................................................................................................................................................................................
14-15/16 x2-5/8 x11-1/4 inch
Weight.. ..5.0
kg
(11.0 Ibs)
English
7
KENWOOD
-
Gerale-Typ
und
Seriennummer
Identification
du
produil
Produkt navn
og
serie
nummer
Modelo
y
Numero
de
serie
Malli
ja
sarjanumero
MOVTD.o
KaL
aplllj.l6<; Oflpa<;
Modello e
numero
di matricola
Modell og
serienummer
Modelo
e
numero
de
serie
Apparat typ &
serienummer
Identificatie van
het
produkt
Model heiti og
rai\numer
II-Mudell
us-serial
number
Model
number
&serial
number
Name
und
Anschrift
des
Kaufers
Nom
&adresse
du
client
Kobers navn
og
adresse
Nombre
ydireccion
del
cliente
Asiakkaan nimi &osoite
Ov0lAa
KaL
ol£ull'uvaTj
ayopamTj
Nome
eindirizzo
del
cliente
Kundens
navn
og
adresse
Nome
e
morada
do
comprador
Kundens
namn
&
adress
Naam
&adres van
de
klanl
Nafn
og
heimilisfang
kaupanda
L-isem uI-indirizz tax-xerrej
Name
&address
of
customer
Stempel und Unterschrift
des
Handlers
Revendeur &
cachet
Forhandler
Distribuidor ysello
Jalleenmyyja &
leima
L1jJpav
,oa
£~aLP
'a<;
Timbro del rivenditore
Forhandlerens
navn
og
stempel
Agenle
e
carimbo
Aterftirsaljare &stampel
Dealer &stempel
Undirritun
og
stimpill stiluai\ila
Timbru lal-beiliegh
Dealer &
stamp
Kaufdatum
Date d'achtat
Kobsdato
Fecha
de
compra
Ostopaiva
HIA£polATjVla ayopa<;
Data di acquisto
Kj0pt
dato
Data
de
compra
Inktipsdatum
Aankoopdatum
Stiludagur
Id-data
taO
meta
nxtara
Purchase
date
See back
cover
for
table
of
contents.
©846-0682-00/01 (06/02)
Warranty Card
Page
2
3
4,5
6,7
8
9
9
10
10
11
11
12
12
13
13
14
14
14
14
15
15
15
15
15
KENWOOD
Corporation
Customer
Information
Center
1-16-2, Hakusan, Midori-ku,
Yokohama-shi, Kanagawa, 226·8525 Japan
Thankyou for purchasing this kenwood product. As mentioned in the pages ofthis
booklet, ourwarranty is onlyvalid in the countries listed, Ifyourcountry is not listed
please contact your retailer for information on warranty procedure, or write to:
Dear Customer,
U.S.A.
Australia
Canada
Military
Belgique
et
Grand-duche
de
Luxembourg
Danmark
Deutschland
Nederland
Portugal
UK &Ireland
Osterreich
Elias
Espana
France
Italia
Suomi
Andorra
Iceland
Malta
Norge
Schweiz
Svizzera
Suisse
Sverige
Table of Contents
-
Gerale-Typ
und
Seriennummer
Identification
du
produil
Produkt navn
og
serie
nummer
Modelo
y
Numero
de
serie
Malli
ja
sarjanumero
MOVTD.o
KaL
aplllj.l6<; Oflpa<;
Modello e
numero
di matricola
Modell og
serienummer
Modelo
e
numero
de
serie
Apparat typ &
serienummer
Identificatie van
het
produkt
Model heiti og
rai\numer
II-Mudell
us-serial
number
Model
number
&serial
number
Name
und
Anschrift
des
Kaufers
Nom
&adresse
du
client
Kobers navn
og
adresse
Nombre
ydireccion
del
cliente
Asiakkaan nimi &osoite
Ov0lAa
KaL
ol£ull'uvaTj
ayopamTj
Nome
eindirizzo
del
cliente
Kundens
navn
og
adresse
Nome
e
morada
do
comprador
Kundens
namn
&
adress
Naam
&adres van
de
klanl
Nafn
og
heimilisfang
kaupanda
L-isem uI-indirizz tax-xerrej
Name
&address
of
customer
Stempel und Unterschrift
des
Handlers
Revendeur &
cachet
Forhandler
Distribuidor ysello
Jalleenmyyja &
leima
L1jJpav
,oa
£~aLP
,a<;
Timbro del rivenditore
Forhandlerens
navn
og
stempel
Agenle
e
carimbo
Aterftirsaljare &stampel
Dealer &stempel
Undirritun
og
stimpill stiluai\ila
Timbru lal-beiliegh
Dealer &
stamp
Kaufdatum
Date d'achtat
Kobsdato
Fecha
de
compra
Ostopaiva
HIA£polATjVla ayopa<;
Data di acquisto
Kj0pt
dato
Data
de
compra
Inktipsdatum
Aankoopdatum
Stiludagur
Id-data
taO
meta
nxtara
Purchase
date
See back
cover
for
table
of
contents.
©846-0682-00/01 (06/02)
Warranty Card
Page
2
3
4,5
6,7
8
9
9
10
10
11
11
12
12
13
13
14
14
14
14
15
15
15
15
15
KENWOOD
Corporation
Customer
Information
Center
1-16-2, Hakusan, Midori-ku,
Yokohama-shi, Kanagawa, 226·8525 Japan
Thankyou for purchasing this kenwood product. As mentioned in the pages ofthis
booklet, ourwarranty is onlyvalid in the countries listed, Ifyourcountry is not listed
please contact your retailer for information on warranty procedure, or write to:
Dear Customer,
U.S.A.
Australia
Canada
Military
Belgique
et
Grand-duche
de
Luxembourg
Danmark
Deutschland
Nederland
Portugal
UK &Ireland
Osterreich
Elias
Espana
France
Italia
Suomi
Andorra
Iceland
Malta
Norge
Schweiz
Svizzera
Suisse
Sverige
Table of Contents
U.S.A.
This
warranty
will
be honored
only
in the U.S.A.
KENWOOD
LIMITED
WARRANTY
FOR
CAR
STEREO
COMPONENTS
HOW
LONG IS THE WARRANTY
Kenwood U.S.A. Corporation
("Kenwood")
warrants this product for aperiod
of
one
(1)
year
from
the date
of
original
purchase.
WHAT IS COVERED
AND
WHAT
IS
NOT
COVERED
Except
as
specified below, this
warranty
covers
all defects in
material
and
workmanship
in
Kenwood
car stereo
components.
The
following
are
not
covered
by
the warranty:
1.
Any
product
which
is notdistributed in the U.S.A.
by
Kenwood
or
which
is notpurchased
in
the U.S.A.
from
an authorized
Kenwoodcar stereodealer
or
an
automobile
dealer, unlessthe productis purchased
through
theU.S.A
Military
Exchange
Service.
2.
Any
product
on
which
the serial
number
has
been
defaced,
modified
or
removed.
3.
Damage,
deterioration
or
malfunction
resulting
from:
a.
Any
shipment
of
the
product
(claims
must
be
presented
to
the carrier).
b. Installation
or
removal of
the
product.
c.
Accident, acts
of
nature, misuse, abuse, neglect,
unauthorized
product
modification
or
failure
to
follow
instructions
supplied
with
the product.
d. Repair
or
attempted
repair
by
anyone
not
authorized
by
Kenwood.
e.
Any
other cause
which
does not relate
to
a
product
defect.
WHO
IS PROTECTED
This
warranty
is
enforceable
only
by
the original purchaser.
WHAT
WE WILL
PAY
FOR
We
will
pay
for
all labor and material expenses
for
covered items. Payment
of
shipping charges is discussed in the
neX1
section
of
this
warranty.
HOW
TO OBTAIN WARRANTY SERVICE
If
your
KENWOOD product ever needs service:
1.
Take
or
ship
it
to
any KENWOOD Authorized Service Center in the U.S.A. along
with
&complete description
of
the
problem. (if
you
are uncenain
as
to
whether
aService Center is authorized, please call1-800-KENWOOD
for
the nearest
Service Center. 1-8oo-536-9663l.
2.
Although
you
must
pay any shipping charges
if
it
is necessary
to
ship the product
for
warranty
service,
we
will
pay the
return
shipping
charges
if
the
repairs
are
covered
by
the
warranty
within
the
United
States.
3.
Whenever
your
units
are
taken
or
sent
for
warranty
service,
you
must
include
a
copy
of
the
original
dated
sales
receipt
as
proof
of
warranty
coverage.
LIMITATION
OF
IMPLIED WARRANTIES
ALL IMPLIEDWARRANTIES, INCLUDING WARRANTIES
OF
MERCHANTABILITYAND FITNESS
FOR
APARTICULAR
PURPOSE,
ARE
LIMITED
IN
DURATION
TO
THE
LENGTH
OF
THIS WARRANTY.
EXCLUSION
OF
DAMAGES
KENWOOD'S LIABILITY
FOR
ANY
DEFECTIVE
PRODUCT
IS
LIMITED
TO
THE
REPAIR
OR
REPLACEMENT
OF
THE
PRODUCT
AT
OUR
OPTION. KENWOOD SHALL NOT
BE
LIABLE
FOR:
1. INSTALLATION
OR
REMOVAL CHARGES, DAMAGE TO
OTHER
PROPERTY
CAUSED
BY
ANY
DEFECTS
IN KENWOOD
CAR
STEREO
COMPONENTS, DAMAGES BASED UPON INCONVENIENCE,
LOSS
OF
USE
OF
THE
PRODUCT;
OR
2.
ANY
OTHER
DAMAGES, WHETHER INCIDENTAL, CONSEQUENTIAL
OR
OTHERWISE.
SOME STATES
DO
NOT ALLOW LIMITATIONS ON HOW LONG AN IMPLIED WARRANTY LASTS AND/OR
DO
NOT ALLOW
THE EXCLUSION
OR
LIMITATION
OF
INCIDENTAL
OR
CONSEQUENTIAL DAMAGES,
SO
THE
ABOVE LIMITATIONS AND
EXCLUSIONS MAY NOT
APPLY
TO YOU.
This
warranty
gives you specific legal rights, and you
may
also have other rights
which
vary
from
state
to
state.
If
a
problem
develops during
or
afterthe Limited Warranty Period,
or
if
you have any questions regarding the operation
of
the
product, you should contact
your
KENWOOD Authorized Dealer
or
Authorized Service Center.
lithe
problem
or
your
question
is
not
handled
to
your
satisfaction, please contact
our
Customer Relations Depanment at the address listed below:
KENWOOD
USA
CORPORATION
P.O
Box 22745, 2201
East
Dominguez
Street,
Long Beach,
CA
90801~5745
Tel:
(310)
639·5300
2
AUSTRALIA
The
warranty
will
only
be
honoured
in
the
country
in
which
the
unit
was
originally
purchased.
EXPRESS
WARRANTY
STATEMENT
FOR
CAR
STEREO
AND
PERSONAL
AUDIO
COMPONENTS
KENWOOD ELECTRONICS AUSTRALIA
PTY'
LTD.
is
proud
of
the
quality
and
workmanship
of
its audio equipment. This
unit has been
properly
designed, tested and inspected before
it
was shipped
to
you.
If
properly installed and operated in
accordance
with
instructions
furnished,
it
should
give
optimum
reliable
performance.
SCOPE OF EXPRESS WARRANTY
Each
of
the
KENWOOD
brand
products
is
expressly
warranted
under
normal
installation
and
use
against
defects
in
material
and
workmanship.
During the express warranty period, KENWOOD ELECTRONICS AUSTRALIA
PTY.
LTD.
will
provide
to
any
KENWOOD
Authorised
Service Centre in Australia free
of
charge
both
pans
and labour necessary
to
correct any defect in
material
or
workmanship.
However, the exclusions noted under the heading "CONDITIONS
OF
THE
EXPRESS WARRANTY"
are
not
covered
by
this
express
warranty.
EXPRESS WARRANTY PERIOD
The KENWOOD brand car stereo and personal
audio
components are expressly warranted
for
aperiod
of
ONE YEAR
from
the date
of
the
original
purchase.
CONDITIONS
OF
THE EXPRESS WARRANTY
When requesting service under KENWOOD express
warranty
record,
together
with
avalid purchase docket
must
be
presented
to
an
authorised KENWOOD Service Centre
with
your
equipment.
The
following
are
not
covered
by
this
express
warranty:
1.
Voltage conversions.
2.
Cabinets, grilles,
other
exterior
finishes, belts, tape heads, and
other
non-durable parts and accessories.
3.
Any
fault
caused
by
faulty
installation,
water
damage. the vehicle
(including
its electrical system)
or
connection
to
an
incorrect
power
supply.
4.
Periodic check-ups
which
do
not
disclose any defects covered
by
the
warranty.
5.
Units
on
which
the serial
number
has been defaced,
modified
or
removed.
6.
Damage
or
deterioration:
a.
Resulting
from
installation and/or removal
of
the product.
b.
Resultingfrom
accident,misuse,abuse, neglect.
unauthorised
product
modification
orfailureto
follow
instructionscontained
in
the
Owner's Manual.
c.
Resulting
from
repair
by
anyone
not
authorised
by
KENWOOD.
d. Resulting
from
installation
of
parts
or
accessories
that
do
not
conform
to
the
quality
or
specifications
of
the
original
parts
or
accessories.
e.
Occurring
during
shipment
(claims must be presented
to
shipper),
7. Damaged
magnetic
tapes.
8.
Installation and removal charges are
not
covered.
9.
This express
warranty
excludes
shi~ping
or
delivery
charges
to
or
from
an authorised KENWOOD Service Centre.
10. The benefits conferred by
this
express
warranty
are in
addition
to
all
other
rights and remedies in respect
of
the
product
which
the
consumer
has
under
the Trade Practices Act
and/or
other
State
or
Territory Laws.
EXCLUSION
OF
CERTAIN DAMAGES
KENWOOD's
liability
for
any defective product is
limited
to
the repair
or
replacement
of
said product at
our
option,
and shall
not
include
damages
of
any
kind,
whether
incidental,
consequential
or
otherwise.
PROCEDURE WHEN REQUESTING SERVICE UNDER THE WARRANTY
1.
Make
your
equipment
available,
with
this
warranty
record and purchasedocket anached,
to
the dealer
from
whom
you
made
the
purchase,
or
the nearestauthorised KENWOOD Service Centre,
or
ship
your
equipment
in its
original
packaging,
or
equivalent,
fully
insured
and
shipping
charges pre·paid,
to
the
authorised
KENWOOD Service Centre.
2.
Attach detailed description
of
the problem encountered, including details
of
any interconnections made to associated equipment.
3.
Make sure
you
recover
this
card,
your
purchase docket and repair docket
when
accepting the
equipment
back after repair.
IMPORTANT NOTICE
1.
Proper maintenance and use are
important
to
the performance level
of
all KENWOOD brand products. Therefore,
you
should
read
your
instruction
manual.
2.
Retain
your
purchase docket
together
with
this
warranty
record
in
asafe place, and present
them
both
to
prove
your
eligibility
for
warranty
work.
3.
We
recommend
that
you keep all the original packaging
as
it
provides
the best protection you can have
for
transportation
of
your
equipment
in the future.
4.
Location
of
nearest KENWOOD Service Centre
will
be
sent
upon
request.
5.
This
warranty
is
in
addition
to
and
not
in place
of
such
rights
at
the
owner
may
have at law.
KENWOOD
ELECTRONICS
AUSTRALIA
PTY.
LTD.
16
GIFFNOCK
AVENUE,
CENTRECOURT
ESTATE,
NORTH
RYDE,
N.S.W.
2113,
AUSTRALIA
TEL.
102)
8879-2222
3
U.S.A.
This
warranty
will
be honored
only
in the U.S.A.
KENWOOD
LIMITED
WARRANTY
FOR
CAR
STEREO
COMPONENTS
HOW
LONG IS THE WARRANTY
Kenwood U.S.A. Corporation
("Kenwood")
warrants this product for aperiod
of
one
(1)
year
from
the date
of
original
purchase.
WHAT IS COVERED
AND
WHAT
IS
NOT
COVERED
Except
as
specified below, this
warranty
covers
all defects in
material
and
workmanship
in
Kenwood
car stereo
components.
The
following
are
not
covered
by
the warranty:
1.
Any
product
which
is notdistributed in the U.S.A.
by
Kenwood
or
which
is notpurchased
in
the U.S.A.
from
an authorized
Kenwoodcar stereo dealer
or
an
automobile
dealer, unlessthe productis purchased
through
theU.S.A
Military
Exchange
Service.
2.
Any
product
on
which
the serial
number
has
been
defaced,
modified
or
removed.
3.
Damage,
deterioration
or
malfunction
resulting
from:
a.
Any
shipment
of
the
product
(claims
must
be
presented
to
the carrier).
b. Installation
or
removal of
the
product.
c.
Accident, acts
of
nature, misuse, abuse, neglect,
unauthorized
product
modification
or
failure
to
follow
instructions
supplied
with
the product.
d. Repair
or
attempted
repair
by
anyone
not
authorized
by
Kenwood.
e.
Any
other cause
which
does not relate
to
a
product
defect.
WHO
IS PROTECTED
This
warranty
is
enforceable
only
by
the original purchaser.
WHAT
WE WILL
PAY
FOR
We
will
pay
for
all labor and material expenses
for
covered items. Payment
of
shipping charges is discussed in the
neX1
section
of
this
warranty.
HOW
TO OBTAIN WARRANTY SERVICE
If
your
KENWOOD product ever needs service:
1.
Take
or
ship
it
to
any KENWOOD Authorized Service Center in the U.S.A. along
with
&complete description
of
the
problem. (if
you
are uncenain
as
to
whether
aService Center is authorized, please call1-800-KENWOOD
for
the nearest
Service Center. 1-8oo-536-9663l.
2.
Although
you
must
pay any shipping charges
if
it
is necessary
to
ship the product
for
warranty
service,
we
will
pay the
return
shipping
charges
if
the
repairs
are
covered
by
the
warranty
within
the
United
States.
3.
Whenever
your
units
are
taken
or
sent
for
warranty
service,
you
must
include
a
copy
of
the
original
dated
sales
receipt
as
proof
of
warranty
coverage.
LIMITATION
OF
IMPLIED WARRANTIES
ALL IMPLIEDWARRANTIES, INCLUDING WARRANTIES
OF
MERCHANTABILITYAND FITNESS
FOR
APARTICULAR
PURPOSE,
ARE
LIMITED
IN
DURATION
TO
THE
LENGTH
OF
THIS WARRANTY.
EXCLUSION
OF
DAMAGES
KENWOOD'S LIABILITY
FOR
ANY
DEFECTIVE
PRODUCT
IS
LIMITED
TO
THE
REPAIR
OR
REPLACEMENT
OF
THE
PRODUCT
AT
OUR
OPTION. KENWOOD SHALL NOT
BE
LIABLE
FOR:
1. INSTALLATION
OR
REMOVAL CHARGES, DAMAGE TO
OTHER
PROPERTY
CAUSED
BY
ANY
DEFECTS
IN KENWOOD
CAR
STEREO
COMPONENTS, DAMAGES BASED UPON INCONVENIENCE,
LOSS
OF
USE
OF
THE
PRODUCT;
OR
2.
ANY
OTHER
DAMAGES, WHETHER INCIDENTAL, CONSEQUENTIAL
OR
OTHERWISE.
SOME STATES
DO
NOT ALLOW LIMITATIONS ON HOW LONG AN IMPLIED WARRANTY LASTS AND/OR
DO
NOT ALLOW
THE EXCLUSION
OR
LIMITATION
OF
INCIDENTAL
OR
CONSEQUENTIAL DAMAGES,
SO
THE
ABOVE LIMITATIONS AND
EXCLUSIONS MAY NOT
APPLY
TO YOU.
This
warranty
gives you specific legal rights, and you
may
also have other rights
which
vary
from
state
to
state.
If
a
problem
develops during
or
afterthe Limited Warranty Period,
or
if
you have any questions regarding the operation
of
the
product, you should contact
your
KENWOOD Authorized Dealer
or
Authorized Service Center.
lithe
problem
or
your
question
is
not
handled
to
your
satisfaction, please contact
our
Customer Relations Depanment at the address listed below:
KENWOOD
USA
CORPORATION
P.O
Box 22745, 2201
East
Dominguez
Street,
Long Beach,
CA
90801~5745
Tel:
(310)
639·5300
2
AUSTRALIA
The
warranty
will
only
be
honoured
in
the
country
in
which
the
unit
was
originally
purchased.
EXPRESS
WARRANTY
STATEMENT
FOR
CAR
STEREO
AND
PERSONAL
AUDIO
COMPONENTS
KENWOOD ELECTRONICS AUSTRALIA
PTY'
LTD.
is
proud
of
the
quality
and
workmanship
of
its audio equipment. This
unit has been
properly
designed, tested and inspected before
it
was shipped
to
you.
If
properly installed and operated in
accordance
with
instructions
furnished,
it
should
give
optimum
reliable
performance.
SCOPE OF EXPRESS WARRANTY
Each
of
the
KENWOOD
brand
products
is
expressly
warranted
under
normal
installation
and
use
against
defects
in
material
and
workmanship.
During the express warranty period, KENWOOD ELECTRONICS AUSTRALIA
PTY.
LTD.
will
provide
to
any
KENWOOD
Authorised
Service Centre in Australia free
of
charge
both
pans
and labour necessary
to
correct any defect in
material
or
workmanship.
However, the exclusions noted under the heading "CONDITIONS
OF
THE
EXPRESS WARRANTY"
are
not
covered
by
this
express
warranty.
EXPRESS WARRANTY PERIOD
The KENWOOD brand car stereo and personal
audio
components are expressly warranted
for
aperiod
of
ONE YEAR
from
the date
of
the
original
purchase.
CONDITIONS
OF
THE EXPRESS WARRANTY
When requesting service under KENWOOD express
warranty
record,
together
with
avalid purchase docket
must
be
presented
to
an
authorised KENWOOD Service Centre
with
your
equipment.
The
following
are
not
covered
by
this
express
warranty:
1.
Voltage conversions.
2.
Cabinets, grilles,
other
exterior
finishes, belts, tape heads, and
other
non-durable parts and accessories.
3.
Any
fault
caused
by
faulty
installation,
water
damage. the vehicle
(including
its electrical system)
or
connection
to
an
incorrect
power
supply.
4.
Periodic check-ups
which
do
not
disclose any defects covered
by
the
warranty.
5.
Units
on
which
the serial
number
has been defaced,
modified
or
removed.
6.
Damage
or
deterioration:
a.
Resulting
from
installation and/or removal
of
the product.
b.
Resultingfrom
accident,misuse,abuse, neglect.
unauthorised
product
modification
orfailureto
follow
instructionscontained
in
the
Owner's Manual.
c.
Resulting
from
repair
by
anyone
not
authorised
by
KENWOOD.
d. Resulting
from
installation
of
parts
or
accessories
that
do
not
conform
to
the
quality
or
specifications
of
the
original
parts
or
accessories.
e.
Occurring
during
shipment
(claims must be presented
to
shipper),
7. Damaged
magnetic
tapes.
8.
Installation and removal charges are
not
covered.
9.
This express
warranty
excludes
shi~ping
or
delivery
charges
to
or
from
an authorised KENWOOD Service Centre.
10. The benefits conferred by
this
express
warranty
are in
addition
to
all
other
rights and remedies in respect
of
the
product
which
the
consumer
has
under
the Trade Practices Act
and/or
other
State
or
Territory Laws.
EXCLUSION
OF
CERTAIN DAMAGES
KENWOOD's
liability
for
any defective product is
limited
to
the repair
or
replacement
of
said product at
our
option,
and shall
not
include
damages
of
any
kind,
whether
incidental,
consequential
or
otherwise.
PROCEDURE WHEN REQUESTING SERVICE UNDER THE WARRANTY
1.
Make
your
equipment
available,
with
this
warranty
record and purchasedocket anached,
to
the dealer
from
whom
you
made
the
purchase,
or
the nearestauthorised KENWOOD Service Centre,
or
ship
your
equipment
in its
original
packaging,
or
equivalent,
fully
insured
and
shipping
charges pre·paid,
to
the
authorised
KENWOOD Service Centre.
2.
Attach detailed description
of
the problem encountered, including details
of
any interconnections made to associated equipment.
3.
Make sure
you
recover
this
card,
your
purchase docket and repair docket
when
accepting the
equipment
back after repair.
IMPORTANT NOTICE
1.
Proper maintenance and use are
important
to
the performance level
of
all KENWOOD brand products. Therefore,
you
should
read
your
instruction
manual.
2.
Retain
your
purchase docket
together
with
this
warranty
record
in
asafe place, and present
them
both
to
prove
your
eligibility
for
warranty
work.
3.
We
recommend
that
you keep all the original packaging
as
it
provides
the best protection you can have
for
transportation
of
your
equipment
in the future.
4.
Location
of
nearest KENWOOD Service Centre
will
be
sent
upon
request.
5.
This
warranty
is
in
addition
to
and
not
in place
of
such
rights
at
the
owner
may
have at law.
KENWOOD
ELECTRONICS
AUSTRALIA
PTY.
LTD.
16
GIFFNOCK
AVENUE,
CENTRECOURT
ESTATE,
NORTH
RYDE,
N.S.W.
2113,
AUSTRALIA
TEL.
102)
8879-2222
3