*Track Random Play Function
*Selecting the Name or Title Disp!ay lor Discs
*To Scroll Manually
*Fast Forwarding and Reversing DISCPlay
*Track Repeat Functron
*Track Scan Function
*Track Random Play Function
eDisc Search
~01s~ Ropeai Function
*Magazine Random Play Function
6clcct1ng the Name or Title Display for DISCS
@ToSCI-oilManually
eSelecting the Tlrne Display for CDs
Gwllchlng to the Name Set Screen
*Magazine Random Play Function
*Switching to the Disc -1st Screen
Gelectlng the DNPS or CD Text
*Changing the DISCI..ist
Gelectlng the DISC
6eiectlng the Channels
sensar Box
~5~~i.Oi
scraan
*Setting the Menu ystem setup Screen
.~.l‘..I....I....~~.....~.fI...,~~ 42
..~..I.L‘.‘.‘~..~~.~.” .,.... 43
udio Control Screen
*Switching to the Crossover Network Seltlng Screerl
Gwtching to the Poslrion Setting Screen
Gvwhlng to the Channel Level SettIny Screen
OSwitchlng LOthe Digital Effect Settiny Seteon
6witchlnq to the Parametric Equal~rer Screen
*Ending &e Sound Effect Menu Screen
wait ~~~~~~i ~u~~~~~~
Audia foxtrot 9c~ean . . . . . . . . . . . . . .44
+ki~ust~ng the Bass !-eve1
eAd~tcsttr~gthe ‘Treble Levei
.Ad~ust~ng the Non-Fading Preout Level
*AdJustlng the Sub Wooter Levels
%~dlustlny the Balance i.evels
*Acllustlng the Fader Levels
BTurning the Loudness On/Off
*External Amp Control
OAdjusting the Volume Offset
*Ending the Audio Control Screen
Gwtchlng to the Sound Preset Screen
aRecallzlg the Kenwood Preset Sound
Gdlustlny the Center Frequency of the Bass
*Adjusting the 5ass Quaiity Factor
*AdlustIng the Center Frequency of the Tmhle
Gwitchlny the Bass Extend mode On/OF1
*Setting the Speaker Type
aStoring Your Sound Settings
4Snchng the Sound Preset Screen
~Possct/er petcock S62w3f-1.......... . . ... ._.... ., _.... 46
*Aci~usling Ihe H&-pass filter for Rear output
*Adjusttng Ihe High-pass filter for Front output
sAdjust the frequency of the Low-pass filter for Non-Fadfng o~&put
6etting the phase for Non-Fading output
*Returning to the Sound Effect Menu Screen
Digh?al Effect Setting Screen .. ,... .. ... .. . . . 47
*Seiecttng the Digital Input Mode
aUsIng the DOLBY PRO LOGIC
*Adjusling the Acoustic image
*Turning the Center Output On/Off
*‘Turnzng the Sub Woofer Output On/Off
*Selectw,g the Dynamic Range
*Selecting the Multi Channel
*Defeat (Crossovernetwork/delaytime)
OReturning to the Sound Effect Menu Screen
Positiun Salting Screen.. .. ... . ,. .‘. ..., ... .48
6electlng the Posltlon Mode
*AdlustIng the Room Sze Mode
*Returning to the Sound Effect Menu Screen
~~annef Level
Setting
Screen. ., . ... .... .. .. ., , 49
*Test Signai
*Adlusting the Front Left Speaker
*Adjusting the Front Right Speaker
sAdjusttng the Rear Left Speaker
*Adjustrng the Rear Rtght Speaker
*Adjusttng the Center Speaker
aReturnIng to the Sound Effect Menu Screen
~3~~3ve~ network ~st~i~~ Screen. .. .... .. .. ... .. . ..50
BAdlusting the Higi~-pass filter for Rear output
rAdlusting the Hugh-pass filter for Front output
*Adjust Ihe frequency of the Low-pass filter for Sub Waofer outp~
*Adjusttng the High-pass fllter for Center output
*SettInS the phase for Sub Woofer output
Gtonng your settings of the Crossover network/Delay time
Gwltching to the Delay Ttme Setting Screen
*Returncng to the Souncl Effect Menu Screen
Delay Time ~e~i~~ Screen ...‘. . .. . . ... ... . . ... . . ..51
*Adjustrng the Front Left Speaker-
.Adlusttng the Front Right Speaker
*Adjusting the Reac Left Speaker
QAdjusting the Rear Right Speaker
@Adjusting the Cenier Speaker
*Adjusting the Sub Woofer
*Ending the Delay Time Settlng Screen
parametric &waker Braen .‘. . . . . . . . . . . ... . . .52
*Seleciing the Adjust Band
*Adjusting the Center Frequency
Gdjusiing the Quality Factor
OAdlustlng the Gain
6etilng the Speaker Type
*Recalling the Kenwood Preset Sound
6torrng Your Sound Settings
*Returntng to the Sound Effect Menu Screen
cc
tm ..‘.” .............I.........,. ~.....” .....53
he
e Levels
*Adlusttng the Fader Levels
*Recalling Your Settings of the Crossover Network/Delay time
*Recalling Your Sound Settings
*External Amp Conlroi
etumin the Source Control Screen
mate @wl ~lfne~ia# .. ... .. r..I*~.vef*f*.*I ..,.. ......54
~~s~a~?a~i~~
~ccessaries.. .... . , .. . . ,. .. ... .. ...... .. ..... . . ..59
~nstailation ~roced~ra.. “.. . .,.. ..,... ..... . . , .. . . . .57
~o~nectjc~ ., ., .. .,...... ... . . .....“. ,.., ... . ........‘.. ..5&T
ffl§talfa~ion ,...~. . . .. .. .... .. ...‘..,.. .. ,‘ . . . , .. . ..I32
ida .....I. I.,.... .I”~ .. .. ....I. .. ........65
eci~ic~~i~na ... .. ....(~.~..... ..*. ... .. I .... .. .. ..... ...... .. .
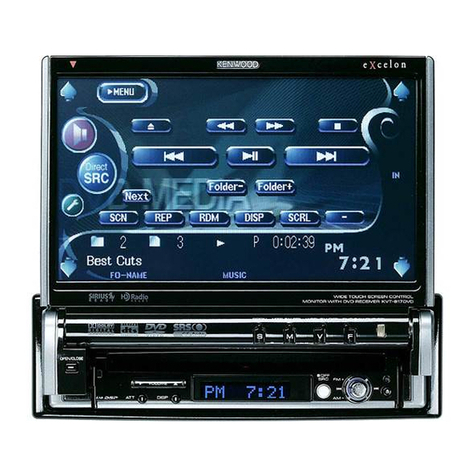
‘The illustrations
of the &splay and the panel appearing m GUSmanual are examples used to explam more clearly how ?he
controls are used. Therefore, what appears on the display It-1the llltlstralions rnay differ from what appears on the display on
the aciual equipment, and some of the illustrations on the display tnay represent somethmg impossible In actual operation.
