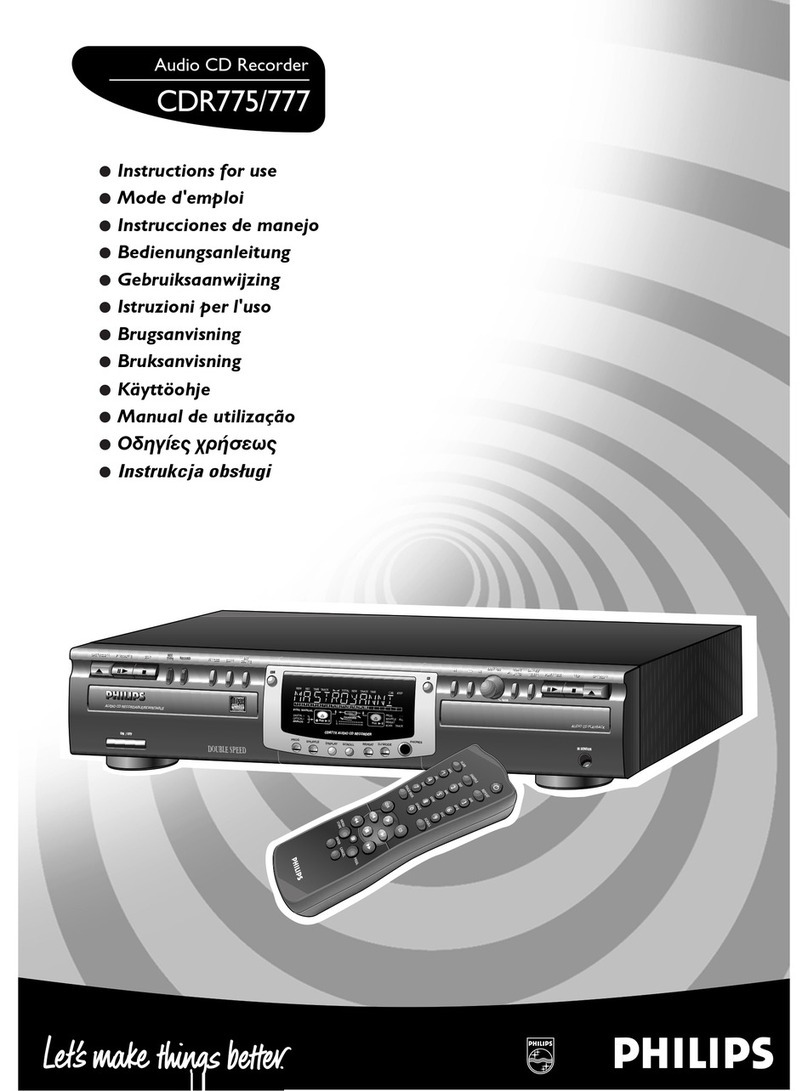
Kenwood DP-R893 User manual

CD
PLAYER
DP-R893
INSTRUCTION
MANUAL
KENWOOD
CORPORATION
(Se
DIGITAL
AUDIO
B60-1095-00
(K,
P,
M,
X,
Y)
96/12
1110987654321
95/1211
1098

Introduction
Your
choice
of
this
product
indicates
that
you
are
a
devotee
to
excellence
in
sound
reproduction.
We
appreciate
your
patronage
and
take
pride
in
the
long
tradi-
tion
of
quality
components
that
our
company
represents.
So
that
you
can
get
the
most
out
of
your
unit,
we
suggest
that
you
take
the
time
to
read
through
this
manual
before
you
hook
up
and
operate
your
system.
This
will
acquaint
you
with
oper-
ating
features
and
system-connection
considerations
so
that
your
listening
pleasure
will
be
enhanced
right
from
tne
start.
You
will
notice
that
in
all
aspects
of
planning,
engineering,
styling,
operating
convenience
and
adaptability
we
have
sought
to
anticipate
your
needs
and
desires.
Keep
this
manual
handy
for
future
reference.
For
your
records
Record
the
serial
number,
found
on
the
back
of
the
unit,
In
the
spaces
designated
on
the
warranty
card,
and
in
the
space
provided
below.
Refer
to
the
model
and
serial
numbers
whenever
you
call
upon
your
dealer
for
information
or
service
on
this
product.
Mode!l__
ss
:C‘«SSrriabl
Nmbler
Unpacking
Unpack
the
unit
carefully
and
make
sure
that
all
accessories
are
put
aside
so
they
will
not
be
lost.
Examine
the
unit
for
any
possibility
of
shipping
damage.
If
your
unit
is
damaged
or
fails
to
operate,
notify
your
dealer
immediately.
If
your
unit
was
shipped
to
you
directly,
notify
the
shipping
company
without
delay.
Only
the
consignee
{the
person
orcompany
receiving
the
unit)
can
file
a
claim
against
the
carrier
for
shipping
damage.
We
recommend
that
you
retain
the
original
carton
and
pack-
ing
materials
for
use
should
you
transport
or
ship
the
unit
in
the
future.
The
marking
of
products
using
lasers
(Except
for
some
areas).
|
CLASS1
=
®
LASER
PRODUCT
|
This
label
is
attached
to
the
rear
panel
and
says
that
the
component
uses
laser
beams
that
have
been
classified
as
Class
1.
It
means
that
the
unit
js
utilizing
laser
beams
that
are
of
a
weaker
class,
There
ia
no
danger
of
hazardous
radiation
outside
the
unit.
Contents
TPOOUG
UGN
taieintcle
satihosiicidi
emalouaomena
aves
A.
Before
applying
power
A\Safety
precautions
A,
IMPORTANT
SAFEGUARDS
system
connections
Controls
and
indicators
Manual
play
(TRACK
mode}
2
DP-R893
(En)
For
the
U.S.A
CAUTION:
Use
of
controls
or
adjustments
or
performance
of
procedures
other
than
those
specified
herein
may
result
in
hazaedous
radiation
exposure.
In
compliance
with
Federal
Regulations,
following
are
reproductions
of
labels
on,
or
inside
the
product
relating
to
laser
product
safety.
T
KENWOOD
CORPORATION
SHIONOGI
SHIBUYA
BUILDING
17-5,
2-
CHOME,
SHIBUYA,
SHIBUYA-KU,
TOKYO,
JAPAN
KENWOOD
CORP.
CERTIFIES
THIS
EQUIPMENT
CONFORMS
TO
DHHS
REGULATIONS
NO.
21
CFR
1040.10,
CHAPTER
|,
SUBCHAPTER
J.
&
Location:
Back
Panel
Accessories
AUCIO
COI
1...
cesesereenrovneeee
For
the
unit
with
a
European
AC
plug
in
areas
other
than
Europe.
Programmed
play
(PGM
mode}
Repeated
play
FRANGONS
Play
seiiveutsesaysecescncdciecotetens
Editing
TIME
OPOLAtlONS
1...
eeecseeeeeeceeeeeees
asda
eats
caocttes
Dates
16
Maintenance
In
case
of
difficulty
Specifications

Before
applying
power
For
the
U.S.A.
and
Canada
Important!
Units
shipped
to
the
U.S.A.
and
Canada
are
designed
for
operation
on
120
volts
AC
only.
CAUTION:
TO
PREVENT
ELECTRIC
SHOCK
DO
NOT
USE
THE
AC
PLUG
WITH
AN
EXTENSION
CORD,
RECEPTACLE
OR
OTHER
OUTLET
UNLESS
THE
BLADES
CAN
BE
FULLY
INSERTED
TO
PREVENT
BLADE
EXPOSURE.
:
For
the
United
Kingdom
Important!
Units
shipped
to
the
U.K.
are
designed
for
operation
on
240
valts
AC
only.
The
mains
plug
must
be
removed
from
the
wall
socket
prior
to
any
interna!
examination.
The
wires
in
this
mains
lead
are
coloured
in
accordance
with
the
following
code:
=
=
Neutral
Brow
iicteiecee
sans
east
Lie
The
wires
in
this
mains
lead
must
be
connected
to
the
terminals
in
the
plug
as
follows:
Wire
colour
BIG:
cit
pehersceyteaaieanas
ESCO
MAI
ite
cordate
ech
eoeniowwesaecs
Plug
terminal
marking
ewer.
NOP
BlACk
eiacmacvs
Or
Hed
Blue
to
Neutral
Plug
Notes:
1.lf
a
18-amp
plug
is
used,
this
must
be
fitted
with
a
13-amp
fuse.
2.
If
a
3-pin
plug
with
earthing
contact
is
used,
no
wire
must
be
connected
to
the
E
terminal.
Safety
precautions
A
Caution:
Read
this
page
carefully
to
ensure
safe
operation.
For
Australia
and
Europe
Important!
Units
shipped
to
Australia
are
designed
for
operation
on
240
V
AC
only.
Units
shipped
to
Europe
are
designed
for
operation
on
230
V
AC
only.
For
other
countries
Important!
Units
shipped
to
countries
other
than
the
above
countries
are
equipped
with
an
AC
voltage
selector
switch
on
the
rear
panel.
Refer
to
the
following
paragraph
for
the
proper
setting
of
this
switch.
AC
voltage
selection
This
unit
operates
on
110-120
of
220-240
volts
AC.
The
AC
voltage
selector
switch
Type
A
or
Type
B
on
the
rear
panel
is
set
to
the
voltage
that
prevails
in
the
area
to
which
the
unitis
shipped.
Before
connecting
the
power
cord
to
your
AC
outlet,
make
sure
that
the
setting
position
of
this
switch
matches
your
line
voltage.
If
not,
it
must
be
set
to
your
voltage
in
accordance
with
the
following
direction.
AC
voltage
selector
switch
te
mill
AC110-
«=
AC
220-
120
V
~
240
V
~
Type
A
—
el
FEO
piti
i
mil
|
Pri
Pi
ey
AC
110-
Move
switch
lever
to
match
your
line
voltage
with
a
small
screwdriver
or
other
pointed
tool.
Note:
———_—iom@®$
oem
—_—
Our
warranty
does
not
cover
damage
caused
by
excessive
line
voltage
due
to
improper
setting
of
the
AC
voltage
selector
switch.
WARNING:
TO
PREVENT
FIRE
OR
ELECTRIC
SHOCK,
DO
NOT
EXPOSE
THIS
APPLIANCE
TO
RAIN
OR
MOISTURE.
CAUTION
RISK
OF
ELECTRIG
SHOCK
DO
NOT
OPEN
CAUTION:
TO
REDUCE
THE
RISK
OF
ELECTRIC
SHOCK,
DO
NOT
REMOVE
COVER
(OR
BACK}.
NO
USER-SERVICEABLE
PARTS
INSIDE,
REFER
SER-
VICING
TO
QUALIFIED
SERVICE
PERSONNEL.
THE
LIGHTNING
FLASH
WITH
ARROWHEAD
SYMBOL,
WITHIN
AN
EQUILATERAL
TRIANGLE,
IS
INTENDED
TO
ALERT
THE
USER
TO
THE
PRESENCE
OF
UNINSULATED
“DANGEROUS
VOL-
TAGE”
WITHIN
THE
PRODUCT'S
ENCLOSURE
THAT
MAY
BE
OF
SUFFICIENT
MAGNITUDE
TO
CONSTITUTE
A
RISK
OF
ELECTRIC
SHOCK
TO
PERSONS.
THE
EXCLAMATION
POINT
WITHIN
AN
EQUILATERAL
TRIANGLE
IS
INTENDED
TO
ALERT
THE
USER
TO
THE
PRESENCE
OF
IMPORTANT
OPERATING
AND
MAINTENANCE
(SERVICING)
IN-
STRUCTIONS
IN
THE
LITERATURE
ACCOMPANYING
THE
APPLIANCE.
DP-R893
(En)
3
ah

IM
PO
RTANT
SAF
EG
UAR
D
S
A
Caution:
Read
this
page
carefully
to
ensure
safe
operation.
Please
read
all
of
the
safety
and
operating
instructions
7.
Heat
—
The
unit
should
be
situated
away
from
heat
before
operating
this
unit.
For
best
results,
follow
all
sources
such
as
radiators,
heat
registers,
stoves,
or
warnings
placed
on
the
unit
and
adhere
to
the
operating
other
units
(including
amplifiers)
that
produce
heat.
and
use
instructions.
These
safety
and
operating
instructions
should
be
retained
for
future
reference.
1.
Power
sources
—
The
unit
should
be
connected
to
a
power
supply
only
of
the
type
described
in
the
operating
instructions
or
as
marked
on
the
appliance.
2.
Power-cord
protection
—Power-supply
cords
should
be
routed
so
that
they
are
not
likely
to
be
walked
on
or
pinched
by
items
placed
upon
or
against
them,
8.
Electric
shock
—
Care
should
be
taken
so
that
objects
pay
particular
attention
to
cords
at
plugs,
convenience
do
not
fall
and
liquid
is
not
spilled
into
the
enclosure
receptacles,
and
the
point
where
they
exit
from
the
through
openings.
If
a
metal
object,
such
as
a
hair
unit.
pin
or
aneedle,
comes
into
contact
with
the
inside
of
this
unit,
a
dangerous
electric
shock
may
result.
For
families
with
children,
never
permit
children
to
put
anything,
especially
metal,
inside
this
unit.
Never
pull
or
stretch
the
cord.
3.
Grounding
or
polarization
—
The
precautions
should
be
taken
so
that
the
grounding
or
polarization
means
of
this
unit
is
not
defeated.
4.
Ventilation
—
The
unit
should
be
situated
so
that
its
9.
Enclosure
removal
-—
Never
remove
the
enclosure.
location
or
position
does
not
interfere
with
its
proper
lf
the
internal
parts
are
touched
accidentally,
a
serious
ventilation.
electric
shock
might
occur.
To
maintain
good
ventilation,
do
not
put
records
ora
,
table-cloth
on
the
unit.
Place
the
unit
at
least
10
cm
away
from
the
walls.
Do
not
use
the
unit
on
a
bed,
sofa,
rug
or
similar
surface
that
may
block
the
ventilation
openings.
10.Magnetic
fields
—
Keep
the
unit
away
from
sources
of
magnetic
fields
such
as
TV
sets,
speaker
systems,
radios,
motorized
toys
or
magnetized
objects.
5.
Water
and
moisture
—
The
unit
should
not
be
used
near
water
-
for
example,
near
a
bathtub,
washbowl,
kitchen
sink,
laundry
tub,
ina
wet
basement,
or
near
a
swimming
pool,
etc.
11.Cleaning
—
Do
not
use
volatile
solvents
such
as
alcohol,
paint
thinner,
gasoline,
or
benzine,
etc.
to
clean
the
cabinet.
Use
a
clean
dry
cloth.
6.
Temperature
—
The
unit
may
not
function
properly
if
used
at
extremely
low,
or
freezing
temperatures.
The
ideal
ambient
temperature
Is
above
+5°C
(41°F).
4
DP-Re93
(En)

A
Caution
:
Read
this
page
carefully
to
ensure
safe
operation.
12.Carts
and
stands
—-—
An
appliance
and
cart
combination
should
be
moved
with
care.
Quick
stops,
excessive
force,
and
uneven
surfaces
may
cause
the
appliance
and
cart
combination
to
overturn.
13.Nonuse
periods
—
The
power
cord
of
the
unit
should
be
unplugged
from
the
outlet
when
left
un-
used
for
a
long
period
of
time.
14.Abnormal
smell
—
!f
an
abnormal
smell
or
smoke
is
detected,
immediately
turn
the
power
OFF
and
pull
out
the
power
cord.
Contact
your
dealer
or
nearest
service
center.
POWER
OFF!
15.Damage
requiring
service
—
The
unit
should
be
serviced
by
qualified
service
personnel
when:
A.
The
power-supply
cord
or
the
plug
has
been
damaged;
or
B.
Objects
have
fallen,
or
liquid
has
been
spilled
into
the
unit;
or
G.
The
unit
has
been
exposed
to
rain;
or
D.
The
unit
does
not
appear
to
operate
normally
or
exhibits
a
marked
change
in
performance;
or
E.
The
unit
has
been
dropped,
or
the
enclosure
damaged.
16.Servicing
—
The
user
should
not
attempt
to
service
the
unit
beyond
that
described
in
the
operating
instructions.
Allother
servicing
should
be
referred
to
qualified
service
personnel.
Notes:
1.
ltem
3
is
not
required
except
for
grounded
or
polarized
equipment.
17.Outdoor
antenna
grounding
-
If
an
outside
an
tenna
is
connected
to
the
receiver,
be
sure
the
an-
tenna
system
is
grounded
so
as
to
provide
some
protection
against
voltage
surges
and
built
up
static
charges.
Section
810
of
the
National
Electrical
Code,
ANSI/NFPA
70,
provides
information
with
respect
to
proper
grounding
of
the
mast
and
supporting
structure,
grounding
of
the
lead-in
wire
to
an
antenna
discharge
unit,
size
of
grounding
conductors,
location
of
antenna-discharge
unit,
connection
to
grounding
electrodes,
and
requirements
for
the
grounding
electrode.
See
Figure.
EXAMPLE
OF
ANTENNAS
GROUNDING
AS
PER
NATIONAL
ELECTRICAL
CODE
ANTENNA
LEAD
IN
WIRE
L
ANTENNA
DISCHARGE
UN!T
(NEC
SECTION
810-20)
p~..
GROUNDING
CONDUCTORS
(NEC
SECTION
870-21}
GROUND
CLAMP
raat"
POWER
SERVICE
GROUNDING
ELECTRODE
SYSTEM
(NEC
ART
250,
PART
H)
NEC
—
NATIONAL
ELECTRICAL
CODE
18.Power
lines
-
An
outdoor
antenna
should
be
lo-
cated
away
from
power
lines.
19.AC
outlets
—
Do
not
connect
other
audio
equipment
with
a
power
consumption
larger
than
that
specified
to
the
AC
outlet
on
the
rear
panel,
Never
connect
other
electrical
units,
such
as
an
iron
or
toaster,
to
it
to
prevent
fire
or
electric
shock.
2,
Item
17
and
18
are
not
required
except
for
units
provided
with
antenna
terminals.
3,
Item
17
complies
with
UL
in
the
U.S.A.
DP-R893
(En)
5

System
connections
Make
connection
as
shown
below.
When
connecting
the
related
system
components,
refer
also
to
the
instruction
manuals
of
the
related
components.
Do
not
plug
in
the
power
lead
uniil
all
connections
are
completed.
AC
voltage
selector
switch
(Except
for
some
areas)
Audio
cord
To
AC
outlet
System
control
connection
When
connected
to
an
amplifier
or
receiver
having
KENWOOD
SYSTEM
CONTROL
terminals,
system
operation
such
as
remote
control
is
made
possible.
For
details,
refer
to
the
instruction
manual
of
the
amplifier
or
receiver.
If
your
amplifier
or
receiver
is
not
equipped
with
the
SYSTEM
CON-
TROL
terminals,
do
not
connect
anything
to
any
SYSTEM
CONTROL
terminals.
Do
not
connect
the
unit
in
any
system
configuration
other
than
specified,
@
Be
sure
to
insert
the
system
control
cord
plugs
fully
into
the
SYSTEM
CONTROL
terminals.
@
If
the
system
control
cord
and
audio cords
are
not
connected
properly,
the
automatic
system
governing
remote
control
and
system
functions
will
not
operate.
Notes:
1.
Connect
all
cords
firmiy.
If
connections
are
loose
there
could
be
loss
of
sound
or
noise
produced.
2.
When
plugging
and
unplugging
connection
cords,
be
sure
to
first
remove
the
power
cord
from
the
AC
outlet.
Plugging/unplugging
connection
cords
without
removal
of
the
power
cord
can
cause
malfunctions
or
darmage
to
the
unit.
M@
Disc
handling
precautions
Handling
Cleaning
Hold
compact
discs
so
that
you
do
not
If
fingerprints
or
foreign
matter
be-
touch
the
playing
surface.
come
attached
to
the
disc,
lightly
se
me
wipe
the
disc
with
a
soft
cotton
cloth
(or
similar}
from
the
center
of
the
disc
Label
side
;
[
outwards
in
a
radia!
manner.
=<
Fiaying
side
Do
not
attach
paper
or
tape
to
either
the
P.
Storage
playing
side
or
the
label
side
of
compact
When
a
disc
is
not
to
be
played
fora
discs.
long
period
of
time,
remove
it
from
the
CD
player
and
store
it
in
its
case.
6
DP-R893
(En)

Controls
and
indicators
P.MODE
key
CHECK
key
OPEN/CLOSE
key
®
4
4
4
1
a
CLEsR
TIME
OISP,
CLEAR
key
—__
es
TIME
DiSP.
key
DISC
SKIP
key
RANOGM
REPEAT
1
a
‘
*
4
1.
‘
.
Disc
selector
keys
EDIT-1,EDIT-2
keys
(DISC
7
~
DISC
5)
FT
=
REPEAT
key
‘
RANDOM
key
KENWOOD
MABE
CMON]
PERE
Bat")
a
<<
aN
70
STAY
‘
,
*
'
Skip
keys
Rotary
tray
(ee)
SH)
POWER
switch
Search
keys
(=<,
[>
])
Ny
PLAY/PAUSE
key
EDIT-1
indicator
REPEAT
indicator
[P.C.]
indicator
Piay
mode
indicator
TRACK
mode
PGM
mode
RANDOM
EDIT
file
indicators
indicator
Play
indicator
Pause
indicator
Disc
No.
indicators
EDIT-2
indicator
Music
calender
(1
~
20)
TRACK
NO.
indicator
Time
counter,
Program
No.
SINGLE
TIME
TOTAL
TIME
DP-R893
(En)
7

Manual
play
(TRACK
mode)
OPEN/CLOSE
key
Disc
selecter
keys
(DISC
1
~
DISC
5)
POWER
switch
Rotary
tray
PLAY/PAUSE
key
M@
Playing
a
CD
from
the
beginning
1
Press
the
POWER
switch
to
ON.
?
Load
a
CD.
@
Open
the
disc
tray.
@)
Place
a
disc
on
the
tray.
@
When
inserting
two
or
more
discs,
use
the
[DISC
SKIPikey
to
rotate
the
tray.
Up
to
five
discs
may
be
inserted.
@
When
inserting
a
disc
while
the
tray
rotates,
a
——
malfunction
might
occur.
insert
the
disc
when
the
tray
does
not
rotate.
DISC
SKIP
|
3
Close
the
tray.
1
2 3 4
3&
MNS
ES
a6
F
8
BB
10
1%
#12
12°16
«18
Oo:
ag
18
47
18
4B
20
e
After
the
tray
is
closed
completely,
The
disc
number
of
the
inserted
disc
will
light
up.
perform
next
step.
4
Start
playback.
Select
the
disc.
=
[=e
3
«6
BE
oa
15
13014
#16
oot
S
‘
1B
18 20
Osc
4
Osc
2
OGC
3
OSS
4
cS
eS
©
C2
©
Display
showing
number
of
disc
being
played
(¥)
Elapsed
time
from
the
beginningof
track
being
played
Track
No,
being
played
@
Play
will
commence
from
the
disc
selected.
When
two
or
more
discs
are
inserted,
the
discs
will
be
played
in
ascending
order
from
disc
1.
@
When
the
PLAY/PAUSE
key
is
pressed
without
selecting
a
disc,
play
will
automatically
commence
in
order
of
ascending
disc
number
from
the
disc
last
inserted.
To
pause
CD
play
{|
Tostop
CD
play
Fa
Lights
up
To
resume
playback,
press
the|»>/m]|
key
again.
8
p?-R893
(En)

mM
Listening
from
the
desired
track
1
Ensure
that
the
CD
player
is
in
the
TRACK
mode.
e
lf
the
indicator
is
lighted,
press
the
[P.
MODE]
key.
2
Select
the
desired
disc.
Continue
pressing
until
the
desired
track
No.
appears.
@
The
selected
track
number
and
play
indicator
willlight
up,
and
the
|
track
will
start
to
play.
@
When
the
[4
]key
is
pressed
once
during
play,
the
track
starts
|
again
from
the
beginning.
TIME
DISP.
key
P.,MODE
key
Dise
selector
keys
(DISC
1
~
DISC
5)
Search
keys
(<<)
.[>>)})
TIME
DISP.
key
Skip
keys
([He=<},
[>>
))
To
fast
forward
and
backward
@
The
track
will
start
to
play
from
where
you
release
the
key.
Tracks
can
be
selected
directly
using
the
numeric
keys
on
a
KENWOOD
amplifier/receiver
remote
control
by
connecting
the
CD
player
to
the
amplifier/receiver
using
a
system
control
cord.
For
more
details,
please
refer
to
your
amplifier
or
receiver
instruction
manual.
Press
the[
TIME
DISP.]
key
when
you
want
to
check
the
elapsed
time
and
remaining
time
of
the
track
being
played.
Every
time
the
[TIME DISP.
key
is
pressed,
the
displayed
time
changes
as
shown
below.
The
time
information
display
may
not
appear
when
playing
a
CD
containing
21
or
more
tracks.
In
such
a
case,
the
display
will
snow
“-—-—-".
During
randorn
play
or
programmed
play,
display
will
show
SINGLE
TIME
only.
SINGLE/TOTAL
TIME
display
SINGLE
TIME
TIME
DISP.
ee
==
TOTAL
TMG
23:45
alles
Elapsed
time
of
the
track
being
Time
display
examples
SINGLE
TIME
TOTAL
TIME
TOTAL
TIME
Remaining
time
of
the
track
being
played
Elapsed
time
of
the
whole
CD
Remaining
time
of
the
whcle
CD
DP-R8g3
{En}
9

Programmed
play
(PGM
mode)
The
program
mode
allows
you
to
play
desired
tracks
in
the
order
you
want
to
hear
them.
A
maximum
of
20
selections
can
be
entered
in
memory.
M@
Playing
desired
tracks
in
desired
order
1
Press
the
STOP
key.
4
Start
playback.
|
2
Enter
the
PGM
mode.
@
|f
one
of
the
skip
keys
([mPi]
or
[Ke]
)
is
pressed
during
pro-
|
grammed
playback,
the
track
being
played
is
skipped
in
the
|
forward
or
reverse
direction.
P.MQDE
_
indicator
lights
up.
hcipate
ecw
eal
To
check
the
programmed
order
&s
*
@
&
10
$1
92°12
#14
«#18
GG0660
|
R00
66006
indicator
lights
up.
GHECK
3
Program
desired
tracks
in
desired
order.
Cc
n_
Ca
Example:
Select
track
5
on
DISC
4.
:
=
|
re
@
Select
the
disc.
:
O2@2O00u!
P-je
Display
showing
program
No.
12,
DISC
3,
track
No,
7.
Osc
1
@
Everytime
the
CHECK]key
is
pressed,
the
track
No.
and
the
order
it
was
programmed
(P-No.)
are
displayed
in
the
order
of
pro-
gramming.
e@
The
previous
display
will
resume
in
a
few
seconds.
To
resume
normal
playback
@)
Press
the
P.MODE
key.
P.MODE
Cc
Biinks
SINGLE
Tite
Nty
Cea
be
©@e0005
P-O}
Track
number
@
The
playback
in
the
order
of
the
track
Nos.
on
CD
will
start
after
the
track
being
played.
To
stop
programmed
playback
e
When
selecting
tracks
using
the
numeric
keys
on
the
remote
control
of
the
amplifier/receiver,
the
key
does
nothave
to
be
pressed
after
the
tracks
have
been
selected.
®
Byrepeating
steps@
@
@,
up
to
twenty
tracks
may
be
selected.
@
|f
you
made
a
mistake,
press
the[(CLEARIkey
and
select
the
correct
track,
@
By
pressing
the
key
without
selecting
track
numbers,
all
the
tracks
on
the
disc
selected
in
step
CD
will
be
programmed.
CPE)
4°
2
42
4
4
ples
ceeehien
Tr
2 i
44
12
12
4
15
@e@eAL
i
eS
eee
10
pp-re93
(En)

2
Select
the
track
No.
to
be
added.
CD
Select
the
disc.
@)
Select
the
track
number.
[=a
sai
bebe
@)
Press
the
P.MODE
key.
Clearing
from
the
last
track
CLEAR
@
Every
time
the
key
is
pressed,
tracks
are
cleared
from
the
last
track
in
order.
@
The
track
being
played
cannot
be
cleared.
Clearing
the
whole
of
program
P,.
MODE
——
7
@
Selected
tracks
will
be
completely
cleared
just
by
pressing
the
OPEN/CLOSE|key.
P.MODE
key
OPEN/CLOSE
key
CHECK
key
Dise
selector
keys
(DISC
1
~
DISC
§)
|
CLEAR
key
PLAY/PAUSE
key
@
To
change
a
track
in
the
program
|
2
Press
the
CHECK
key.
CHECK
Press
until
the
P-No.
to
be
changed
is
displayed.
,
3
Select
the
track
No.
to
replace
the
previous
one.
|
@
Select
the
disc.
psec
4
Osc
2
osc
3
DSC
4
DEC
S
@
Select
the
track
number.
@)
Press
the
P.MODE
key.
P,MODE
Auto-Space
function
in
the
program
mode,
a
space
of
about
4
seconds
is
inserted
automati-
cally
between
the
programmed
tracks.
This
function
is
provided
to
facilitate
the
DPSS
function
of
the
cassette
deck.
However,
such
a
space
may
also
be
inserted
in
case
the
sound
of
two
tracks
are
continued,
for
example
with
some
classic
music
and
live
recordings.
DP-R8e3
(En)
11
ee

Repeated
play
M@
Repeated
playback
One-disc
repeat
irene
1
Press
the
STOP
key.
Repeated
playback
of
programmed
tracks
1
Press
the
STOP
key.
2
Enter
the
PGM
mode.
,
|
P.
MODE
indicator
lights
up.
is
Perel
|
Select.
the
desired
disc.
:
—)
*
v
Enter
the
PGM
mode.
|
2
P
MODE
indicator
lights
up.
Y
O@OO®
|
3
Select
the
desired
track(s).
@
Select
the
disc.
osc
5
Osc.1
ps
osc
3
ae
C
@)
Select
the
track
number.
[1
|
Ir
@)
Press
the
P.MODE
key.
Press
the
REPEAT
key.
REPEAT
P.MODE
ee
e
When
selecting
tracks
using
the
numeric
keys
on
the
remote
|
control
of
the
amplifier/receiver,
the|P.
MODE
|key
does
not
have
to
be
pressed
after
the
tracks
have
been
selected.
@
All
of
the
selected
tracks
will
be
played
repeatedly.
@
lf
only
one
track
is
selected,
that
track
will
be
played
repeatedly.
|
4.
Press
the
REPEAT
key.
REPEAT
ly
(PEx]
-
rity
¥
)
O@e@®
|
5h
Start
playback.
REPEAT}
indicator
tights
up.
All-disec
repeat
|
Enter
the
TRACK
mode.
P.MODE
i
©O@2000
|
2
Press
oe
key.
indicator
lights
up.
|
DEE
ee
o@eeeooG!
3
Start
playback.
TRACK
Jindicator
lights
up.
To
stop
repeat
play
Press
the!
REPEAT)
key
again.
REPEAT
@
All
tracks
on
all
ciscs
in
the
tray
will
be
played
repeatedly.
12
DP-Re93
(En!

Random
play
The
random
play
function
chooses
tracks
at
random
(non-
PLAY/PAUSE
key
selected),
and
in
differing
order.
it
lets
you
enjoy
hours
of
P.MODE
key
Disc
selector
keys
(DISC
1
~
DISC
5)
tireless
track
listening.
RANDOM
key
Bry
okip
keys
REPEAT
k
eee
([re<],
[>>H])
M@
Playing
tracks
in
a
random
order
1
Ensure
that
the
CD
player
isin
the
TRACK
mode.
To
select
another
track
during
random
play
@
If
the
indicator
is
lighted,
press
the
|
P.MODE
|
key.
2.
Press
the
RANDOM
key.
RANDOM
During
random
track
selection.
Blinks
To
cancel
random
play
|
n6
17 18
t#
pal
Press
either
one
of
these
keys.
SINGLE
TMG
TRASH
NO
o@eeeGS
18:08
@
Jracks
from
all
the
disc{s)
in
the
tray
will
be
played
randomly.
@
When
the
first
track
has
been
played,
another
track
is
selected
at
.
e@
Normal
play
starts
from
the
@
Playback
stop.
random
again,
and
played.
track
being
played.
Note:
The
same
track
on
the
same
CD
will
not
play
twice
over
continuously,
however,
it
may
happen
that
the
same
track
is
repeated
later
in
play.
DP-R893
(En)
13

Editing
SS
This
function
is
for
editing
when
you
are
recording
the
contents
ofa
CD
onto
a
tape.
Itis
to
ensure
that
the
final
track
on
each
side
of
the
tape
is
fully
recorded
and
that
the
possible
ee
geld
cartels
i
recording
time
on
the
tape
will
be
fully
used.
The
two
sides
of
two
discs
can
be
edited
by
using
EDIT-1
and
EDIT-2
keys
respectively.
This
function
is
useful
when
con-
tinuous
recording
using
two
cassettes.
TIME
DiSP.
key
EDIT-1,
EDIT-2
keys
OPEN/CLOSE
key
Skip
keys
([-e<],
>i)
@
To
edit
The
CD
contents
are
edited
as
follows.
(1)
The
input
tape
recording
time
is
divided
by
two,
and
tracks
that
can
be
accommodated
in
file
A
(which
refers
to
tracks
on
tape
side
A)
are
selected
in
order
of
their
track
Nos.
|
Press
the
STOP
key.
@
Ensure
that
the
CD
player
is
in
the
TRACK
mode.
|
2?
Press
the
EDIT-1
key.
EDIT-1
GD)
Remaining
time
in
file
A
@
ThelEDIT-2}key
cannot
be
pressed
until
after
the
first
disc
has
been
edited
using
the|EDIT-1]
key.
{2}
In
a
few
seconds,
the
time
left
on
tape
side
A
is
displayed,
then
file
B
(tracks
on
tape
side
B)
is
edited
in
the
same
manner.
|
3
Select
the
disc
to
be
edited
(one
disc
only).
Seo
sec
a,
“thal
i
—
=
a
O®@O®
Remaining
time
in
file
B
@
|f
thelSTOP]key
orl
OPEN/CLOSE]
key
is
pressed
during
editing,
|
editing
will
be
suspended
and
the
function
terminated.
e
The
edit
function
cannot
be
used
for
two
or
more
discs.
|
"“C
-"is
displayed
after
a
few
seconds.
|
4
Input
the
recording
time
of
the
tape.
After
the
"C
-"
is
displayed,
@D
TIME
DISP.
enter
the
tape
length.
Completion
of
editing
Stops
blinking
Track
Nos.
selected
from
disc
TRACS
HO.
TOTAL
TIME
G
1-43:22
Total
time
of
selected
tracks
@
By
pressing
the[TIME
DISP.
|key
the
set
timedength
intervals
will
change
in
this
order:
46454-6090.
@
Byusing
the
skip
key/>4],
|<]
interval
lengths
can
be
adjusted
in
units
of
one
minute
(to
a
maximum
of
99
minutes).
[mri]
:
increase
by
one
minute.
:
[Hd<d]
:
decrease
by
one
minute.
To
edit
the
second
disc
Press
the
EDIT-2
key
as
in
step
number
2,
and
repeat
steps
3
and
4.
@
Press
the
EDIT-1
key
once
again.
EDIT-1
CA
@
When
the
interval
length
has
been
set
using
the
numeric
keys
on
the
remote
control
of
the
amplifier/receiver,
the[EDIT-1]
key
does
not
have
to
be
pressed
after
the
interval
has
been
set.
14
pp-Reg3
(En)

CHECK
key
P.MODE
key
OPEN/CLOSE
key
CLEAR
key
STOP
key
PLAY/PAUSE
key
M
To
check
the
edited
contents
M@
To
record
an
edited
program
The
CCRS
recording
function
may
be
used
by
connect-
ing
the
CD
player
to
any
KENWOOD
cassette
deck
with
|
an“O@
”
mark,
using
a
system
control
cord.
:
if
connected
to
a
cassette
deck
that
is
able
to
relay
|
recording,
material
edited
using
the
EDIT-1
and
EDIT-2
keys
can
be
continuously
recorded.
For
details
please
refer
to
“Recording
of
CD
playback”
section
in
your
cassette
deck
instruction
manual.
Press
the
CHECK
key.
indicator
lights
up.
@
The
CCRS
double-speed
recording
function
may
be
used
when
decks
that
are
made
to
handle
twice
normal
speed
dubbing
are
|
used,
e@
VVhen
connected
to
a
single
deck
or
one
way
deck,
this
function
may
prove
to
be
partially
unusable.
Omar]
ae
oe
Il
6
7
@
8
19
1
$72
1%
#14
«#168
O©DOO®
(ee
eee
CCRS
display
@
Every
time
the
|CHECK]
key
is
pressed,
the
track
Nos.
are
displayed
in
the
edited
order.
@
This
function
can
be
used
only
after
pressing
the[STOP]key.
M
To
play
an
edited
program
@
To
clear
the
edited
contents
Press
either
of
these
keys.
eq
@
The
play
starts
in
order
from
the
first
track
in
file
A
and
then
pauses
at
the
beginning
of
file
B.
®
To
listen
to
file
B,
press
the
key
again.
@
Edited
material
will
be
completely
cleared
by
just
pressing
the
lOPEN/CLOSElkey.
Notes:
1.
While
you
can
edit
with
a
different
time
setting
to
that
of
the
tape
you
are
using,
part
of
the
tape
may
be
left
with
nothing
recorded
on
it,
or
the
last
track
on
side
A
or
side
B
may
be
cut
short.
2.
Up
to
a
maximum
of
20
tracks
can
be
edited
using
this
function.
3.
The
EDIT
function
may
not
operate
properly
for
discs
having
only
one
track
or
having
tracks
of
long
duration
such
as
classical
music.
DP-R893
(En)
15

Timer
operations
The
unit
has
the
timer
stand-by
function.
With
this
function
and
commercially-available
audio
timer,
playback
can
be
started
at
the
desired
time.
1
Connect
the
power
cord.
S
Wall
AC
outlet
!
é
ieee
@
Connect
each
unit's
power
cord
to
the
SWITCHED
outlet
of
i
ae
e
—
Amplifiers
co
!*
the
SWITCHED
outlet.
@
Refer
to
the
instruction
manual
of
the
timer.
2
Turn
on
the
amplifier
and
the
unit.
3
Insert
a
disc
and
set
the
starting
time
of
the
timer.
@
Set
the
timer
while
the
unit
and
the
amplifier
are
ON.
e@
Playback
starts
at
the
set
time.
@
Be
careful
of
the
volume
setting
of
the
amplifier.
(The
loud
sound
may
damage
the
speakers.)
Note:
When
operating
the
unit
other
than
CD
player
using
an
audio
timer,
be
sure
to
remove
the
disc
from
the
CD
player.
16
pDp-R993
(En)
“lt
|

Maintenance
HM
Beware
of
condensation
When
water
vapor
comes
into
contact
with
the
surface
of
cold
material,
water
drops
are
produced.
if
condensation
occurs,
correct
operation
may
not
be
possible,
or
the
unit
may
not
function
correctly.
This
is
not
a
malfunction,
however,
and
the
unit
should
be
dried.
{To
do
this,
turn
the
POWER
switch
ON
and
leave
the
unit
as
it
is
for
several
hours.)
Be
specially
careful
in
the
following
conditions.
@
When
the
unit
is
brought
from
a
cold
place
to
a
warm
place,
and
there
is
a
large
temperature
difference.
@
When
a
heater
starts
operating.
@
When
the
unit
is
brought
from
an
air
-
conditioned
place
to
a
place
of
high
temperature
with
high
humidity.
@
When
there
is
a
large
difference
between
the
internal
temperature
of
the
unit
and
ambient
temperature,
or
in
conditions
where
condensation
occurs
easily.
M@
Note
related
to
transportation
and
movement
Before
transporting
or
moving
this
unit,
carry
out
the
following
operations.
1.
Turn
the
power
ON
but
do
not
load
a
disc.
2.
Wait
a
few
seconds
and
verify
that
the
display
shown
appears.
Wait
further
a
few
seconds.
3.
Turn
the
power
OFF.
2
q
4 5
TRACK
NO.
7
g
9
10
12
$18
id
15
5
(TO
Ji
Sl
17
18 19
20
DP-R893
(En)
17

In
case
of
difficulty
a
a
ae
ee
When
appears
to
be
a
malfunction
may
not
always
be
serious.
If
your
unit
should
not
perform
as
expected,
consult
the
table
below
to
see
if
the
problem
can
be
corrected
before
seeking
help
from
your
dealer
or
service
representative.
No
power
is
applied
with
the
POWER
|
e
Power
plug
is
loosely
connected.
switch
ON.
@
With
the
power
plug
connected
to
the
switched
AC
outlet
of
an
amplifier,
the
power
of
the
amplifier
is
turned
off.
Disc
is
loaded,
player
does
not
play.
Disc
is
loaded
upside
down.
Disc
is
loose.
Disc
is
dirty.
Disc
is
cracked.
Condensation
occured
on
the
optical
lens
unit.
Disc
is
not
loaded.
Play
mode
is
not
entered
(The
play/pause
indicator
is
not
lit).
Disc
is
too
dirty.
Disc
is
cracked,
The
connection
cords
are
inserted
loosely.
Music
is
interrupted.
(Sound
is
skipped.)
Disc
is
too
dirty.
Dise
is
cracked,
Oscillation
is
applied
to
this
unit.
Disc
begins
to
play
when
power
is
The
CD
player
will
automatically
play
when
switched
ON.
a
disc
has
been
inserted
and
power
is
switched
ON.
Notes:
@
Insert
the
power
plug
firmly
to
the
AC
outlet.
@
Turn
the
amplifier's
power
ON.
@
Load
the
disc
again
with
its
label
side
up.
@
Insert
disc
properly.
@
Wipe
off
the
dust
on
the
surface
of
the
disc
referring
to
“Disc
handling
precautions”.
@
Replace
the
disc
with
a
new
one.
@
Leave
the
player
for
about
1
hour
so
that
the
condensation
is
removed.
®
Loada
disc
and
press
the
PLAY/PAUSE
key
:
@
Press
the
PLAY/PAUSE
key
:
e@
Wipe
off
the
dust
on
the
disc
surface
referring
to
“Disc
handling
precautions”.
@
Replace
the
disc
with
a
new
one.
@
Connect
all
connection
cords
firmly.
@
Wipe
off
the
dust
on
the
disc
surface
referring
to
"Disc
handling
precautions”.
e@
Repiace
the
disc
with
a
new
one.
@
Try
selecting
a
place
where
no
strong
vi-
brations
occur
by
changing
the
installation
place,
etc.
@
Toavoid
disc
playing
automatically,
remove
disc
before
switching
off
power.
1.
This
system
is
microprocessor-controlled,
so
malfunction
may
occur
due
ta
external
noise
or
interference
noise.
Insuchacase,
unplug
the
power
cord,
plug
it
and
turn
power
on
again.
2.
Do
not
use
contact
cleaners
because
it
could
cause
a
malfunction.
Be
specially
careful
against
contact
cleaners
containing
oil,
for
they
may
deform
the
plastic
components.
18
op-Re93
(En)

Specifications
Format
General
SYSTOMM
-orereeserecsssecetees
Compact
disc
digital
audio
system
POWEr
CONSUMPTION
«-.--+-0-serrcessecersseeseeserees
eussoucsesevessr
15
W
De
SOE
vassrewawcucndevevceducnsivaseruvesies
cuesteteude
Semiconductor
laser
DITO
NGI
ONG:
src
sscevessvscctsncwsesssnvesseness
W
:
440
mm
(17-5/16")
Playing
rotation
«-+++.+--+--.----e100
200
rpm
-
500
rpm
(CLV)
H:120mm_
=
(4-3/4")
D:390mm
_
(15-3/8")
Weight
(Net)
o--<cerscrserccescrsseserenesseoerscutseneesone
5.4
kg
(11.9
Ib)
D/A
convertors
D/A
CONVELSION
-10sessnesscnserssascenensuesaseneeseensesanssenennanenssees
1
Bit
OVErSAMPLiNg
--1+cecreesernenecccersnensoenenansasewaaarscnneenetoennssenes
8
ts
Audio
Frequency
r@Sponse
-------++-:-se0ersses
4
Hz
~
20
kHz,
+1.0
dB
Signal
tO
NOISE
ratio
-++-------22..eessssseseseweees
more
than
96
dB
DYNAMIC
FANGE
«11ee-erecreneseneatesseeeseevansnenen
more
than
94
dB
Fotal
harmonic
distortion
------
less
than
0.008
%
at
1
kHz
Wlows
flutter
--<::sccccccssesccsconssnsnncnnersnans
»-unmeasurable
limit
Output
level/iMpPedance
----.-ccrssceseeeranerneneenes
2.0
V/3.3
kQ
Note:
KENWOOD
follows
a
policy
of
continuous
advancements
in
development.
For
this
reason
specifications
may
be
changed
without
notice.
For
CANADA
DOC
REGULATION
“This
digital
apparatus
does
not
exceed
the
CLASS
B
limits
for
radio
noise
emissions
from
digital
apparatus
as
set
out
in
the
radio
interference
regulations
of
the
Canadian
Department
of
Communications.“
For
the
U.S.A.
FCC
WARNING
This
equipment
may
generate
or
use
radio
frequency
energy.
Changes
or
modifications
to
this
equipment
may
cause
harmful
interference
unless
the
modifications
are
expressly
approved
in
the
instruction
manual.
The
user
could
lose
the
authority
to
operate
this
equipment
if
an
unauthorized
change
or
modification
is
made.
NOTE
This
equipment
has
been
tested
and
found
to
comply
with
the
limits
for
a
Class
B
digital
device,
pursuant
to
Part
15
of
the
FCC
Rules.
These
limits
are
designed
to
provide
reasonable
protection
against
harmful
interference
in
a
residential
installation.
This
equipment
may
cause
harmful
interference
to
radio
communications,
if
it
is
not
installed
and
used
in
accordance
with
the
instructions.
However,
there
is
no
guarantee
that
interference
will
not
occur
in
a
particular
installation.
If
this
equipment
does
cause
harmful
interference
to
radio
or
television
reception,
which
can
be
determined
by
turning
the
equipment
off
andon,
the
user
is
encouraged
to
try
to
correct
the
interference
by
one
or
more
of
the
following
measures:
—
Reorient
or
relocate
the
receiving
antenna.
——
Increase
the
separation
between
the
equipment
and
receiver.
—
Connect
the
equipment
into
an
outlet
on
a
circuit
different
from
that
to
which
the
receiver
is
connected.
—
Consult
the
dealer
or
an
experienced
radio/TV
technician
for
help.
DP-R893
{En}
19

KENWOOD
By
aly
ee
ee
‘
ha
Other manuals for DP-R893
3
Other Kenwood CD Player manuals

Kenwood
Kenwood DPC-971 User manual

Kenwood
Kenwood DPC-183 User manual

Kenwood
Kenwood LVD-820R User manual

Kenwood
Kenwood DP-2060 User manual

Kenwood
Kenwood DP-SE7 User manual

Kenwood
Kenwood DP-SE7 User manual

Kenwood
Kenwood DP-R4080 User manual

Kenwood
Kenwood KDC-80 User manual

Kenwood
Kenwood DPF-R3010 User manual

Kenwood
Kenwood KDC-C601 User manual

Kenwood
Kenwood KMD-D401 User manual

Kenwood
Kenwood DP-3030 User manual

Kenwood
Kenwood KDC-C565FM User manual

Kenwood
Kenwood DPC-961 User manual

Kenwood
Kenwood DPC-X802 User manual

Kenwood
Kenwood KDC-C803 User manual

Kenwood
Kenwood DPC-42 User manual

Kenwood
Kenwood DPC-441 User manual

Kenwood
Kenwood DPC-885 User manual
Kenwood
Kenwood DP-R4070 User manual