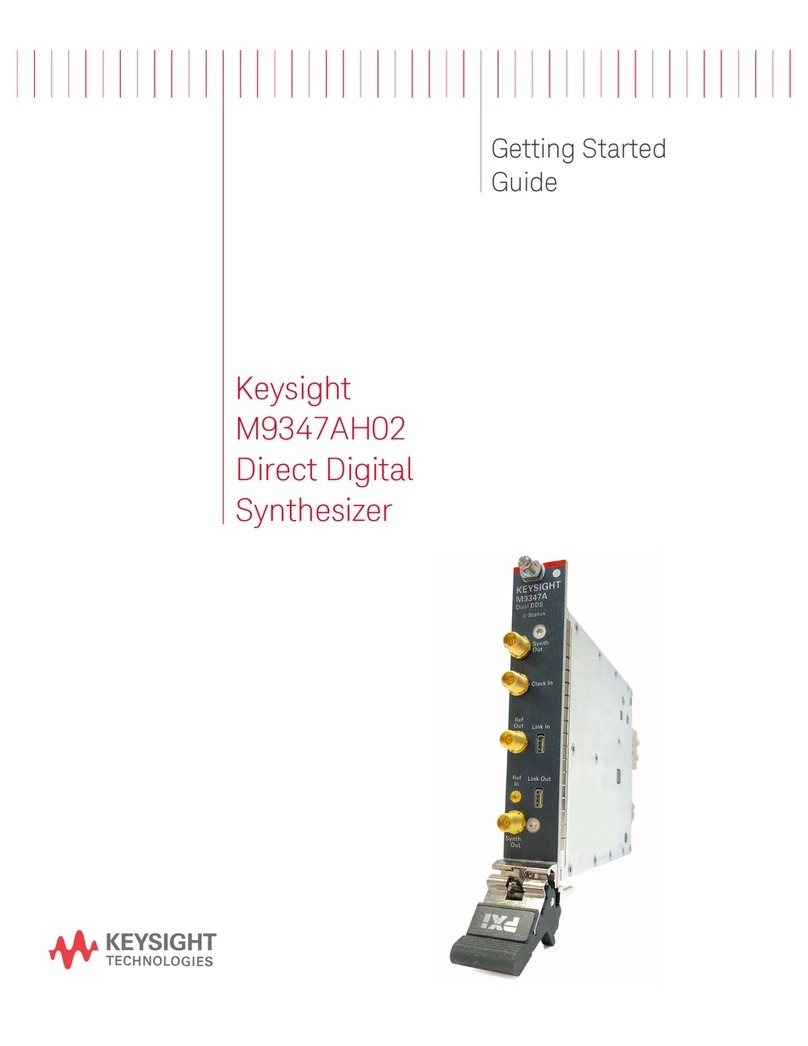
Keysight Technologies N5221BU-665 User manual

Installation Note
Keysight - Add 4-Port Capability
Upgrade Kit for
Version 7 Synthesizers
(For Models With Direct Digital Synthesis (Only))
To Upgrade PNA N5221B and N5222B Option 665
Upgrade Kit Order Number: N5221BU- 665 and N5222BU- 665
Keysight Kit Number: N5222-60128

Notices
© Keysight Technologies, Inc.
2000-2020
No part of this manual may be
reproduced in any form or by any
means (including electronic storage
and retrieval or translation into a
foreign language) without prior
agreement and written consent from
Keysight Technologies, Inc. as
governed by United States and
international copyright laws.
Trademark Acknowledgments
Manual Part Number
N5222-90128
Edition
Edition 1, September 2020
Printed in USA/Malaysia
Published by:
Keysight Technologies
1400 Fountaingrove Parkway
Santa Rosa, CA 95403
Warranty
THE MATERIAL CONTAINED IN THIS
DOCUMENT IS PROVIDED “AS IS,”
AND IS SUBJECT TO BEING
CHANGED, WITHOUT NOTICE, IN
FUTURE EDITIONS. FURTHER, TO
THE MAXIMUM EXTENT PERMITTED
BY APPLICABLE LAW, KEYSIGHT
DISCLAIMS ALL WARRANTIES,
EITHER EXPRESS OR IMPLIED WITH
REGARD TO THIS MANUAL AND
ANY INFORMATION CONTAINED
HEREIN, INCLUDING BUT NOT
LIMITED TO THE IMPLIED
WARRANTIES OF
MERCHANTABILITY AND FITNESS
FOR A PARTICULAR PURPOSE.
KEYSIGHT SHALL NOT BE LIABLE
FOR ERRORS OR FOR INCIDENTAL
OR CONSEQUENTIAL DAMAGES IN
CONNECTION WITH THE
FURNISHING, USE, OR
PERFORMANCE OF THIS
DOCUMENT OR ANY INFORMATION
CONTAINED HEREIN. SHOULD
KEYSIGHT AND THE USER HAVE A
SEPARATE WRITTEN AGREEMENT
WITH WARRANTY TERMS
COVERING THE MATERIAL IN THIS
DOCUMENT THAT CONFLICT WITH
THESE TERMS, THE WARRANTY
TERMS IN THE SEPARATE
AGREEMENT WILL CONTROL.
Technology Licenses
The hardware and/or software
described in this document are
furnished under a license and may be
used or copied only in accordance
with the terms of such license.
U.S. Government Rights
The Software is “commercial
computer software,” as defined
by Federal Acquisition Regulation
(“FAR”) 2.101. Pursuant to FAR
12.212 and 27.405-3 and
Department of Defense FAR
Supplement (“DFARS”) 227.7202,
the U.S. government acquires
commercial computer software
under the same terms by which
the software is customarily
provided to the public.
Accordingly, Keysight provides
the Software to U.S. government
customers under its standard
commercial license, which is
embodied in its End User License
Agreement (EULA), a copy of
which can be found at
http://www.keysight.com/find/sweula
The license set forth in the EULA
represents the exclusive authority
by which the U.S. government
may use, modify, distribute, or
disclose the Software. The EULA
and the license set forth therein,
does not require or permit,
among other things, that
Keysight: (1) Furnish technical
information related to
commercial computer software
or commercial computer
software documentation that is
not customarily provided to the
public; or (2) Relinquish to, or
otherwise provide, the
government rights in excess of
these rights customarily provided
to the public to use, modify,
reproduce, release, perform,
display, or disclose commercial
computer software or
commercial computer software
documentation. No additional
government requirements
beyond those set forth in the
EULA shall apply, except to the
extent that those terms, rights, or
licenses are explicitly required
from all providers of commercial
computer software pursuant to
the FAR and the DFARS and are
set forth specifically in writing
elsewhere in the EULA. Keysight
shall be under no obligation to
update, revise or otherwise
modify the Software. With
respect to any technical data as
defined by FAR 2.101, pursuant
to FAR 12.211 and 27.404.2 and
DFARS 227.7102, the U.S.
government acquires no greater
than Limited Rights as defined in
FAR 27.401 or DFAR 227.7103-5
(c), as applicable in any technical
data.
Safety Notices
A CAUTION notice denotes a hazard. It
calls attention to an operating
procedure, practice, or the like that,
if not correctly performed or adhered
to, could result in damage to the
product or loss of important data. Do
not proceed beyond a CAUTION
notice until the indicated conditions
are fully understood and met.
A WARNING notice denotes a hazard.
It calls attention to an operating
procedure, practice, or the like that,
if not correctly performed or adhered
to, could result in personal injury or
death. Do not proceed beyond a
WARNING notice until the indicated
conditions are fully understood and
met.

3
Keysight Add 4-Port Capability Upgrade Kit
Upgrade Kit Number: N5222-60128
Installation Note
Description of the Upgrade
This upgrade converts your N5221B or N5222B Option 205 2-port analyzer to
a N5221B or N5222B Option 405 4-port analyzer by adding:
— a x4 direct digital synthesizer (DDS) assembly
— an additional source
—anadditionalmixerbrick
— two additional test port couplers
—asplitter
— a modified front panel
—anadditionalcableguard
— two additional LFE bias tee combiners
— PC assembly, low frequency extension (LFE) – 4-port
— new cables
Refer to “Overview of the Installation Procedure” on page 15.
This repair must be done at a service center or a self-maintainer service
center! Refer to “Getting Assistance from Keysight” on page 4.
This upgrade kit is for upgrading 2-port Option 205 models with (x2) direct
digital synthesis (DDS) to a 4-port Option 405 with DDS only.

4 Installation Note N5222-90128
Getting Assistance from Keysight
-
Getting Assistance from Keysight
Installing this upgrade kit requires special skills and experience. If you think
you may not be qualified to do the work, or need advice, contact Keysight.
Contacting Keysight
Assistance with test and measurements needs and information on finding a
local Keysight office are available on the Web at:
http://www.keysight.com/find/assist
If you do not have access to the Internet, please contact your Keysight field
engineer.
If You Have Problems With the Upgrade Kit Contents
Keysight stands behind the quality of the upgrade kit contents. If you have
problems with any item in the kit, refer to www.keysight.com and the Contact
Keysight ()link.
In any correspondence or telephone conversation, refer to the Keysight
product by its model number and full serial number. With this information,
the Keysight representative can determine whether your product is still
within its warranty period.

Installation Note N5222-90128 5
Getting Prepared
Getting Prepared
To successfully install this upgrade kit, you will need the following:
—Alicensekey-referto“License Key Redemption” below.
— A PDF copy or a paper copy of the PNA Service Guide - refer to
“Downloading the Online PNA Service Guide” below.
— An ESD-safe work area - refer to “Protecting Your Workspace from
Electrostatic Discharge” below.
— Correct tools - refer to “Tools Required for the Installation” on page 9.
— Enough time - refer to “About Installing the Upgrade” on page 10.
— Test equipment for the post-upgrade adjustments and full instrument
calibration. To view the equipment list, click the Chapter 3 bookmark “Tests
and Adjustments” in the PDF Service Guide1.
The PNA contains extremely sensitive components that can be ruined if
mishandled. Follow instructions carefully when making cable connections,
especially wire harness connections.
The person performing the work accepts responsibility for the full cost of
the repair or replacement of damaged components.
IMPORTANT!
—This document contains references to legacy and to a new A25
HMA26.5 Multiplier/Amplifier assembly. Your model instrument may
have a legacy HMA26.5 or a new HMA26.5 assembly. Both types of
assemblies are compatible with this upgrade. This note is for your
reference, because some figures contain legacy assemblies that your
instrument may not have installed.
—If you want to verify your instrument’s A25 HMA26.5
Multiplier/Amplifier, refer to “Verify the Model/Version of HMA26.5
Installed” on page 6.
—See also, your instrument’s PDF Service Guide a.
a. See “Downloading the Online PNA Service Guide” on page 7.
1. See “Downloading the Online PNA Service Guide” on page 7.

6 Installation Note N5222-90128
Getting Prepared
-
License Key Redemption
To enable the option product(s), you must request license key(s) file from the
Keysight Software Manager:
http://www.keysight.com/find/softwaremanager:
To complete the request, you will need to gather the following information:
— From the certificate
— Order number
— Certificate number
— From your instrument
— Model number
— Serial number
Using the information just gathered, you must request license key file(s) from
the Keysight Software Manager:
http://www.keysight.com/find/softwaremanager.
You will need to provide an email address, to which Keysight will promptly
email your license key(s) file. Refer to “License Key Redemption” on page 6.
Verify the License Contents
Refer to the license message you received from Keysight:
If the model number, serial number, or option number do not match those on
the license message you received from Keysight, you will not be able to install
the license key file. If this is the case, contact Keysight for assistance. Refer to
“Getting Assistance from Keysight” on page 4.
Verify the Model/Version of HMA26.5 Installed
This upgrade kit contains components for use with PNA models using the
legacy HMA26.5 part number 5087-7765. If your PNA has the newer HMA26.5
part number N5240-60101 installed you may discard these parts:
Ensure that you are connected to an external server, before attempting to
download your email and license key file.
If you are unfamiliar with the licensing process, refer to the
http://literature.cdn.keysight.com/litweb/pdf/N5242-90024.pdf.
The enclosed Software Entitlement Certificate is a receipt, verifying that
you have purchased a licensed option for the PNA of your choice. You must
now use a Keysight Web page to request a license key file for the
instrument that will receive the option.

Installation Note N5222-90128 7
Getting Prepared
Figure 1
— A22 splitter 5087-7139
— W42 N5222-20009
— W43 N5222-20007
— W44 N5222-20008
(If you have the legacy 5086-7765 HMA26.5, please discard the N5245-20195
semi-rigid cables. Refer to Figure 1 on page 7.)
The new N5240-60101 HMA26.5 has the splitter integrated into the
assembly. Refer to Figure 1on page 7.
Comparison of Legacy HMA26.5 (5087-7765) and New HMA26.5
(N5240-60101)
Downloading the Online PNA Service Guide
To view the online Service Guide for your PNA model number, use the following
steps:
1. Go to www.keysight.com.
2. In the Search box, enter the model number of the analyzer (Ex: N5222B)
and click Search.
3. Click Technical Support > Manuals.
4. Click Service Manual.
5. Click the service guide title to download the PDF file.
6. When the PDF of the Service Guide is displayed, scroll through the
Contents section bookmarks to locate the information needed.

8 Installation Note N5222-90128
Getting Prepared
-
Protecting Your Workspace from Electrostatic Discharge
For information, click on the Chapter 1 bookmark, “Electrostatic Discharge
Protection” in the PDF Service Guide1.
ESD Equipment Required for the Installation
1. See “Downloading the Online PNA Service Guide” on page 7.
Description Keysight Part Number
ESD grounding wrist strap 9300-1367
5-ft grounding cord for wrist strap 9300-0980
2 x 4 ft conductive table mat and 15-ft grounding wire 9300-0797
ESD heel strap (for use with conductive floors) 9300-1308

Installation Note N5222-90128 9
Getting Prepared
Tools Required for the Installation
Description Qty Part Number
T-6 TORX driver - set to 4 in-lbs (0.45 N.m) 1 N/A
T-10 TORX driver - set to 9 in-lbs (1.02 N.m) 1 N/A
T-20 TORX driver - set to 21 in-lbs (2.38 N.m) 1 N/A
5/16-in (8 mm) nutsetter or open end torque wrench - set to 10 in-lbs
(1.13 N.m)
1N/A
5/16-in (8 mm) nutsetter or open end wrench (to stabilize the bias tee
combiner when torquing cables)
1N/A
5/16-in (8 mm) nutsetter or open end torque wrench - set to 21 in-lbs
(2.38 N.m)
1N/A
T-6 TORX driver - set to 6 in-lbs (0.68 N.m) 1 N/A
T-20 TORX driver - set to 21 in-lbs (2.38 N.m) 1 N/A
5/16-in (8 mm) nutsetter or open end torque wrench- set to 8 in-lbs (0.9
N.m)
1N/A
3/16-in (5 mm) nutsetter or open end torque wrench - set to 6 in-lbs
(0.68 N.m)
1N/A
5/8-in (16 mm) nutsetter or open end torque wrench - set to 21 in-lbs
(2.38 N.m)
1N/A
1-in (25.4 mm) torque wrench - set to 72 in-lbs (8.15 N.m) 1 N/A
9 mm nutsetter or open end torque wrench - set to 21 in-lbs (2.38 N.m) 1 N/A
1/4-in (6 mm) open end wrench 1 N/A
Use a 5/16-in torque wrench set to 10 in-lbs on all cable connections,
except the front panel coupler to Bias-T combiner cable connections.
Torque these to 8 in-lbs.
Additional exception: Torque the front and rear panel bulkhead connectors
and these connections to 21 in-lb.

10 Installation Note N5222-90128
Getting Prepared
-
About Installing the Upgrade
Products affected N5221B and N5222B Option 205 with x2 DDS installed
Installation to be performed by Keysight service center or personnel qualified by Keysight
Estimated installation time 5 hours
Estimated adjustment time 3 hours
Estimated full instrument calibration time 7.5 hours

Installation Note N5222-90128 11
Items Included in the Upgrade Kit
Items Included in the Upgrade Kit
Check the contents of your kit against the following list. If any part is missing or
damaged, contact Keysight Technologies. Refer to “Getting Assistance from
Keysight” on page 4.
Table 2 Contents of Upgrade Kit N5222-60128
Ref
Desig. Description Qty Part Number
-- Installation note (this document) 1 N5222-90128
-- Software Entitlement Certificate (provided separately) 1 5964-5145
-- China RoHS Addendum 1 9320-6722
A8 26.5 GHz source (2) board 1 5087-7342
A11 Direct digital synthesizer (DDS) assembly, (x4) – (Replaces A11 x2 DDS assembly.) 1 N5240-60102
A22aSplitter 15087-7139
A24 Mixer brick (2) 1 5087-7829
A26 Test port 3 receiver bridge 2 5087-7757
A27 Test port 4 receiver bridge
A30 Test port 3 coupler 2 5087-7813
A31 Test port 4 coupler
A72 LFE Bias-T combiner - port 3 2 5087-7403
A73 LFE Bias-T combiner - port 4
A70 LFE PC assembly - 4-port 1 N5291-60001
-- Vibration mount (between couplers 1 & 3, and 2 & 4) 2 04670-2725
-- Bracket for receiver coupler 2 N5242-00006
-- Stabilizer, test set motherboard 1 N5242-00019
-- Machine screw, M3 x 8, pan head (to install A24 mixer brick to mounting plate) 4 0515-0372
--
Machine screw, M4.0 x 10, pan head (2 each to install the following boards to the
analyzer chassis: A11 direct digital synthesizer (DDS) assembly and A8 26.5 GHz
source board.)
8 0515-0380
-- Machine screw, M2.5 x 20, pan head (to install A26 and A27 receiver coupler
assemblies to test set deck)
4 0515-0430
-- Machine screw, M3.0 x 14, pan head (to install A70 LFE board) 2 0515-0665
-- Machine screw, M3.0 x 18, pan head 2 0515-0666
-- Machine screw, M3 x 16, pan head (to install A72 & A73 Bias T combiners to
brackets)
4 0515-1227

12 Installation Note N5222-90128
Items Included in the Upgrade Kit
-
-- Machine screw, M3.0 x 20, pan head (to install brackets to receiver couplers; to
install A24 mixer brick)
7 0515-1410
-- Machine screw, M3.0 x 6, flat head (to install dress panel to coupler plate) 2 0515-1946
-- Machine screw, M2.5 x 14, pan head 2 0515-2141
-- Cap for SMA 1 0960-0055
-- Bulkhead connector for test set front plate (hardware supplied with connector) 12 1250-3805
-- Cable clamp snap-in pressure sensitive with adhesive mounting 4 1400-1334
-- Cable clamp pressure sensitive with adhesive mounting 4 1400-1391
-- Dust caps for test ports 4 1401-0214
-- Nut – flanged 2 5022-1087
-- Clamp – SMP – instrument 2 5023-3299
-- Microwave splitter 1 5087-7139
-- Cable assy coax – 205 mm long 2 8120-5017
-- Gap pad (between each test coupler and the test set front plate) 4 E4403-20033
-- Test set front plate (subpanel), 4-port 1 N5221-00007
-- Front panel, dress panel, lower, 4-port 1 N5222-00009
-- Cable guard, center jumper cables 1 N5242-00049
-- Front panel overlay (label), 4-port (Options 405, 420, and 425) 1 N5242-80036
-- Short, installed on A24 mixer brick 1 0960-0055
-- Vibration mount 2 0460-2725
-- Mounting nuts (for port 3 & 4 test port couplers) 2 5022-1087
W2 RF cable, A11 13.5 GHz (SRC 2) direct digital synthesizer (J6)-SRC 2 RF IN P1– (This
cable replaces W2 N5222-20090)
1 N5240-20123
W5 RF cable, A8 source (2) board P5 to W6 on bottom of analyzer – Top Cable 1 N5222-20062
W6 RF cable, W5 to A26 port 3 receiver coupler 1 N5222-20041
W7 RF cable, A8 source (2) board P3 to W8 on bottom of analyzer – Top Cable 1 N5222-20063
W8 RF cable, W7 to A23 port 4 receiver coupler 1 N5222-20042
W14 RF cable, A29 port 1 coupler to front-panel Port 1 CPLR ARM 1 N5222-20030
W15 RF cable, A26 port 3 receiver coupler to front-panel Port 3 SOURCE OUT 1 N5222-20047
W17 RF cable, A26 port 3 receiver coupler to front-panel REF 3 SOURCE OUT 1 N5222-20023
Table 2 Contents of Upgrade Kit N5222-60128
Ref
Desig. Description Qty Part Number

Installation Note N5222-90128 13
Items Included in the Upgrade Kit
W18 RF cable, A30 port 3 coupler to front-panel Port 3 CPLR ARM 1 N5222-20015
W19 RF cable, A23 port 4 receiver coupler to front-panel Port 4 SOURCE OUT 1 N5222-20050
W21 RF cable, A23 port 4 receiver coupler to front-panel REF 4 SOURCE OUT 1 N5222-20025
W22 RF cable, A31 port 4 coupler to front-panel Port 4 CPLR ARM 1 N5222-20018
W26 RF cable, A32 port 2 coupler to front-panel Port 2 CPLR ARM 1 N5222-20034
W30 RF cable, Front panel jumper 6 N5222-20091
W32 RF cable, Port 3 RCVR C IN to A24 mixer brick (C) 1 N5222-20048
W33 RF cable, Port 4 RCVR D IN to A24 mixer brick (D) 1 N5222-20055
W42aRF cable, A21 HMA26.5 to A22 splitter 1N5222-20009
W43aRF cable, A22 splitter to A23 mixer brick 1N5222-20007
W44aRF cable, A22 splitter to A24 mixer brick 1N5222-20008
W50 RF cable, REF 4 RCVR R4 IN to A24 mixer brick (R4) 1 N5222-20058
W52 RF cable, A23 mixer brick (R1) to A20 IF multiplexer (P411) 1 N5242-60021
W53 RF cable, A23 mixer brick (R2) to A20 IF multiplexer (P412) 1 N5242-60022
W55 RF cable, A24 mixer brick (D) to A20 IF multiplexer (P801) 1 N5242-60024
W56 RF cable, A24 mixer brick (R4) to A20 IF multiplexer (P414) 1 N5242-60019
W57 RF cable, A24 mixer brick (R3) to A20 IF multiplexer (P413) 1 N5242-60020
W58 RF cable, A24 mixer brick (C) to A20 IF multiplexer (P601) 1 N5242-60023
W60 RF cable, A20 IF multiplexer board P203 to A12 SPAM board (J2) 1 N5242-60013
W62 RF cable, A20 IF multiplexer board P603 to A12 SPAM board (J5) 1 N5242-60015
W162 RF cable, assembly A29 port 1 test coupler to A71 port 1 Bias combiner 1 N5222-20115
W163 RF cable, assembly FP, Port 3 CPLR THRU to A72 port 3 Bias combiner 1 N5222-20121
W164 RF cable, assembly FP, A30 Port 3 test coupler to A72 port 3 bias combiner 1 N5222-20117
W165 RF cable, assembly FP, Port 4 CPLR THRU to A73 port 4 Bias combiner 1 N5222-20122
W166 RF cable, assembly FP, A31 port 4 test port coupler to A73 port 4 Bias combiner 1 N5222-20118
W168 RF cable, assembly FP, A32 Port 2 test coupler to A74 port 2 bias combiner 1 N5222-20116
W175 A74 bias combiner "RF IN" to conn "Port3" on LFE board 2 N5240-60098
W176 A71 bias combiner "RF IN" to conn "Port4" on LFE board
W180 RF cable, assembly REF 3 RCVR R3 IN to A24 mixer brick (R3) 1 N5222-20125
Table 2 Contents of Upgrade Kit N5222-60128
Ref
Desig. Description Qty Part Number

14 Installation Note N5222-90128
Items Included in the Upgrade Kit
-
W202bRF cable, A24 mixer brick (top connector) to A21 HMA25.6 A24 mixer brick (top
connector)
1N5222-20126
W209 Cable assy, coaxial LFE – A11 (Source 2) direct digital synthesizer (DDS) J12 to A70
LFE board
1 N5240-60114
-- Ribbon cable, A19 test set motherboard J213 to A24 mixer brick (2) 1 N5242-60006
-- Cable, DC – 2 pin to R/A SMP (Port 3 bias combiner DC to A19 Bias J543 and Port 4
bias combiner DC to A19 Bias J544.)
2 N5240-60091
a. The A22 splitter (5087-7139) and N5222-20007, N5222-20008, and N5222-20009 cables are only used with a legacy
HMA26.5 p/n: 5087-7765. If your PNA has a new N5240-60101 assembly installed, then set aside these parts as spares for
use in other PNAs with the older HMA26.5 or discard. If you are unclear which HMA26.5 assembly your PNA has installed, refer
to Figure 1 on page 7.
b. The N5222-20126 cable is used only with instruments that have a newer HMA26.5 installed. If your PNA has a legacy
5087-7765 HMA26.5 assembly installed, then this cable can be discarded. If you are unclear which HMA26.5 assembly your
PNA has installed, refer to Figure 1 on page 7.
Extra quantities of items such as protective plastic caps, screws, cable ties, and
cable clamps may be included in this upgrade kit. It is normal for some of these
items to remain unused after the upgrade is completed.
Table 2 Contents of Upgrade Kit N5222-60128
Ref
Desig. Description Qty Part Number

Installation Note N5222-90128 15
Installation Procedure for the Upgrade
Installation Procedure for the Upgrade
The network analyzer must be in proper working condition prior to installing
this option. Any necessary repairs must be made before proceeding with this
installation.
Overview of the Installation Procedure
“Step 1. Obtain a Keyword and Verify the Information.”
“Step 2. Remove the Outer Cover.”
“Step 3. Remove the Inner Cover.”
“Step 4. Remove the Front Panel Assembly.”
“Step 5. Remove the A19 Test Set Motherboard.”
“Step 6. Disconnect A71 and A74 Bias-Tee Combiner’s LFE Cables From the
A70 Low Frequency Extension (LFE) Board and the Ends of the LFE Cables
Connected to the IF Multiplier (IF MUX) Board.”
“Step 7. Remove the A75 Low Frequency Extension (LFE) Board.”
“Step 8. Remove Some Low Frequency Extension (LFE) Cables (8120-5014
(x1), 8120-5021 (x1), N5240-60097 (x1), and N5240-60098 (x1)) From the IF
Multiplexer (IF MUX) Board.”
“Step 9. Remove Some of the Mixer Brick (MXB) Cables.”
“Step 10. Remove Some Gray Cables From the A20 IF Multiplexer Board.”
“Step 11. Remove the A75/A70 LFE Board Bracket.”
“Step 12. Remove Some Bottom-Side Semi-Rigid Test Set Cables.”
“Step 13. Remove the A71 and A74 Bias Tee Combiner Assemblies.”
“Step 14. Remove the A23 Mixer Brick Assembly.”
“Step 15. Assemble the A24 Mixer Brick and A22 Splitter Assemblies.”
“Step 16. Install the A23/A24 Mixer Brick Assembly.”
“Step 17. Assemble the A26 and A27 Receiver Bridge Assemblies.”
“Step 18. Install the A26 and A27 Receiver Bridge Assemblies.”
“Step 19. Install Semirigid Cable W50 to the Deck.”
“Step 20. Reassemble/Assemble the Port 1–4 Bias Tee Combiner
Assemblies.”
This installation requires the removal of the analyzer’s protective
outer covers. The analyzer must be powered down and
disconnected from the mains supply before performing this
procedure.

16 Installation Note N5222-90128
Installation Procedure for the Upgrade
-
“Step 21. Reinstall the A71 and A74 and Install the New A72 and A73 Bias Tee
Combiner Assemblies.”
“Step 22. Assemble the A29–A32 Test Port Coupler Assemblies.”
“Step 23. Install the LED Boards and Test Port Coupler Assemblies On the
4-Port Test Set Front Plate.”
“Step 24. Install the Bulkhead Connectors in the Test Set Front Plate.”
“Step 25. Install the 4-Port Coupler Plate Assembly to the Deck.”
“Step 26. Remove the Old A11 (x2) Direct Digital Synthesizer (DDS) Assembly
and Cables.”
“Step 27. Assemble the A8 26.5 GHz Source 2 Assembly.”
“Step 28. Install the A8 26.5 GHz Source 2 Assembly.”
“Step 29. Install the *NEW* A11 (x4) Direct Digital Synthesizer (DDS)
Assembly and Cables.”
“Step 30. Connect New Cables to A20 IF Multiplexer (IF MUX) Board.”
“Step 31. Reinstall A70 Low Frequency Extension (LFE) Board Bracket.”
“Step 32. Install the New Mixer Brick (MXB) Cables and Route Cables.”
“Step 33. Reconnect/Connect Old and New Cables and then Route Low
Frequency Extension (LFE) Cables (8120-5014 (x2) and 8120-5017 (x3)) and
the Other Ends of the Cables Connected to the IF Multiplexer (IF MUX)
Board.”
“Step 34. Install the New A70 Low Frequency Extension (LFE) Board.”
“Step 35. Connect/Reconnect A71–A74 Bias-Tee Combiner’s Cables to A70
Low Frequency Extension (LFE) Board and the Other Ends of the Cables
Connected to the IF Multiplier (IF MUX) Board.”
“Step 36. Install the New Test Set Cables and Install Cable Clamps on Ferrite
Beads.”
“Step 37. Secure the Front Panel Bulkhead Connectors.”
“Step 38. Reinstall the A19 Test Set Motherboard.”
“Step 39. Install Cables on the A19 Test Set Motherboard.”
“Step 40. Install/Reinstall the A71–74 and Bias-Tee Combiner’s Gray Low
Frequency Extension (LFE) DC bias Cables and Route Cables.”
“Step 41. Install the Other End of the A70 LFE Board Cables to the A11 Direct
Digital Synthesizer (DDS) Assembly Gray Cables.”
“Step 42. Replace the Front Panel’s Lower Dress Panel.”
“Step 43. Reinstall Front Panel Assembly.”
“Step 44. Install the New Lower Front Panel Overlay.”

Installation Note N5222-90128 17
Installation Procedure for the Upgrade
“Step 45. Install the Front Panel Jumper Cables.”
“Step 46. DC Continuity Test the LFE Board and Test Ports.”
“Step 47. Position the Cables and Wires to Prevent Pinching.”
“Step 48. Reinstall the Inner Cover.”
“Step 49. Reinstall the Outer Cover.”
“Step 50. Remove Option 205 License.”
“Step 51. Enable Option 405.”
“Step 52. Verify the PNA Analyzer Program is Running with the Correct
Options.”
“Step 53. Perform Post-Upgrade Adjustments and Calibration.”
“Step 54. Prepare the PNA for the User.”
Step 1. Obtain a Keyword and Verify the Information
Follow the instructions on the Software Entitlement Certificate supplied to
obtain a license key file for installation of this upgrade. Refer to “License Key
Redemption” on page 6.
Verify that the model number, serial number, and option number information
on the license key match those of the instrument on which this upgrade will be
installed.
If the model number, serial number, or option number do not match those on
your license key, you will not be able to install the option. If this is the case,
contact Keysight for assistance before beginning the installation of this
upgrade. Refer to “Contacting Keysight” on page 4.
Once the license key file has been received and the information verified, you
can proceed with the installation at step 2.
Step 2. Remove the Outer Cover
For instructions, click the Chapter 7 bookmark “Removing the Covers” in the
PDF Service Guide.
If the model number, serial number, or option number do not match those
on your license key file, you will not be able to install the option. If this is
the case, contact Keysight for assistance before beginning the installation
of this upgrade. Refer to “Contacting Keysight” on page 4.

18 Installation Note N5222-90128
Installation Procedure for the Upgrade
-
Step 3. Remove the Inner Cover
For instructions, click the Chapter 7 bookmark “Removing the Covers” in the
PDF Service Guide1.
Step 4. Remove the Front Panel Assembly
For instructions, click the Chapter 7 bookmark “Removing and Replacing the
Front Panel Assembly” in the PDF Service Guide1.
Step 5. Remove the A19 Test Set Motherboard
For instructions, click the Chapter 7 bookmark “Removing and Replacing the
A23 test set motherboard” in the PDF Service Guide1.
1. See “Downloading the Online PNA Service Guide” on page 7.

Installation Note N5222-90128 19
Installation Procedure for the Upgrade
Step 6. Disconnect A71 and A74 Bias-Tee Combiner’s LFE Cables
From the A70 Low Frequency Extension (LFE) Board and the Ends of
the LFE Cables Connected to the IF Multiplier (IF MUX) Board
1. Disconnect the (8120-5014 (x2), 8120-5017 (x1), and 8120-5021 (x1)) IF
gray cables item ➀through item ➃ as shown in Figure 2. (i.e., one end is
removed in “Step 8. Remove Some Low Frequency Extension (LFE) Cables
(8120-5014 (x1), 8120-5021 (x1), N5240-60097 (x1), and N5240-60098
(x1)) From the IF Multiplexer (IF MUX) Board” on page 21.)
Save: 8120-5014 (x2) and 8120 (x1) for reuse.
Discard: 8120-5021.
2. Disconnect the W208 N5240-60112 Source 1 and W210 N5240-60113 LO
Source cables from the LFE board as shown – (items ➄and ➅). The other
end of the W208 N5240-60112 and W210 N5240-60113 needs to be
disconnected from the A11 direct digital synthesizer (DDS) assembly.
Refer to Figure 2 and Figure 47 on page 73.
Figure 2 Disconnect A71 and A74 bias-T combiners cables to the A75 LFE board the
other ends of the LFE cables to the LFE Board (8120-5014 (x2), 8120-5017
(x1), 8120-5021 (x1), N5240-60112, and N5242-60113)

20 Installation Note N5222-90128
Installation Procedure for the Upgrade
-
Step 7. Remove the A75 Low Frequency Extension (LFE) Board
1. Disconnect the N5240-60089 Motherboard / IF Multiplexer / LFE/ Test set
motherboard (i.e., MB/IF MUX/LFE/TSMB) ribbon cable to LFE board J1
(item ➀). Save for reuse. Refer to Figure 3.
2. Refer to Figure 3 for the following:
a. Remove the A75 LFE board’s 0515-0665 screws (x2). It will not be
reused (item ➁).
b. Remove the A75 LFE board from the standoffs (item ➁).
Figure 3 Remove the A75 LFE board (N5240-60089, N5291-60005, and 0515-0665)
IMPORTANT!
Save all mounting hardware for reuse. And, for later steps, mark all cables
for reconnection.
This manual suits for next models
1
Table of contents
Other Keysight Technologies Synthesizer manuals
