manuals.online logo
Brands
  1. Home
  2. •
  3. Brands
  4. •
  5. KHS
  6. •
  7. Watch
  8. •
  9. KHS SENTINEL DC User manual

KHS SENTINEL DC User manual

KHS TACTICAL WATCHES
Gewerbeallee 4
45478 Muelheim an der Ruhr
ermany
www.khs.net | [email protected]
User´s Manual | Warranty
KHS SENTINEL DC Page 1
Congratulations
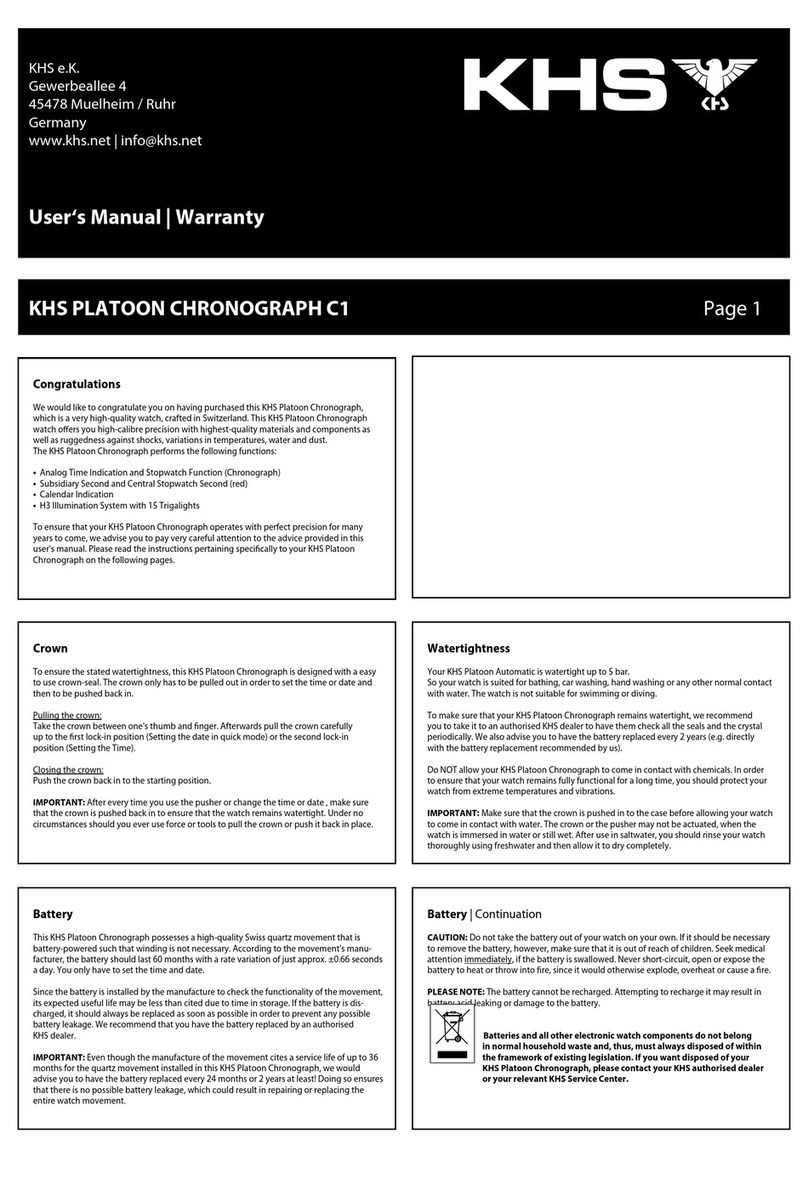
We would like to congratulate you on having purchased this KHS Sentinel DC, which is a
high-quality sports- and outdoor-watch. This Sentinel DC watch offers you high-calibre
precision with highest-quality materials and components as well as a ruggedness against
shocks, variations in temperatures, water and dust.
The KHS Sentinel DC performs the following functions: :
•Digital time indication with Home Time and foreign time (TM2 / 2nd time zone)
•Compass function (COMP)
•Chronograph / Stop function (CHR) with recall function (RCL)
•Timer (Countdown) (TMR)
•Alarm (ALM)
To ensure that your KHS Sentinel DC operates with perfect precision for many years to come,
we advise you to pay very careful attention to the advice provided in this user‘s manual.
Please read the instructions pertaining specifically to your KHS Sentinel on the following
pages.
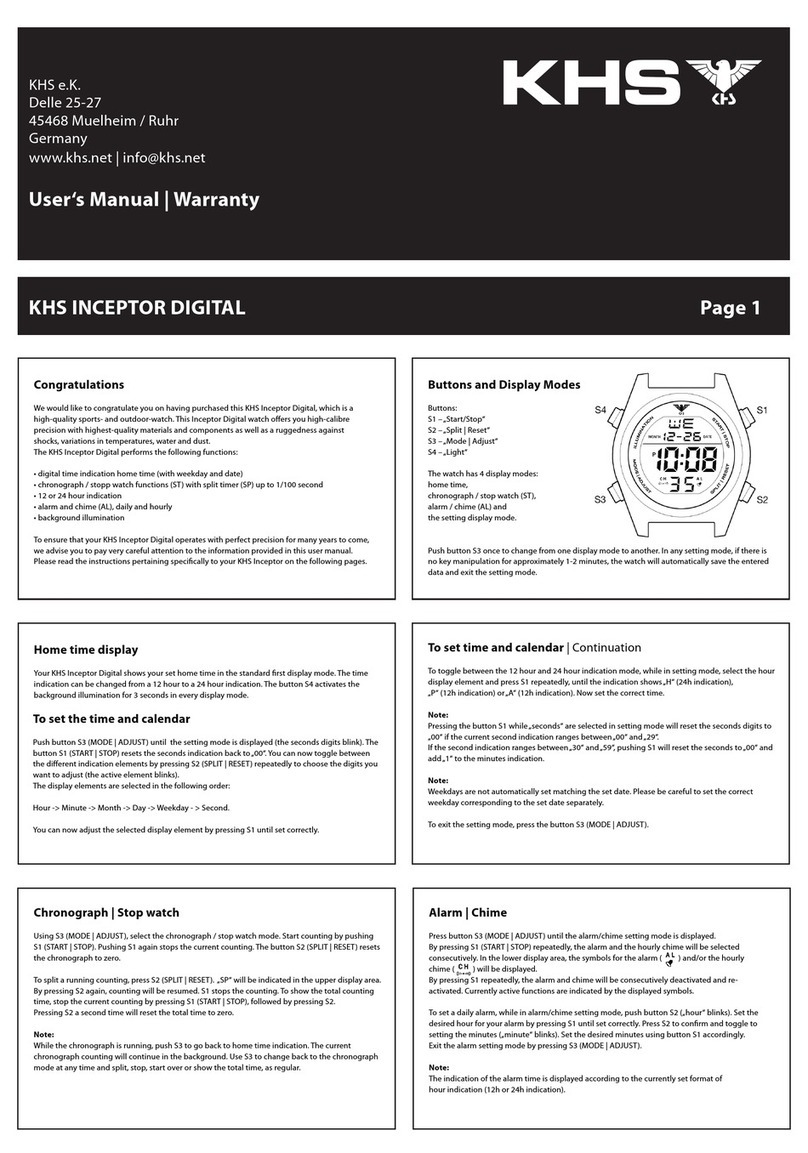
Buttons and Dis lay Modes:
Button:
S1 – Button „Start/Stop“
S2 – Button „Lap/Reset“
S3 – Button „Mode“
S4 – Button „Light“
The watch has 6 display modes:
Home time / Foreign time (TM2), Compass (COMP),
Chronograph / Stop function (CHR),
Recall (RCL), Countdown-Timer (TMR) and Alarm
function (ALM).
To change from one display mode to another, press S3 button once. The mode description
will appear for approximately 2 seconds before the selected mode is activated. In any setting
mode, if there is no key manipulation for approximately 1-2 minutes, the watch will
automatically save the entered data and exit the setting mode.
Home and foreign time dis lay:
To change from the home time mode to the foreign time mode press the button S1. The
mode descripton (TM2) will be displayed. To change back to the home time mode , press
button S1 again.
To set the time and calendar:
1. Press S3 button to select home time / foreign time mode.
2. Press and hold S2 button for approximately 2 seconds. The second digits will blink.
3. Press S1 button to reset the second digits to zero.
4. Press S3 button, the minute digits will blink.
5. Press S1 button to set the minute digits. Holding down the button will speed up the
process.
6. Press S3 button, the hour digits will blink.
7. Press S1 button to set the hour digits. Holding down the button will speed up the process.
To set the time and calendar | Continuation
8. Follow the same pattern to set the hour format, date, month, year, hourly chime option
and button beep option.
9. To set the hour format, press S1 button to toggle between 12-hour and 24-hour format.
The P.M. indicator may be displayed to indicate the time period 12:00 P.M. – 11:59 P.M. in 12-
hour format.
10. To set the hourly chime option, press S1 button to turn it ON or OFF.
11. To set the button beep option, press S1 button to turn it ON or OFF.
12. When finished making all the settings, press S2 button to confirm.
NOTE: The day (of the week) is automatically set in accordance with the date. The date can
be set within the range of 1st January 2008 to 31st December 2099.
NOTE: In FOREI N TIME settings, only the hour digits and minute digits are open to set. All
other settings are synchronized between HOME TIME and FOREI N TIME mode.
To use the com ass | Continuation
You should also calibrate it after replacing the battery. If your watch has been exposed to
strong electromagnetic fields, such as electric lines, magnets or loudspeakers, then you have
to calibrate it again. Please also calibrate the compass before using it for the first time and
before a long trip.
NOTE: Because of the difference between true North and magnetic North, you have to
compensate it by adjusting the compass declination. The declination angle for your local area
may be found below in the table:
City / Declination Angle:
Anchorage / 22 E London / 4 W Rio De Janeiro / 21 W
Atlanta / 4 W Little Rock / 3 E San Francisco / 15 E
Bombay / 1 W Livingston, MT / 14 E Seattle / 19 E
Boston / 16 W Munich / 1 E Shanghai / 5 W
Calgary / 18 E New York City / 14 W Toronto / 11 W
Chicago / 3 W Orlando / 5 W Vancouver / 20 E
Denver / 10 E Oslo / 2 W Washington DC / 10 W
Jerusalem / 3 E Paris / 2 W Waterbury, CT / 14 W
To use the com ass:
Press S3 button to select compass mode. The current
time will be displayed for approximately 0.5 second,
then the relative compass point and angular bearing
will be displayed.
This moving pointer (individual quadrat) represents
the direction of North (N).
NOTE: If there is no key manipulation for 30 seconds,
the compass sensor will be deactivated for power
Saving and the watch will display only the current
HOME TIME or FOREI N TIME (depends on your
selection in time mode).
Press S1 button to re-activate the compass sensor.
NOTE: If the compass does not seem to work well, for example: when it displays the wrong
compass direction or it displays “DIST”(distort) on the screen, then you have to calibrate the
compass.
KHS SENTINEL DC Page 2
Chronogra h / Sto watch:
Time measurement with the chronogra h:
1. Press S3 button to select chronograph mode.
2. The chronograph will then be displayed in its current status – reset, running or stopped.
3. To resume a counting, press S1 button to resume from where it left off.
4. To start a new counting, reset the chronograph to zero first. Press S1 button to stop
counting, then press and hold S2 button for approximately 2 seconds to reset.
Measurement of ela sed time in chronogra h mode:
1. Press S1 button to start counting.
2. To stop counting, press S1 button. Press S1 button to resume from where it left off.
3. To reset to zero, press S1 button to stop counting and then press and hold S2 button.
Chronogra h / Sto watch | Continuation
Measurement of s lit time in chronogra h mode:
1. Press S1 button to start counting.
2. While the chronograph is running, press S2 button once to register a lap. The lap number
and lap time of the registered lap will be displayed. The chronograph is still running in the
background. After approximately 10 seconds, the lap number and split time of the current
lap will be displayed.
3. Repeat the last step until all the laps have been registered.
4. To stop counting, press S1 button. Press S1 button to resume from where it left off.
5. To reset to zero, press S1 button to stop counting, then press and hold S2 button for
approximately 2 seconds.
NOTE: The watch can register and record up to a maximum of 30 laps. The chronograph can
count up to a maximum of 99 hours, 59 minutes and 59 seconds. You can leave the
chronograph running while switching over to other operating modes.
To calibrate the com ass | Continuation
4. Rotate the watch horizontally in clockwise direction slowly for at least 2 rotations, taking at
least 15 seconds per rotation.
5. Press S1 button or leave the watch idle for 60 seconds to confirm the calibration process, or
press S2 button or S3 button to abort the calibration process.
To set the declination angle:
1. Press S3 to choose the compass mode (COMP).
2. Press and hold S2 button for approximately 2 seconds to enter into CAL mode.
3. Press S3 button, the declination angle will blink.
4. Press S1 or S3 button to set the declination angle. Holding down the button will speed up
the process.
5. When finished making all settings, press S2 button to return to COMPASS mode.
To calibrate the com ass:
1. Press S3 to choose the compass mode (COMP).
2. Press and hold S2 button for approximately 2 seconds to enter into CAL(calibration) mode.
3. Press S1 button, the pointers will begin to rotate clockwise.
Recall function of the s lit time mode:
To use the recall function of the s lit time mode:
1. Press S3 button to select recall mode (RCL).
2. Press S1 button to scroll through the recorded individual lap time and total elapsed time.
NOTE: The recall function is available only when there is lap record. The message “NO LAPS”
will be displayed if there is no lap record.
NOTE: The lap record will be cleared when the chronograph is reset.
Timer (Countdown):
To set the timer:
1. Press S3 button to select TIMER mode.
2. Press and hold S2 button for approximately 2 seconds, the timer selection will blink.
3. Press S1 button to toggle between timer interval 1 and timer interval 2 to set.
4. Press S3 button, the second digits will blink.
5. Press S1 button to set the second digits. Holding down the button will speed up the
process.
6. Press S3 button, the minute digits will blink.
7. Press S1 button to set the minute digits. Holding down the button will speed up the
process.
8. Press S3 button, the hour digits will blink.
9. Press S1 button to set the hour digits. Holding down the button will speed up the
process.
10. Press S3 button, the action-at-end selection will blink.
Timer (Countdown) | Continuation
11. Press S1 button to select among CS (Count Stop), CR (Count Repeat) and CCU (Count Up).
12. When finished making all the settings, press S2 button to confirm.
NOTE: Illustration of the action-at-end selections:
a) CS (Count Stop) – the timer will stop when the countdown reaches zero.
b) CR (Count Repeat) – the timer will repeat the countdown when the countdown
reaches zero.
c) CCU (Count Up) – the timer count up to a maximum of 23 hours 59 minutes
and 59 seconds when the countdown reaches zero..
NOTE: The timer cannot be activated if the value of timer interval 1 is set as 0:0’00”.
Timer (Countdown) | Continuation
To use the timer:
1. Press S3 button to select timer mode.
2. The timer will be displayed in its current state – reset, running, or stopped.
3. To resume a counting, press S1 button to resume from where it left off.
4. To start a new counting, reload the timer first. Press S1 button to stop counting and then
press S2 button.
5. After reaching zero in a countdown, a tune will be emitted. To stop the tune, press any
button.
NOTE: You can leave the timer running while switching over to other operating modes.
KHS SENTINEL DC Page 3
Background illumination:
To use the background illumination:
Press S4 button to turn on the backlight for approximately 3 seconds.
To use the KHS-Freelight illumination:
Press and hold S4 button for 3 seconds to activate the KHS-Freelight-function. The bulb icon
will be displayed to indicate this feature is on. In this mode, you can activate the backlight by
pushing any one of the four buttons.
NOTE: KHS-Freelight will automatically turn off after 6 hours. To deactivate the KHS-
Freelight, press and hold S4 button for 3 seconds. The bulb icon will disappear.
Alarm | Continuation
NOTE: The alarm will automatically be activated after being set.
NOTE: The alarm will work according to home time or foreign time (depends on your
selection in time mode).
To use the alarm:
1. Press S3 button to select ALARM mode.
2 Press S2 button to select among alarm entries 1, 2 and 3 to set.
3. Press S1 button to activate the alarm. The alarm indicator will be displayed.
4. Press S1 button again to deactivate the alarm. The message “OFF” will be displayed.
When an alarm goes off:
A 20-second alarm tune will be emitted at the designated time when the alarm is activated.
To stop the tune, press any button.
Alarm:
To set the alarm function:
1. Press S3 button to select ALARM mode.
2. Press S2 button to select among alarm entries 1, 2 and 3 to set.
3. Press and hold S2 button for approximately 2 seconds. The minute digits will blink.
4. Press S1 button to set the minute digits. Holding down the button will speed up the
process.
5. Press S3 button, the hour digits will blink.
6. Press S1 button to set the hour digits. Holding down the button will speed up the process.
7. Press S3 button the alarm frequency will blink.
8. Press S1 button to select among daily (DL Y) and individual day (of the week) only –
Sunday (SUN), Monday (MON, Tuesday (TUE), Wednesday (WED), Thursday (THU), Friday (FRI)
and Saturday (SAT).
9. When finished the settings, press S2 button to confirm.
Watertightness
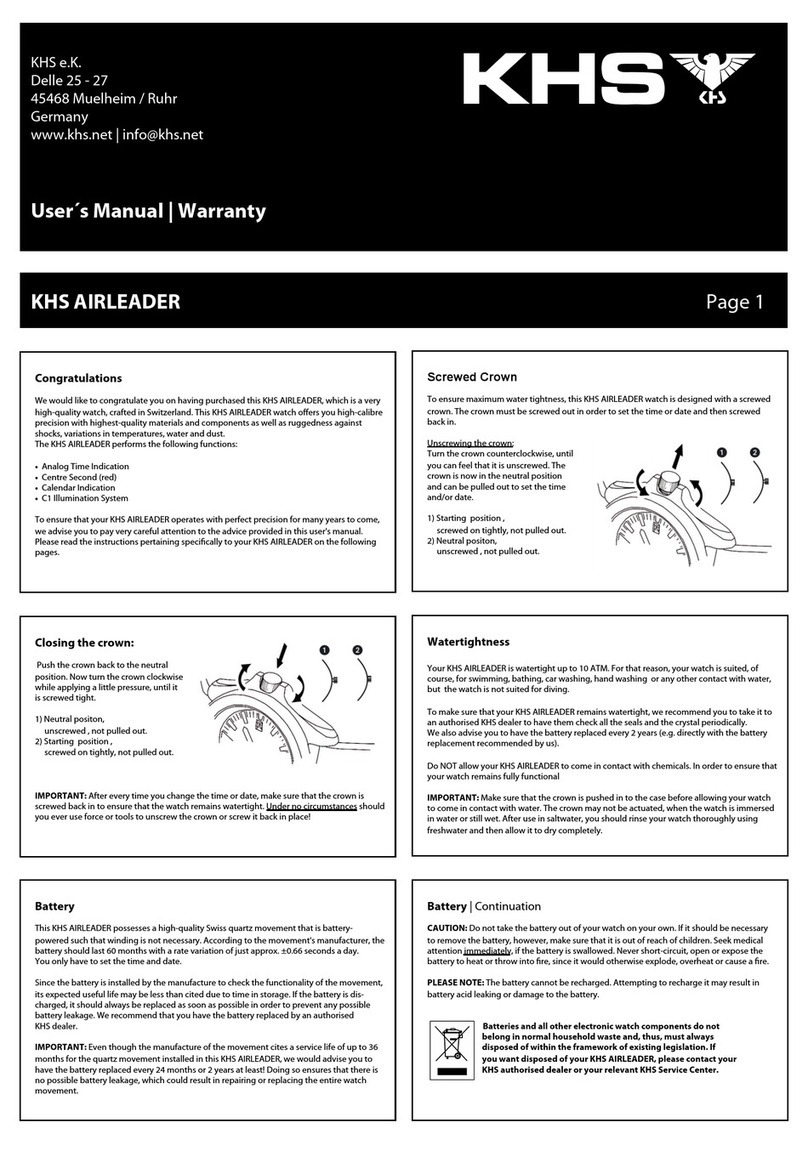
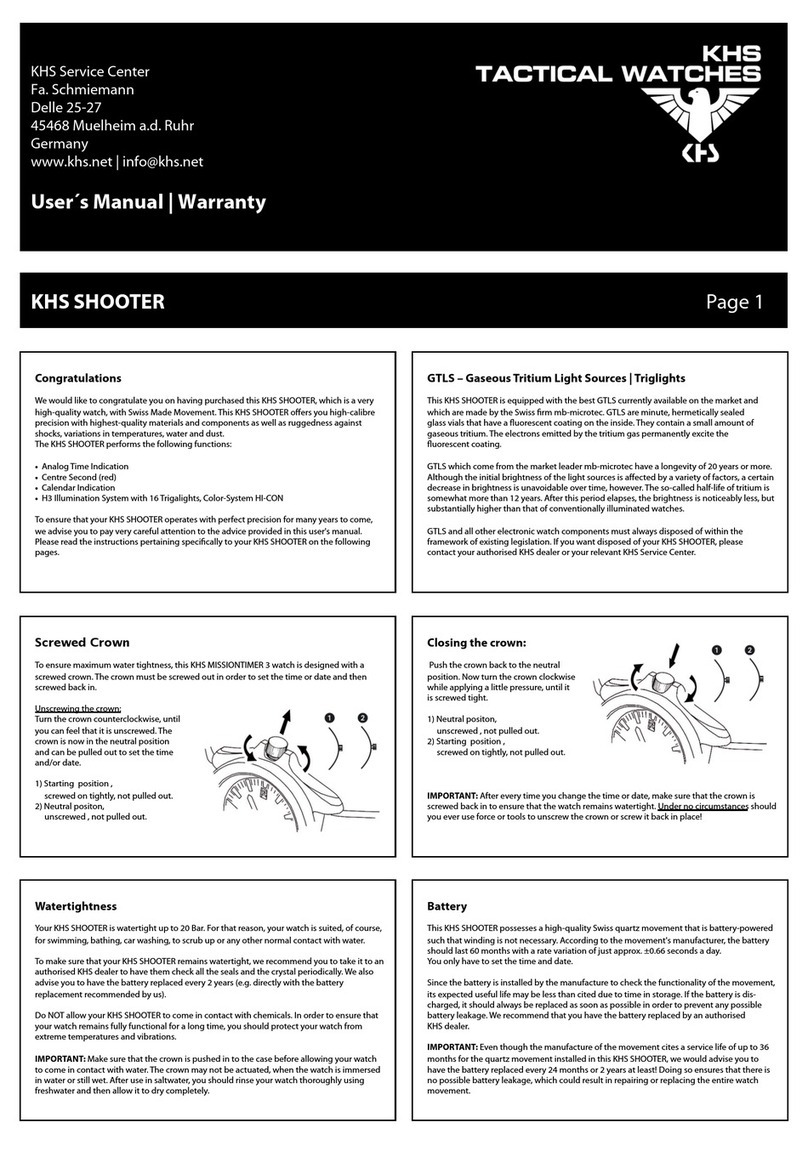
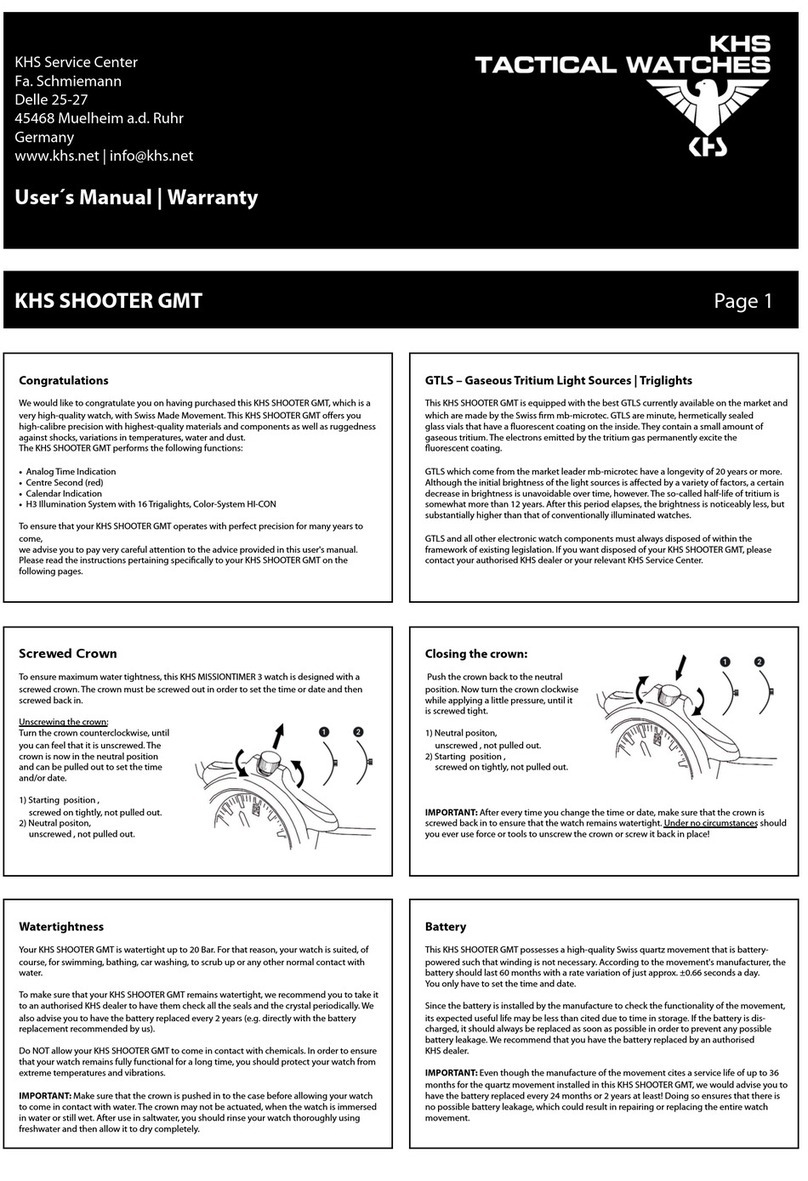
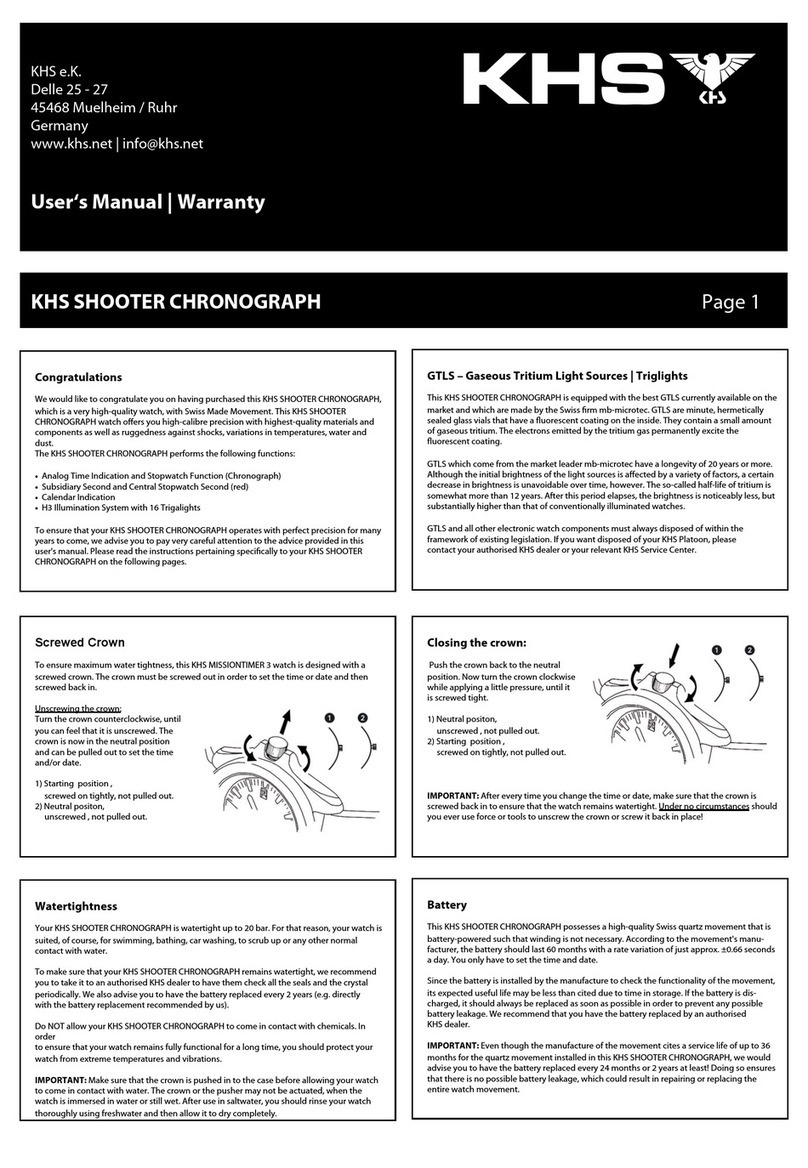
Your KHS Sentinel DC is watertight up to 10 ATM. For that reason, your watch is suited, of
course, for swimming, bathing, car washing, hand washing or any other contact with water,
but the watch is not suited for diving.
To make sure that your KHS Sentinel DC remains watertight, we recommend you to take it to
an authorised KHS dealer to have them check all the seals and the crystal periodically. We
also advise you to have the battery replaced every 2 years (e.g. directly with the battery
replacement recommended by us).
Do NOT allow your KHS Sentinel DC to come in contact with chemicals. In order to ensure
that your watch remains fully functional for a long time, you should protect your watch from
extreme temperatures and vibrations.
IMPORTANT: Make sure that the push pieces may not be actuated, when the watch is
immersed in water or still wet. After use in saltwater, you should rinse your watch thoroughly
using freshwater and then allow it to dry completely.
Battery
This KHS Sentinel DC possesses a high-quality quartz movement that is battery powered
such that winding is not necessary. According to the movement's manufacturer,
the battery should last 24 months with a rate variation of just approx. ±0.66 seconds a day.
You only have to set the time and date.
Since the battery is installed by the manufacture to check the functionality of the
movement, its expected useful life may be less than cited due to time in storage. If the
battery is discharged, it should always be replaced as soon as possible in order to prevent
any possible battery leakage. We recommend that you have the battery replaced by an
authorised KHS dealer.
IMPORTANT: Even though the manufacture of the movement cites a service life of up to 24
months for the quartz movement installed in this KHS Sentinel DC, we would advise you
to have the battery replaced every 12 to 18 months! Doing so ensures that there
is no possible battery leakage, which could result in repairing or replacing the entire watch
movement.
Battery | Continuation
CAUTION: Do not take the battery out of your watch on your own. If it should be necessary to
remove the battery, however, make sure that it is out of reach of children. Seek medical
attention immediately, if the battery is swallowed.
Never short-circuit, open or expose the battery to heat or throw into fire, since it could
otherwise explode, overheat or cause a fire.
CAUTION: The battery cannot be recharged. Attempting to recharge it may result in
battery acid leaking or damage to the battery.
Batteries and all other electronic watch com onents do not
belong in normal household waste and, thus, must always
dis osed of within the framework of existing legislation. If
you want dis osed of your KHS Sentinel DC, lease contact
your KHS authorised dealer or your relevant KHS Service Center.
Notes:
_____________________________________________________________________________
_____________________________________________________________________________
_____________________________________________________________________________
_____________________________________________________________________________
_____________________________________________________________________________
_____________________________________________________________________________
_____________________________________________________________________________
_____________________________________________________________________________
KHS SENTINEL DC Page 4
KHS Warranty in Euro e:
THIS WARRANTY CARD IS VALID ONLY FOR PRODUCTS PURCHASED IN EUROPE.
For other countries, please contact the store where the item was purchased.
This KHS product, except consumables or articles with limited resistance (e.g. battery, band, case), is warranted to the original purchaser to be free from defects of quality at the time of delivery for a
period of two years from the date of purchase ("warranty period"). During the warranty period, and upon proof of purchase and filled warranty card, the product will be repaired using replacement or
reconditioned parts, or the product will be replaced with the same or a similar replacement or reconditioned model, within a reasonable period of time.
To obtain these warranty services, please take or send the product, with a copy of your sales receipt or other proof of purchase and filled warranty card that shows the date of purchase, to a
member of the KHS SERVICE (see contact details) or the store where purchased. There will be no charge for parts or labour to you for valid warranty services. Due to the possibility of damage or loss
during shipping it is recommended when sending the product in for service that the product is packed securely and the sending is insured, return receipt requested.
The customer shall NOT have any claim under this warranty for repair or adjustment expenses if:
(1) The problem is caused by improper, rough or careless treatment;
(2) The problem is caused by a fire or other natural calamity;
(3) The problem is caused by improper repair or adjustment made by anyone other than a KHS service centre;
(4) The case, band, glass or battery is damaged or worn;
(5) The proof of purchase and filled warranty card is not presented when requesting service; or
(6) The warranty period has expired.
NEITHER THIS WARRANTY NOR ANY OTHER WARRANTY OR UARANTEE, EXPRESS OR IMPLIED, INCLUDIN ANY IMPLIED WARRANTY OR CONDITION OF MERCHANTABILITY OR OF FITNESS FOR A
PARTICULAR PURPOSE, SHALL EXTEND BEYOND THE WARRANTY PERIOD. NO RESPONSIBILITY IS ASSUMED FOR ANY INCIDENTAL OR CONSEQUENTIAL DAMA ES, INCLUDIN , WITHOUT LIMITATION,
DAMA ES RESULTIN FROM INACCURACY OR MATHEMATICAL INACCURACY OF THE PRODUCT OR LOSS OF STORED DATA. SOME STATES OR JURISDICTIONS DO NOT ALLOW LIMITATIONS ON HOW
LON AN IMPLIED WARRANTY LASTS AND SOME STATES OR JURISDICTIONS DO NOT ALLOW THE EXCLUSION OR LIMITATION OF INCIDENTAL OR CONSEQUENTIAL DAMA ES, A ES, OR THE
EXCLUSION OR LIMITATION BY A PARTY OF LIABILITY FOR DEATH OR PERSONAL INJURY CAUSED BY THAT PARTY'S NE LI ENCE, SO THE ABOVE LIMITATIONS OR EXCLUSIONS SHALL NOT APPLY IN
SUCH CASES. THIS WARRANTY IVES YOU SPECIFIC RI HTS, AND YOU MAY ALSO HAVE OTHER RI HTS WHICH VARY FROM STATE TO STATE, JURISDICTION TO JURISDICTION, OR COUNTRY TO
COUNTRY. NOTHIN IN THIS WARRANTY AFFECTS YOUR STATUTORY RI HTS.
THANK YOU FOR CHOOSIN A KHS PRODUCT.
If you have any problems with this product, please contact a KHS Service Centre or the store where purchased.

Other KHS Watch manuals

KHS INCEPTOR DIGITAL Guide

KHS

KHS INCEPTOR DIGITAL Guide

KHS Platoon Chronograph C1 User manual

KHS

KHS Platoon Chronograph C1 User manual

KHS Platoon User manual

KHS

KHS Platoon User manual

KHS AIRLEADER User manual

KHS

KHS AIRLEADER User manual

KHS MISSIONTIMER 3 AUTOMATIC User manual

KHS

KHS MISSIONTIMER 3 AUTOMATIC User manual

KHS AIRLEADER Guide

KHS

KHS AIRLEADER Guide

KHS SEEKER User manual

KHS

KHS SEEKER User manual

KHS Shooter Chronograph Dimensions and installation guide

KHS

KHS Shooter Chronograph Dimensions and installation guide

KHS MISSIONTIMER 3 User manual

KHS

KHS MISSIONTIMER 3 User manual

KHS SHOOTER GMT User manual

KHS

KHS SHOOTER GMT User manual

KHS SHOOTER User manual

KHS

KHS SHOOTER User manual

KHS STRIKER MKII User manual

KHS

KHS STRIKER MKII User manual

KHS SILENCER User manual

KHS

KHS SILENCER User manual

Popular Watch manuals by other brands

Casio 4726 Operation guide

Casio

Casio 4726 Operation guide

Coros APEX quick start guide

Coros

Coros APEX quick start guide

ROTORCRAFT VD31 quick start guide

ROTORCRAFT

ROTORCRAFT VD31 quick start guide

Tikkers 10 Series manual

Tikkers

Tikkers 10 Series manual

MEGASTEK MT80T user manual

MEGASTEK

MEGASTEK MT80T user manual

Casio QX-560 user guide

Casio

Casio QX-560 user guide

Seiko 5R86 instructions

Seiko

Seiko 5R86 instructions

AGPtek LW11 Welcome guide

AGPtek

AGPtek LW11 Welcome guide

Lorier HYDRA owner's manual

Lorier

Lorier HYDRA owner's manual

Orient UG1R002B instruction manual

Orient

Orient UG1R002B instruction manual

Casio 3185 Operation guide

Casio

Casio 3185 Operation guide

SP scienceware H-B DURAC B61700-5200 instructions

SP scienceware

SP scienceware H-B DURAC B61700-5200 instructions

Casio 5466 Operation guide

Casio

Casio 5466 Operation guide

TFA 38.2030 operating instructions

TFA

TFA 38.2030 operating instructions

iwc IW5007 Operating	 instruction

iwc

iwc IW5007 Operating instruction

Eurotops BK431 instruction manual

Eurotops

Eurotops BK431 instruction manual

Freestyle Navigator 2.0 quick start guide

Freestyle

Freestyle Navigator 2.0 quick start guide

HOLZKERN Blue Moon manual

HOLZKERN

HOLZKERN Blue Moon manual

manuals.online logo
manuals.online logoBrands
  • About & Mission
  • Contact us
  • Privacy Policy
  • Terms and Conditions

Copyright 2025 Manuals.Online. All Rights Reserved.