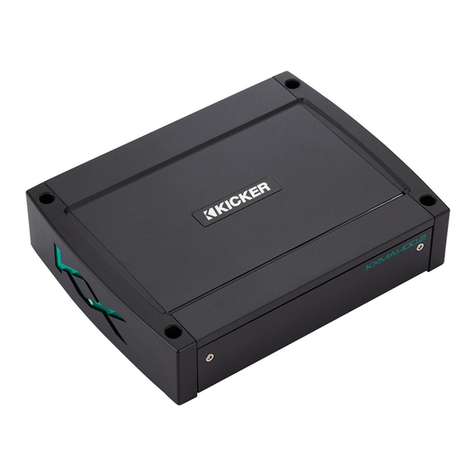
Kicker IQ Series User manual


2
Contents
lnhaltsverzeichnis
Introduction . .
Hardware Setup
Software Setup
lntroducci6n . . . .
lnstalaci6n del equipo
lnstalaci6n del software.
Einfuhrung . . . . .
Hardwarekonfiguration .
Softwarekonfiguration .
Introduction . . . . .
Configuration du materiel
Configuration du logiciel
Contenido
Table
des
mati8res
3
4
' 10
' 3
' 14
'20
' 3
'24
'30
' 3
'34
'40

Introduction
EinfUhrung
lntroducci6n
Introduction
KICKER's new 10-series of amplifiers represent the pinnacle of mobile amplifier technology. From
the high-end components we've Bainstakingly selected, including
an
unparalleled level of DSP
power, to KICKER's own 1WEEO
M
software, our development team has set the bar again for
high-end mobile audio electronics. The 1WEEO application allows for an unprecedented amount
of control over
all
aspects of your acoustic demands by laptop; or with your phone or tablet via
the
101
Bluetooth®accessory. Experience a revolution, take charge of your music, and hear why
KICKER's innovation
is
unmatched!
La nueva Serie-10
de
amplificadores KICKER representa
el
pinaculo de
Ia
tecnologfa en
amplificadores m6viles. Desde los componentes de lujo seleccionados meticulosamente,
incluido un nivel
de
procesamiento digital de senales
(DSP)
sin precedentes, hasta
el
software
1WEEO™
desarrollado por KICKER, nuestro equipo
de
desarrollo nuevamente estableci6
el
estandar de
Ia
audioelectr6nica m6vil
de
lujo. La aplicaci6n 1WEEO ofrece
al
usuario un control
sin precedentes
de
todos los aspectos relacionados con las exigencias acusticas mediante
un ordenador portatil, o un telefono o tableta con
el
accesorio
101
Bluetooth®. Experimente
una revoluci6n, tome
el
control
de
su musica y escuche por que
Ia
innovaci6n de KICKER es
inigualable.
Die neue 10-Verstarkerserie von KICKER ist die Kr6nung der mobilen Verstarkertechnologie. Von
den Highend-Komponenten, die sorgfaltig ausgewahlt wurden (einschlieBiich einer beispiellosen
DSP-Leistung), bis zur
1WEEO™
Software von KICKER hat unser Entwicklungsteam die
Messlatte fur mobile Highend-Audioelektronik erneut hoch angesetzt. Die 1WEEO-Anwendung
erm6glicht eine beispiellose Steuerung aller
A~ekte
lhrer akustischen Anforderungen auf einem
Laptop, Telefon oderTablet uber
101
Bluetooth
R.
Erleben Sie eine Revolution und ubernehmen
Sie das Kommando uber lhre Musik. Erfahren Sie, warum die Innovation von KICKER
unubertroffen ist!
Les nouveaux amplificateurs KICKER serie
10
representent
le
summum
de
Ia
technologie
des amplificateurs mobiles. Depuis les composants hauts
de
gamme que nous avons
soigneusement selectionnes, y compris un niveau de puissance
de
DSP incomparable, jusqu'au
logiciei1WEEO™ specifique
de
KICKER, notre equipe
de
developpement releve anouveau
Ia
barre pour l'electronique audio mobile haut
de
8amme. L:application 1WEEO offre une diversite
de commande par ordinateur portable sans precedent
de
tous les aspects
de
vos exigences
acoustiques, ou au moyen
de
votre telephone ou tablette en utilisant l'accessoire
101
Bluetooth
®.
Experimentez une revolution, prenez
le
contr61e
de
votre musique et entendez pourquoi
!'innovation
de
KICKER est incomparable! 3

4
Hardware Setup
Mounting
Mount
the amplifier
to
the
desired
location using the included screws.
Do
not drill into any electronics, wiring,
or
vehicle mechanisms.
Wiring
Wire+
12Vand Ground connections.
Install a fuse within 18"
of
battery and
in-line with power cable connected
to
your amplifier. See diagram on
next page for reference.
See
the
following charts for appropriate
gauge and fuse ratings.
Model
External
Fuse
10500.1
60 Ampere
10500.2 60 Ampere
10500.4 60 Ampere
10
1000.1 100Ampere
101000.5 100Ampere
Ampere
::;
4ft
4-7ft
7-1Oft 1
Go-13ft
13-16ft 16-19ft 19-22ft
22-28ft
60
100
8GA
4GA
8GA
4GA
4GA
4GA
4GA
4GA
4GA 4GA 1
/OGA 1/OGA
1/OGA 1/OGA 1/OGA 1/OGA

Use
the
101
to
connectand control multiple
10
amps
via
Bluetooth,
stream
music directly
from
yourBluetooth
device,
andmuch morel
10
mono amp shown
+ -
~24"
(60cm)
i-:-
-
Ground
<18"
101
(Sold
separately)
~
(45cm)
--.1
Fuse
Battery
-
-
Ground
-•
remote turn-on
Wire
your speakers to the
10
amplifier using 16GA or
larger
wiring.
Connect the output of your source unit to the
RCA
Inputs of the
10
amplifier.
Use the
IQ
's
RCA
Outputs to pass the
signal
to another
amplifier.
5

6
If
your source unit uses
HI-Level
outputs) use the
KICKER
KISL
to
easily
attach RCA plugs to your bare
wires.
Consult a mobile
electronics specialist
if
you
are
unsure. See the following diagram for
reference.
to amplifier
from
source unit high-level speaker outputs

IQRC Installation
With the
IORC,
you
have
the ability to control the
gain,
bass boost,
center frequency,
and
bandwidth
levels
remotely for up to two
matched amplifiers.
Push
the control knob to select the feature,
then rotate to increase or decrease the
values.
To
surface-mount
the
IORC
remote bass
level
control, screw the remote to the chosen
location, then
run
the cable
from
the controller to the
HI
ORC"
jack
on
the amplifier pane
l.
Do
NOT connecVdisconnect while the amplifier
is
on.
AMP 1 must
be
connected before AMP 2
will
be
made active.
~
~ ~
~
n
(9~01
n
u
nr
' I
NAn
-26dB-
OdB
K(J~=
OdB
-18dB
level
<J
GAIN
C)
<J
BOOST
indicator
24Hz-
80Hz
C)
C)
C)
JfJtl1
C)
.50-100
7

8
Features & Operation
~@
~
~~
-
~
~
------------------------
------~
111
~
~
~ ~
~
CDJ
CDJ
0
c::::J
rGD1
~ ~ ~ ~
12V/DC/AUDIO LO/HI
@. @.
.®.
PANEL Q GUI
~ ~ ~
~
AUTO INPUT
o 11
•o"'
1ao
o do 1s
LO
CK
n
~
(§
"'
TURN·ON LEVEL GAIN
X-
OVER
KICK
~
.-
~
~
~
w
~
~ ~
~
m
~
~
I
I
I
~~
~
m1000.1
~~
II
I
The 10-Series
is
unlike any amplifier on the market today.
It
is
fully
functional using the analog end panel controls, but unlocks its full
potential when the DSP (Digital Signal Processor)
is
taken advantage
of. We recommend familiarizing yourself with the following controls.
AUTO TURN-ON: Set the switch to +
12V
to
use the remote
turn-on lead from your source unit. Run 18 gauge wire from the
Remote Turn-On Lead on your source unit
to
the terminal labeled
REM
between the amplifier's positive and negative
power
terminals.
The DC Offset
mode
detects
a 6V
DC
offset from the HI-Level
speaker outputs when the source unit has been turned on. The
Audio setting
detects
the incoming audio signal from your source
unit and automatically turns on the a[np. Using either the
DC
Offset
or Audio
mode
causes
the REM terminal
to
have a +1
2V
out for
turning on additional amplifiers.

INPUT
LEVEL: The RCA inputs on KICKER
10
amplifiers are
capable of receiving either
Hi
or Low-level signals from a source unit.
GAIN: The input gain control
is
not a volume control.
It
matches the
output of the source unit to the input level of the amplifier.
Turn
the
source unit
up
to about
3/4
volume. Next, slowly turn the gain
up
until you can hear audible distortion, then turn
it
down
a little.
X-OVER: Use the XOVER switch(es) on the end panel of the
amplifier to set the internal crossovers to
OFF,
HI,
or LO. When the
switch
is
set to
OFF,
a
full
bandwidth signal will be amplified. Set the
switch to
HI
if
you want the amplifier's internal crossover to serve
as a high-pass
filter.
Set the switch to LO
if
you want the amplifier's
internal crossover to serve as a low-pass
filter.
FADER:
Turn
on the
FADER
switch
if
you are running
two
sets of
inputs to the amplifier. Leave the fader switch OFF
if
you want
to
drive
all
channels from a single stereo input.
KICK
EQ: Adjust the bass
boost
from
0-18dB,
centered at 40Hz.
PANEL LOCK: When active (LED ON) the amplifier
is
using the
settings from the Tweeq software. When
it
is
not active
(LED
OFF)
the amplifier is using the end panel controls.
GUI:
Connect
to
your
computer
or tablet and run the KICKER
TWEEO software for real-time control of your amp's
OSP.
9

Software Setup (Windows)
KICKER TWEEQ may
be
compatible with the
Mac
OS through Boot Camp,
but
is
not
supported.
TWEEO is a
new
DSP software configuration tool forthe 10-series
of
amps. Because
the smartest
amp
demands the smartest application, we've developed TWEEO in-house
with ourcustomer's needs at the forefront
of
the creation process. The
10
amplifiers are
fully-functional without TWEEO, but
to
get the
most
out
of
your
new
KICKER amp,
use
it
on your computer,
or
your tablet or phone using the
101
Bluetooth accessory, and hearthe
difference!
Installation
Visit
\fVVWV.kicker.com/tweeq
and
click
the
DOWNLOAD
button. Open the
installation
file
and
follow the instructions
to complete the
installation.
Setup
Power
on
and
connect your
10
amplifier
to your computer
via
mini-USB connection.
Run
Tweeq.
exe
and
wait for the software to
scan for
any
connected
amplifiers.
You
will
be
prompted to begin the
configuration
wizard.
10

1W
EE
O
will
scan and
iden
t
ify
al
l
connected ampl
ifie
rs.
KI
CKE
Rhas
support for multi-amp installations
using the
10
1accessory.
You
may al
so
use a U
SB
hub to connect multiple
amps, however technical support
is
not
available for this setup.
Choose to bridge the channels
if
both
channels
are
used to drive a common
load
.
T
urn
the
FADER
ON
if
you are
running
two sets of inputs to the ampl
ifier.
Turn
t
he
FADER
OFF
if
you want to drive
al
l
channels
from
a single stereo input.
For
example, turn the
FADER
ON
if you
are
only using AMP 1
as
your input
source. Select the input source for the
subwoofer
signal,
if
applicable.
11

Select the type
of
driver used by each
channel. This will assist the TWEEQ
software
in
automatically configuring your
crossover.
See
Page
13
for reference
chart.
Select the speaker-size for each
channel. This further assists the software
in
configuring your crossover. If you have
a 2
or
4-channel
amp
and selected
to
use a Full-Range signal
in
the previous
window you will not see this dialog box.
12
Set the distance
of
each speakerfrom
the primary listening position. This will
automatically configure the correct
time-delay for each speaker
to
present
the best sound-stage. The Reference
Speaker setting should be set if there
is
a speaker
in
use that is not connected
to
your currently chosen amp, and is also
the farthest from the listening position.

Congratulations!
Your
10
Amplifier has
been automatically configured using
the
TWEEO
Wizard
.
You
may
save
this
preset by
se
lecting
File>Save
at
the top
left
of the application.
It
is
recommended
that
you
save this
initial
configuration for
restoration
and
AlB listening purposes.
...
You
may
continue to fine-tune the
DSP
for your specific application(s), including
adjusting Time-Delay
and
Crossover
settings. For complete instructions on the
KICKER
TWEEO
application, download
the
fu
ll
manual
from
wvvvv.kicker.com/
support.
Driver
Full
Range
Midrange
Midbass
Sub
Tweeter
XOVER
Type
NoXOVER
High-pass
Band-pass
Band-pass
High-pass
IQOS+C-20141204
13


--
OT CE
--
Use
the
included
KICKER
Fuse
and
FHS Fuse
Holder,
located
under
this
sticker
in
the
styrofoam
panel,
during
installation
at
the
amplifier.
Please
see
the
enclosed
insert
detailing
fusing
and
w·ring.

Model
10500.1
10500.2
10500.4
101000.1
101000.5
Ampere S4ft
60
100
BGA
4GA
~18"
ground
(45cm)
i
see table for
fuse
rating foryouramplifier fuse
Extemal
Fuse
60
Ampere
60
Ampere
60
Ampere
100
Ampere
100
Ampere
4-7ft
7-10ft
1~13ft
13-16ft
16-19ft 19-22ft
22-28ft
BGA
4GA
4GA
4GA
4GA
4GA
4GA 4GA 1/OGA 1/OGA
1
/OGA 1
/OGA 1
/OGA 1/OGA
fuse
f
~18
"
(45cm)
i
~18"
ground -
(45cm)
•
i
fuse
fuse
rating
equivalent
to
the
sum
of
all
external
amplifier
fuses
(eg
two
BOA
fuses
would
require
a
120A
fuse
at
the
battery)
1
ground
+12V
-battery

PROPER FUSING IS IMPERATIVE!
An
appropriately
rated
fuse,
installed
in-line
and
within
18"
of
the
vehicle battery connection,
is
required
to both protect the
wire
and
prevent
damage to the vehicle should
the
wire
become
shorted to ground,
i.e.
come
into
contact
with
metal.
Likewise,
an
appropriately
rated
fuse
should
also
be
installed
within
18"
of
the
amplifier.
The
purpose of this
fuse
is
to prevent damage to
the
amplifier
and/or
the
vehicle should the
amplifier
experience some type of
overload.
The
fuse
rating
should
be
matched to
the
amplifier
requirements;
60A for the
10500,
1
OOA
for the 101000.
If
two or
more
amplifiers
are
connected to
the
vehicle battery
via
the
same
power
wire,
the
amplifiers
should
be
fused
with
their respective
fuse
rating
within
18" of
the
amplifiers,
and
the
power
wire
should
be
fused
within
18"
of
the
battery
with
a
fuse
rating
equivalent to
the
sum
of
all
the
amplifier
fuses -
not
to exceed the
recommended rating for the length
and
gauge
of
wire being used.
See
reverse
side
for
diagram.
This manual suits for next models
5
Other Kicker Amplifier manuals

Kicker
Kicker PX200.1 User manual

Kicker
Kicker ZX350.2 User manual

Kicker
Kicker ZX400.1 User manual

Kicker
Kicker BX360.4 User manual

Kicker
Kicker DX100.2 User manual

Kicker
Kicker PXA300.4 User manual

Kicker
Kicker KX800.5 User manual

Kicker
Kicker XS50 User manual

Kicker
Kicker ZX460 User manual

Kicker
Kicker Livin Loud SX650.1 User manual

Kicker
Kicker PX100.2 User manual

Kicker
Kicker KEY500.1 User manual

Kicker
Kicker ZXM450.2 User manual

Kicker
Kicker PXA.1 Series User manual

Kicker
Kicker KXMA.5 Series User manual

Kicker
Kicker KX400.1 User manual

Kicker
Kicker SX700.4 User manual

Kicker
Kicker Impulse IX252 User manual

Kicker
Kicker BX200.2 User manual

Kicker
Kicker KXM800.5 User manual