10
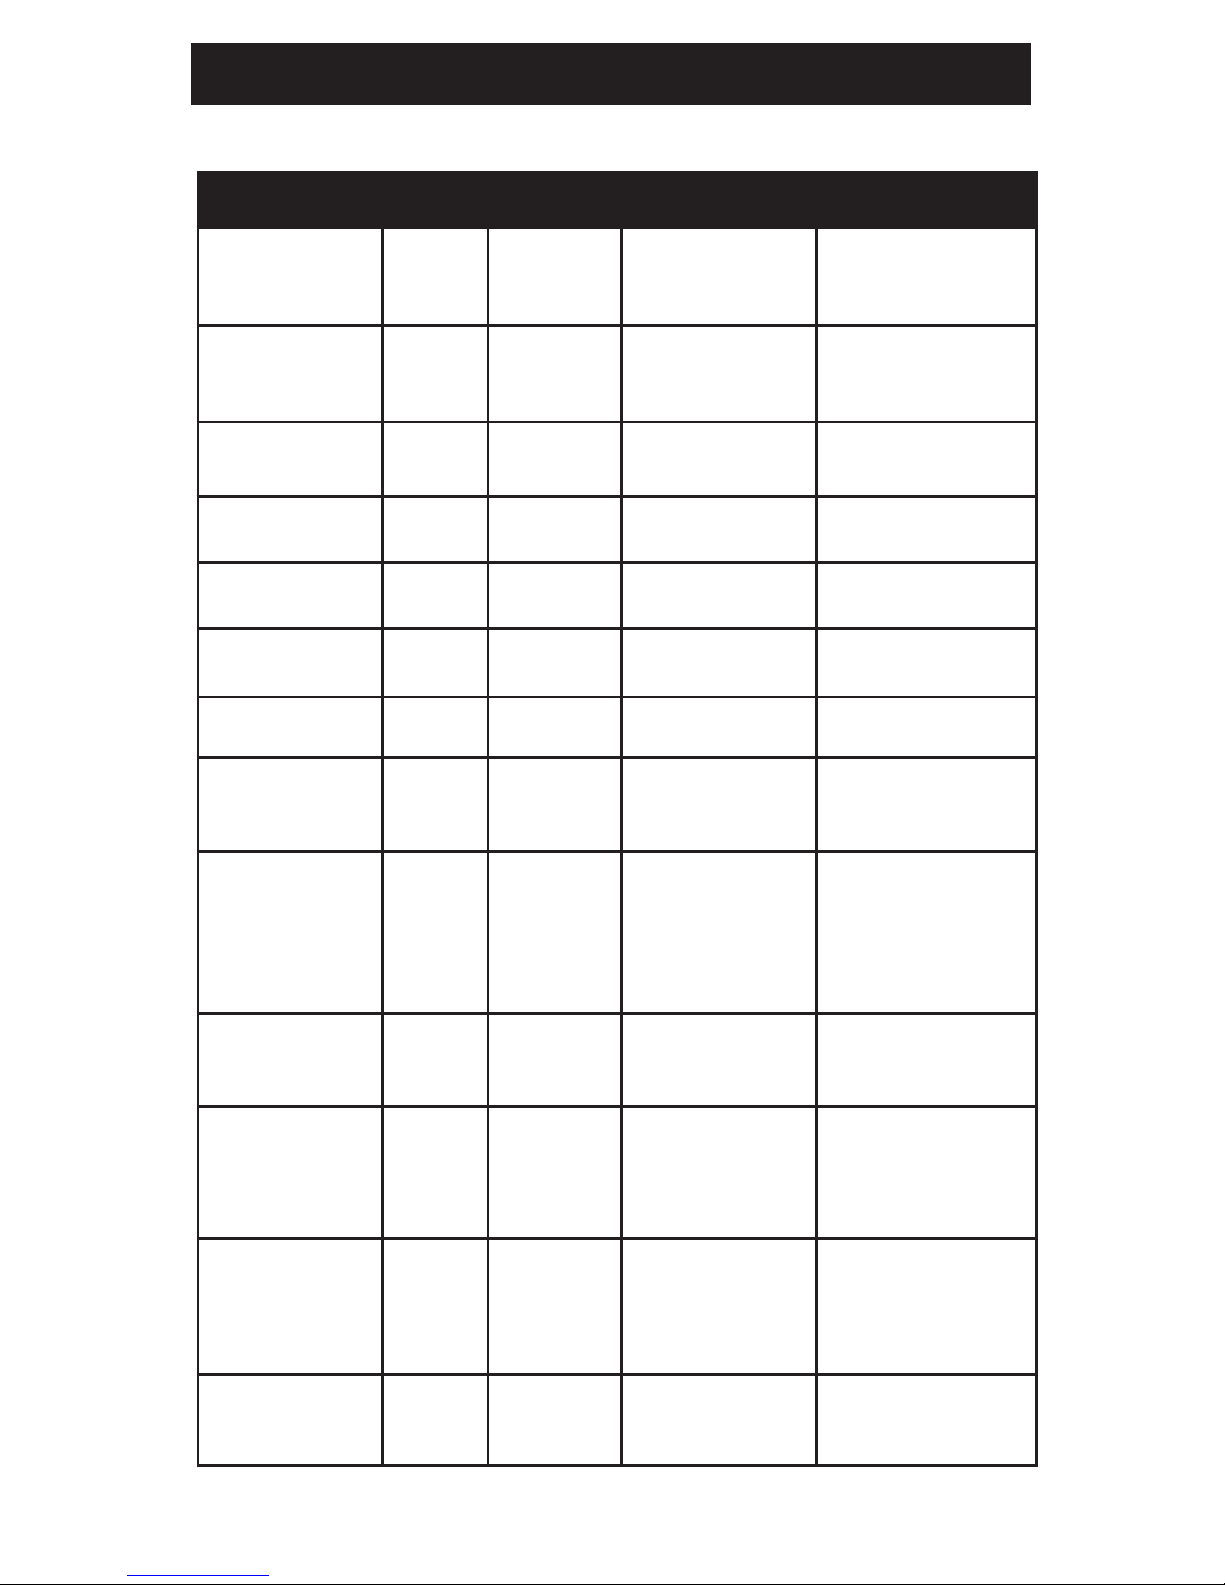
Mode What to do What to expect
Create Account Download and install app RemoteLync App should be on your mobile device
Connect to
Wireless Router
Following instructions in app, connect to
monitor
You should connect to the Kidde… monitor through Wi-FI. The
monitor will report back what routers are with in range for you to
select and provide passcode to inorder for monitor to connect.
Enrol Monitor to
account
Once monitor is connected to wireless router,
press button on monitor then tap "enroll my
monitor" in app
Once monitor is connected to your router, you will add it to your
account. Besure you are connected to the same Wi-Fi router as the
monitor for enrollment to work.
Learn Alarms in
home
With monitor connected to wireless router
and monitor enrolled to you account, setup
monitor with the alarms in your home furthest
from the monitor
With the monitor in setup mode you will test the smoke and/or
CO alarms furthest from the monitor so it can judge the volume
it will hear alarms at. This helps reduce false detections from your
neighbours house or appartment.
Test monitor Test your monitor (self-test) and that it is
functioning properly with the alarms in your
home.
App will show testing progress. It will indicate if self-test completed
successfully and whether or not it detected an alarm pattern from
your alarms if they were tested.
Alarm Detected Through the app, notify your contacts to
check on the situation if you are not able.
When an alarm pattern is detected, monitor will send out notifications
to you and your contacts you have added for this monitor.
Add new Monitor Open your app and using the “add” function,
setup the monitor as was done on previous
monitor(s). Name monitor to be sure you can
identify the differnet locations.
Follow the same processes as above for connecting to wireless router,
enrolling into account and learning alarm furthest from monitor.
Change Monitor
Location
Using the “setup alarms with moniotr from the
menu in the app, follow the instruction and test
alarm furthest from monitor when instructed.
App will walk you through the process to re-establish detection of
your alarms.
Change/Reset
Router
Go into app and follow instructions to connect
monitor to Wi-Fi.
You will go through the same process of “connecting to wireless
router” as was done at setup.
Un-Enroll Monitor Remove monitor from your account Go into monitor menu and remove monitor from account if you no
longer have the monitor.
Operation table for app
Operating Instructions