Kielder KWT-085 User manual

ORIGINAL INSTRUCTION MANUAL
For use with all variants of KWT-085 Cordless Impact Wrench TYPE
18
KIELDER 18V BATTERY SYSTEM
KWT-085
Kielder
18V CORDLESS IMPACT WRENCH
www.kielder.co
KWT-085-IMB22

2
KWT-085-IMB22 Kielder WT Ltd

3
Kielder WT Ltd KWT-085-IMB22
Noise & Vibration Data
Acoustic Pressure: <101 dB(A) K=3dB
Acoustic Power: <112 dB(A) K=3dB
Maximum Vibration: 13 m/s2 / K = 5.9m/s2
Sound emission values determined according to
EN60745-2-1. The declared vibration total value has
been measured in accordance with a standard test
method used to compare one tool with another and
according to EN60745. Both sound and vibration
values have an uncertainty factor of K. The declared
total values may be used in a preliminary assessment
of exposure.
WARNING!
The vibration emission during actual
use of the power tool can dier from
the declared total value depending on
the ways in which the tool is used. The need to identify
safety measures and to protect the operator are based
on an estimation of exposure in the actual conditions
of use (taking account of all parts of the operating
cycle, such as the times the tool is switched o, when
it is running idle, in addition to trigger time). Identify
additional safety measures to protect the operator such
as proper maintenance of the tool, keeping hands warm
and organisation of work patterns.
CONTENTS
Safety Rules & Instruction 4
Product Overview Diagram 8
Specication Table 9
Usage
Wrench 10
Battery 12
Charger 14
Maintenance & Operating Torque 16
LED Light & Belt Clip 17
Warranty & Support 18
EC - Declaration Of Conformity
We declare that under our responsibility the
product under part number:
KWT-085 18V Cordless Impact Wrench
complies with the applicable EU directives:
2011/65/EU, 2004/108/EC, 2006/42/EC
including the amendments and are manufactured
in accordance following standards or
standardised documents:
EN 60745-1:2009+A11
EN 60745-2-2:2010
EN 55014-1:2006+A1:2009+A2:2011
EN 55014-2:1997+A1:2001+A2:2008
All documentation is held in KWT-085 Technical
File and is available, on request for review.
Authorised Signatory:
Steven Bulloss
Director
Dated: 14/09/22
Kielder WT Ltd, Unit C2, Beighton Link Business
Park, Old Colliery Way, Beighton, Sheeld,
S20 1DJ.
IMPORTANT!
Please read these operating and
safety instructions carefully and
completely. For your own safety, before using this
equipment check that the voltage is correct and
that all external parts are rmly secured and the
machine in tact. If you are uncertain about any
aspect of using this equipment, or require support
please contact Kielder WT customer services and
we’ll be happy to help:
Tel: 0114 242 3794
Email: tools@kielder.co
Plug Type
• The appliance is supplied with a moulded
three pin mains plug for your safety and
convenience.
• Only use this plug in the socket it is intended.
• A 3 amp fuse is tted in this plug. Should the
fuse need to be replaced please ensure that
the replacement fuse has a 3 amp rating and
it is approved by ASTA or BSI to BS1362.
• Check for the ASTA mark or the BSI mark on
the fuse.
• If the plug contains a removable fuse cover,
you must ensure that it is retted when the
fuse is replaced.
• If you lose the fuse cover the plug must not be
used until a replacement cover is obtained.
Intended Use
The tool is intended for the fastening and
unfastening of threaded bolts and nuts.

4
KWT-085-IMB22 Kielder WT Ltd
WARNING!
This product uses Lithium
Battery cells, do not use if
the battery has been damaged in transit
or becomes damaged during use. If
Lithium-ion cells are damaged they
present a ammable hazard.
General Safety
Warning: when using electric tools, basic
safety precautions should always be
followed to reduce the risk of re, electric
shock and personal injury. Please read all
of these instructions before attempting to
operate this machine. Save this manual for
future reference.
• Keep work area clear. Cluttered work
areas invite accidents.
• Consider work area environment. Do not
expose tools to rain. Do not use tools in
damp or wet locations. Keep work area
well lit. Never use tools near ammable
liquids or gases.
• Protect yourself against electric shock.
Avoid body contact with earthed or
grounded surfaces.
• Keep other people away. Do not let
others, especially children, come close
to the work, and touch the tool or power
cable. Keep them away from the work
area.
• Store idle tools. When not in use, tools
should be stored in a dry locked-up
place, out of children’s reach.
• Never force the tools. Your tools will be
more ecient and safer when used at the
rate for which they were intended.
Personal Safety
• Stay alert, watch what you are doing and
use common sense when operating a
power tool. Do not use a power tool while
you are tired or under the inuence of
drugs, alcohol or medication. A moment
of inattention while operating power tools
may result in serious personal injury.
• Use personal protective equipment.
Always wear eye protection. Protective
equipment such as dust mask, non-
skid safety shoes, hard hat, hearing
protection, anti-vibration gloves used
for appropriate conditions will reduce
personal injuries.
• Prevent unintentional starting. Ensure
the switch is in the o-position before
connecting to power source and/or
battery pack, picking up or carrying the
tool. Carrying power tools with your
nger on the switch or energising power
tools that have the switch on invites
accidents.
• Remove any adjusting key or wrench
before turning a power tool on. A wrench
or a key left attached to a rotating part
of the power tool may result in personal
injury.
• Do not overreach. Keep proper footing
and balance at all times. This enables
better control of the power tool in
unexpected situations.
• Dress properly. Do not wear loose
clothing or jewellery. Keep your hair,
clothing and gloves away from moving
parts. Loose clothes, jewellery or long
hair can be caught in moving parts.
• If devices are provided for the connection
of dust extraction and collection facilities,
ensure these are connected and properly
used. Use of dust collection can reduce
dust-related hazards.

5
Kielder WT Ltd KWT-085-IMB22
Safe Use Of Power Tools
Do not force the power tool. Use the
correct power tool for your application.
The correct tool will do the job better and
safer at the rate for which it was designed.
• Do not use the power tool if the switch
does not turn it on and o. Any power
tool that cannot be controlled with
the switch is dangerous and must be
repaired.
• Disconnect the plug from the power
source and/or the battery pack from
the power tool before making any
adjustments, changing accessories, or
storing power tools. Such preventive
safety measures reduce the risk of
starting the power tool accidentally.
• Store idle power tools out of the reach
of children and do not allow persons
unfamiliar with the power tool or these
instructions to operate the tool. Power
tools are dangerous in the hands of
untrained users.
• Maintain power tools. Check for
misalignment or binding of moving
parts, breakage of parts and any other
condition that may aect the power tool’s
operation. If damaged, have the power
tool repaired before use. Many accidents
are caused by poorly maintained power
tools.
• Keep cutting tools sharp and clean.
Properly maintained cutting tools with
sharp cutting edges are less likely to bind
and are easier to control.
• Use the power tool, accessories and
tool bits etc. in accordance with these
instructions, taking into account the
working conditions and the work to be
performed. Use of the power tool for
operations dierent from those intended
could result in a hazardous situation.
Battery & Charger
Recharge battery only with the charger
specied by the manufacturer. A charger
that is suitable for a certain type of battery
pack may create a risk of re when used
with another battery pack.
• Use power tools only with specically
designated battery packs. Use of any
other battery packs may create a risk of
injury and re.
• Keep battery pack and charger away
from other metal objects, like paper
clips, coins, keys, nails, screws or other
small metal objects, that can make a
connection from one terminal to another.
Shorting the terminals together may
cause burns or a re.
• Under abusive conditions, liquid may be
ejected from the battery; avoid contact.
If contact accidentally occurs, ush with
water. If liquid contacts eyes, additionally
seek medical help. Liquid ejected from
the battery may cause irritation or burns.
Service
Have your power tool serviced or repaired
by Kielder or a qualied technician using
only identical replacement parts. This will
ensure that the safety of the power tool is
maintained.

6
KWT-085-IMB22 Kielder WT Ltd
• Wear ear protectors.
Exposure to noise can
cause hearing loss.
• Wear eye protection to
protect from loose particles
which may be thrown up
by the impact motion of
the tool.
• Wear a dust mask if
the work creates dust.
•
Wear anti-vibration or
vibration asborbing gloves.
• Apply the power tool to the fastening
only when it is switched o. Rotating
tool inserts can slip.
• The torque depends on the impact
duration. The maximum torque is
achieved from the sum of all individual
torques achieved through impact.
• If accurate torque is required check the
fastening with a torque wrench.
• When storing or carrying the tool the
Forward/Reverse lever should be set to
the centre to lock the trigger and prevent
the tool being started accidentally.
• Hold the machine with a rm grip. High
reaction torque can occur while driving
in and loosening fastenings.
• Secure the workpiece. A workpiece
is held more securely in a vice than
by hand.
• Always wait until the tool has stopped
Additional Safety & Working
Instructions
completely before setting it down.
• DURING USE DO NOT TOUCH THE
METAL SQUARE DRIVE PART OF THE
WRENCH OR ANY OF THE METAL
CASING ON THE FRONT PART OF THE
TOOL. Hold power tools by the insulated
gripping surface as the tool may contact
hidden wiring when working into areas
such as walls or oors. Contact with a
‘live’ wire will make exposed metal parts
of the tool ‘live’ and shock the operator.
• Be aware that this tool is always in an
operating condition as it does not have to
be plugged into an electrical socket.
• When working into walls or oors, live
electric wires may be encountered. Hold
the tool only by the rubber handle to
prevent an electric shock in case you
encounter a live wire.
• DO NOT operate the Forward/Reverse
lever when the trigger switch is on. The
battery will discharge rapidly and may
damage the tool.
• During charging the charger may become
slightly warm. This is normal. DO NOT
charge the battery for a long period.
• When storing or carrying the tool, set
the Forward/Reverse lever to the centre
(switch lock).
• Do not strain the tool by partially
depressing the speed control trigger so
that the motor stops.
CAUTION!
This product is powered
by a rechargeable
battery system, please
pay attention to these additional
instructions:

7
Kielder WT Ltd KWT-085-IMB22
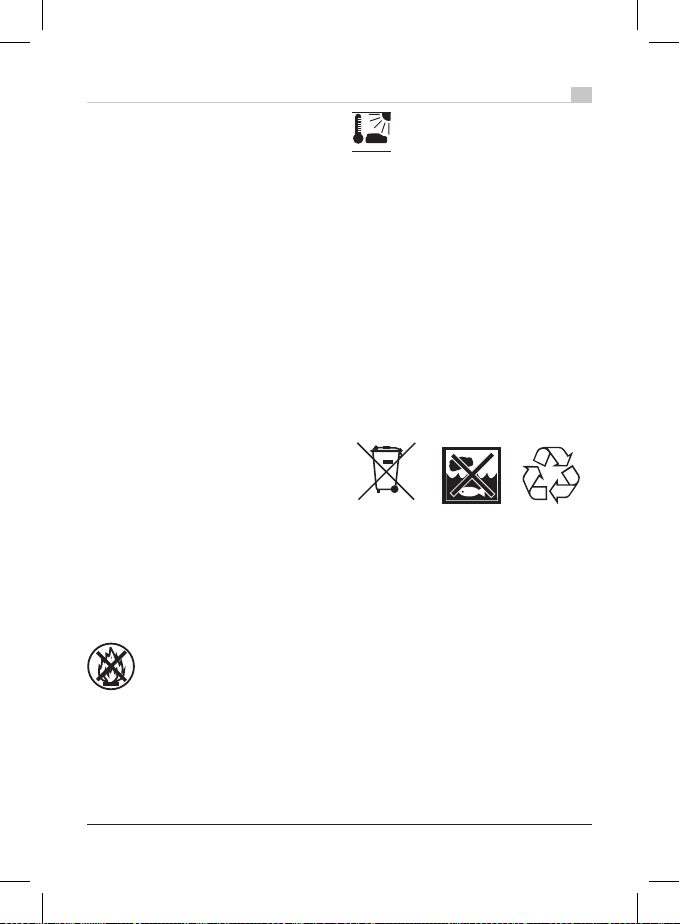
Collection And Disposal Of Old Equipment
And Used Batteries:
These symbols on the products, packaging
and accompanying documents mean that
used electronic products and batteries
should not be mixed with general household
waste.
• When the battery pack is not being used,
the battery should be stored so that foreign
substances like dust and water do not
contaminate the terminals.
• When the battery pack is being charged,
ensure that the terminals are free of dust
and water. Clean the terminals before using
the battery if any foreign substances are
seen.
• The life of the battery pack may be
adversely aected by dust or water during
operation.
• If the motor or battery becomes hot, the
protection function will activate and the
motor or battery will stop operating.
• Before inserting the battery pack, always
check to ensure that the tool is turned o.
• For safe use ensure that the battery pack is
installed properly and securely to the main
unit before operating.
• Do not use other than the Kielder battery
packs that are designed for use with this
rechargeable tool.
• Kielder is not responsible for any damage or
accident caused by the use of recycled or
counterfeit battery packs.
• Do not dispose of the battery pack in a re
or expose it to excessive heat.
• Do not attempt to dismantle or modify the
battery pack.
• Do not subject the battery
pack to shocks or drive nails or
similar items into it.
• Do not allow metal objects to
touch the terminals on the battery pack.
• Do not carry or store the battery pack in
the same container as nails or small metal
objects.
• Do not charge the battery pack in a high
temperature location e.g. next to a re or in
direct sunlight. The battery may overheat,
catch re or explode.
• Do not use other than the
dedicated charger to charge
the battery pack as the battery may leak,
overheat or explode.
• When removing the battery pack from the
tool or the charger, always reattach the
pack cover as the battery contacts could be
shorted, leading to a risk of re.
• When the battery pack has deteriorated
replace it with a new one. Continued use of
a damaged battery pack may result in heat
generation, ignition or rupture of the battery.
MAX 45ºC
Li-Ion
For proper treatment, recovery and recycling
of old products and used batteries, please
take them to applicable collection points, in
accordance with the national legislation and
the Directives 2002/96/EC and 2006/66/EC.
By disposing of these products and
batteries correctly, you will help to save
valuable resources and prevent any potential
negative eects on human health and the
environment which could otherwise arise from
inappropriate waste handling.
For more information about collection and
recycling of old products and batteries, please
contact your local municipality, your waste
disposal service or the point of sale where you
purchased the items.
Penalties may apply for the incorrect
disposal of waste in accordance with national
legislation.

8
KWT-085-IMB22 Kielder WT Ltd
(15)
(10)
(11)
(14)
(13)
(1)
(3)
(2)
(4)
(5)
(6)
(7)
(8)
(9)
(12)
(1) Square Drive
(2) Friction Ring
(3) Square Drive Shoulder
(4) Forward / Reverse / Lock Selector
(5) Trigger
(6) Hand Grip
(7) Belt Clip
(8) Speed Selector
(9) LED Light
(10) Battery Charge Level Indicator
(11) Battery Release Button
(12) Battery; attached to tool
(13) Charger
(14) Battery Insert Slide
(15) Charging Indicator

9
Kielder WT Ltd KWT-085-IMB22
SPECIFICATIONS
Main Unit
Model KWT-085
Motor Voltage 18.0V - DC
Motor Type Digital Brushless
Drive 1/2" Square
Weight (with battery KWT-003-25 tted) 3.4kg
Weight (without battery tted) 2.8kg
No Load Speed 0-660rpm / 1320rpm / 2000rpm
Impact Rate 0-2200ipm
Max Fastening Torque (Hi / Med / Low) 1050Nm / 726Nm / 363Nm
Max Breakaway Torque 1790Nm
Battery Type Lithium-ion
Battery Pack
Model KWT-003
Cell Type Lithium-ion
Battery Voltage 18.0V DC
Weight (KWT-003-25) 0.6Kg
Battery Charger
Model KWT-004
Ratings See Rating Label on Base of Charger
Charge Time: KWT-003-25 90 mins
Weight 0.4Kg
VVolts
Direct Current
min-1 Revolutions Per Minute
Ah Electrical Capacity
Class II construction
(double insulated)
Read Instruction Manual
Before Use
Wear Hearing Protection
Wear Safety Glasses
Wear Vibration Absorbing
Gloves
Indoor Use Only
Conforms to CE
standard
Do not burn or
incinerate
Maximum safe ambient
temperature for battery
MAX 45ºC

10
KWT-085-IMB22 Kielder WT Ltd
USAGE
Attaching The Socket
Align the square insert (A) on the socket
with the square drive on the wrench (B)
and slide together until the socket rests
against the square drive shoulder (C)
To further secure the socket, your Kielder
Impact Wrench is equipped with a friction
ring (D). The rubber ring keeps the socket
on the square drive and makes it easier
to remove.
To remove the socket, simply reverse the
process and slide the socket from the
square drive.
(D)
Attaching or Removing the
Battery Pack
Connect The Battery Pack:
Line up the alignment channels and slide
on the battery pack.
Slide the battery pack until it locks into
position with an audible “CLICK”.
Remove The Battery Pack:
Depress the button (E) at the front of the
battery indication panel and slide the
battery pack out.
(E)
(A)
(B)
(C)

11
Kielder WT Ltd KWT-085-IMB22
Operating the Tool
WARNING!
Do not operate the Forward/
Reverse lever until the tool
comes to a complete stop.
Forward Rotation (Clockwise)
• Push the lever into the forward rotation
position (F).
Reverse Rotation (Anti-Clockwise)
• Push the lever into the reverse rotation
position (G).
Operating the Tool.
• Depress the trigger (H) slowly to start the
tool, check the direction of rotation is as
required.
• The speed increases as the trigger is
depressed further.
• The brake operates and tool stops
immediately when the trigger is released.
(I)
• After use, move the lever to the centre (I),
this is the trigger lock position and how
the tool should be stored.
CAUTION!
When using threaded
fastenings, start the fastening
onto the rst few threads by
hand before using the wrench. This will
help ensure that the fastening does not
become cross-threaded.
Speed Selection
• Slowly depress the trigger (H) and the
green light will appear on the base of the
unit to show speed selection. Simply press
the green button (J) to switch between
your 3 levels of speed (363Nm / 726Nm /
1050Nm).
(J)
(F)
(H)
(G)

12
KWT-085-IMB22 Kielder WT Ltd
CAUTION!
Don’t operate the tool
continuously when switching
battery packs. The tool
requires time to cool down in between. In
normal operating ambient temperatures
this should take around 5 minutes, in hot
working conditions allow a longer time for
the tool to cool down.
Battery Level Indicator
• The Battery Level indicator is located
on the front of the battery. To check the
amount of power remaining, press and
hold the small circular button (K) on the
indication panel.
• Excessive discharging of lithium-ion
batteries dramatically shortens their life.
This tool includes a battery protection
feature to prevent excessive discharging
of the battery pack. If the tool is subject
to a sudden load during use that causes
the motor to lock, the over-discharge
prevention sensor may trigger. If this
happens, address the issue that caused
the motor to lock and cycle the trigger.
NOTE:
The battery level indicator is just a guide.
The indication may change due to the
condition of the battery or the ambient
temperature.
Take note of which of the three lights are
illuminated.
Red, Yellow & Green illuminated = High
Charge
Red & Yellow illuminated = Med-Low
Charge
Red light illuminated = No Charge
If the battery is of low charge, it should
be charged before further use.
The battery level indicator may be used
with battery connected or disconnected
to the tool.
• If the tool is started with little battery
power remaining, it may stop operating
after a short time. If this happens, check
the battery power remaining by pressing
the small circular button (J) on the indicator
panel and charge the battery pack
accordingly.
(K)
Red Yellow Green
LED Light
The tool is equipped with an automatic LED
light which helps to illuminate the work area.
Pull on the trigger very slightly to activate
the LED light. Depress the trigger more to
activate the impact wrench.
The light illuminates with very low current
and it does not adversely aect
the tool’s performance during use
or the capacity of the battery.
CAUTION!
• The built in LED light is designed to
illuminate the work area temporarily.
• Do not use it as a substitute for a regular
ashlight as it does not have sucient
brightness.
Note: The LED light turns o
automatically approximately 5
seconds after the wrench has
stopped operating.
WARNING!
DO NOT STARE INTO THE
BEAM – LED lights are very bright and
may cause injury to the eye.

13
Kielder WT Ltd KWT-085-IMB22
Battery Care
• For optimum battery life, store the battery
pack following use without charging it.
• Do not charge the battery pack when the
temperature is below 0°C or above 40°C.
• When charging the battery pack ensure
that the terminals on the battery charger
are free of foreign objects such as dust
and water. If any dirt is found on the
terminals clean the terminals before
charging the battery pack. The life of
the battery pack terminals may also
be aected by foreign objects during
operation.
• Avoid storing the battery pack in a
container with other metal objects such
as nails, coins, etc. Metal objects can
make a connection from one terminal
to another and could short the battery
terminals resulting in overheating and
irreparable damage to the battery,
sparks, burns or re.
• Do not touch the terminals with any
conductive material.
• When operating the battery pack, ensure
that the work place is well ventilated.
• When the battery pack is removed
from the main unit, store the battery in
a location to prevent dust or dirt from
contaminating the battery terminals
which may cause a short circuit.
• Do not store the battery pack in locations
where the temperature may reach or
exceed 45°C.
• Do not incinerate the battery pack even
if it is severely damaged or is completely
worn out. The battery pack can explode
in a re.
• Do not expose the battery pack to
water or rain.
• Be careful not to drop, shake or strike
the battery.
Battery Pack Life
The rechargeable batteries
have a limited life. If the
operation time becomes short after
recharging, replace the battery pack.
ATTENTION!
Battery Recycling
For environmental protection and recycling
of materials, please ensure that the
battery pack is disposed of at an ocially
assigned location.
The battery pack is not fully charged at the
time of purchase. Be sure to charge the
battery before use.

14
KWT-085-IMB22 Kielder WT Ltd
Charging The Battery Pack
CAUTION!
• The charger is designed to
operate on standard domestic
electrical power as shown
on the rating plate. Charge only on the
voltage indicated on the rating plate e.g.
230v/50Hz.
• Do not attempt to use it on any other
voltage or frequency rating!
• If the temperature of the battery pack is
extremely low, charging may automatically
stop to prevent degradation of the battery.
• The ambient temperature range for
charging is between 0°C and 40°C.
The battery pack may not work if the
temperature is outside these parameters.
• When charging a cool battery pack (below
0°C) in a warm place, leave the battery
pack at the place and wait for more than
one hour to warm up the battery to the
ambient temperature.
• Allow the charger to cool in between
charges, when charging more than two
battery packs consecutively.
• Do not insert your ngers onto the contact
area at any time.
• To prevent the risk of re or damage to the
battery charger, do not cover vent holes
on the charger and the battery pack.
• Unplug the charger when not in use.
• Take care to ensure metal objects such
as nails, coins etc are kept away from
the charger. Metal objects can make a
connection from one terminal to another
and could short the charging unit.
• Ensure that the terminals on the charger
are free of foreign objects such as dust
and water. If any dirt is found on the
terminals clean the terminals before
charging the battery pack.
• When the charger is not in use, store in
a location to prevent dust or dirt from
contaminating the terminals which may
cause a fault or short circuit.
• Position the charger on a work bench or
similar in a well ventilated location and
ensure that the charger cannot be covered
by workshop cloths etc.
• Plug the charger into a suitable power
socket. The green LED (L) will illuminate.
Note:
Sparks may be produced when the plug is
inserted into the power supply but this isn’t
a problem in terms of safety.
• Connect the battery pack into the
charger; line up the alignment channels
on the battery (M) with the corresponding
channels on the charger (N) and slide the
battery into place.
WARNING!
When a battery becomes
discharged due to prolonged
use or exposure to direct
sunlight or heat, always allow the battery
pack to cool down before recharging. This
will allow the battery to be recharged to its
full capacity.
(L)
(M)
(N)

15
Kielder WT Ltd KWT-085-IMB22
• The red charging LED (O) will be
illuminated during charging. When
charging is completed an internal
electronic switch will automatically trigger
to prevent overcharging. Charging may
not start if the battery pack is warm (such
as immediately after sustained use).
• When charging is complete the red LED
(O) will extinguish and the green LED will
illuminate (K).
• Once charging is complete slide the
battery out of the charger, disconnect the
charger from power supply and store.
Charging Times
Normal charging time for the KWT-003-
25 5.0Ah battery pack is between 75-
90mins, but this can vary depending upon
circumstances.
• If the battery pack is not fully discharged
it may take less than 75 minutes to
recharge.
• If the battery pack and ambient
temperature are cold then recharging
could take up to and over 90 minutes.
• If the battery pack is very hot it may not
recharge. Allow it to cool right down
before beginning the charging process.
Charging Indicator
This charger is designed to detect
problems that can sometimes arise with
rechargeable battery packs. The status
of the LED’s can alert the operator to a
potential problem with the battery pack.
This will be either by the Green LED
staying illuminated when a discharged
battery is connected i.e the charger
remains in standby mode, or by the red
LED failing to turn o at the end of a
charge. If any issue is suspected with the
battery do not attempt to re-charge or
use it.
Note:
If battery pack failure is suspected, we
recommend that the operator inserts
a new battery of known quality into
the charger to check that the charger
is working correctly. If the new battery
charges correctly, then the original battery
is probably defective and should be sent
for safe recycling. If the new battery
pack displays the same problems as the
original, have the charger tested by a
qualied person.
(O)
(L)

16
KWT-085-IMB22 Kielder WT Ltd
Operating Torque
This is aected by a wide variety of
factors:-
• Running in period - the performance of
the wrench will improve with each use
from new as internal components wear in.
During normal conditions performance will
also improve after a minute or two of use,
both the battery and internal lubrication
are at their most ecient operating
temperature warmed up from a cold start.
• Voltage – when the battery pack becomes
nearly discharged the voltage decreases
and the torque level drops.
• Run Time – longer run time results in
increased torque as indicated in CHART
1 & CHART 2, with the torque curve
attening between 10 and around 20
seconds depending on application.
• For stubborn fastenings such as rusted
bolts increasing the duration of run time
may be benecial as the impact motion
of the wrench will start to free the seized
threads. Always treat rusted xtures with
a quality penetrating uid before using
the wrench.
• Dierent bolt diameters – the size of the
bolt diameter aects the torque.
• Operating conditions – torque will vary
according to conditions such as surface
nish. Torque is considerably reduced
when the bolt and nut turn together.
• Socket play – Torque is reduced if a
socket of the wrong size is used, a worn
poor tting socket is used, or a star/spline
type socket is used rather than a six sided
type on a hex-head fastening.
• Socket type, heavy duty deep impact
sockets transfer more ‘knock’ to the
fastening and will facilitate achieving
maximum torque levels.
• Trigger – torque is reduced if the unit is
used with the switch not fully depressed.
• Connecting adaptor – the torque will be
reduced if a universal joint or a connecting
adaptor is used.
• Type of fastening - the torque
performance will be aected by fastenings
such as Nyloc where the impact action
of the wrench is less eective. Or if there
is pressure on the fastening which can
cause a degree of ‘fouling’ such as a
wheel bolt xture rather than a wheel stud
& nut. A high tensile fastening will also
react more eectively to the impact action
of this tool than a standard fastening.
• Threads which are contaminated with
dirt or damaged/strained will also aect
the rate at which the torque curve climbs.
Clean threads in good condition will allow
maximum torque to be achieved more
quickly than threads which are dirty or
fouled in some way.
Torque (Nm) Threaded Fastening Standard Tensile
KWT-085 MODEL
400
0
600
200
800
1000
1200
1400
1600
1800
Run Time (Sec)
510 15 20
M33
M30
M27
M20
M16
M14
M24

17
Kielder WT Ltd KWT-085-IMB22
Helpful Hints To Maximise
Performance
• Hold the wrench perpendicular to the
fastening (P) thus ensuring the ats of the
socket are in complete contact with the
fastening, facilitating the full transfer of
impact from the tool. By holding the wrench
in this way, all components can spin freely
around the central drive axis; important if
maximum performance is to be achieved
(Q).
• Refrain from pushing the wrench onto the
fastening like you would when using a drill
(R), hold the wrench securely in a neutral
manner without forward pressure. Forward
pressure onto the fastening can jam the
impact mechanism preventing eective
performance.
How To Use The Belt Hook
WARNING
• Always attach the belt hook
securely to the main unit with
the screw (S) fastened rmly in place. If the
belt hook is not attached to the main unit,
the hook may disconnect. This may result in
an accident or injury.
• Regularly check the screw for tightness.
Tighten rmly if it appears to be loose.
• Ensure that the belt hook is attached
securely onto a waist belt or other belt. If
the unit slips o the belt, it may result in an
accident or injury.
• When using the belt hook, avoid running or
jumping with it as this may cause the hook
to slip and the main unit to fall.
• Remove hook when not needed to prevent
unintentional catching/snagging.
(S)
Maintenance
• This tool requires no major additional
lubrication or maintenance, only to keep
the tool in a good clean condition.
• Use only a dry soft cloth or brush for
cleaning the tool or a gentle ow of
compressed air. Do not use a damp cloth,
thinner, benzene etc or other volatile
solvents for cleaning.
• If the inside of the tool or battery pack is
exposed to water, drain and allow to dry
thoroughly as soon as possible. If you
experience any problems when operating
the tool, contact Kielder WT.
(P)
(Q)
90�
(R)

18
KWT-085-IMB22 Kielder WT Ltd
Warranty & Support
The Kielder 3 Year Warranty
To take advantage of the Kielder
3 year warranty the product must
be registered within 30 days of
Purchase or Delivery.
Please register your product by
completing the online form at:
www.kielder.co
...or call customer services on:
0114 242 3794
Why is Registration a Requirement?
For Kielder to be able to fully support &
service a product warranty over a 3 year
period it is imperative that the product
is registered. If the product hasn’t been
registered we’re simply not able to fully
administer a warranty of this duration and
therefore can only oer a standard 12 month
guarantee for any unregistered product.
Note: Batteries are excluded from the 3 Year
Warranty. Battery packs are classed as being
a consumable item and they have a separate
xed period warranty of 12 months.
Warranty Statement
• Each Kielder product is thoroughly inspected
during production and is guaranteed to
perform as specied. The product will be
free of defects, in both workmanship and
materials, for the duration of the warranty
from the date the product is purchased.
• The warranty becomes eective at the date
of purchase (or the date of delivery if this
is later).
• In the event that your machine needs
repairing or replacing, you must provide
proof of purchase/delivery before any
work can be carried out on your machine.
Without this, any work carried out may be
chargeable.
• If your product requires attention from our
engineers, we aim to have it collected &
repaired within 7-10 working days.
• The repair or replacement of your machine
under warranty will not extend the period of
warranty.
• The warranty provides benets which are
additional to and do not aect your statutory
rights as a consumer.
What is covered?
• The repair or replacement of your machine
(at Kielder’s discretion), if your machine is
found to be defective due to faulty materials,
workmanship or function within the warranty
period (if any part is no longer available or
out of manufacture, Kielder will replace it
with a functional replacement part).
• Use of the machine in the UK only, overseas
users should contact the ocial importer or
retailer for that country.
What is not covered?
• Kielder does not guarantee the repair or
replacement of a product incurred as a result
of normal wear and tear.
• Usage of the product within a construction
site environment.
• Accidental damage, faults caused by
negligent use or care, misuse, neglect,
careless operation or handling of the product
which is not as instructed in Kielder’s
Instruction manual.
• Batteries are excluded from the 3 Year
warranty.
• Use of parts which are not assembled or
installed in accordance with the instructions
of Kielder.
• Use of parts which are not Kielder genuine
components.
• Faulty installation (except installation by
Kielder).
• Repairs or alterations carried out by parties
other than Kielder.
How to contact Kielder
If you have any queries over your product,
please don’t hesitate to contact us via:
tools@kielder.co
or call customer services on:
0114 242 3794.
...and we’ll be happy to help.

19
Kielder WT Ltd KWT-085-IMB22

KWT-085-IMD22 Kielder WT Ltd
Kielder
KIELDER WORKS TEAM
WT
Kielder WT Ltd
Sheeld, UK
T: +44 (0)114 242 3794
E: tools@kielder.co
W: http://www.kielder.co
Registered in England & Wales: 09426163
Kielder Tools
Other Kielder Power Tools manuals
Popular Power Tools manuals by other brands

Campbell Hausfeld
Campbell Hausfeld RP4000 operating instructions

Gude
Gude 11 PRO Translation of original operating instructions

Würth
Würth Vario Drill VD 90 Translation of the original operating instructions

Bosch
Bosch GBH 2-24 RE Professional Original instructions

F.F. Group
F.F. Group JS 550 PLUS Original instructions

Makita
Makita DHR243RTJV instruction manual